
Working with several layers in Illustrator may make it difficult to organize and navigate the file, so flattening it is a smart option to unite the layers you’re working on into a single one and avoid mistakes.
But there’s more than just that, cause It will also save you time by making it easy to save, print, or transfer to others without losing any quality or functionality.
We’ll look at three different methods in this tutorial, and you’ll be able to tell the difference between them and choose the one that fits your needs.
1. How to Flatten an Image in Illustrator Using “Flatten Transparency”
To flatten an image in Illustrator, first select all visible objects using the “Selection Tool” (V), or use the “Ctrl+A” keyboard shortcut. Open the “Flatten Transparency” settings and adjust them to your preferences, or select from the available default presets. Click “Ok” to apply.
Step 1:
Select the objects.
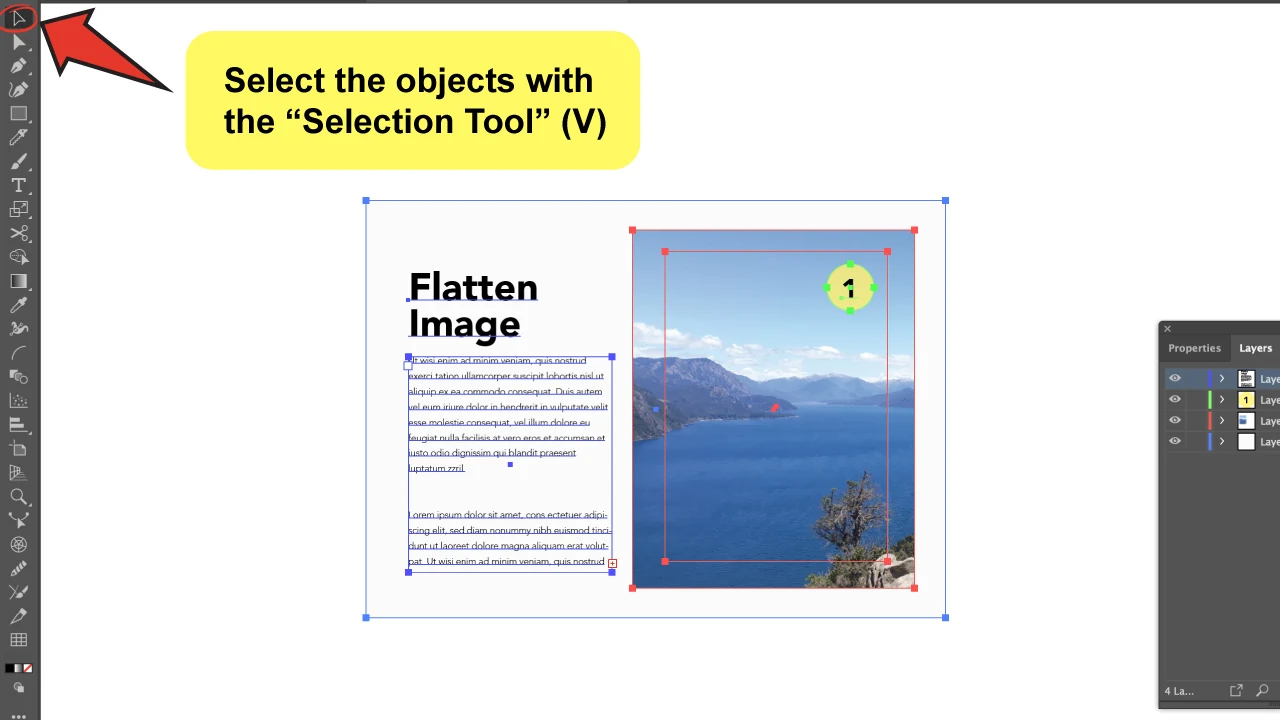
Click and drag over the objects that you want to flatten with the “Selection Tool” (V) to select all, or simply press the “Ctrl+A” keyboard shortcut (Command if you are a Mac user). This will automatically select all the visible objects that are on your canvas.


Step 2:
Open the “Flatten Transparency” settings.
Go to the top-menu and click on “Object” > “Flatten Transparency.”
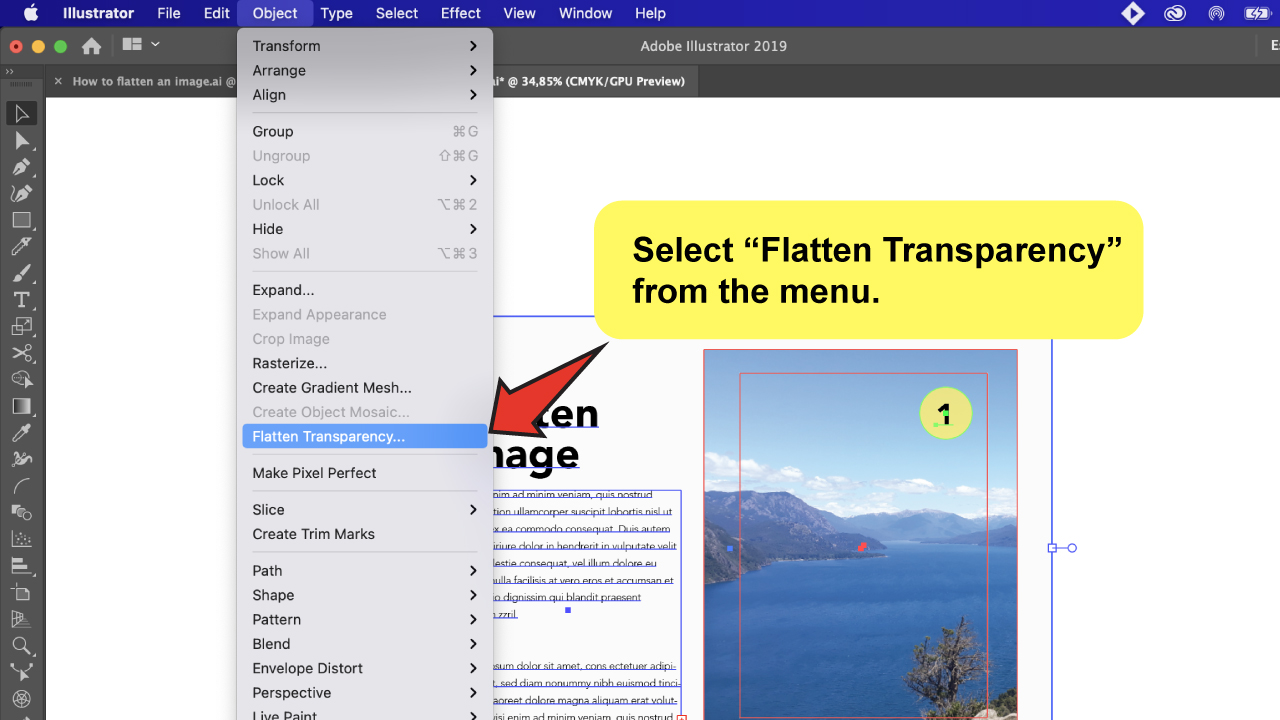

You’ll see a “Flatten Transparency” menu-box appears.

Step 3:
Define the “Preset.”


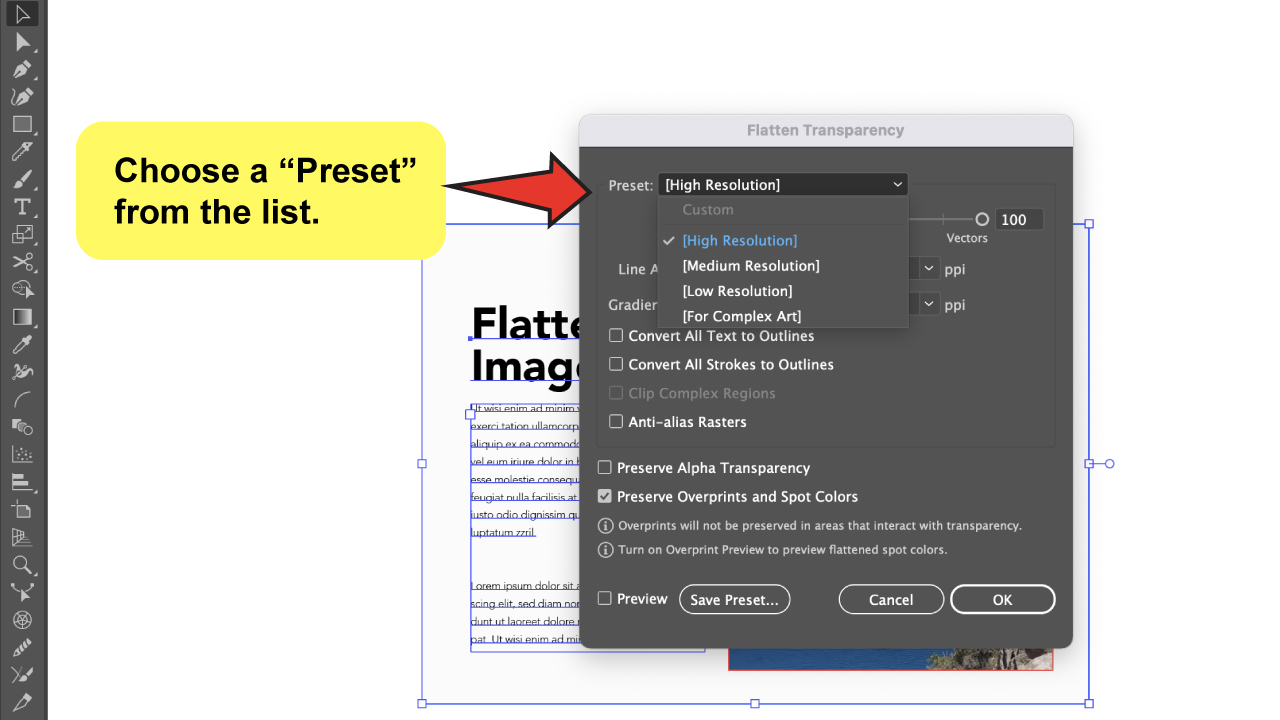
We will see that the “Flatten Transparency” menu-box has pre-configured settings, and the first thing you’ll notice is a set of presets to choose from.
You can try any of them since they are mostly determined by the type of quality or resolution you want for your image, so your selection will be influenced by that.
These default presets may not always be the best fit for your needs, so in the following steps, I’ll guide you through the settings available to help you find the best option for you.
You will notice that the preset automatically changes to “Custom” as you begin to make adjustments.

Step 4:
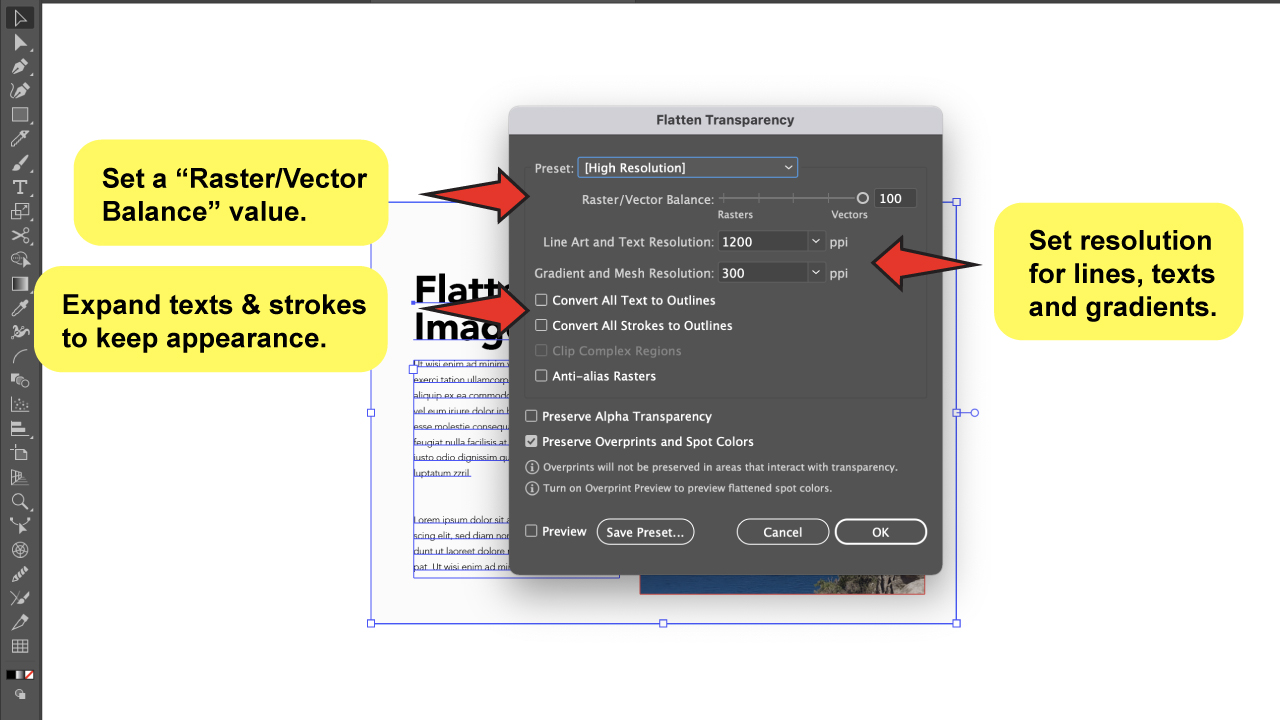
Define the “Raster/Vector Balance” and the resolution and appearance settings.
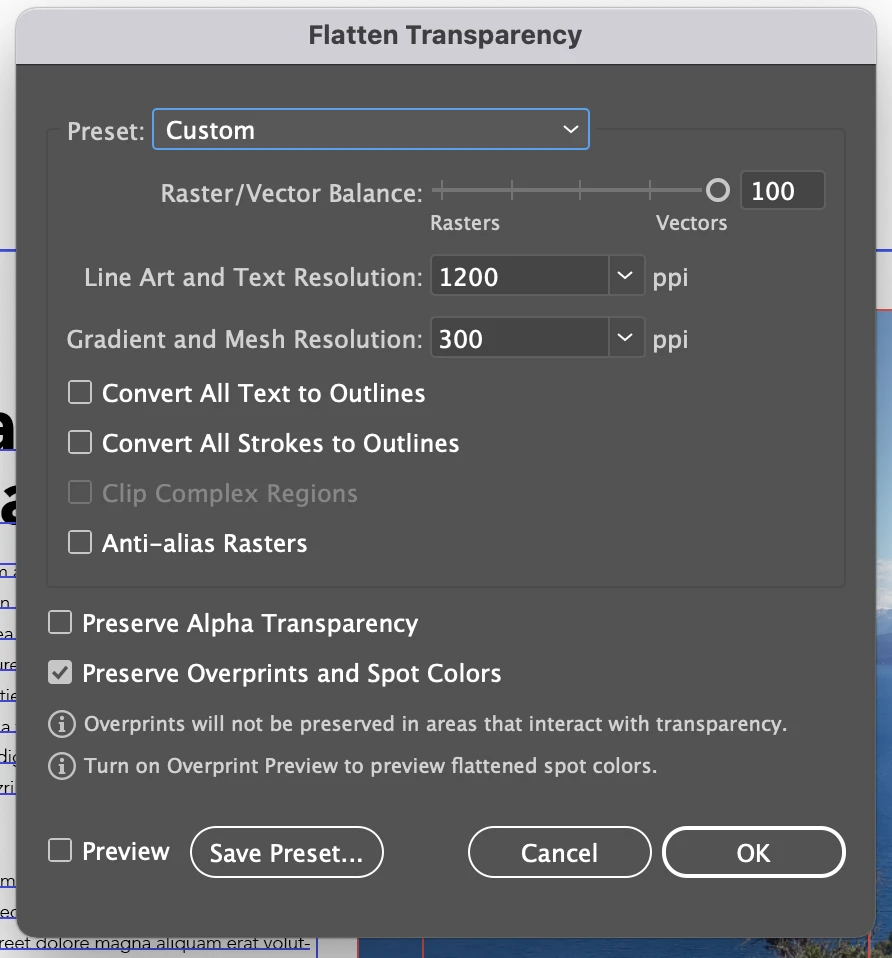
You can adjust the “Raster/Vector Balance” value from 0 to 100. This way you will be specifying how much of the vector information you have will be kept.
Note that the more vectors there are, the greater the quality of the graphics, but also the larger the file size. Rasterization will convert your vector files to pixel images, so I recommend it only when dealing with a large file.
After that, you’ll see settings for adjusting the “Line Art and Text Resolution” and the “Gradient and Mesh Resolution.” All gradients, lines, and texts will be rasterized to the given resolution using these parameters when rasterizing. For printing, I always recommend that both be in 300 PPI.
You may also click the “Convert All Texts to Outline” and “Convert All Strokes to Outline” options to preserve the file’s appearance. Keep in mind that if you apply these, you will no longer have editable text or strokes, so, if you are unsure don’t do it.

Step 5:
Check on the “Alpha Transparency” or “Oversprints and Spot Colors” options.
“Alpha Transparency“ works so that the flattened objects retain their overall opacity. Blending modes and overprints will be lost with this option. I recommend you this option if you’re exporting to SWF or SVG.
“Oversprints and Spot Colors” will preserve the spot colors and overprint for objects that aren’t transparent. If the file contains spot colors and overprinted objects, use this option when printing.
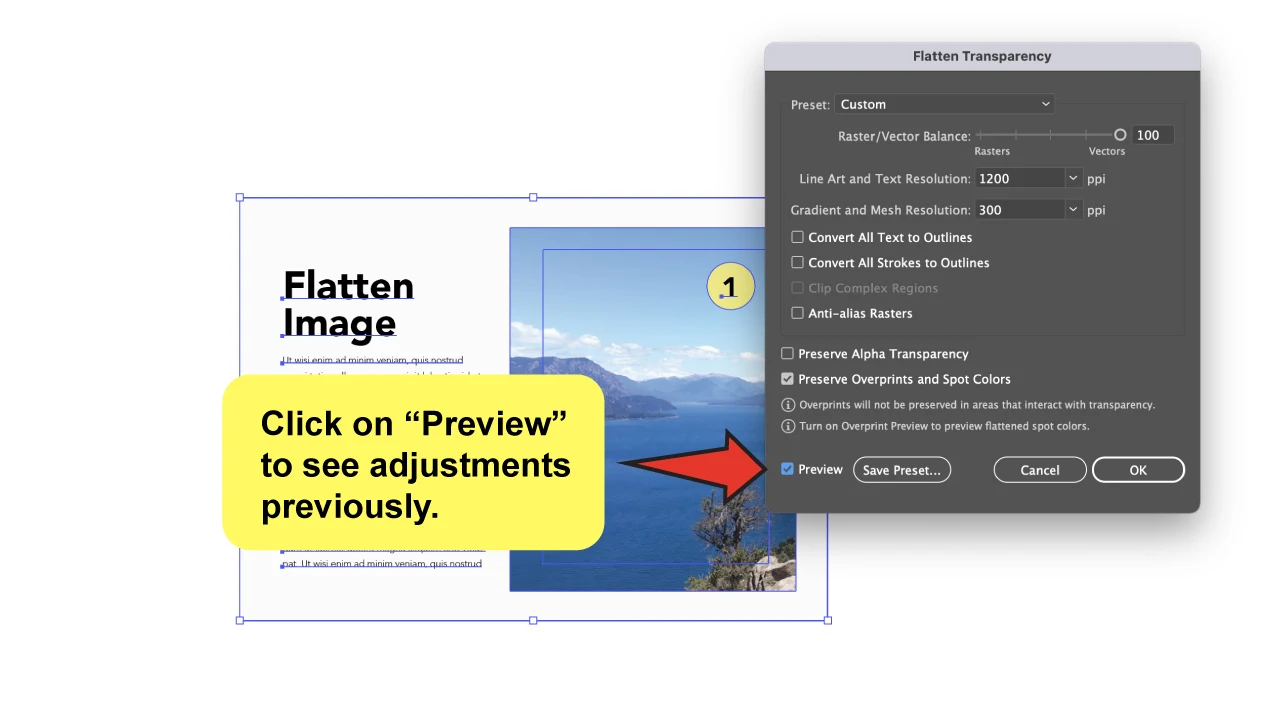
You cannot select both options at the same time. Both of them affect the appearance of your file, so if you’re not sure, check the “Preview” box to see how the settings will affect your file.

Once you’ve finished, you can click on “Save Preset” to save this preset and use it whenever you need it in the future, without having to redo everything.
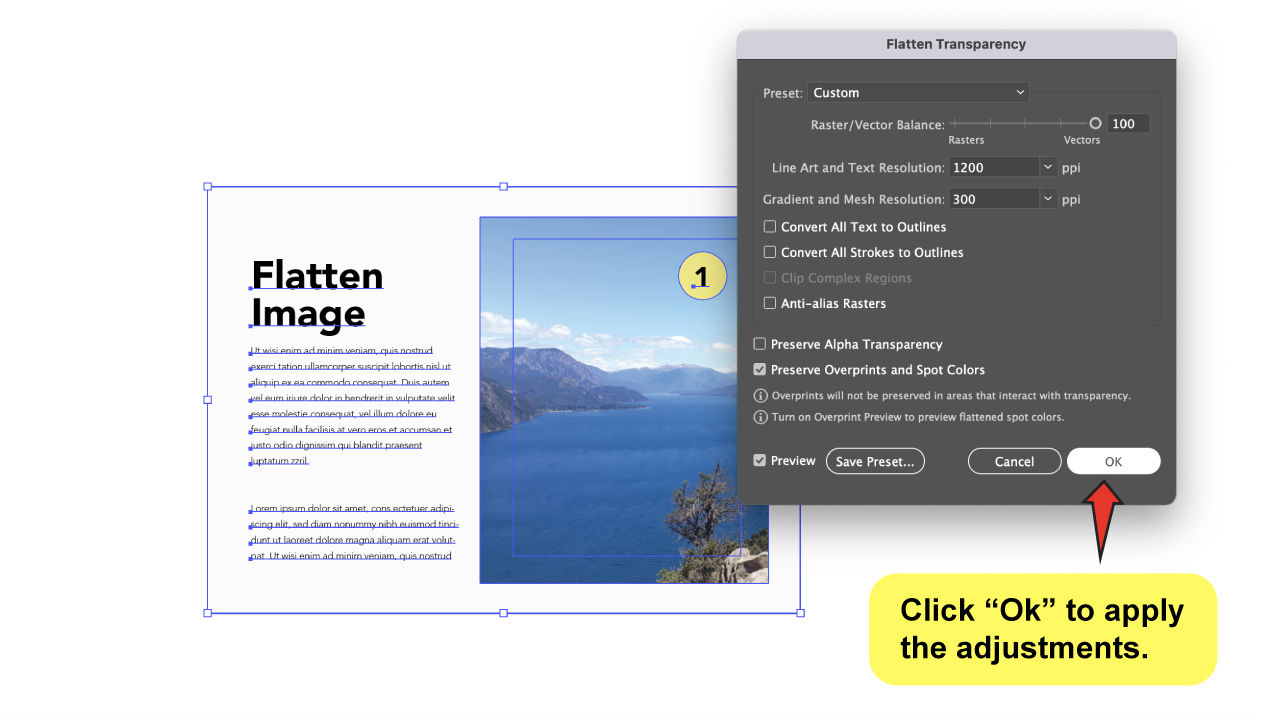
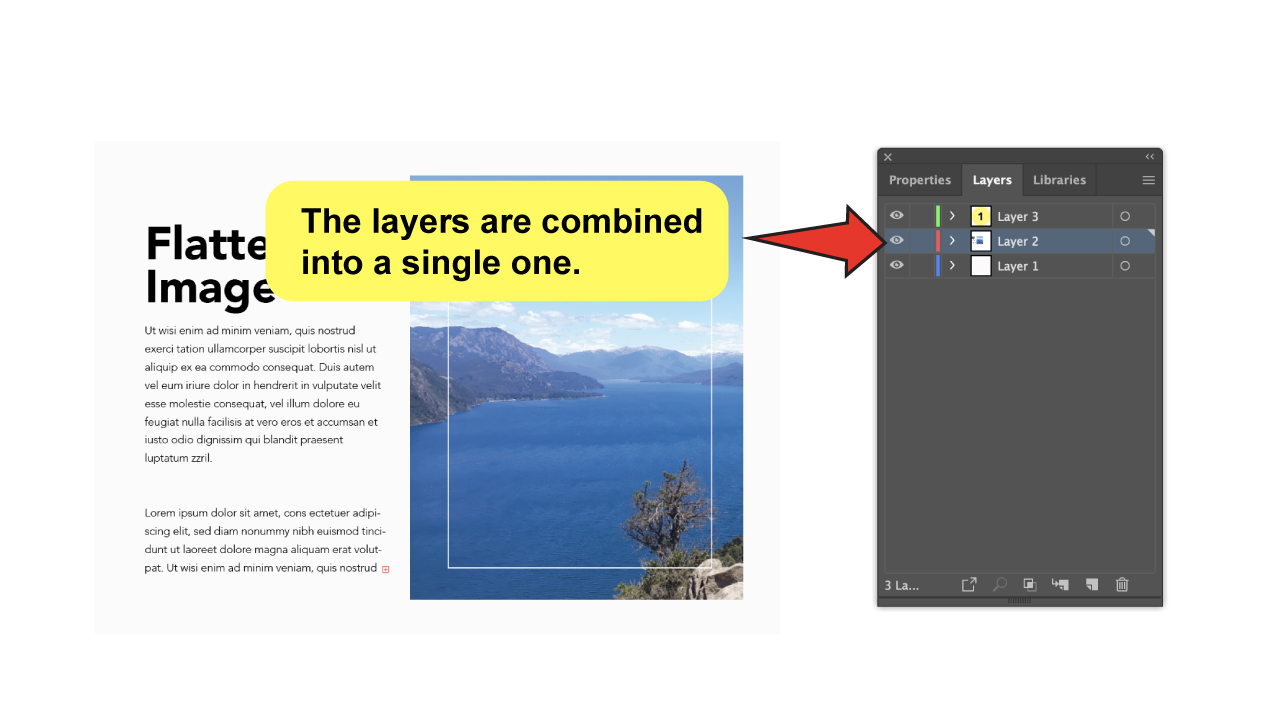
Remember to press the “Ok” button when you’re done to apply the changes, and that’s it! Everything is combined into a single layer now.

2. How to Flatten an Image in Illustrator Using the “Layers” panel.
To flatten an image in Illustrator, open the “Layers” panel first. Click on the hamburger icon to see the panel’s options, and choose the “Flatten Artwork” option to combine all layers into a single one, or the “Merge Selected” to combine only the layers you chose by selecting them previously.
Step 1:
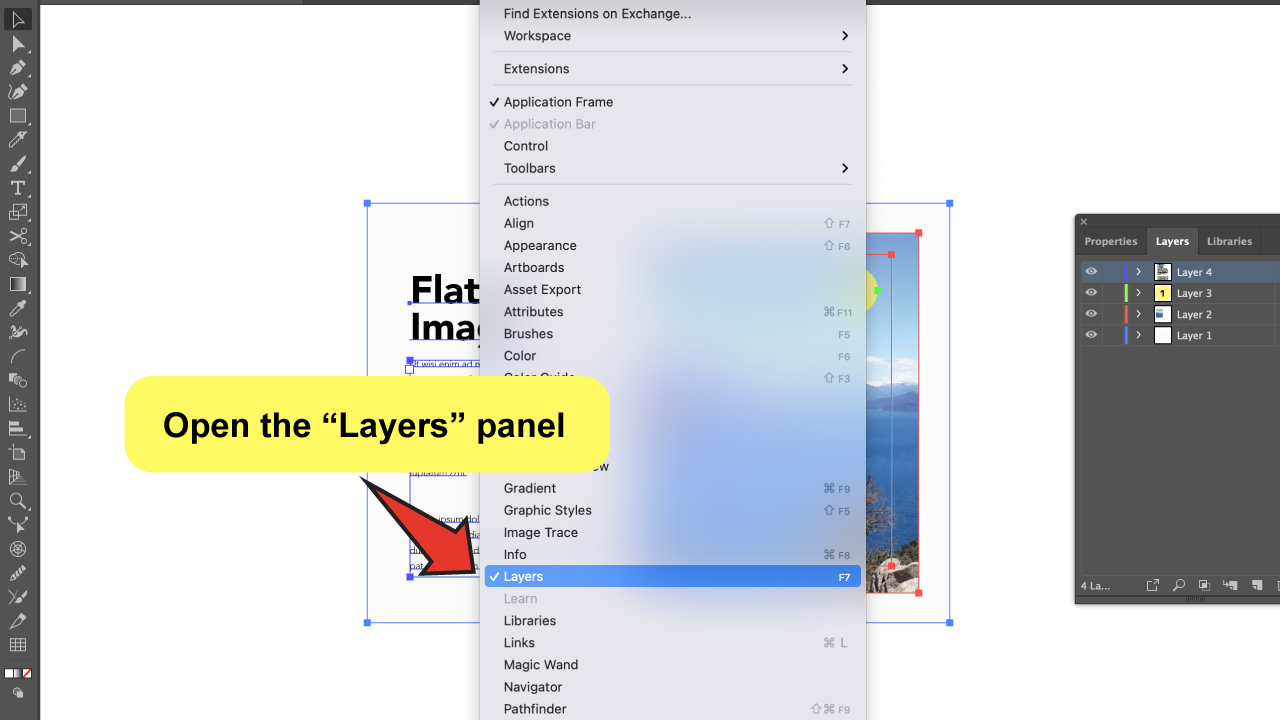
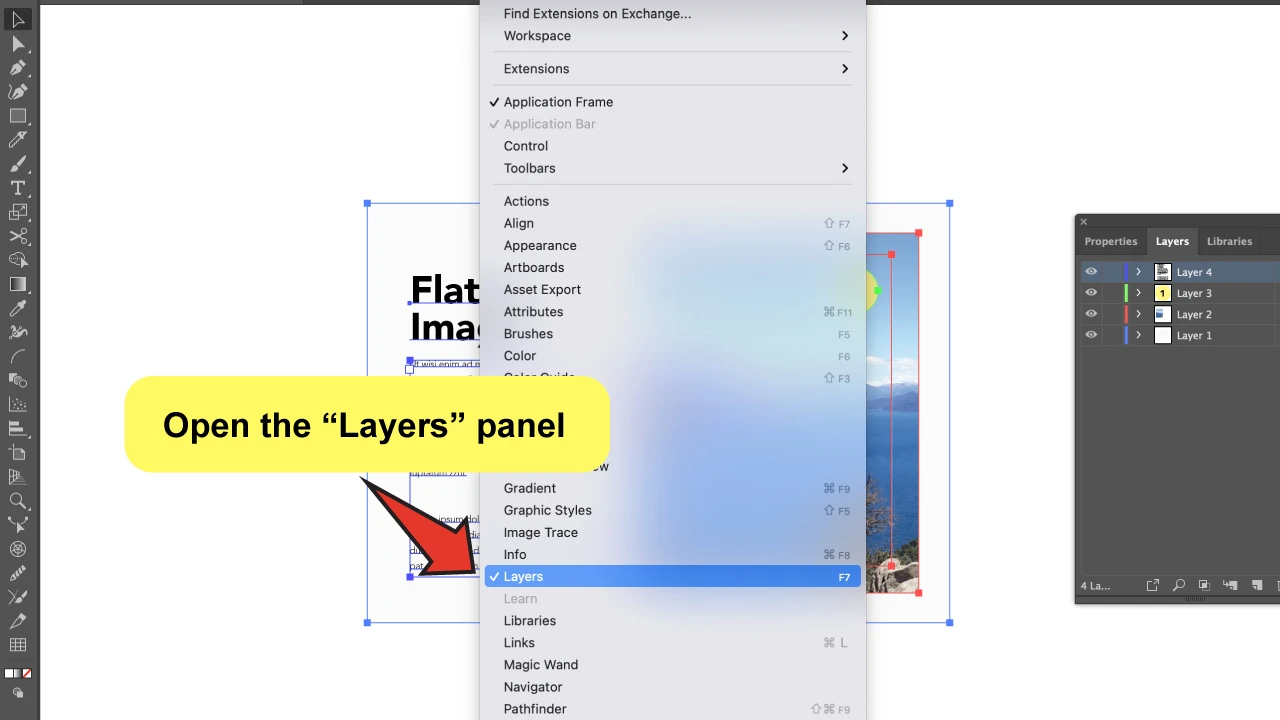
Open the “Layers” panel.
To start, open the “Layers” panel in the Illustrator file you’re working on by going to “Window” on the top-menu and selecting “Layers.” You may also press the “F7” shortcut.
Step 2:
Flatten Layers.
Click on the hamburger icon, on the top-right corner of the “Layers” panel, and select the “Flatten artwork” option from the drop-down menu.

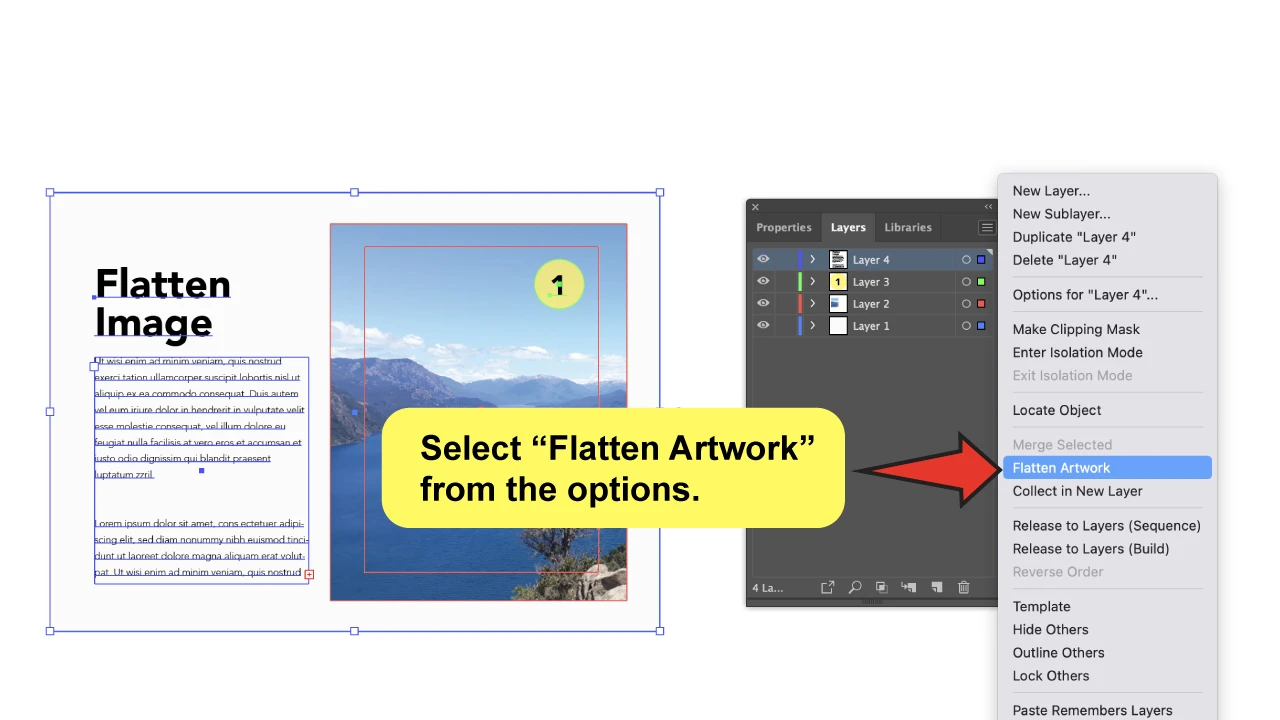
This solution unifies all of the layers without needing them to be selected beforehand.
As a result, you will only have one layer remaining on the panel because they have all been combined into one.
You can still edit the layer’s content inside of it, but you won’t have it as separated layers anymore.


Step 3:
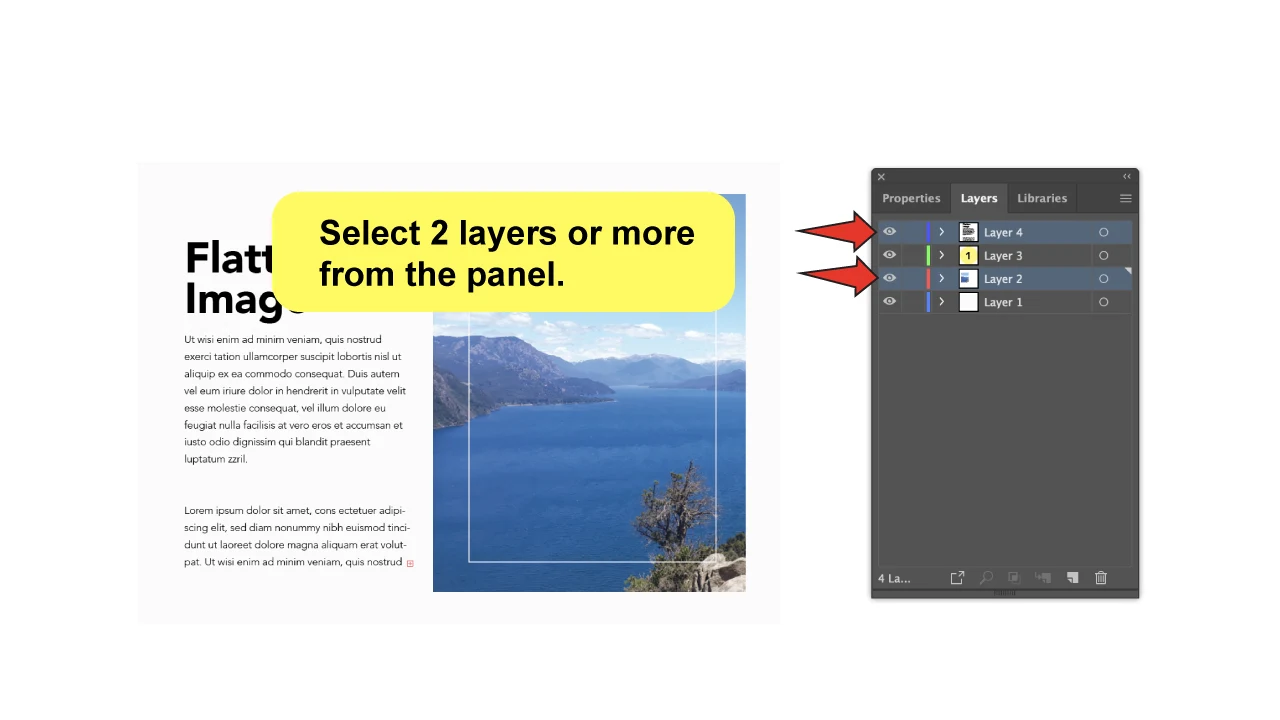
Merged Selected.
This is only another option to put your artwork together into the same layer, and it works for when you want to combine some of the layers only.
Select one of the layers. Hold down the “Shift” key, and click on the other layers you want to include to add them to the selection.

Choose now the “Merge Selected” option from the same drop-down menu we were on the previous step.

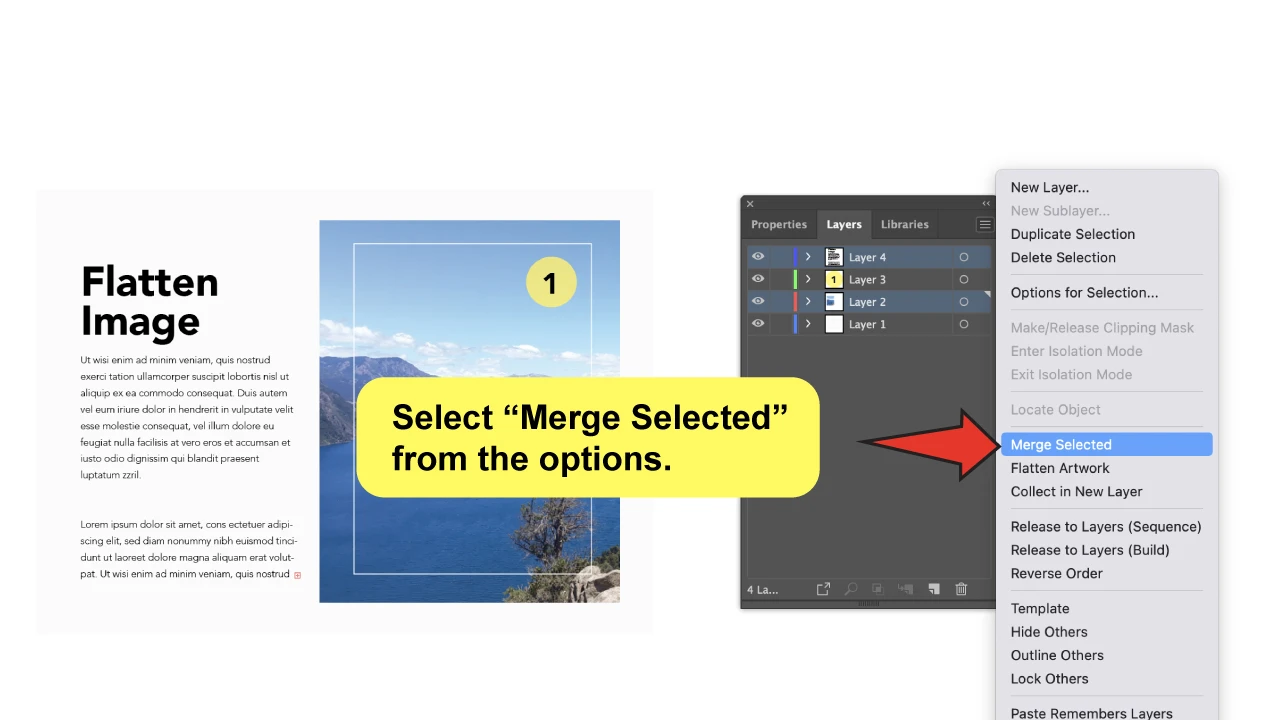
You will see that only the layers you selected have now been combined, and you can still edit each layer’s content inside of the new layer with this method also.
 3. How to Flatten an Image in Illustrator Using “Rasterize”
To flatten an image in Illustrator, go to the top-menu “Object” option, and choose “Rasterize.” Customize the settings to your liking, defining the color mode, resolution, background type, and optimization, and then click “Ok” to apply. Your artwork has now been converted to a pixel image.
Step 1:
Select the objects.
It is essential to select all of the objects in advance when using this method. To do so, use the “Selection Tool” (V).

Step 2:
Open the “Rasterize” menu box.
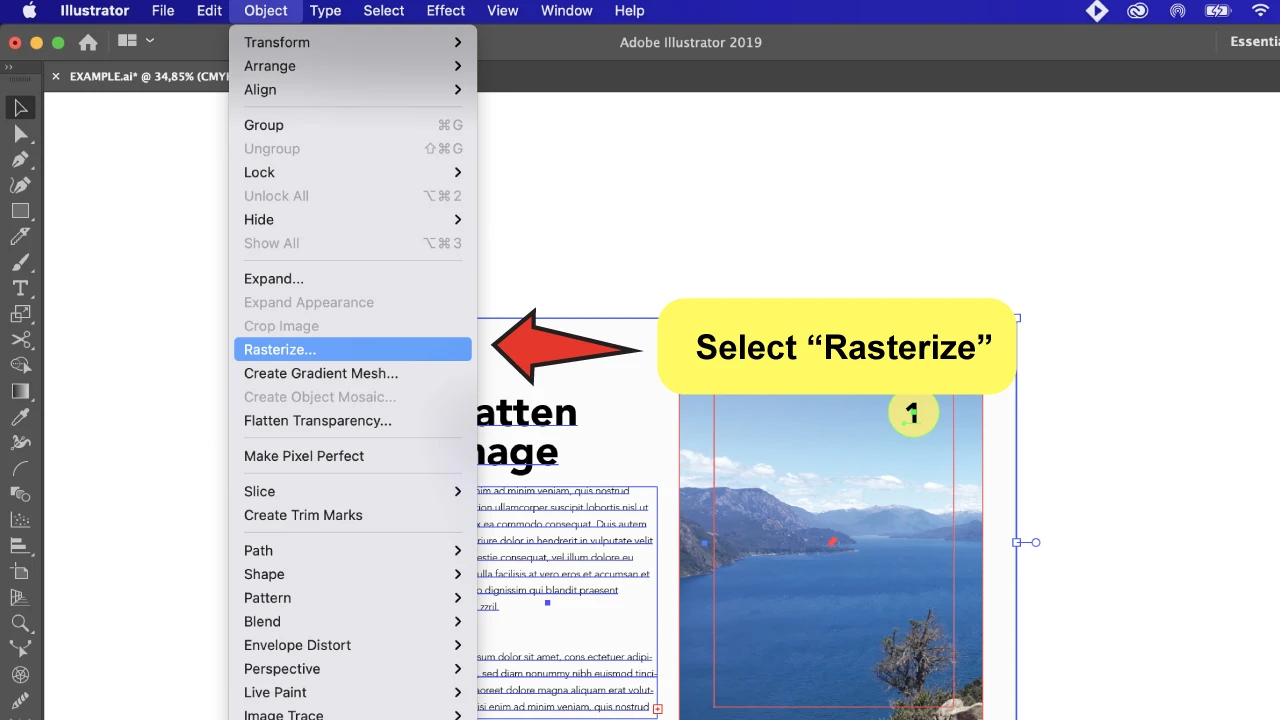
Go to “Object” on the top-menu, and select “Rasterize”.
A setting box with options will appear.

Step 3:
Customize the “Rasterize” settings.
Rasterizing seems very simple but you need to pay attention to all the details on the settings to do it properly and achieve the results that you want. I will help you go through the options.
“Color Model” is the first option. This will determine if the raster should be on CMYK, Grayscale, or Bitmap.

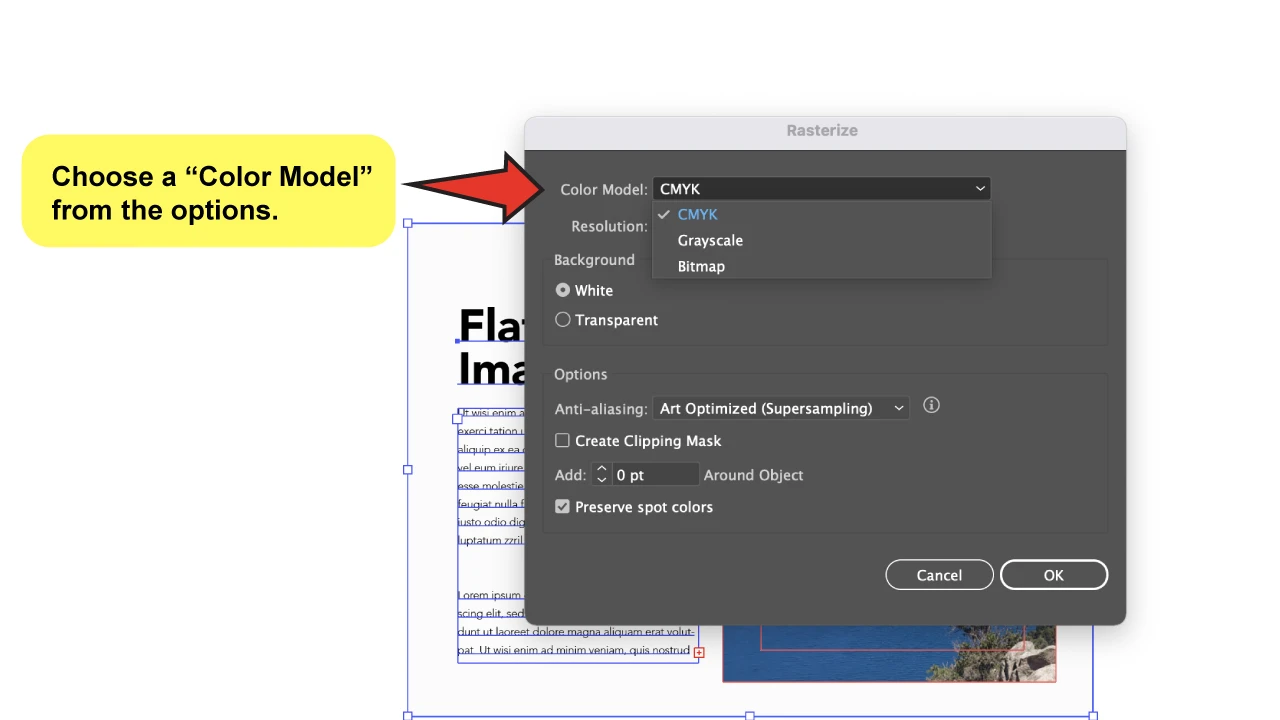
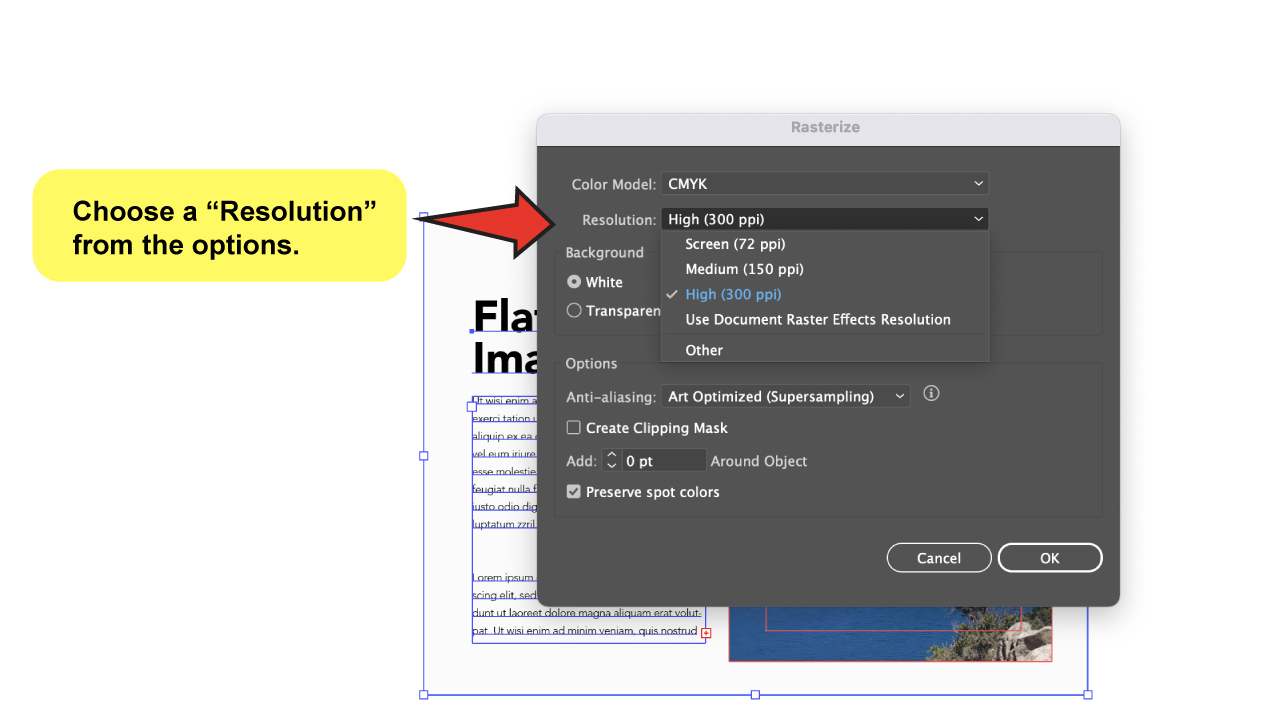
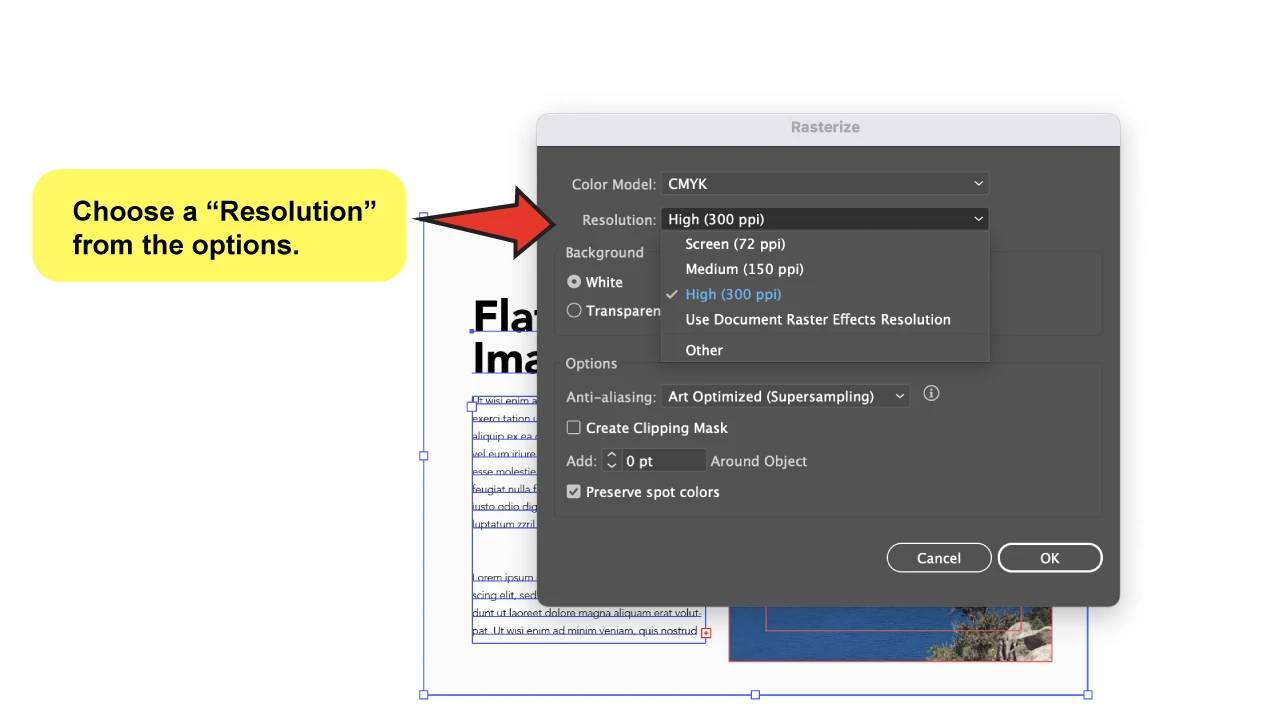
Following, there’s the “Resolution.” I always recommend “300 PPI” cause it’s the highest quality allowed during the printing process.
You will also need to choose between having a White or Transparent “Background.“ I advise checking the “Transparent” box.
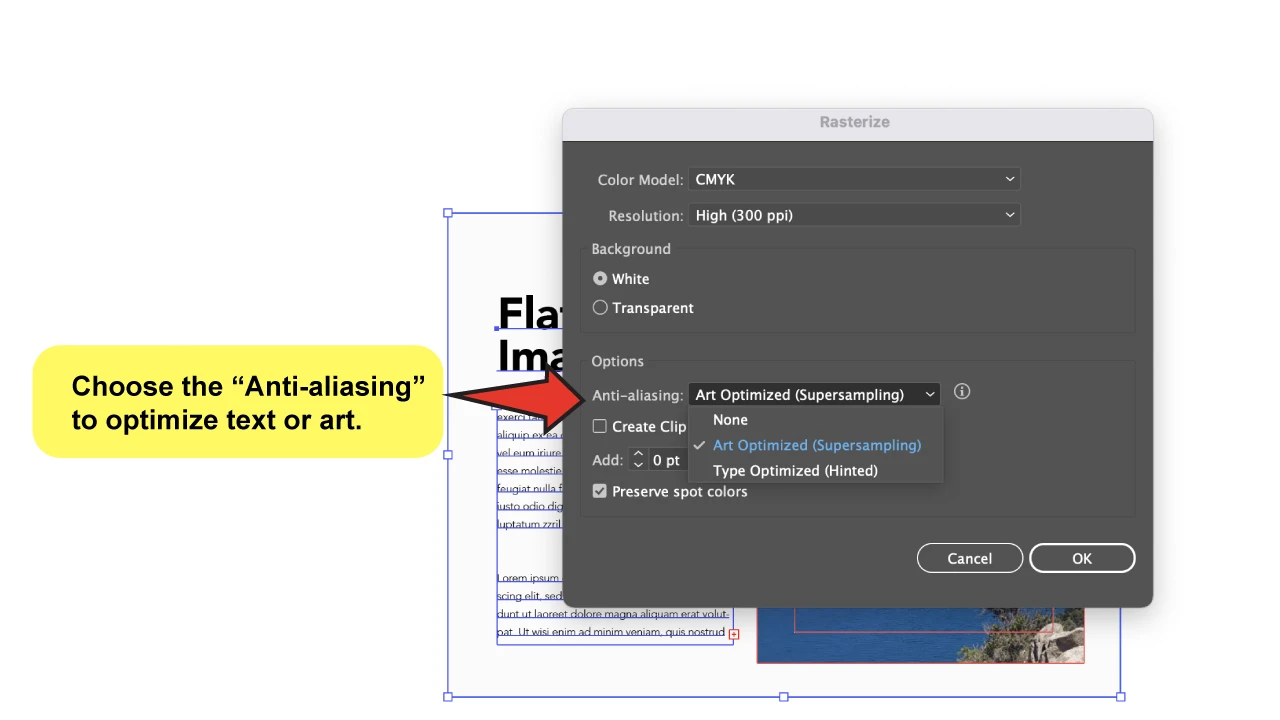
“Anti-Aliasing” option smooths out and blurs rough edges by adding pixels around the edges and color boundaries. You can apply the “Art Optimized” effect to your raster, based on whether you want to optimize the graphics in general. When you want to optimize the text appearance, the “Text-optimized” option would do it.
If you choose “None,” the edges will be sharper, but curves and diagonal lines will be jagged.

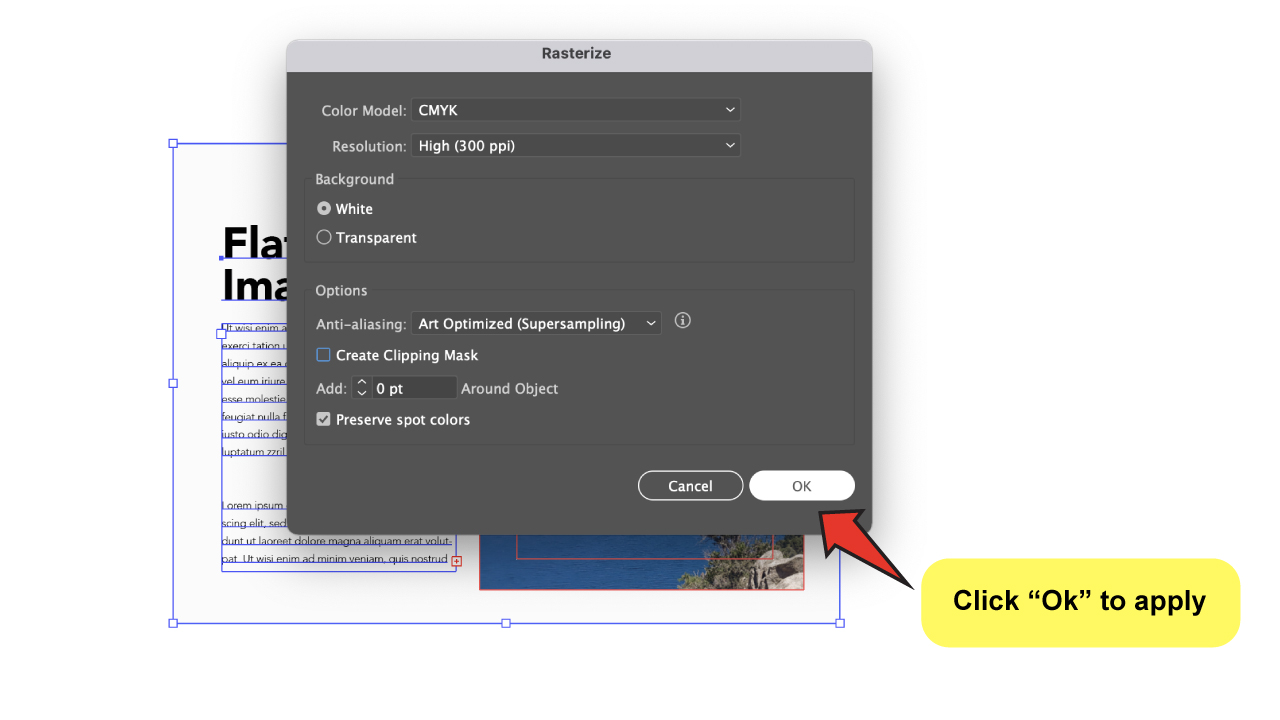
Lastly, we have the options for “Create Clipping Mask” and “Preserve Spot Colors.” The first will generate a clipping mask around all of the objects you’ve chosen to rasterize. I don’t usually check it, but you can try it out if you think it will help you organize your files. The second keeps the spot colors, so the final appearance won’t be affected on the raster.
Click the “Ok” button when you are done!


Hey guys! It’s me, Marcel, aka Maschi. On MaschiTuts, it’s all about tutorials! No matter the topic of the article, the goal always remains the same: Providing you guys with the most in-depth and helpful tutorials!

