Wow! Your profile photo looks stunning!
How did you manage to make the image take the shape of a circle?
Well, if you’re still not a Canva user, you’re missing out on one of the things that make Canva great — the ability to fill a shape with an image.
So, if you’re raring to learn this cool graphic design trick, read below.
How to Fill a Shape with an Image in Canva
To fill a shape with an image in Canva, head to the “Elements” tab. Then, in the “Frames” section, select a shape. Then, choose an image you’ll fill the shape with from Canva’s “Photos” tab. Click and drag the image towards the shape until it fills its space.
Filling Shapes with Images in Canva — All You Need to Know
Filling a shape, or even learning how to change the shape of a photo in Canva isn’t as complicated as it sounds.
Gone are the days when you’d have to manually place an image on top of a shape to make it look like it’s framed.
With Canva, you’ll only have to master a few steps to successfully fill a shape with an image in Canva.
So, granting you’ve already opened a design file or created a new one, here’s what you should do.
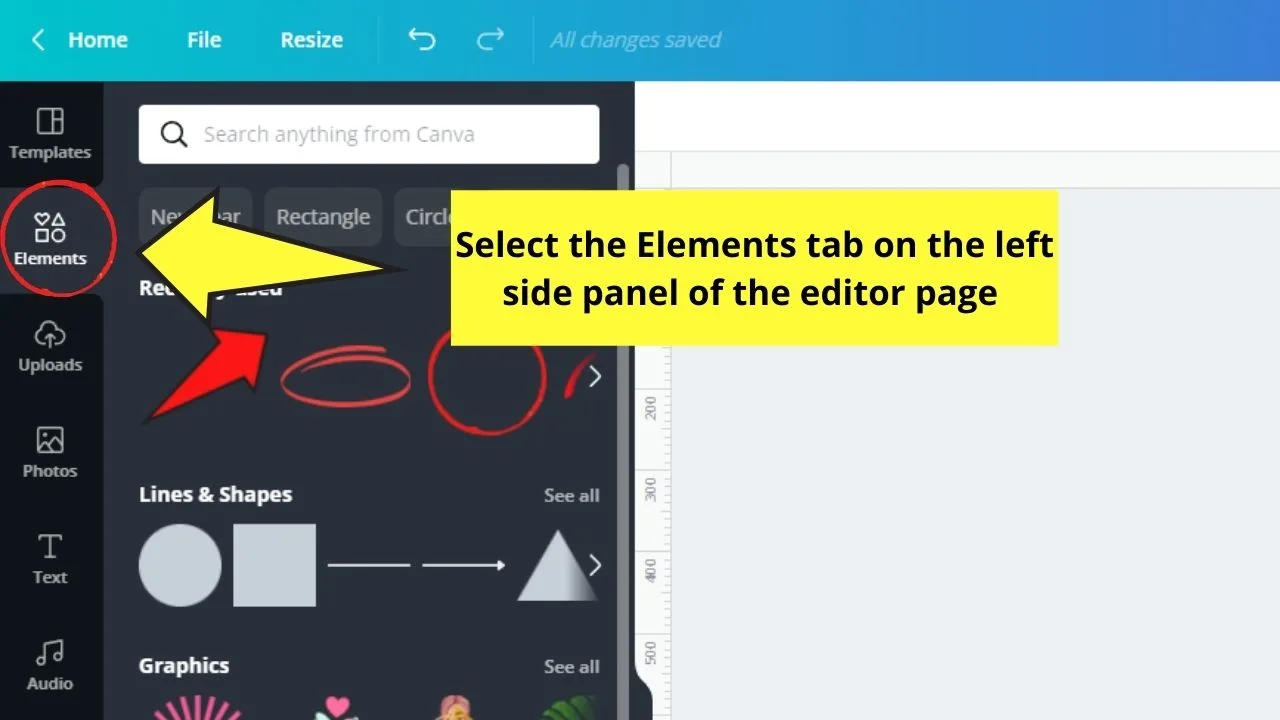
Step 1: On the editor page, head to the left side panel and click the Elements tab.
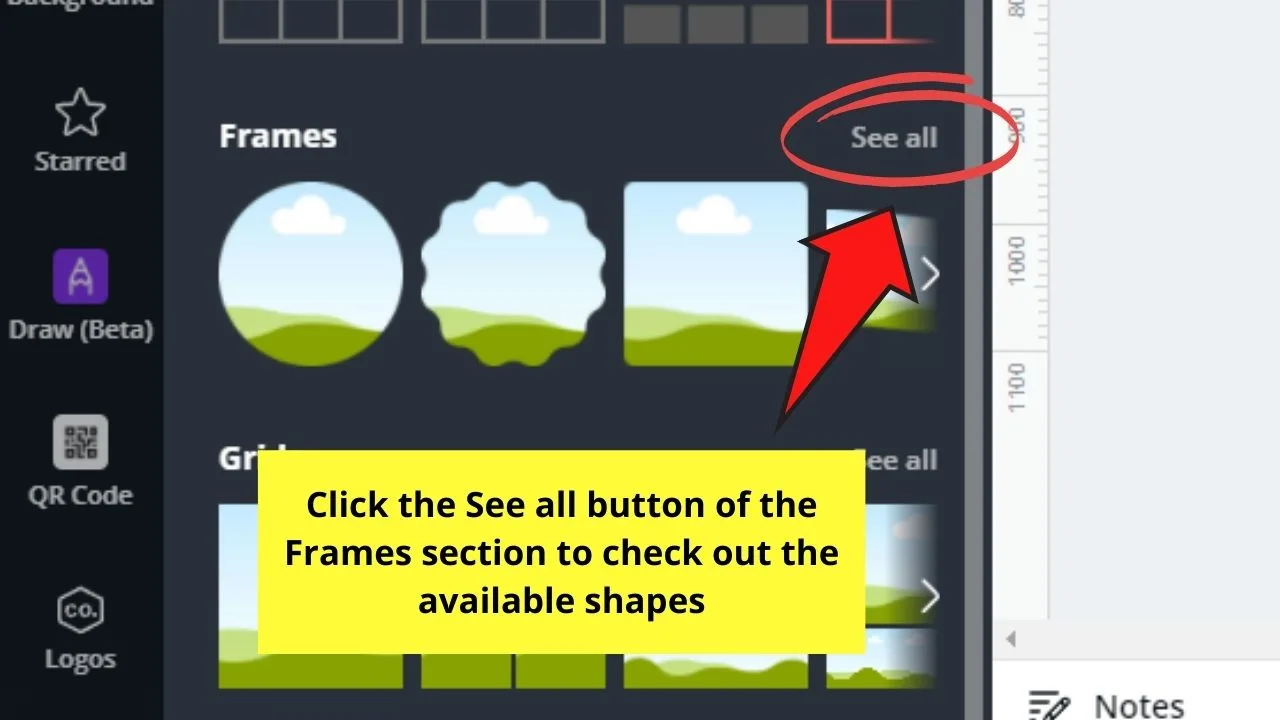
Step 2: Scroll down the right-side panel until you see the Frames section. Select the See all button to check out the various shapes in the gallery.
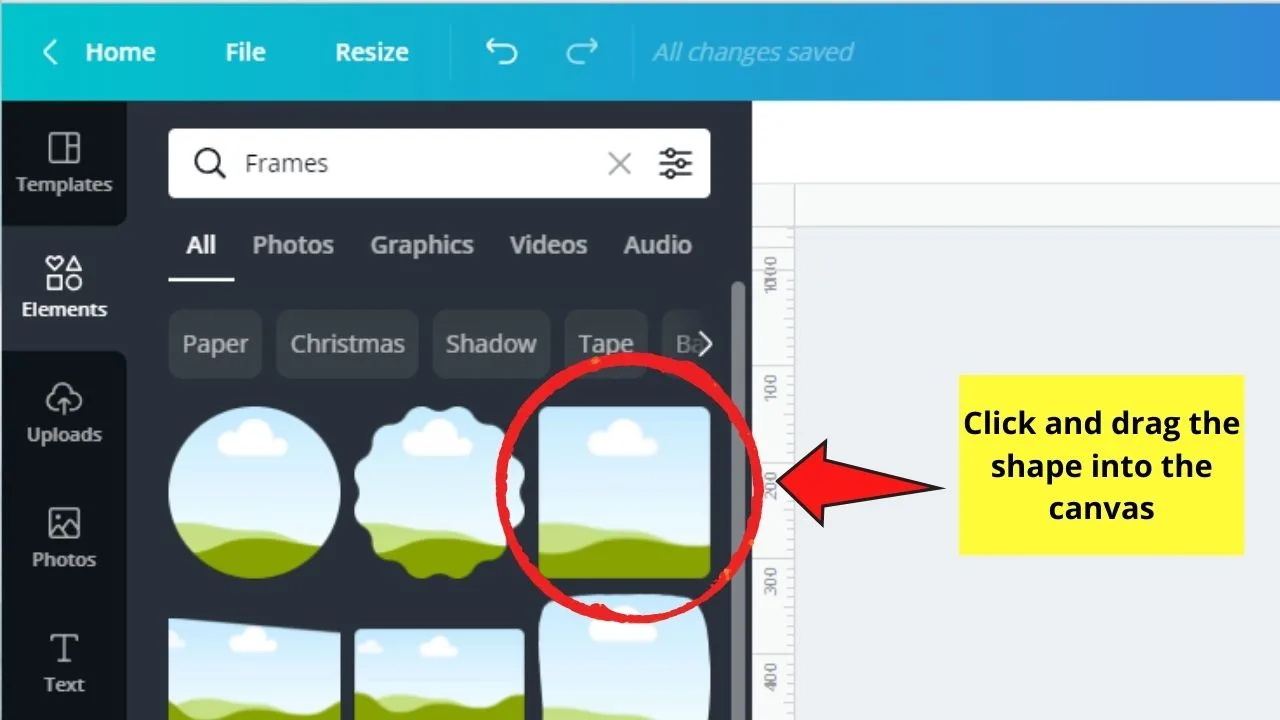
Step 3: Continue scrolling down the Frames gallery until you find the shape you’d like to use. Click and drag the shape once you find one that you’ll use.
Step 4: Now, it’s time to choose what image you’ll fill the shape.
You can use Canva’s stock images by heading to the Photos tab on the left side panel of the editor page.
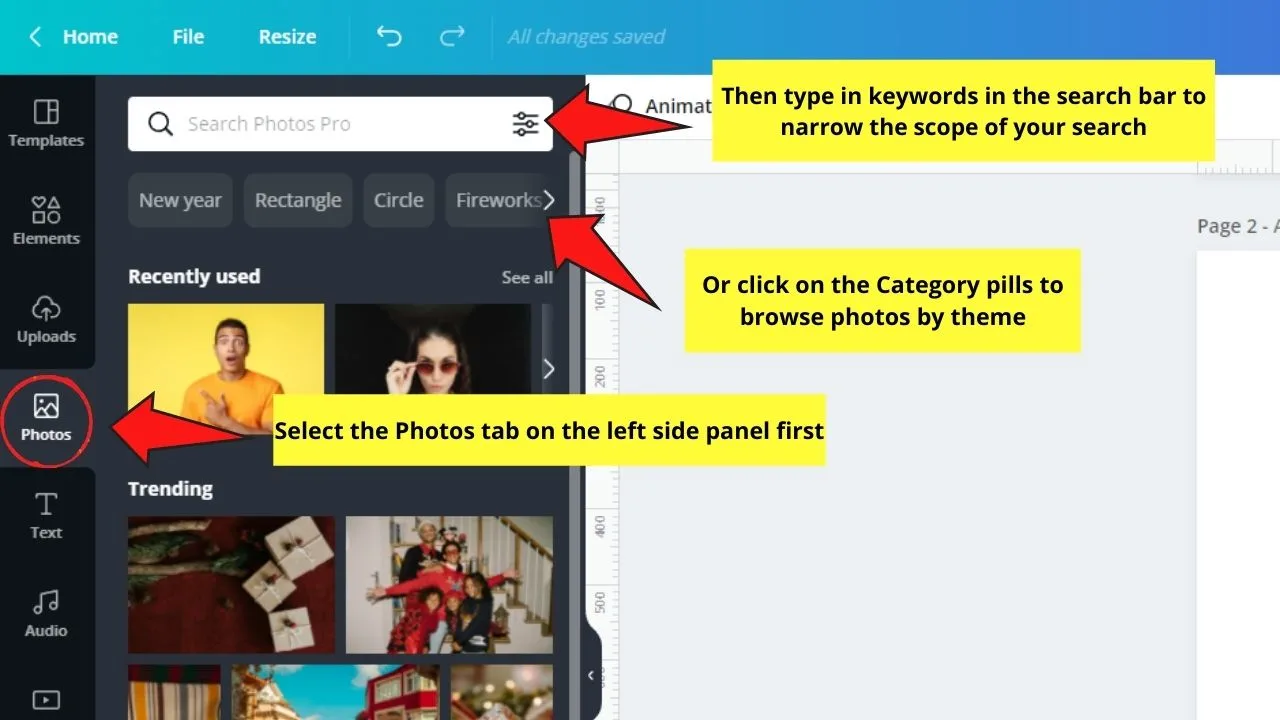
From there, you can either use the search bar function and type in keywords to find the photo you’re looking for.
Or, you can click on the Category pills below the search bar to help you narrow your search further.
Another way to add a picture to Canva is to import one through the Uploads tab.

Simply click on it on the left side panel and select the Upload media button to begin the process.
Step 5: After selecting the image you’ll use, click and drag it towards the shape you added earlier.
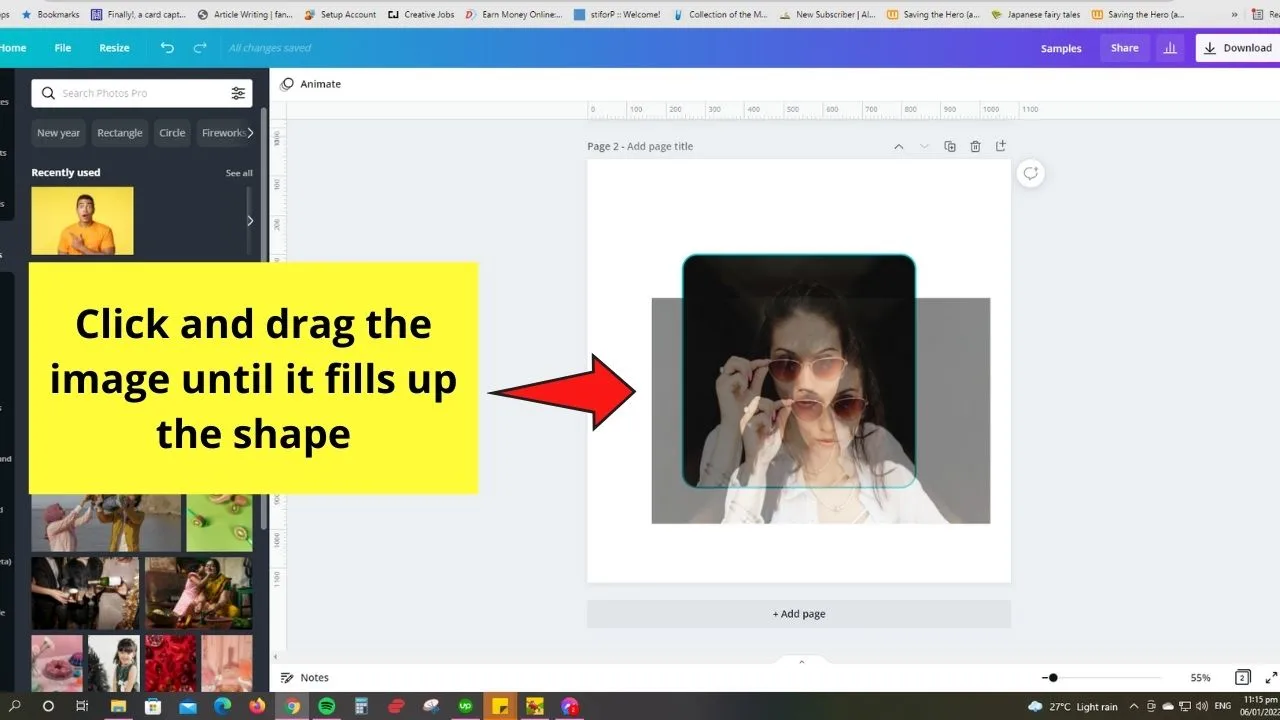
Keep dragging until you see the image filling up the shape’s space.
Step 6: If, however, you want to adjust the crop positioning of the photo inside the shape, all you need to do is double-click on it first.
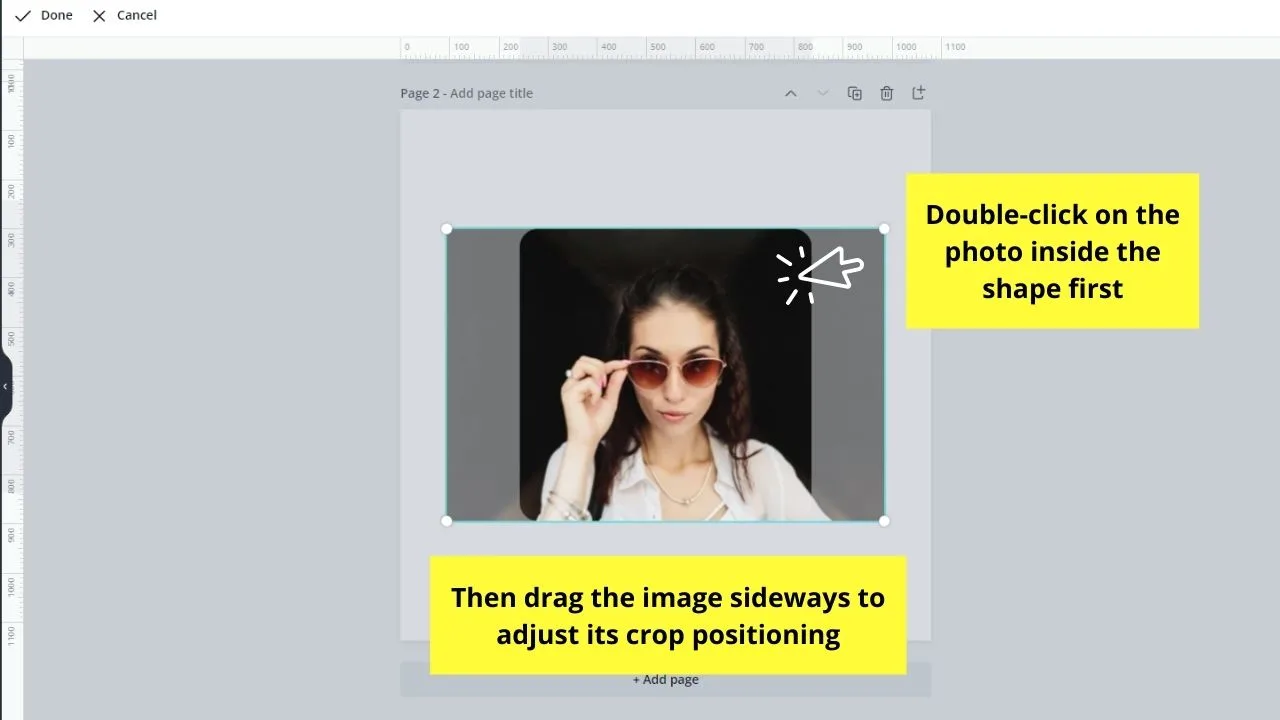
Then, you’ll see the image inside a grid of some sort. Drag the photo sideways to change the part of the picture you want to be featured inside the shape.
You can also opt to click the Crop button on the editor toolbar to make crop positioning adjustments.
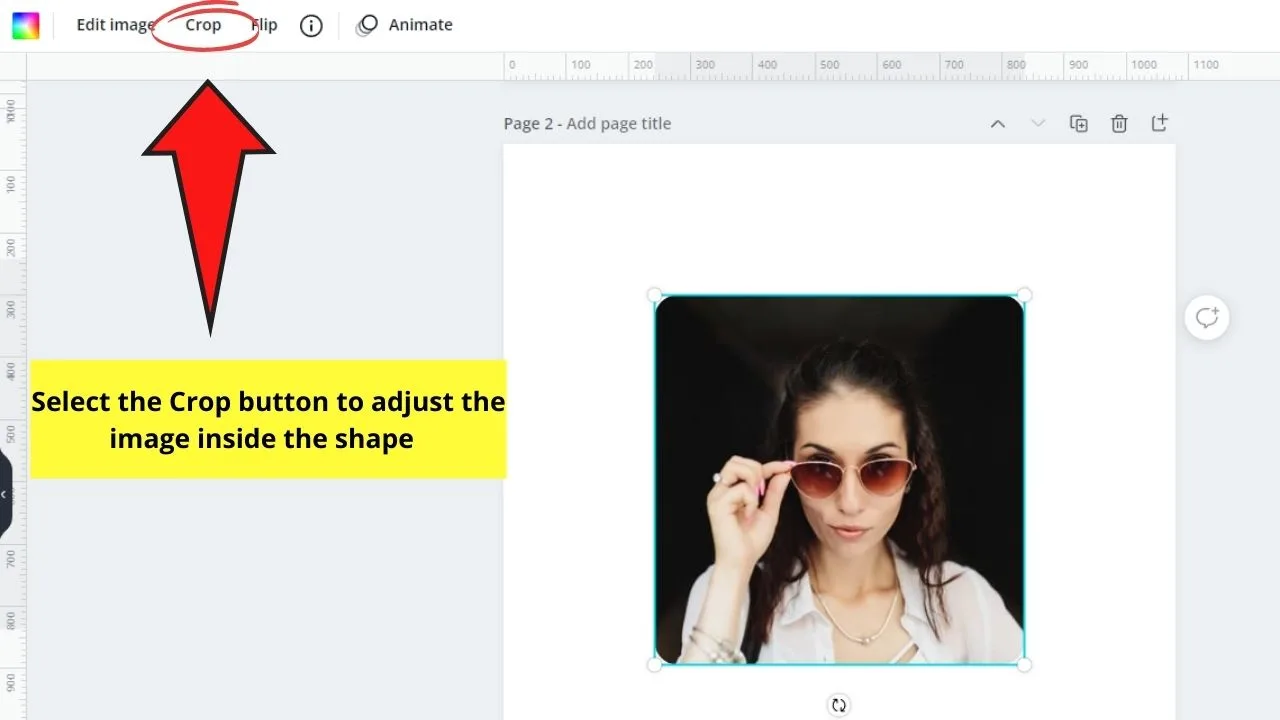
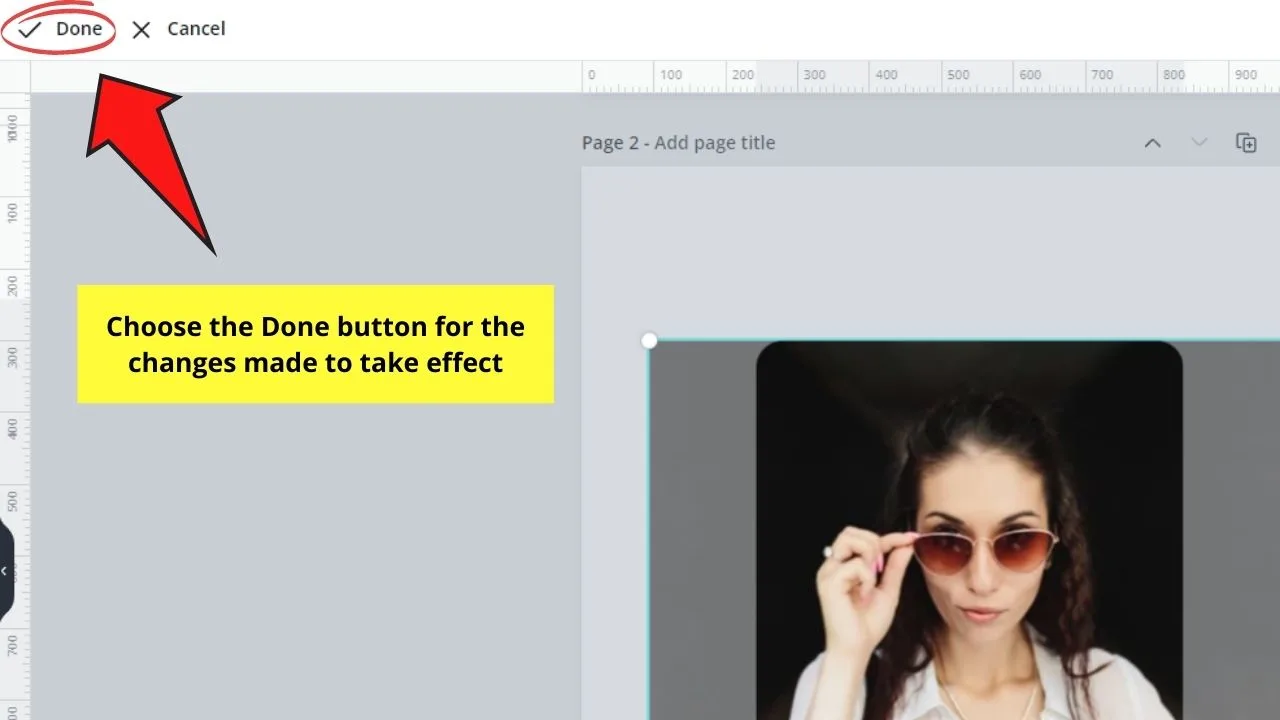
Whatever method you choose, make sure to select the Done button afterward.
Step 7: Resize the image-laden shape by dragging the white circles and pill handles surrounding it.
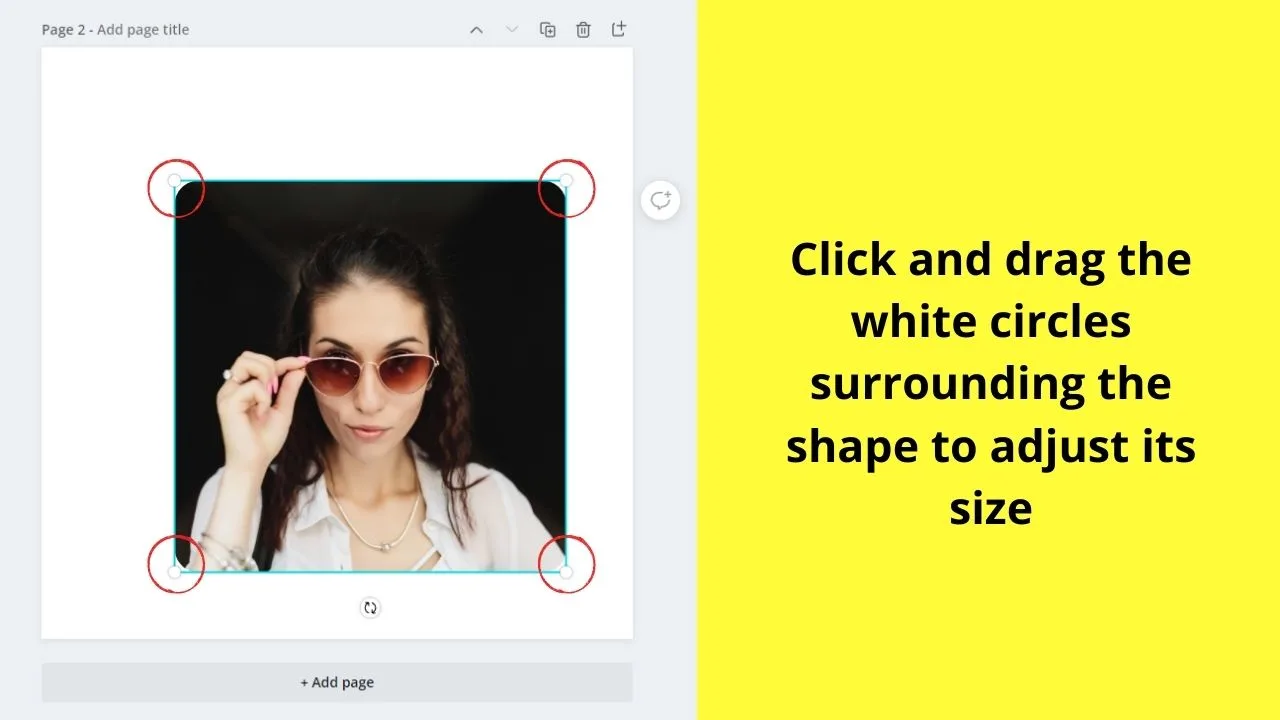
Then, drag it across the canvas to position it according to the design you have.
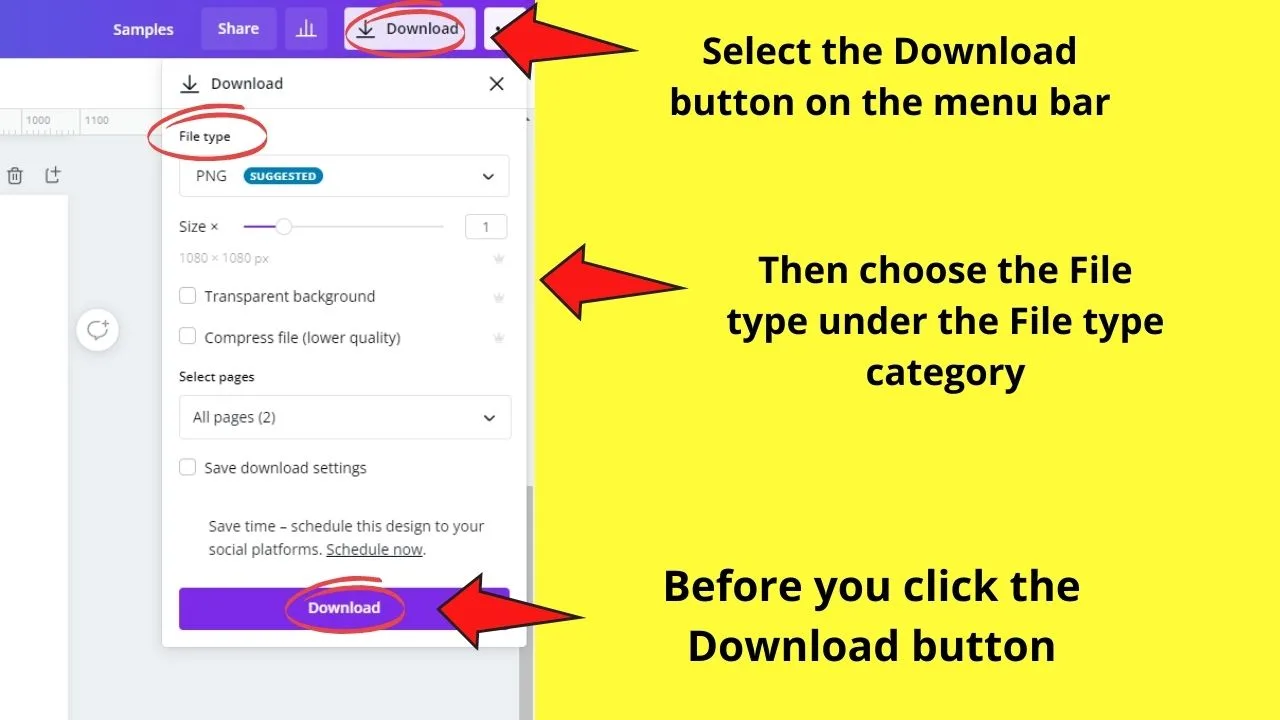
Step 8: Once you’re satisfied with how the framed image looks, click the Download button and select a file type to save it into before you hit the Download button.
Very easy, right?
If you find this a bit confusing still, you can read up on how to use frames in Canva to learn more about making images fill a shape in the tool.
How to Put a Photo into a Shape on Canva
First of all, go to “Elements” and search for “Frames.” Drag & drop the desired frame into your project. Then, either go to “Photos” to choose one of Canva’s photos or go to “Uploads” and upload your very own photo. Lastly, make sure to drag your photo onto the frame and the photo will then automatically be inserted into your shape (frame).
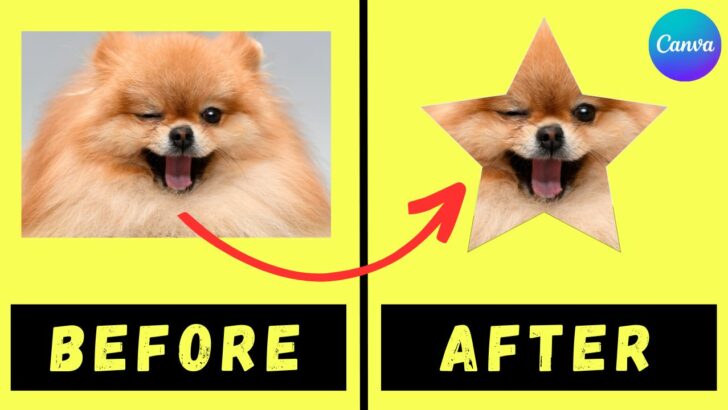
Depending on your frame, this will obviously also change the shape of your photo. For instance, if you do choose a star frame, then after dragging your photo onto the star frame, your photo will then be star-shaped.
How to Change the Picture Shape in Canva using ANY shape
This is where things get really interesting.
Generally speaking, when we put an image into a shape in Canva, we are limited to the “Frames” shapes that you can find in Canva’s “Elements” section.
However, there is a neat little workaround that lets you put photos and images, be it from Canva’s own vast stock images library or your own photos, into basically ANY shape.
This method is a little bit more time-consuming because we need to make use of some third-party software to get this done.
However, this workaround is well worth it because, without this workaround, you are incredibly limited as far as the shape of photos goes in Canva.
As we have seen, you can only put photos into Canva’s very own “Frames,” and there are not that many shapes to be honest.
Also, there is no dedicated tool such as a pen tool or something similar that would let you create your very own shapes.
This is why you should have a look at the video below to learn how to put your images and photos into basically ANY shape.
With this method, you will also be able to put your pictures inside basically any Canva element that you can find under “Elements.” (see the video thumbnail below, for instance, here I put an image into a duck element that I took from Canva’s Elements tab!).
The third-party software that we are using for this is GIMP, which is completely free both on MAC and on PC.
How to Fill a Shape with Color in Canva
Now, let’s suppose you would like to fill a shape with color in Canva rather than actually fill it with a regular image or picture. There are a couple of ways to go about this in Canva.
First of all, you might be unaware of the fact that Canva recently performed a shapes update. You can learn more about Canva shapes here.
With that said, if you would simply like to have a certain shape with a certain color, the easiest would be to use the regular Canva shapes feature.
To use it, just press “R” on your keyboard to add a rectangle to your design.
You can then simply transform your rectangle into dozens of other shapes by left-clicking on it and then clicking on “Shape” on the top toolbar.
On the left side, you will then see plenty of shapes to choose from.
Choose your shape by left-clicking on it, and your rectangle will immediately transform into this new shape.
Now, to change the color of that shape, simply make sure your shape is selected and then click on the color square in the top toolbar to adjust its color.
In case you would like to fill a Canva frame shape with a color, then the only way to do that would be actually to insert a background into it with the desired color.
So you would first add the frame from “Elements,” then you would go to “Photos” and search for something like “red background” or “green background,” and then you would drag the photo background onto your frame to fill it with the respective color.
Please note that you can’t head over to “Background” in the left-side toolbar and then choose a background from there to fill a shape because the backgrounds you find there are directly applied to your design and are not available as independent photos and images.
Frequently Asked Questions about How to Fill a Shape with an Image in Canva
Can you still fill shapes with images in Canva even if you’re on a free account only?
As Frames isn’t a Canva Pro-exclusive feature, free users can still enjoy filling shapes with images. However, just avoid using premium photos during the process so you won’t have to pay anything when you download them.
Is it possible to download a framed photo with a transparent background?
It’s possible to download framed pictures with transparent backgrounds. Simply tick the Transparent background button after selecting PNG as the file type. But, you’ll need to be on Canva Pro to enjoy this transparent background feature.

Hey guys! It’s me, Marcel, aka Maschi. On MaschiTuts, it’s all about tutorials! No matter the topic of the article, the goal always remains the same: Providing you guys with the most in-depth and helpful tutorials!
