

Canva is an awesome piece of software.
I find myself using Canva very very often.
In fact, there’s hardly any day that I can do without Canva.
It’s just so easy to get things done in Canva and Canva does it all: Facebook, Instagram, Pinterest, Youtube thumbnails…you name it!
As far as designing posters and thumbnails go, Canva definitely does an awesome job.
But what about video editing?
Well, that’s a whole different story.
In this article, we are going to discuss whether Canva is capable of fading out audio tracks or not. And if yes, how so.
How to Fade Out Audio in Canva?
To fade out audio in Canva, click the 3-dot icon on the audio clip timeline. Choose the “Audio Effects” option on the menu. Drag the “Fade Out” slider to the right to increase the fade-out effect’s duration.
In previous versions of Canva, you’d have to use a separate video editing tool to fade out audio. But with recent updates, you can already apply this effect right within the Canva app.
Granting that you have already added the audio for the video, follow these next steps.
Step 1: Select the 3-dot icon on the audio clip timeline
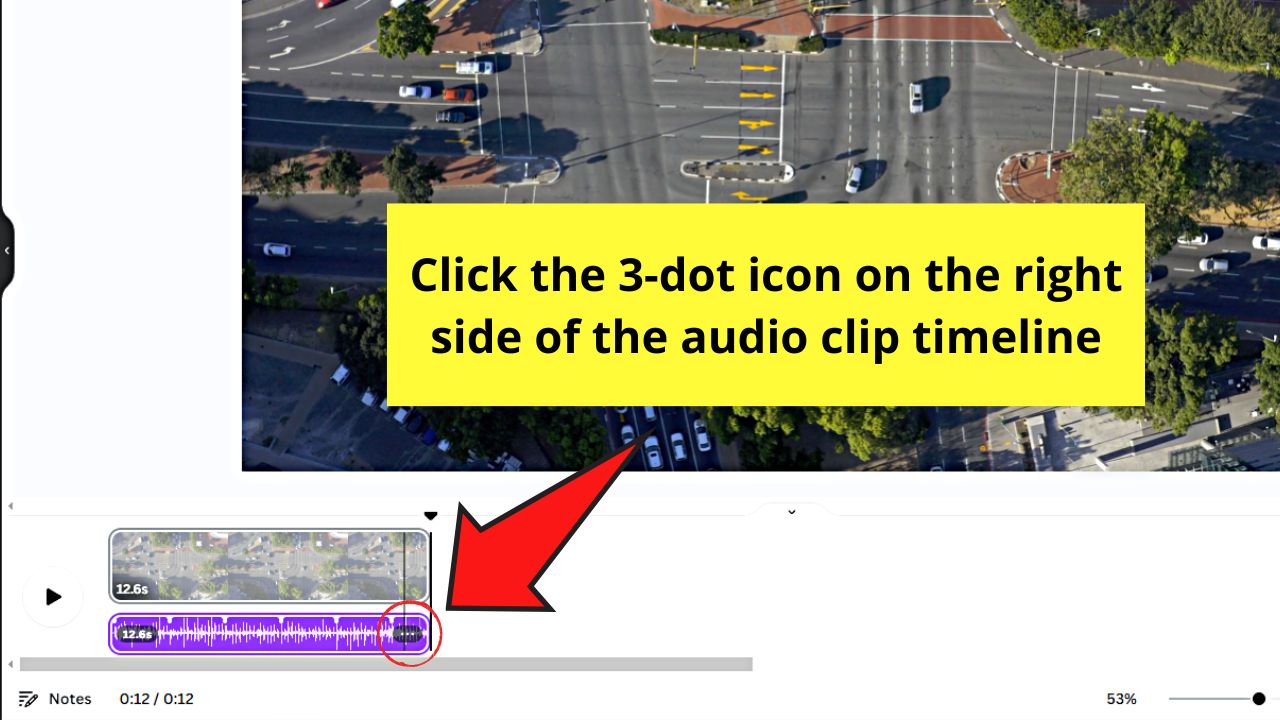

You’ll find this button on the right of the audio clip after hovering the cursor over it.
Step 2: Click “Audio Effects”


You’ll find this on the menu that appears after selecting the 3-dot icon on the audio clip timeline.
An object panel then appears on the editor page’s left side.


Step 3: Drag the “Fade Out” slider to the right
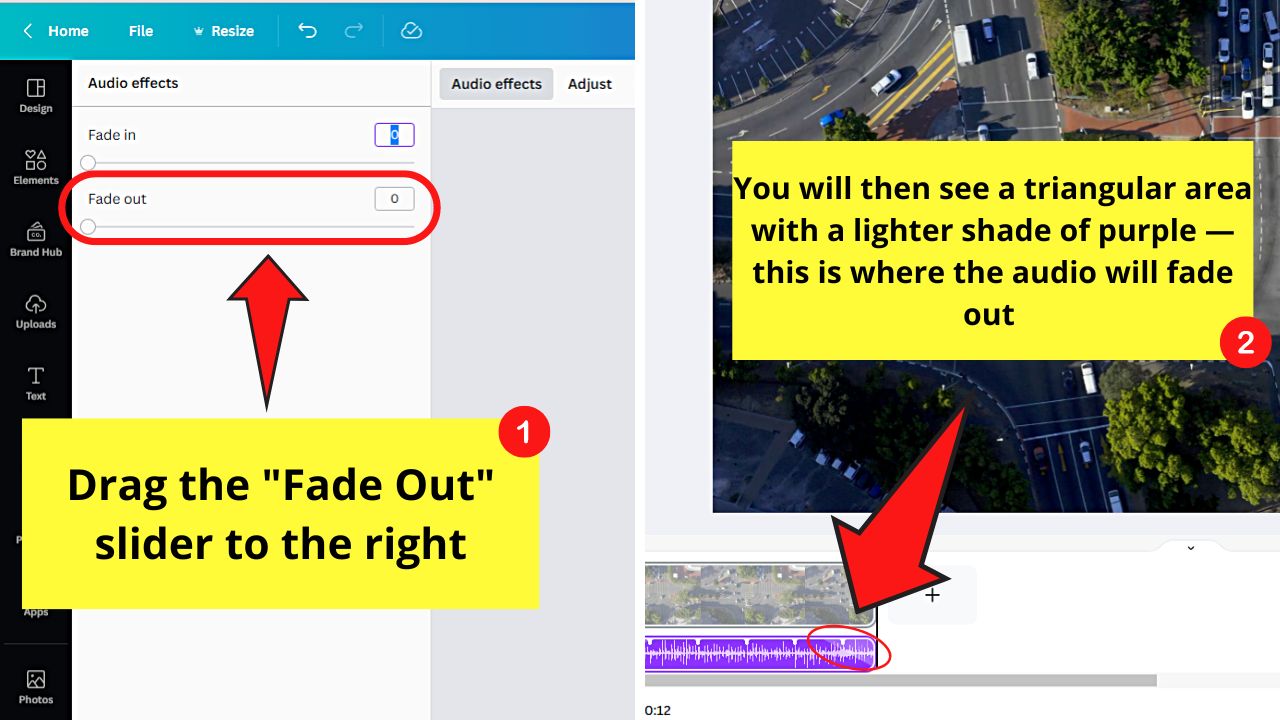

There are 2 sliders that you can find on the object panel that appears. The one on top is the “Fade In” slider; the one below it is the “Fade Out” slider.
Since you want to fade out the audio you added, go to the second slider and drag it to the right. You’ll then notice a part of the audio clip having a lighter shade of purple, which indicates the part where the fading out will happen.
You can fade the audio out 5 seconds (this is the max duration) before it ends. You can also make the duration of the fade-out shorter by dragging the “Fade Out” slider to the left.
How to Fade In Audio in Canva
To fade in audio in Canva, select the 3-dot icon on the lower right of the audio clip timeline. Choose “Audio Effects” and drag the “Fade In” slider to the right to increase its duration.
Fading in audio in Canva works basically like how you fade it out. But instead of gradually silencing the audio until it ends, you’re now increasing its volume at the beginning.
Granting again that you have already added the audio clip, these are the next steps you’ll follow.
Step 1: Select the 3-dot icon on the audio clip timeline


You’ll find this button on the lower right of the audio timeline once you hover the cursor over it.
Step 2: Click “Audio Effects”


You’ll find this option in the menu that appears after selecting the 3-dot icon.
Step 3: Drag the “Fade In” slider to the right

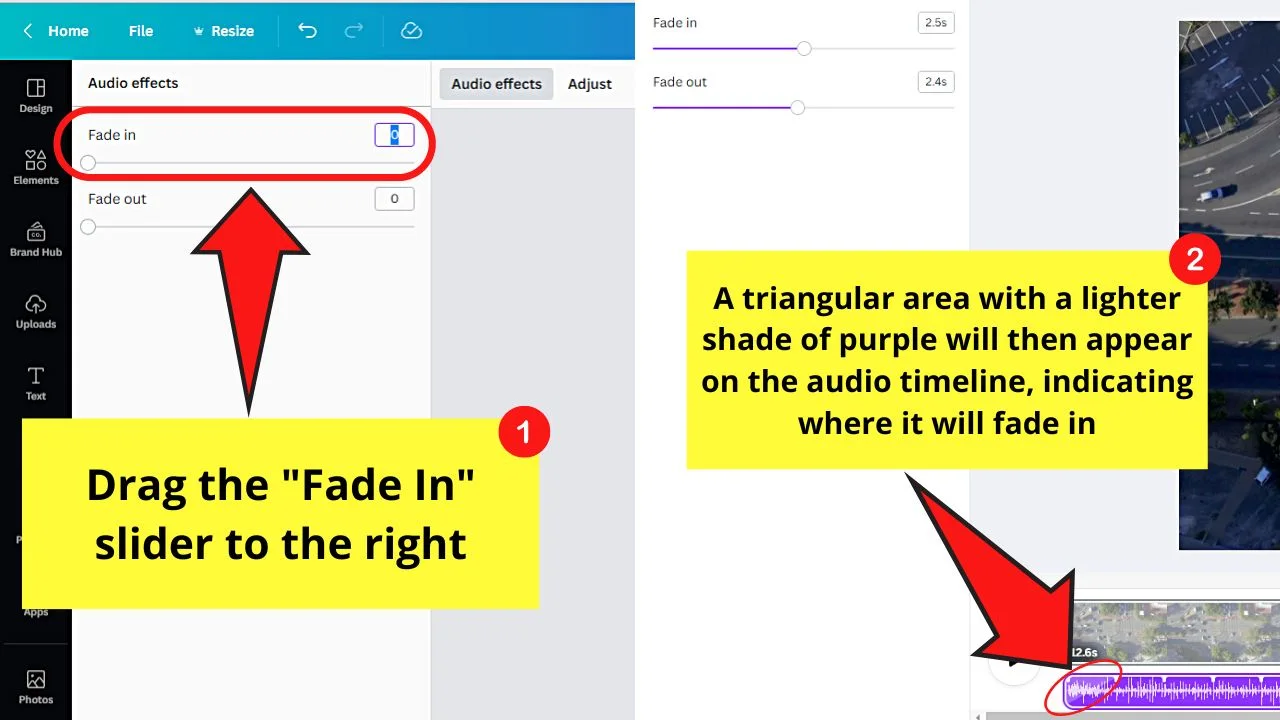
You’ll find this slider as the first option on the object panel that appears on the left of the editor page. Dragging this slider to the right increases the duration of the “Fade in” effect, making the audio increase in volume gradually.
Like in the “Fade Out” slider, the maximum duration for fading the audio in is 5 seconds. You can also decrease its duration by dragging the same slider to the left.
You will then see the part where the “Fade In” effect is applied becoming light purple.
Even if you added audio clips to every slide on your Canva video, you can still enjoy using any of these 2 sliders. Just make sure to select the right audio clip timeline before applying these effects.
Frequently Asked Questions about How to Fade Out in Canva
What is the difference between fading in and fading out audio?
When you fade in audio, you’re gradually increasing its volume from the beginning. Fading out means you’re gradually lowering the audio’s volume to silence.
Can you apply “Fade In” and “Fade Out” effects on the same audio clip in Canva?
You can apply both the “Fade In” and “Fade Out” effects on the audio you added in Canva. Just make sure to choose the correct audio clip first before selecting the 3-dot icon. Then click “Audio Effects” and drag the respective sliders for “Fade in” and “Fade out.”


Hey guys! It’s me, Marcel, aka Maschi. On MaschiTuts, it’s all about tutorials! No matter the topic of the article, the goal always remains the same: Providing you guys with the most in-depth and helpful tutorials!

