

Running a multi-author site on WP can have its challenges. How to change the author name in WordPress should not be one of them.
There are a few methods, and thankfully, none of them require duplicating posts or pages to display a new author name, then deleting the originals. That would be sad.
Changes to author names can be made in the post editor, or in the quick edit menu when viewing all posts or all pages.
The author names available are determined by the users registered on your site. If you run a single user site, you will need to set up a new user account first to set a display name.
What gets shown as a display name is set in the user profile. If a user selects a different format for their display name, the full author will be replaced by a nickname.
As an admin, you can change how author names are displayed.
How to change the author in WordPress
In the WP editor, Click “screen options”, then check the box for “author”. A new widget will show letting you select a different author. The “quick edit” function can be configured to change the author on up to 999 posts or pages.
How to add an author in WordPress
If the author that you would like to change to has not yet been added to WordPress, you will first need to add a new author profile (if you have already done that, you can ignore this section).
WordPress has an integrated user-management system that is based on user roles.
You can add new authors yourself, or choose to let people register themselves as authors or contributors.
The difference between an author and a contributor is that a contributor cannot publish content.
All they can do is “submit for review”. Authors and Editors can publish. Admins can change the author name of any post before and after it is published.
To add a new user, go to “Users” select “add new”.

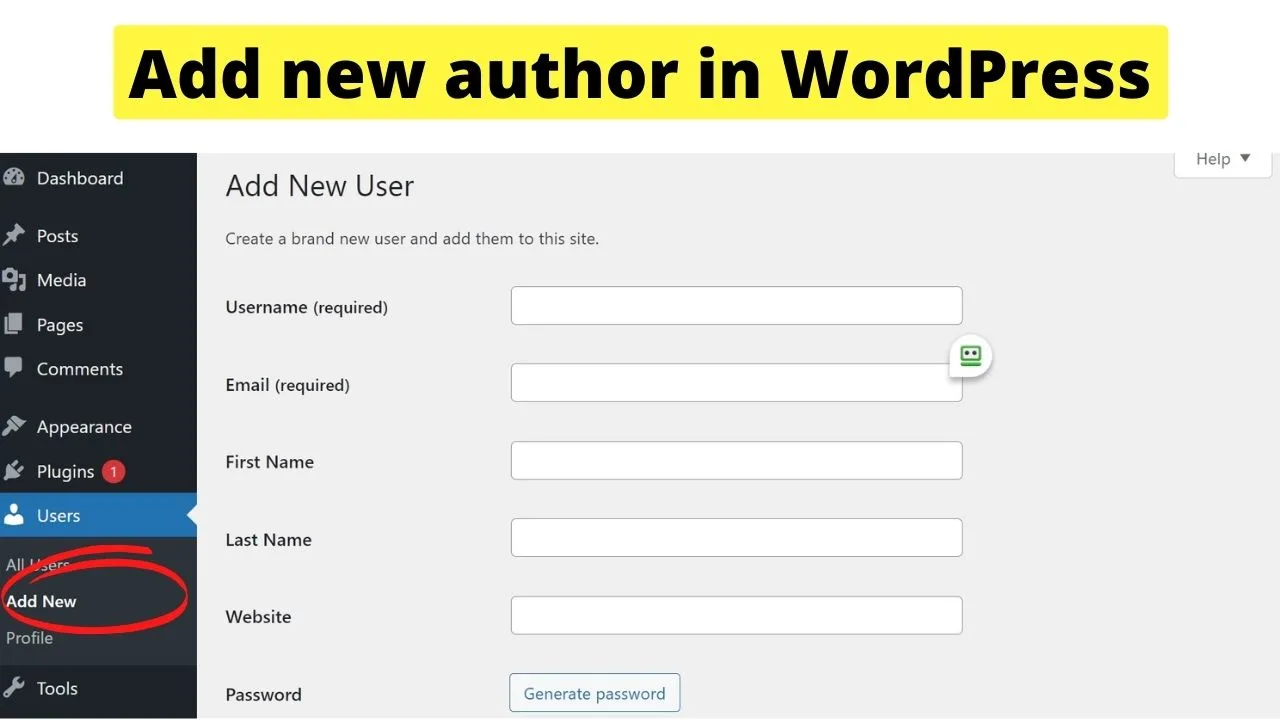
The new user needs to have a unique user name and email address to receive notifications.
The full name is not mandatory, however, if only a user name is added to the profile and no first or last name is saved, the user name will become the display name.
How to change the display name in WordPress
Once a new user is set up using the mandatory information of a user name and email, a user profile is set up.
If no additional names are provided, the user name becomes the display name.
If you are the only user on your website and your display name is showing anything other than your full name, it is your “user profile” that needs to be changed.


You cannot leave fields blank so as not to show author names.
The process to remove or hide the author in WordPress is different.
Users need to set up their “user profile” page with additional information. If they do not do that, an admin has access to all user profiles.
You can log in as an administrator and insert the full name, or change the user role to a contributor.
Contributors can submit content for review. Editors and Administrators can set a different user name to display when publishing the content.
To change the display name to show the full author name, or any other variation, head to the user profile page.

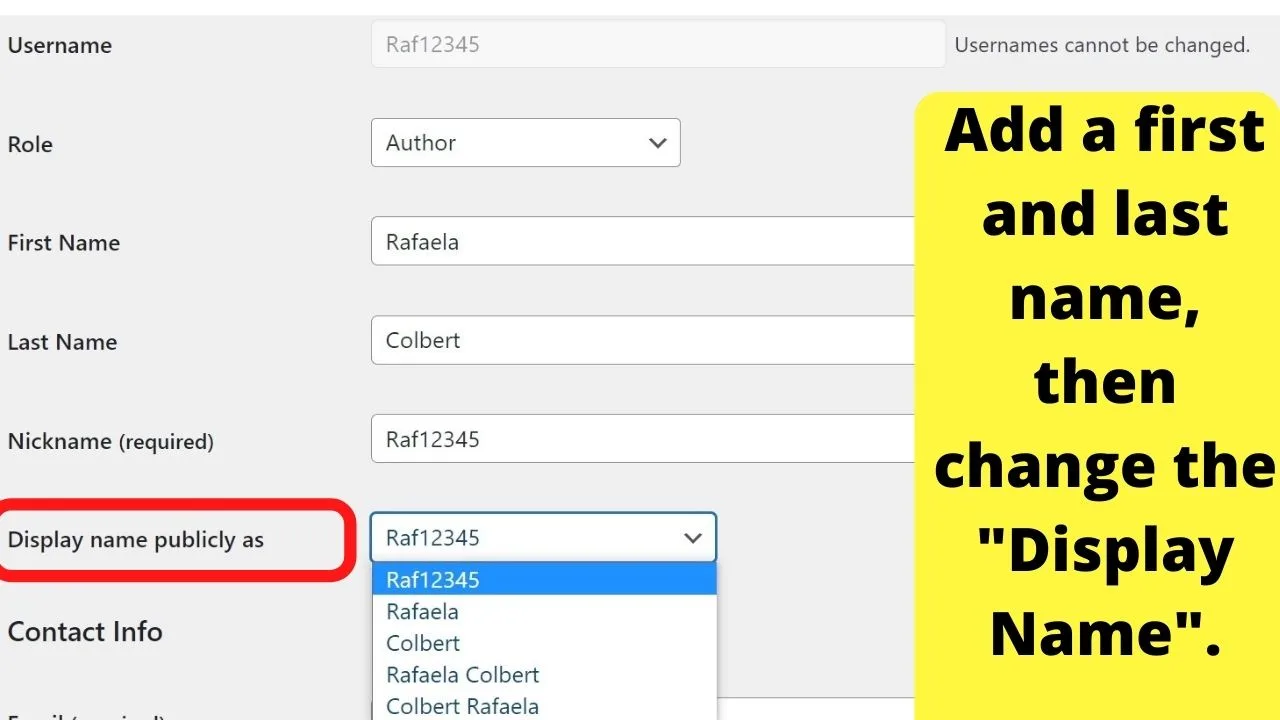
Click the dropdown menu for “Display name publicly as” then select the name you want to show.
How to change the author in WordPress Block Editor
In the Block Editor, the right sidebar has two panels. Only one shows at a time. By default, it is the settings for the block you are editing.
To the left of that, there is a tab titled “post”. Click that and this will show you the post settings, much like the traditional Classic Editor has.
The “Status and Visibility” widget in the post editor is where to change the author.


How to change the author in the WordPress Classic Editor
For those using the Classic Editor, the option to change authors from within the editor may be hidden.
To show the author widget, click on a post, or create a new post. At the top of your screen, click on the “screen options” tab. This will show a list of elements that can be enabled. Check the “author” box.

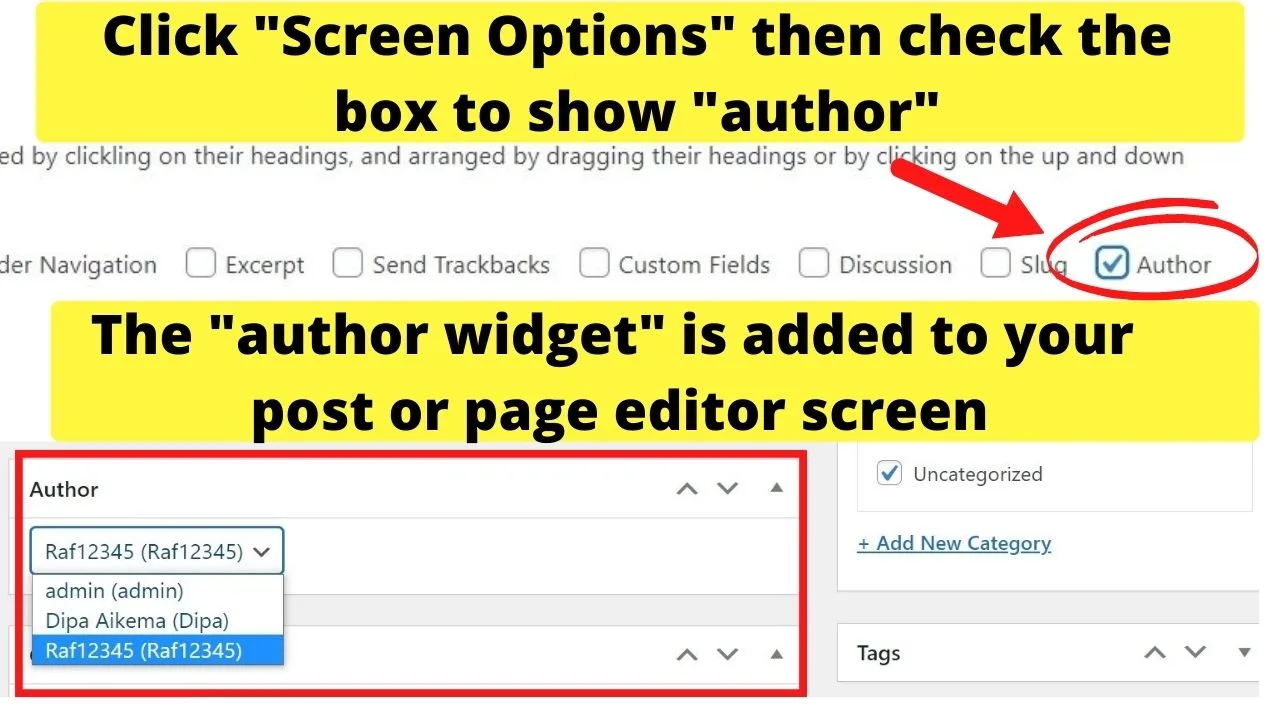
Scroll down the page and a new widget will show where you can select from a different user profile as the author.
The names that show here are all those registered with author roles. That includes editors, contributors, and admins. Not subscribers.
How to change the author for multiple posts in WordPress
Rather than spend a lot of time editing individual posts, you can use the “quick edit” feature to make bulk changes.
The ability to change the author here will not show until you have more than one author registered. When there is only one user profile, the “author” dropdown menu will not show in the “quick edit” menu.
You need to register a new user profile first, then use the “quick edit” function.
To find it, go to “posts” then click “all posts”.
Clicking the first tab beside “title” selects all posts in view. The default is 20 posts. If you want to increase that to change the author on more than 20 posts, click on “screen options”.

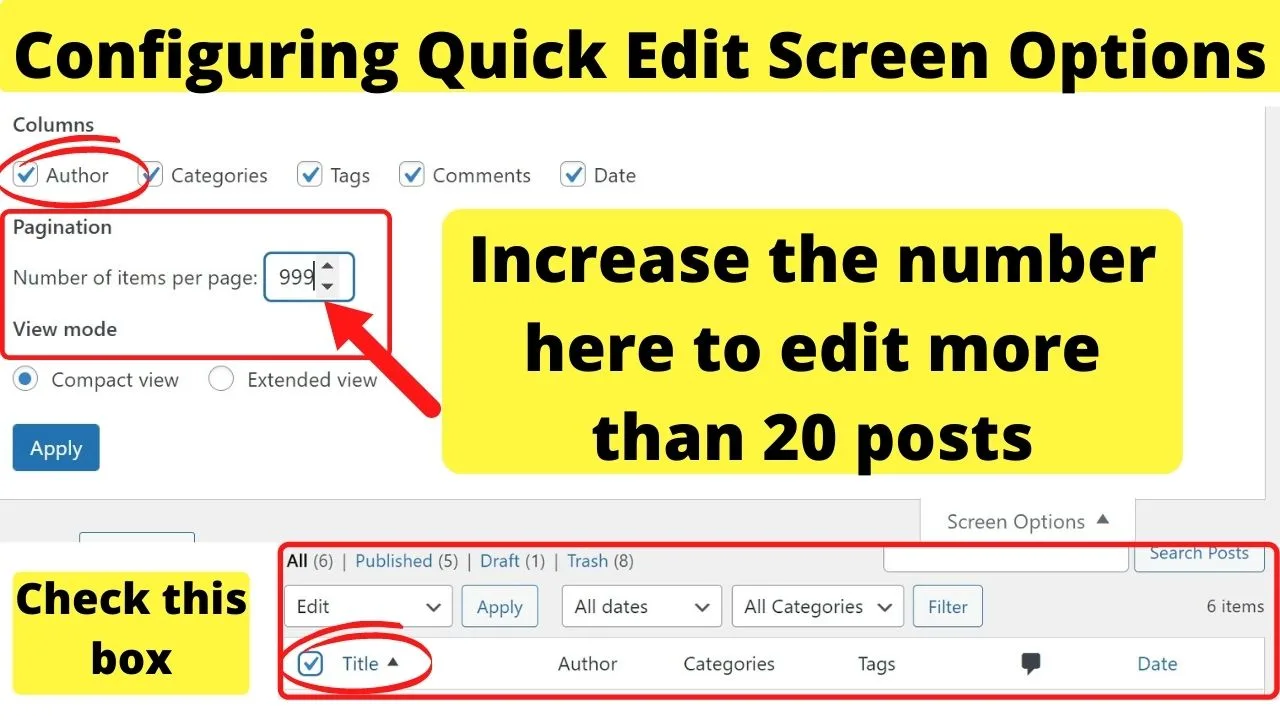
Make sure the “author” box is checked in the “columns” section, then for pagination, you can set your post limit up to a max of 999. Once this is increased, up to 999 posts will show on one page before being paginated.
You can select all posts or go through them individually. You can also select all, then deselect the posts you do not want to change. Use whichever method is quicker depending on what you are trying to do. Change dozens or just a few.
From the first dropdown menu (labelled bulk actions) select “Edit”, then click “apply”.
This will open the WordPress quick edit feature.
From here, click on the dropdown menu for “author” and select the profile you want to use as the display name for each post selected.
If your site has posts and pages, you can use the same process to change the author of multiple pages by going to Pages > All pages > select “Edit” from the dropdown menu, then select the new author name to display instead.
How to Change The Author in WordPress when Using an Author Plugin
Setting the author of an article or blog post can be done without any plugin.
However, if you do want to display this information in a nice way, you might want to download a WordPress plugin to do the job for you.
There are countless Author plugins out there and many of these can even be used for free (or at least do have a free version).
My favorite author plugin is Simple Author Box plugin. It’s simple to set up.
And, as far as changing the author for posts and articles goes, in fact, it’s just the same thing as without a plugin. You can still set the author at the end of every article right in the WordPress. If you don’t see the input field, make sure that on top of the page, under “Screen Options”, that the option “Author” is ticked.
Also, another thing that you need to be careful with are the actual headings that these kinds of plugins output.
If you do have an author box in your article, let’s say at the end of the post, you would probably like your name to be an h2 heading or so.
My brother recently had a case where his author plugin (a different one) always used h1 headings for the actual name. This is very bad in terms of SEO, as there is only supposed to be one h1 heading in the whole article, that being the title of the actual article.
You don’t want to have further h1 headings throughout your text. It’s considered bad practise.
Also, as far as adding subheadings in WordPress goes, make sure not to use all too many of these. I usually stick with h2 and h3 headings only. I use the occasional h4 heading but only if the post is really long and complex.
Try to keep it as simple as possible!


Hey guys! It’s me, Marcel, aka Maschi. On MaschiTuts, it’s all about tutorials! No matter the topic of the article, the goal always remains the same: Providing you guys with the most in-depth and helpful tutorials!

