
Welcome, guys!
Today, we will have a quick look at something super important when working with WordPress: How to Add A Subheading!
When writing our blog posts and articles in WordPress, of course we should keep things organized structured, and one nice way to do this is obviously to make use of subheadings.
So, how can you add a subheading into your WordPress post?
Let’s find out together! We will both cover the Classic Editor and also the New Gutenberg Editor!
I personally still use the Classic Editor on some of my WordPress websites, as I got used to it over time and it still has some advantages over the new editor, at least in my opinion.
For instance, out of the box, you still don’t have a find & replace option in the WordPress Gutenberg editor. This is a feature that I dearly love and use very regulary in the Classic Editor. Hopefully this will be added to Gutenberg soon. If not, I might need to come up with my own plugin for that in the near future! Who knows…
Anyway, without further ado, let us know focus on subheadings within WordPress.
Adding Subheadings to WordPress using the Classic Editor
If you have been blogging for a while, chances are that you are still using the Classic Editor.
Or maybe, me included, you are just not that much of a fan of the new Gutenberg Editor and you just simply prefer the Classic Editor over the Gutenberg editor.
So, let’s assume you are still using Add A Subheading in WordPress.
The first thing to note here is that, unfortunately, the classic editor does not just simply let you add subheadings from the WordPress Editor toolbar (the Gutenberg editor does, but we will get to that later on.)
To fix this, there are two cool things that we can do.
First of all, we can easily solve this by installed the plugin: TinyMCE Advanced Editor.
To do so, just head over to Plugins —> Add New from within your WordPress Dashboard (left side).
Now, search for TinyMCE Advanced (by: Andrew Ozz) and install that plugin. After you have installed the plugin, activate it.
After you have done that, you will now have an extended WordPress Editor toolbar that will easily let you add and change headings & subheadings.

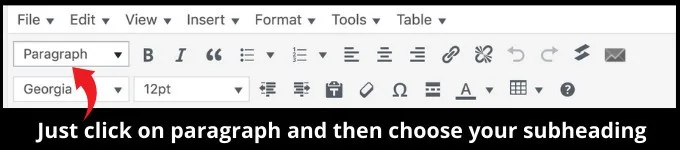
As you can see in the picture above, all you need to do is to click on “Paragraph” and then you will be able to choose the desired subheading from the list that will appear.
That’s it.


Once you have installed TinyMCE Editor, you will always be able to do subheadings like this.
For every single post.
This is actually very handy.
And TinyMCE Editor is a free plugin.
Now, there is one more method that you guys can use to add subheadings to your WordPress posts.
This method works for both the Gutenberg Editor and also the Classic Editor.
Read on to find out how to do it. It’s really simple, too!
Adding To Add Subheadings in WordPress (Gutenberg Editor)
Some time ago, WordPress introduced the new Gutenberg Editor.
If you happen to just have started your blog, the Gutenberg Editor comes preinstalled for you and is actually your standard editor.
The reason why this is important is that adding subheadings is slightly different when using the Gutenberg Editor than it used to be before with the Classic Editor.
But don’t worry guys. I will cover both editors in this post.
Now, let us first have a look at how you can add subheadings in the Gutenberg Editor:
So I assume you have your WordPress post open and ready for that. If you haven’t, go to Posts —> Add new.
What you will see there is the add title field. This field is for the main title of your blog post (Heading 1).
Now, add whatever text you would like.
Maybe you could write the sentence “How to Add Subheadings In WordPress?”
Copy that text a couple of times, so that you have a few sentences in your post.
It is now time add a subheading (Heading 2), so that we can add some more text after that.
To do just that, click on a new line and then you will want to click the Plus Symbol on the right side (bottom right corner, it is called “Add Block”)


There, simply select “Heading” and you will be able to choose what kind of heading you would like to insert.
If this is going to be your first subheading in your WordPress post (=first subheading after the main title), you will want to choose H2 heading.
To make it a H2 heading, first write the desired heading text into the new block, then choose h2 from the toolbar.
You will find the regular toolbar at the top of your post (see screenshot above)
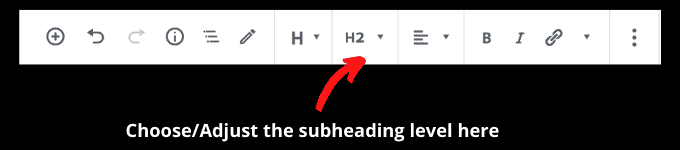
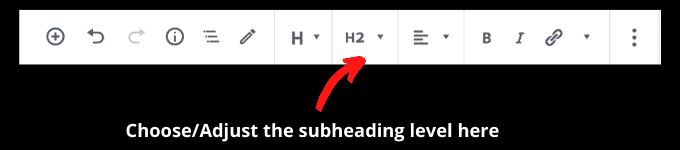
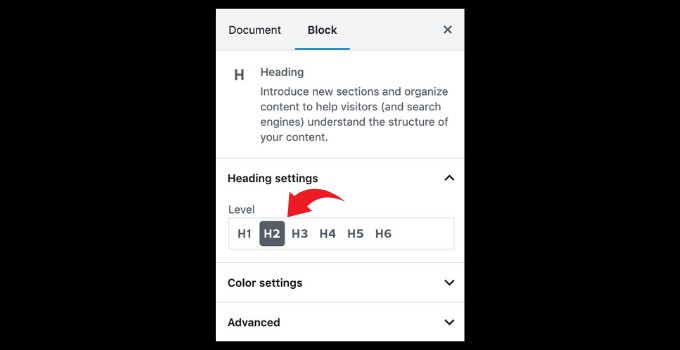
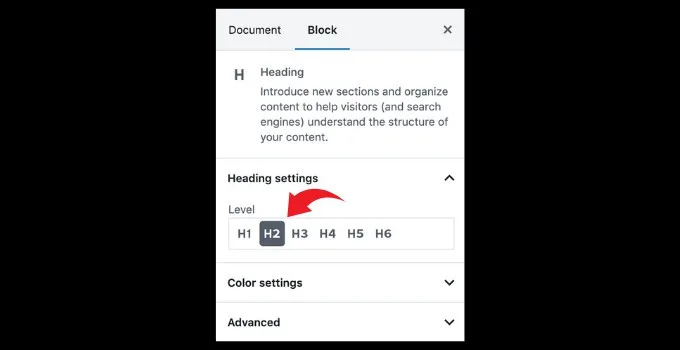
Also, there is another way to actually select the level of heading that you need.
Rather than selecting/choosing it from the topbar, you can also select it from the settings menu (displayed on the right side of the post as a kind of sidebar).
To choose it from there, first click on settings on the top right corner of your post (the settings button has a little wheel on it).
There, choose “Block” and then under “Heading settings” you can also adjust the Heading level.
That’s it already. You see, adding subheadings in WordPress is a very easy task.
The procedure to add these headings is always the same, no matter if we are talking about Heading 1, Heading 2, Heading 3, Heading 4, Heading 5 or even Heading 6.
It generally doesn’t make a lot of sense to go that deep with headings, though.
I would advise you to just use Heading 1 as the main title and then just use Heading 2. For most shorter texts (up to like 1500 words), this will do.
If you do craft very long texts, go a little bit deeper and also use Heading 3.
From an SEO standpoint, it is totally fine to keep it very simple here and just use Heading 1 and Heading 2.
Manually adding subheadings using the WordPress Classic Editor
Let us have a look at yet another cool and easy way to add subheadings to your WordPress posts, be it using the Classic Editor or the Gutenberg Editor.
As you probably know, WordPress always had a Visual editor and a Code editor.
The methods we have discussed so far were all based on the Visual editor.
This means that we used the visual editor to actually add our subheadings to our WordPress posts.
Now, this can also be done manually, directly inside of the Code editor. If you are a programmer or just like messing with code, then this method is for you.
And to be honest, this method is actually pretty easy and straightforward.
If you are using the Classic Editor, what you want to do is to first switch to the Code Editor.
In the Classic Editor, the Code Editor is actually called Text Editor (or just simply text).
See in the screenshot below where you can switch over to the text editor (where all the code is)

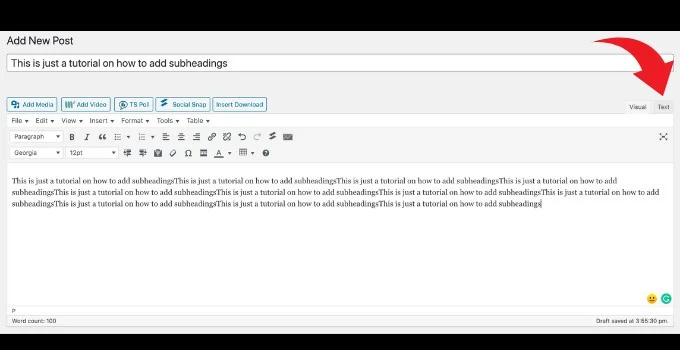
So, all that you need to do is to click on “Text” and the Text Editor (Code Editor) will open.
In the text editor, you will see all the code that is automatically generated while you write your text.
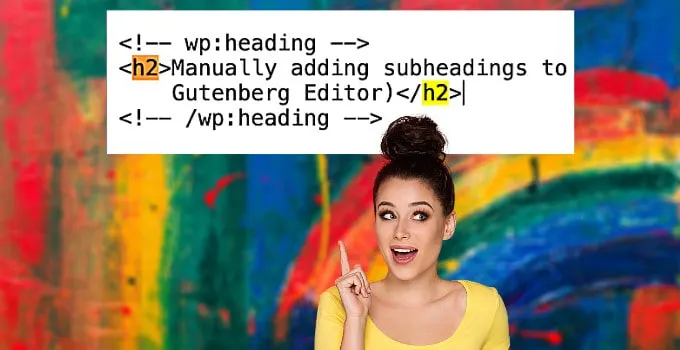
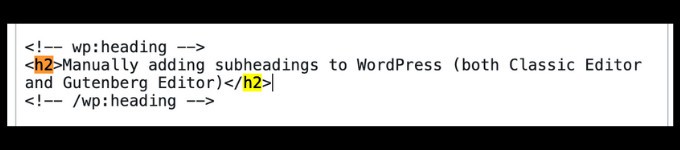
Now, to manually add a subheading to the code editor, all you need to do is to put the text that you want as subheading between this code here:
<h2></h2>
So, to give you an example: If you would like to have the sentence “WordPress is the most awesome piece of software ever” as a subheading 2, what you would need to do is to put that between the code I just provided.
It would look like this:
<h2>Wordpress is the most awesome piece of software ever</h2>
This does obviously work for all sorts of subheadings, not just for Heading 2. So instead of <h2>, you could very well also have <h3>, <h4> and so on.
Just always make sure that if you do choose let’s say <h3>, then at the end of the text that you would like to use the subheading, you will also need to change that into </h3>.
The slash (/) indicates that the piece of code is finished.
So with <h3> you are basically opening the code up and in the end of your subheading you are going to close it with </h3>.
Now, as far as manually adding subheadings in the new Gutenberg editor goes, the process of doing so is actually almost identical. Let’s get that off the table as well.
Adding Subheadings manually using the Gutenberg Editor
To add subheadings manually in the Gutenberg editor, the first thing you want to do is to click the “More tools & options” menu which is located in the top right corner (the button image features three small dots aligned vertically).
Now, select Code Editor.
The code that you need to add here is exactly the same as in the Classic Editor. So just choose the part of text that you would like to have as a subheading and put <h2></h2>, <h3></h3> or <h4></h4> around it. Done.

That’s it, already. It’s that simple.
Oh, and if you would like to browse through your headings while being in the code editor, you can simply press Ctrl + F on a Windows PC or Command (Apple) + F on a Mac and then input the heading that you are looking for (like h2 or h3 or h4).
Like this, you will find your headings real quick and if necessary, you can make quick adjustments to them.
Pretty handy, indeed.
I hope you enjoyed this tutorial. If you did, you might also want to check out the Maschituts Youtube Channel.
I got lots of interesting tutorials up on that channel covering everything from WordPress to SEO to Premiere Pro and all the other nice stuff that bloggers (should) use on a daily basis.
And if you are still new to this blogging thing, have a look at our interesting article on blogging as a career!
Why Use Subheadings in WordPress in the first place
Subheadings give your content structure.
Think of how chapters and subchapters are presented in a table of contents.
Here’s an example of the “Contents at a Glance” for the WordPress for Dummies book.
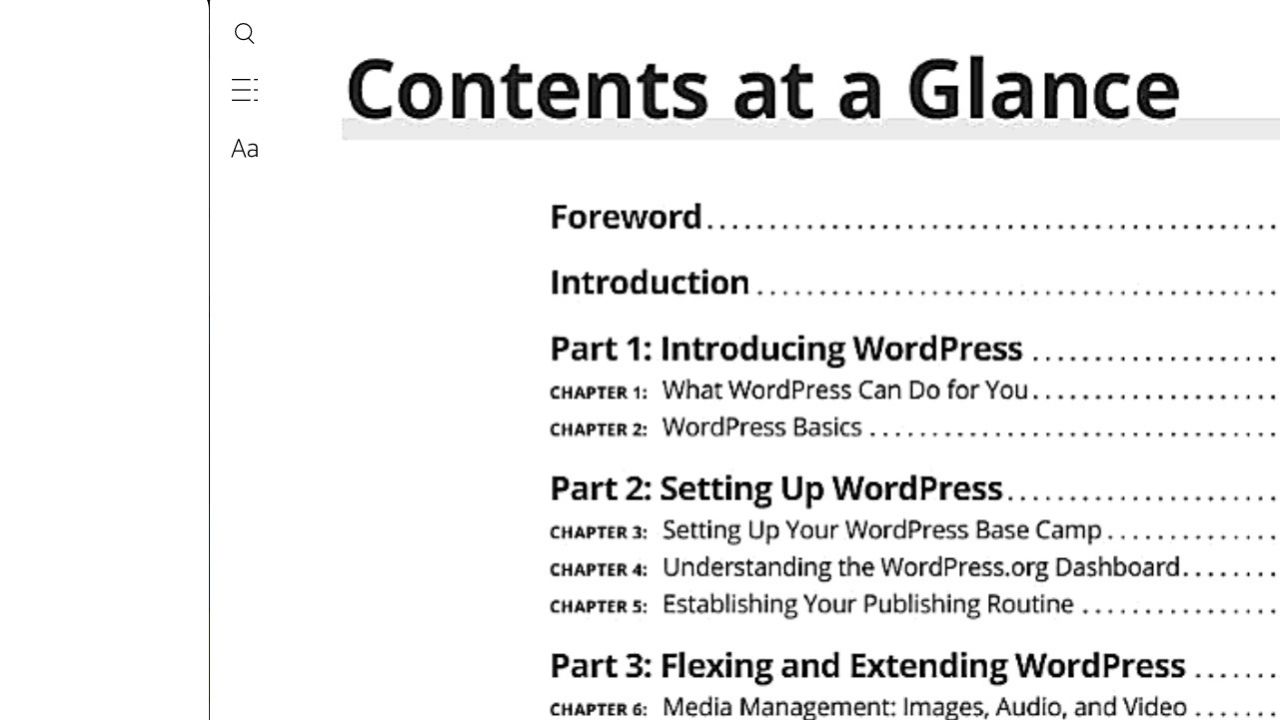

The index is split into Part 1, followed by Chapters for each Part.
It makes it easily scannable and it’s structured with a logical flow.
“Part 1: Introducing WordPress
Chapter 1: What WordPress can Do for You
Chapter 2: WordPress Basics”
Then in Part 2 is another subheading with the Chapters for that part in a smaller subheading.
The structure on a web page would be:
Heading 2: Part 1
Heading 3: Chapter 1
Heading 3: Chapter 2
Heading 1 doesn’t apply because your site title, or page title will be programmed (in your theme) to be in heading 1. That’s the most important part of a page and shouldn’t be over used.
For SEO, your most important keyword, aka, your target keyword phrase, goes in your page or post title.
That should automatically be applied as a Heading 1 or Heading 2, depending on your theme.
Most themes have Heading 1 for the site title, then pages and post titles are Heading 2.
Once you get into the content editor, then, it’s good practice to structure your content with subheadings.
The simplest way to work out what your headings should be is to use an outline.
In the case of this post, it’s about how to add a subheading in WordPress and there’s a few different ways to do it, depending on the set up of the editor.
The outline for the various ways that’s going to be covered are:
How to add a subheading in WordPress
-
- Using the block editor
- Using the classic editor
- Adding heading tags with page builders
- Adding (or editing) heading tags in HTML
That outline above is the structure of the page and the heading tags are how search engines could be instructed to view the importance of each element.
From a reader perspective, it’s easily scannable.
And that’s how people (in a hurry) read web pages. They scan until they find a section that has the information they need.
Keeping them all in H2 means they’re all equally very important. Because they will be to someone, depending on the editor they’re using.
In order of importance, heading 1 is the most important, followed by H2, then 3, 4 and so on. Rarely is anything higher than a heading four any use.
Using a WordPress “Table of Contents Plugin” to Organize Your Blog Posts and Headings
For longer blog posts, having a table of contents plugin can come in really handy and will help to organize your headings and overall structure of your blog post.
The cool thing is that these plugins will automatically detect all the headings in your article and will then generate a Table of contents based on the headings found in the article.
This is especially useful if you do have a lot of long blog posts with lots of headings in it. These types of posts are sometimes really hard to read and giving the readers the option to check the contents (the Table of contents is usually placed after the introduction of the post), will greatly enhance the user experience.
If you would like to install a Table of Contents plugin, within WordPress, simply go to “Plugins” > “Add New” and search for “Table of Contents” plugin. There are several free plugins for you to choose from. I personally like the “Table of Contents Plus” plugin.
As far as SEO goes, using a Table of Contents plugin is only beneficial.
However, a potential downside of using a TOC plugin is the fact that people are less likely to read through all of your post. If you do monetize your website with banner ads, having a Table of Contents might have a bad impact on your revenue. That is something to keep in mind.
Frequently asked questions about “Adding Subheadings in WordPress”
Can you have multiple H1 headings in an WordPress post?
Technically speaking, having multiple H1 headings in an article on WordPress is no problem. However, from an SEO perspective, having multiple h1 headings is not considered good practice. With that said, avoid using h1 headings for anything apart from the main title of your blog post.
Should I use all types of subheadings from h1 to h6?
No matter the blog post, it is best practice to only use a single h1 heading for your post. This heading is reserved for the main title of your post. Then, feel free to use h2 and h3 headings. Only use h4-h6 headings if absolutely necessary, as using too many headings will make your post really hard to understand and unpleasant to look at. Keep things simple.
How big should my headings be in WordPress?
For the size of your headings to make sense, make h1 heading the biggest and then go down in size for the other headings. For instance, if you have h1-h3 headings in use in your post, h1 is the biggest and h3 would be the smallest in size. A good size for h1 headings is around 28-34 px. A good size for an h2 heading is around 22-26px. An h3 heading should be around 16-20px.
Are headings important for SEO?
Headings are incredibly important for SEO. They tell Google what your content is about and they also tell Google what to look for in the upcoming paragraphs. Make sure your headings are straightforward and that they are telling both Google and the reader what to expect in the upcoming text section.


Hey guys! It’s me, Marcel, aka Maschi. On MaschiTuts, it’s all about tutorials! No matter the topic of the article, the goal always remains the same: Providing you guys with the most in-depth and helpful tutorials!

