

Blurring is one of the tools graphic designers should master. After all, blurring photos is capable of adding an element of mystery to them.
This blurring effect can also be used to give focus to certain parts of an image. But, most of the time, you blur a part or even the entire picture to cover areas you don’t want the public to see.
With all those reasons in mind, is it possible to blur the edges of a photo when using Canva?
Is there a specific tool in the app that I can use when I only need to blur parts of the image and not all of it?
How to Blur the Edges of a Photo in Canva
To blur the edges of a photo in Canva, select the image and click the “Edit image” tab. Scroll down and click the “Blur” app. Adjust the sliders for “Intensity,” “Brush size,” and “Spread.” Drag the blur brush over the edges of the photo before selecting “Done” and “Apply.”
But, before you can start using the “Blur” app, you first have to add it to the “Edit Image” menu.
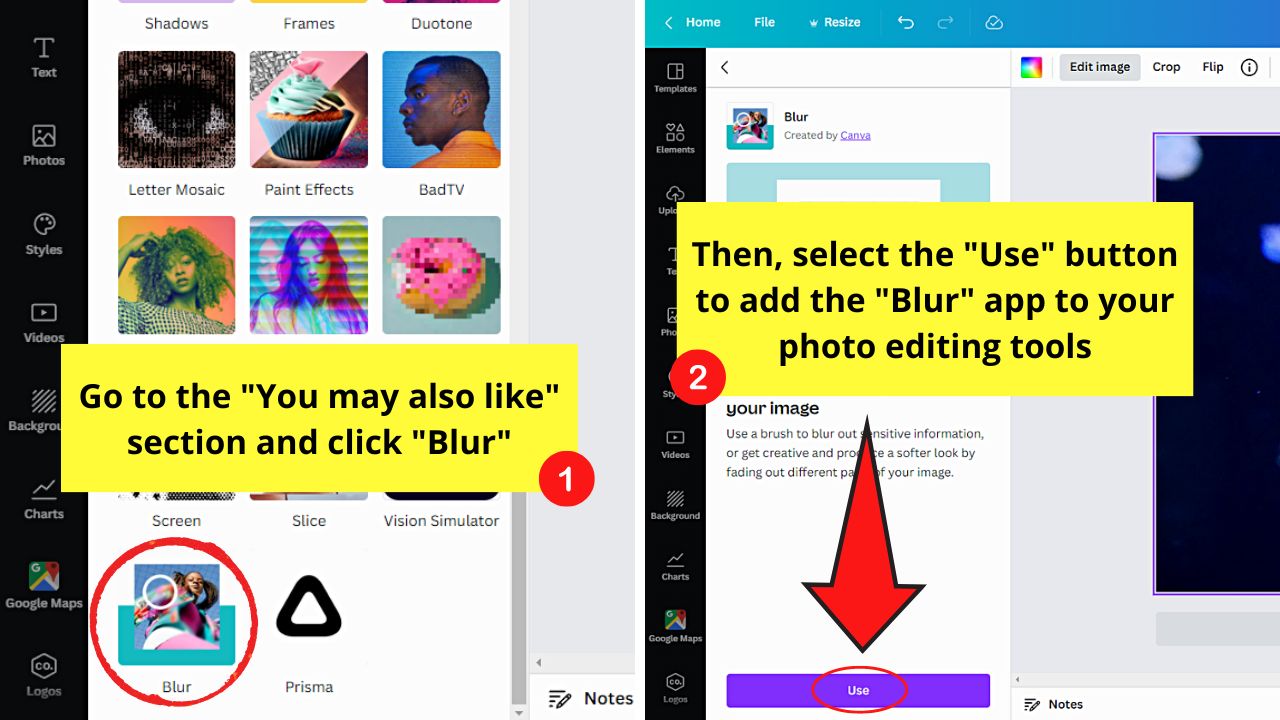
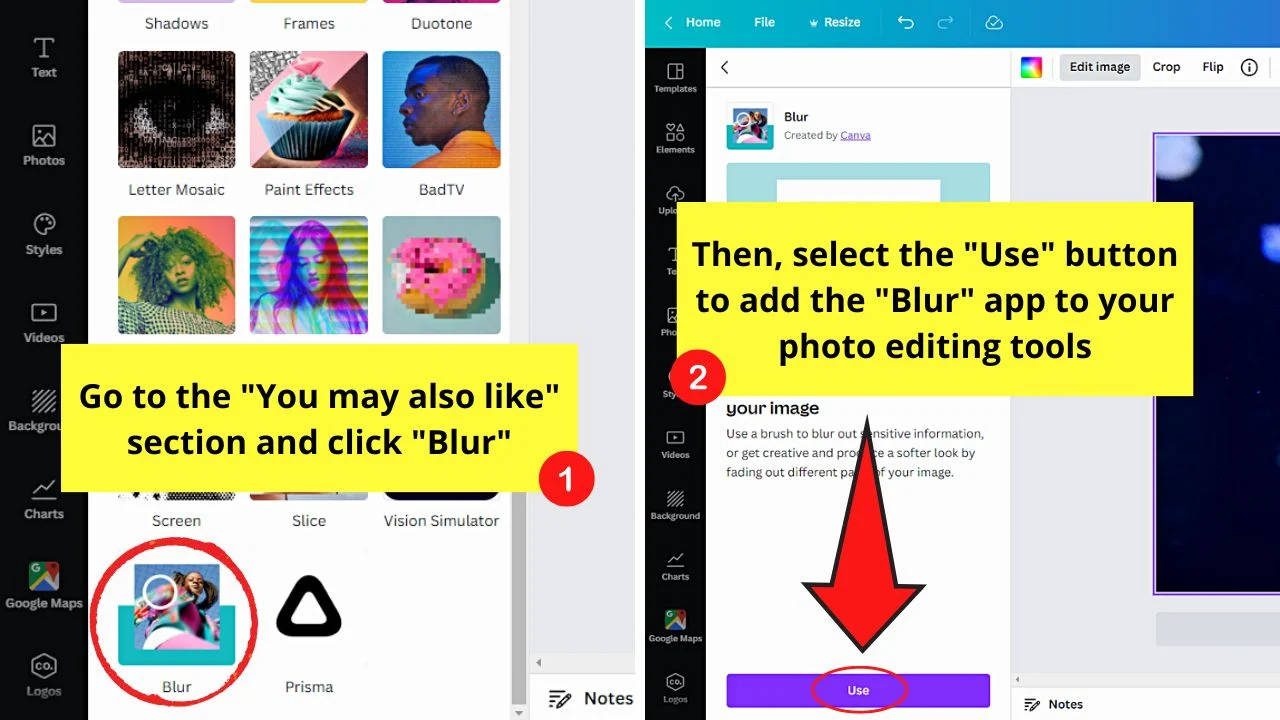
To do so, simply click on the “Edit Image” tab on the toolbar and scroll down the “You may also like” section.

Once there, find “Blur” and select it. Then, click the “Use” button for the “Blur” app to be integrated into the photo editing menu.
After which, just follow the steps below to successfully blur the edges of any photo you’re editing in Canva.
Step 1: After opening a new design file or an existing one from the home page, go to the left-side panel and choose a photo.


If you prefer to blur an image from your computer, click the “Uploads” tab. Then, select the “Upload a file” button to locate the said picture.
But, if using a stock photo is preferable, then select the “Photos” tab instead.
Then, use the search bar on the gallery to type in the specific keywords for the image you’re looking for.


Step 2: Once you find the photo you’ll use, click or drag and drop it into the canvas.


Resize the image or right-click on it and click “Set image as background” if you want it to take up the entire canvas’ space.


Step 3: Select the photo you recently added by clicking it, granting that you have already added the “Blur” app.

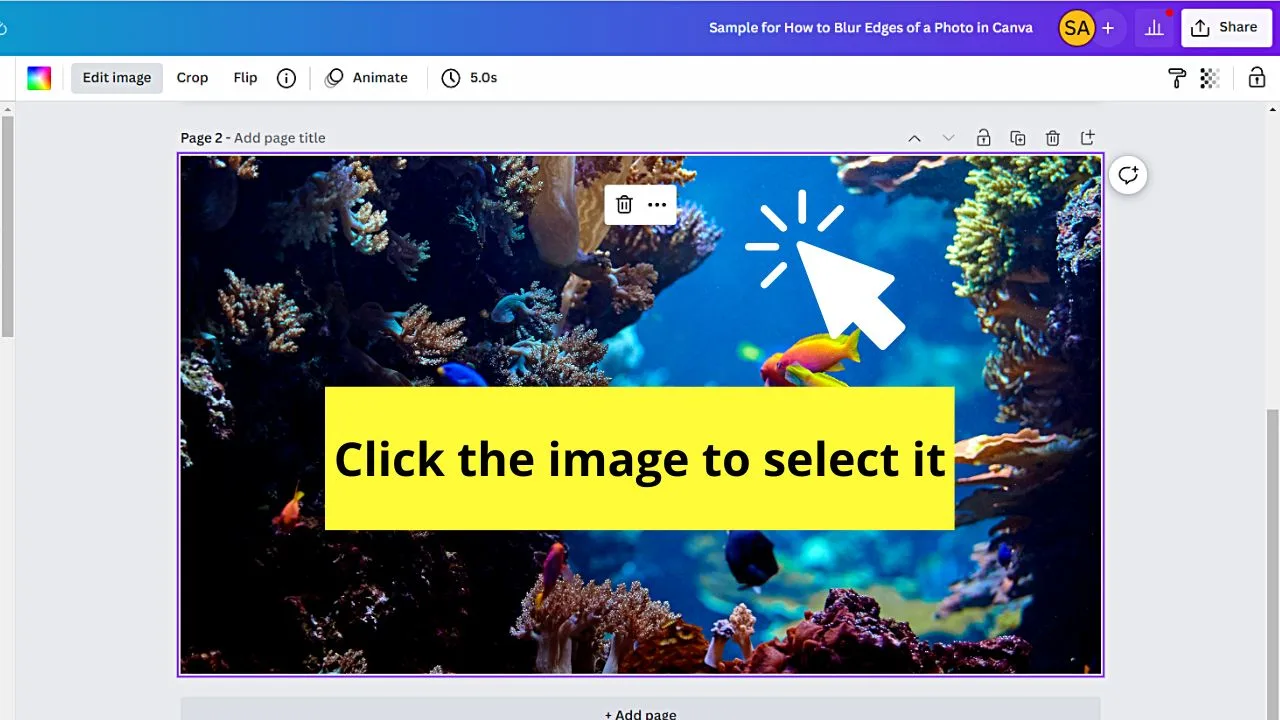
You’ll then see a purple outline surrounding the said image.
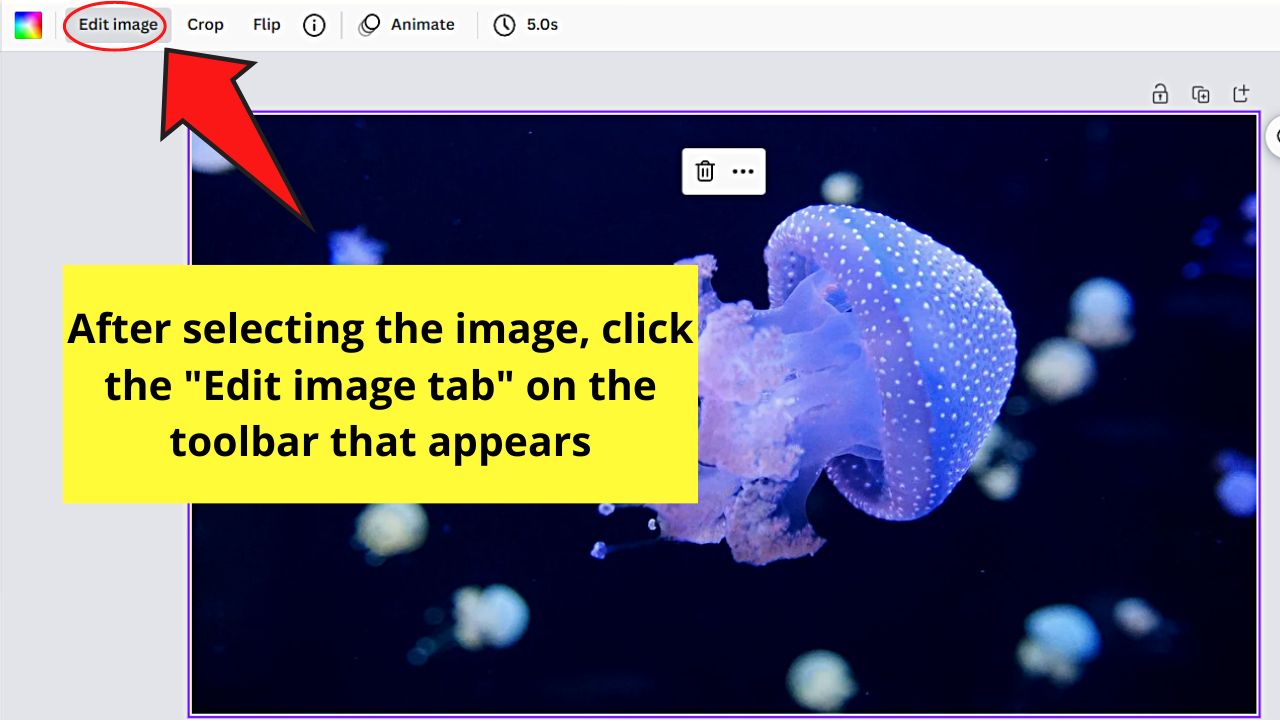
Step 4: On the toolbar that appears, click “Edit image.”


This move will then make photo editing tools appear to the left of the screen.
Step 5: Keep scrolling through the photo editing menu and click the “Blur” app.
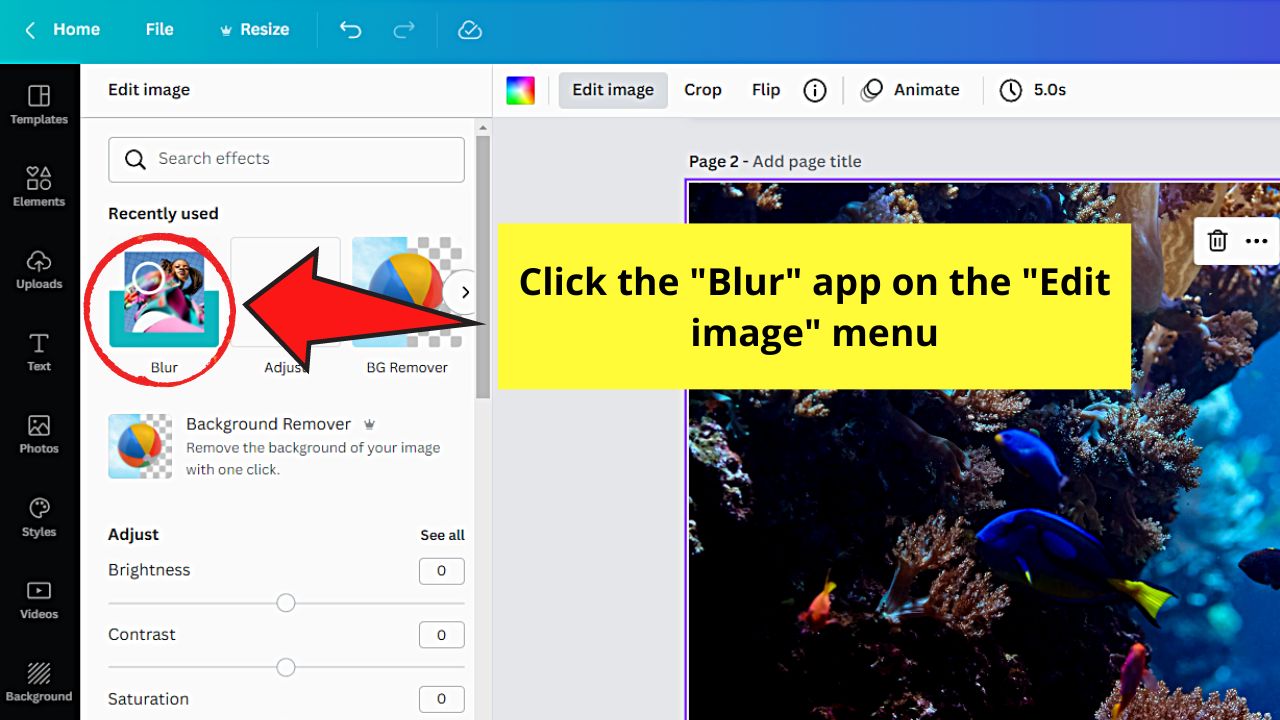

In case you recently used the said tool, you’ll see it in the “Recently used” section.
Step 6: Click the “Blur” button on the “Blur” app menu.

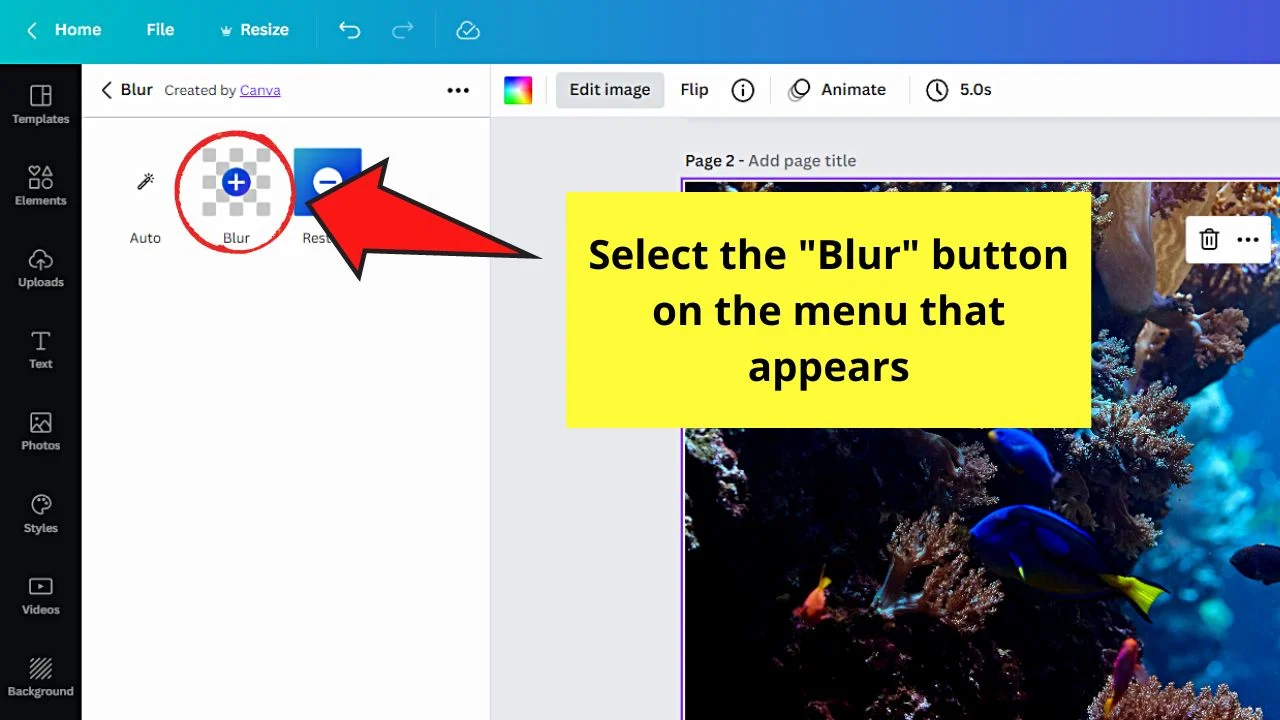
This will allow you to blur out only part of the photo, more specifically its edges.
You’ll find this button between “Auto” and “Restore.”
Step 7: On the “Blur Settings” menu, increase or decrease the “Intensity,” “Spread,” and “Brush Size” by dragging their respective sliders to the left or right.

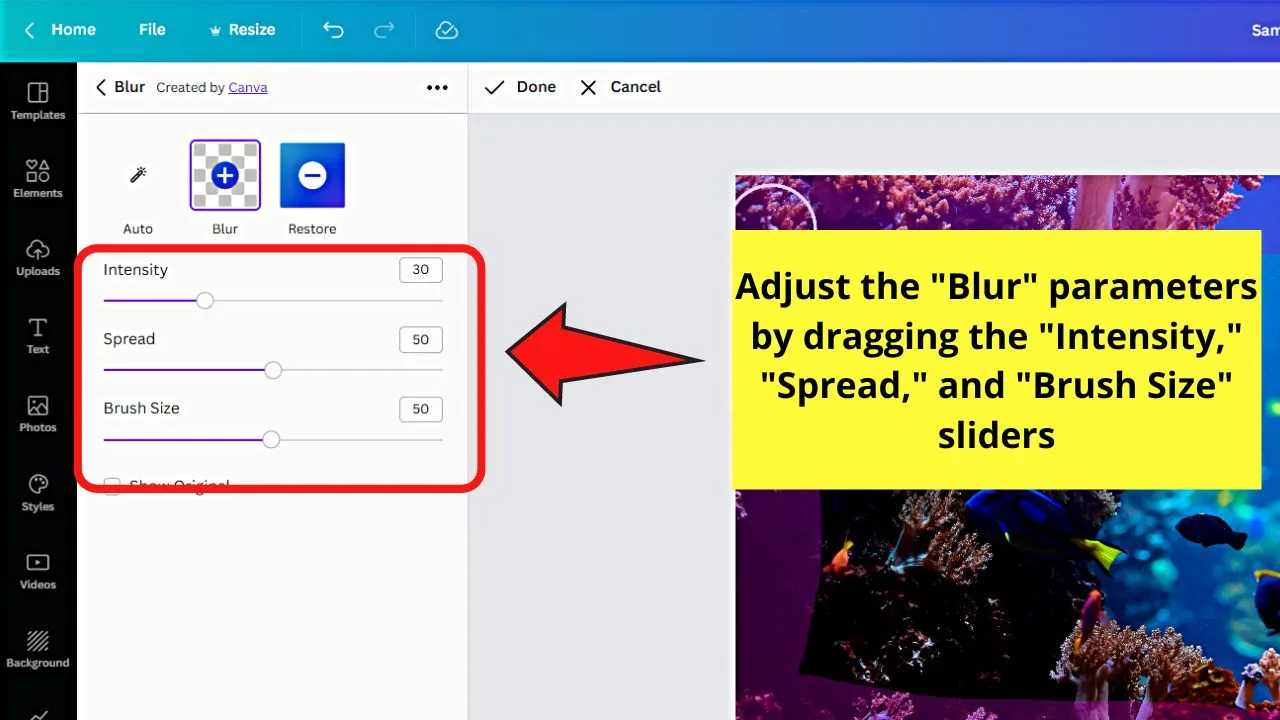
Adjust those “Blur” parameters accordingly.
Step 8: Once you’re done tweaking the “Blur” settings, click and drag the cursor across the area you want to blur out.
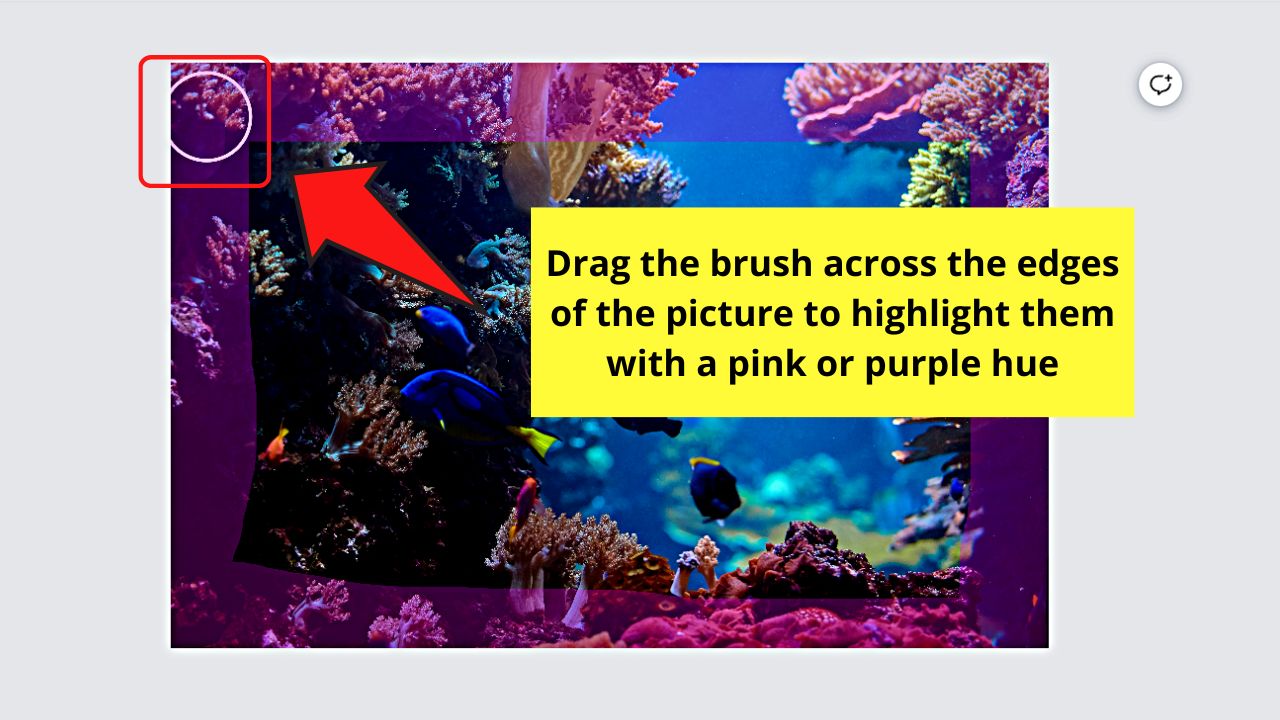

Again, since you only want the edges blurred out of the photo, click and drag the cursor-turned-brush across the sides of the image.
You will then see the areas you selected highlighted in pink or purple. Once you’re done, stop moving your mouse and release your click.
After this, Canva will then blur the highlighted areas earlier. In case you accidentally blurred out the wrong area on the image, just select the “Restore” brush.
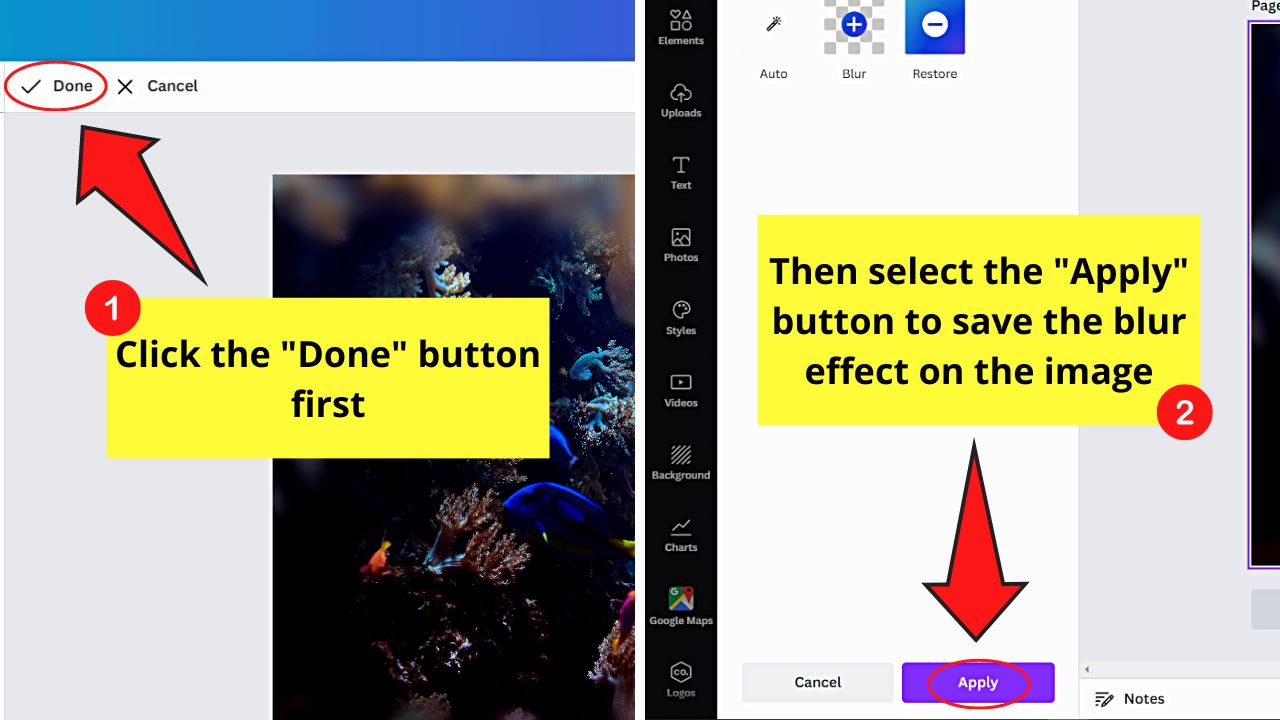
Step 9: If you’re good with how the image currently looks, click “Done and then the “Apply” buttons.

You can then now proceed with editing your photo further by adding more elements and effects to it.
Thanks to Canva’s latest updates, blurring any part of the images now, including their edges, has become simpler.
Frequently Asked Questions about How to Blur the Edges of a Photo in Canva
Can I use this new “Blur” app to blur faces on an image?
You can use the “Blur” app to remove faces on an image. Select the “Blur” app after clicking “Edit image.” Then, position the brush tool on the face and click and drag the cursor across it until the face is highlighted. Then, release the mouse click for the face to be blurred.
Can you use the “Blur” app to blur out sections of a video edited in Canva?
Unfortunately, the new “Blur” app on Canva is only applicable to photos or images. There is currently no feature in Canva yet that allows its users to blur certain sections on a video.
How do I change the brush size of the “Blur” app in Canva?
After clicking the “Blur” app on the photo editing tools menu, select the “Blur” button. Once you’re inside the “Blur Settings” page, go to the “Brush Size” slider and drag the circle across the line. Make the brush smaller by dragging the slider to the left, and to the right to make it larger.
Is the “Blur” app an exclusive feature for Canva Pro users?
The “Blur” app is not exclusive to Canva Pro users. There is no crown icon on the app thumbnail’s lower right corner. You only need to go to the “You may also like this” section of the “Edit image” menu to activate it.
How is the “Blur” app different from the native “Blur” tool in Canva?
The native “Blur” tool in Canva allows you to blur the entire image. Drag the “Blur” slider rightward to increase the blur intensity. The new “Blur” app, however, allows you to blur out specific parts of an image by dragging the cursor across them.


Hey guys! It’s me, Marcel, aka Maschi. On MaschiTuts, it’s all about tutorials! No matter the topic of the article, the goal always remains the same: Providing you guys with the most in-depth and helpful tutorials!

