Yes, we all know the process of blurring photos and images in Canva.
We only need to access the Blur slider tool to blur out the background of a particular picture we’ll use for our design.
But, what if I want to keep the clarity of some parts of the photo and blur the others out? Is that even possible in Canva?
Well, that question’s about to be answered in a jiffy if you keep reading below.
How to Blur Part of an Image in Canva
To blur part of an image in Canva, click on the image, then click on “Edit Image” in the top toolbar and then search for the “Blur” app. Within the blur app, select “Erase” and then hover over the part of the image that you would like to blur. Then click on Done, followed by “Apply” to finalize the process.
Blurring Part of an Image in Canva — Updated Method
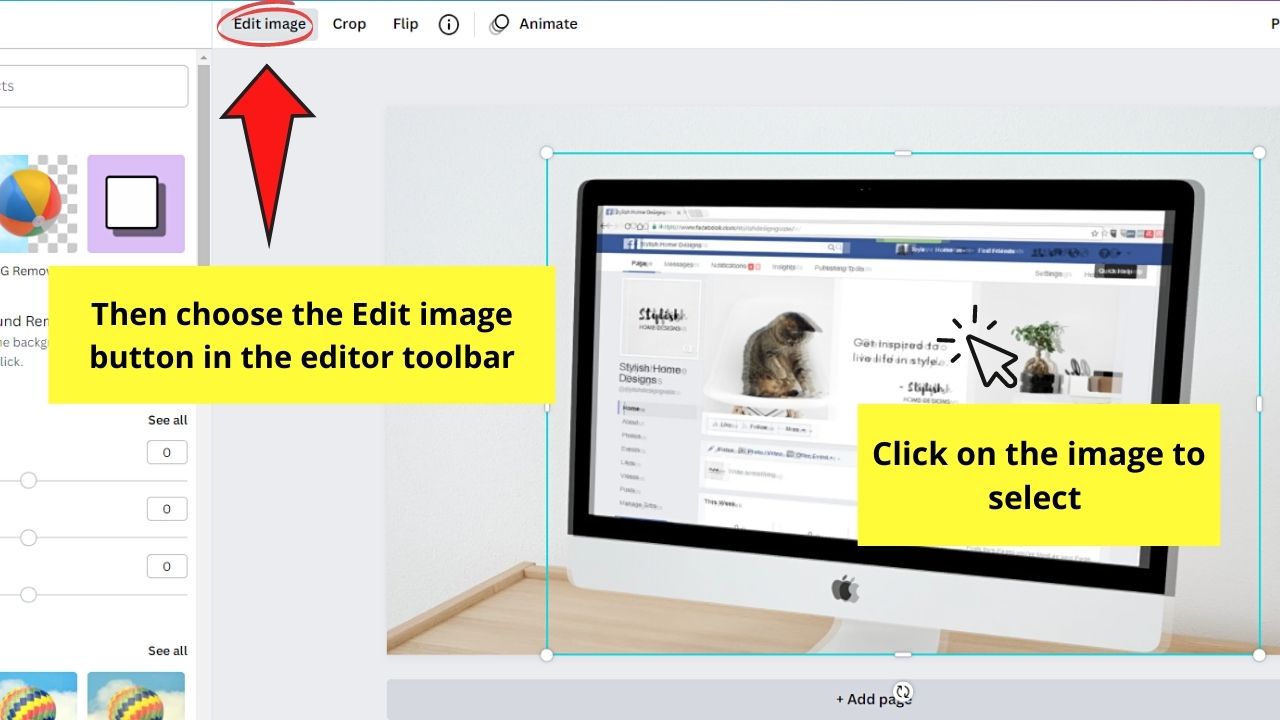
Step 1:Granting that you already added a photo to your project, either from the “Photos” or “Uploads” tab, click to select it.
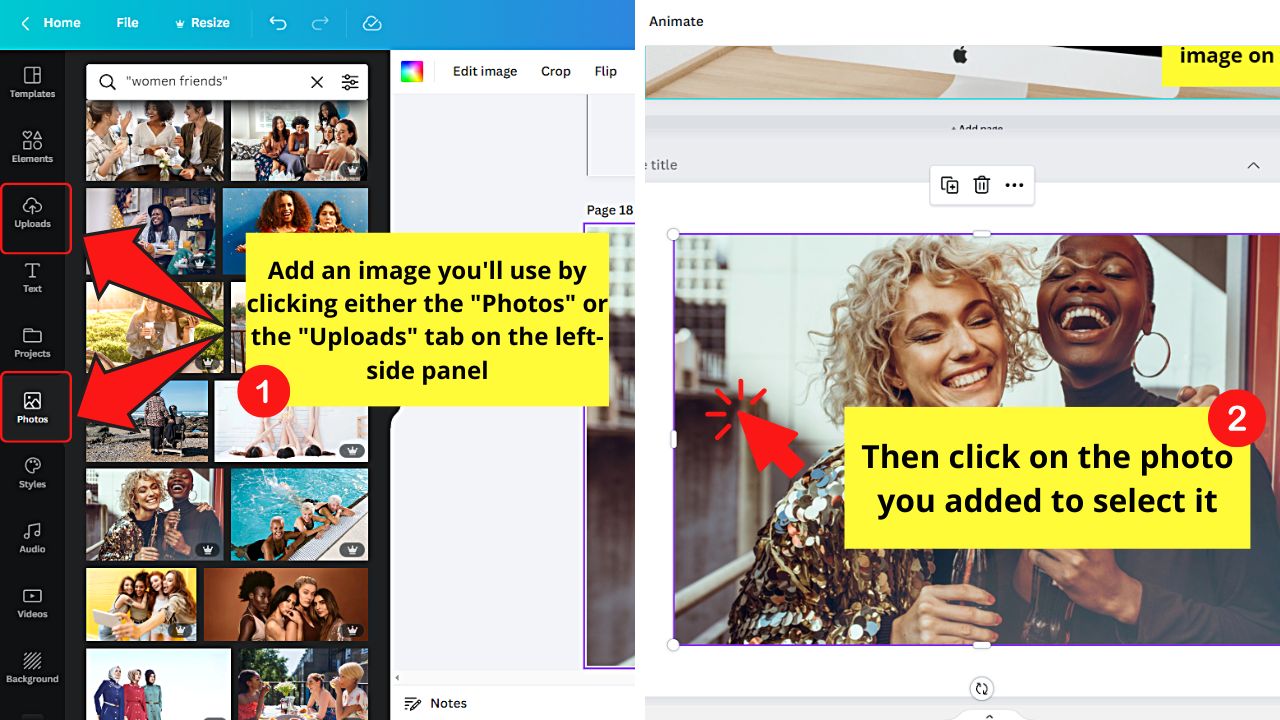

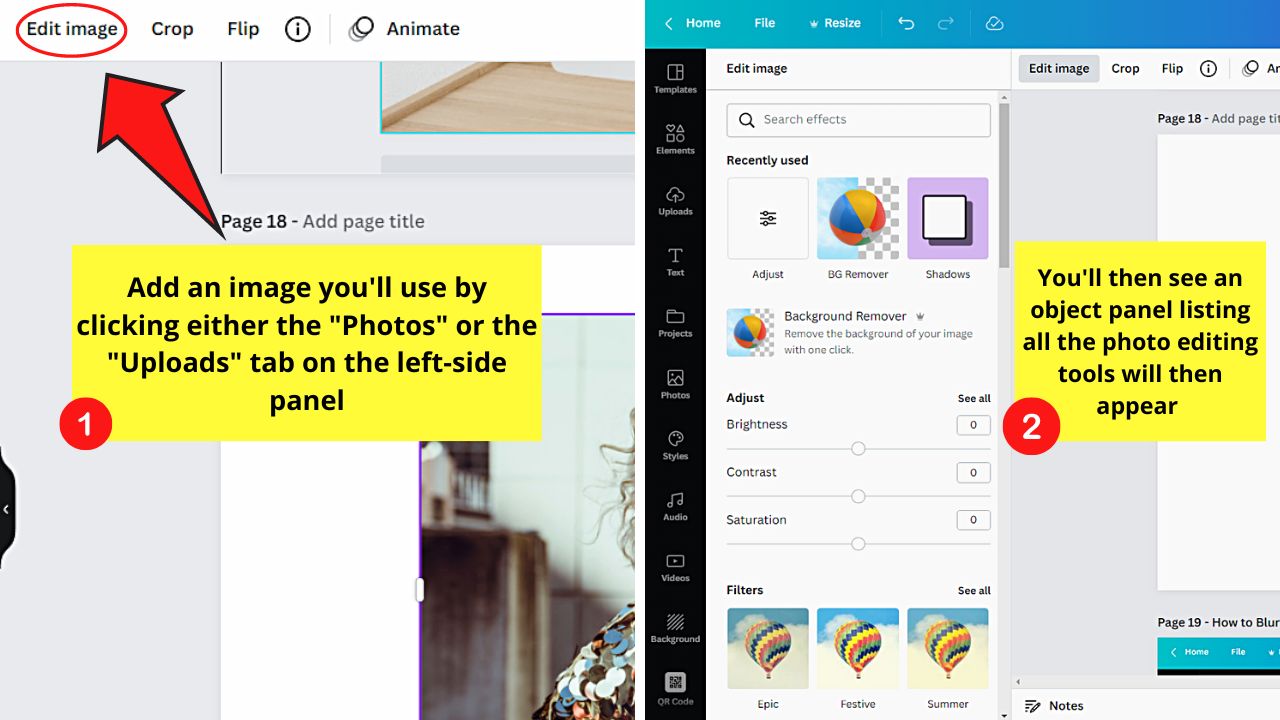
Step 2:On the top toolbar, select the “Edit image” tab.
An object panel listing all the photo editing tools and apps will then appear.
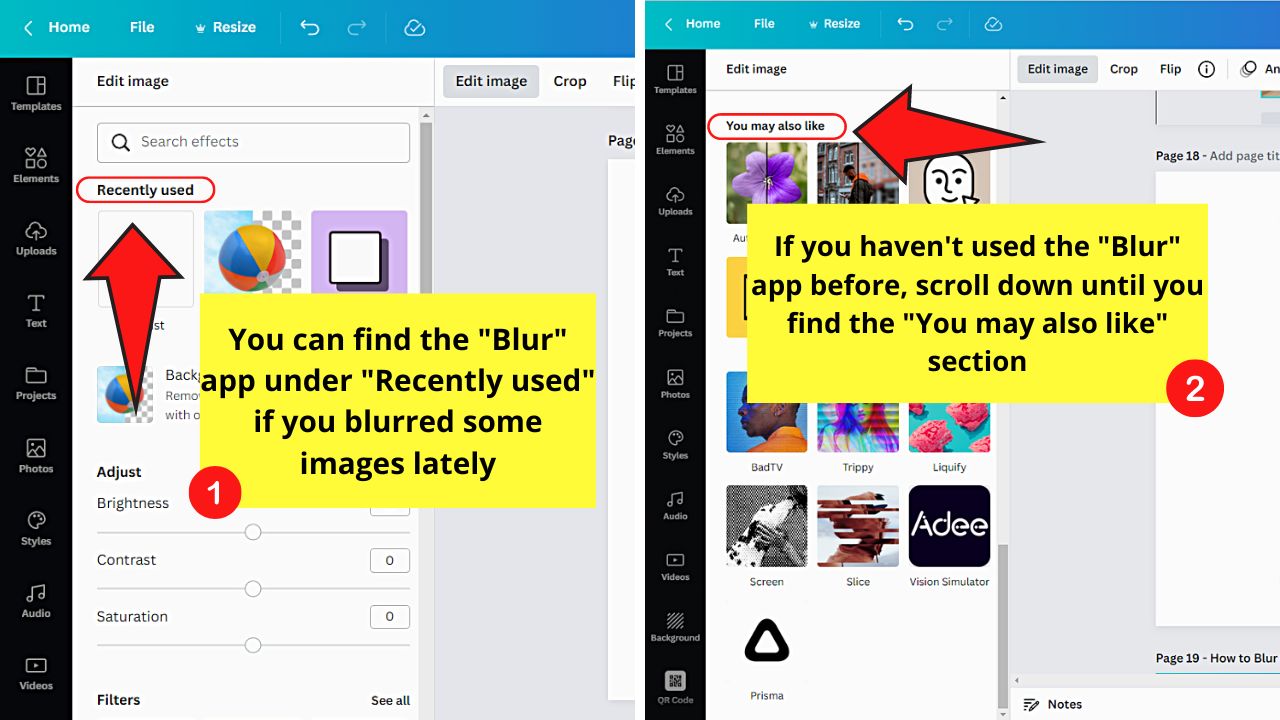
Step 3:Since you want to blur part of the image you added, you have to find the “Blur” app.
If you have used it before, you’ll find it under the “Recently used” section. If not, you have to scroll down to the “You may also like” section and click the “Blur” app’s thumbnail.
Then, click the “Use” button to add it to your app list.
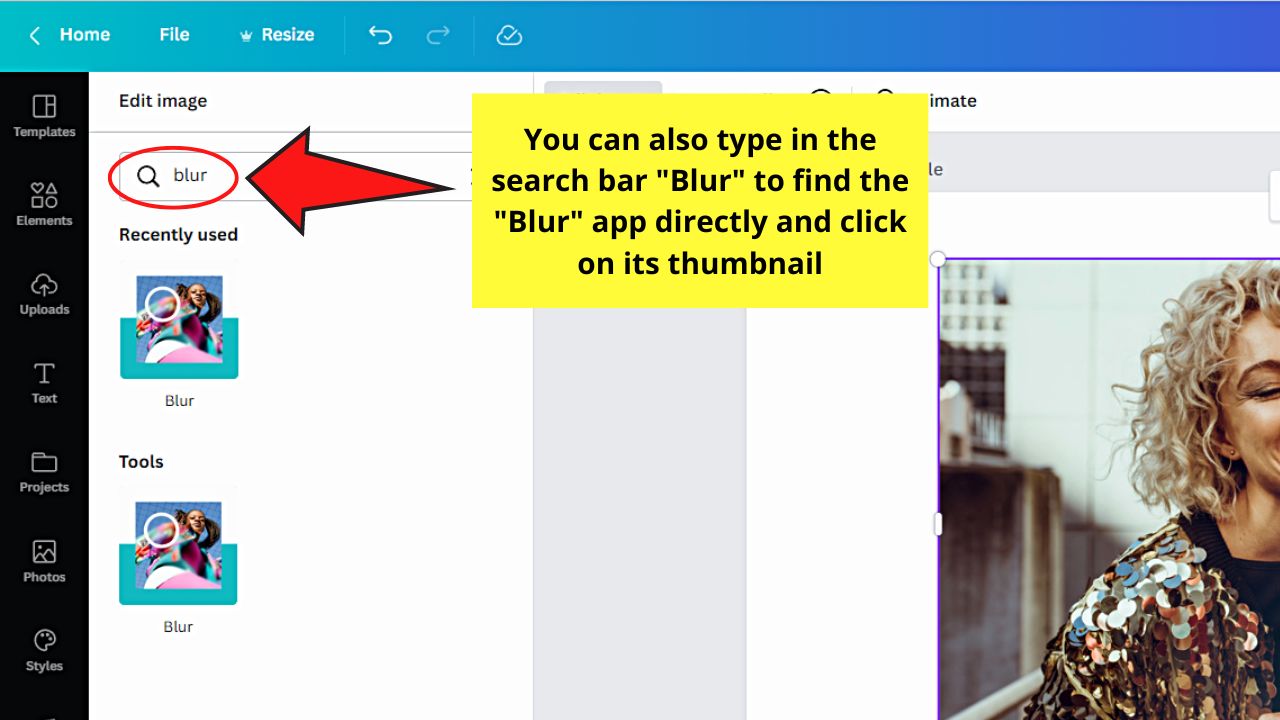
For a more direct method of finding the “Blur” app, type in the search bar the keywords and click its thumbnail.
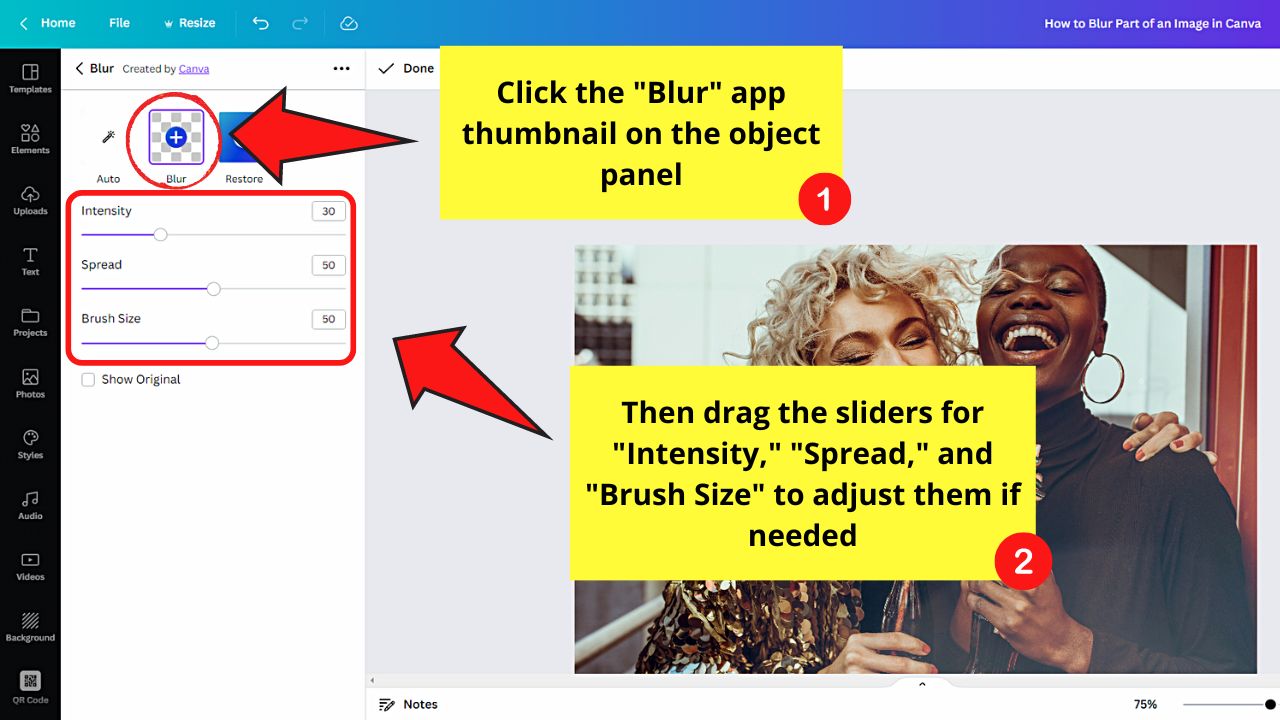
Step 4: Click the “Blur” tool, which has a “+” icon in the middle of the square. You’ll then see various sliders appear below.
You can drag those sliders to adjust the “Intensity,” “Spread,” and “Brush Size.”
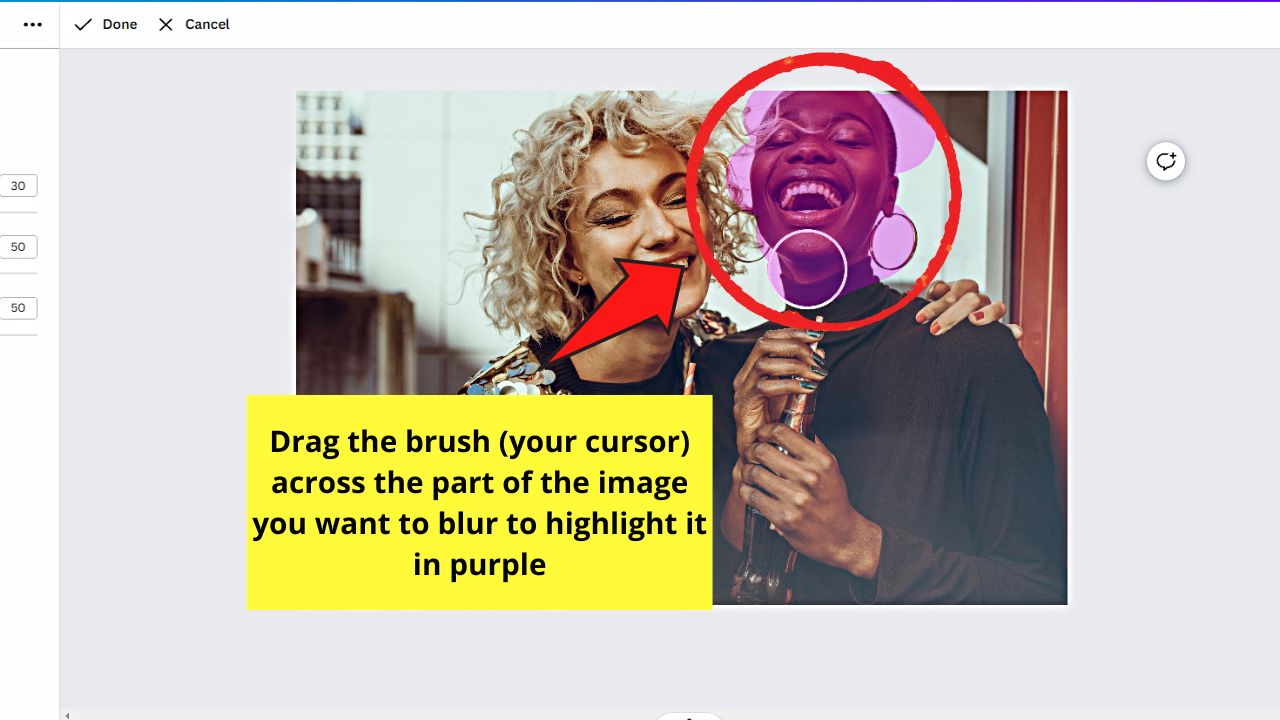
Step 5: After adjusting the “Blur” brush’s parameters, go to the part of the image you want to blur and drag the cursor across it.
You’ll then see the said image part highlighted in purple.
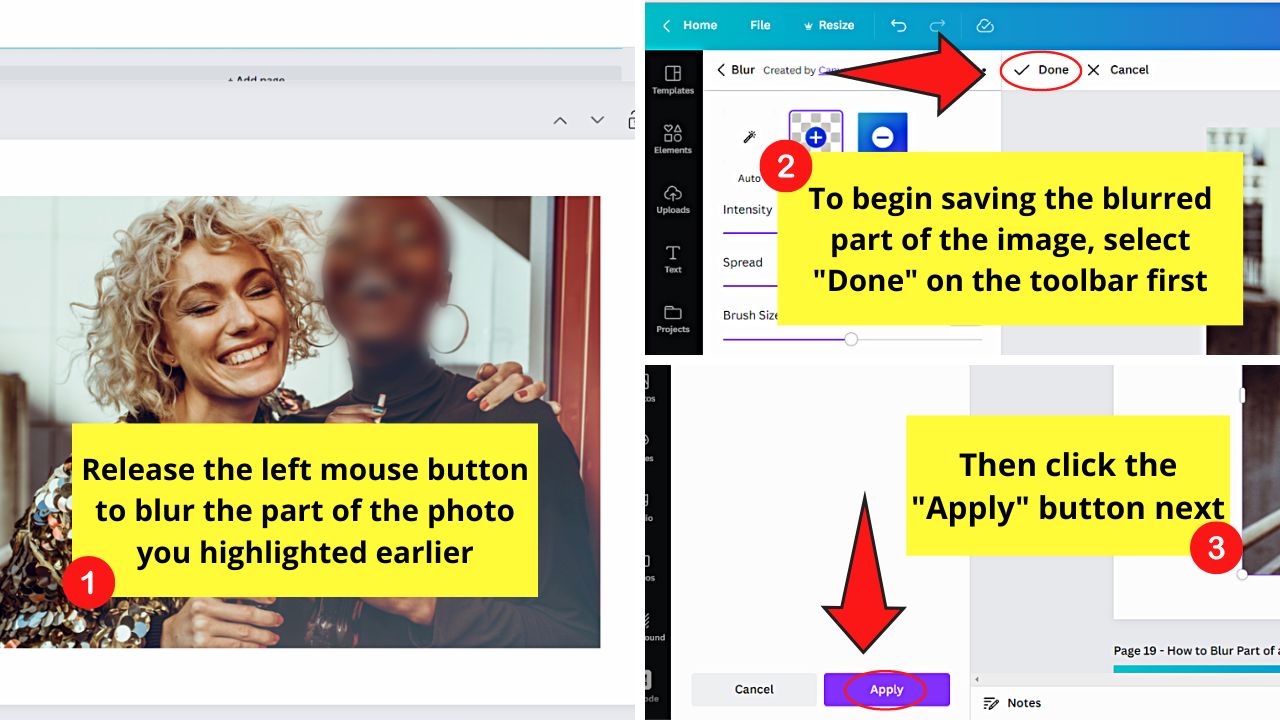
Step 6: After highlighting that part of the image, release your hold on the left mouse button. The said image part will then be blurred.
But, to save the changes you made to that photo, select the “Done” and “Apply” buttons.
Blurring Part of an Image in Canva — The Old School Method
Step 1: First, add a photo to the canvas.
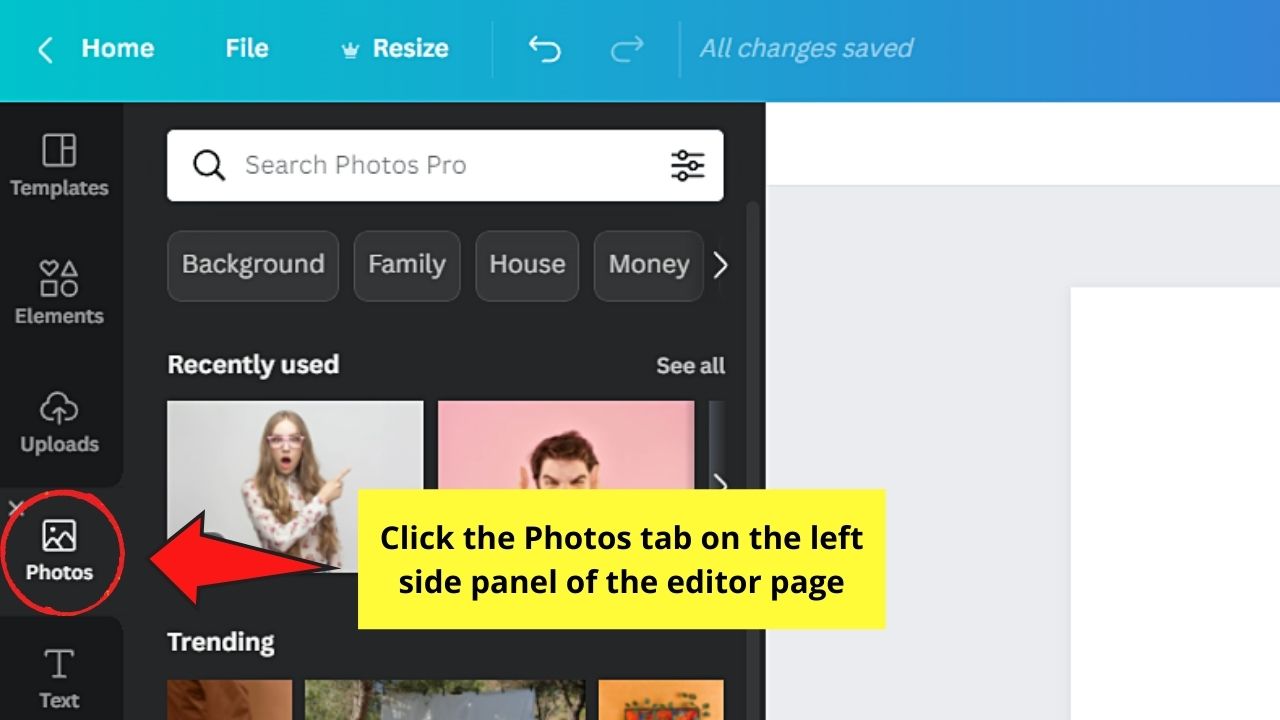
You can opt to choose from the vast photo gallery of Canva by selecting the Photos tab on the left side panel.
Or, you can access your device’s gallery by selecting the Uploads tab on the same left side panel. Then, click the Upload media button to begin the process of importing the image.
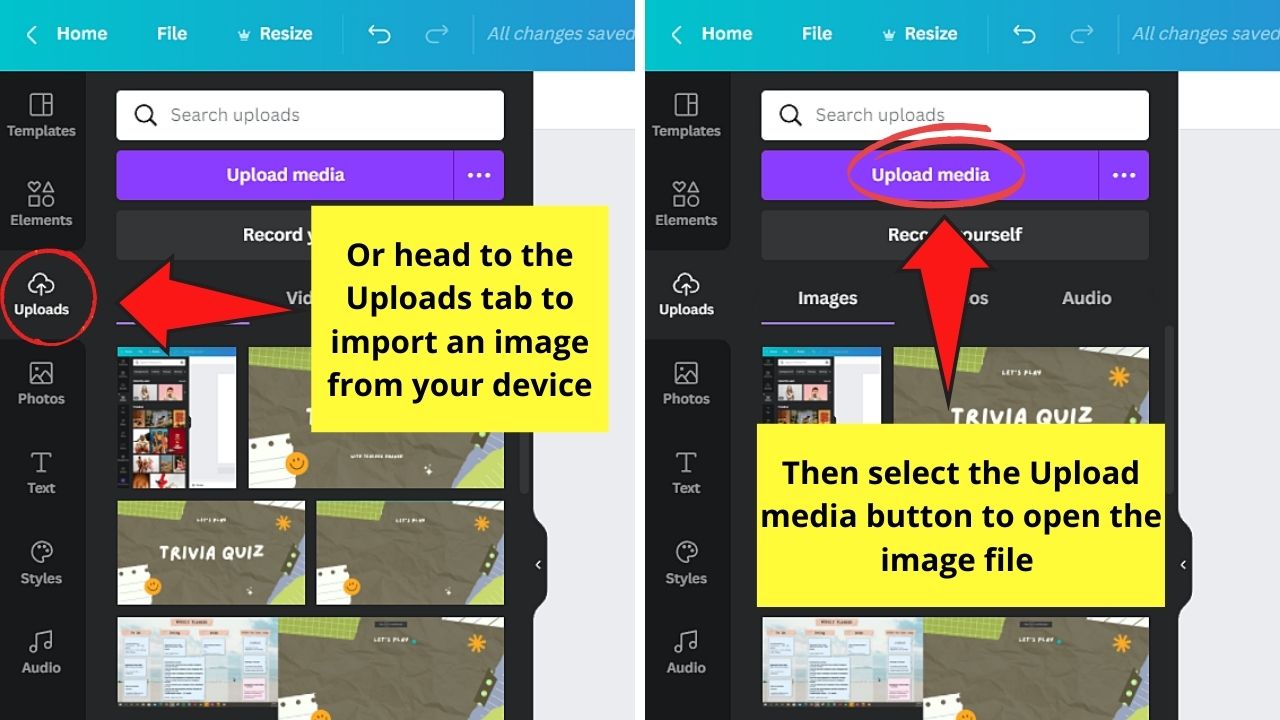
Better yet, you can directly click and drag the photo you’ll use from your device to the editor page.
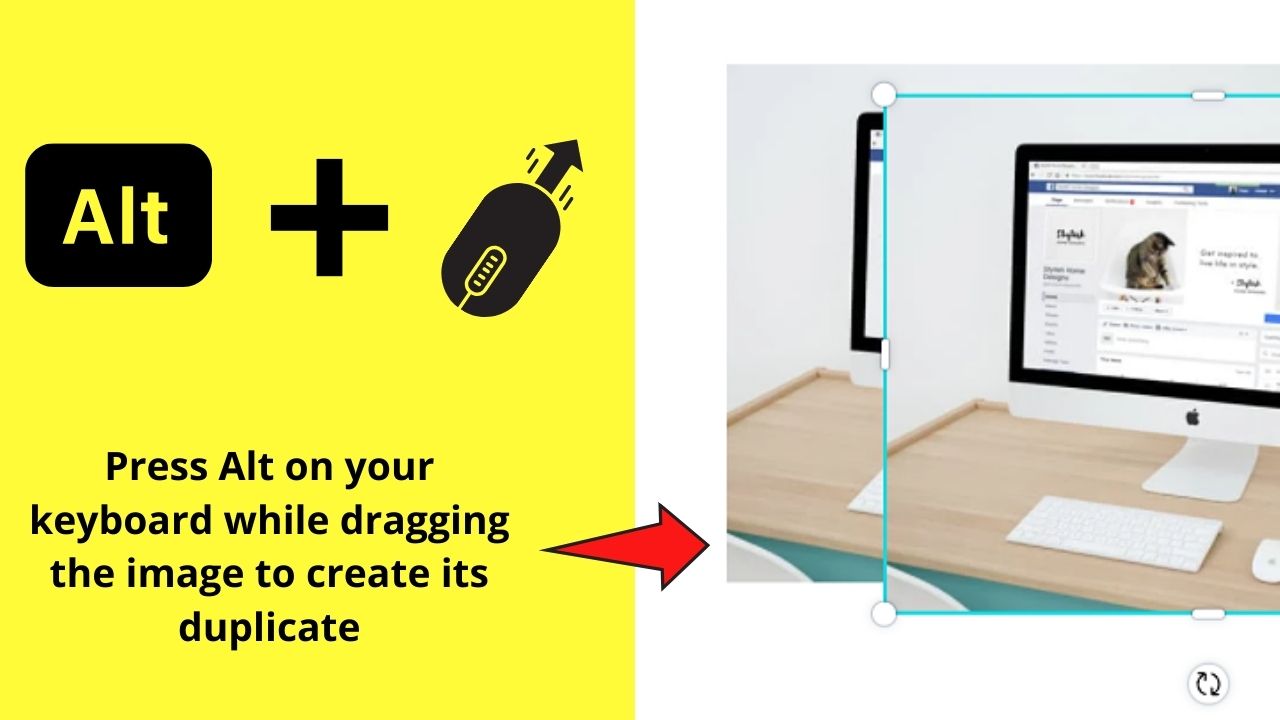
Step 2: Once the image is uploaded to Canva, create another copy of it.
To do this, just press the Alt key while dragging the photo. This will then produce the 2nd copy of the image.
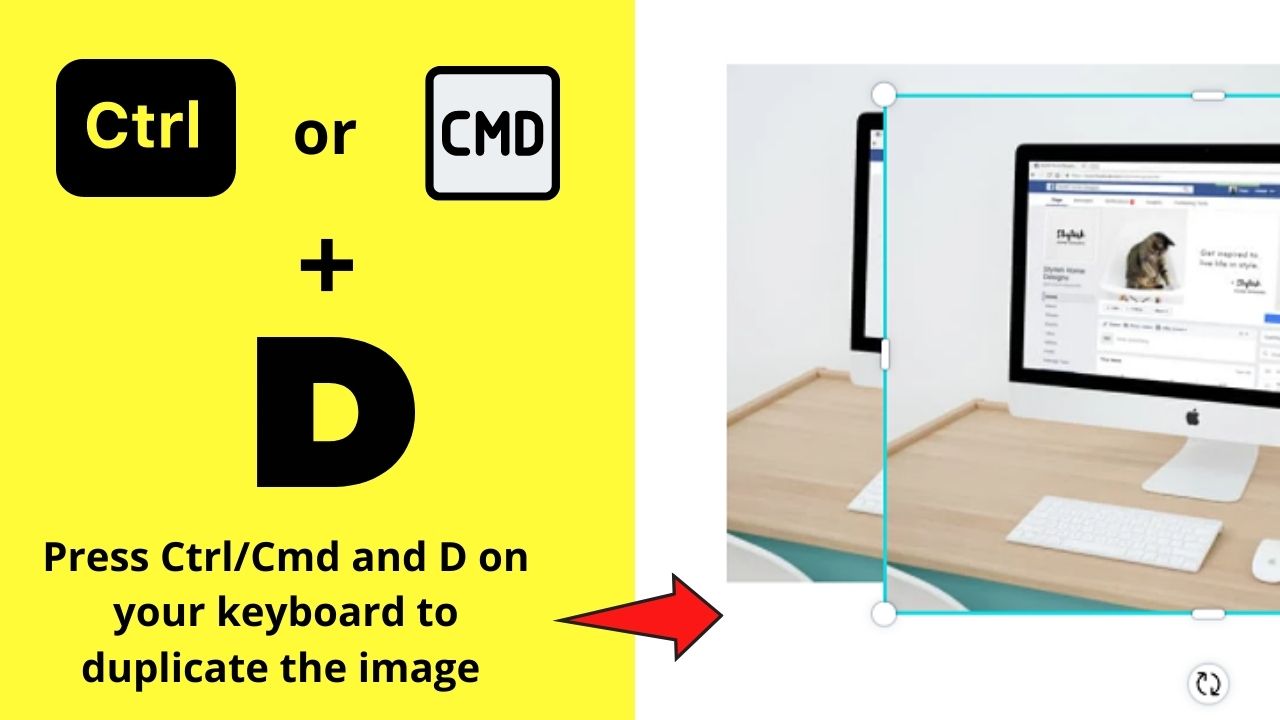
But, if you prefer a mouse-less way of copying the image, make sure to select the photo first.
Then, press Cmd/Ctrl + D on your keyboard simultaneously to duplicate the picture.
If you want to learn more about the most useful keyboard shortcuts in Canva, read about them on this site.
Keep repeating this step until you produce the number of copies you need to blur out sections of the photo later on.
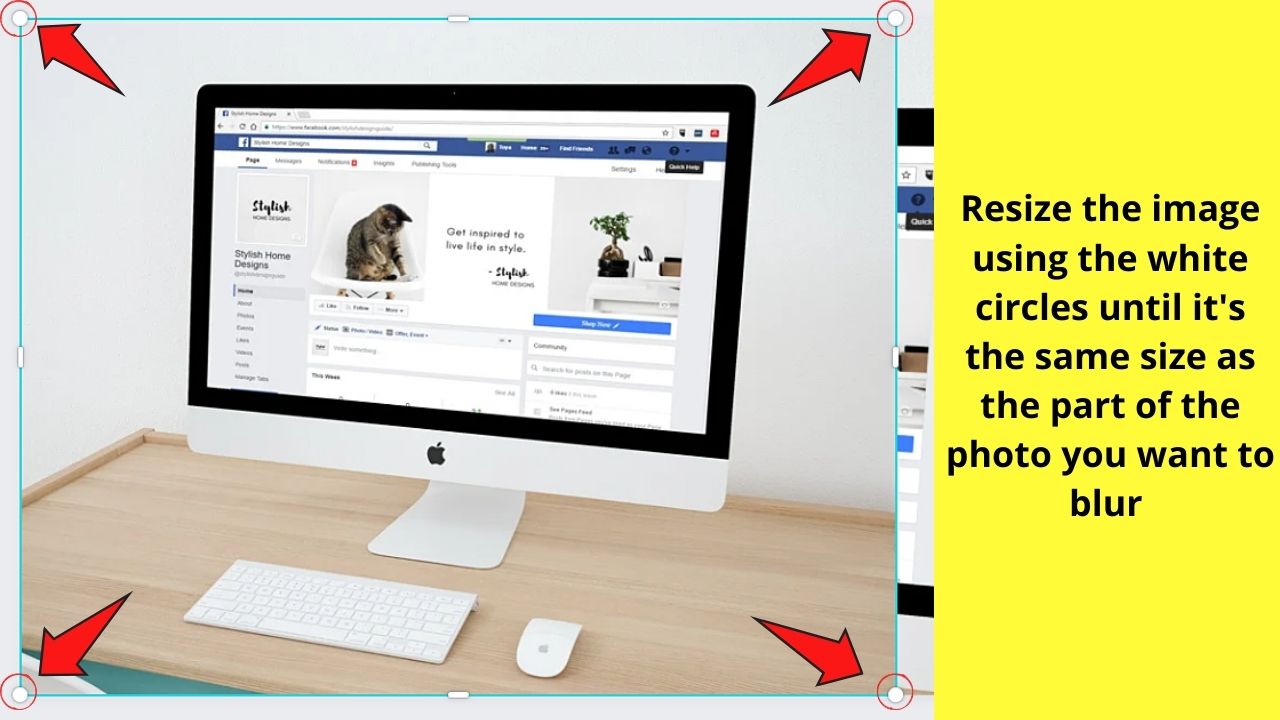
Step 3: After duplicating the images, resize them accordingly on your canvas.
To do this step, click and drag the white circles at the corners of the photo until you reach the desired size.
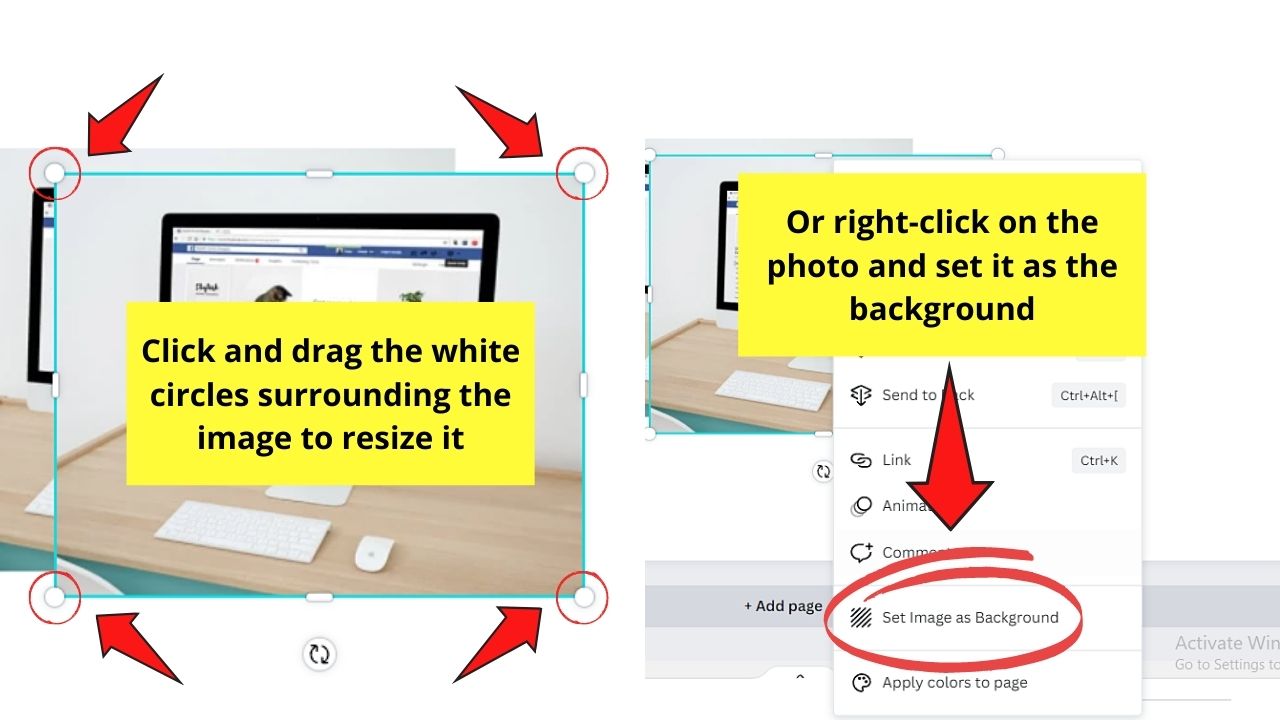
If you prefer making the photo occupy the entire canvas, right-click on it and select the Set image as background option.
This step will then stretch the photo to the size of the canvas.
Step 4: Once you resize the first photo, do the same for the duplicate of the image.
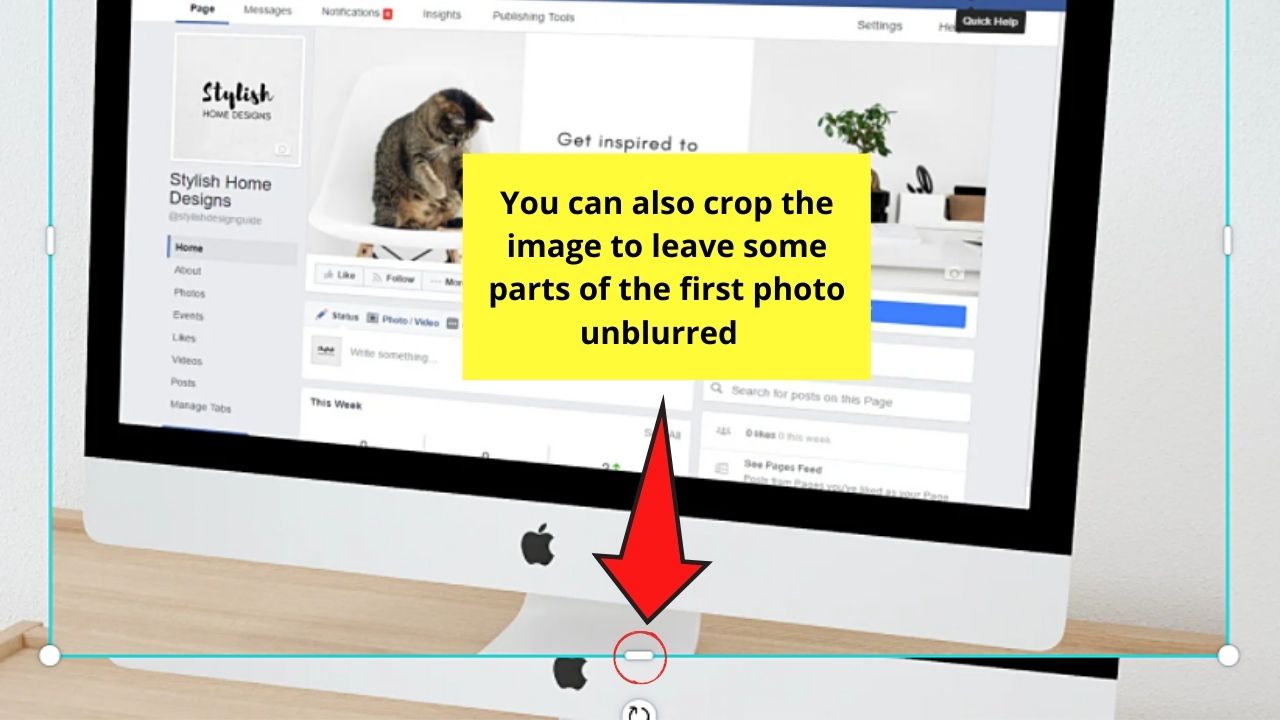
But, instead of setting the 2nd picture as a background, manually resize it by dragging the white circles with the cursor.
Continue dragging the photo’s corners until it’s the same size as the part of the image you want to blur.
You can even crop out part of the picture to leave out some areas of the first photo unblurred later on.
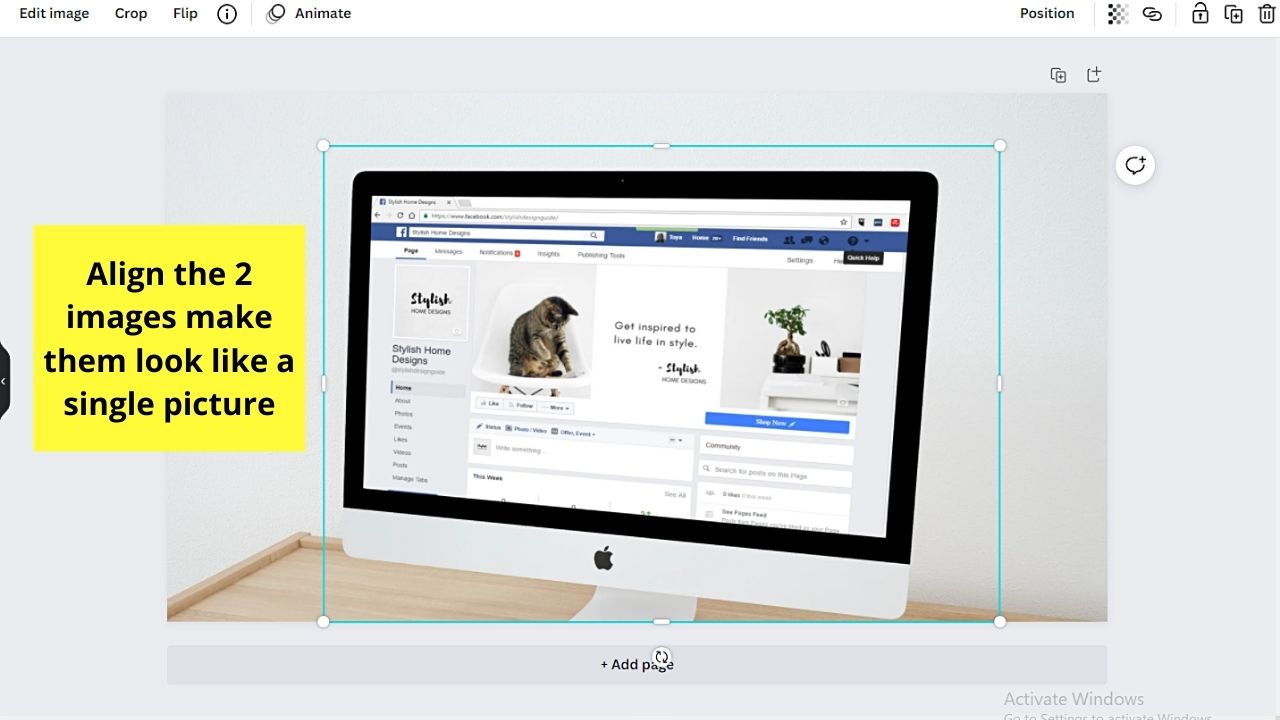
Just make sure to align the first and second photos properly to have a seamless look.
If you want to be sure that both images are aligned, adjust the 2nd photo’s transparency to check if all the photo components occupy the same space.
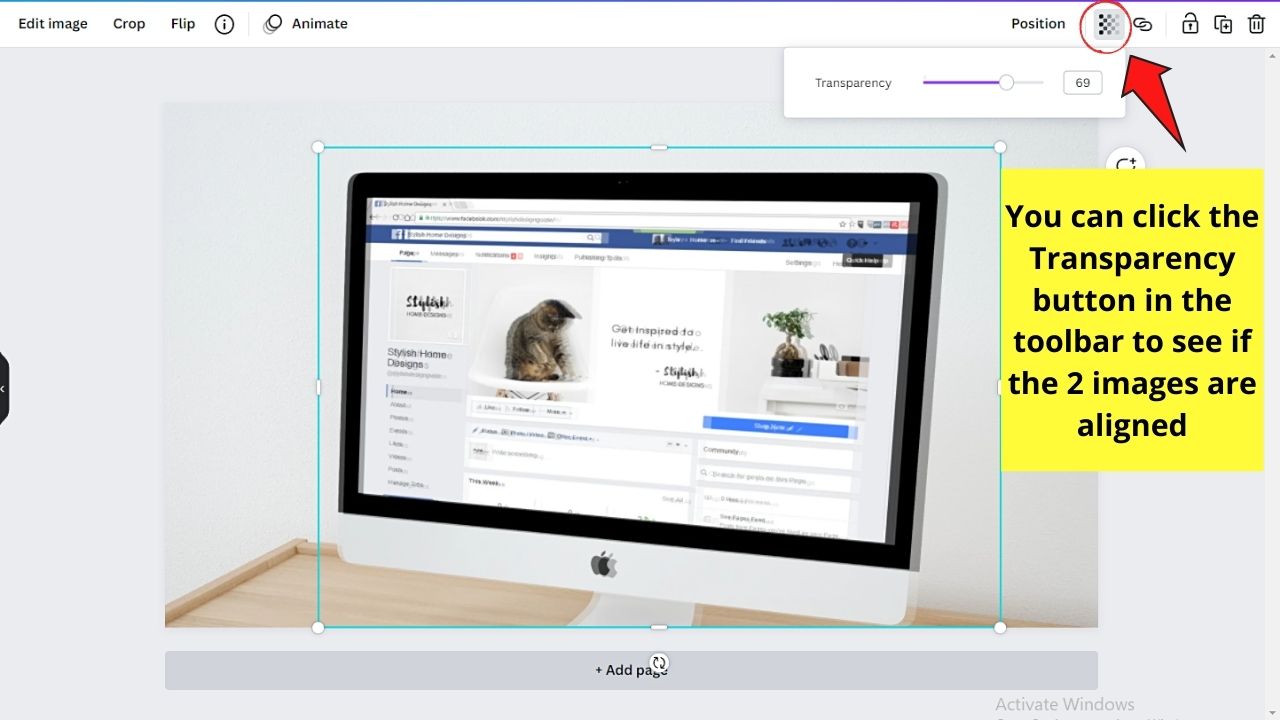
Just make sure to bring back the transparency level to 100 after aligning the images.
Step 5: Once the 2 images are properly aligned and cropped, select the second photo by clicking it.
Then, click the Edit image button found on the editor toolbar to activate the left side panel.
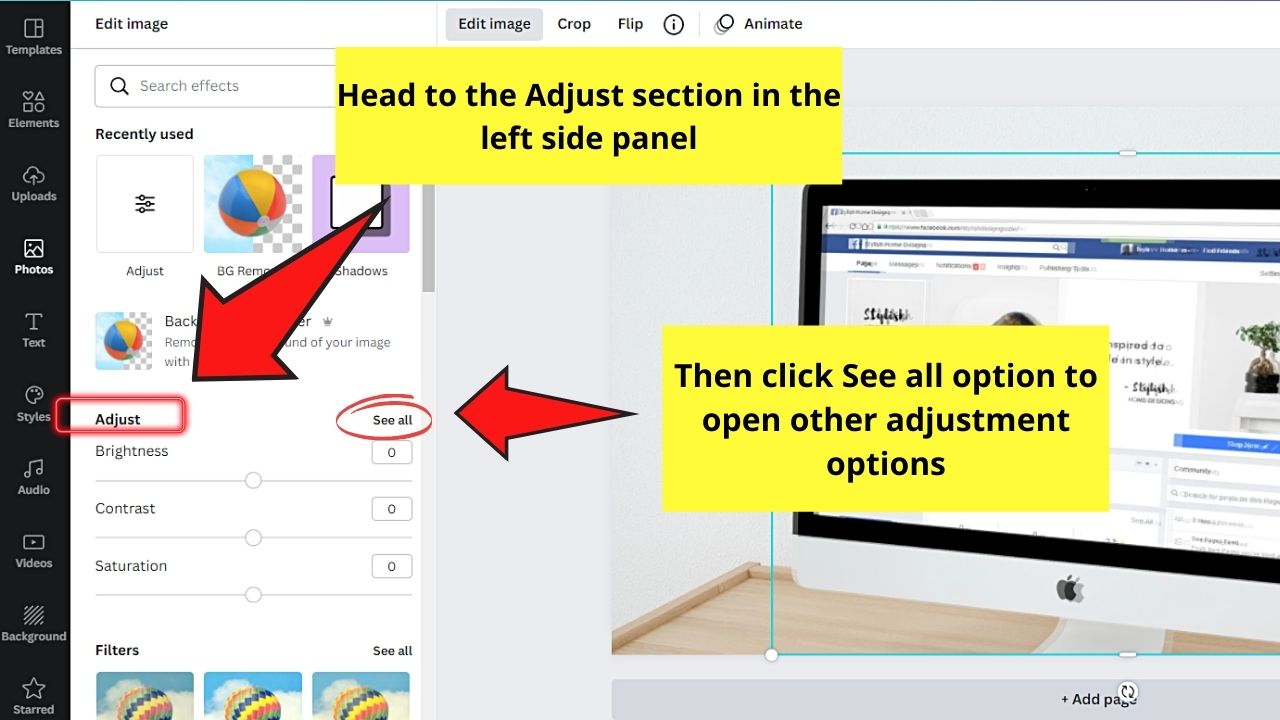
Step 6: In the Edit image left side panel, head to the Adjust section and click “See all.” You’ll then see the various sliders that you can use to tweak the photo.
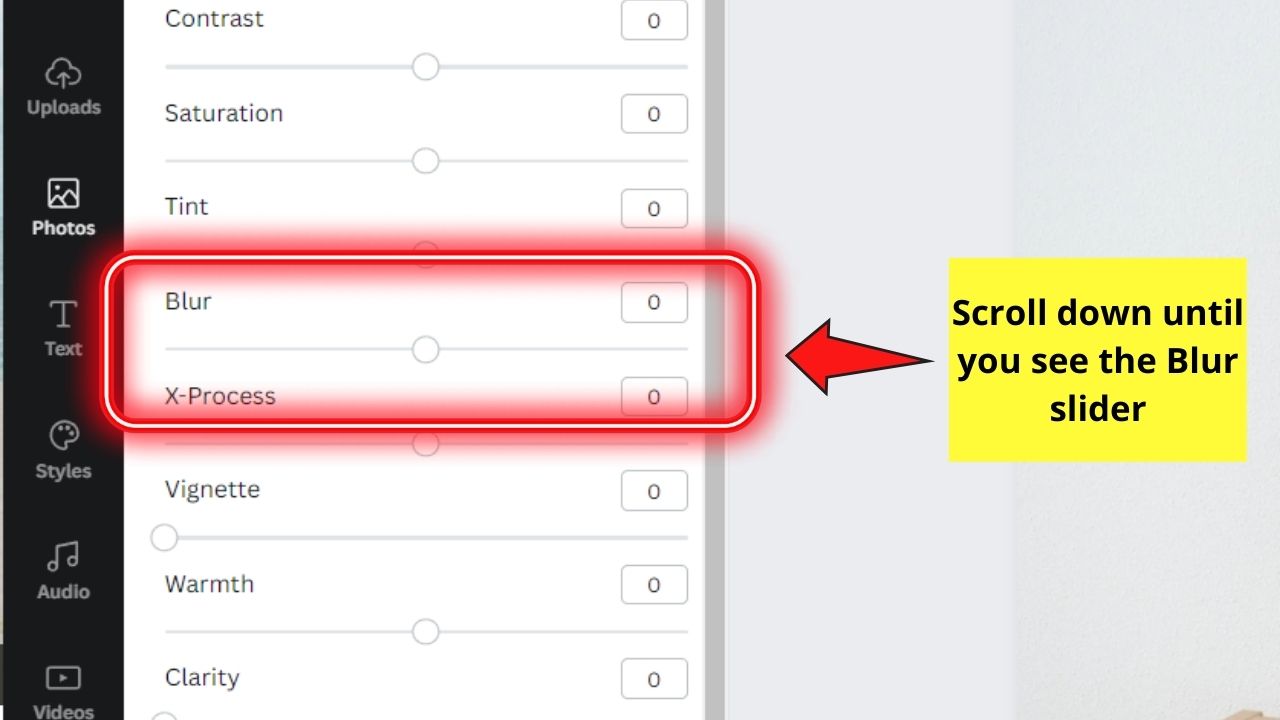
Head to the Blur slider.
Then, click and drag the white circle to the right to increase the blurring effect on the 2nd photo.
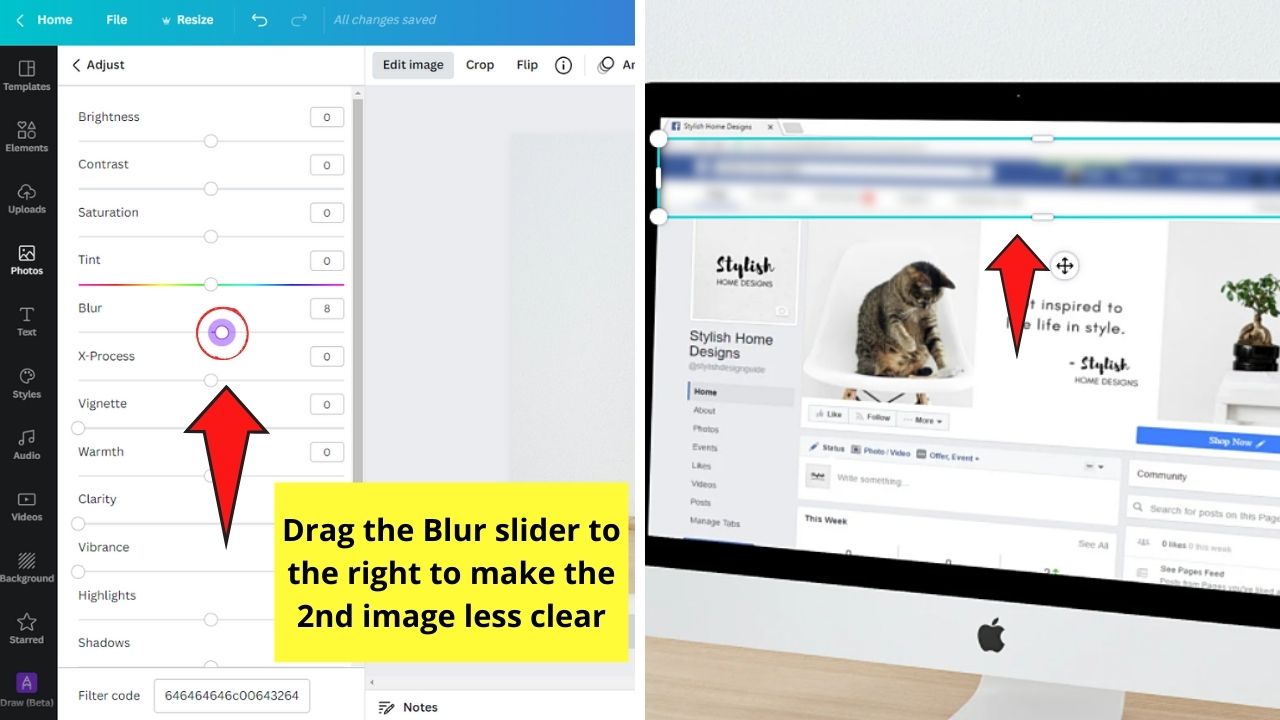
Once you’re satisfied with the blurring of the image, click anywhere on the canvas to save the changes.
Repeat this step for the other duplicated images after positioning them on top of the first photo.
Step 7: If you want to move all the images — both blurred and unblurred — as a unit, press Shift while clicking on the images individually.
You can also just drag the cursor across the photos until all of them are highlighted.
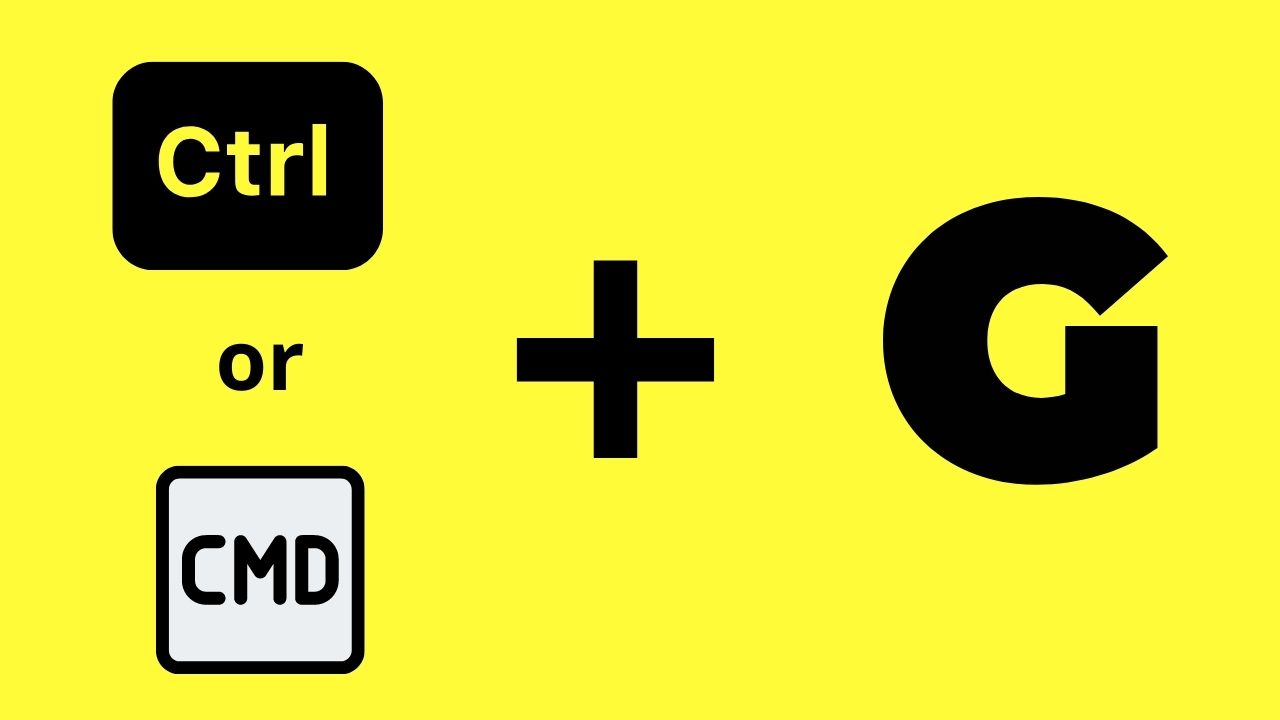
Once done, press Ctrl/Cmd + G or click the Group button in the editor toolbar to group the photos you selected.
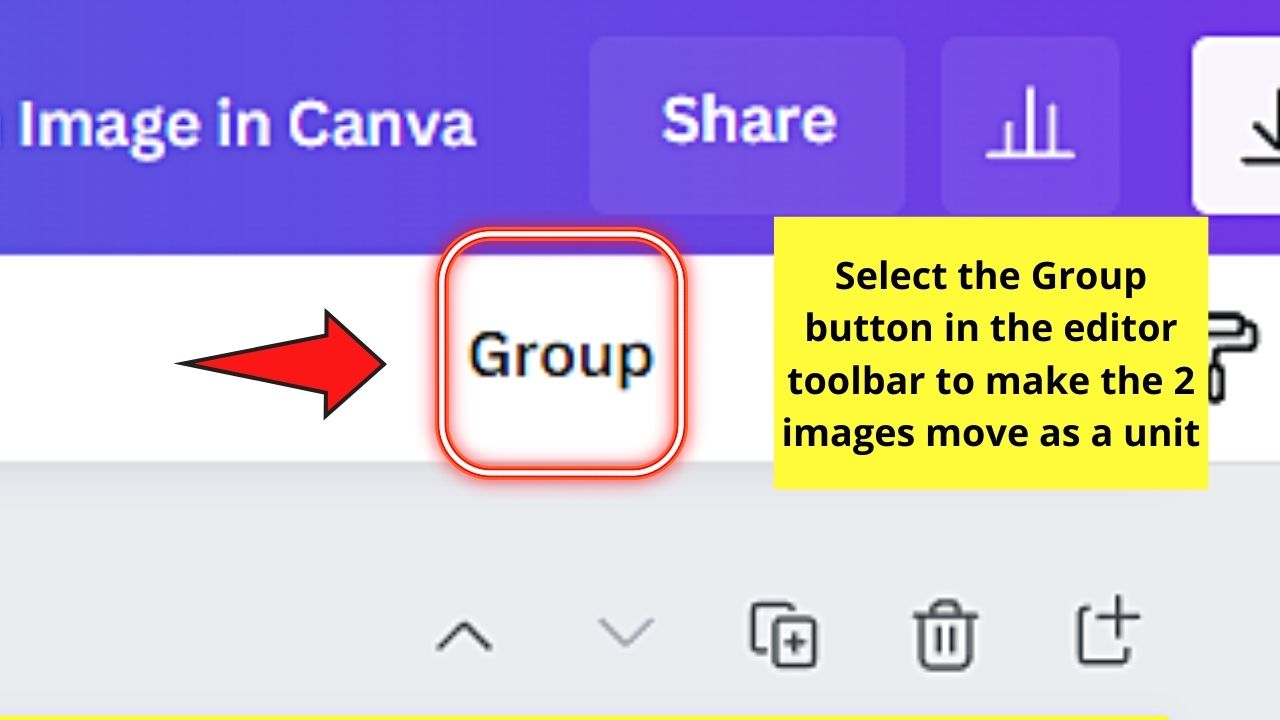
Take note though that this step’s optional. So, you can ungroup the photos later on if you need to do some further editing with them.
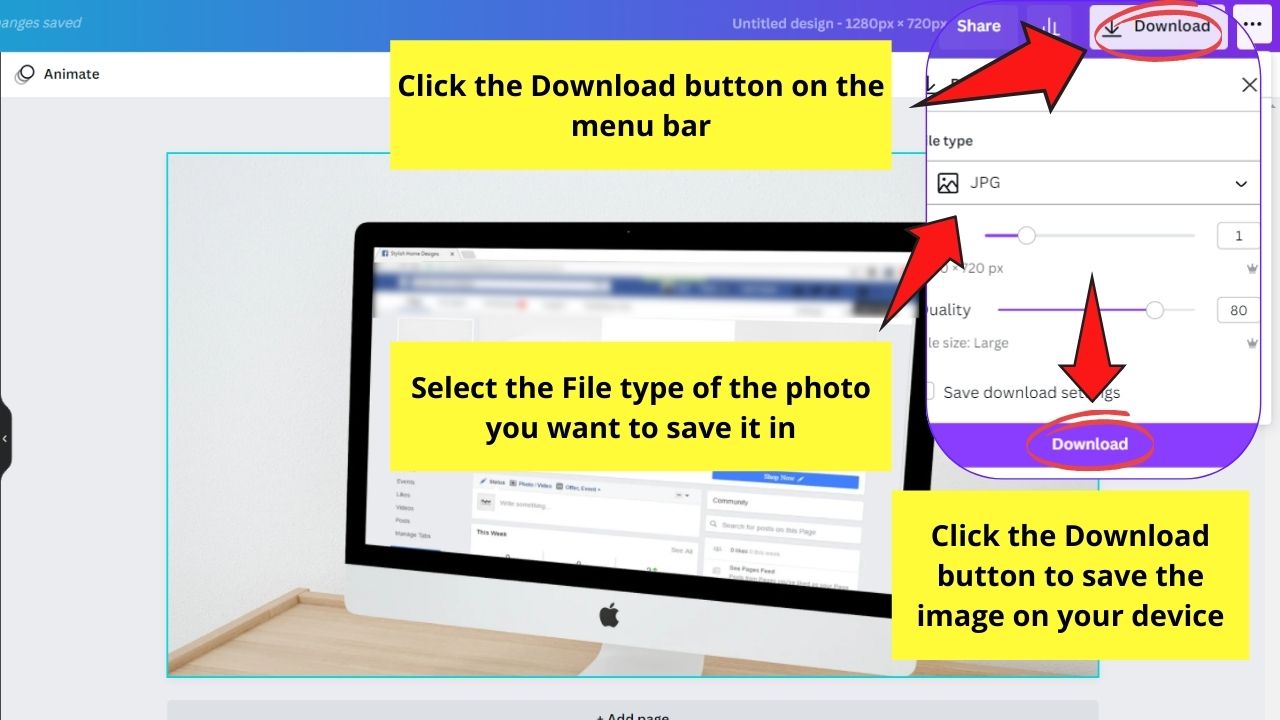
Step 8: Then, once everything looks good, head to the Downloads button and click it.
Select the image’s file type before clicking the purple Download button in the dropdown menu.
Very simple, right?
Though there’s no one-click button for this function, you still can achieve the same effect in Canva with the steps mentioned above.
You won’t even need to use Illustrator or Photoshop to partially blur your photos.
But, if you feel you’re still lacking in knowledge with how to blur images and pictures in Canva, then better view this simple tutorial below.
Frequently Asked Questions about How to Blur Part of an Image in Canva
Can I group the blurred and unblurred photos?
You definitely can group the blurred and unblurred images to make them move as a unit. Just make sure to select all the photos you want to group before pressing the Ctrl/Cmd + G keys on your keyboard.
What if I accidentally blurred a photo that should stay clear; can I reverse it?
You can unblur a photo you want to stay clear in Canva. Just click on the image, select Edit image, then drag the Blur slider to the left to sharpen or unblur it in the Adjust section.
Do I need to align the original and duplicate photos before blurring one of them?
Both the original image and its copy must be aligned before you blur the copy so they’ll appear as a single photo. You’re giving the viewers the illusion that you’re using a special tool to blur parts of the image.