

Bullet points are important design elements. They are really helpful in making your content and designs more organized and structured.
In many software such as Microsoft Word or Google Docs, adding bullet points is very straightforward.
Not so much in Adobe Photoshop…
But there’s nothing to worry about because with our guide and step-by-step instructions you will be making bullet points in Photoshop in no time!
How to Do Bullet Points in Photoshop
There are several ways to do Bullet Points in Adobe Photoshop. Bullet points can be added with a simple Copy-Paste, using Photoshop’s Glyph Panel or by using dedicated keyboard shortcuts.
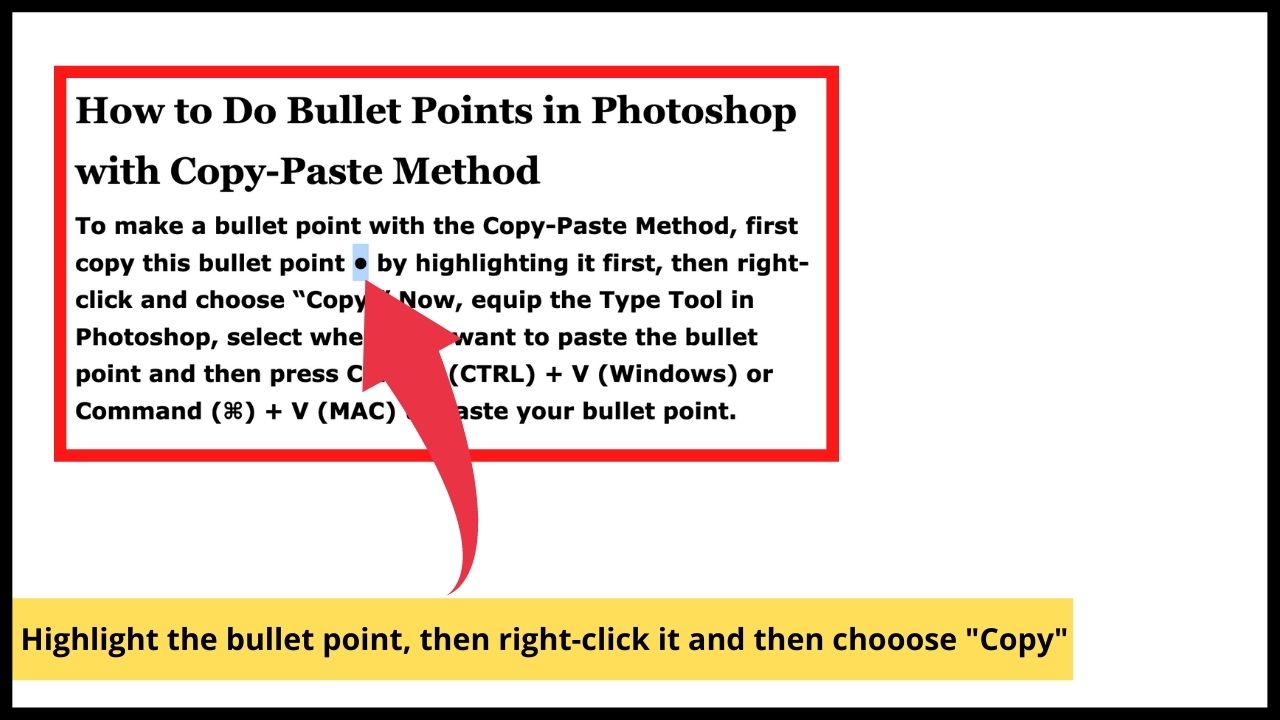
How to Do Bullet Points in Photoshop with Copy-Paste Method
To make a bullet point with the Copy-Paste Method, first copy this bullet point • by highlighting it first, then right-click and choose “Copy.” Now, equip the Type Tool in Photoshop, select where you want to paste the bullet point and then press Control (CTRL) + V (Windows) or Command (⌘) + V (MAC) to paste your bullet point.
Step 1:
Copy the bullet point. Copy this bullet point • or some other bullet point from the internet, that you find suitable, by selecting it and then holding Control (CTRL) + C (Windows) or Command (⌘) + C (MAC). The bullet point is now copied.

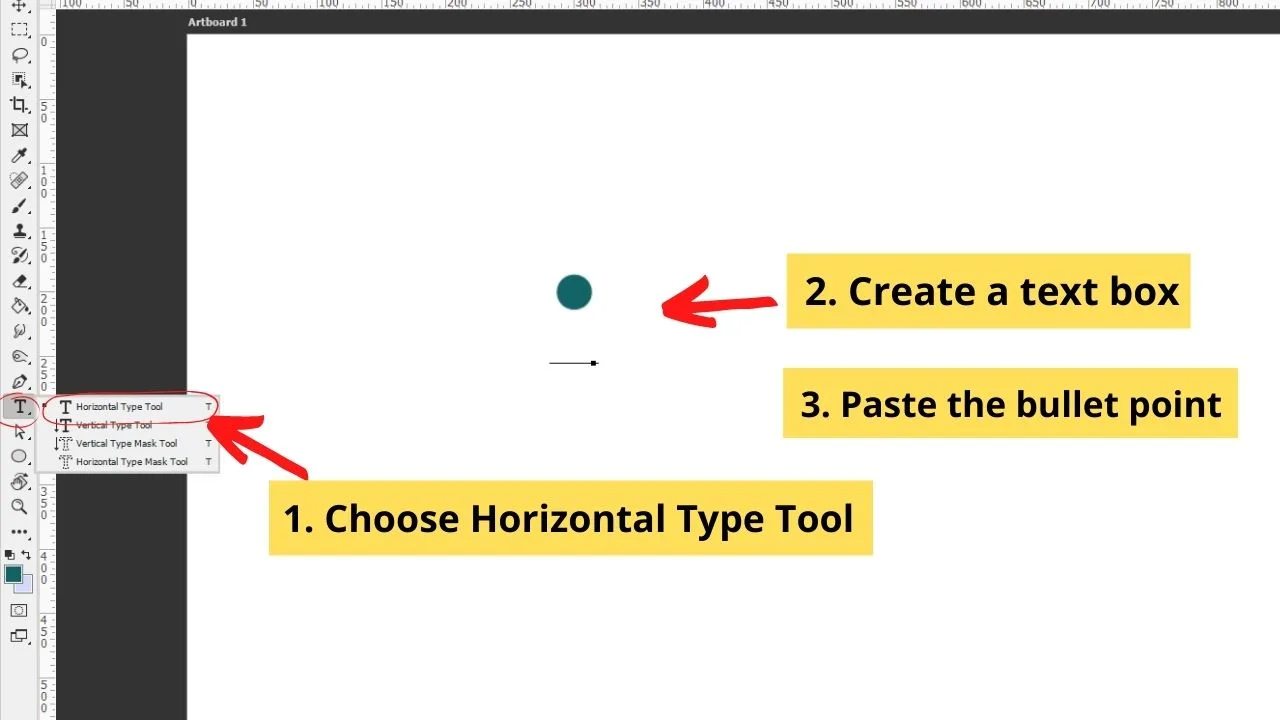
Step 2:
Paste the bullet point. Open Adobe Photoshop, then in the Tool menu, choose the “Horizontal Type Tool” or to access it faster, you can use a shortcut, press the letter T on your keyboard. Create a text box and select the place where you want to paste bullet points, press Control (CTRL) + V (Windows) or Command (⌘) + V (MAC).

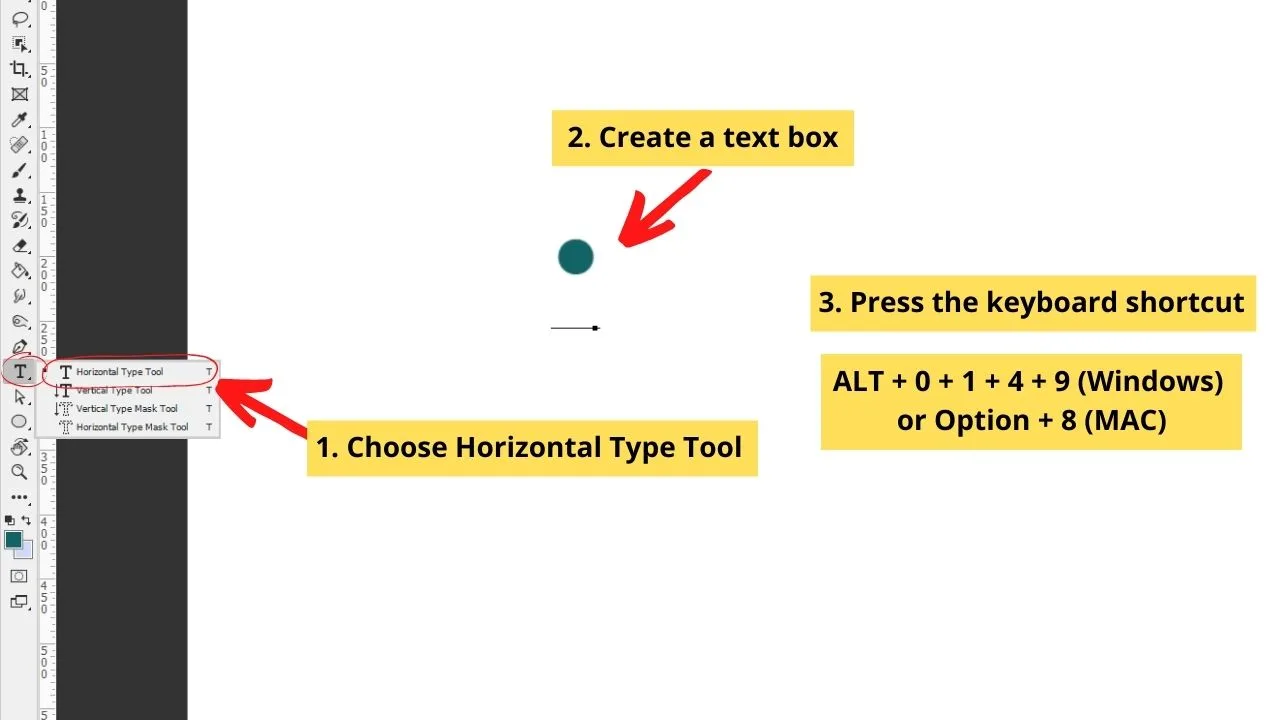
How to Do Bullet Points in Photoshop using Keyboard Shortcuts
Choose the “Horizontal Type Tool” in the Tool menu, create a text box, and after determining where the bullet point will be located, press shortcut ALT + 0 + 1 + 4 + 9 (Windows) or Option + 8 (MAC) to create a bullet point.


Step 1:
Add a bullet point with the help of a keyboard shortcut. Use the “Horizontal Type Tool” and create a text box, after adding text and adjusting where the bullet points should be placed, press the following keyboard shortcut to get the bullet point ALT + 0 + 1 + 4 + 9 (Windows) or Option + 8 (MAC). There are other symbol shortcuts that you can find on the internet if this bullet point doesn’t suit you.

How to Do Bullet Points in Photoshop using Glyphs
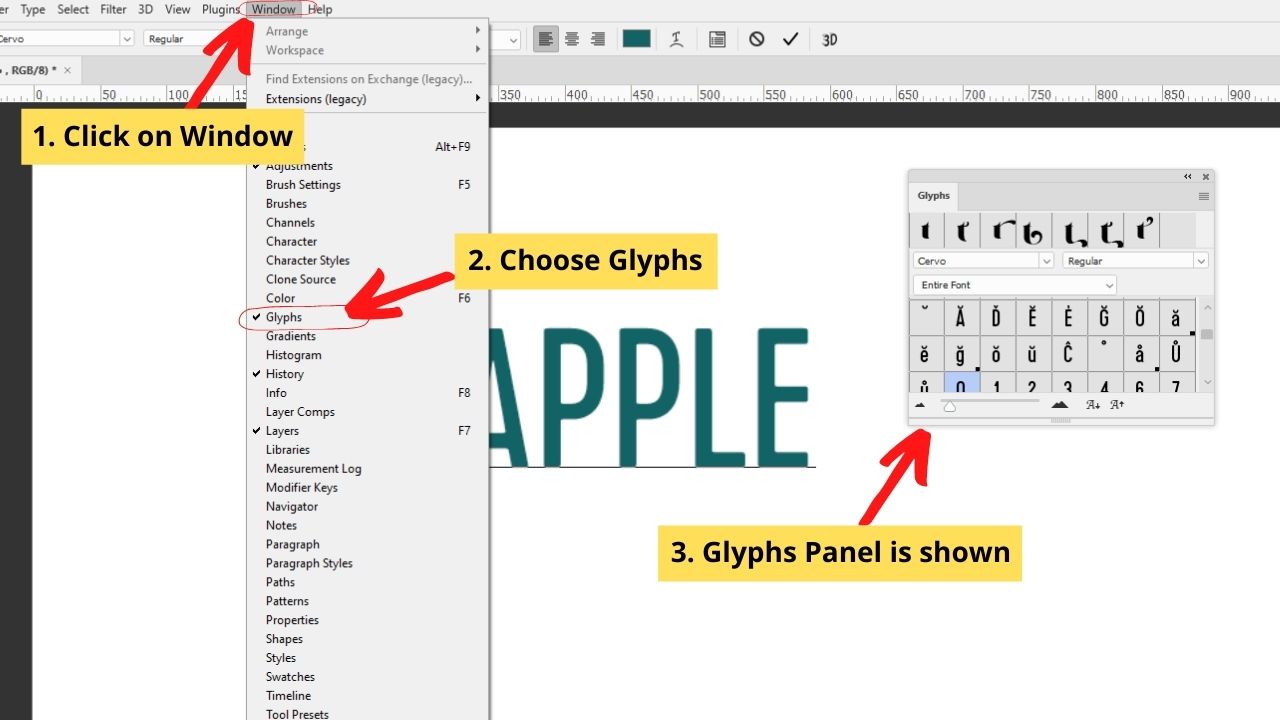
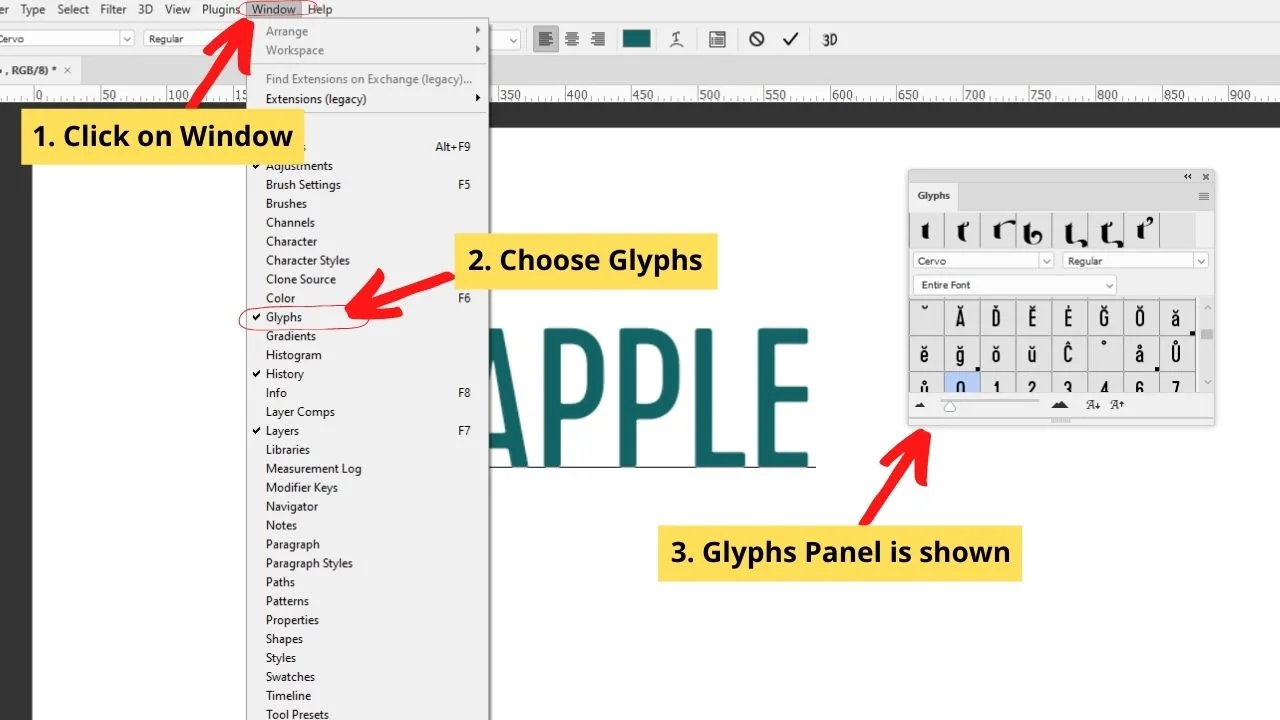
Choose the “Horizontal Type Tool” in the Tool menu, create a text box, and add text. Go to the main menu, click on “Windows”, in the drop-down menu select the “Glyphs” and the window will pop up. In the “Glyphs Panel”, find the bullet points, with double click, add them to the text box.
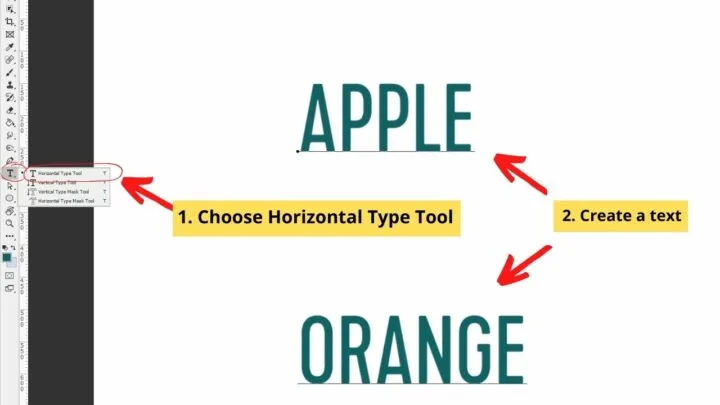
Step 1:
Add a text box and add some text. In the Tool menu, choose the “Horizontal Type Tool”, click on anywhere on the canvas and create a text box. Prepare the text for adding bullet points.
The shortcut for the “Horizontal Type Tool” is the letter T on the keyboard.

Step 2:
Open the Glyphs Panel. In the main menu, click on the “Window”, in the drop-down menu choose the “Glyphs”, and the window will pop up.
Step 3:
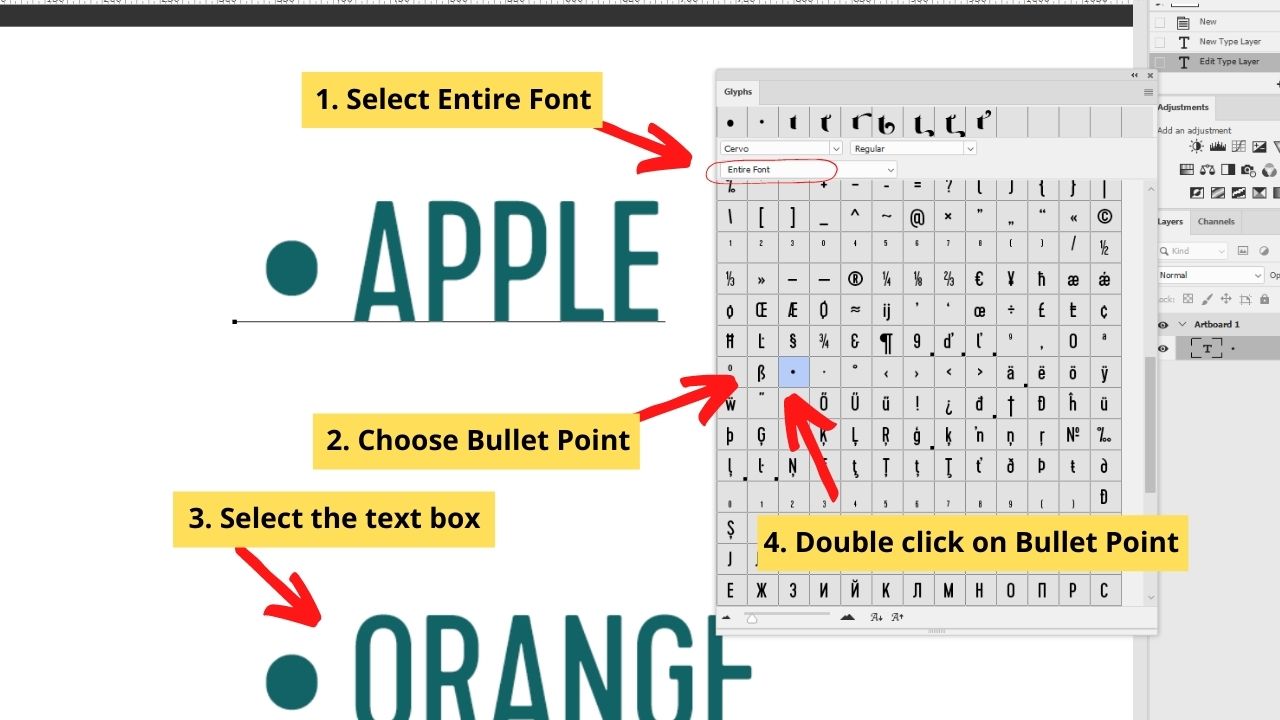
Add the bullet point. In the “Glyphs Panel”, you can choose the font by clicking on the drop-down menu and selecting the wanted font. Most of them have bullet points and the font doesn’t have to be specified, therefore make sure to select “Entire Font” in the drop-down menu. After you find the wanted bullet point, typing tool and text box have to be selected, with double click on the bullet point, it will be placed.


Hey guys! It’s me, Marcel, aka Maschi. On MaschiTuts, it’s all about tutorials! No matter the topic of the article, the goal always remains the same: Providing you guys with the most in-depth and helpful tutorials!

