

Google Photos is one way to store images from a phone without initiating the transfer yourself. Once you’ve set Google Photos as your backup storage, you can view, edit, and even share media files within the app.
Plus, with the help of its AI assistant, all media files in your Google Photos account are organized by date. Pretty nifty, right?
But if you need to delete all the media files saved in Google Photos, is there a way you can select all photos? Is there a nifty “Select All” button available?
How to Select All Photos in Google Photos on iPhone
There is no “Select All” button in Google Photos iPhone. But, you can long-press on an image and scroll down without lifting your finger from the screen. You can also tap the checkmark icon beside a date or a particular album to choose all images under it.
Then tap what action you want to do to those selected images on the bottom menu that appears.
Since Google Photos doesn’t have a “Select All” button (like when you’re putting multiple pictures on an IG story), choose one of the methods below.
Method 1: Long-Pressing an Image Before Scrolling Down the Photos
Granting that you have already launched “Google Photos,”
Step 1: Press and hold an image

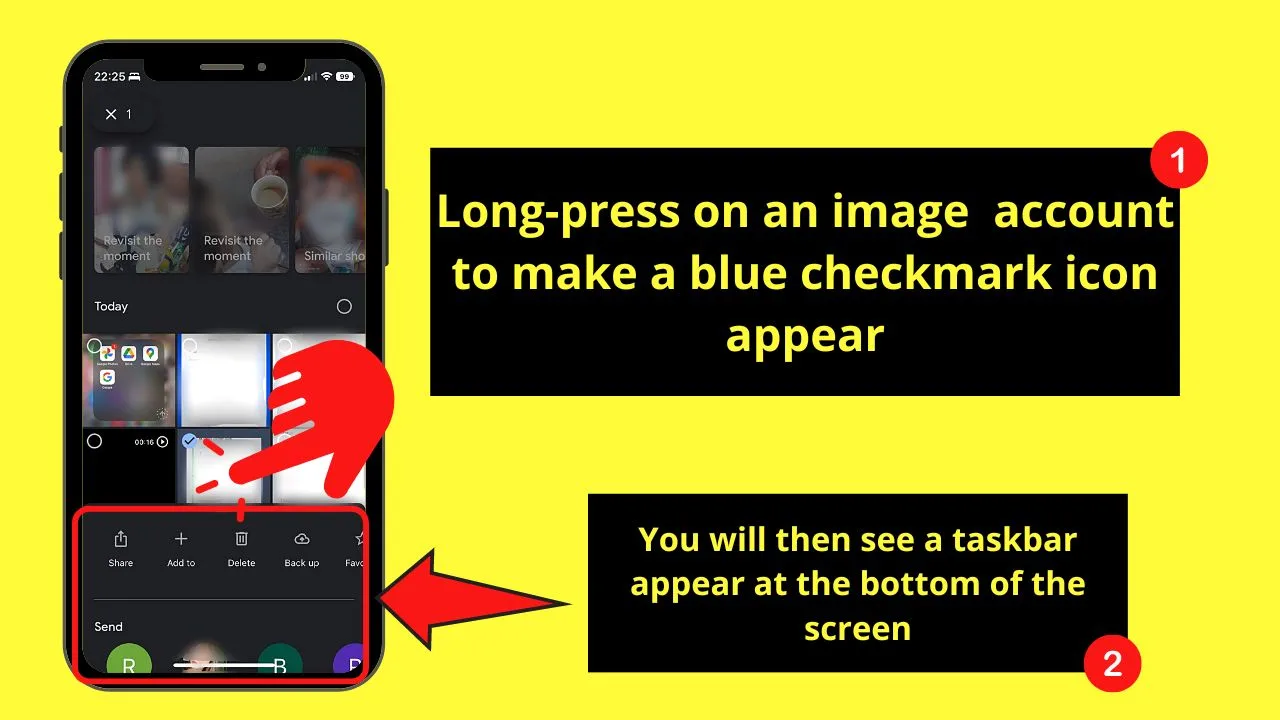
This will make a blue checkmark icon appear on the upper left corner of the photo. It means you have successfully selected that picture.
You will also see a taskbar appear at the screen’s bottom part.
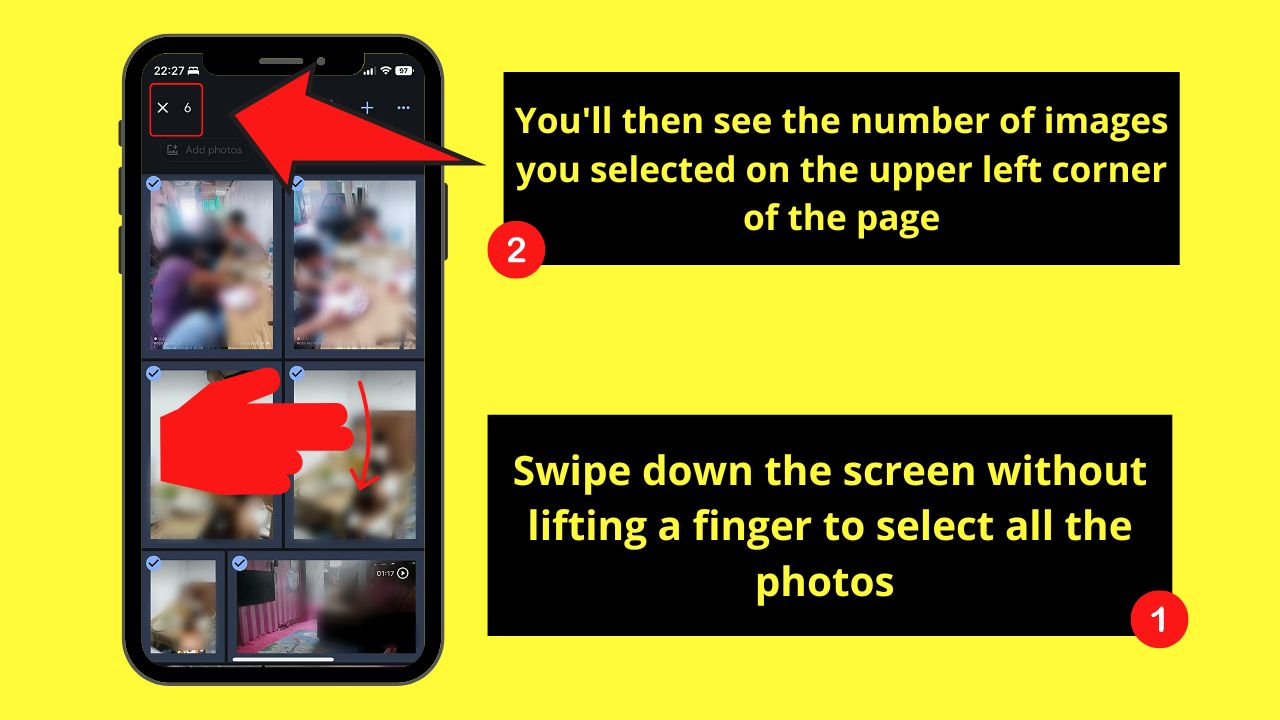
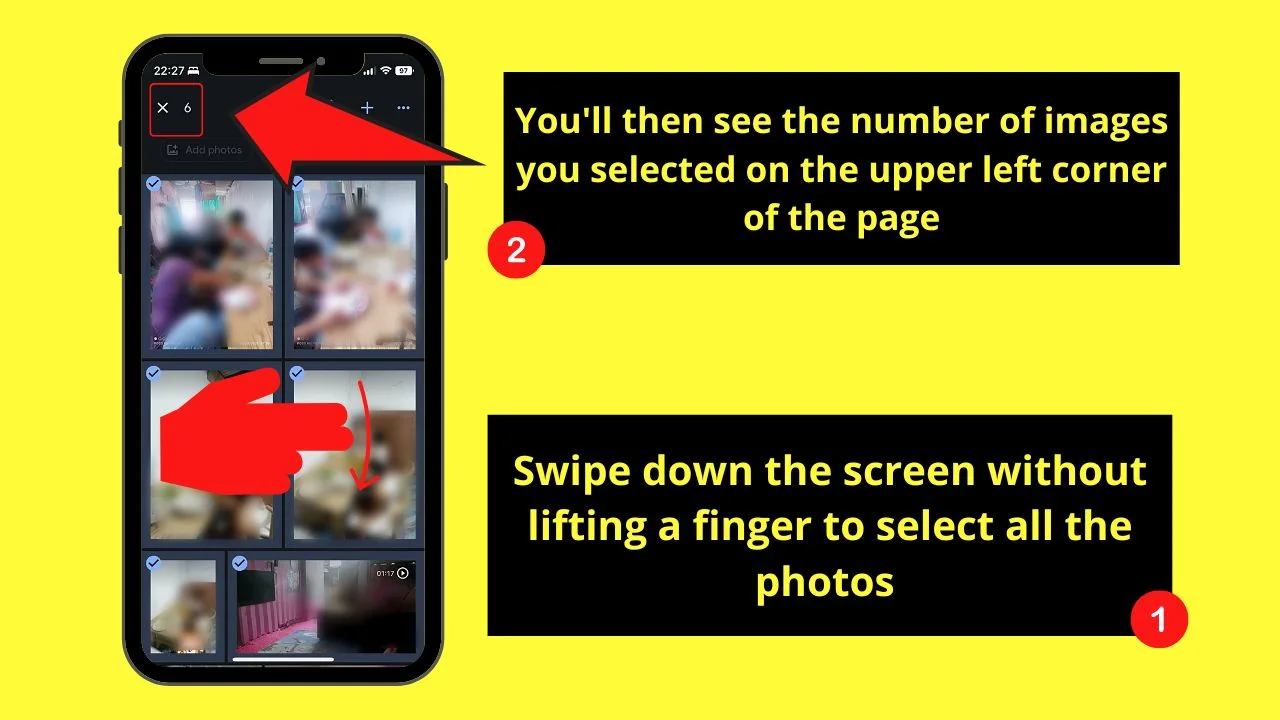
Step 2: Keep scrolling down until the last image is selected
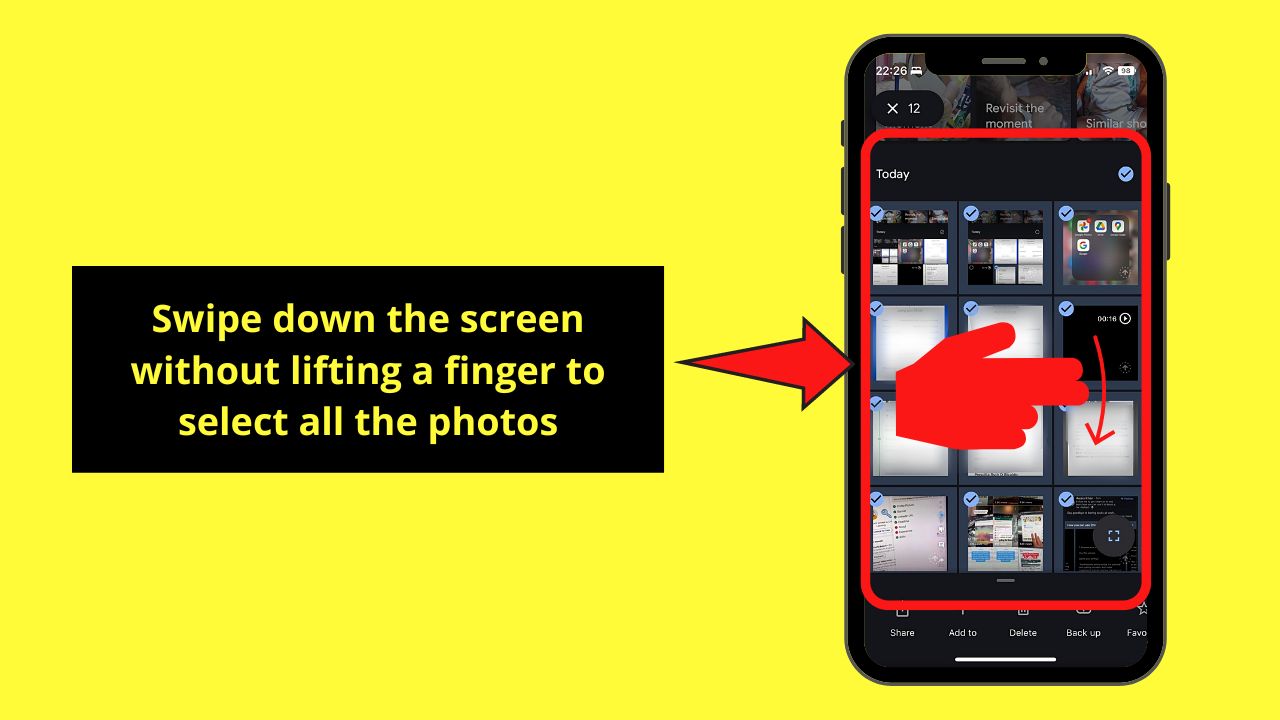
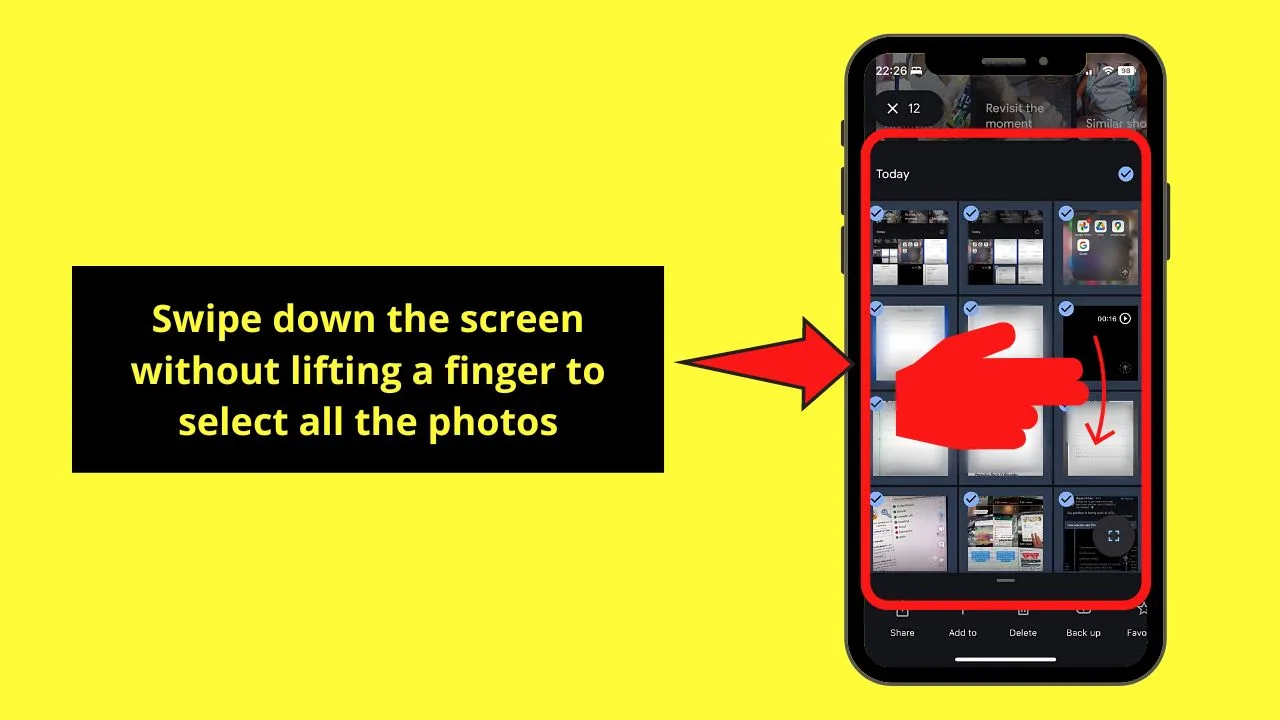
You mustn’t lift your finger while you’re scrolling down to select all the photos.
You will then notice that the images have blue checkmark icons on their upper left corners. The total number of photos selected will also appear on Google Photos’ top-left corner.
Method 2: Choosing a Particular Date
All media, whether photos or videos in Google Photos, are organized by the date they’re uploaded there.
That is the default way Google Photos categorizes the images unless you create albums.


Step 1: Tap the checkmark icon beside the date
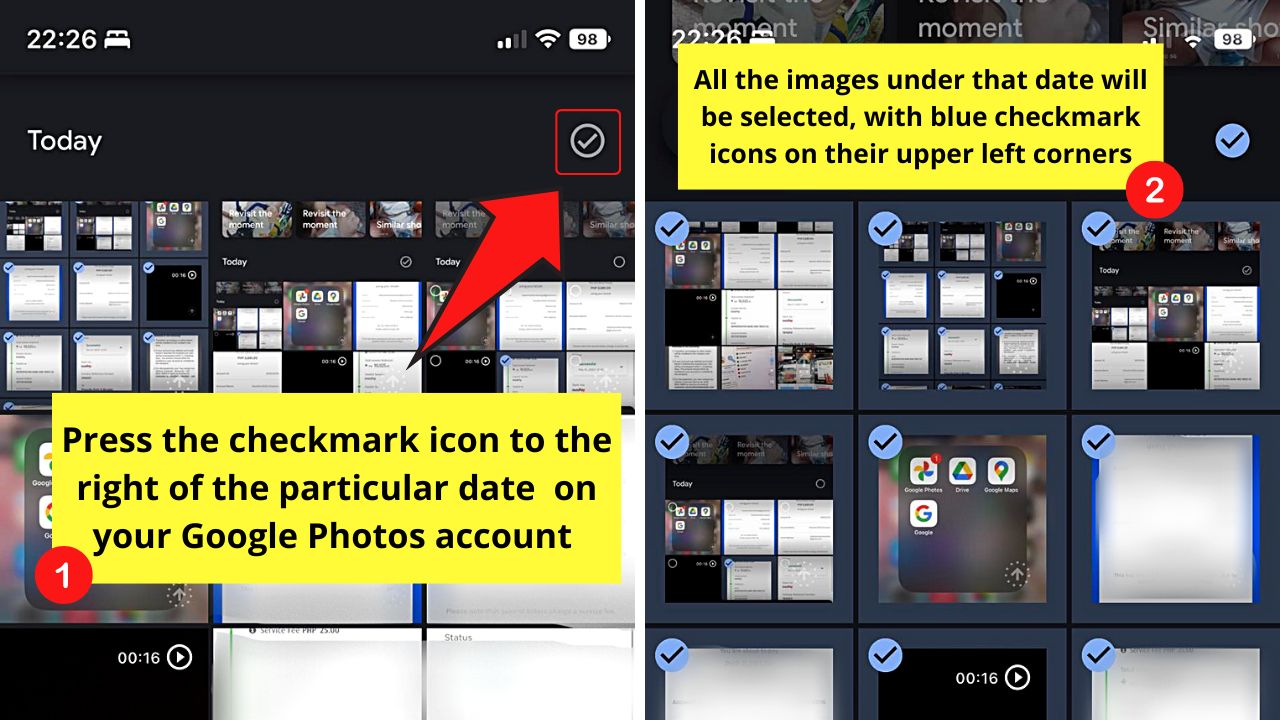

You’ll find this greyed-out icon to the right of the said date. Once you tap it, all the images under that particular date will be selected.
You will then see the number of all the photos chosen on the upper left corner of the Google Photos screen.
Step 2: Choose an action from the taskbar

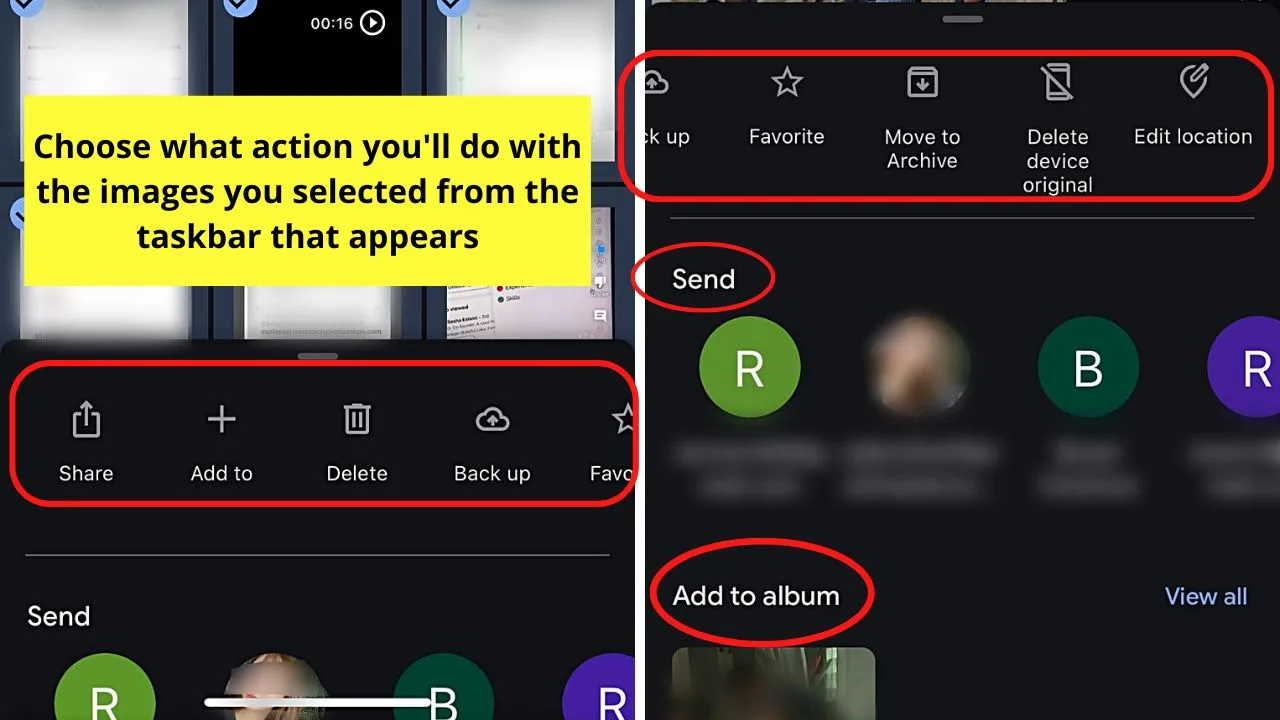
Selecting images on Google Photos will make the taskbar appear from below the screen. From there, you can choose what action you’ll apply to the photos selected.
These actions include:
- Share
- Add to
- Delete
- Back up
- Favorite
- Move to Archive
Aside from the ones listed above, you can also send the selected photos to an email or add them to a Google Photos album.
Method 3: Selecting a Google Photos Album
If you have taken the liberty to group images according to a theme instead of by date, you need a different way of choosing those pictures.
Step 1: Press “Library”

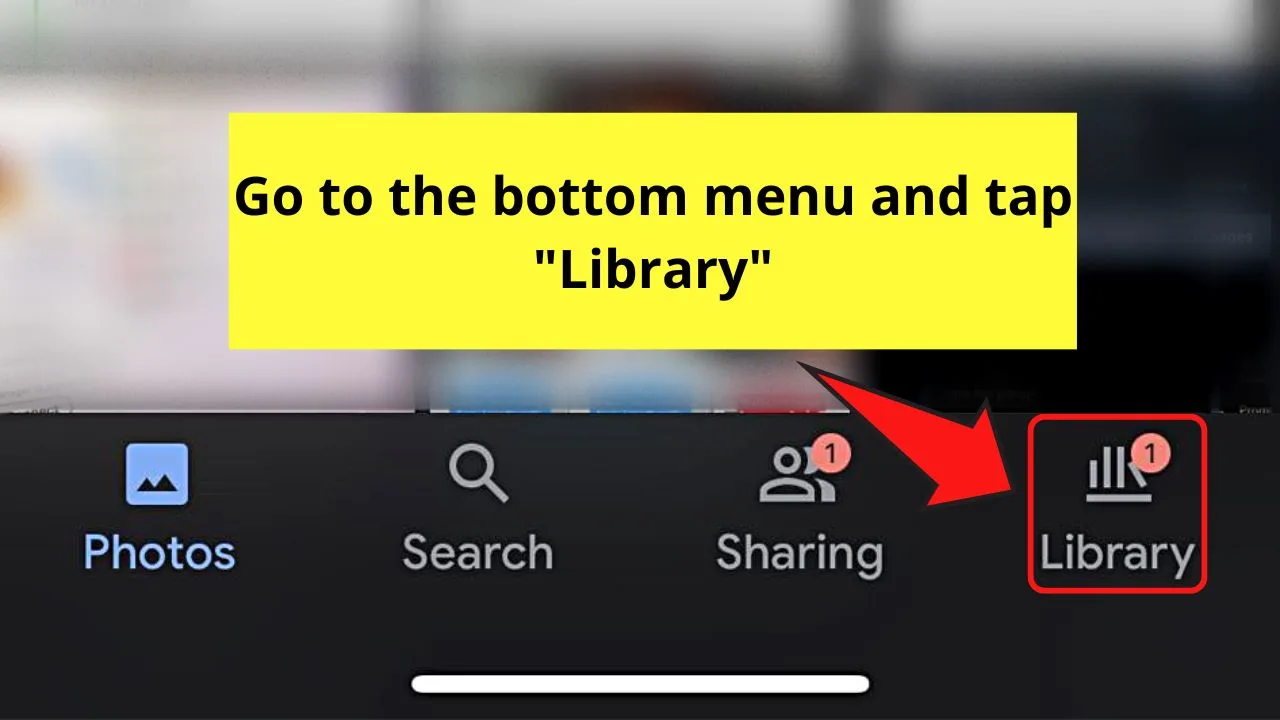
You’ll find this tab on the bottom menu of the Google Photos screen.
Step 2: Choose an album


You’ll find all the albums you have created in Google Photos under the “Albums” section.
Step 3: Long-press on an image


Like in the first method, you’ll see a blue checkmark icon appear on the upper left of the image thumbnail.
The corresponding taskbar also appears at the bottom part of the screen.
Step 4: Scroll down without lifting your finger off the screen
This move selects all the photos, marking them with the same blue checkmark icon on their upper left corners.
You’ll also see the number of photos selected on the screen’s top-left corner. Proceed with choosing the action you’ll apply by pressing the buttons on the taskbar.
Now that you know these 3 nifty methods of selecting all photos in Google Photos on your iPhone, you’ll be doing the feat in whichever style is easier for you.
Just make sure that you have updated the Google Photos app to avail of all the updated features on the app.
Also, if you should ever want to do the same (= select all photos in Google Photos) but from an Android device or a PC, we got you covered as well:
- How to select all photos in Google Photos from an Android Device
- How select all photos in Google Photos on an iPhone
Frequently Asked Questions about How to Select All Photos in Google Photos on iPhone
Does Google Photos have a “Select Multiple” button like in iPhone’s “Photos?”
Unlike iPhone’s “Photos,” Google Photos doesn’t have a “Select Multiple” or “Select All” button to choose all images at once. You can only select all photos on Google Photos by either choosing an image and scrolling down without lifting a finger from the screen or choosing a specific date or album.
How do you delete the photos you have selected on Google Photos iPhone?
After selecting the images you’ll delete on Google Photos, tap “Delete” on the taskbar that appears. “Delete” is found between “Add to” and “Back Up.”
Can I deselect images previously selected in Google Photos iPhone?
You can deselect photos you have previously chosen in Google Photos iPhone. Simply press that particular image again until the blue checkmark icon on the image’s upper left corner disappears.
How many photos can you select at once in Google Photos?
You can only download 500 images at the same time. If you select more than the limit, a “500 items is the most that can be downloaded at a time” notification then appears.


Hey guys! It’s me, Marcel, aka Maschi. On MaschiTuts, it’s all about tutorials! No matter the topic of the article, the goal always remains the same: Providing you guys with the most in-depth and helpful tutorials!

