If you’re a bit short of space on your PC due to the large number of photos saved on it, better get a plan in Google Photos. You only have to sync your computer media files with Google Photos to have a backup with little effort.
Technically, Google Photos sorts images and other media files by date. But if you have a huge photo collection you’d like to re-organize into albums, you’d have to learn how to select them all within the app.
But how? Is there a “Select All” button that will help you achieve this feat when accessing Google Photos on your PC?
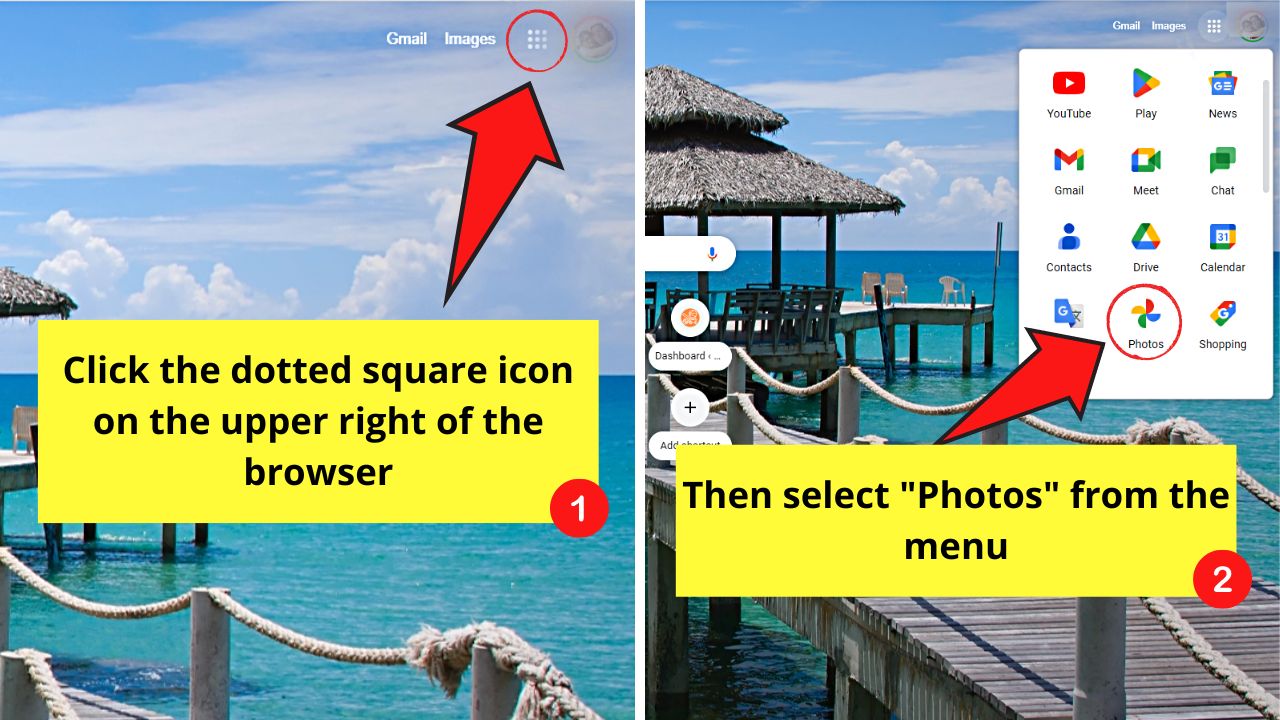
How to Select All Photos in Google Photos on PC
One way to select all photos in Google Photos on a PC is to click on an image’s white checkmark icon, press “Shift,” and scroll down to the last photo. You can also select a particular date to select all images under it or an album to scroll down and press the “Shift” key to do the same.
Granting that you have launched Google Photos on the web browser you’re using, let’s delve into the details of those methods.
Method 1: Pressing the “Shift” Key While Scrolling Down
Step 1: Select the tick icon on an image
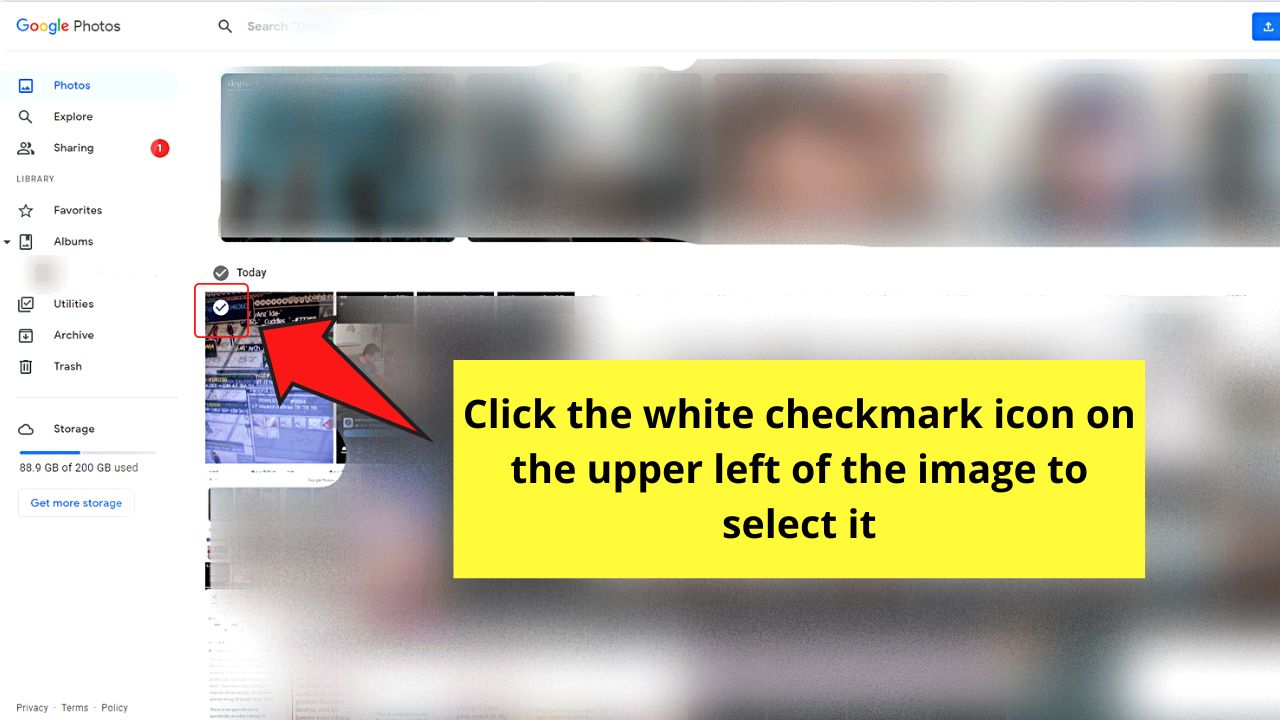
You’ll find this icon on the upper left of the image when you hover your cursor over it. Clicking on this button will turn the white tick icon from white to blue.
Step 2: Press “Shift” and select the last image

Simultaneously do this by clicking the last photo to select all the images. All the photos will then turn blue and have blue checkmark icons on their top-left corners.
You will also see the total number of images that you have selected on the upper left of the page.
Method 2: Choosing a Specific Date
Step 1: Scroll down and select a date
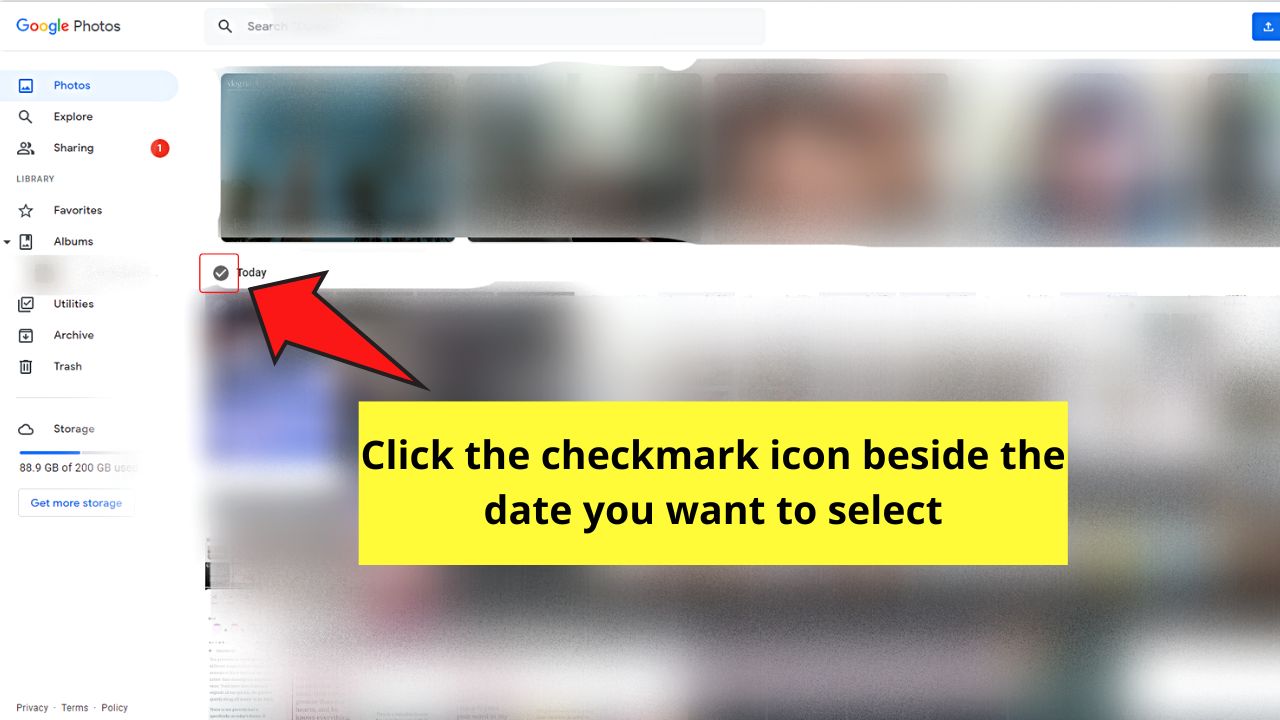
Once you find the date, hover your cursor to the left of that particular date to make a checkmark icon appear. Click that icon to select that date.
All the images under that date will then have blue tickmarks on their top-left corners. You’ll also see the total number of pictures that you have chosen in the upper left corner of the page.
Step 2: Select more dates that you want to choose
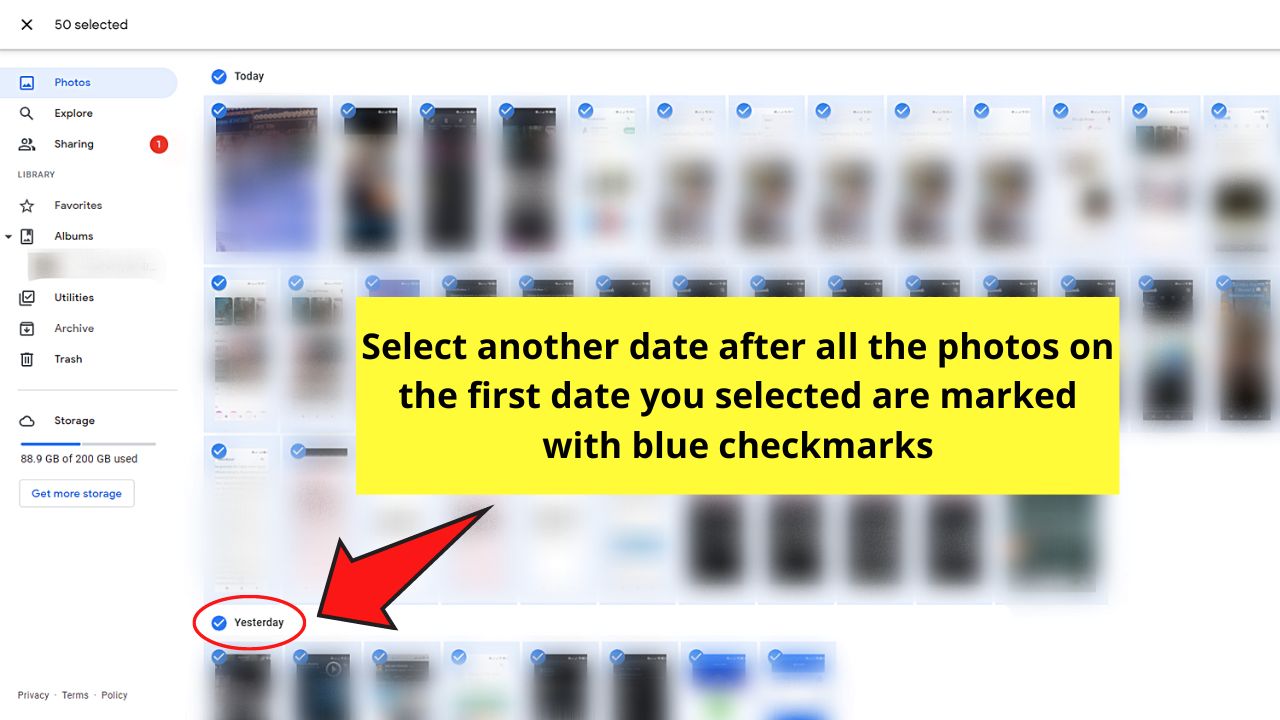
Simply hover your cursor to the left of that date again and click that checkmark icon to select all the images grouped under it.
After selecting all the photos, choose the functions you want to do with them on the toolbar. You’ll see this to the right of the number that shows how many images were selected.
Method 3: Selecting an Album
This method is another way of choosing grouped photos aside from the date technique.
Step 1: Click “Albums”
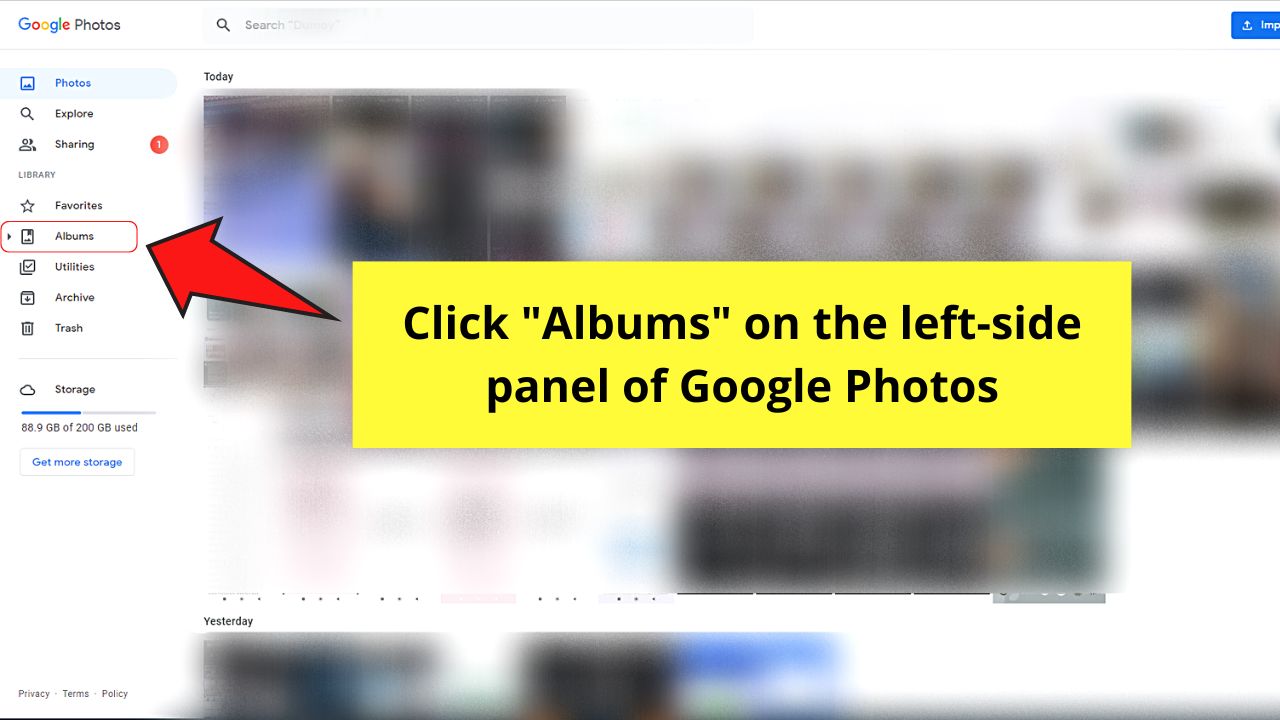
You’ll find this option on the left-side panel of the Google Photos page.
Step 2: Select the album you want to choose photos from
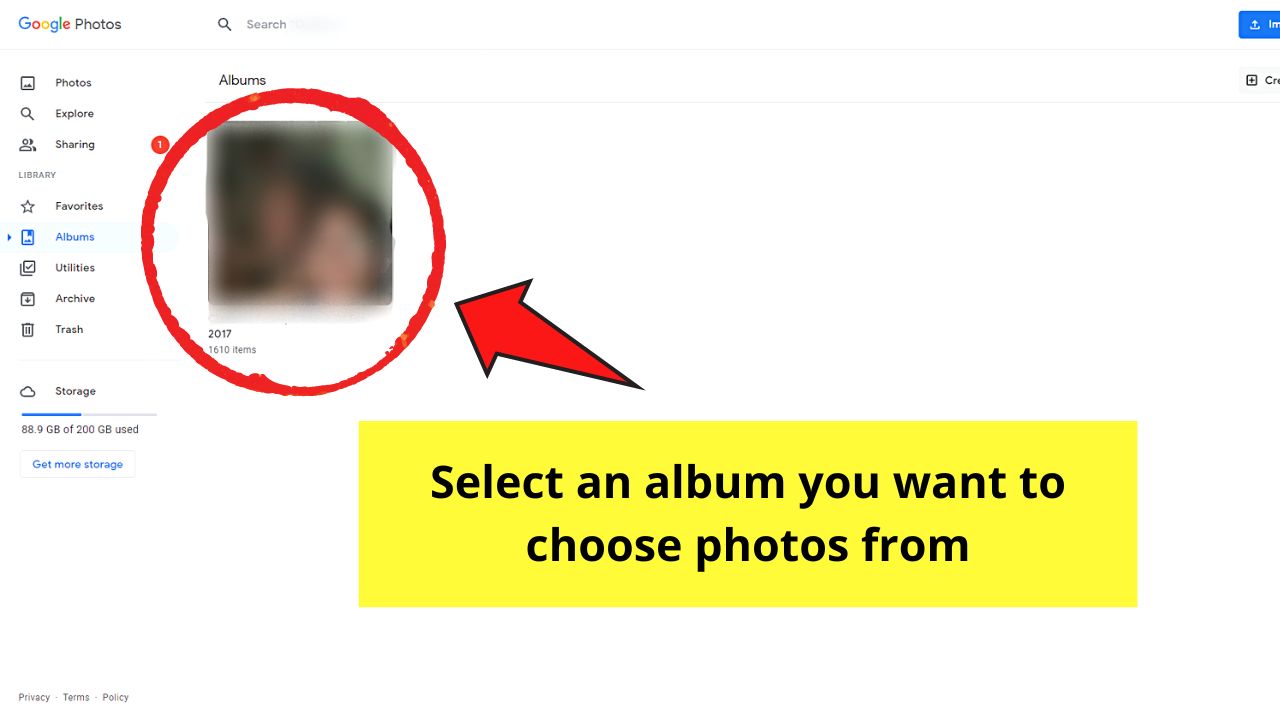
Just click on the album thumbnail that you want to open to see its contents.
Step 3: Choose an image
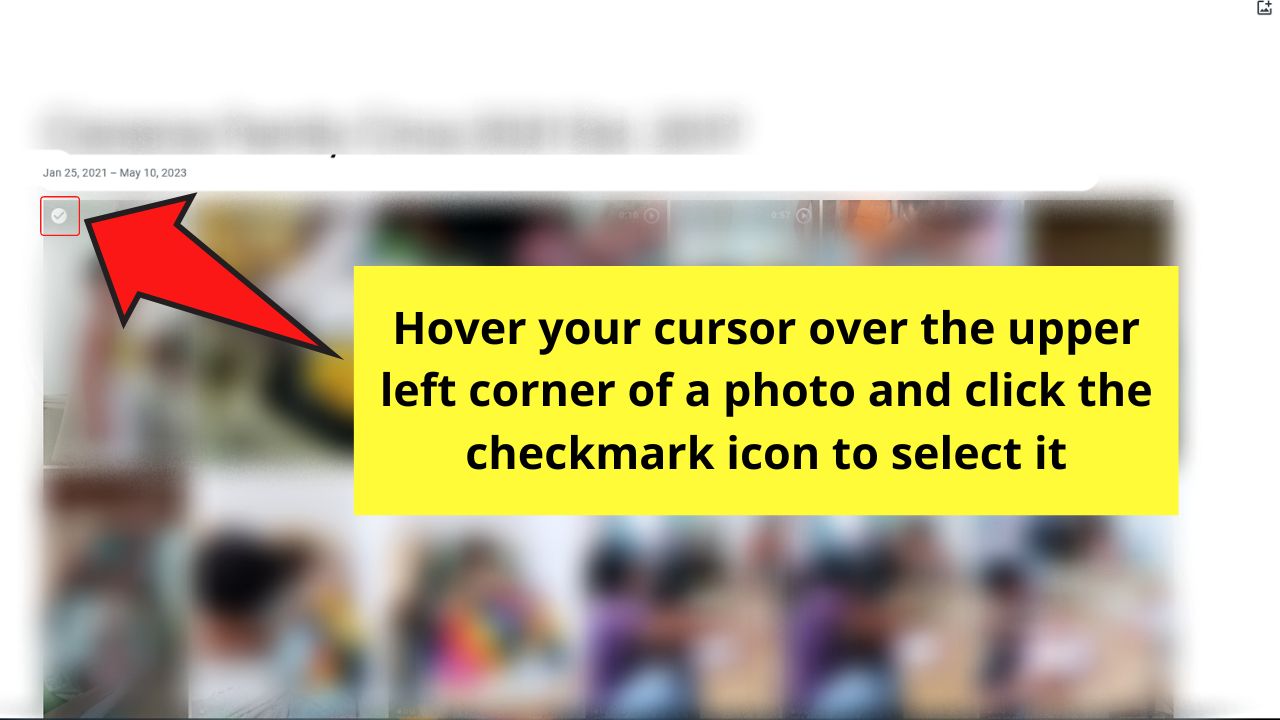
Hover your cursor on the upper left of the photo thumbnail until you see the white checkmark icon. Click it so it turns to blue, meaning that you have successfully selected that photo.
Step 4: Press “Shift” and scroll down
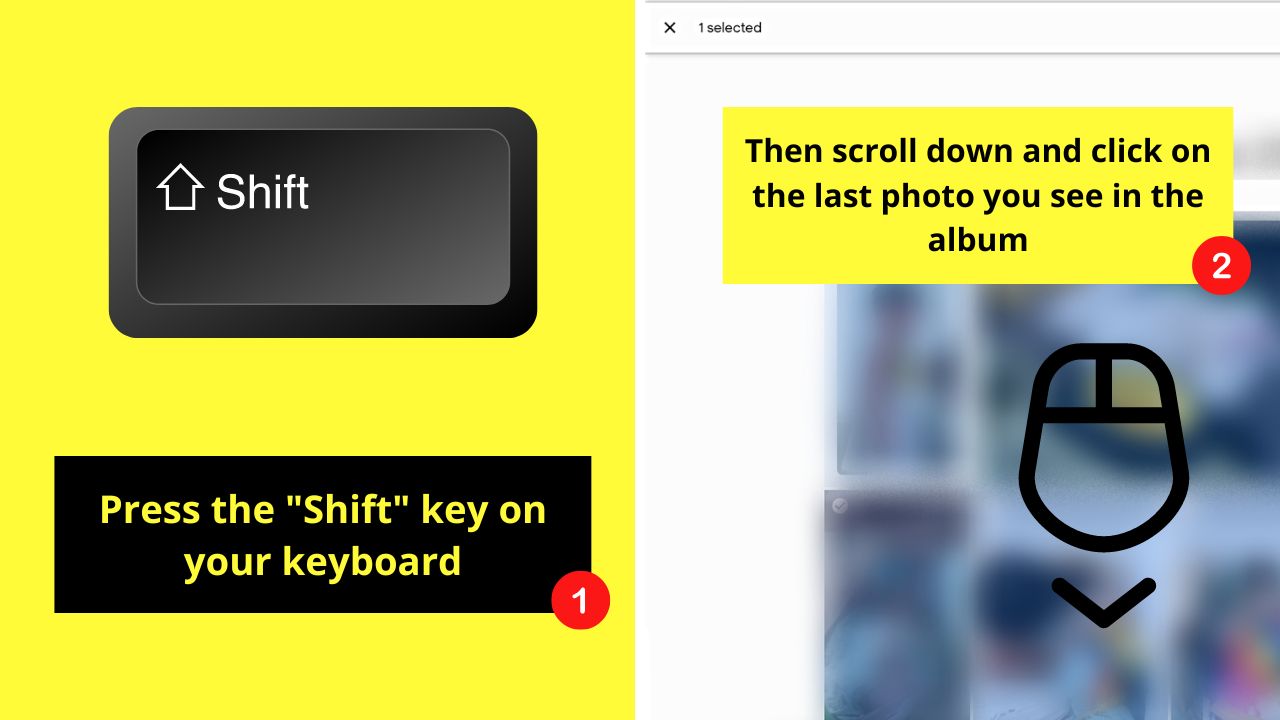
Like in the first method, simultaneously pressing the “Shift” key and scrolling down selects all the images on that window.
You can then see the number of images you chose on the upper left of the album page.
Then choose what you’d like to do with those pictures by clicking on the options on the toolbar together with the image count.
Deselecting All Photos in Google Photos on PC — Possible?
Selecting all photos in Google Photos on a PC is easy regardless of what method you opt to follow. But if you change your mind and you want to deselect some, or in this case, all images chosen earlier, it’s even easier.
Remember the image count that appears once you select all the photos in your Google Photos account? If you’re keen enough, you’ll also see the “X” icon beside it.
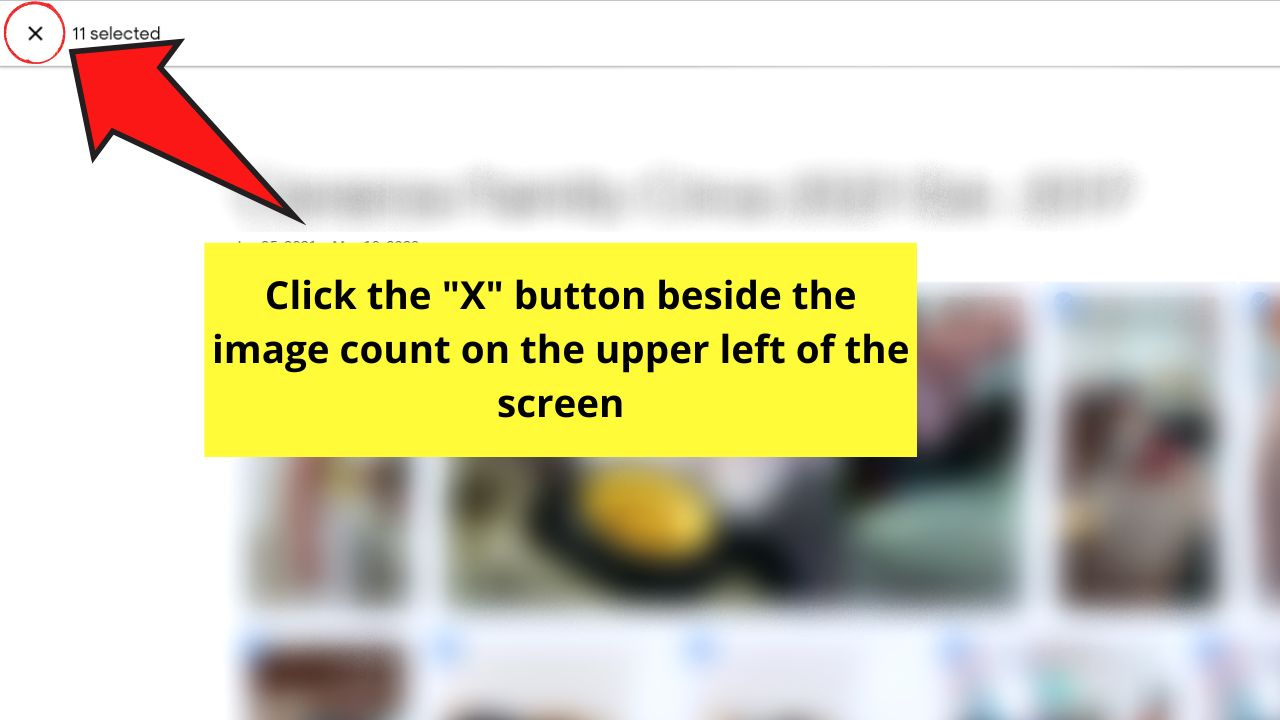
Clicking the said “X” icon deselects the images marked with a checkmark, reverting them to their original state.
Also, if you ever want to do the same from an Android mobile device, here’s how it is done:
Frequently Asked Questions about How to Select All Photos on PC
How do you save the images you selected on Google Photos to your PC?
Once you have selected all the photos you’ll save to your PC from Google Photos, go to the toolbar and select the vertical 3-dot icon. On the menu that appears, choose “Download” or “Download All” (if you see it. You can also press “Shift + D” for the same effect.
Can I manually deselect a photo after making a group image selection on Google Photos?
You can manually deselect images on Google Photos after making a group selection. Instead of clicking “X” on the toolbar, select the pictures you’ll remove. The blue checkmark icons on their upper upper-left disappear, and you’ll notice the image count go down on the toolbar.
Is there a limit to the number of photos that I can select when I want to download them from Google Photos?
Google Photos only allows 500 images to be downloaded at a time. But, you can increase this limit by adding photos to an album first. The 500-image limit will then increase to 20,000 at a time.