

Have you ever seen someone else’s design and wondered: ¿how on earth can I create something like that? Then, I must say this tutorial is for you.
The use of paths and anchor points is one of the core concepts that make Adobe Illustrator such a valuable software. B
elieve me when I tell you this: if you master these, altogether with other essential tools, you can build and draw pretty much whatever you want!
So, it is crucial to understand how anchor points operate in a path, and how you can edit them according to your preference.
Perfect your knowledge and you’ll be the admired designer this time.
But, wait! What is really an anchor point? An anchor point is a bending point used to change the shape or the direction of a line segment.
Whether you’re using the “Pencil”, the “Pen”, or the “Paintbrush” tool, anchor points will always provide you control over the path’s direction and curvature.
And because things never turn to be that simple around here, you also have to know there are two types of anchor points: “Corner Points” and “Smooth Points”.
Corner points can intersect straight lines, curved lines, or a combination of the two, but they must exist in order for the path to change direction.
Smooth points, on the other hand, are implemented so that a path remains as a single smooth line with no sudden changes in direction or curvature.
So, basically, in order to reshape or to edit a path, you must be able to locate and select the path’s anchor points, so that you can move them as you like.
To be able to see the anchor points, you can simply go to the “Direct Selection Tool” and click on the path you’re working at the time.
You can select them by just clicking on each one with the same tool. In addition, you can select multiple points by holding the “Shift” key.
Learning paths and anchor points will help you go further with your Illustrator projects. So, now that you´ve finally got the general concept of it all, let’s get to work!
How to Move Anchor Points in Illustrator
To move an anchor point, use the “Direct Selection Tool”. To begin, click on the anchor point you wish to move; then, drag it to a new spot with your mouse, pad, or “Arrow Keys.” You can select two or multiple points and add extra ones to the selection by pressing the “Shift” key.
How to Move Anchor Points in Illustrator: Step-by-step Tutorial
But, before you learn to walk, you´ve got to learn to crawl. So, let’s talk a little bit more about what a path is.
A path is any line you draw in Illustrator with either the “Pen” tool, the “Pencil” tool or another drawing feature. Along the path, Illustrator embeds different anchor points by default.


So, when you click on a path, these anchor points show up. You can use these to re-shape or to manipulate the line into a different direction or curve, and add new ones on the same path in case you need them.
A path can be open or closed. An open path has open-ended endpoints, such as a line; a closed path has connected endpoints, such as a circle.
You must learn how to select anchor points and get the way to manipulate them however you like. To move anchor points in Illustrator, check out these steps!
Step 1:
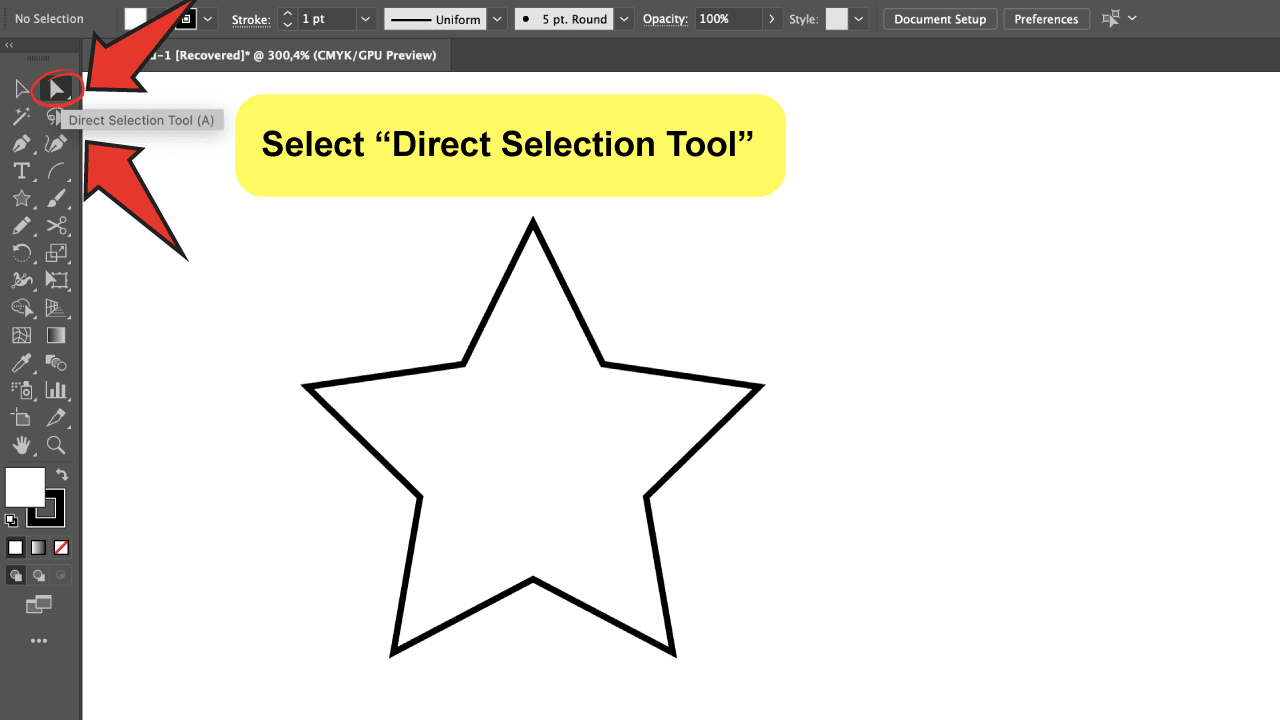
Pick the “Direct Selection Tool”
You can select this tool by navigating the left menu bar. It´s usually next to the “Selection Tool”, and it looks like a white arrow.

Step 2:
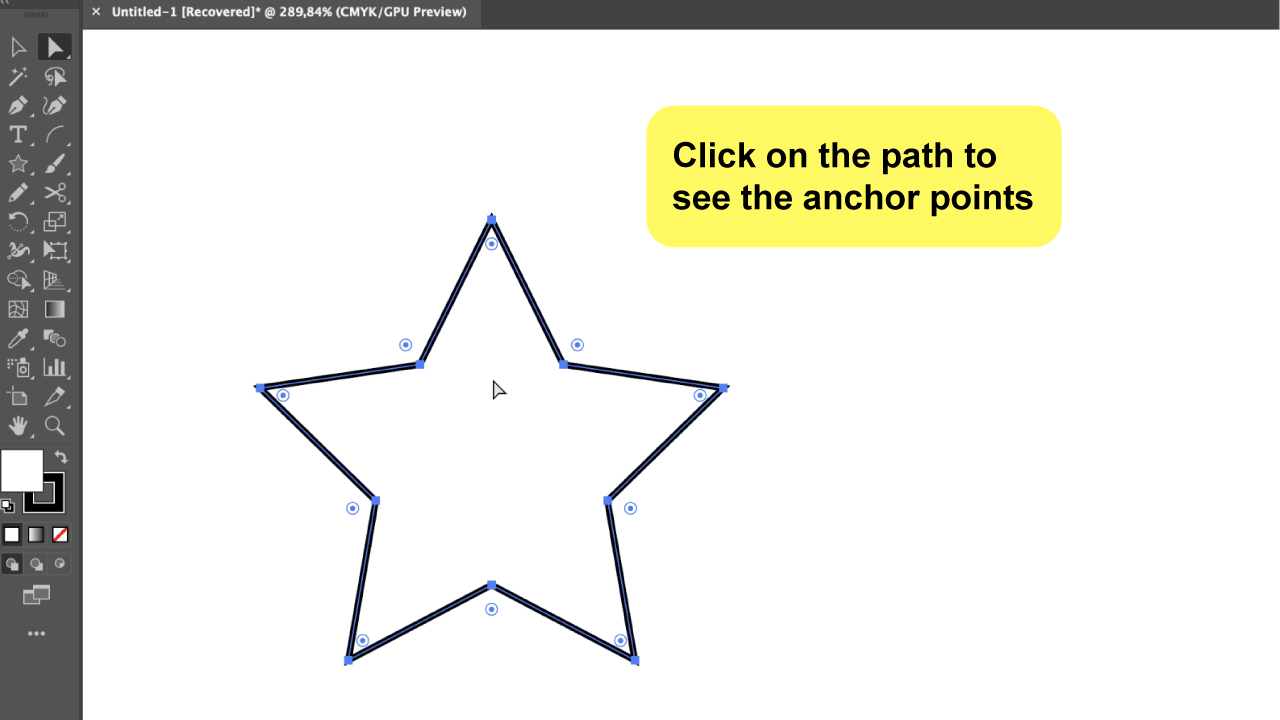
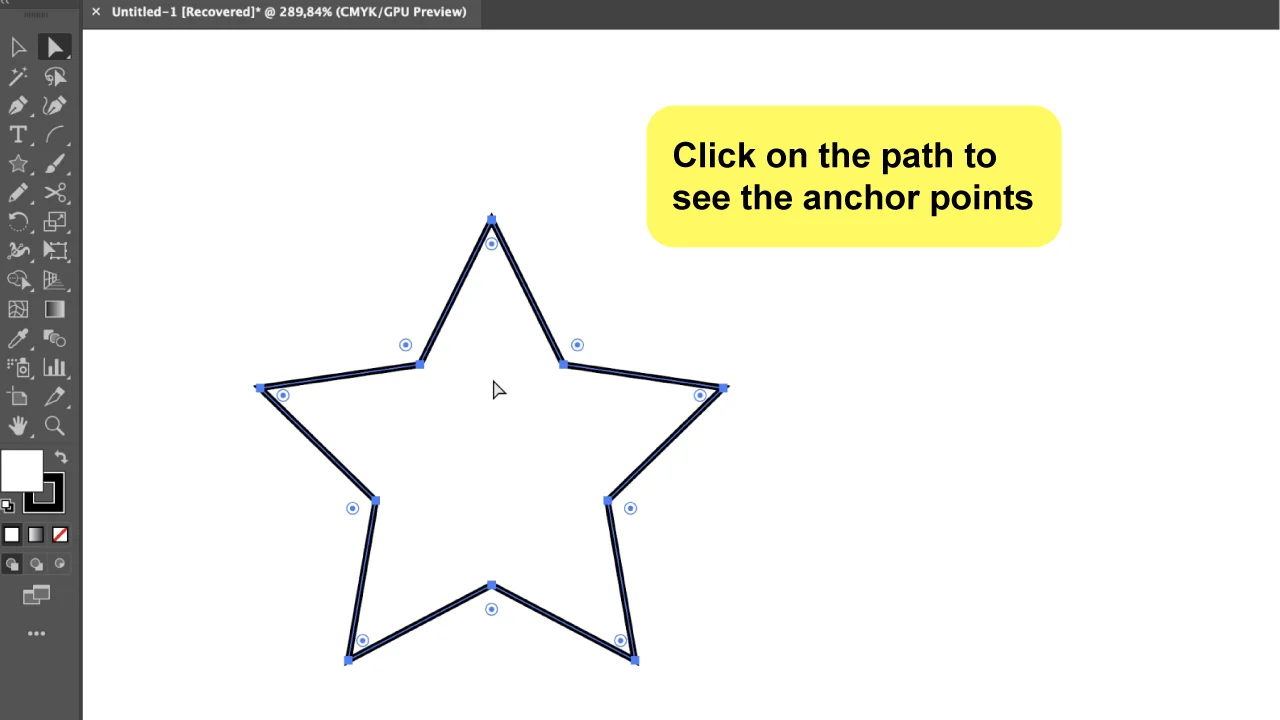
Find the anchor points on your path.
With the “Direct Selection Tool”, click on the shape you are working on. You will see how all the anchor points appear as soon as you click on the path.
By doing that, all the anchor points on the shape will be selected; but, if you step in only one point or in multiple of them, the remaining ones will show a little white square: that means they are not selected.
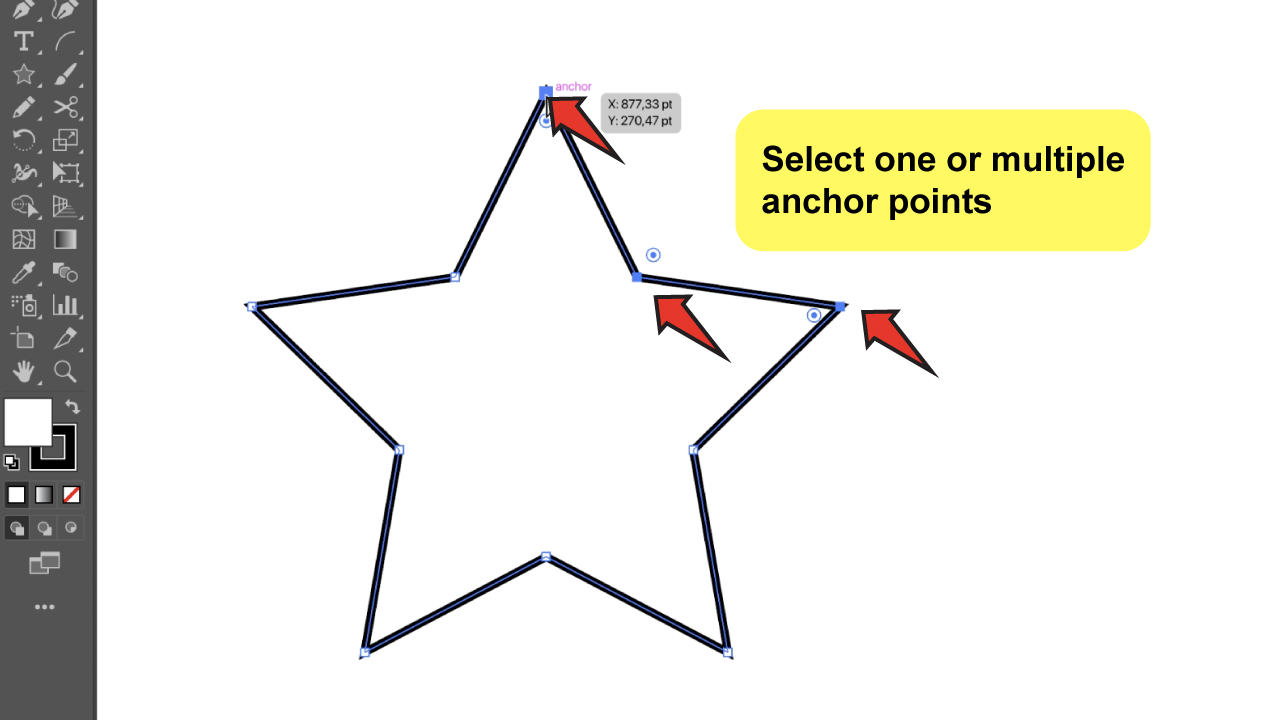
If you happen to be working with “Smart Guides”, you will also notice that, as soon as you step on any of the points, the coordinates will be displayed.
Step 3:
Select one or multiple anchor points to move.
Click or drag a boundary around a single or many anchor points.
Press the “Shift” key if you want to add more anchor points to the selection.

Step 4:
Move the anchor points.
You can just drag the previously selected anchor points for a more “free-hand” adjustment. But, in case you feel like getting more precise, you can use the “Arrow Keys” on your computer’s keyboard: with this option, the movement will be softer and you will have more control on it.


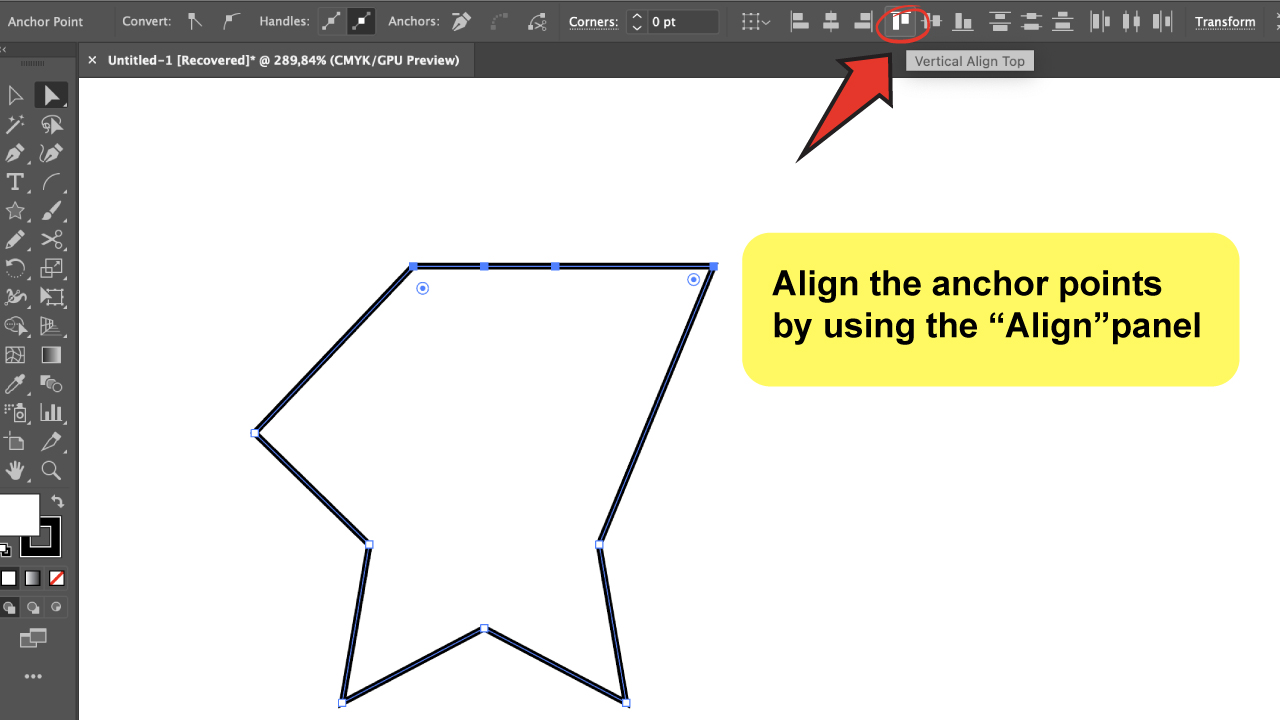
Now, there’s also another way to be precise, by aligning the anchor point you selected with another existent one on the same path. To do this, you can use the “Align” panel: you will have to select two or more anchor points and then choose the alignment you want from the panel.

Frequently Asked Questions About How to Move Anchor Points in Illustrator
How do I add new anchor points?
If you select the “Pen Tool” and just step on top of the path you are working on, you will see a “+” sign. You win! That means you can click and add a new anchor point.
How many anchor points do I need to create a path in Illustrator?
Anchor points are all the points that build a path. So, as in a geometry lesson, any path should be composed by a minimum of 2 anchor points.
How can I make the anchor point handles a little bigger?
To enlarge them you can go to “Illustrator” > “Preferences” > “Selection & Anchor Display” on the top menu bar. There is an adjustable slider right there.


Hey guys! It’s me, Marcel, aka Maschi. On MaschiTuts, it’s all about tutorials! No matter the topic of the article, the goal always remains the same: Providing you guys with the most in-depth and helpful tutorials!

