

Knowing how to quickly arrange artboards in Illustrator may be quite handy if you’re working on a project with a lot of separate artboards.
You could want to reorganize artboards in Adobe Illustrator for a bunch of reasons, including:
You may be working on a huge project and suddenly discover you have an infinite number of layers to deal with, and you just don’t have the time!
Or perhaps, like every other designer, you are incredibly organized and can’t stand looking at your file and seeing all that mess!
There is an incredibly simple way to rearrange all the artboards in your file, and you can do it by using the “Artboards” panel’s amazing feature called “Rearrange All Artboards.”
Believe me when I say that this will do it automatically for you in a matter of seconds!
Now, if you’re used to doing things the old-fashioned way, this might not be the solution for you. But don’t worry! because you can still do things manually if that’s what you want!
Simply choose the “Artboard” tool from the left menu bar, or use the “Shift+O” keyboard shortcut to tap on any artboard and drag it around your canvas.
If you want to be more precise, you can also use the “Align” panel to align them like any other object.
To rearrange artboards in Adobe Illustrator, open the “Artboard” panel, which is available under the “Window” option in the top menu bar, and then click on the “Rearrange All Artboards” button in the lower-left corner of the panel. Configure all of the options to your liking, and then click “Ok.”
How to Rearrange Artboards in Adobe Illustrator: Step-by-step Guide
Before you begin, here’s a quick tip that could come in handy if you’re in a hurry: You may make all of the artboards fit on the canvas by selecting “Fit All in Window” from the “View” button on the top main menu.
Follow the next steps and you’ll have it figured out in seconds!
Step 1:
Select the “Artboard Tool”
You can activate it by selecting it from the left menu bar on the left or by pressing “Shift+O.”
By activating the “Artboard Tool” you will be able to see all the artboards highlighted on your canvas, and it will also display the name of each artboard in the upper left corner.


Step 2:
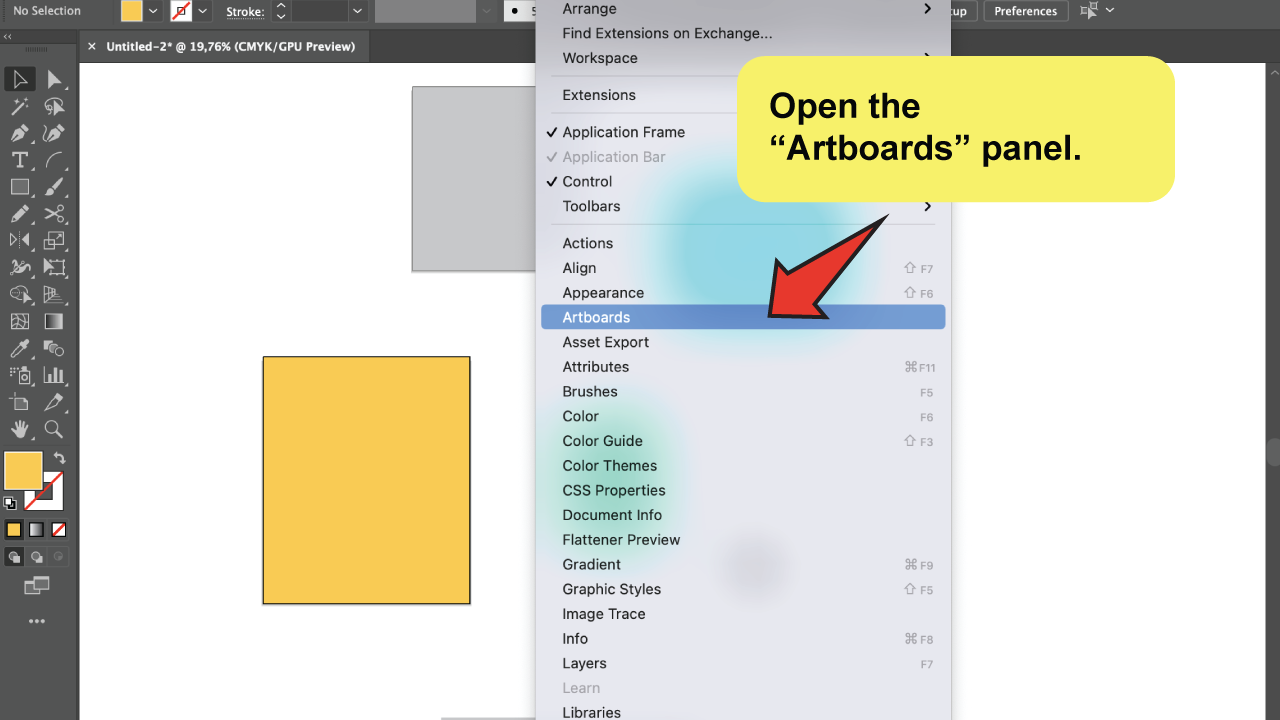
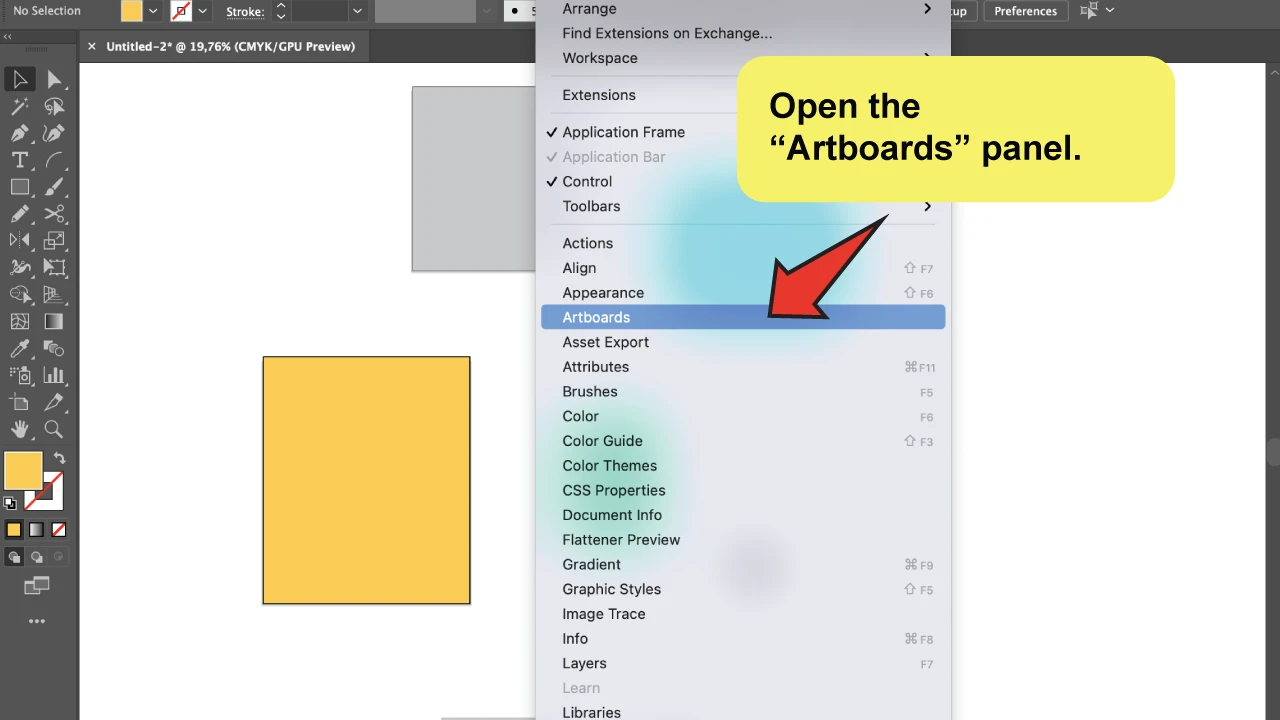
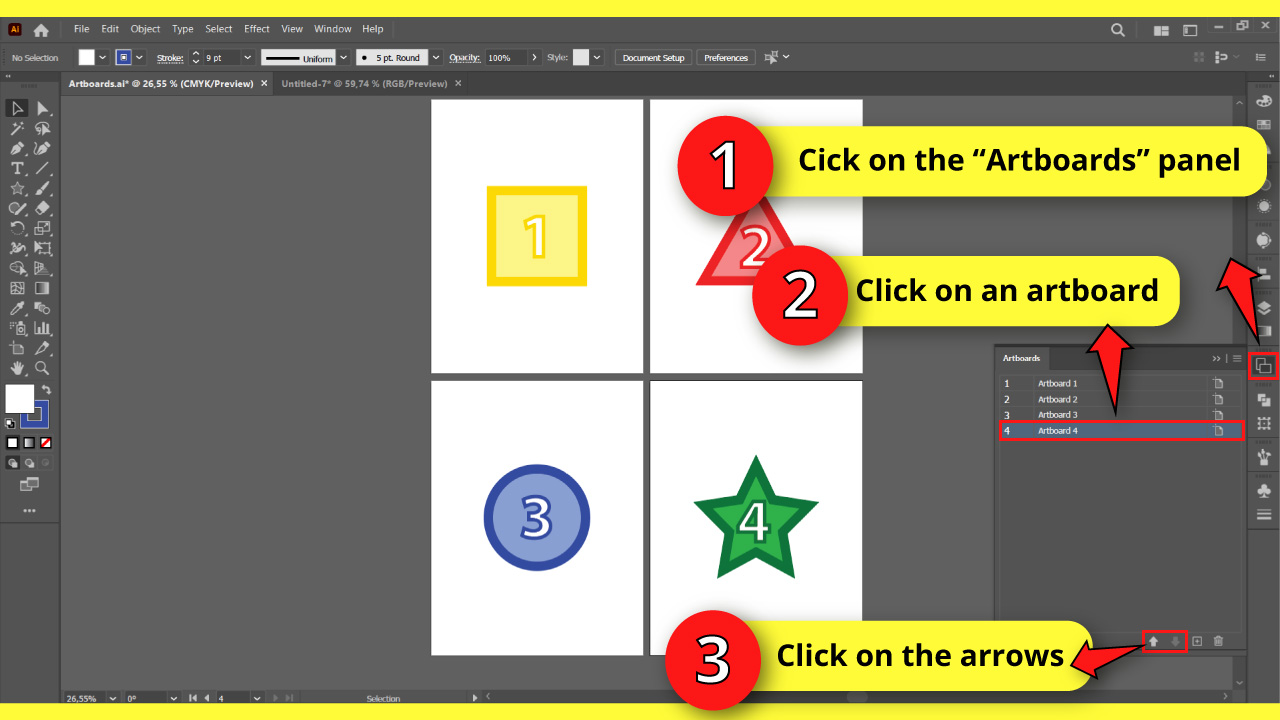
Open the “Artboards” panel.
Go to “Window” on the top menu bar, and click on “Artboards”.
Any artboard you pick on your file will be highlighted immediately on the “Artboards” panel, indicating which artboard you are now standing on.
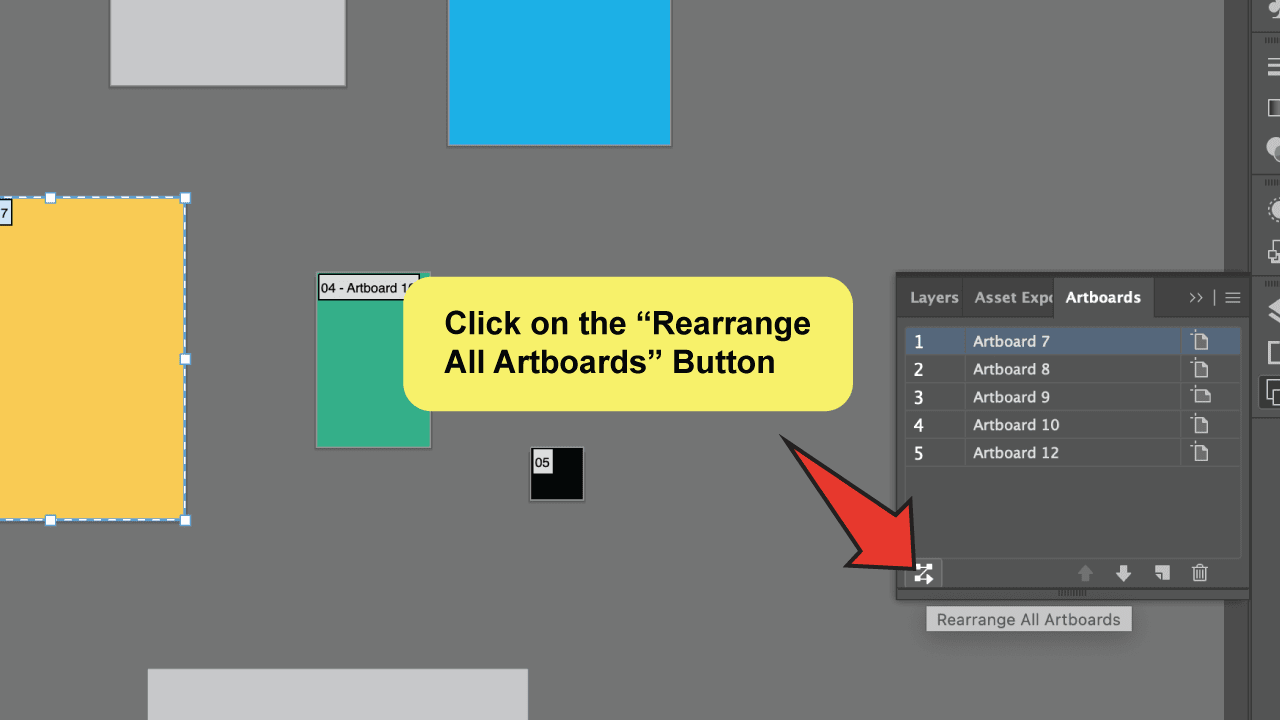
Step 3:
Click on the “Rearrange All Artboards” Button
You can easily find this button right on the lower-left corner of the panel.
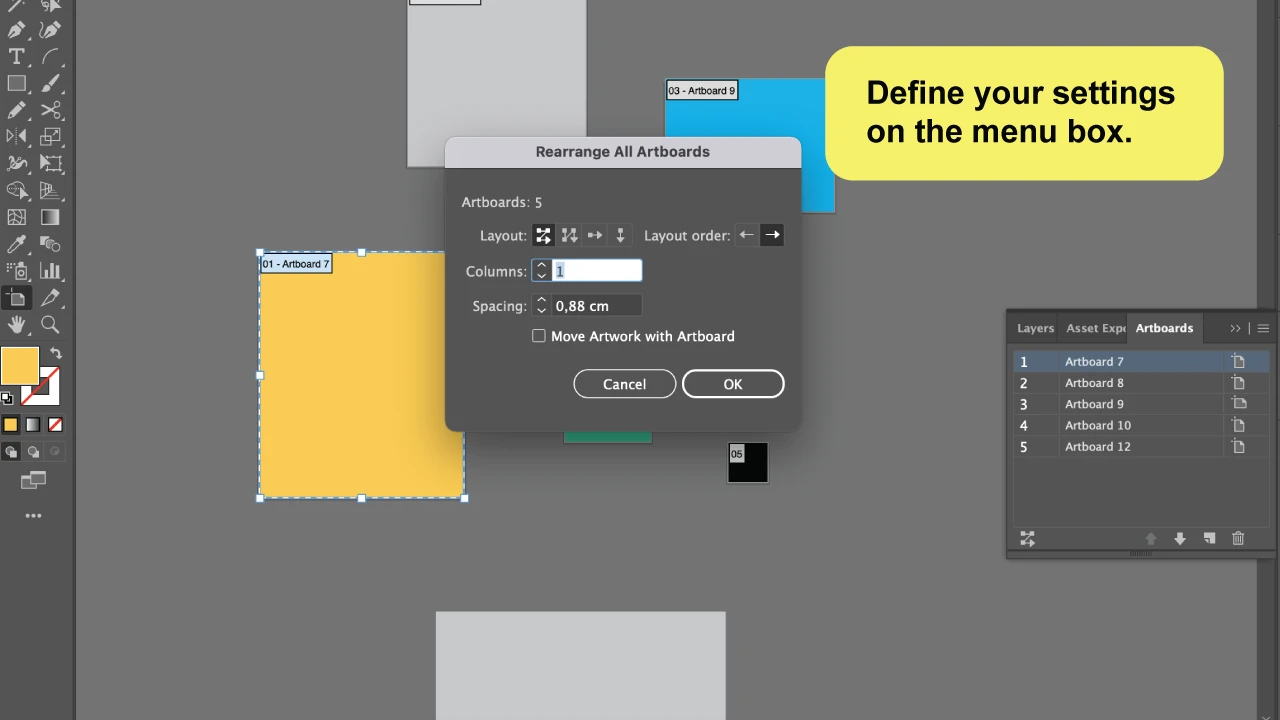
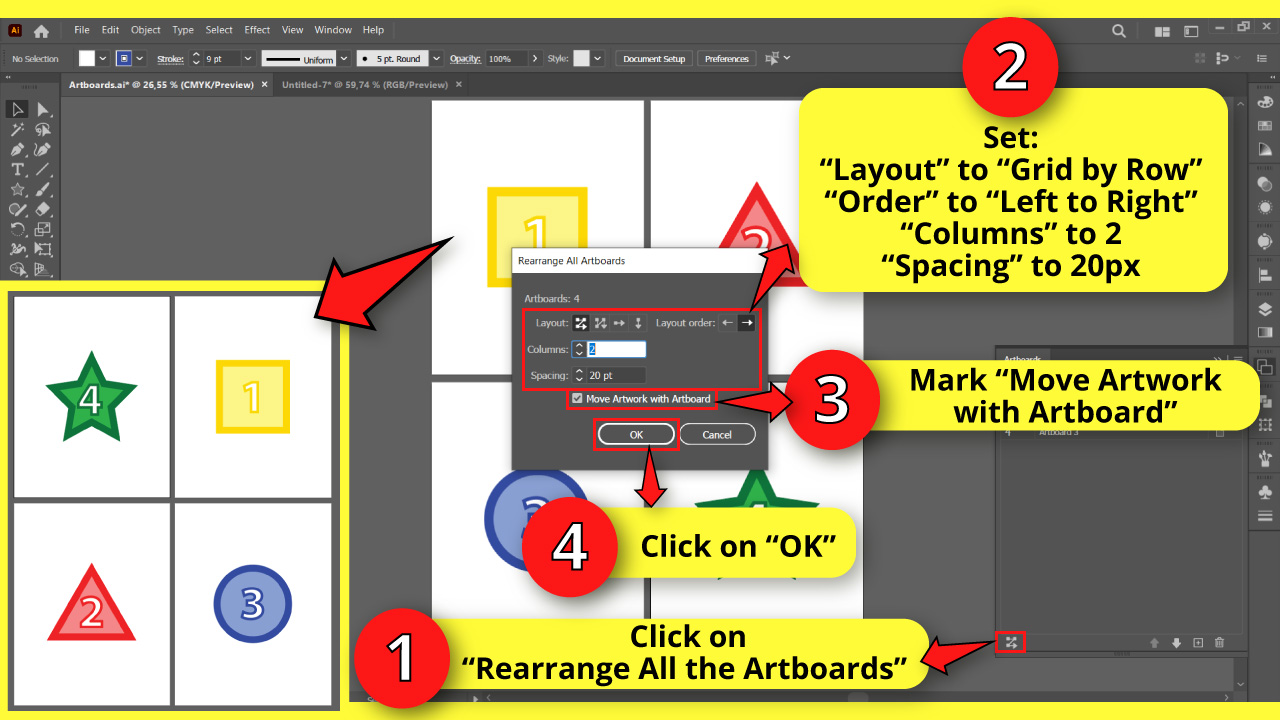
You will notice a menu box shows up with a few options that you must set as your preference.
Please proceed with the next steps to better comprehend them.

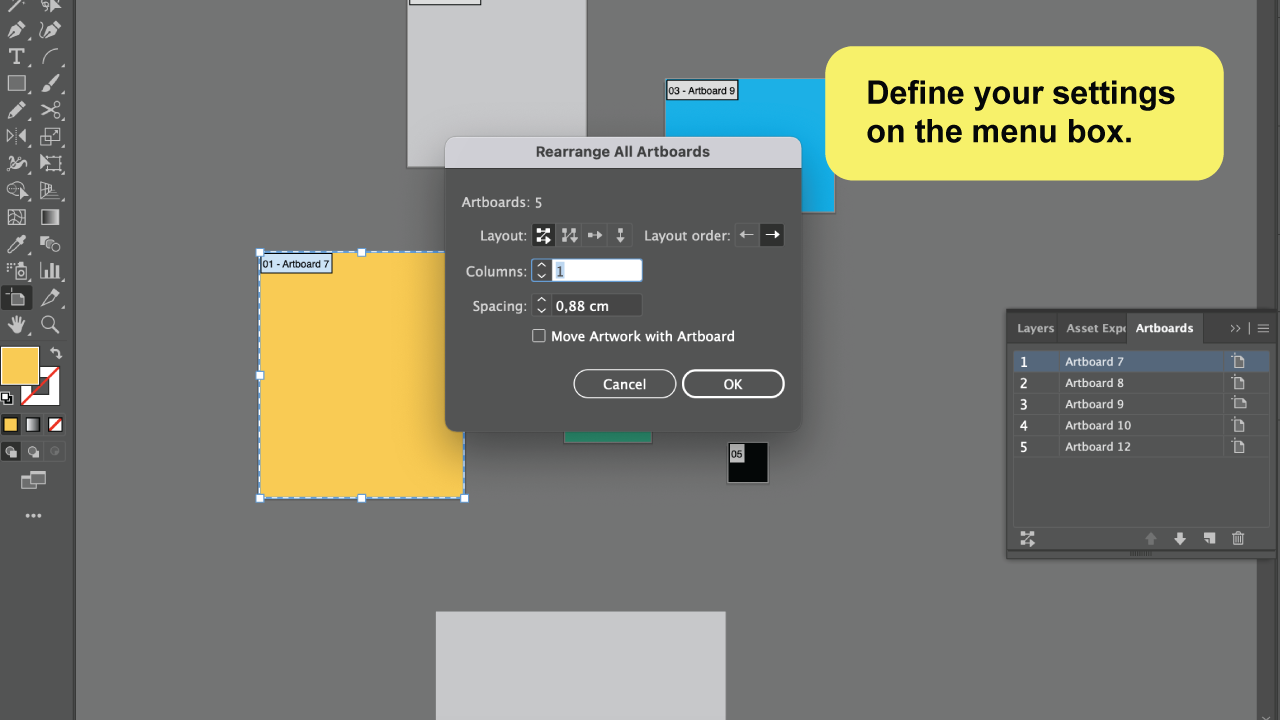
Step 4:
Define your arrangement settings on the menu box.
You can configure the settings however you want. There is no right or wrong answer here; feel free to customize it to your liking.
Here’s a quick summary of each of the available settings:
Layout: In essence, you have four options: “Grid by Row,” “Grid by Column,” “Arrange by Row,” and “Arrange by Column.”
Layout Order: Select whether you want the layout to be “Right-to-Left” or “Left-to-Right.”
Columns/Rows: To enter the number of columns or rows that you want.
Spacing: To determine the overall spacing between artboards.
Finally, don’t forget to select the “Move Artwork With Artboard” option, or the artboard will move independently of what’s inside it.
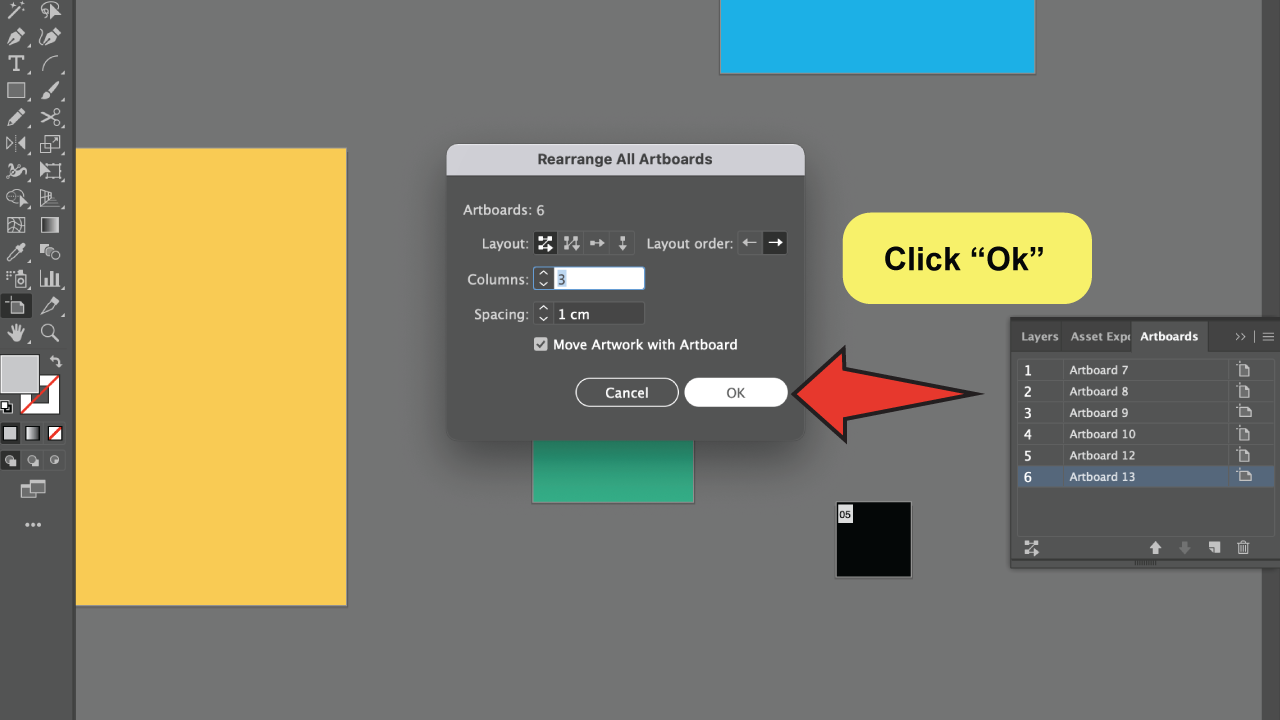
Step 5:
Click “Ok”
You should be finished by now, so click the “Ok” button and enjoy a properly organized file!
Remember that you can always undo and restart if you are unhappy with the result.


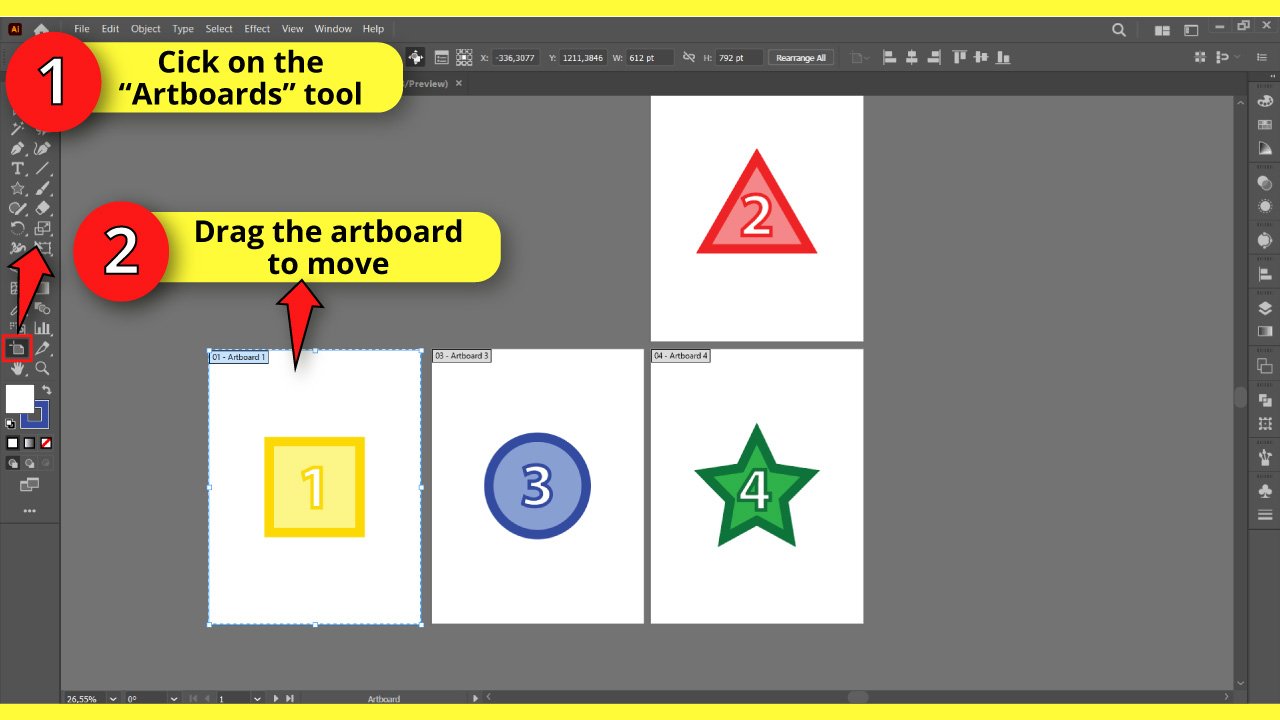
How to Move Artboards in Illustrator
Click on the “Artboard” (Shift + O) tool located on the left-side toolbar. Then, left-click, hold, and drag the artboard to the desired spot in the workspace.

In this section, we will cover how to move artboards all over the Illustrator workspace.
Keep in mind that the changes will only apply to the appearance of the Illustrator workspace, but the position of the artboards will remain unchanged.
That means if you are going to export the artboards in PDF, for example, the arrangement of the artboards will remain as set by default.
If you want to change the arrangement of the artboards so that the changes will also apply when you are exporting, go straight to “How to Renumber Artboards in Illustrator.”
With that cleared up, let’s jump into it.
Before moving artboards, you need to have multiple artboards in Illustrator.
Alternatively, instead of creating brand new artboards, you can duplicate artboards in Illustrator if you have already designed a layout that you want to replicate across multiple artboards.
Once you have multiple artboards, select the “Artboard” (Shift + O) tool located on the left-side toolbar, or press the “Shift + O” command to shortcut it.
After selecting the “Artboard” (Shift + O) tool, you can drag and place the artboards in another spot on the workspace.
How to Renumber Artboards in Illustrator
Go to “Window,” followed by “Artboards.” Click on an artboard and use the “Up” and “Down” arrows to move it through the list and renumber it. Next, click on the “Rearrange All the Artboards” button. After adjusting the settings, click on “OK.
Step 1: Renumber the Artboards
Using this method, you can move, renumber, and change the position of the artboards.
The changes will not only apply to the appearance of the workspace but also to the position of the artboards when exporting them to PDF or other files.
To renumber artboards, click on the “Artboards” panel, usually located on the right-side toolbar.
If you can’t find it, you may have to enable it first by going to “Window > Artboards” in the menu at the top of the screen.
Once you are on the “Artboards” panel, click on the artboard you want to renumber. Next, click on the “Up” and “Down” arrows at the bottom of the panel to change its position.
You can also change the position by clicking, holding, and dragging the artboard to another spot on the list.
The changes will not be visible until you rearrange the artboards.
Step 2: Rearrange the Artboards
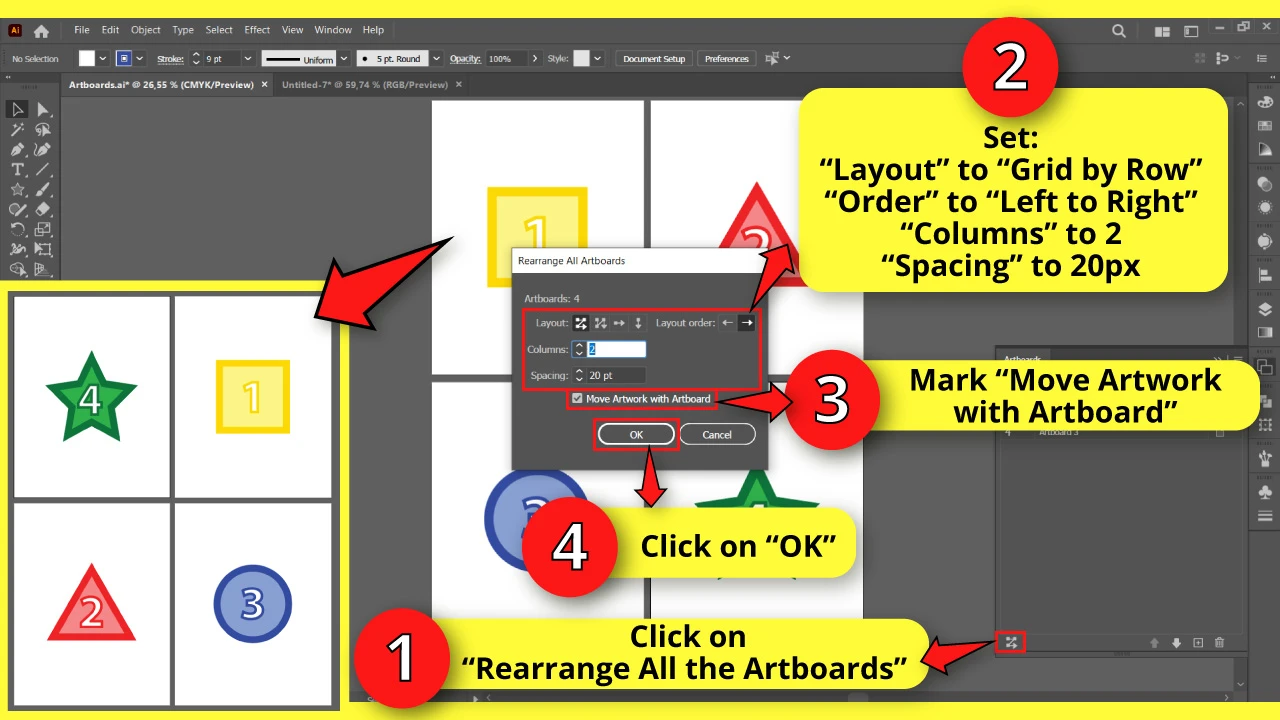
To rearrange the artboards, click on the “Rearrange All the Artboards” button at the bottom-right corner of the panel.
On the “Rearrange All the Artboards” pop-up window, you can adjust its settings. I’ll set them to the default:
“Layout” to “Grid by Row”
“Order” to “Left to Right”
“Columns” to 2
“Spacing” to 20px
Make sure to mark the “Move the Artwork with Artboard” checkbox.
Finally, click on “OK”.
Frequently Asked Questions About How To Rearrange Artboards in Adobe Illustrator
Can I align artboards manually in Illustrator?
An interesting fact is that artboards behave like other objects as well, so you can use the “Align” panel to organize them. You can even overlap them as well.
How can I select an artboard in Illustrator?
You can select the artboard you want by just clicking on it, and you can add more of them to your selection by just pressing the “Shift” key while doing this.
Is it possible to move the artboards without using the “Artboards” panel in Illustrator?
This can be done by using the “Artboard Tool,”; simply tap on any artboard and drag once you’ve selected the tool.


Hey guys! It’s me, Marcel, aka Maschi. On MaschiTuts, it’s all about tutorials! No matter the topic of the article, the goal always remains the same: Providing you guys with the most in-depth and helpful tutorials!

