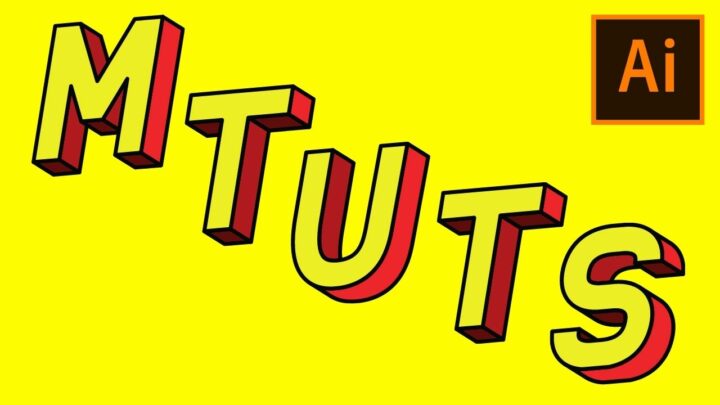

In this article, I am going to show you an easy way to make 3D letters in Illustrator.
Now, without further ado, let’s dive right in.
How to make 3D letters in Illustrator
To make 3D letters in Illustrator, use the “Type Tool,” add a letter, and remove its fill. Open the “Appearance” window, add a “New Fill,” and choose the color. Select the fill, click on “Add New Effect” > “3D,” select “Extrude & Bevel,” and adjust the effect.
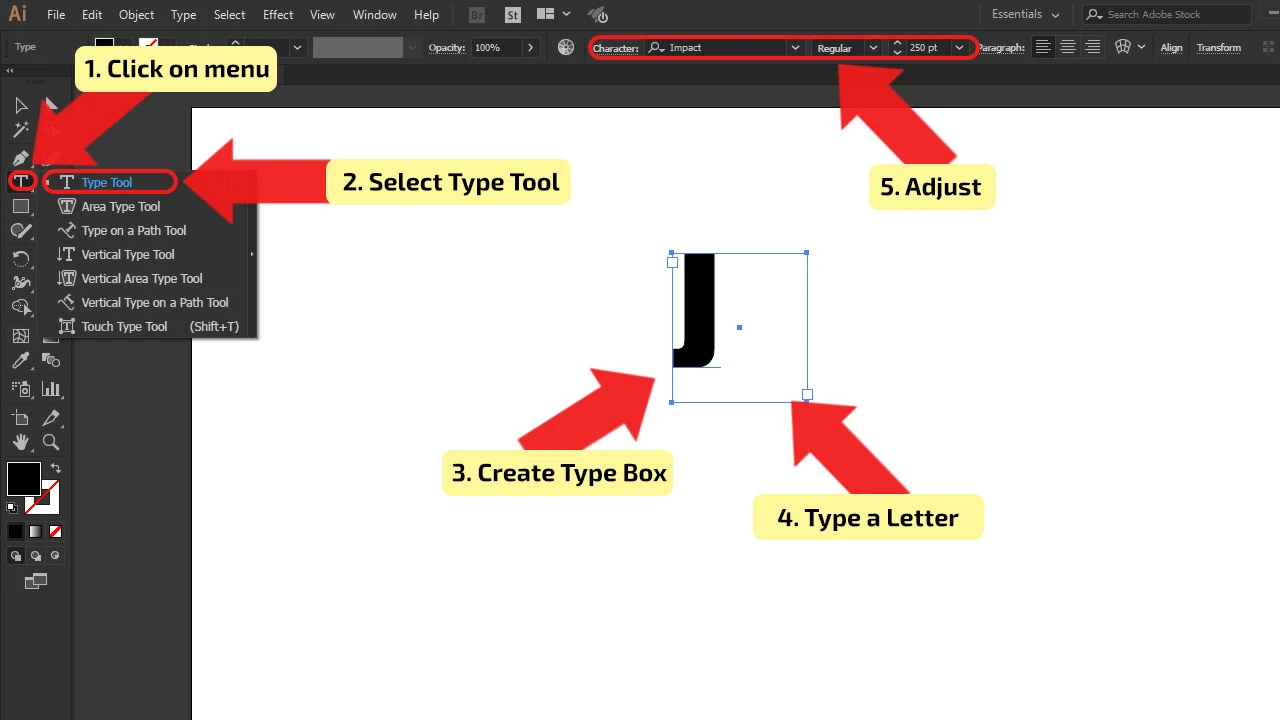
Step 1: Add the Letter
In the “Tool menu,” find “Type Tool” and select it, or use the shortcut by pressing the letter “T” on your keyboard. Draw the typing box and type the letter on which you will add a 3D effect. The font’s size, type, and style need to be adjusted. In the tutorial the letter J, and the size is set up to 250px, the chosen font type is “Impact,” and it is set up to “Regular” style. If you don’t have this Font type installed, feel free to use another font, size, and style.

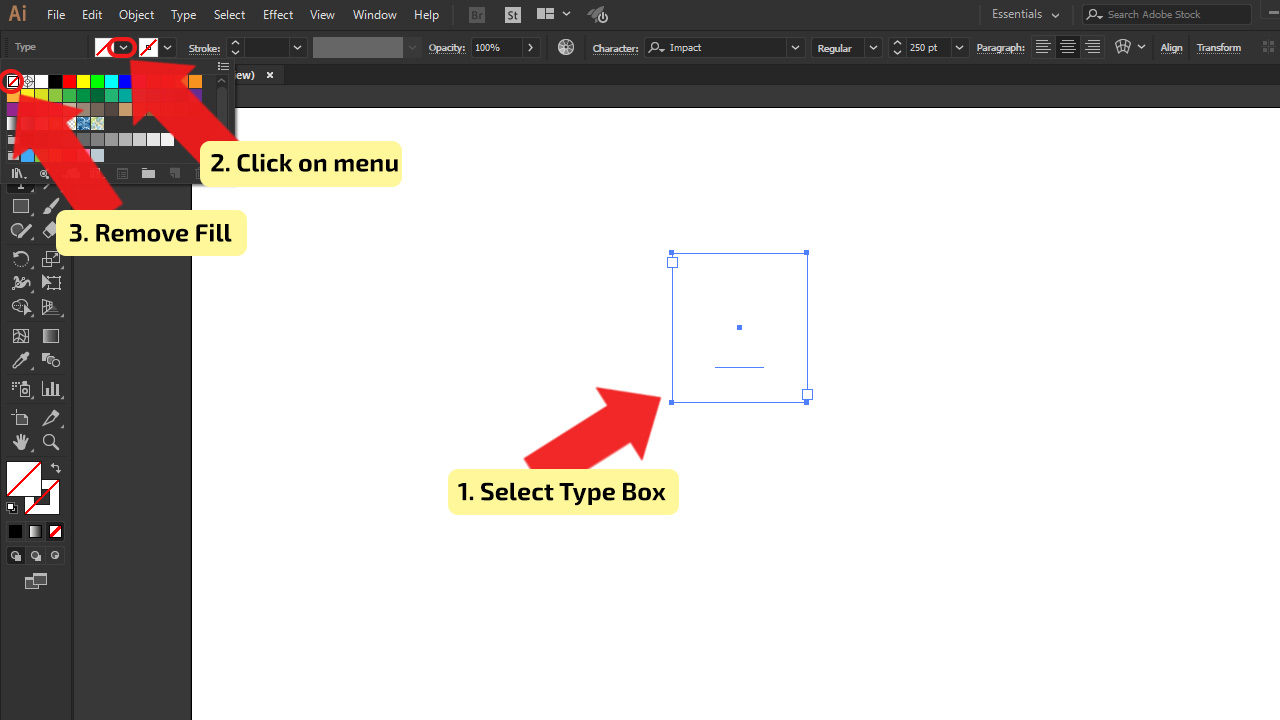
Step 2: Remove the Fill
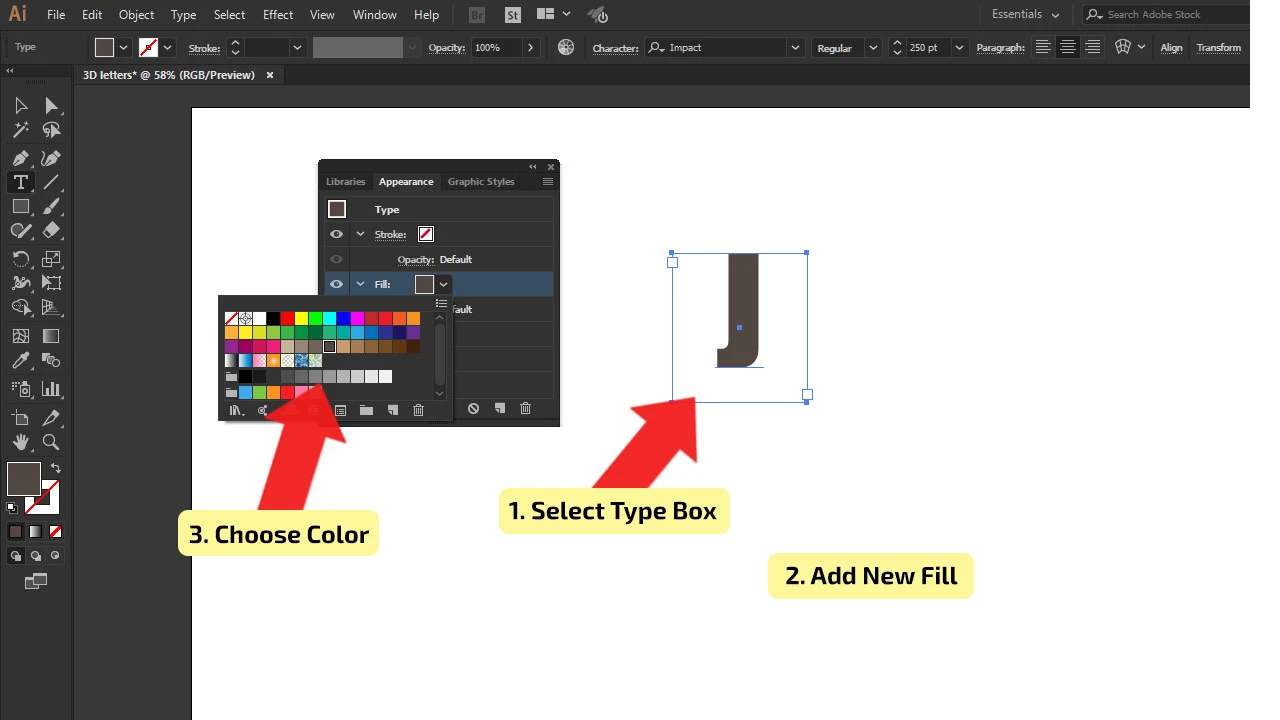
Before you continue, remove the text’s fill. Select the letter with “Selection Tool,” find it in the “Tool Menu,” or use the shortcut by pressing the letter “V” on your keyboard. After selecting, in the “Top Tool Menu,” find the “Fill” icon, click on the drop-down menu, and remove the color by choosing the [None] box. In this way, you will easily add a needed fill for adjusting the effects.

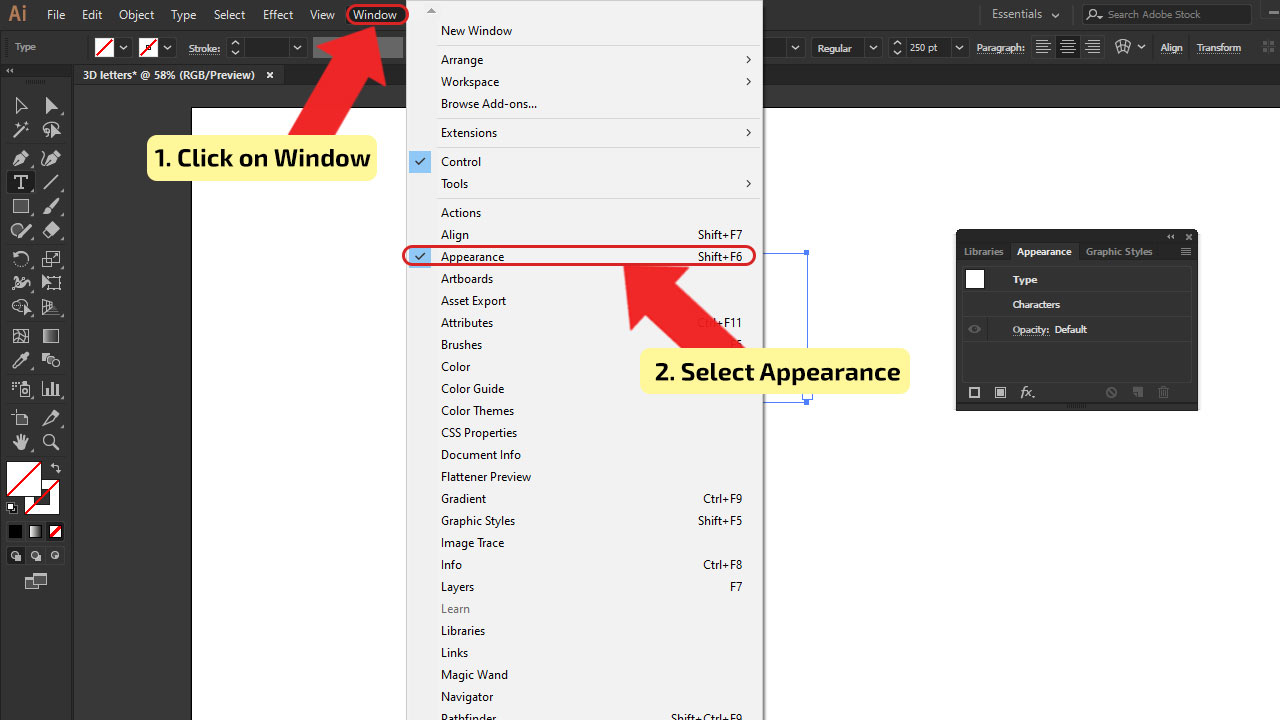
Step 3: Open the Appearance Window
You will need to use the “Appearance” window to continue creating a 3D letter. Open this window with settings by clicking on “Window” in the main menu. Select “Appearance” in the drop-down menu, and a window will appear. These settings options you will use to add effects to your letter.
The shortcut to open the “Appearance” window: Shift + F6 (Windows/MAC).

Step 4: Adjust the letter
Select the letter with “Selection Tool” before you start adjusting. At the bottom of the “Appearance” window, click on the “Add New Fill” button. Set the wanted color for the letter by clicking on “Fill Color Thumbnail.” In this tutorial, the color of the letter J is set to dark gray. If you are not satisfied with the chosen color after it’s applied to the letter, you can change it in the same way.
The shortcut for the “Selection Tool” is the letter “V” (Windows/MAC).

Step 5: Add effects to the letter
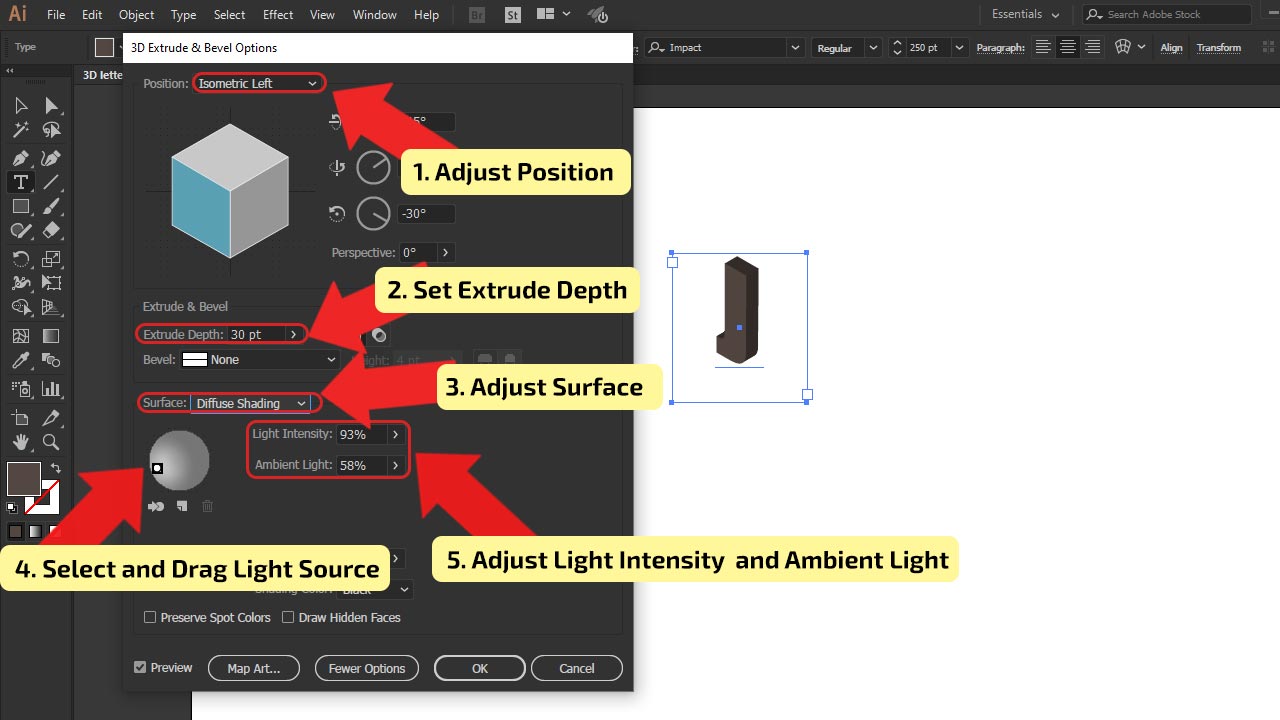
In the “Appearance” window, select the fill that was added in the previous step. At the bottom of the window, click on the “Add New Effect” button. In the drop-down menu, click on “3D” and select “Extrude & Bevel”. The “3D Extrude & Bevel Option” window will pop up.


Step 6: Adjust extrude
In the drop-down menu, to adjust the “Position,” choose “Isometric Left.” Then, set the “Extrude Depth” to 30pt. Underneath it, you will find options for “Surface.” Click on the arrow to open the drop-down menu, then choose “Diffuse Shading.” On the round object in the options with a doth on it, you can adjust the source of the light by selecting it and dragging it around. In this window, you can also change the brightness of the selected light by changing the percentage in the box next to “Light Intensity,” sliding it left and right, or just typing the wanted value. Adjust the brightness of all surfaces equally using the slider or typing the value in the percentage box next to “Ambient Light.” If you can’t find these options for light adjustments, don’t stress about it, they are hidden, and you are able to make them visible by clicking on the “More Options” button at the bottom of the window.

Step 7: Adjust the color of the extrusion.
In the “Shading Color” menu, choose “Custom,” the color will automatically change to red. This option will give you the freedom to adjust the color as you intended. Click on the color box, and the “Color Picker” window will pop up. Choose the color and press the “OK” button.


Step 8: Fine-tune
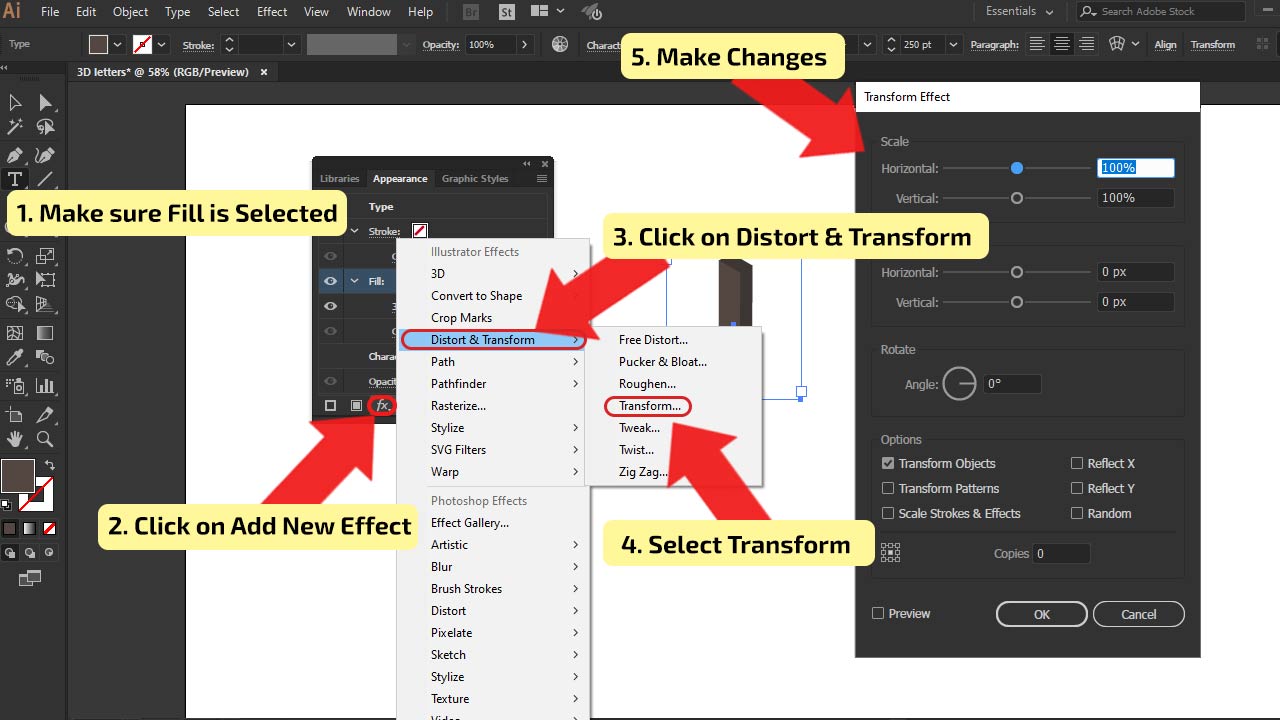
When you are done with “3D Extrude & Bevel”, you can add more effects. Before you start adding new effects, make sure the fill-in the “Appearance” window is selected. Click on the “Add New Effect” button, and in the drop-down menu, select “Distort & Transform,” then click on “Transform.” The window “Transform Effect” will pop up, and you will be able to adjust the effect. After you make changes, press the “OK” button.

Step 9: Save the 3D effect.
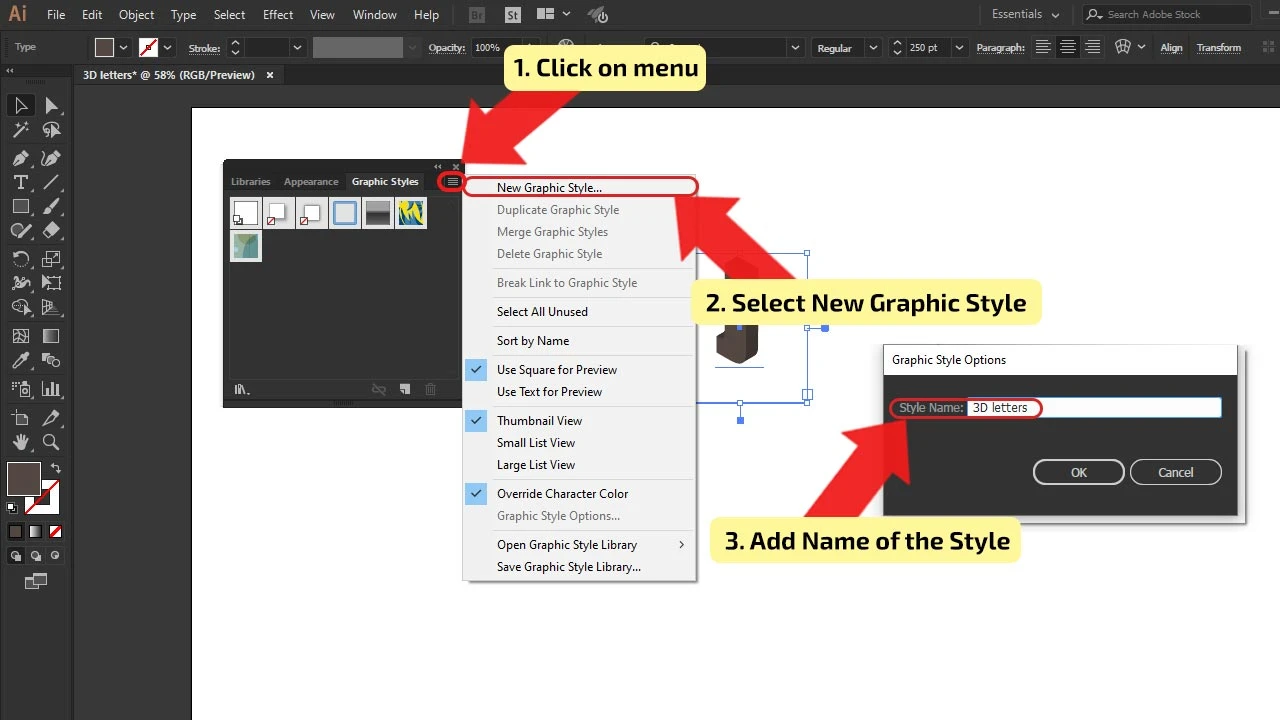
If you are satisfied with the outcome of your 3D letter and you want to use it again without setting it up again, save the effect. In the main menu, go to “Window” in the drop-down menu, select “Graphic Styles,” and the window will be shown. At the top right side of the window, click on the icon and choose “New Graphic Style.” In the window “Graphic Styles Options,” name your style and press the “OK” button. It will be stored and visible in the “Graphic Styles” window. You can reuse it on the letters, words, and objects.
The shortcut to open the “Graphic Styles” window: Shift + F5 (Windows/MAC).

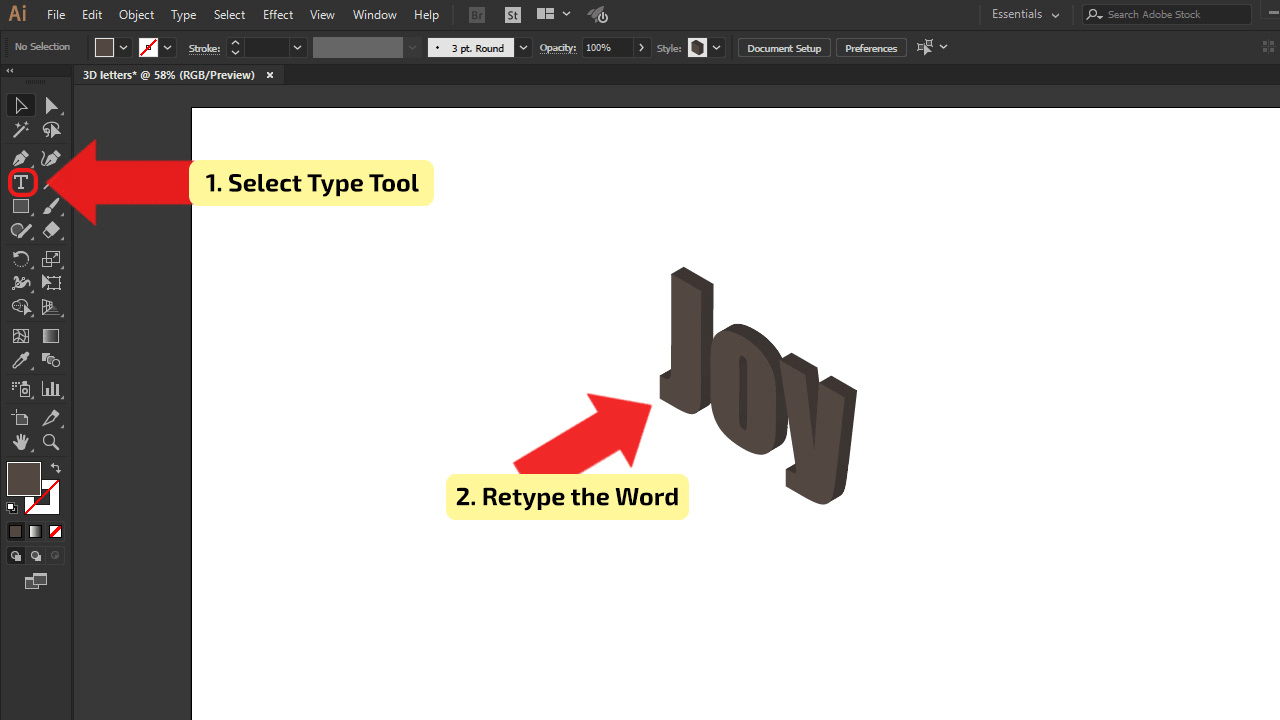
Step 10: Add more letters (rinse & repeat).
After you finish the effect and save it, you can change the text using the “Type Tool.” You can add more letters or different text. For example, you can type “JOY” instead of the letter “J”. If you create a new word, you can reuse the effect, open the “Graphic Styles” window, and you will find a saved 3D effect.
The shortcut for the “Type Tool” is the letter “T” (Windows/MAC).


Hey guys! It’s me, Marcel, aka Maschi. On MaschiTuts, it’s all about tutorials! No matter the topic of the article, the goal always remains the same: Providing you guys with the most in-depth and helpful tutorials!

