If there’s one social media app that is famous for creating worldwide trends, it is TikTok.
No matter what trend becomes hype, TikTok never fails to engage most of its users into trying that trend out.
From filters to dance challenges, duets, and skits, TikTok has been the go-to social media app for short-form video entertainment.
And, if you’re loving all the things you can do on TikTok, you wouldn’t think twice about uploading photos to it.
Yet, isn’t TikTok known for producing videos instead of just posting still pictures on it? Can you edit a photo within the TikTok app without using third-party editing apps?
And, is it possible to edit photos within the TikTok app when you’re using an iPhone? Let’s see about that in a bit.
How to Edit Photos on TikTok iPhone
To edit photos on TikTok iPhone, you begin by uploading an image. If the photo you choose has faces on it, tap the “Beautify” button. If, however, the image doesn’t have faces on it, tap “Effects”, “Filters,” and/or “Enhance” on the right-side panel of the “Create TikTok” page before you post it.
Whether you want to use multiple photos for your TikTok video or upload a single photo for your TikTok, you can edit them before you hit the “Post” button.
How to Edit Single Photos With Faces on TikTok iPhone
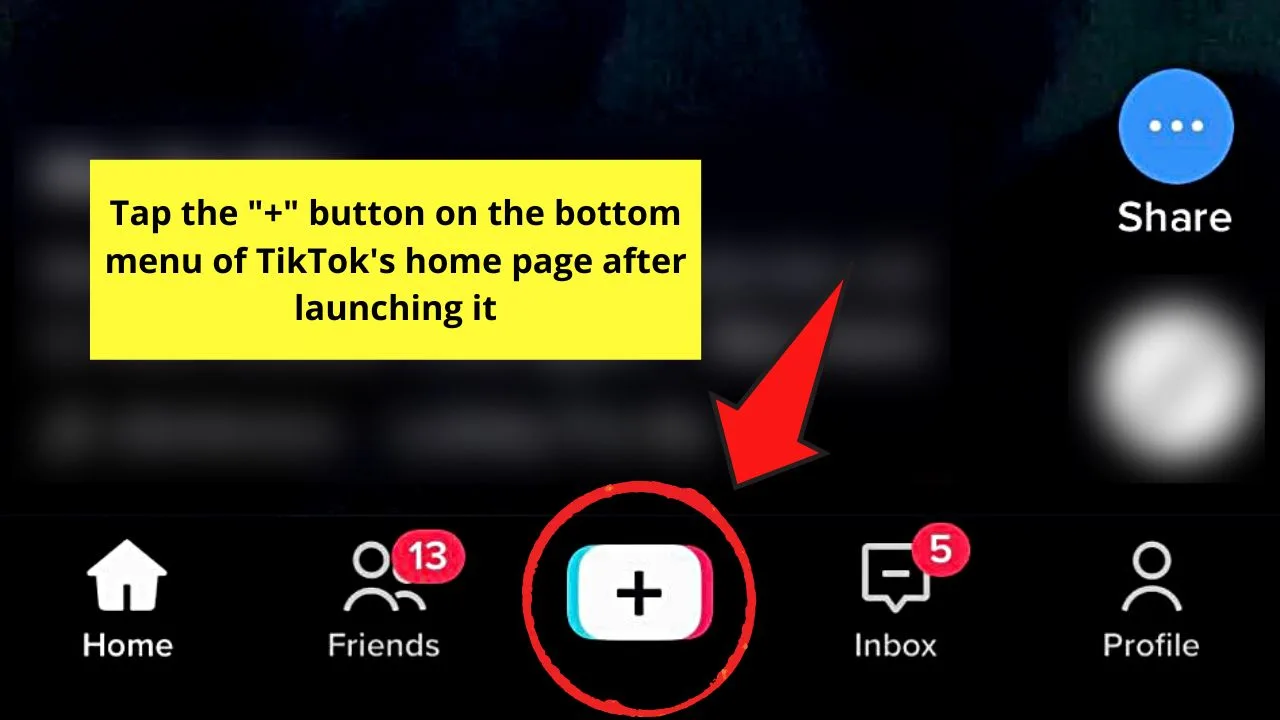
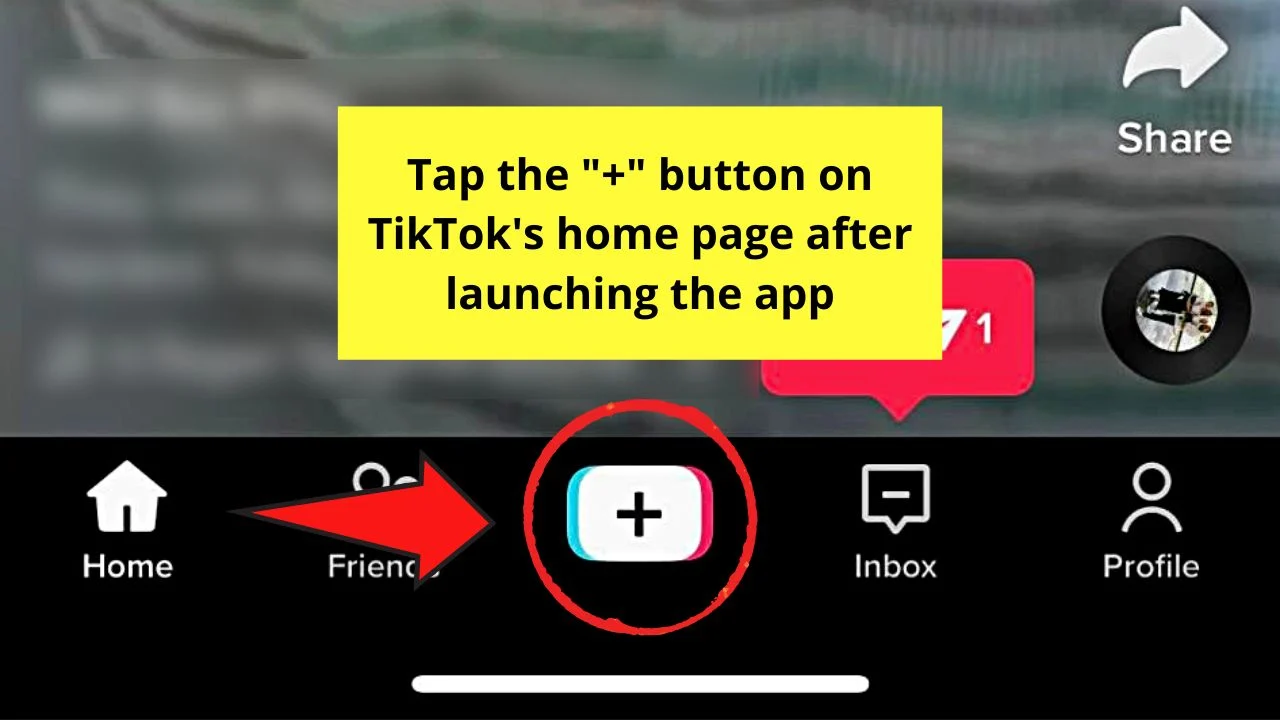
Step 1: After launching TikTok, tap the “+” button on the bottom menu of the home page.
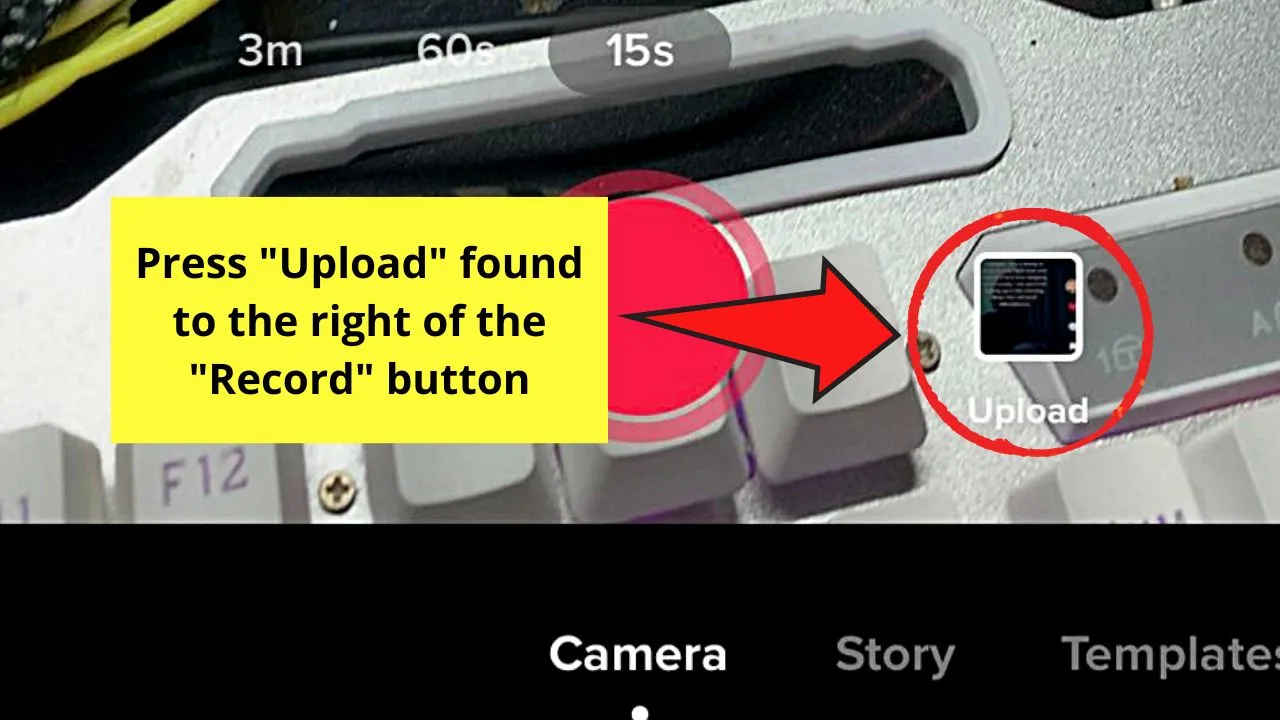
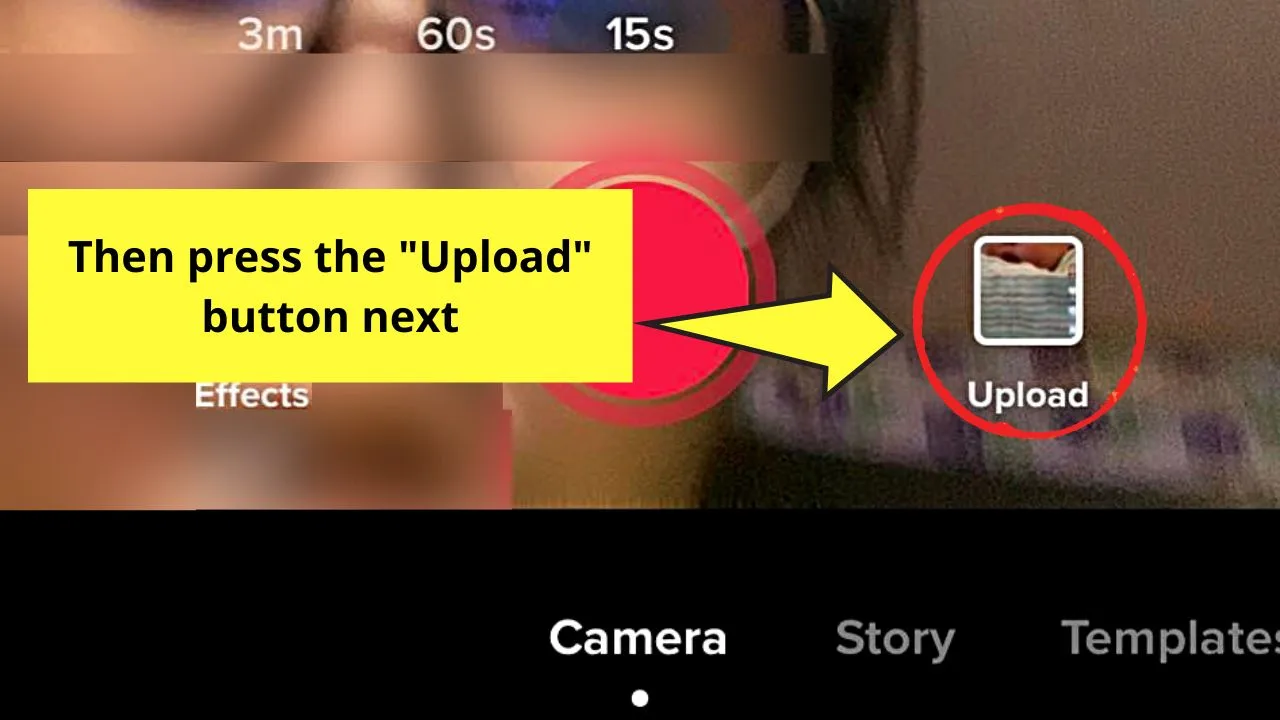
Step 2: On the creator page, press the “Upload” button.
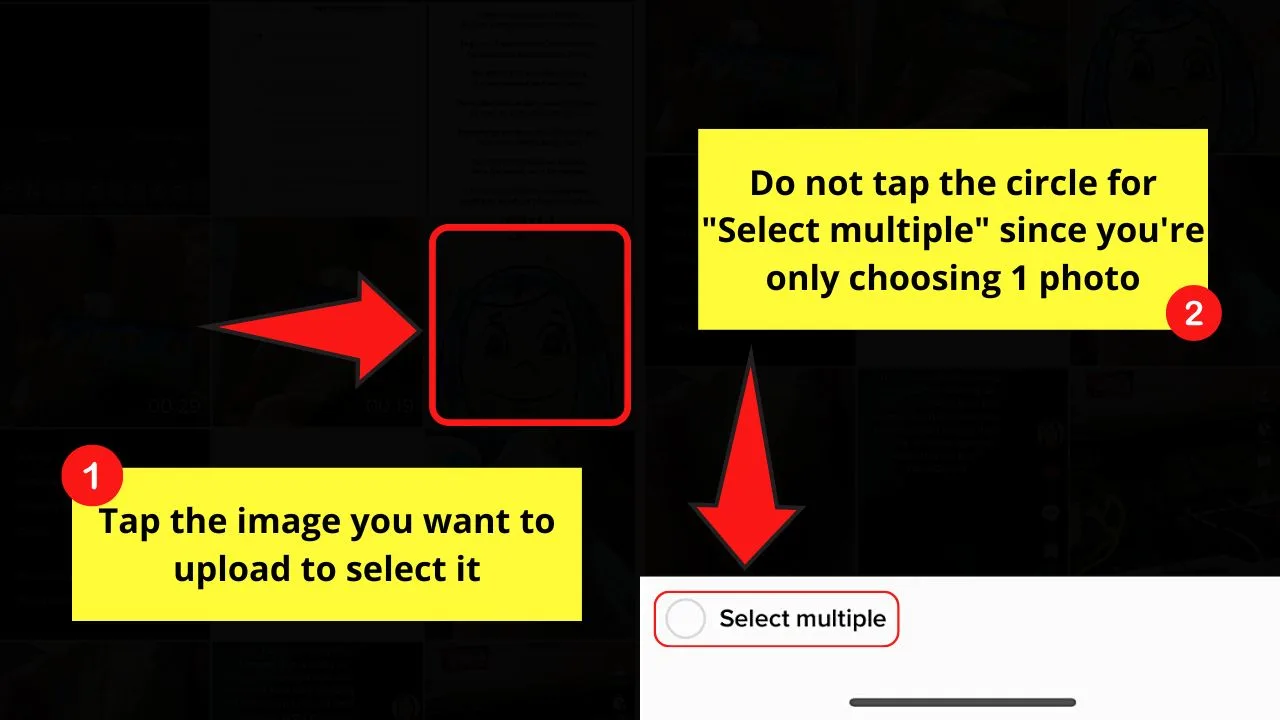
Select a picture from the photo gallery that appears. Since we only want to use one image, don’t tap the circle for the “Select multiple” option.
After which, just press on the photo you’ll use to select it.
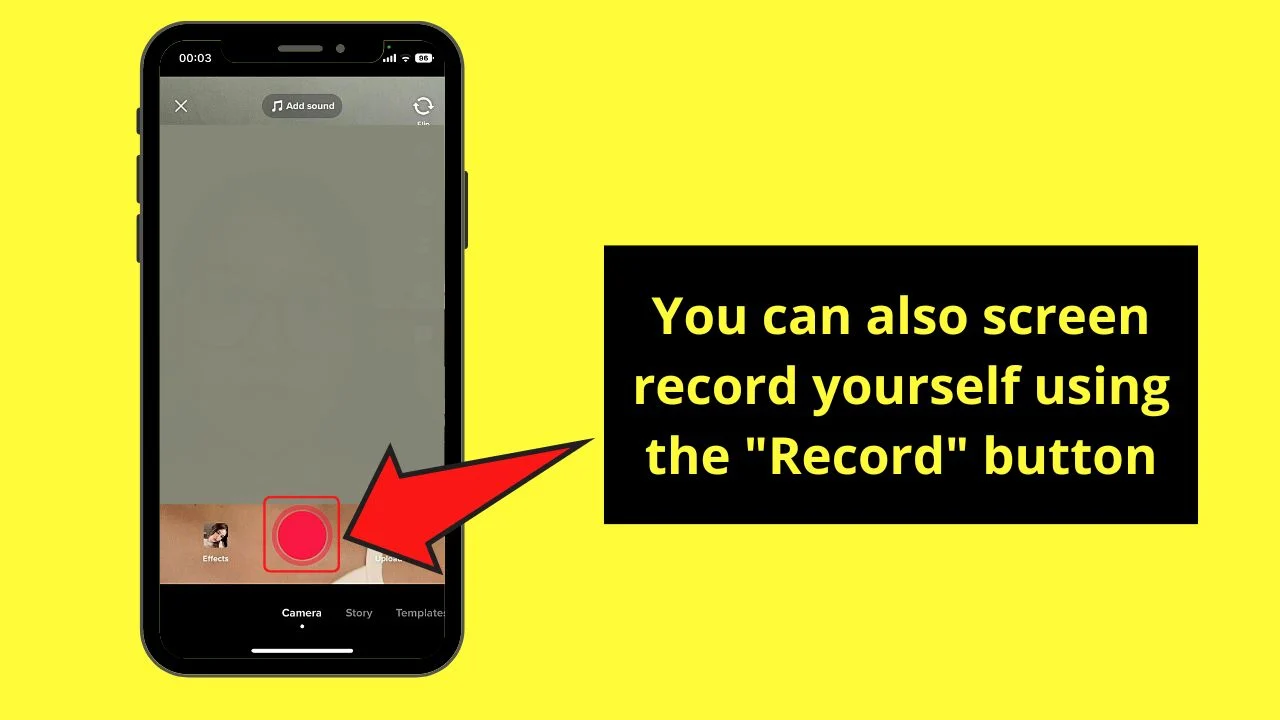
You can also just screen-record yourself by tapping the “Record” button.
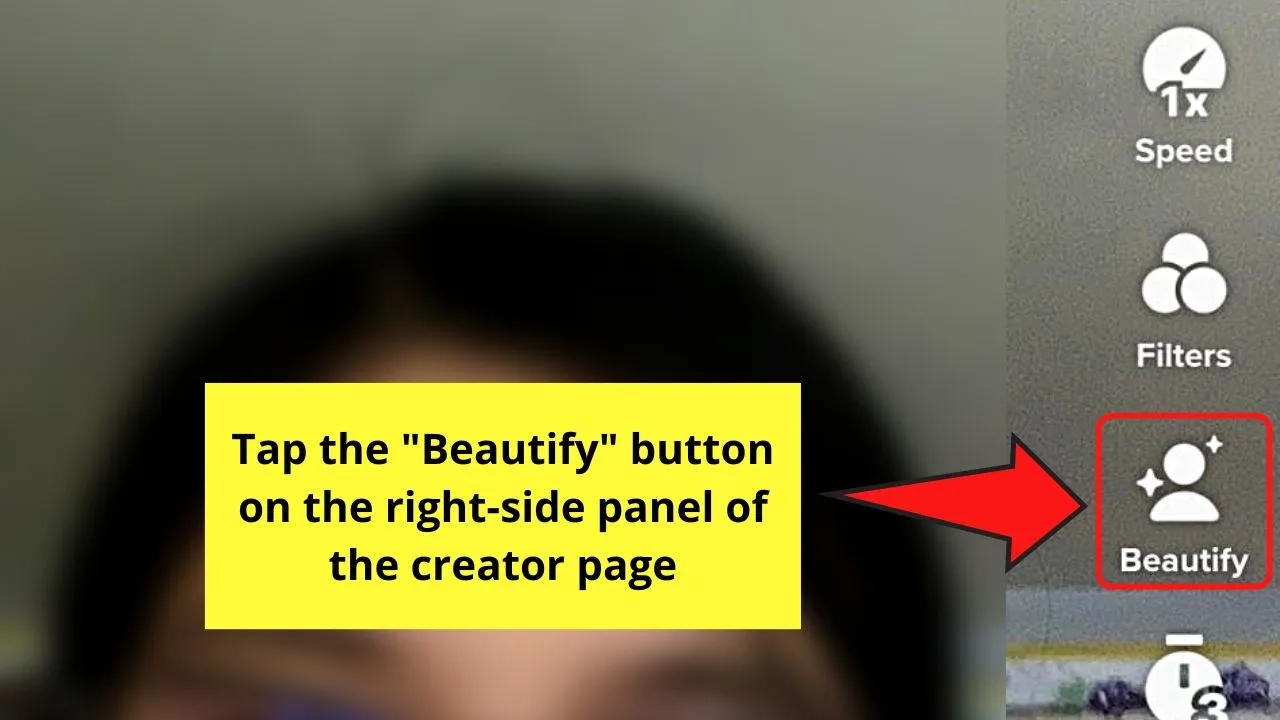
Step 3: Once you selected an image with the faces of persons on it or screen-recorded yourself, tap the “Beautify” button on the right-side panel.
Step 4: On the “Beautify” menu that appears, manually beautify or enhance a certain part of the face on the photo, tap the “Face” option.
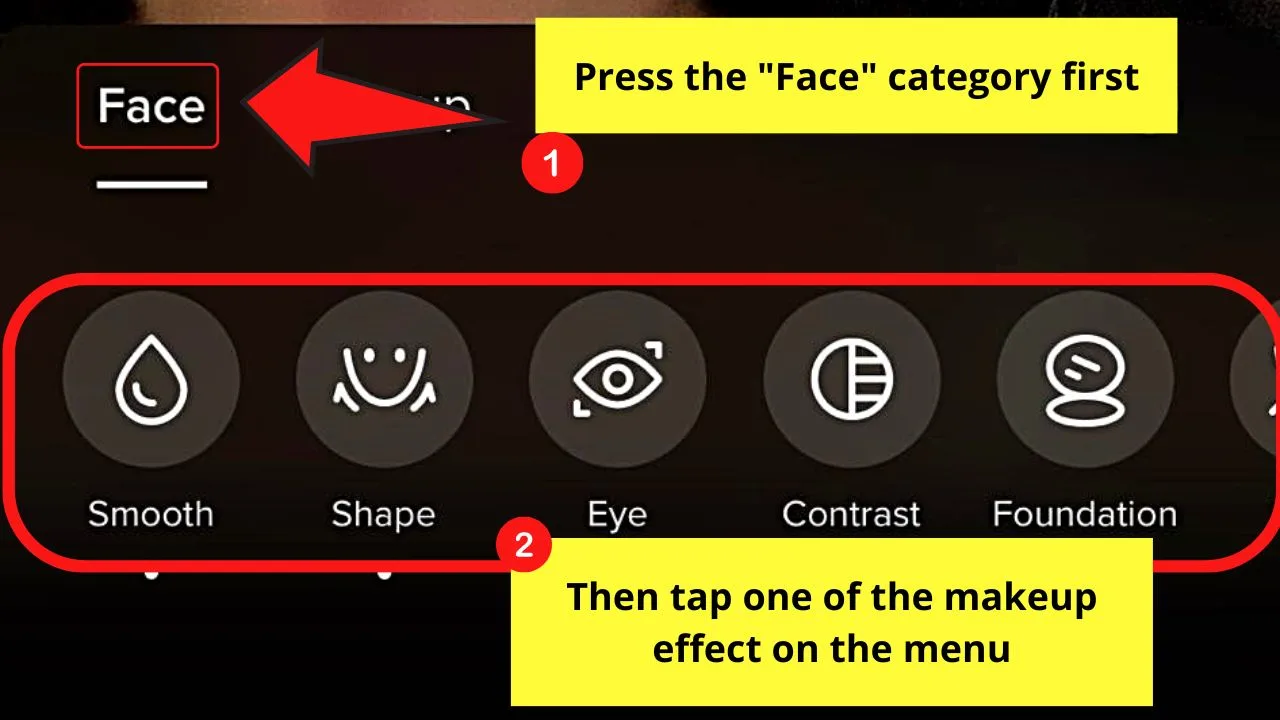
After which, press each one of the following face-enhancing options available:
- Smooth
- Shape
- Eye
- Contrast
- Foundation
- Head
- Face
- Brighten eyes
- Cheekbones
- Nose
- Mouth
- Forehead
- Lipstick
- Blush
- Shadow
- Contour
- Teeth
- Undereye
- Degree (Nose)
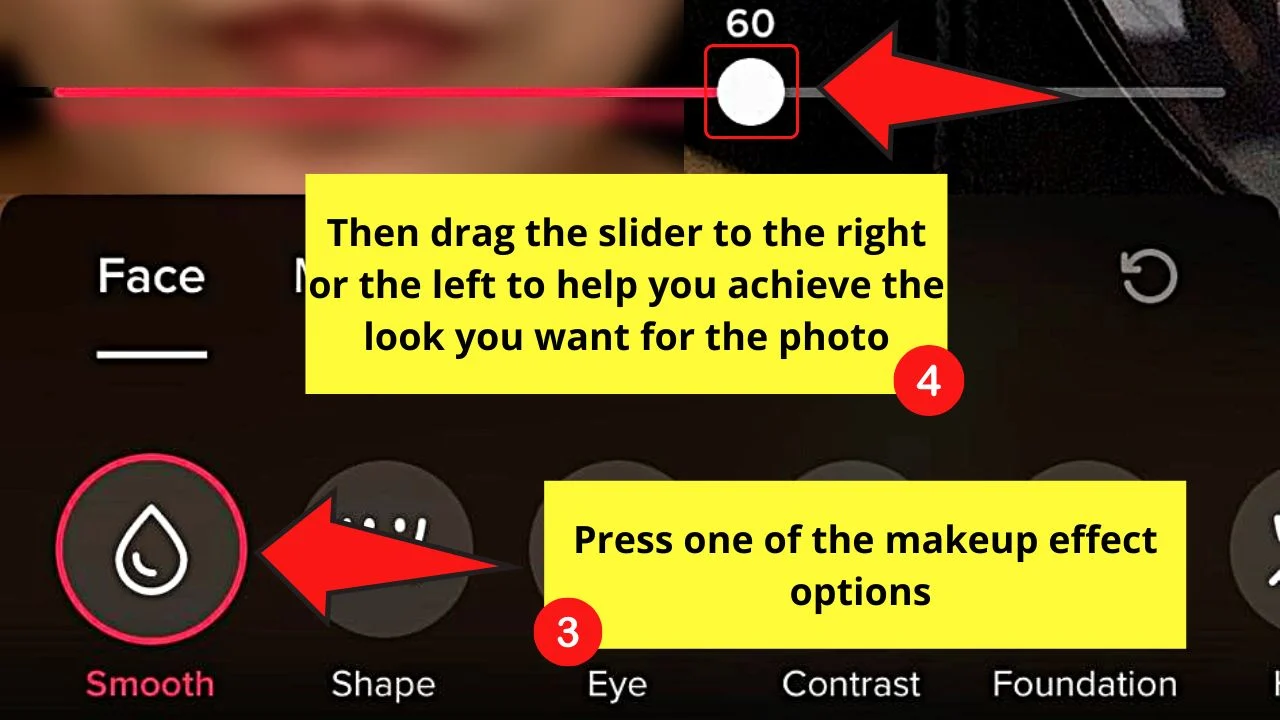
Once you select one of these face-enhancing options, a slider will appear above the menu.
From there, drag the slider to the right or the left, depending on how you want your photo to look. Don’t be afraid to experiment until you achieve the effect you want to have on your image.
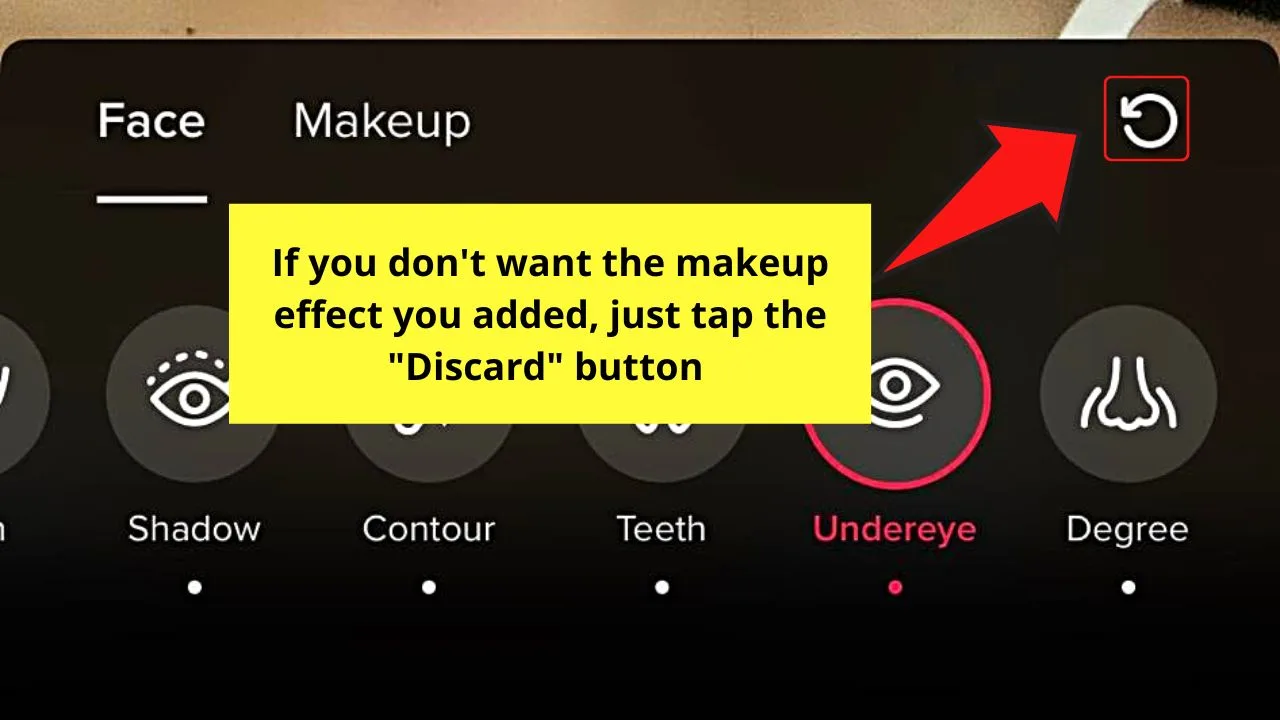
You can always tap the “Discard” button to remove the makeup effects you added to the photo.
Step 5: If, however, you prefer to use use a one-tap makeup filter, then press the “Makeup” category instead.
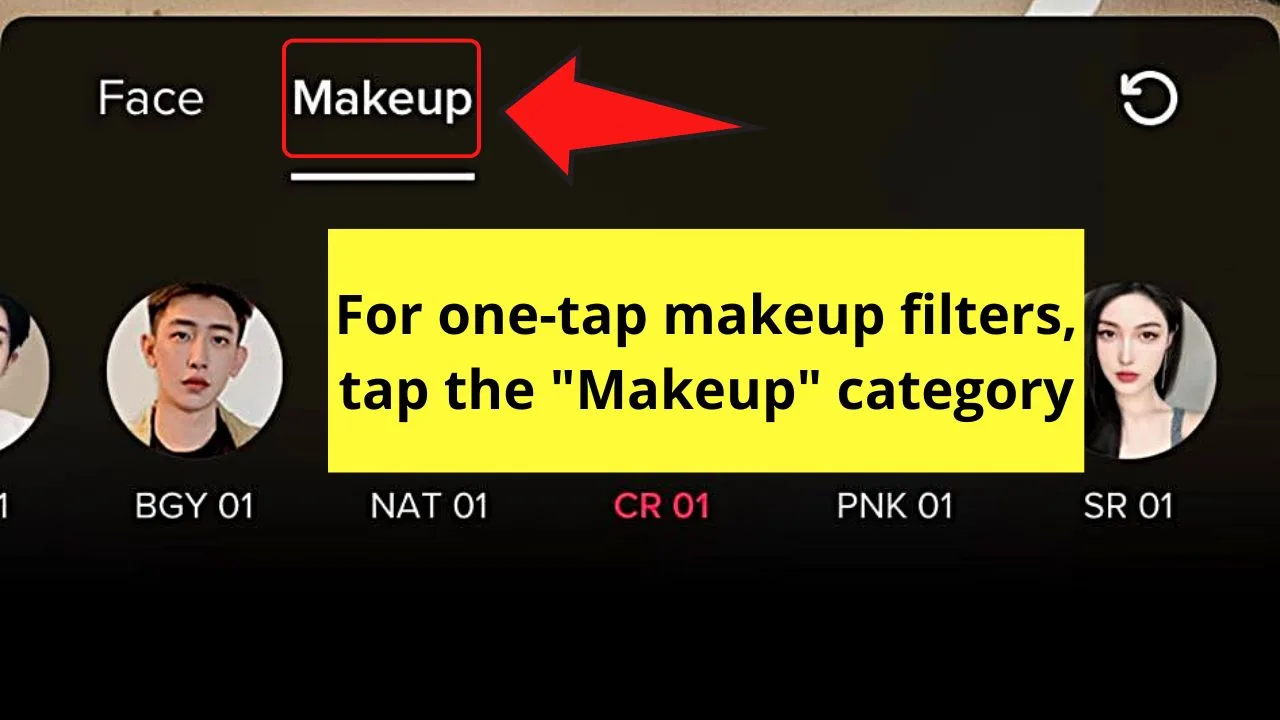
From there, swipe your finger to the left to choose what makeup filter you want to use by tapping on it.
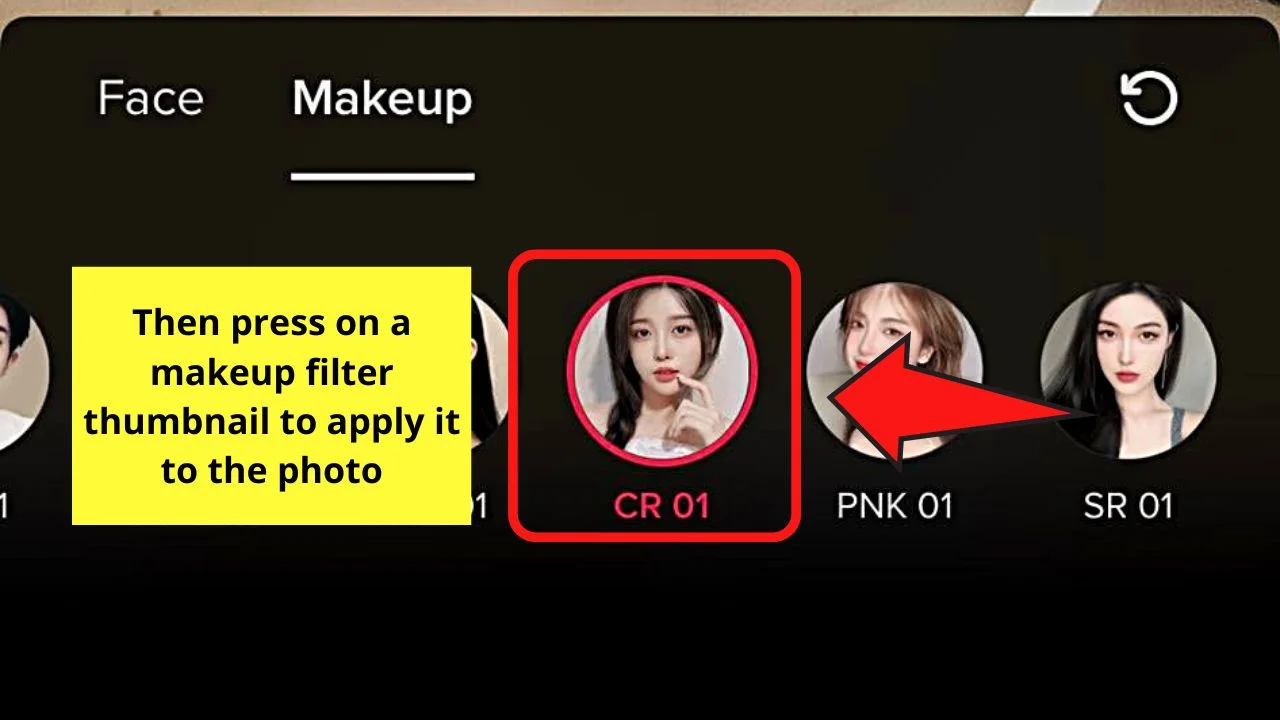
Once you’ve chosen a makeup filter to use, press on the middle of the image you’re editing to exit the “Beautify” menu.
But, like in Step 4, you can always tap the “Discard” button to remove any makeup filter you added.
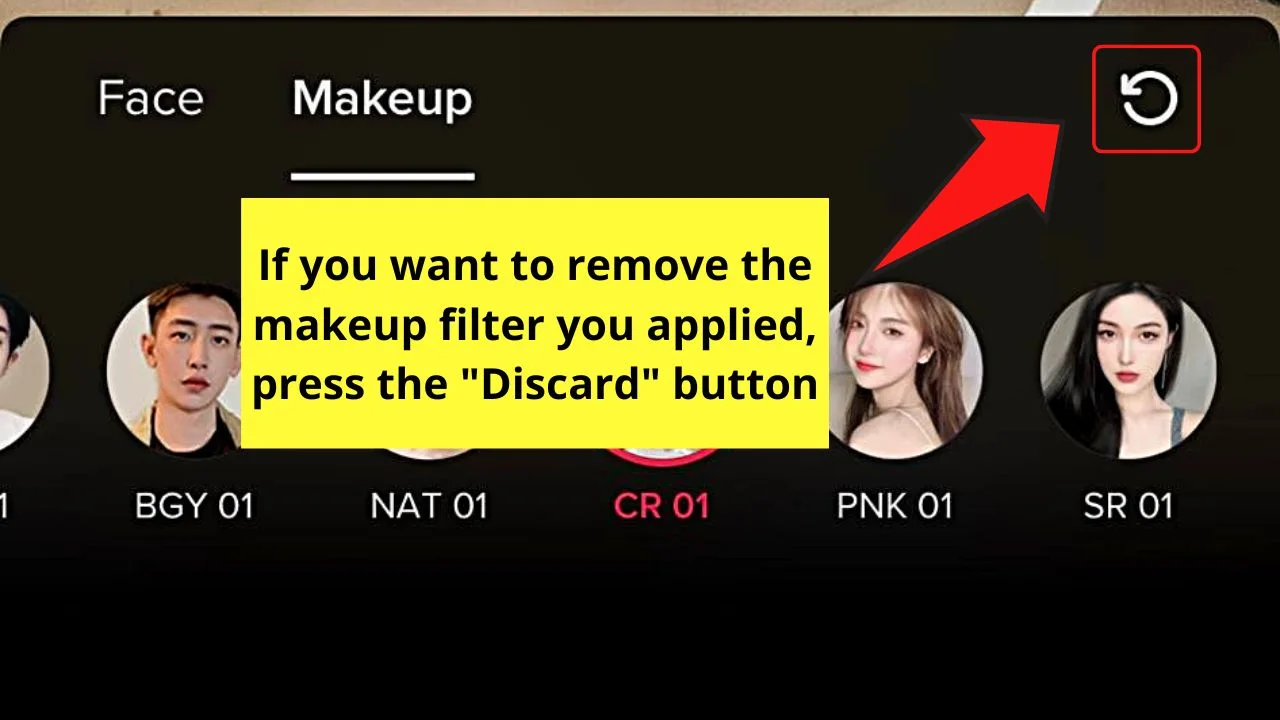
Step 6: After beautifying the portrait image, tap the “Next” button to proceed to post the said image to TikTok.
But, if you’re hesitant to post the said image just yet, simply save it as a draft and download it to your camera roll.
However, if the photo you’ll upload doesn’t have faces on it, continue reading to know how you can edit those types of images.
How to Edit Single Photos Without Faces on TikTok iPhone
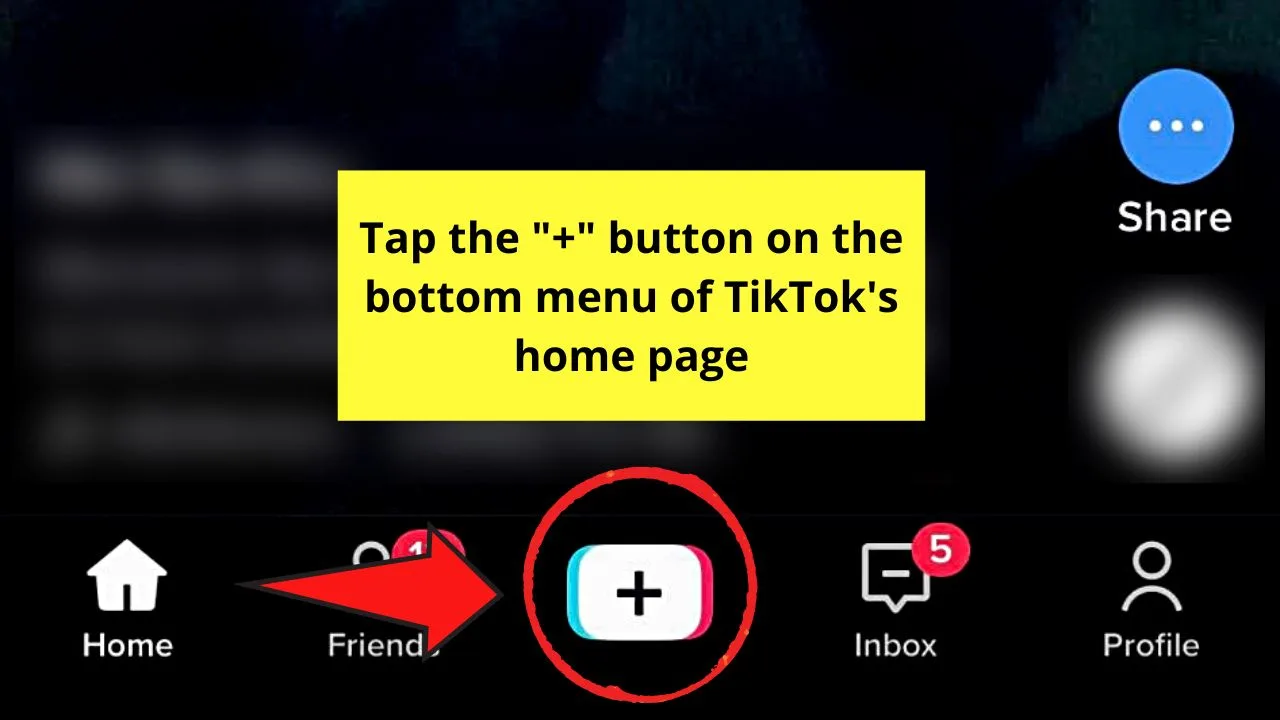
Step 1: Press the “+” button on the bottom menu of TikTok’s home page after launching the app.
Step 2: On the creator page, tap the “Upload” button beside the red “Record” button.
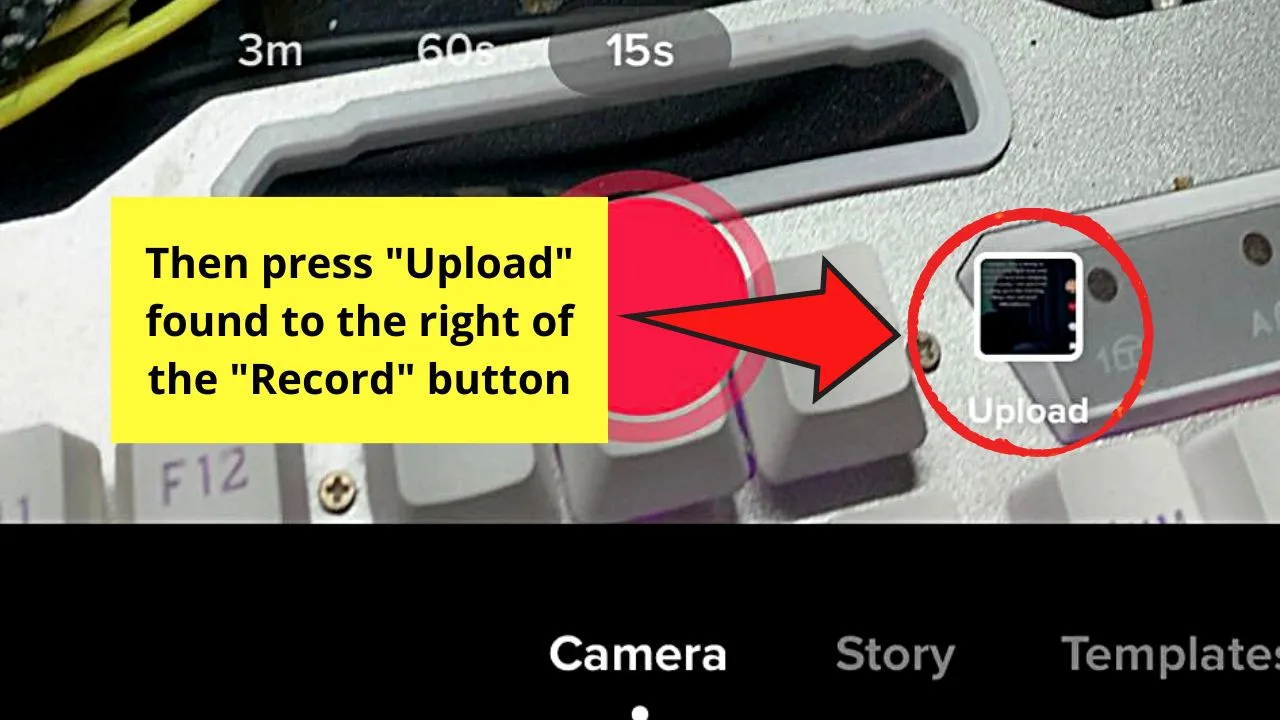
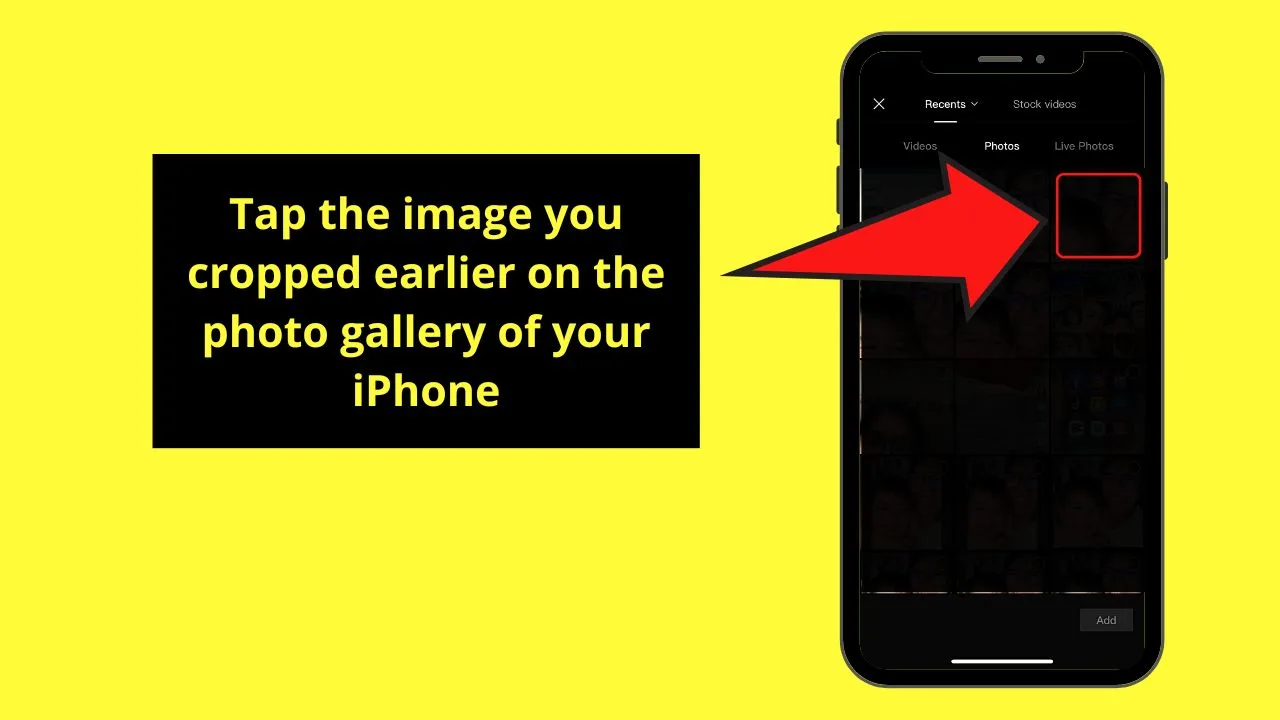
Choose the image you’ll use from the gallery by tapping on it.
Again, since you want to use a single photo only, don’t tap the circle for the “Select multiple” option.
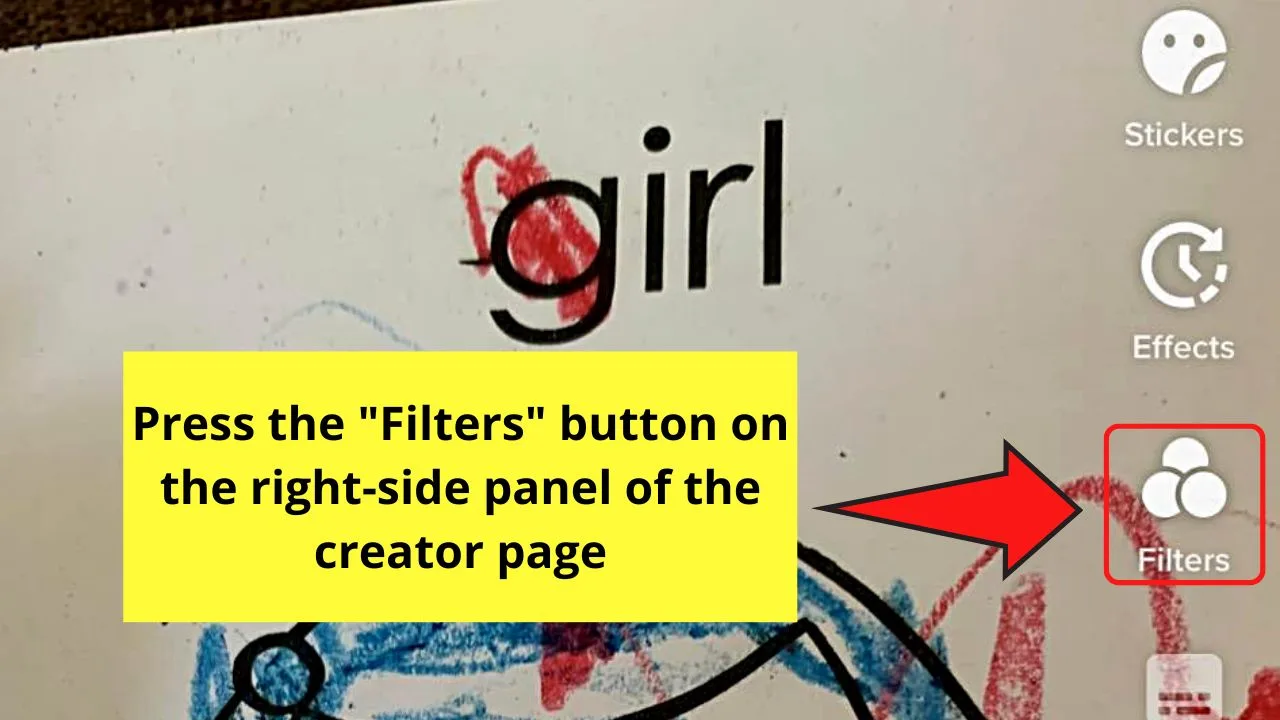
Step 3: Once the photo appears on the creator page, you can opt to add a filter first by pressing the “Filters” button on the right-side panel.
Step 4: Choose the category of the filter you want to use, depending on the image you selected.
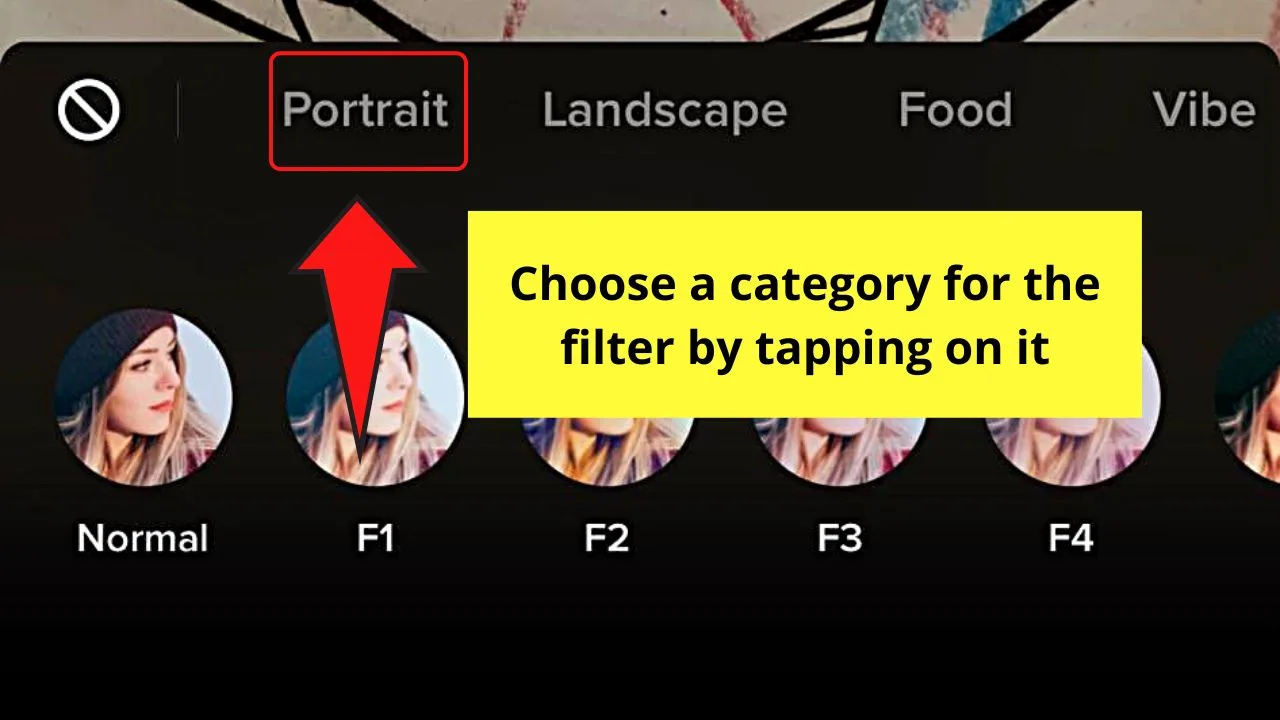
For sample purposes, I tapped “Portrait.”
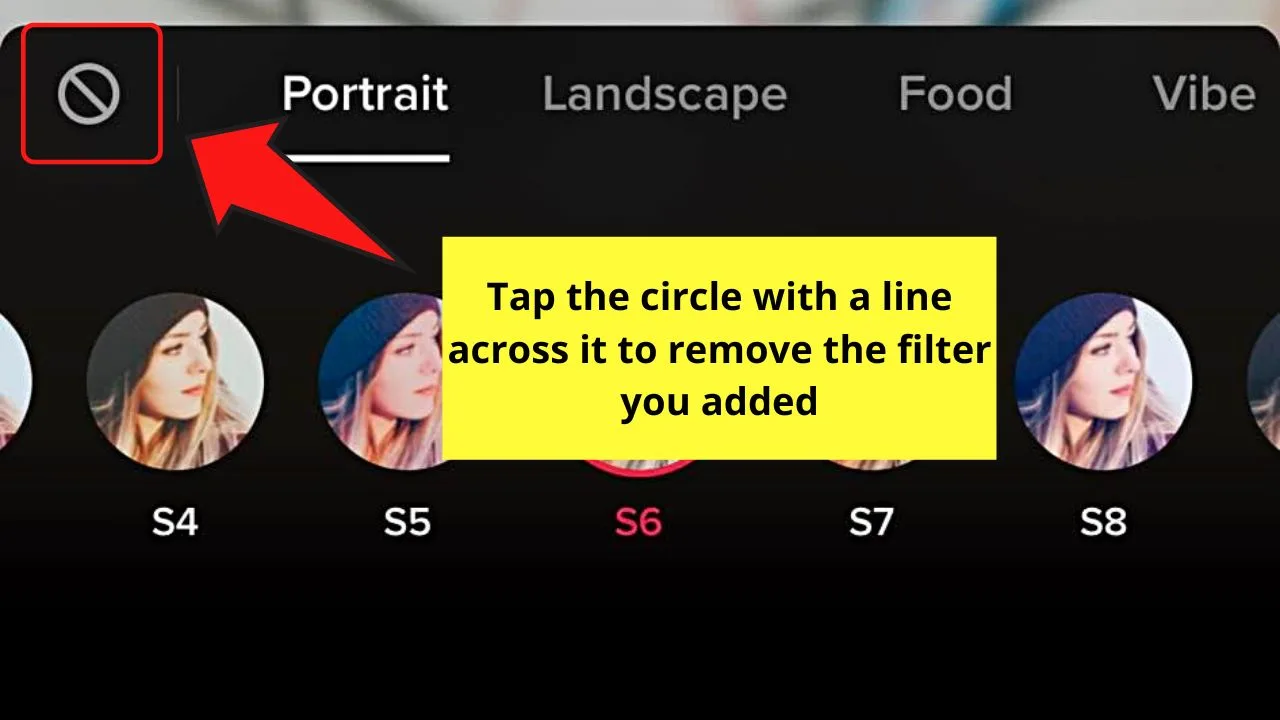
Step 5: To select a filter, swipe your finger to the left until you find the filter you’d like to use and tap it.
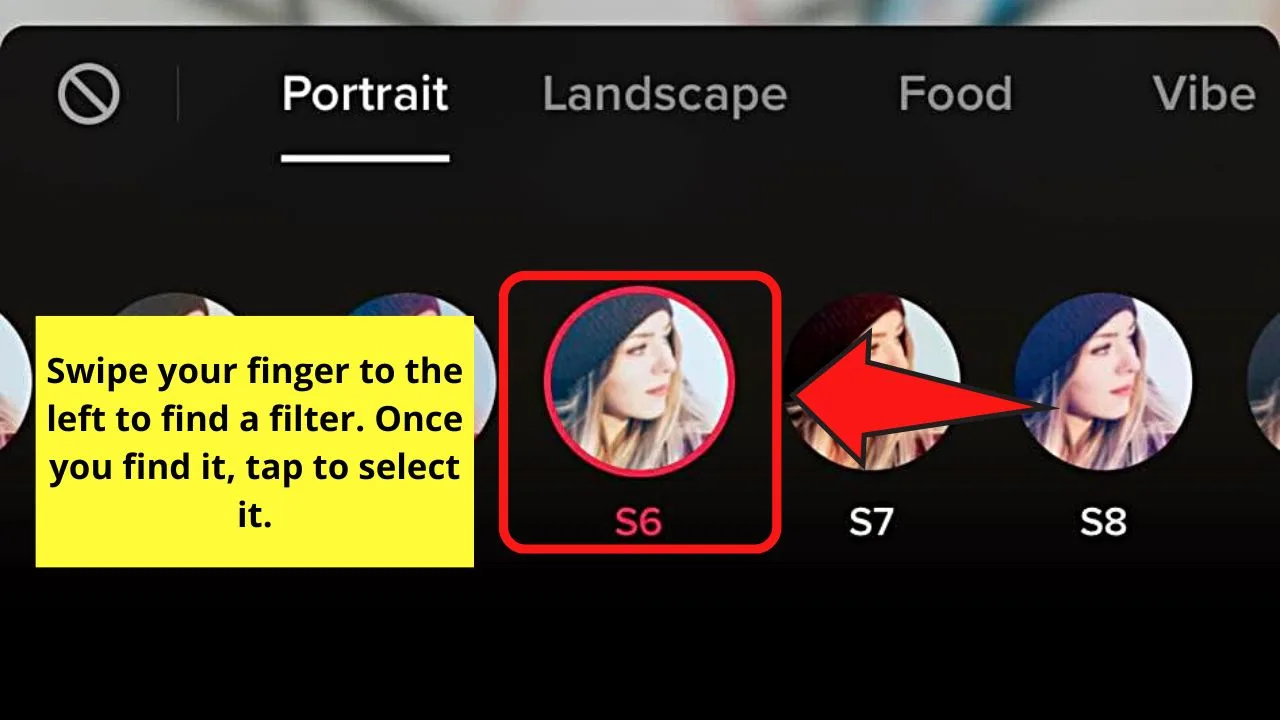
If you want to remove the existing TikTok filter or simply don’t want to use a filter, then press the circle with a diagonal line across it.
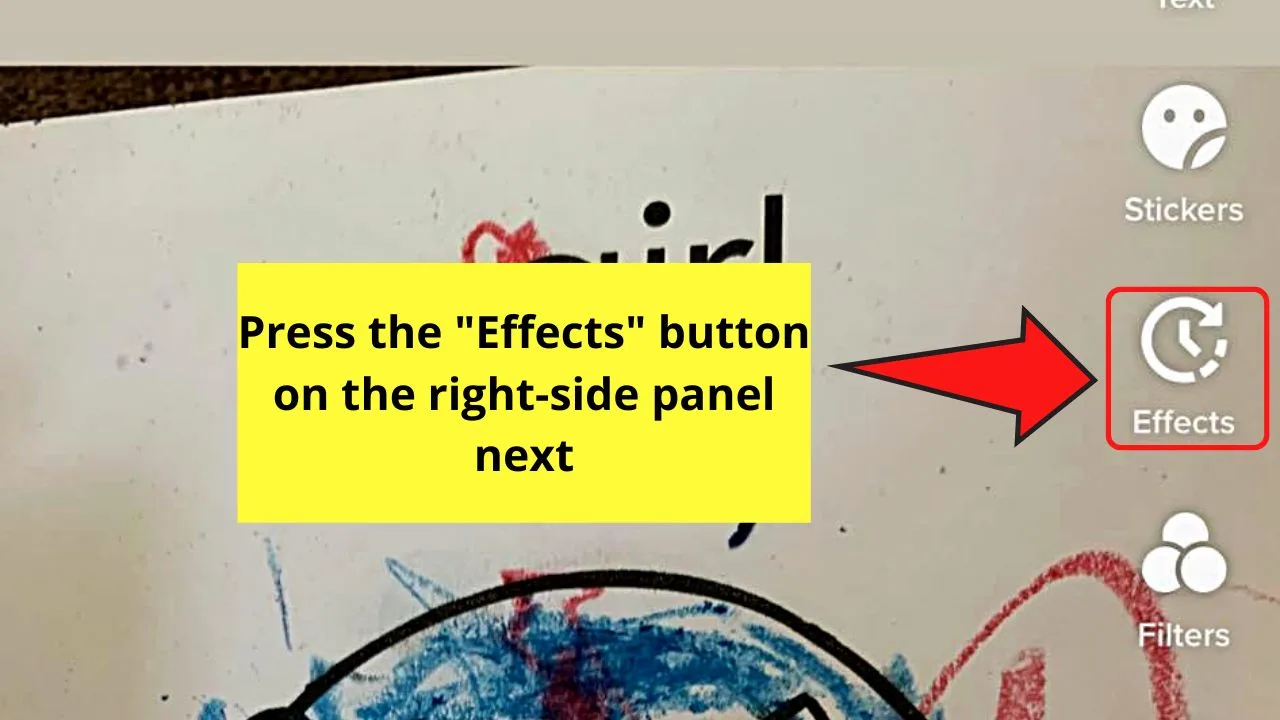
Step 6: After adding the filter, tap the “Effects” button.
From there, choose the category of the filter you want to use by tapping on the category names on the bottom menu.
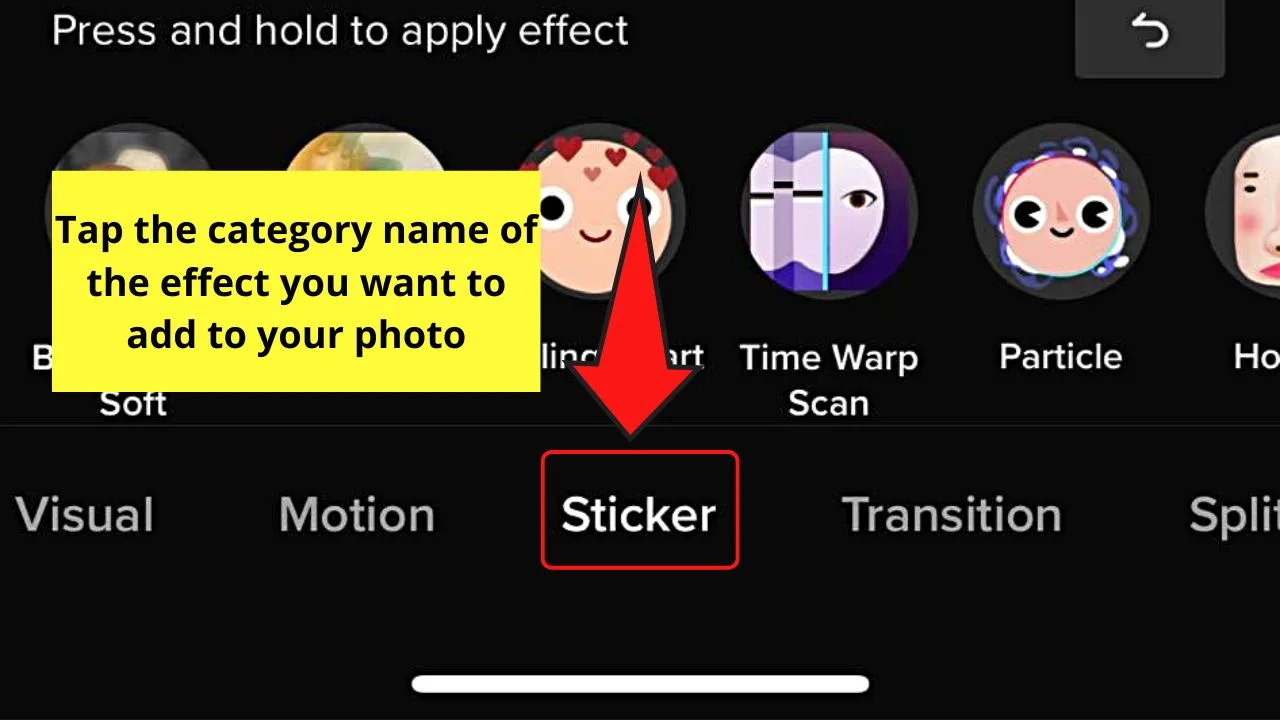
Step 7: Once you selected the effects category, swipe your finger to the left to browse through the effects available.
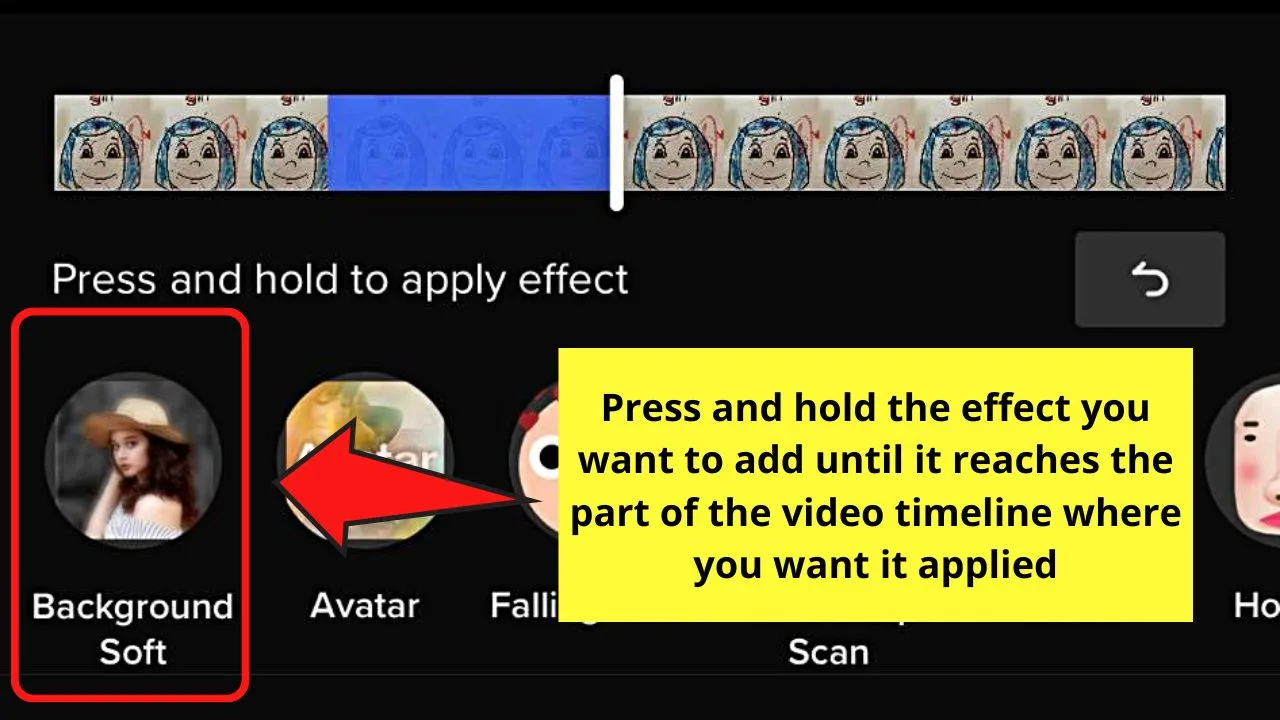
If you find an effect you want to use, press and hold the effect thumbnail until it reaches the part of the video timeline you want that effect to be added.
Step 8: Repeat steps 4-7 to add more effects to the image.
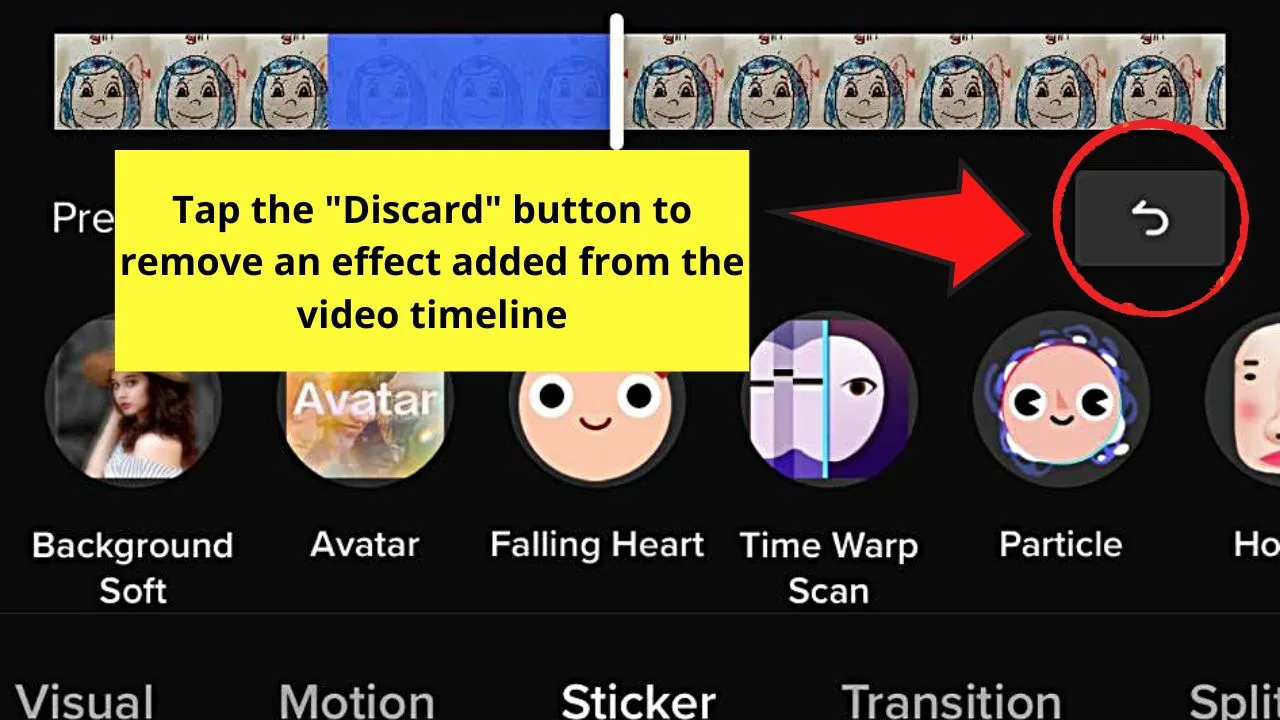
If, however, you want to remove and use another effect, press the “Discard” button to delete the said effect.
Step 9: Once you’re done adding effects to the photo, tap the “Save” button on the upper right corner of the screen.
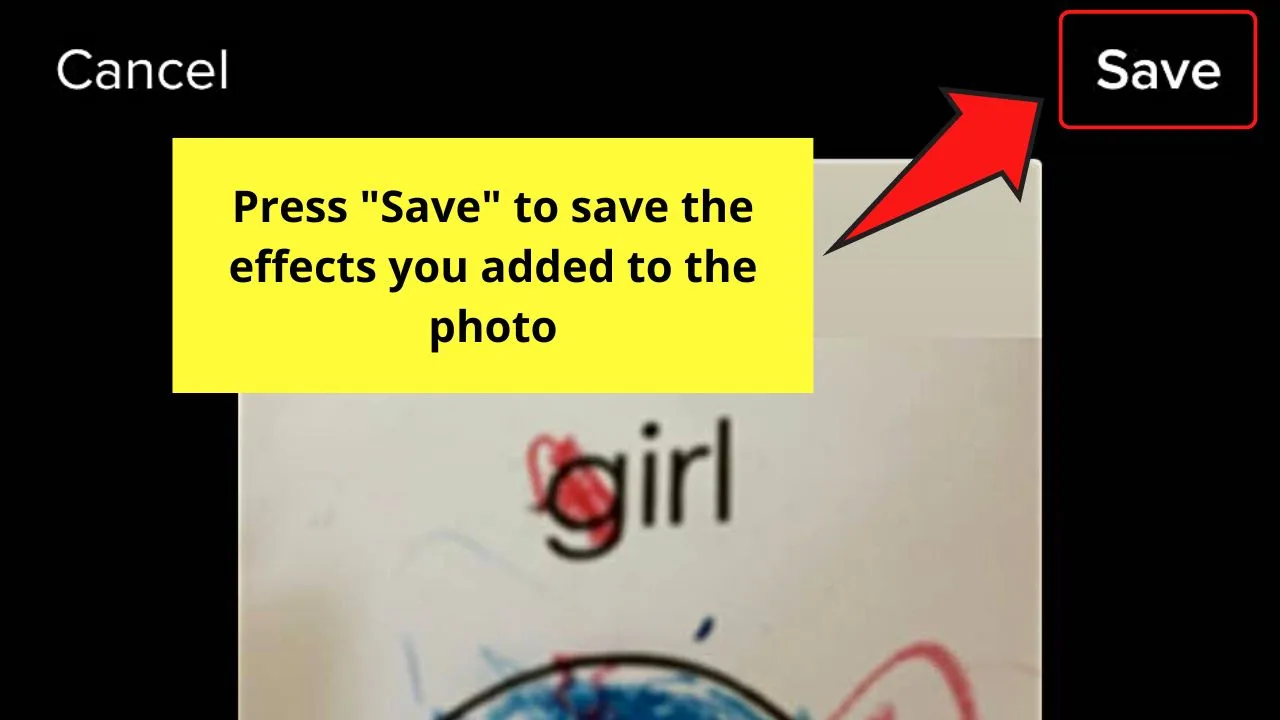
This move will then take you back to the creator page.
Step 10: If you want to further improve the overall look of the photo, go to the right-side panel and tap “Enhance.
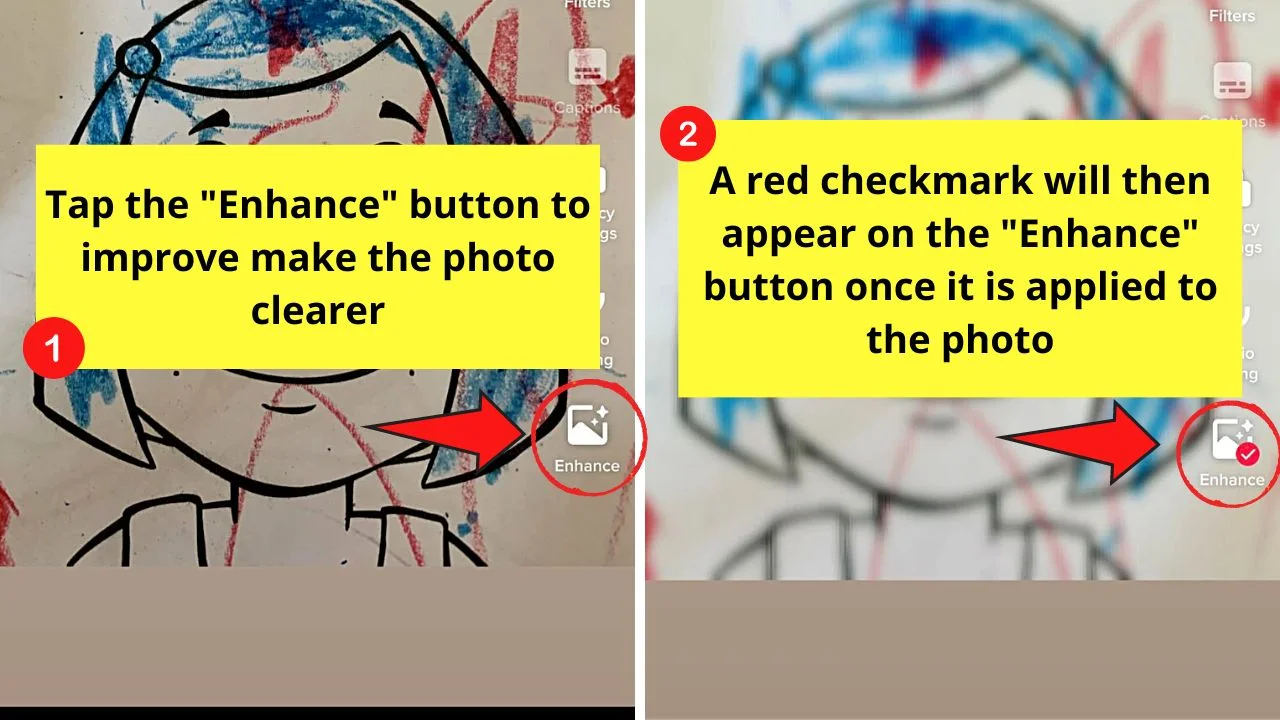
You’ll know that the said feature’s selected as the image looks sharper, at the same time a red checkmark appears on the upper right of its icon.
Step 11: After editing the photo, you can tap the “Next” button to proceed with posting it to TikTok.
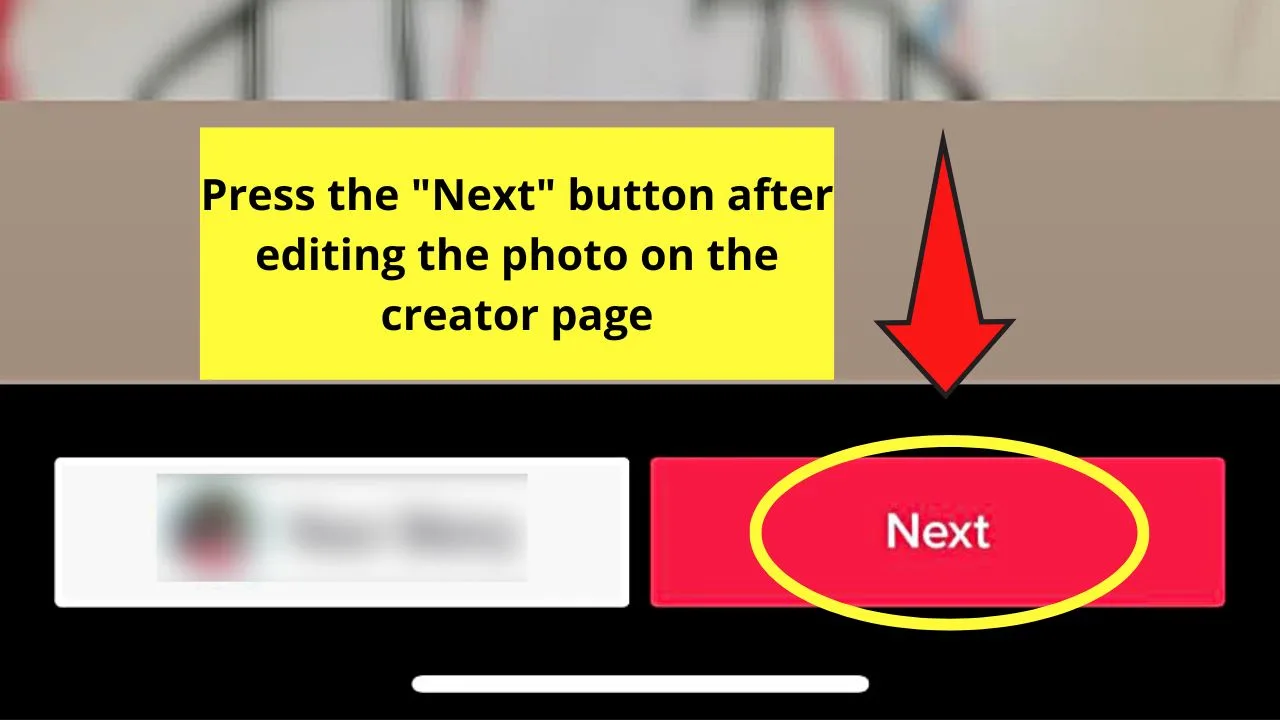
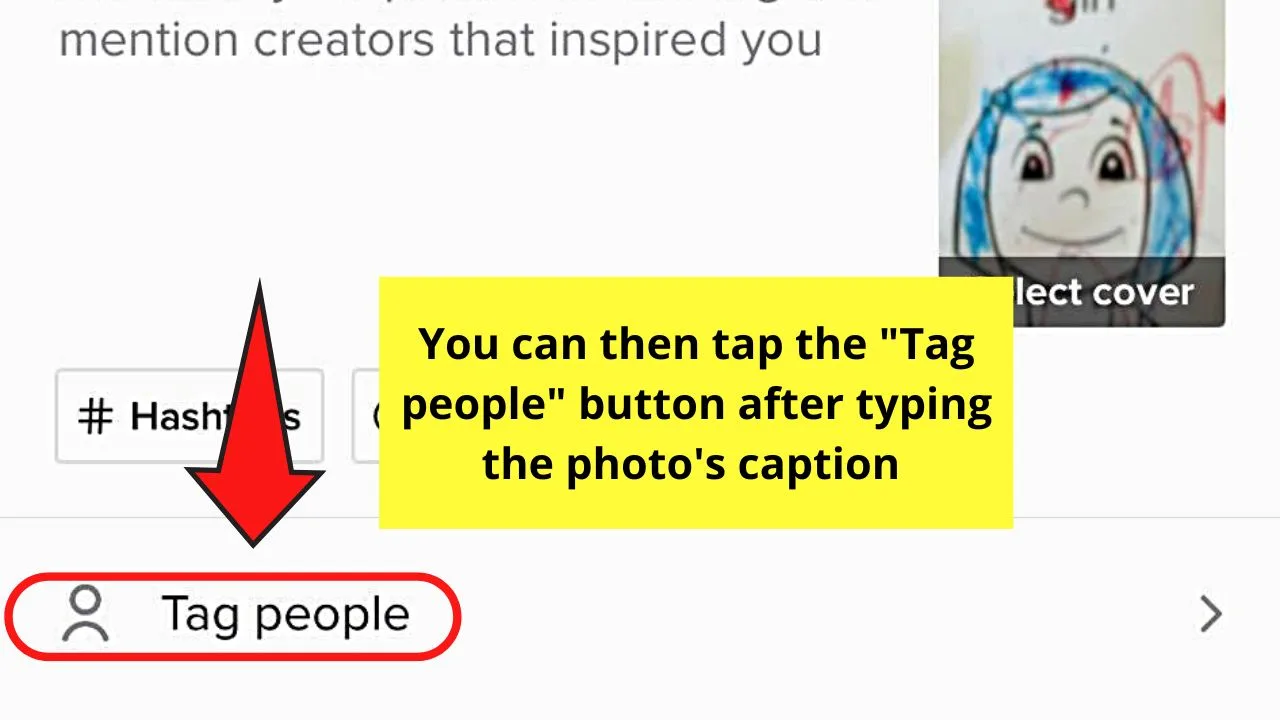
You can then tag someone on the TikTok you’re posting through the “Tag people” button.
Step 12: Once you’re done making the final tweaks on the photo you’re posting, press “Post” to upload it to your TikTok account.
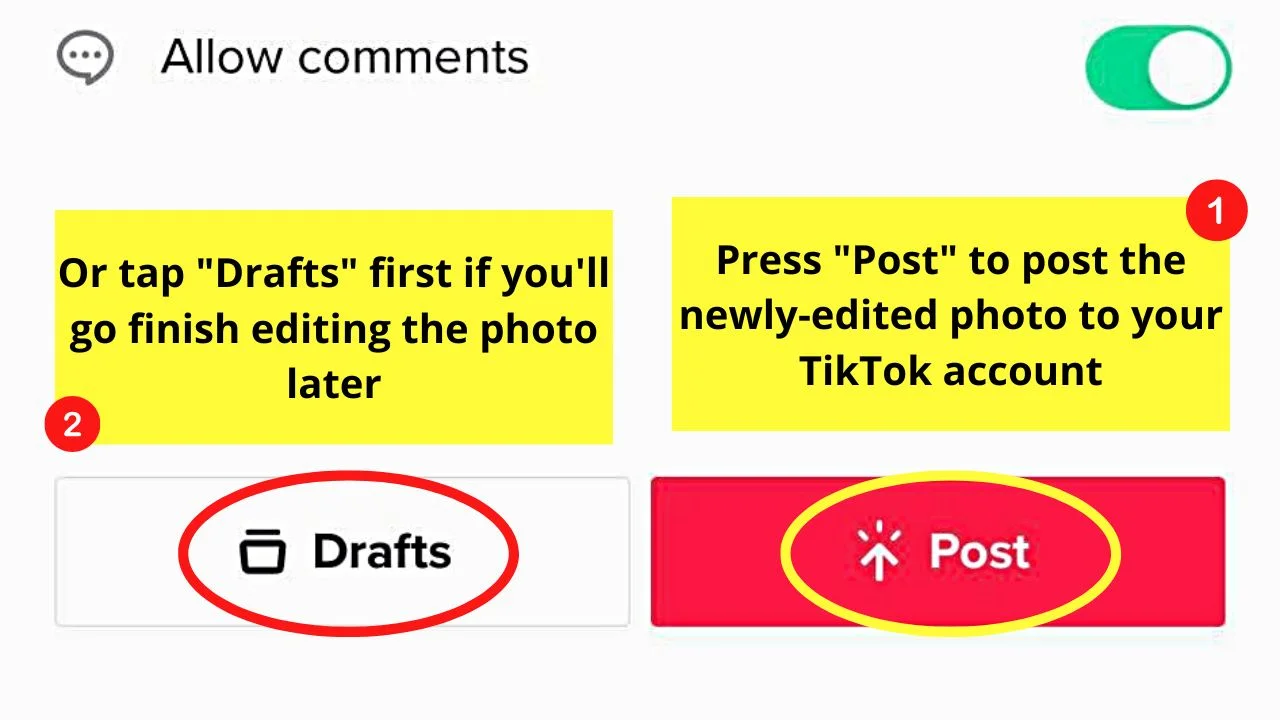
If, however, you prefer to edit it later on, tap “Drafts” instead.
Editing single photos on TikTok iPhone is quite simple, right? But, what if you want to edit multiple photos at a time?
How do you go about the process?
Editing Multiple Photos on TikTok iPhone
For those who don’t know it, you can add multiple photos at a time on TikTok to create a photo slideshow.
You can even make the said photo slideshow run faster if you know how.
But, before you can proceed with that task, study how to edit multiple photos on TikTok with the following steps.
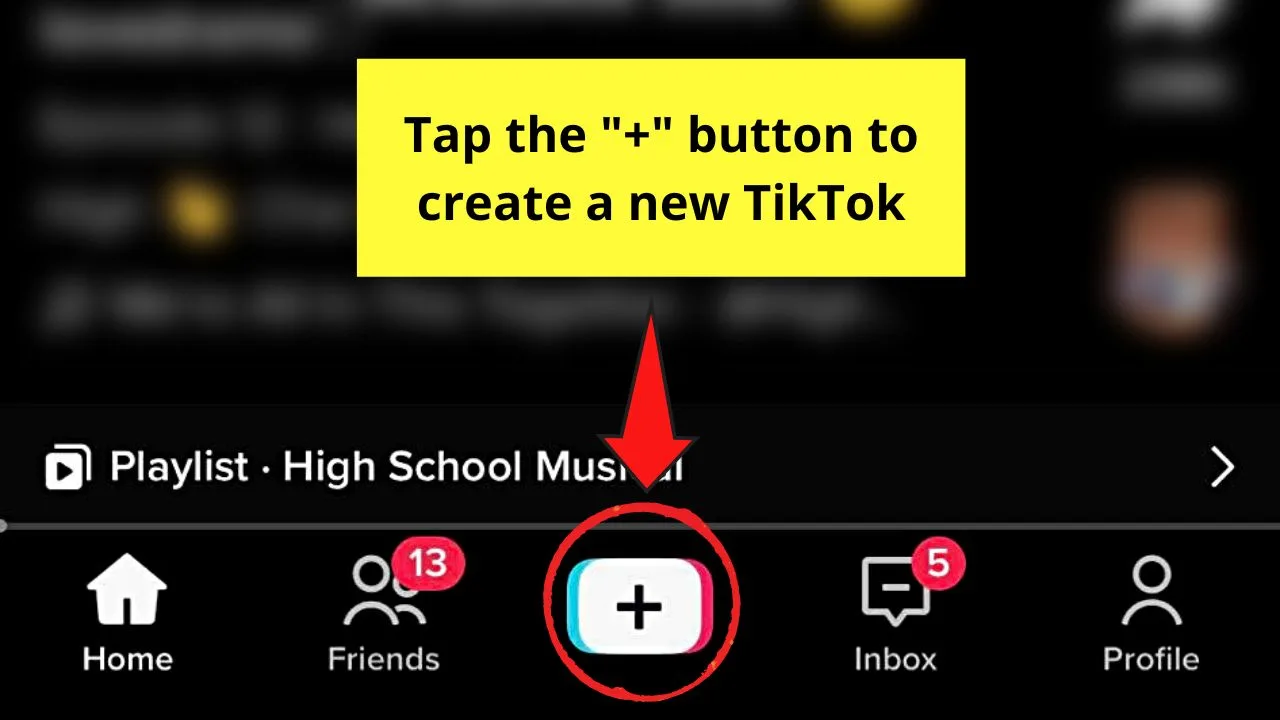
Step 1: Press the “+” button on the bottom page of TikTok’s home page.
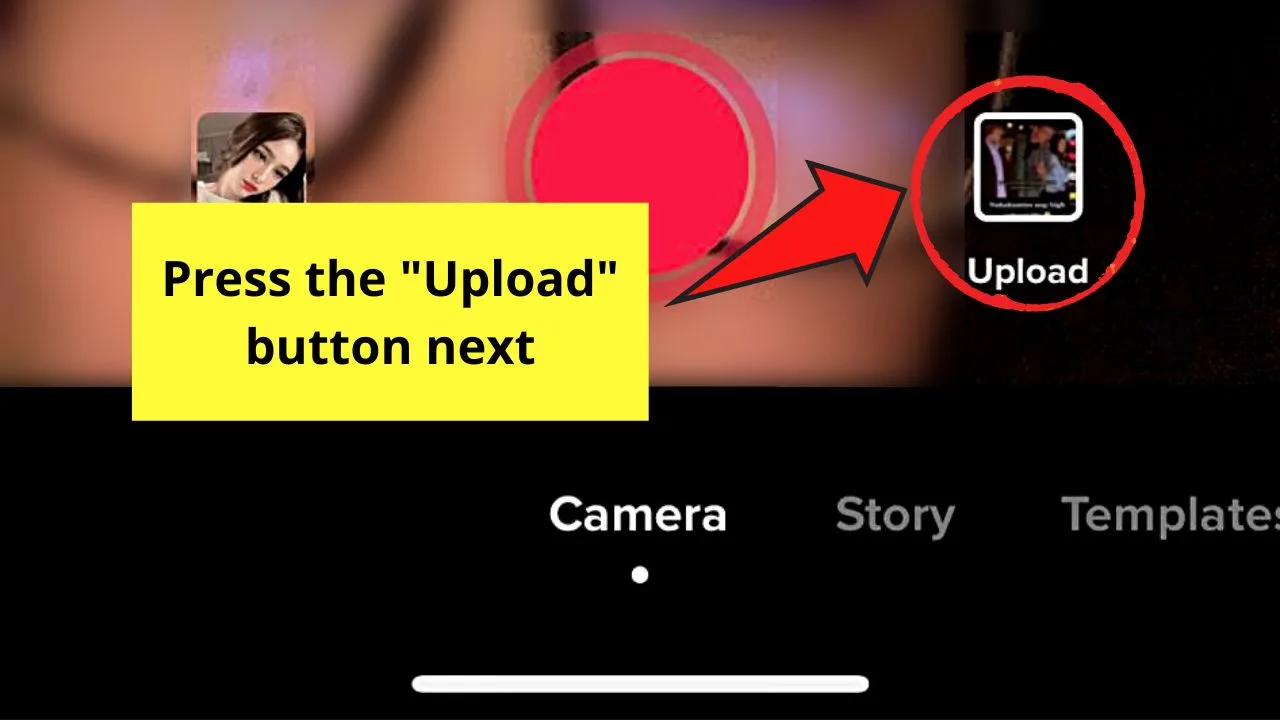
Step 2: Tap the “Upload” button on the creator page.
Step 3: To add two or more photos from the gallery, tap the circle for the “Select multiple” to activate it.
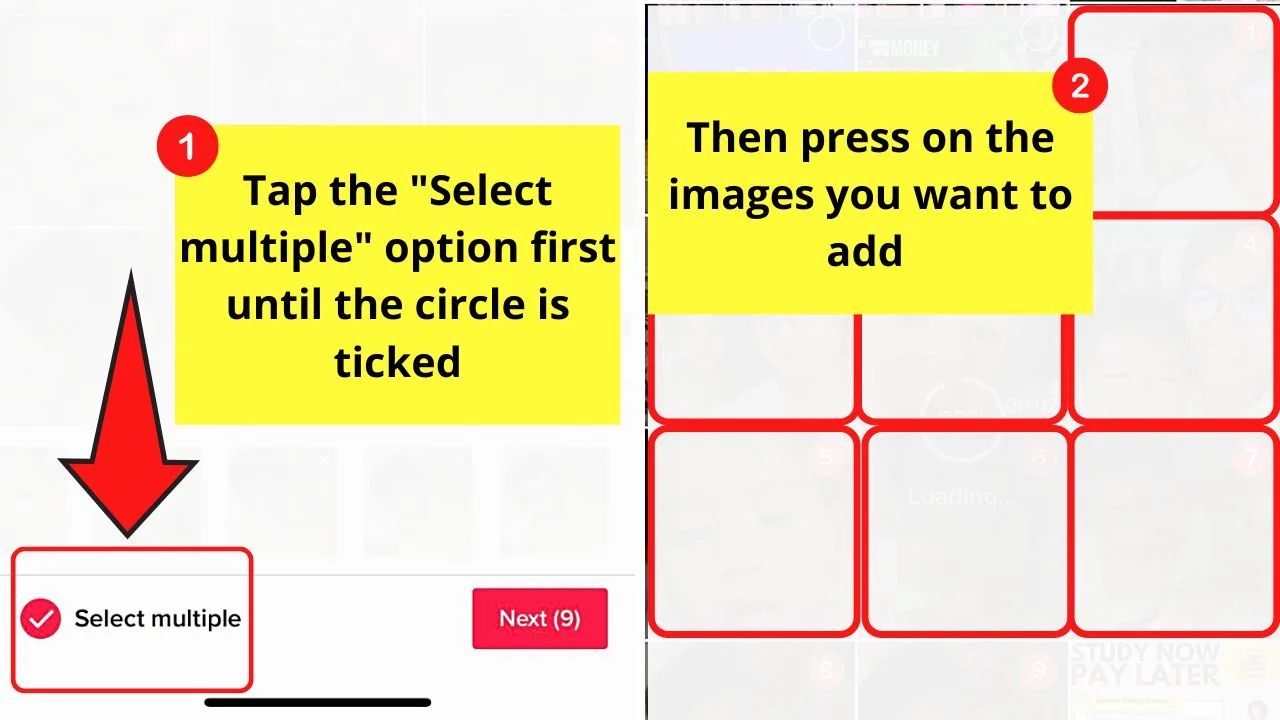
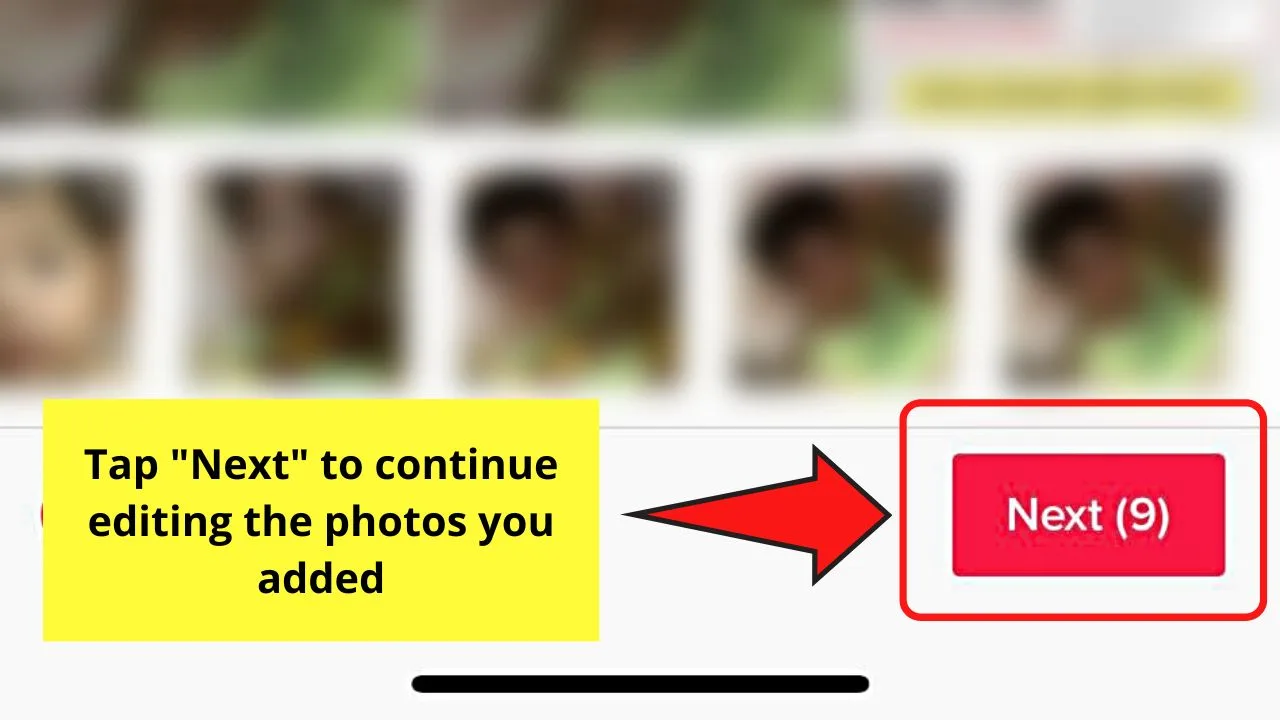
Once the said feature’s activated, you can now tap on as many images from the photo gallery as you like.
Then, tap “Next.”
You can also use a slideshow template from the “Templates” menu.
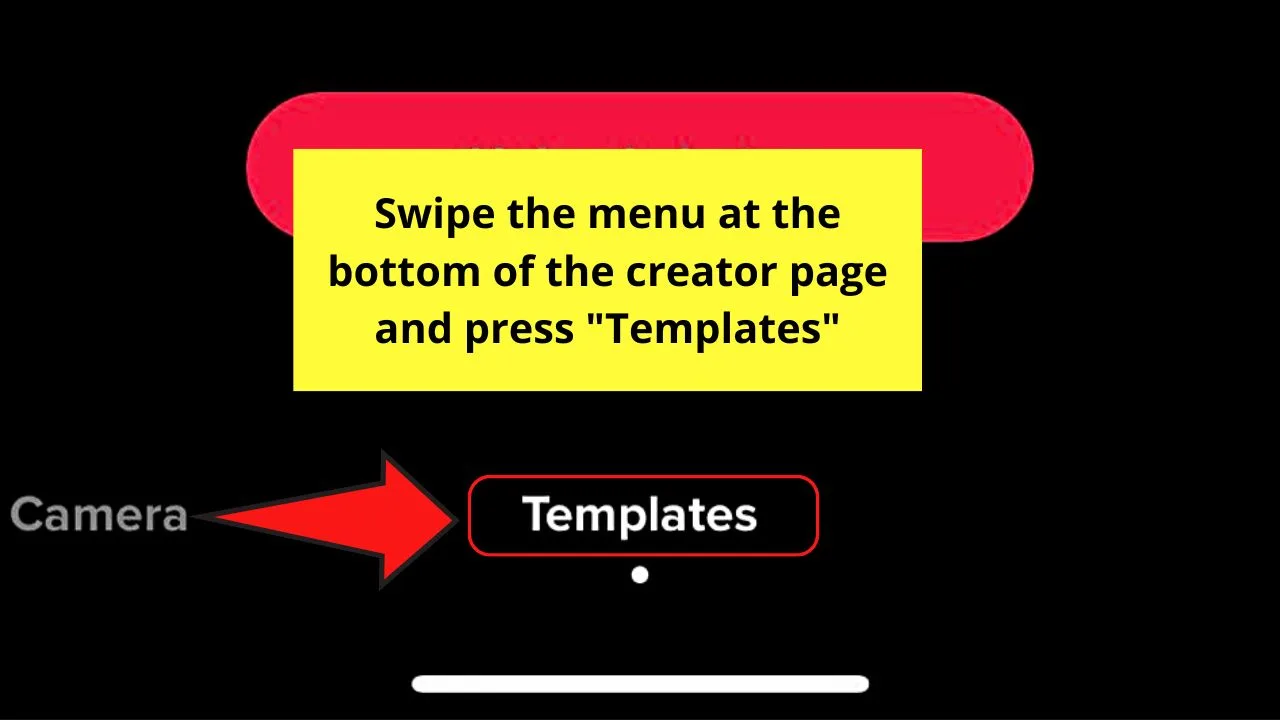
Simply press “Templates” on the bottom menu of the creator page, and tap a slideshow template before tapping the “Upload Photos” button.
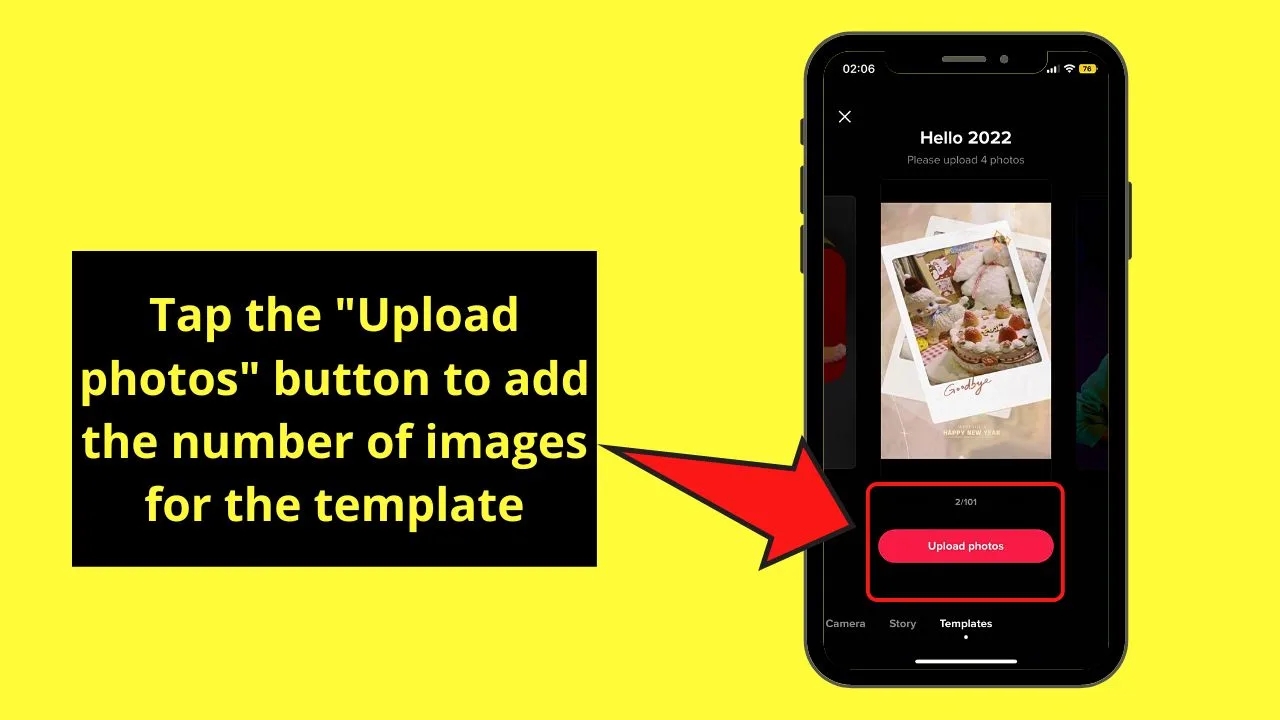
Step 4: Add the number of images needed for the template you selected before pressing “OK.”
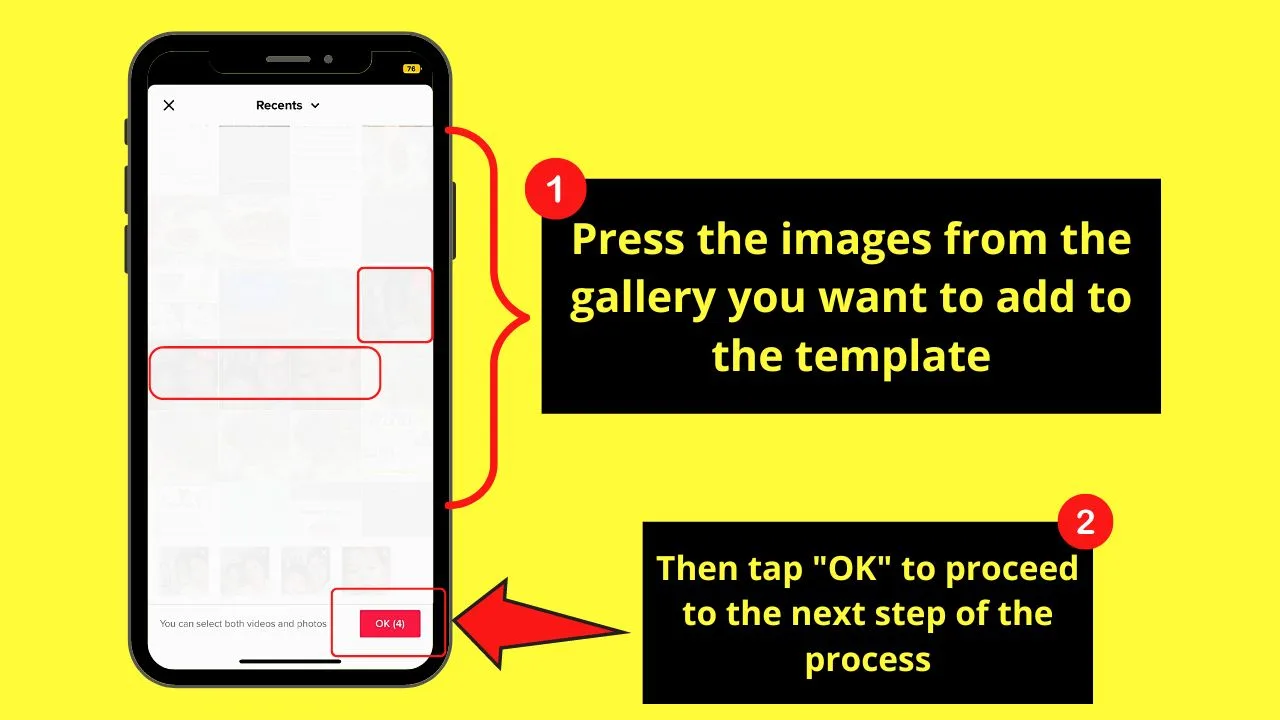
Wait for TikTok to upload all the images selected. Once the slideshow is already ready, you can proceed with editing the photos added.
To start, press the “Effects” tab on the right-side panel of the creator page.
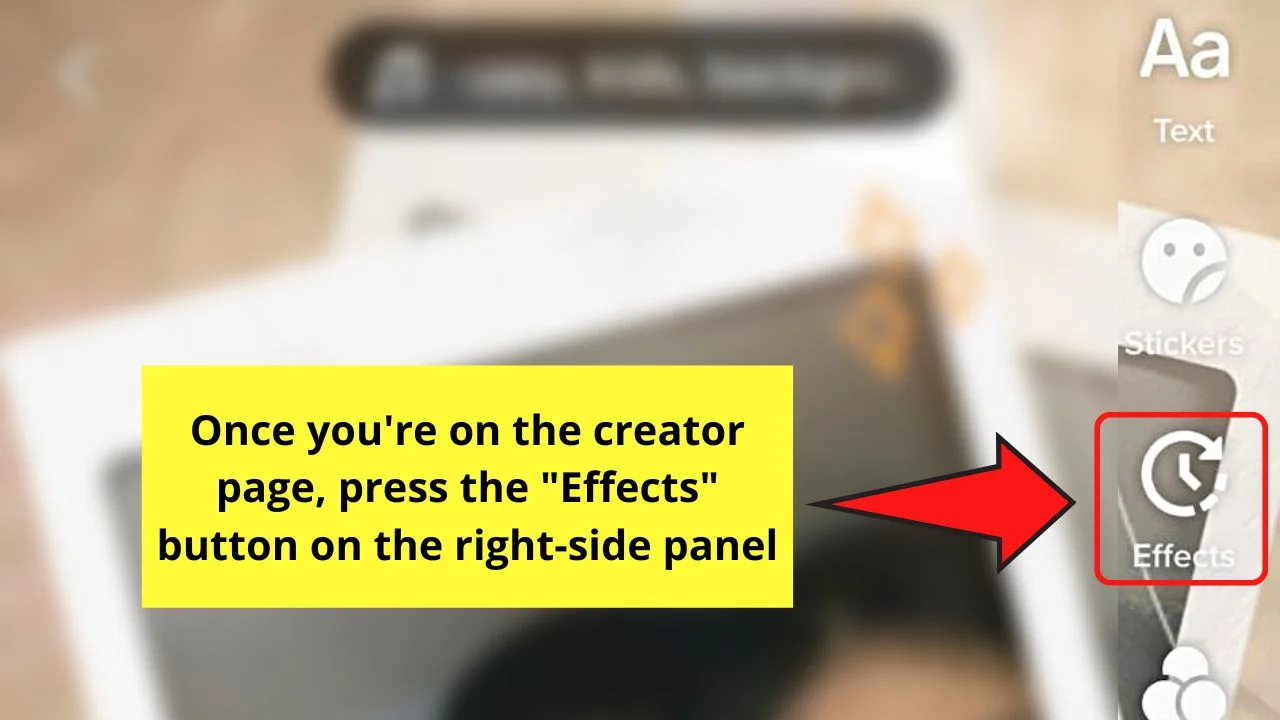
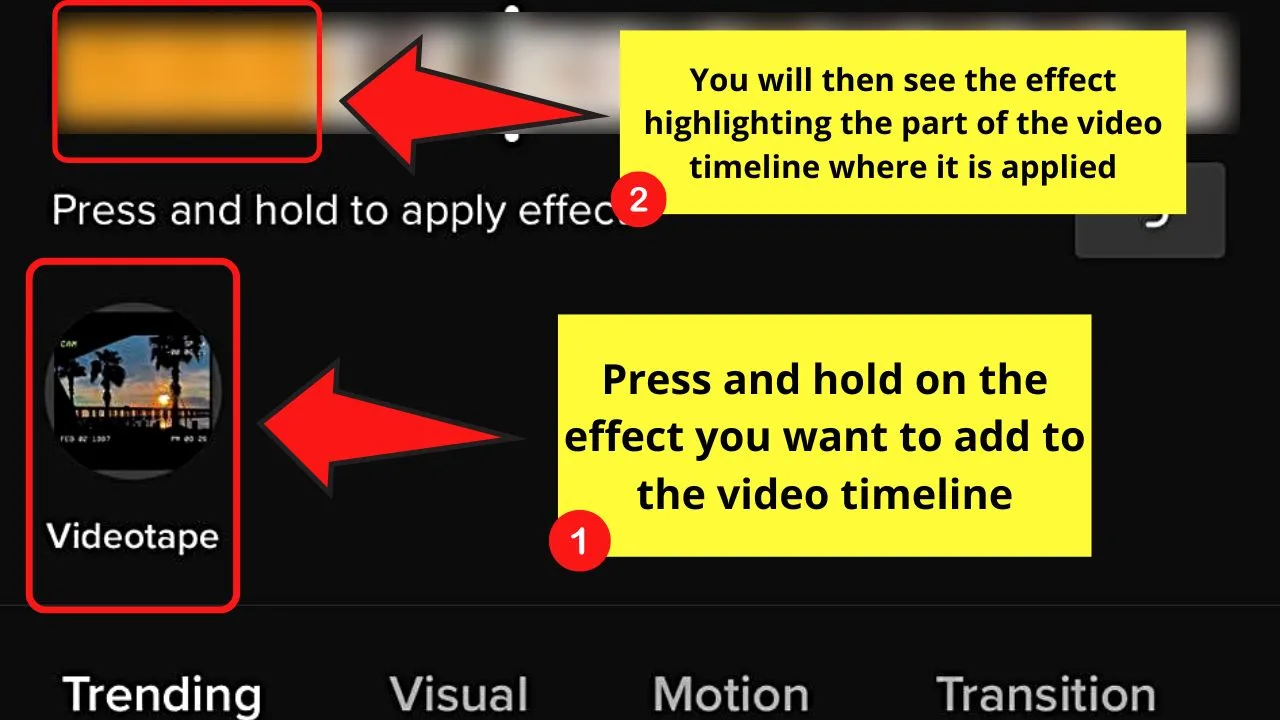
From there, choose the effects for each of the images by tapping on the category and long-pressing the thumbnail of the effect you want to apply.
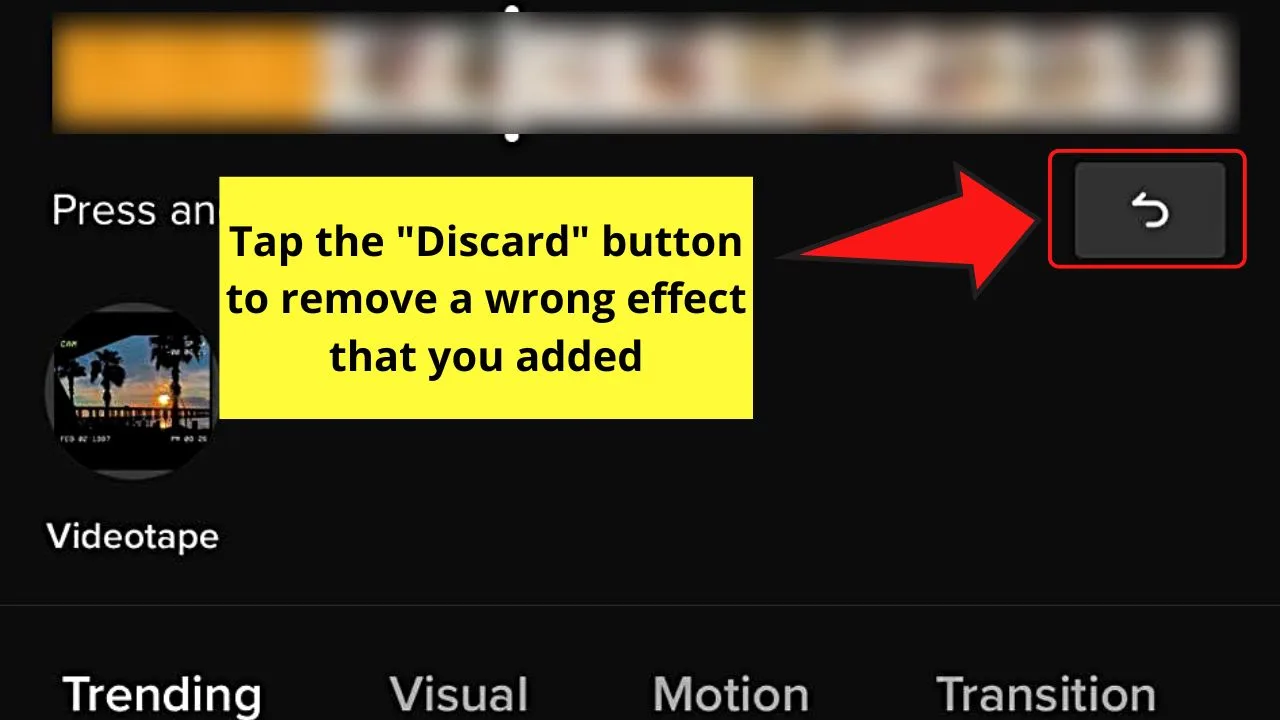
If you accidentally added a wrong effect, just press the “Discard” button to delete it from the timeline.
Repeat the process until you have applied the effects to all the photos you added.
Step 5: After adding effects to your TikTok photo slideshow, then tap “Save” to keep the effects you added.
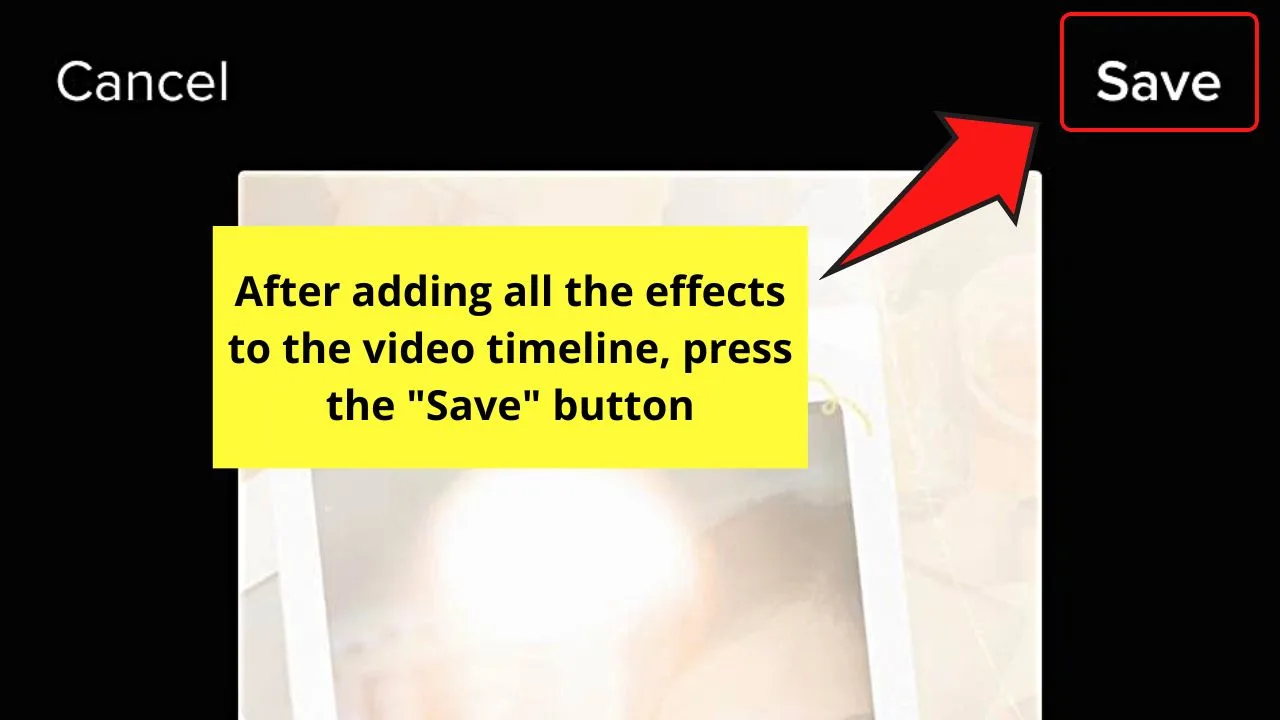
You’ll then be redirected to the creator page.
Step 6: On the same right-side panel, press the “Filters” button.
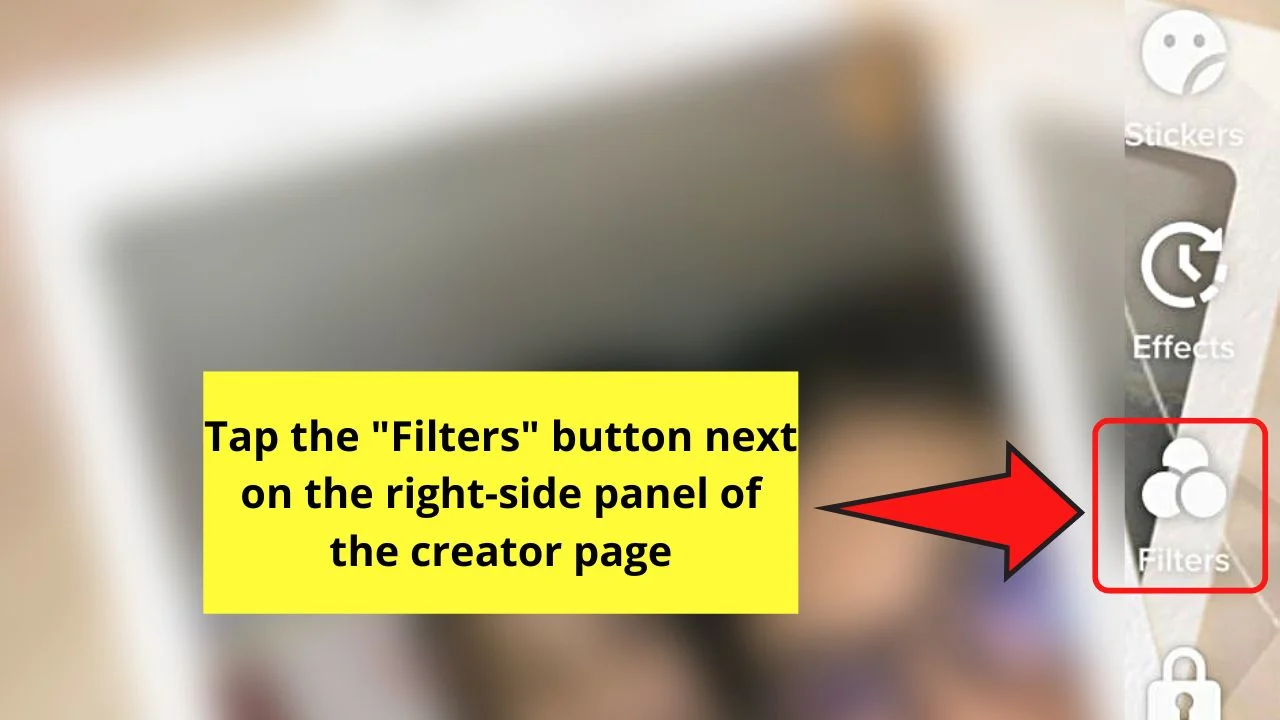
You will then see a filters menu pop out from the screen’s bottom part. Once you see it, tap on the filter category and the filter thumbnail to apply it to each of the photos.
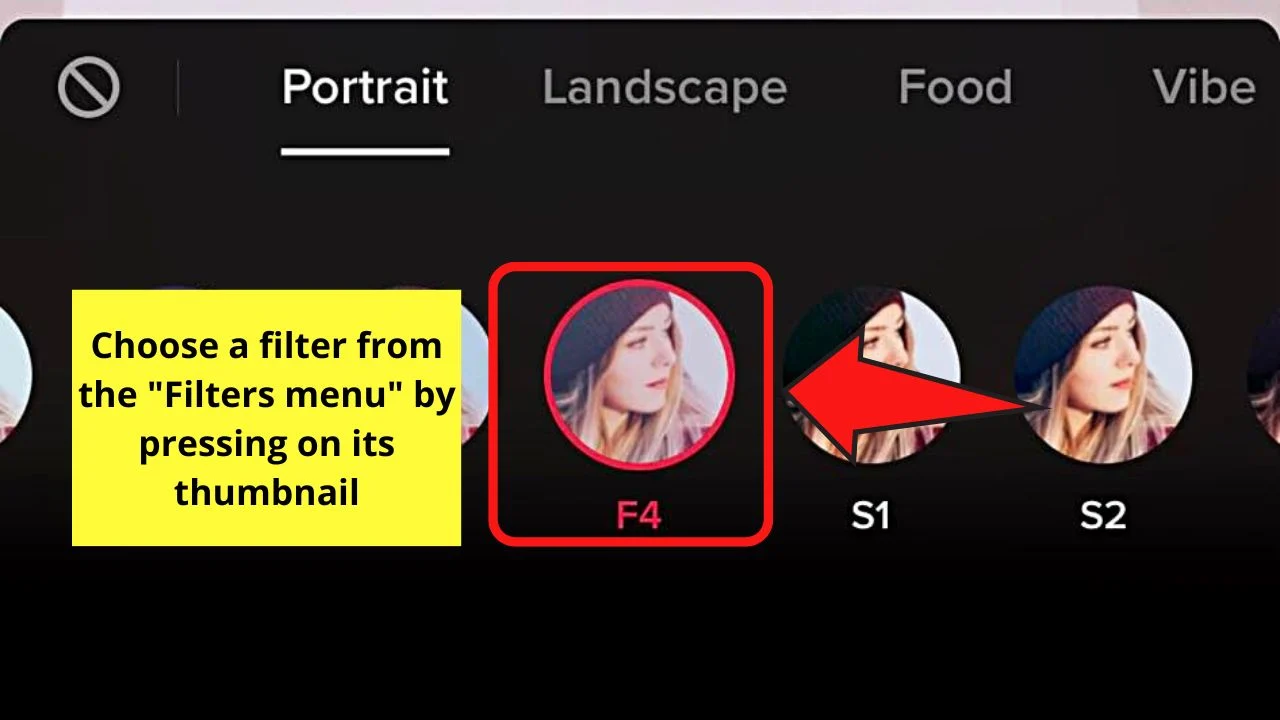
You can always change the filter added by pressing another filter thumbnail if you don’t like the first one you selected.
Once you’re done adding filters, tap the middle of the photo on the creator page to exit from the filter menu.
Step 7: Tap the “Enhance” button on the right-side panel to improve the TikTok photo slideshow’s resolution.
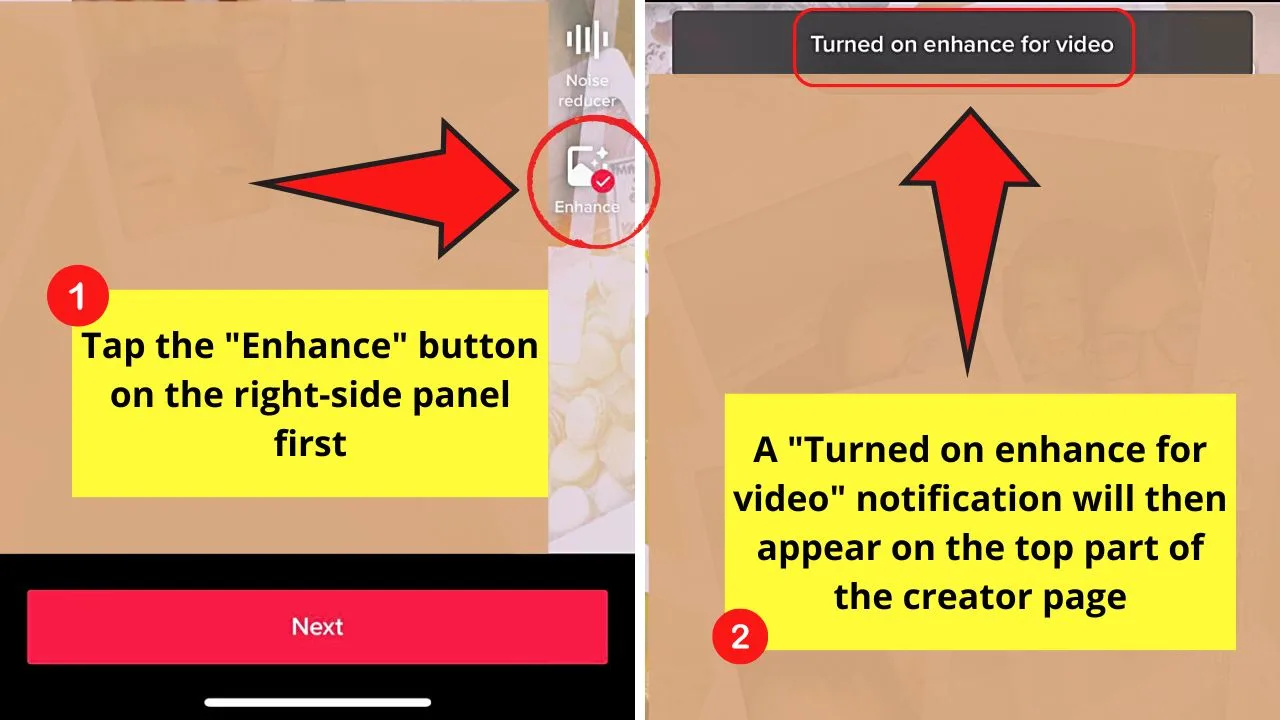
A “Turned on enhance for video” message will then appear, and the images in the footage will then have a sharper look to them.
Step 8: If you don’t have anything to add (music, stickers, text, and the like), press the “Next” button.
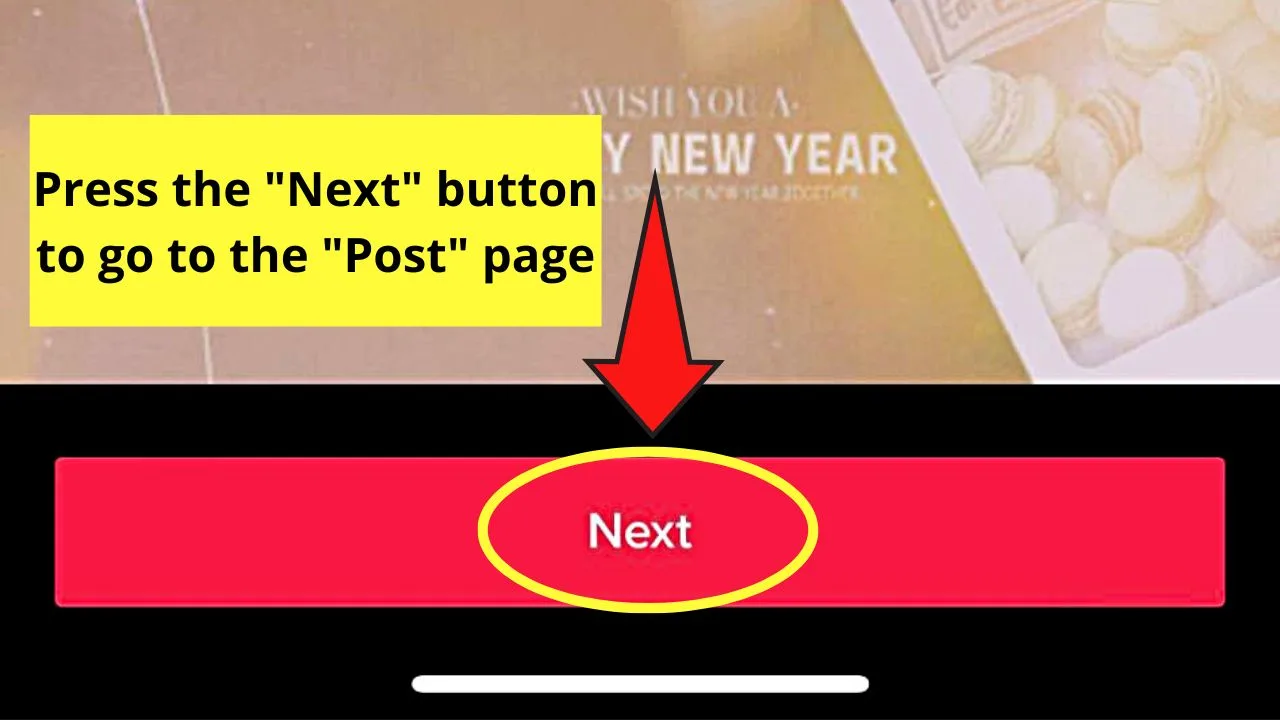
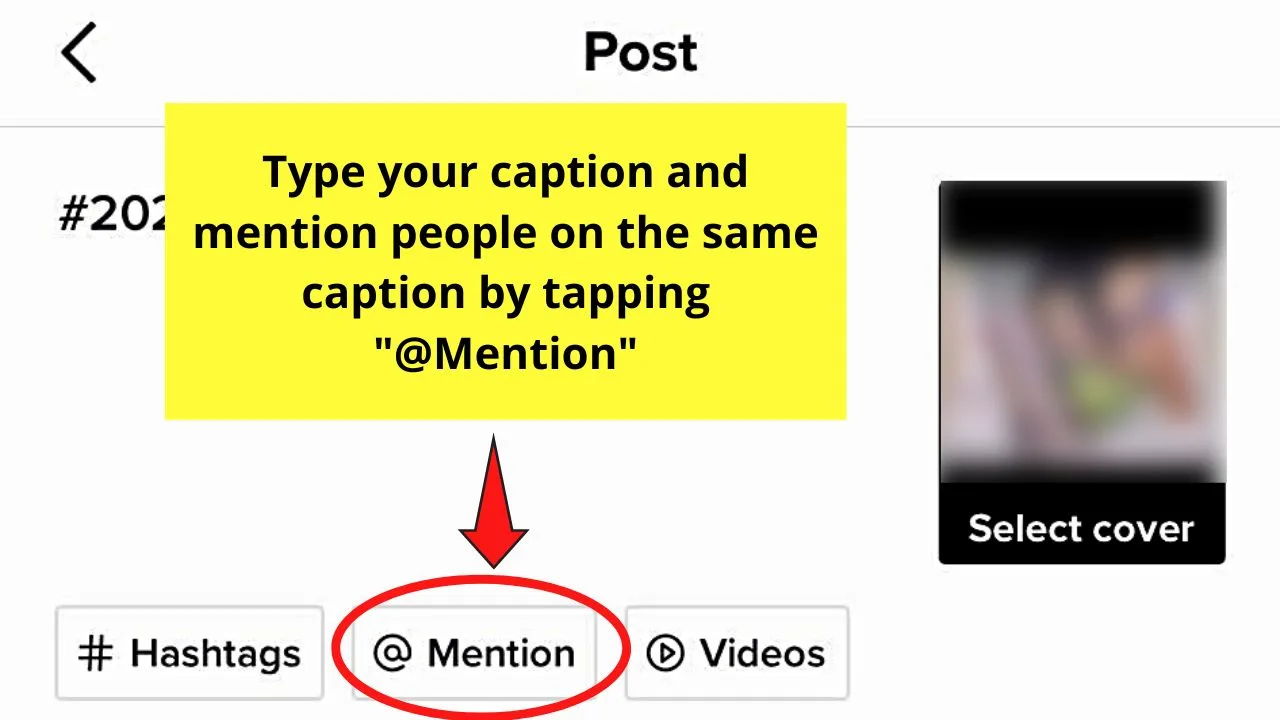
Step 9: On the “Post” page, type your post’s caption and mention people you want to know about your new post.
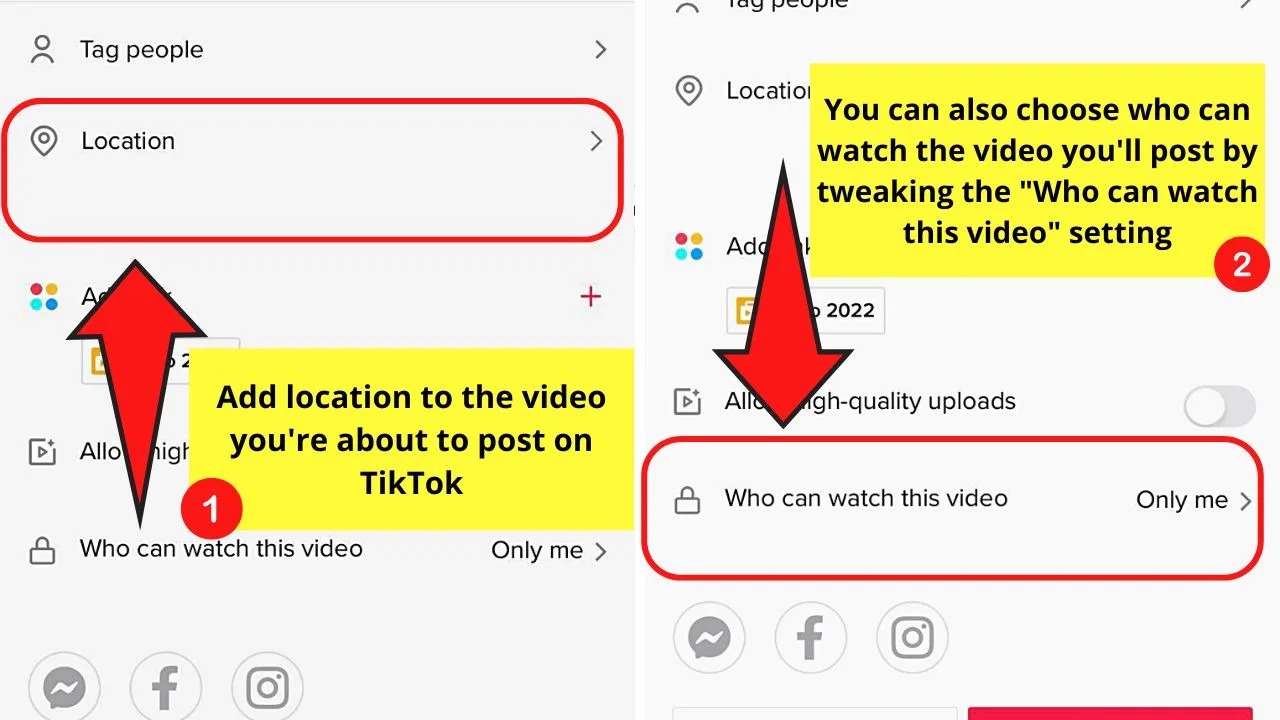
Add location as well if you want and tweak the “Who can watch this video” setting as well.
After which, you can tap “Post” to proceed with uploading your new TikTok video to your account.
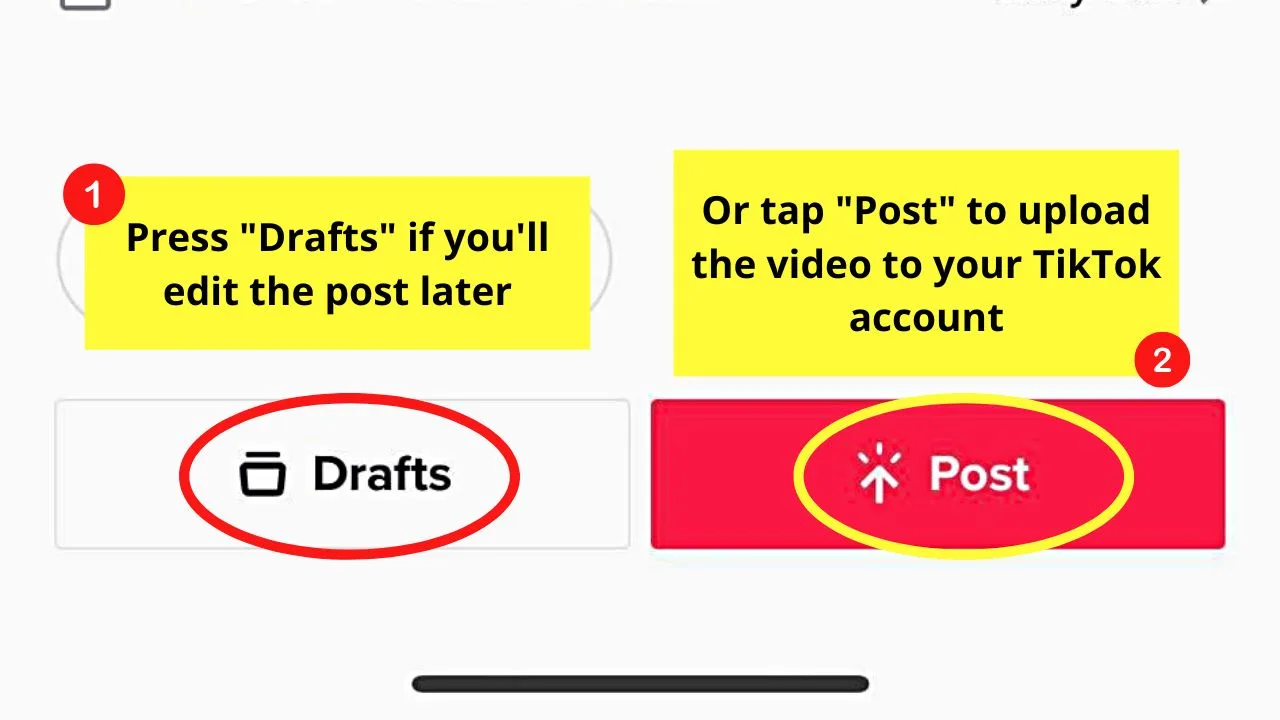
Or, if you’re planning to edit the said post later, press “Drafts” instead.
How to Make Pictures Full Screen on TikTok iPhone
Do you notice the black bars found above and below the photo you upload for your TikTok story or post?
If you do, then perhaps you’re thinking right now if there’s a way to remove those black bars and make the image full screen.
Well, you’re in luck, as there certainly are ways for you to make an image full screen on TikTok, as well as crop a video on TikTok.
Method 1: Making Photos Full Screen Using iPhone’s Photo Editor
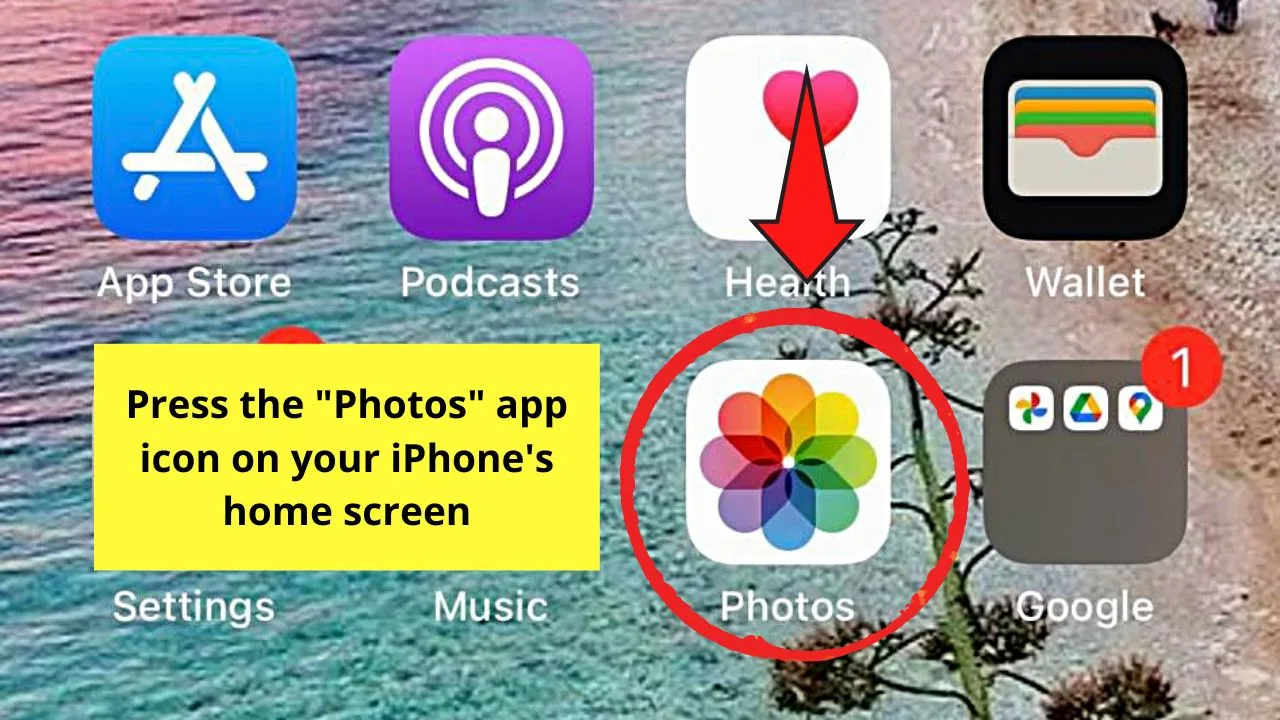
Step 1: Open the “Photos” gallery on your iPhone by tapping on its app icon.
Step 2: Once the “Photos” gallery appears, swipe up the images until you find the one you want to post on TikTok.
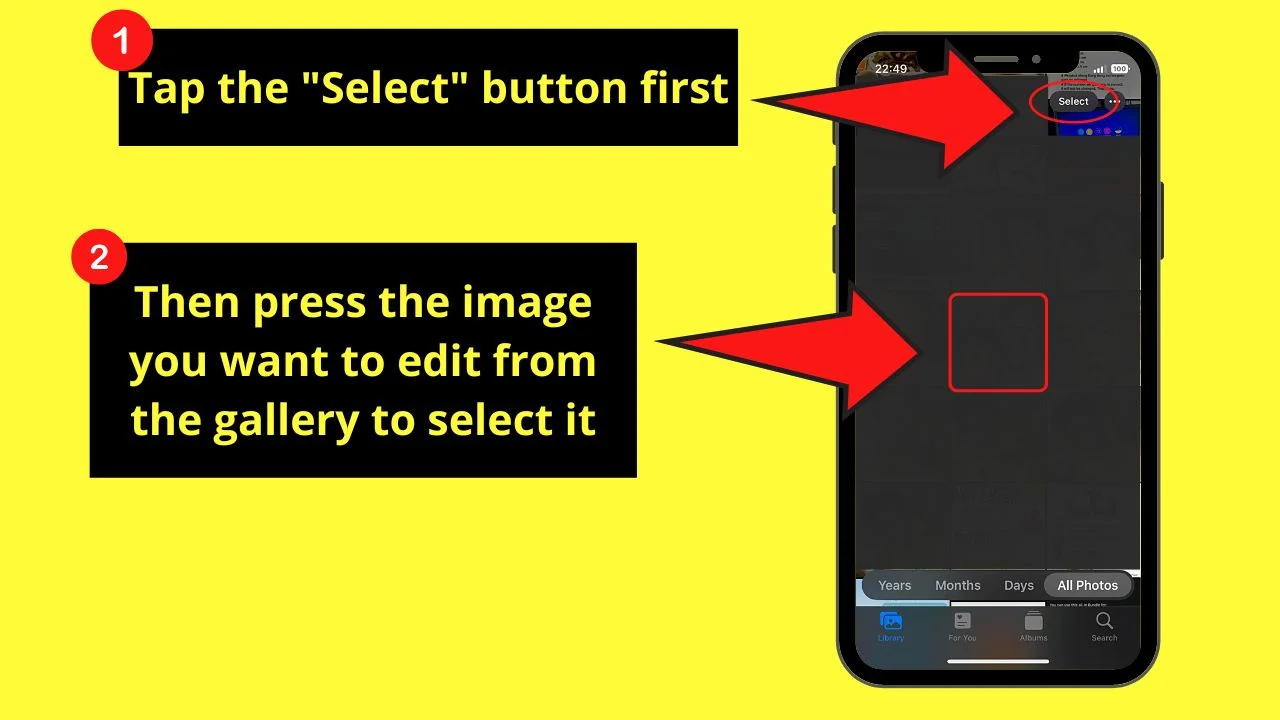
Press “Select” first and then tap to choose the said photo.
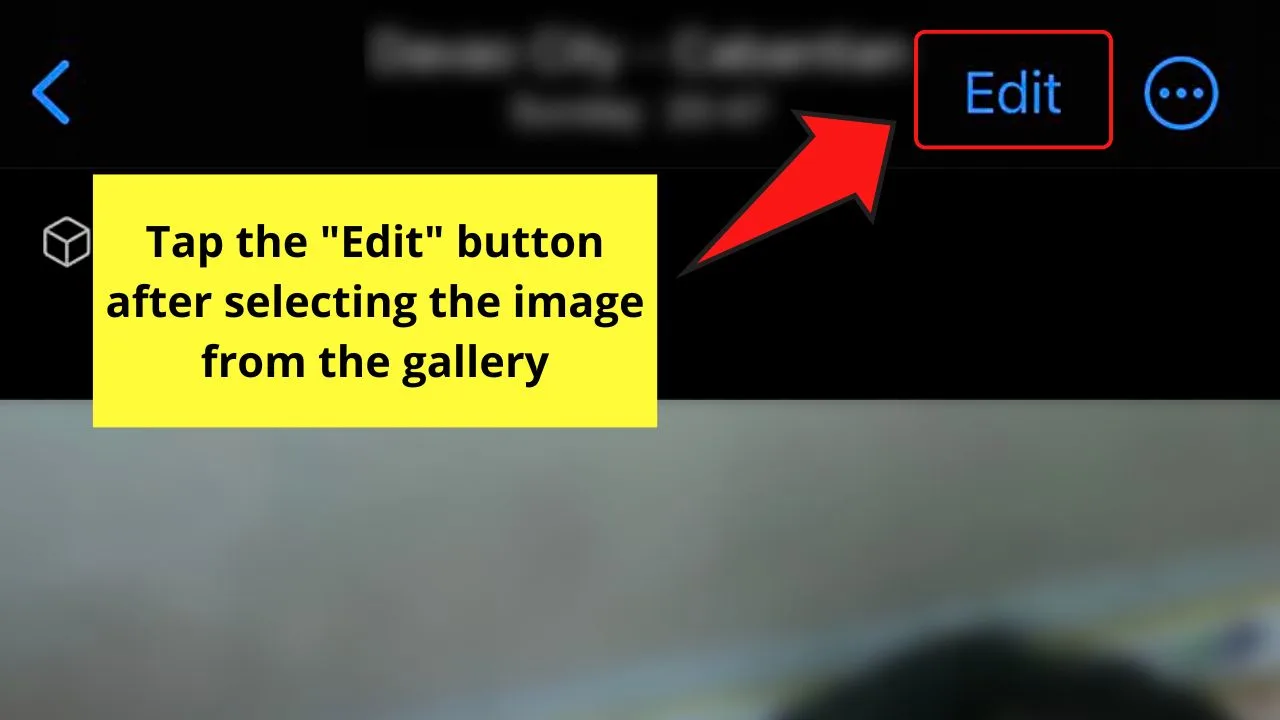
Step 3: Adjust the size of the image by tapping the “Edit” button on the upper right of the screen.
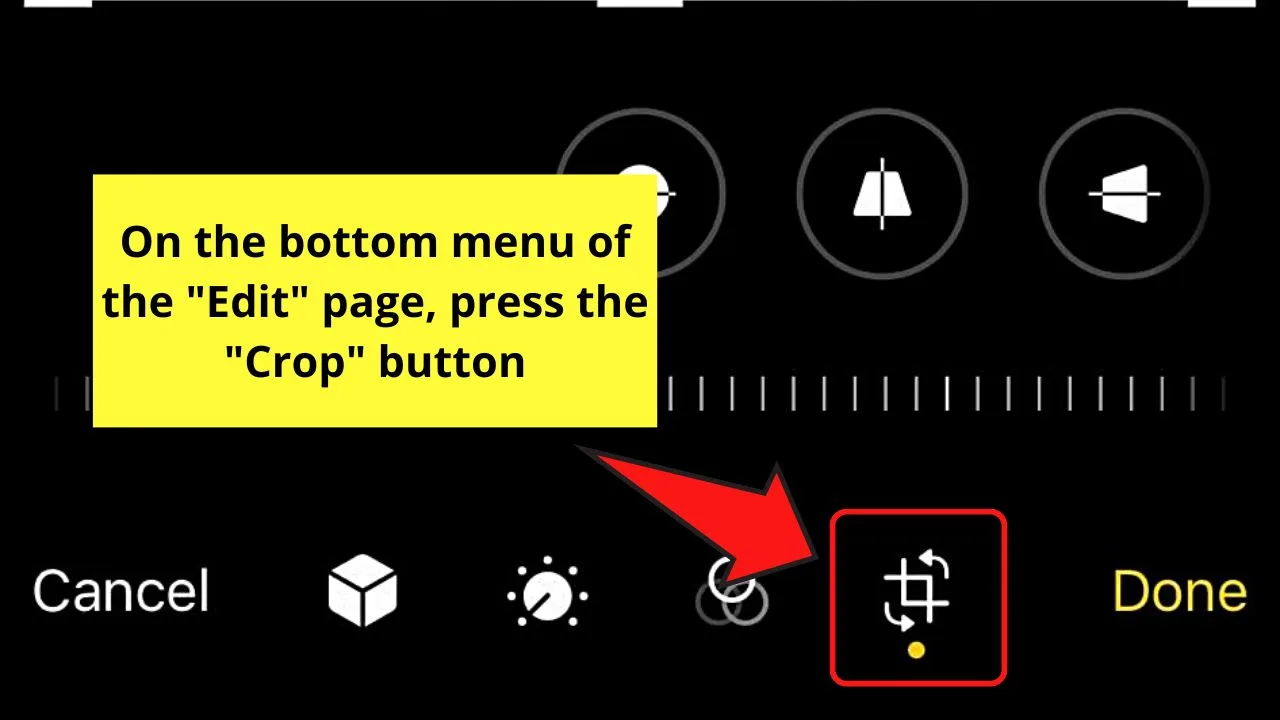
Step 4: Open the cropping tool by pressing the “Crop” button.
Step 5: On the header menu, press the “Aspect Ratio” button.
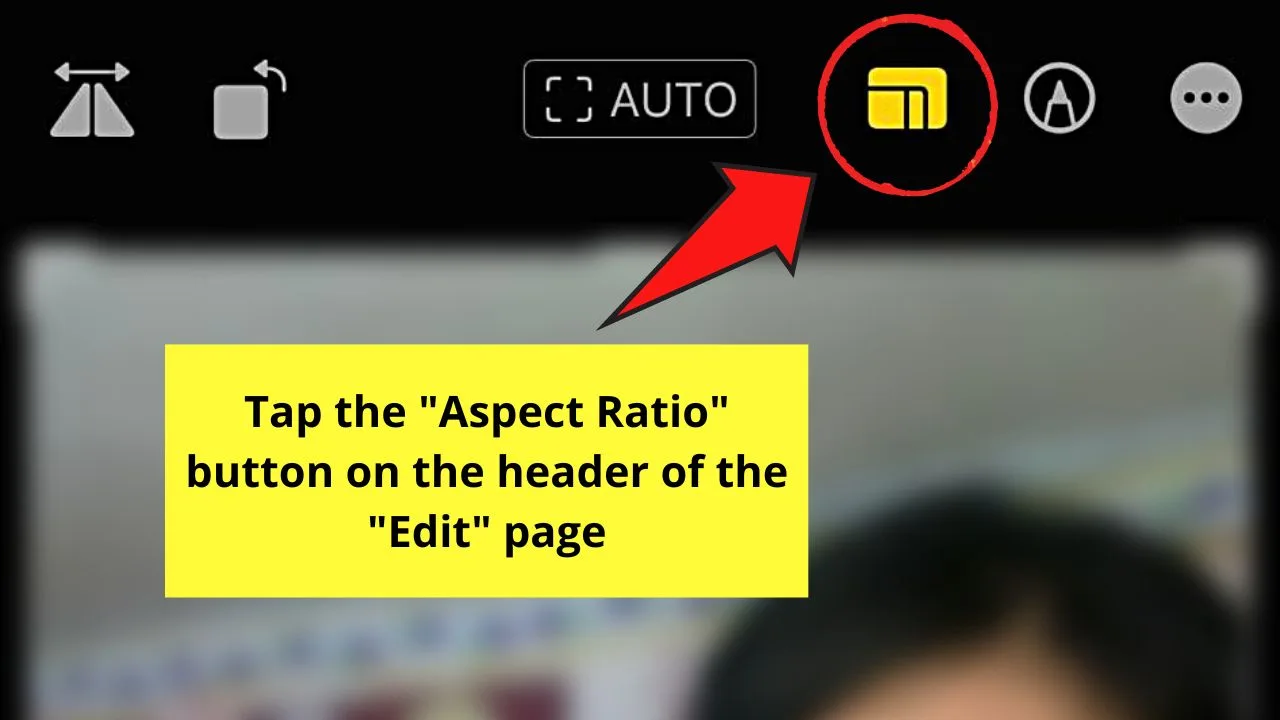
This will then make the cropping options appear below the image.
From there, swipe the cropping options to the left until you see the “9:16” option. Press to select it.
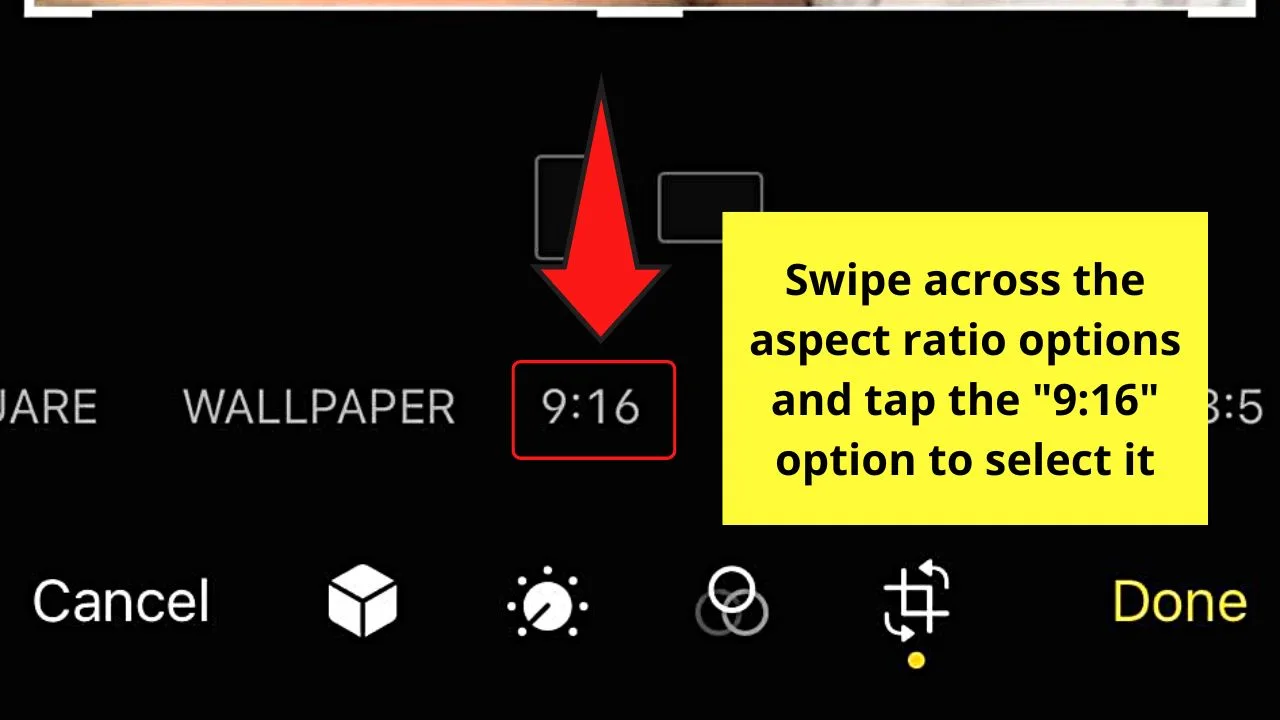
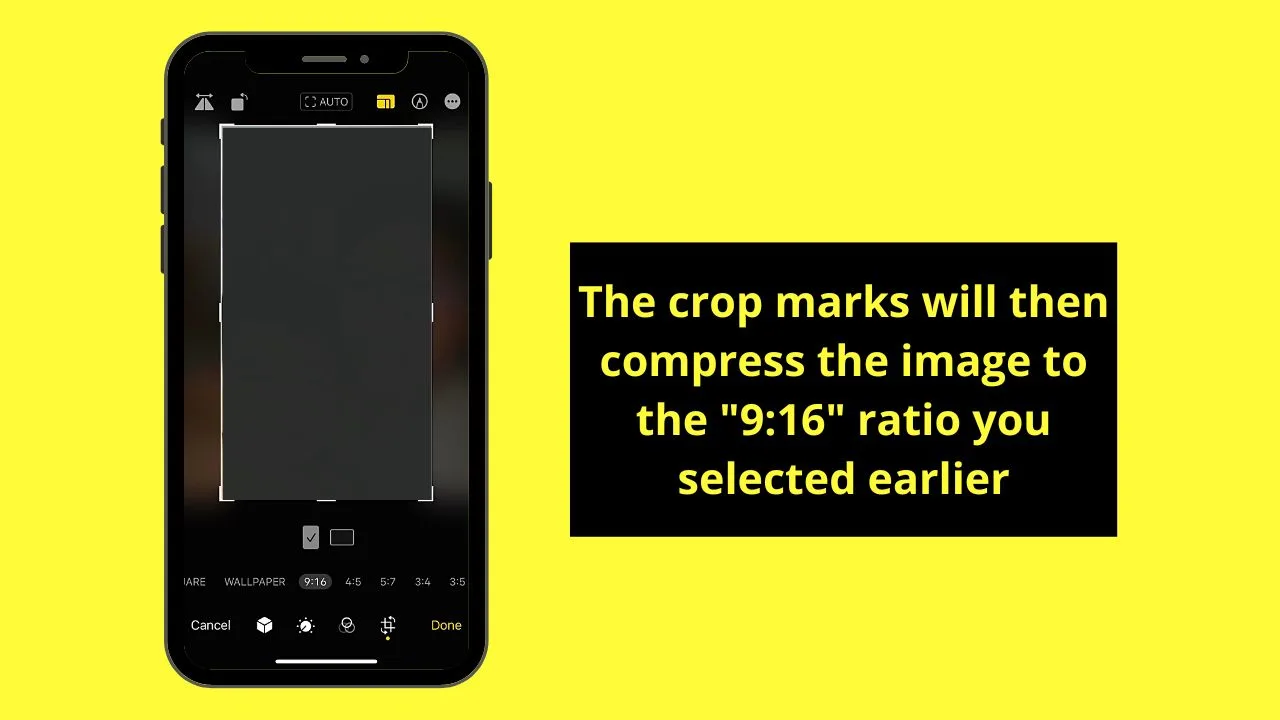
After selecting it, the crop marks will then narrow the image down to the aspect ratio you tapped.
Step 6: Tap the “Done” button to save the photo in its new aspect ratio.
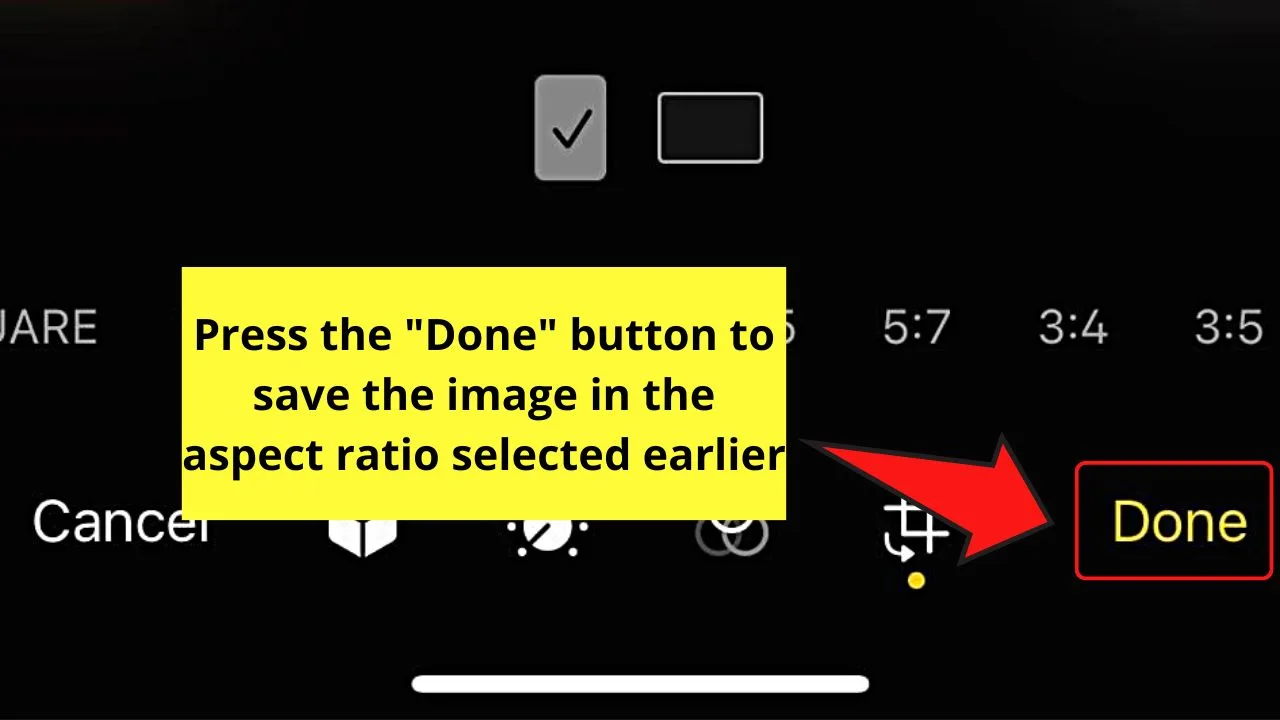
From there, you can proceed with opening TikTok.
Step 7: Press the “+” button on the bottom menu of TikTok’s home page to upload the newly-cropped photo.
Then, tap the “Upload” button beside the red “Record” button.
Step 8: Find the newly cropped photo from the gallery and press to select it.
Since you want to make the image fill the full size of the screen, pinch your fingers outward to zoom in.
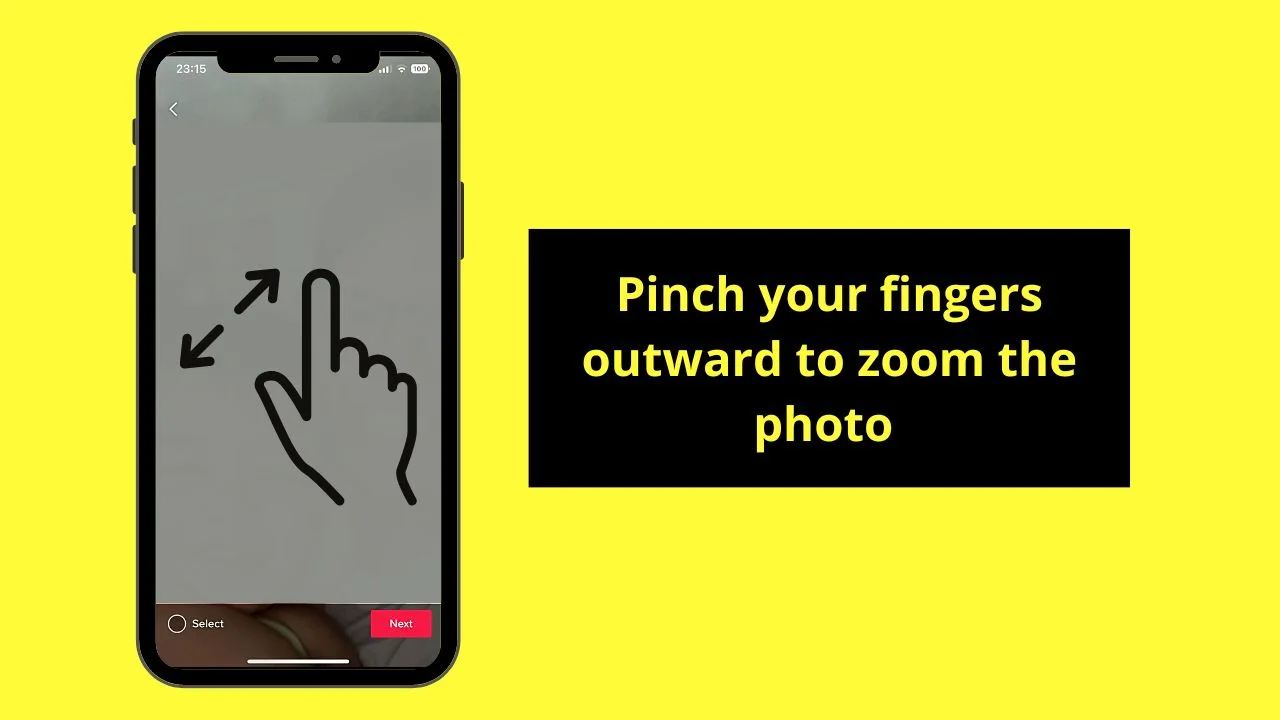
Step 9: Tap the “Select” option before pressing “Next.”
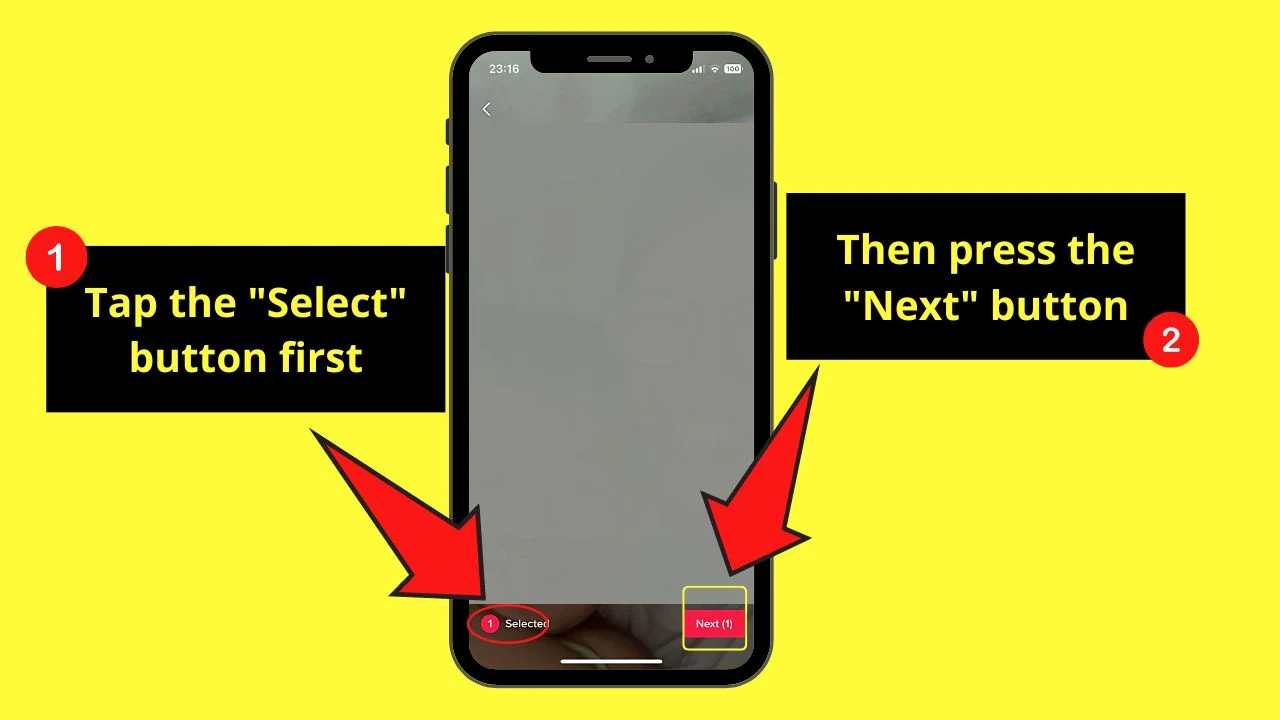
The cropped image will then fill in the full size of the TikTok screen.
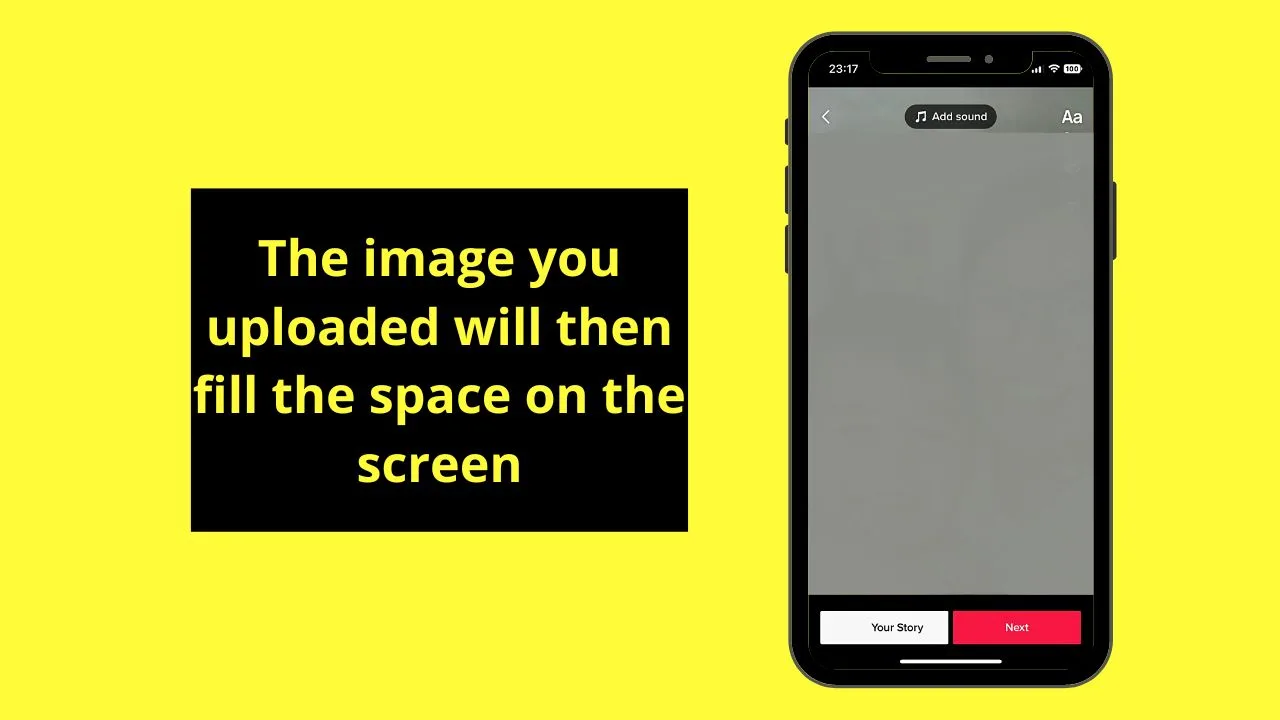
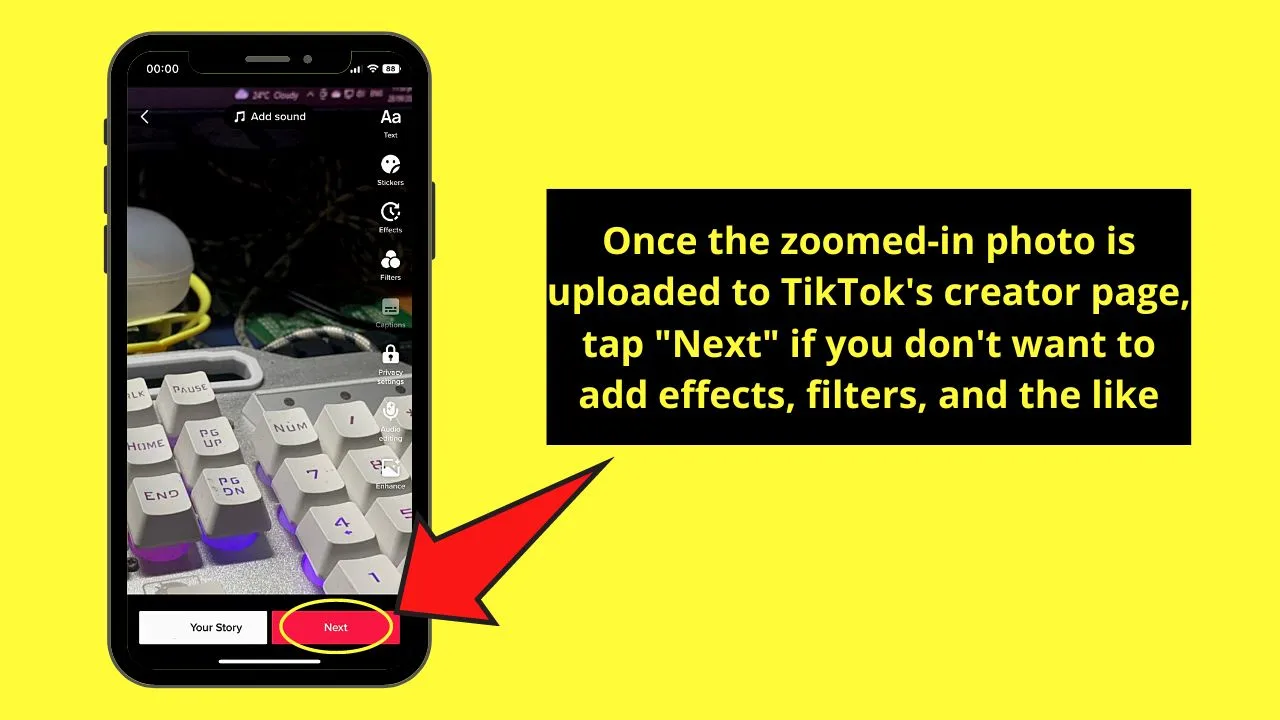
You can now proceed with adding sound, filters, effects, stickers, and text to the photo you uploaded.
After editing the photo, you can now tap the “Next” button and proceed with posting it to TikTok or saving it as a draft first.
Method 2: Making Photos Full Screen Using CapCut
Step 1: Launch CapCut on your iPhone by tapping on its app icon.
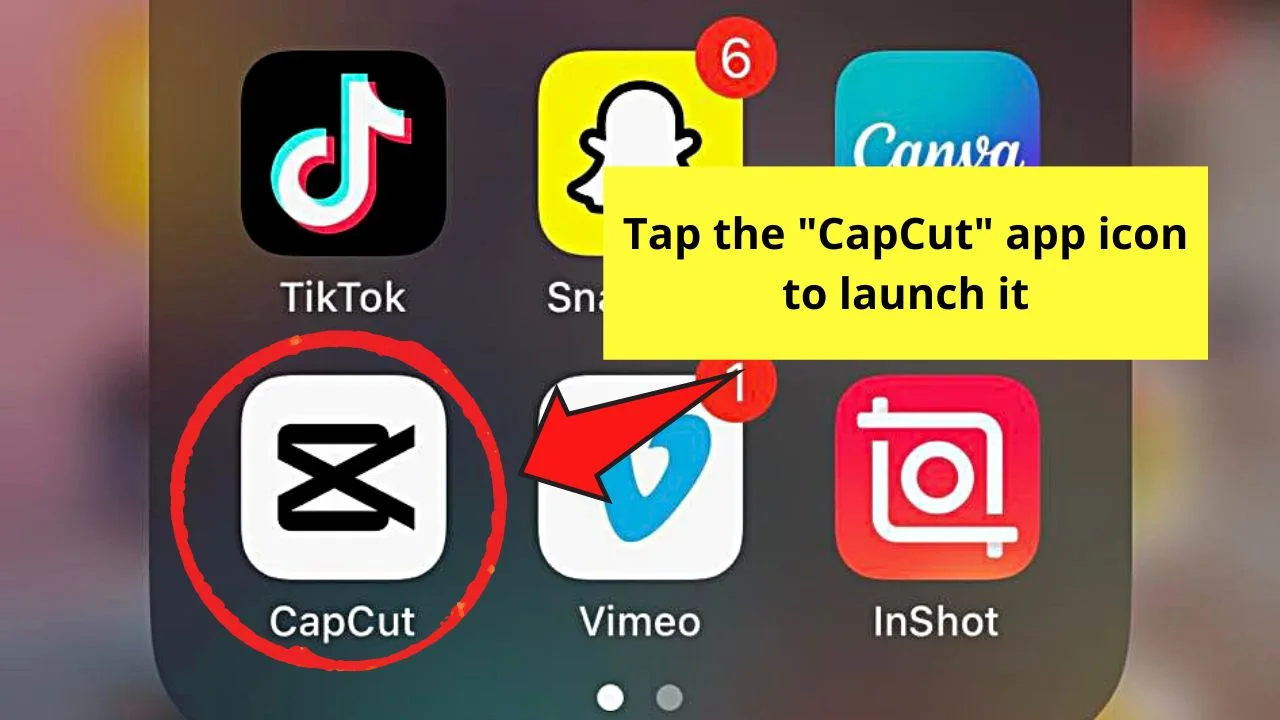
Step 2: Once CapCut loads to its home page, press the “New Project” button.

Step 3: Tap the “Photos” category on the header To make an image full screen.
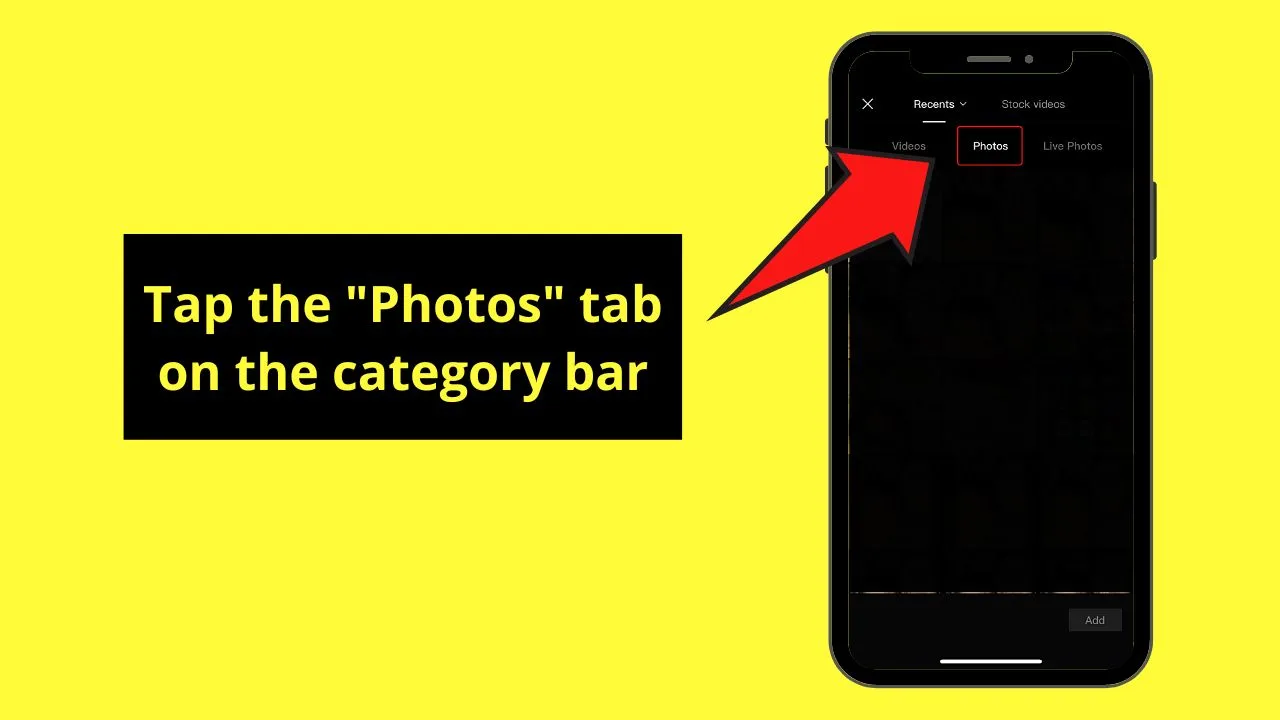
Step 4: Locate the photo and tap “Add” to select it.
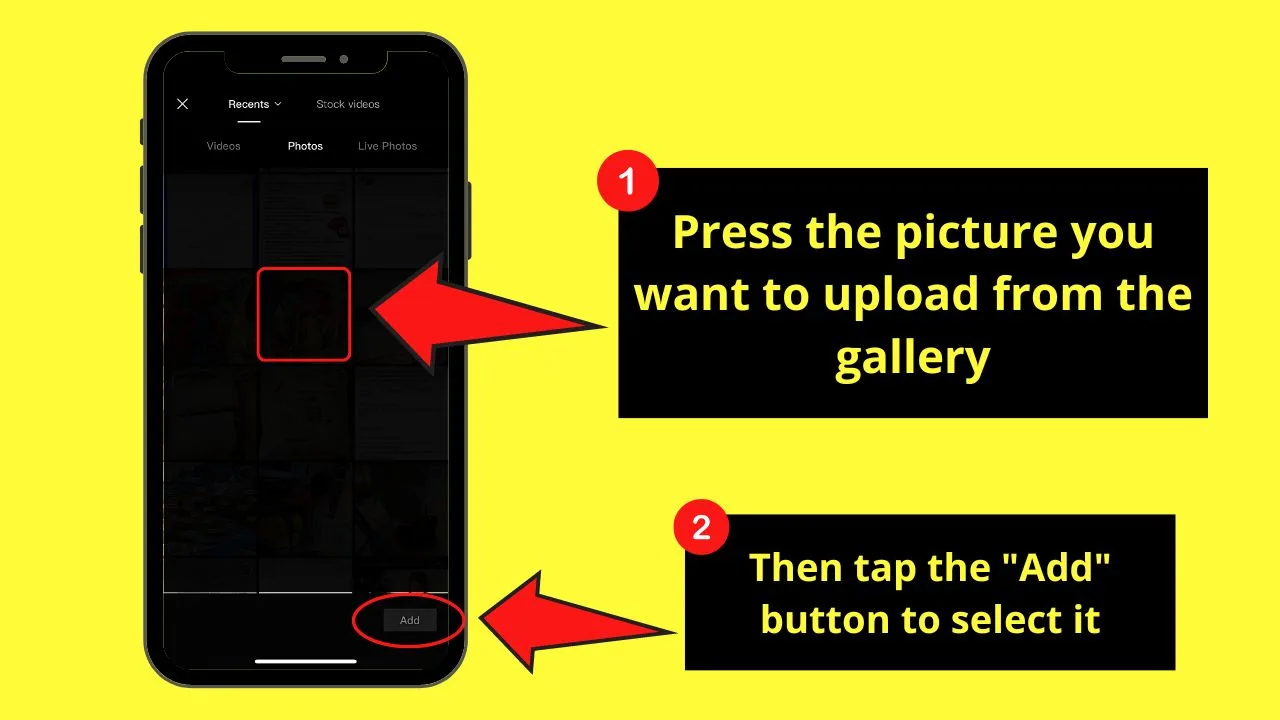
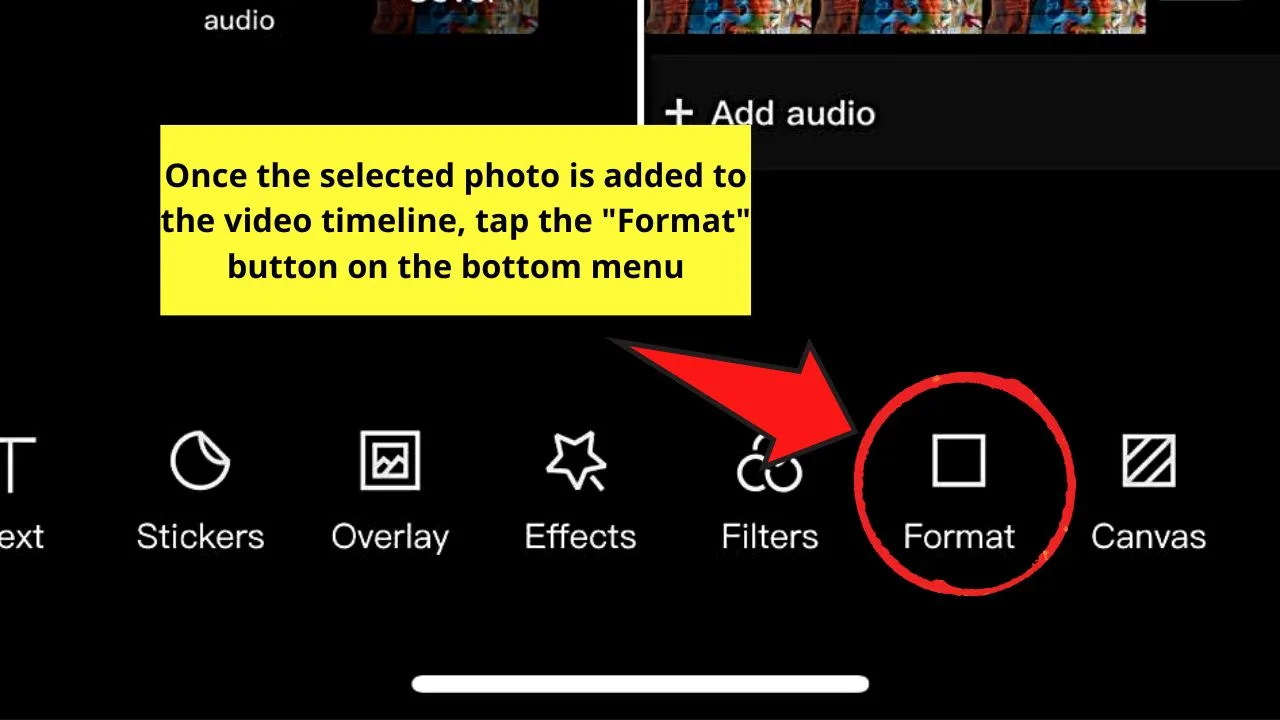
Step 5: The image will then be added to the video timeline, but since you want to crop the said photo, press “Format” on the bottom menu.
Step 6: Aspect ratio options will then appear below the video timeline. Locate the “9:16” ratio option and tap it.
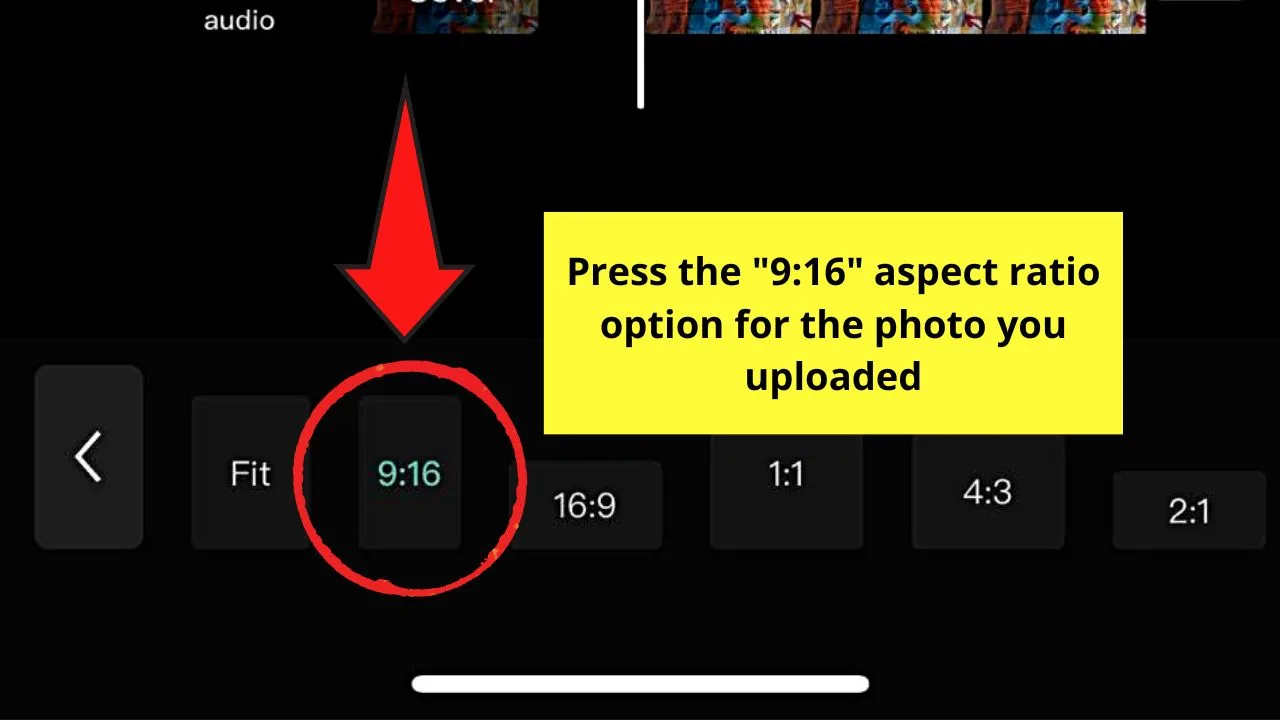
The image will then automatically assume the 9:16 aspect ratio you selected earlier.
Step 7: Now, tap the image and press the “Style” button.
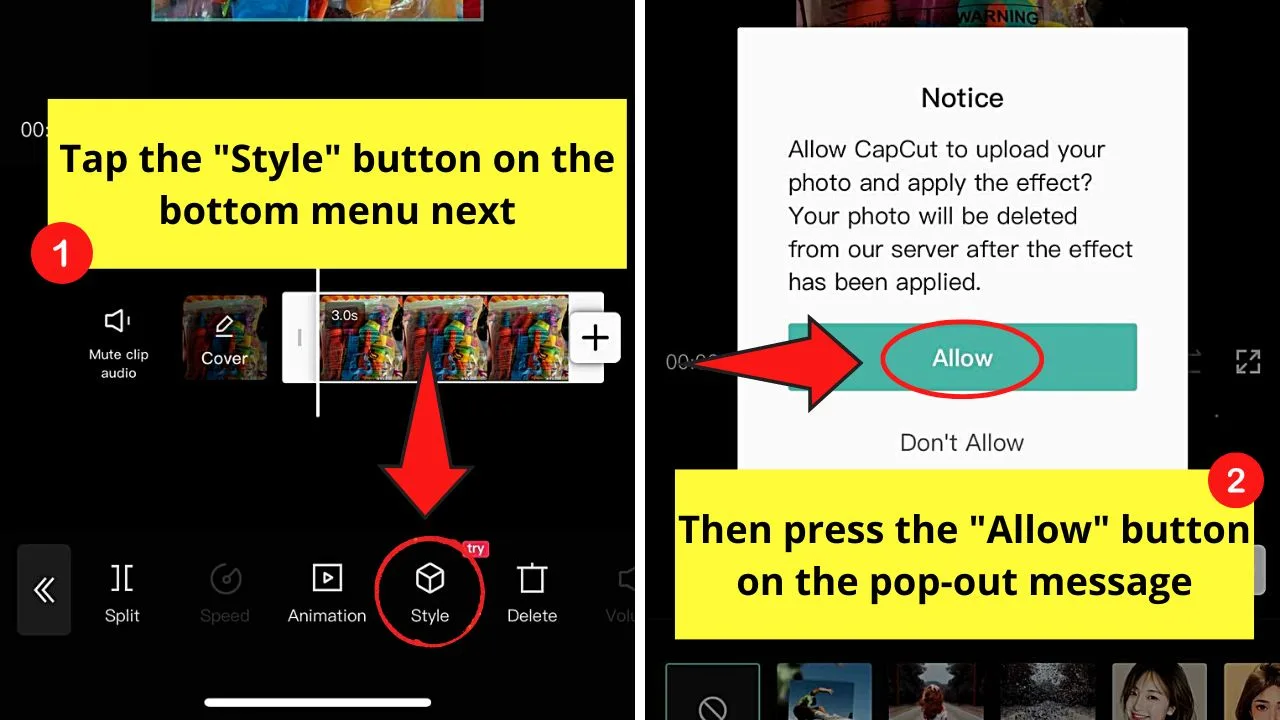
If this is your first time using the “Style” button, a pop-out message appears in the middle of the screen, asking you to allow CapCut to delete the original image after applying a style option.
Just press the “Allow” button to proceed.
Step 8: Swipe right on the bottom menu and press the “3D Zoom” option.
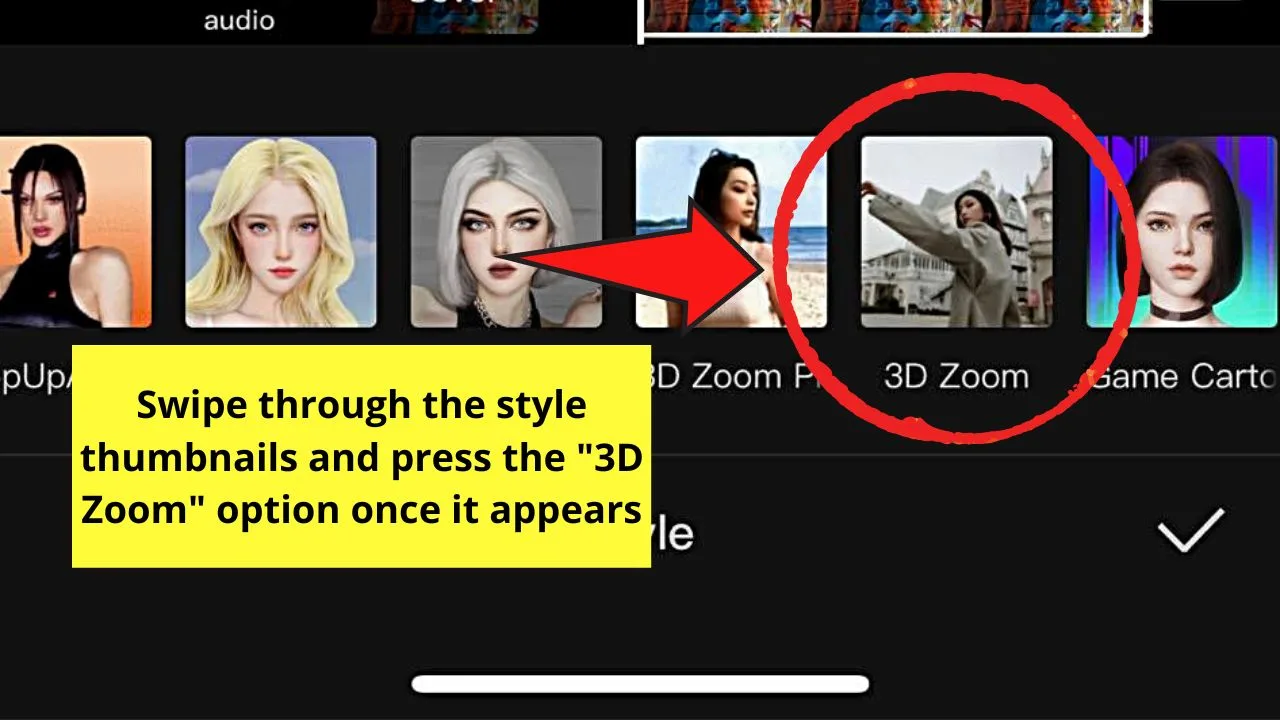
Then, allow CapCut to generate the new image with the 3D Zoom style applied to it.
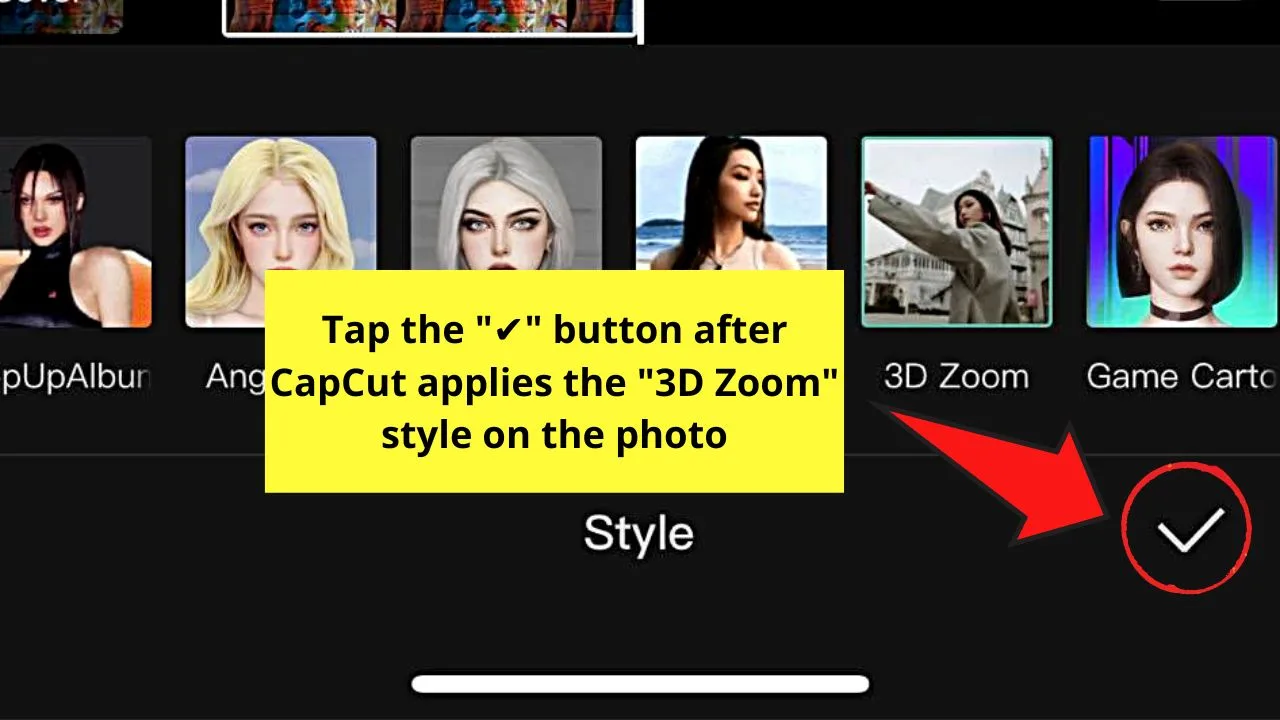
After which, tap the “✔” button to save the photo with its new style.
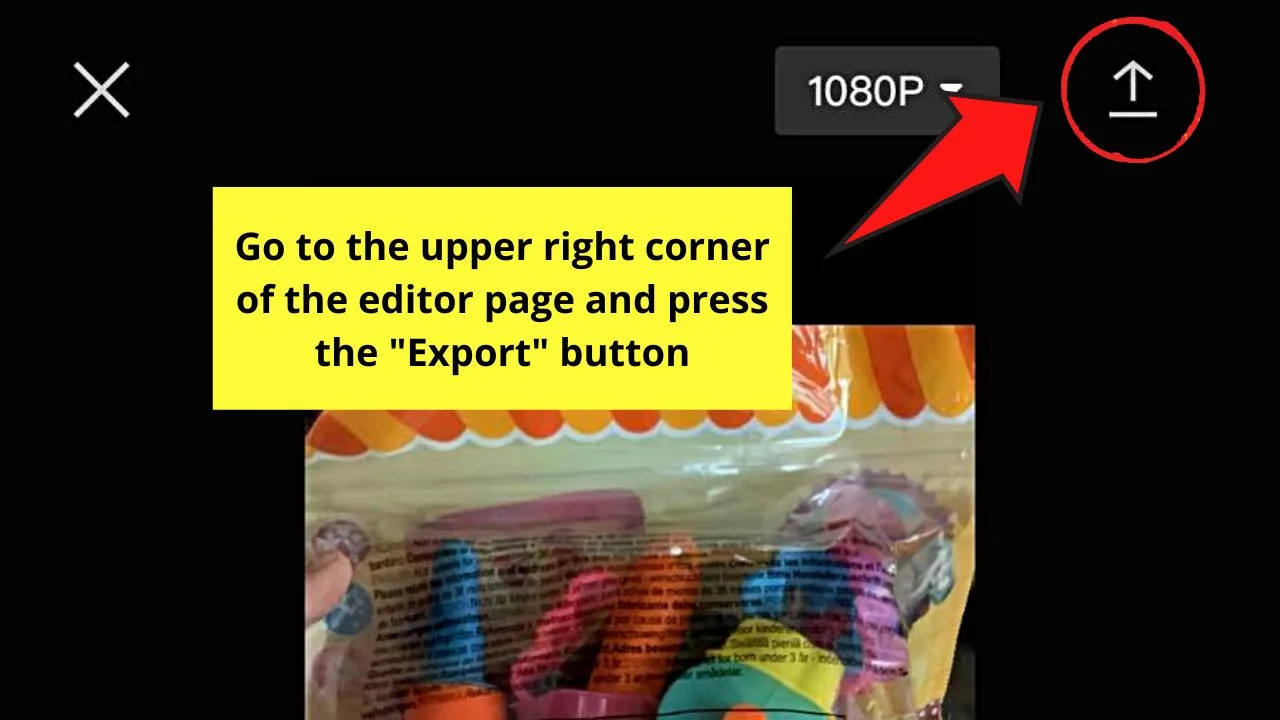
Step 9: To save the newly-cropped image to your phone, press the arrow-up icon on the top right of the screen.
From there, CapCut will make download the newly-edited image to your phone.
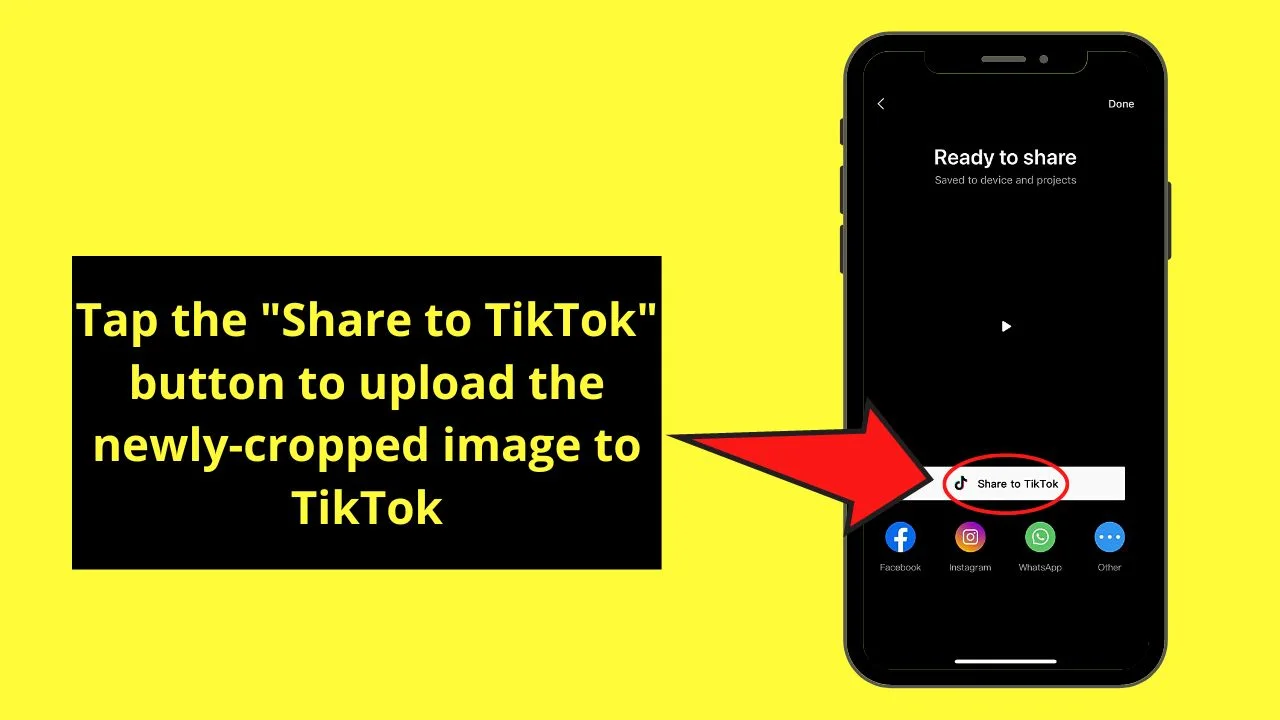
But, since you want to share it with TikTok, just press the “Share to TikTok button to proceed to upload it to the app.
Method 3: Making Photos Full Screen Using TikTok’s Green Screen Effect
Step 1: Go to your Instagram app and swipe your finger to the right to make the creator page appear.
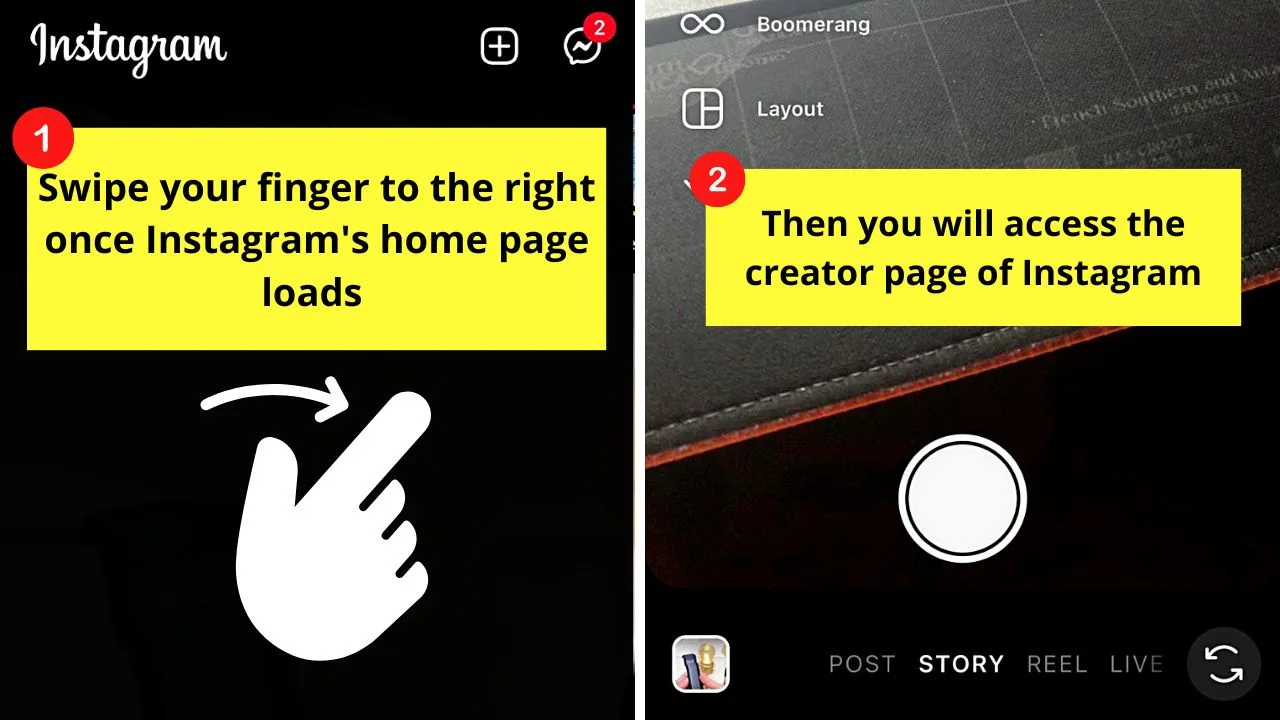
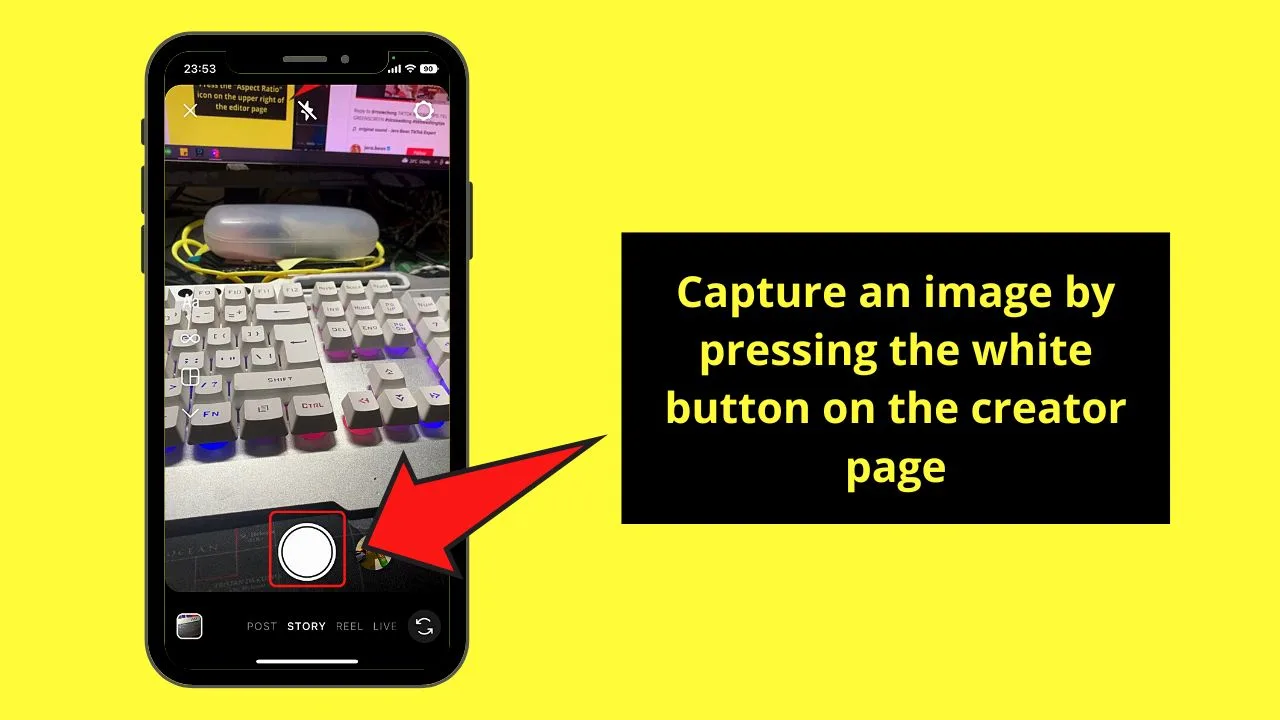
Step 2: Once you’re on IG’s creator page, capture an image or upload a photo you want to use for your TikTok post later on.
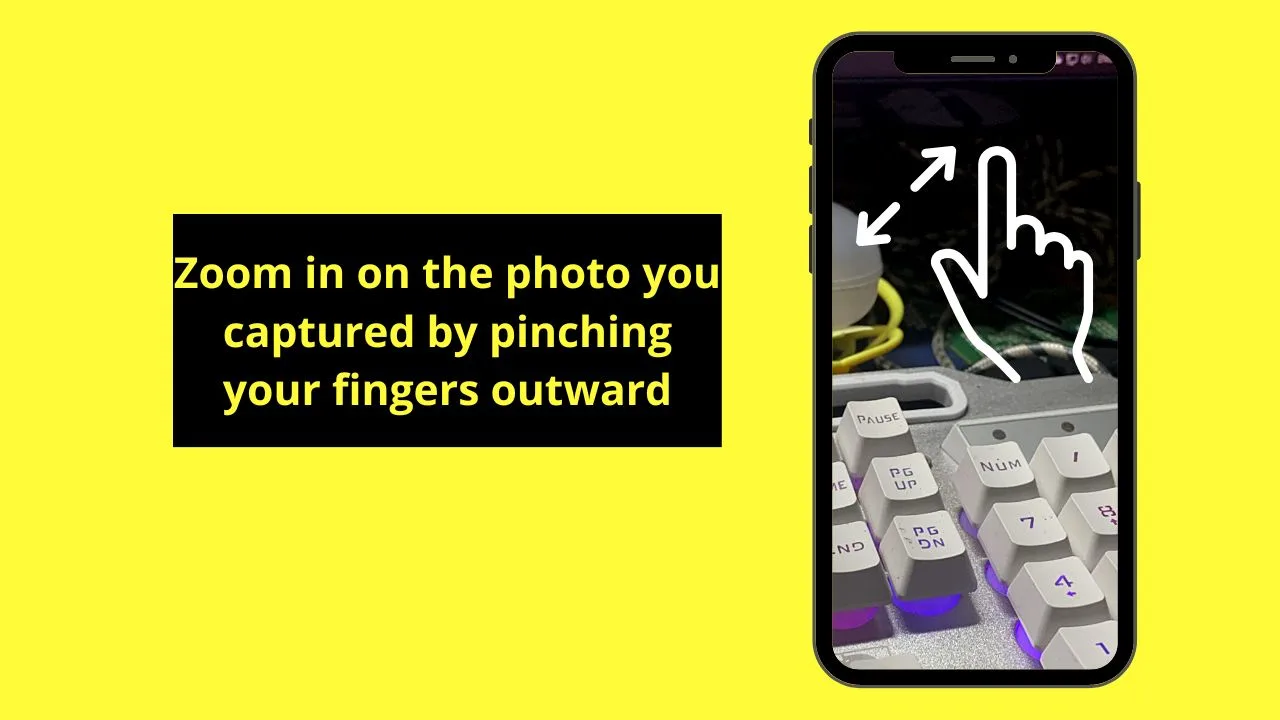
Step 3: After uploading or capturing the image you’ll use, pinch your fingers outward to zoom in on the photo.
Step 4: Once the photo is zoomed in, press the meatballs menu on the top right of the screen.
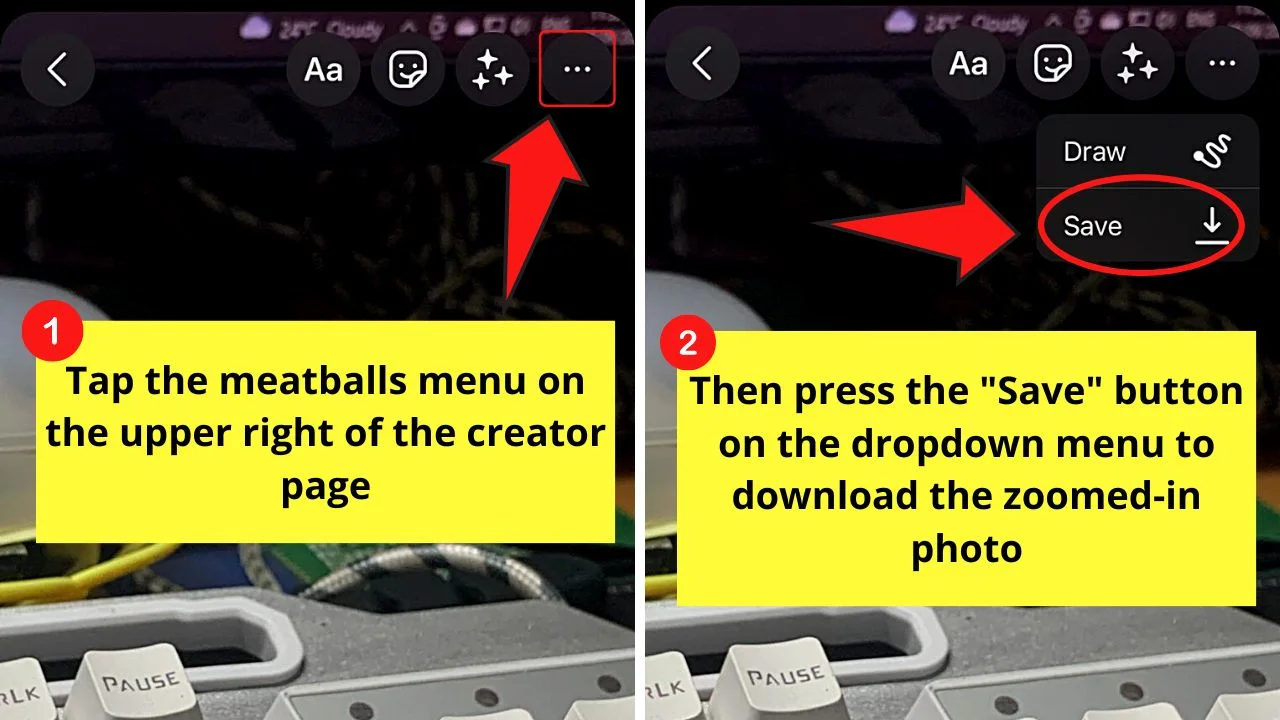
Then, tap the “Save” option from the dropdown menu to download it to your phone.
Launch the TikTok app on your phone by tapping on its app icon.
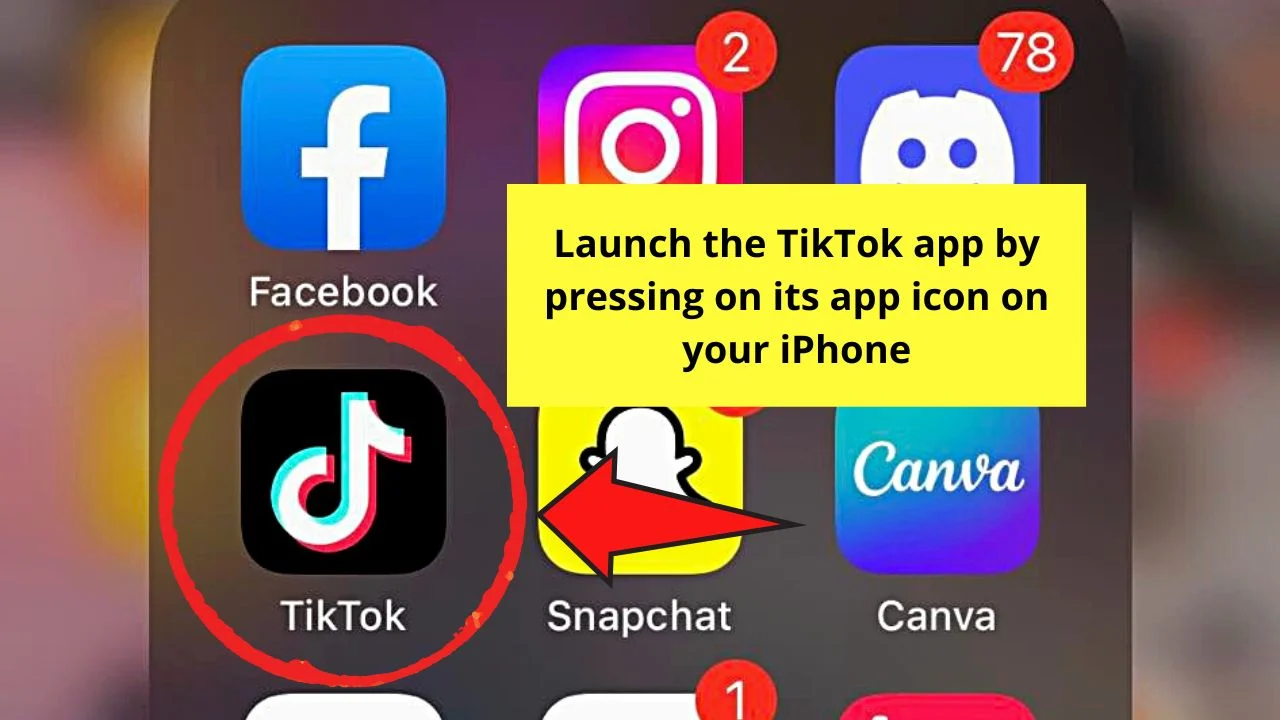
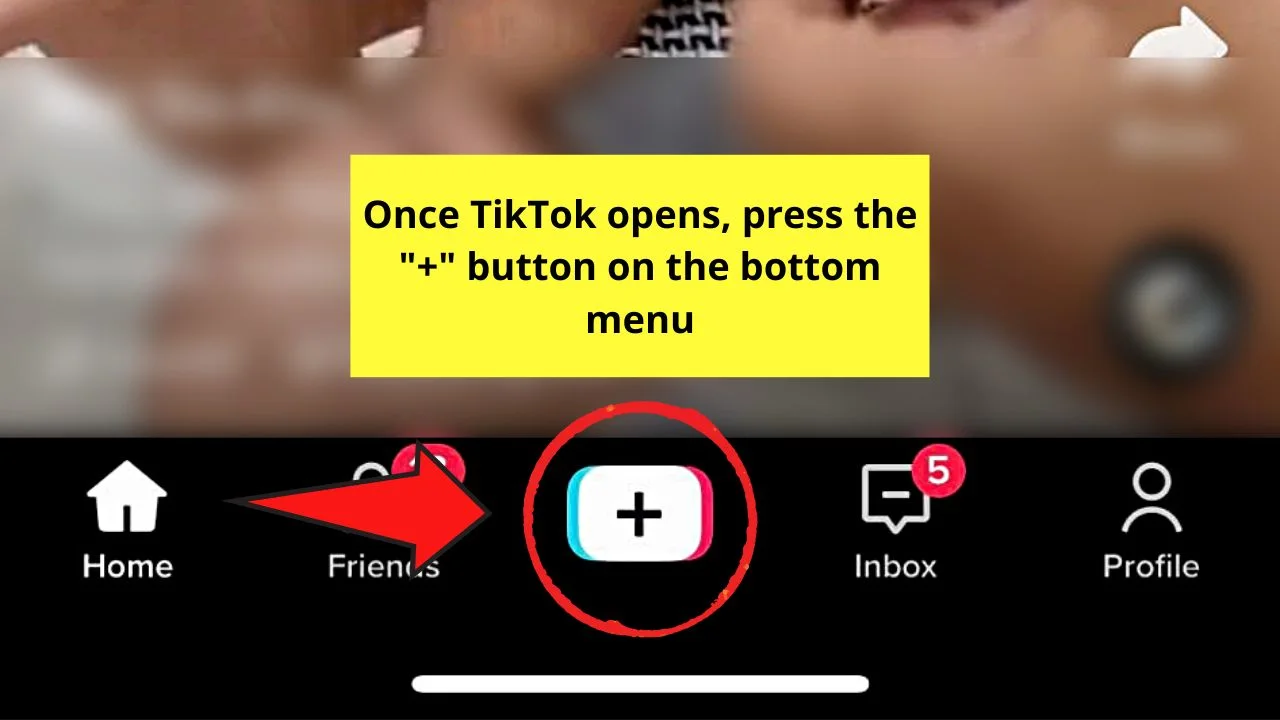
Step 5: Once TikTok’s home page loads up on the screen, press the “+” button.
Step 6: Press the “Effects” button.
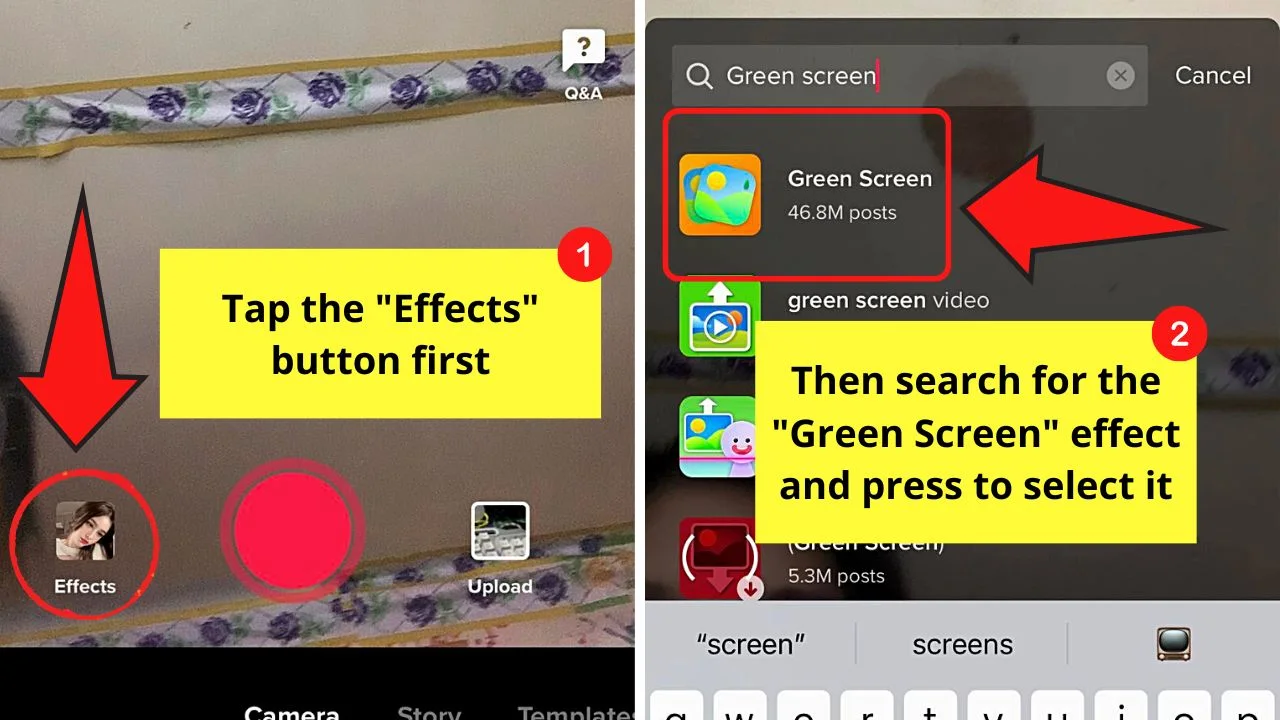
Then, find the “Green Screen” effect thumbnail and select it.
If you can’t find it from the effects gallery, tap the magnifying lens icon and type “Green Screen” in the search bar.
Step 7: After which, press the “Upload” button.
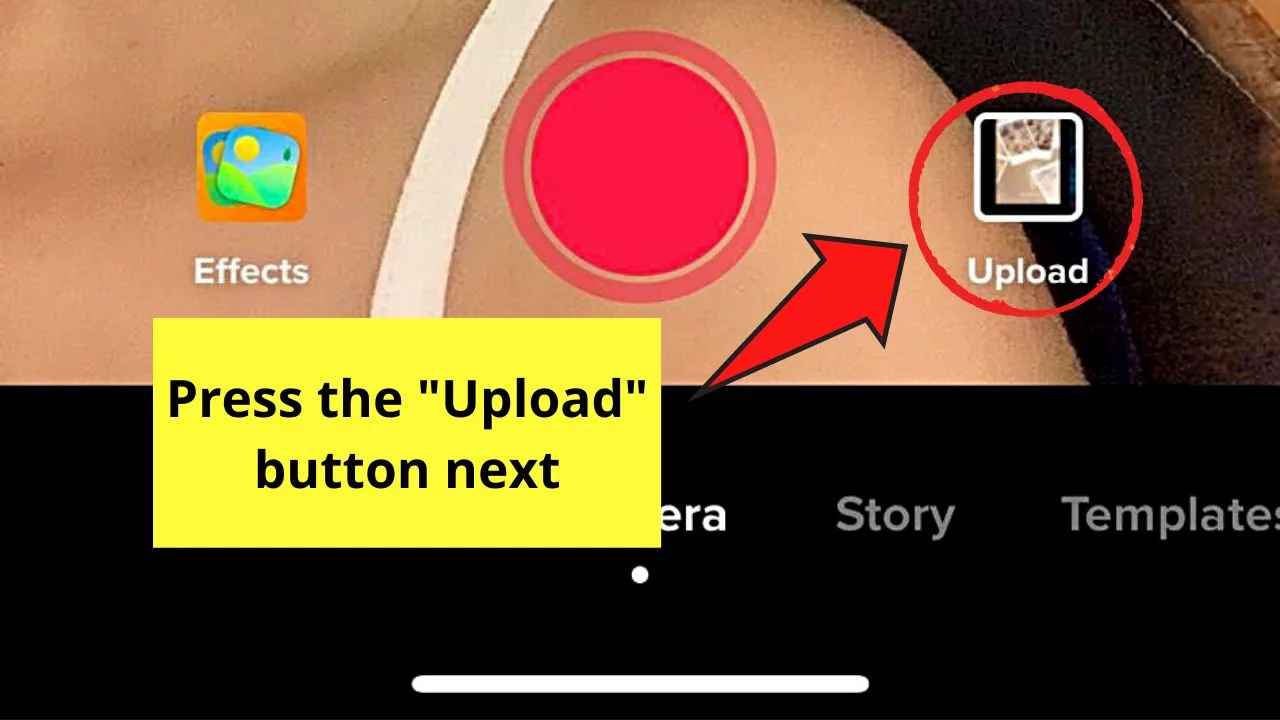
Locate the image you recently downloaded from Instagram on your iPhone’s gallery. Once you locate it, tap to choose it.
Step 8:Press the “Next” button to continue posting the photo to TikTok or saving it as a draft.
TikTok Photo Editing Hack — The “Formula” You Should Know
Now that we’re on the topic of editing photos on TikTok iPhone, there’s this one photo editing “hack” that has become a trend on TikTok recently.
And perhaps, you’ve already encountered countless TikToks on your “For You” feed showing how to achieve the summer feel look like they’re taken on a professional camera.
But, for those who haven’t tried the trend, don’t worry. You can still learn to use this “hack” by following this simple formula using your iPhone’s editing tools.
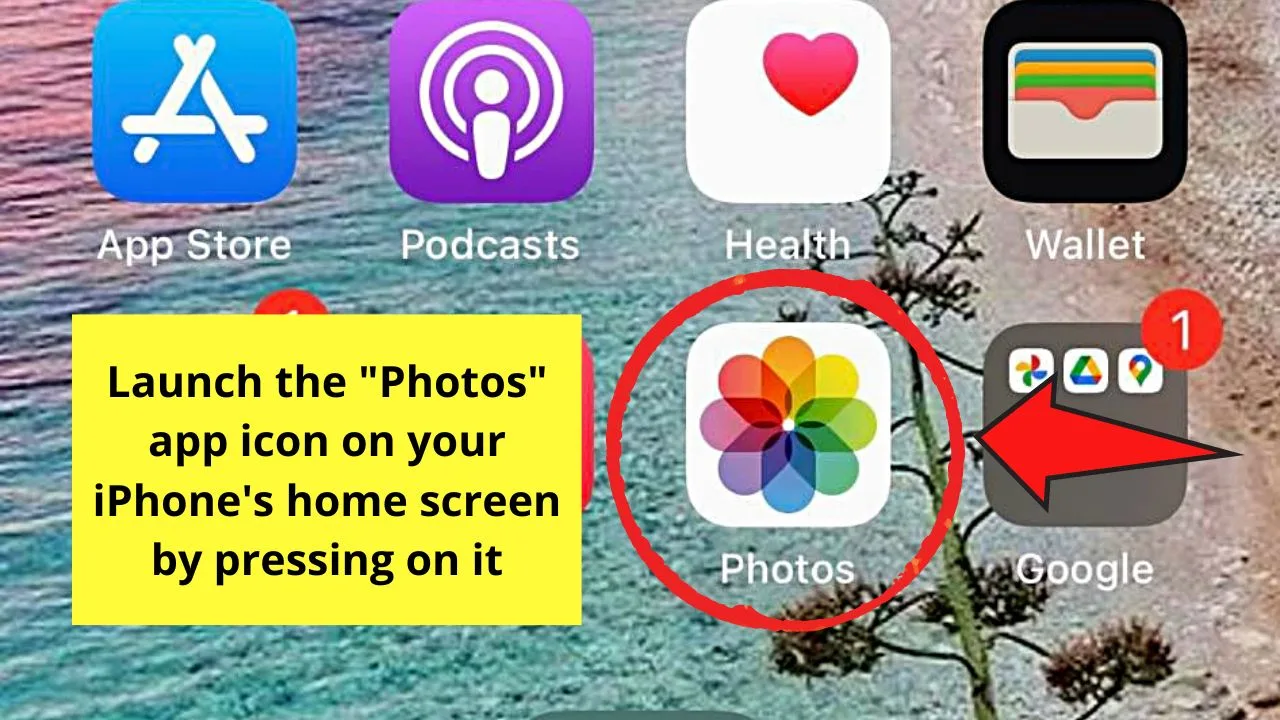
Step 1: On your iPhone’s home screen, press the “Photos” app icon to launch it.
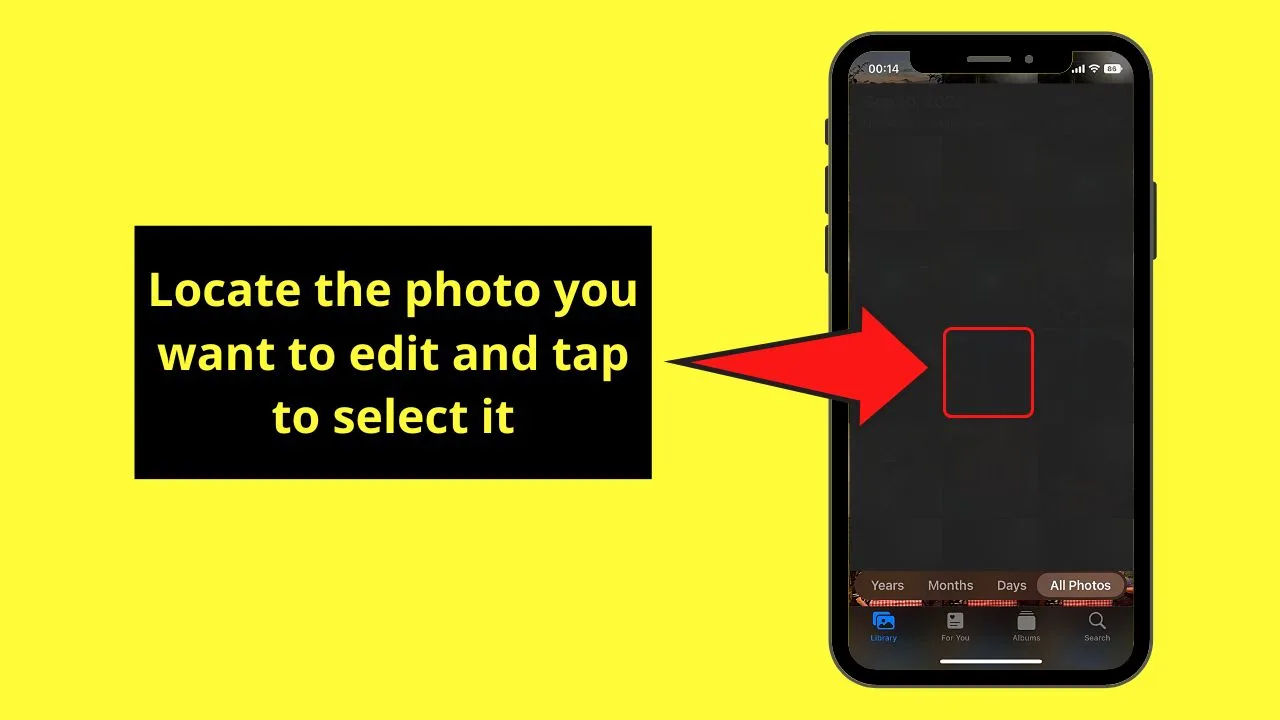
Step 2:Swipe through those photos and videos in the gallery and tap to select one.
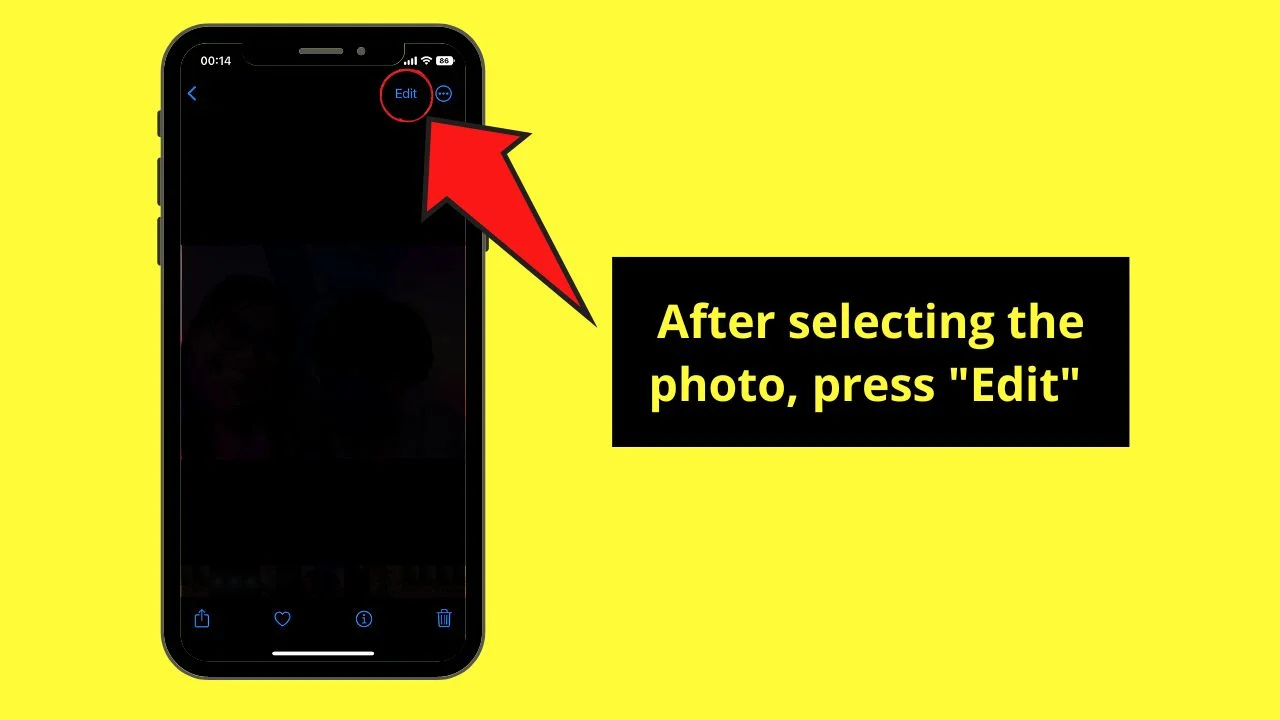
Step 3: After selecting the image you’ll use, press the “Edit” button.
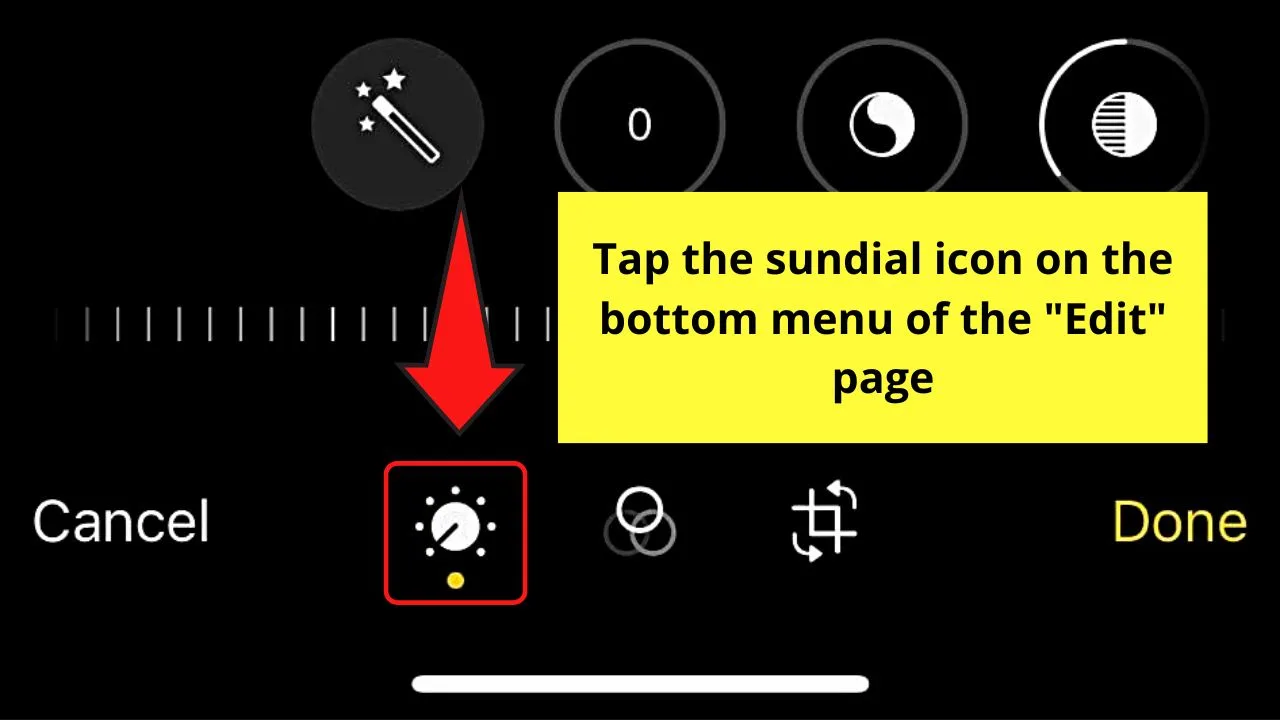
Step 4: On the bottom menu of the “Edit” page, press the sundial icon.
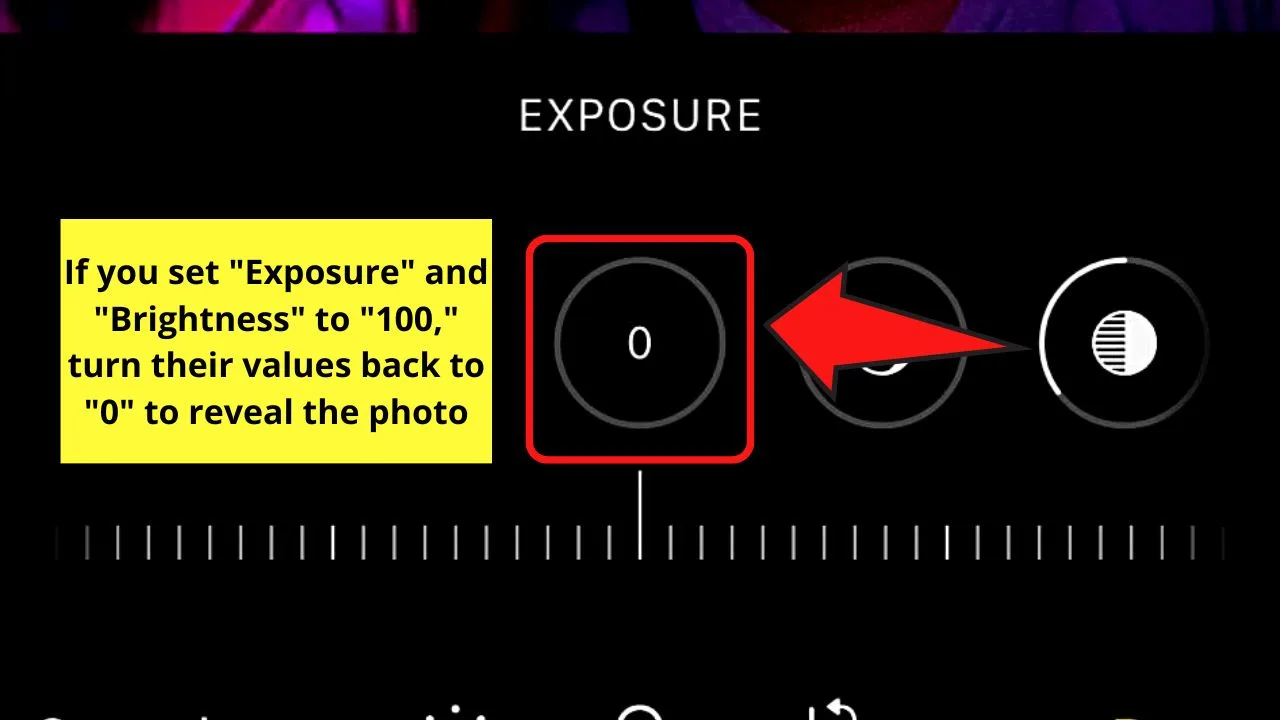
Step 5: Locate the “Exposure” and “Brilliance” options on the “Adjust” menu and turn them up to “100.”
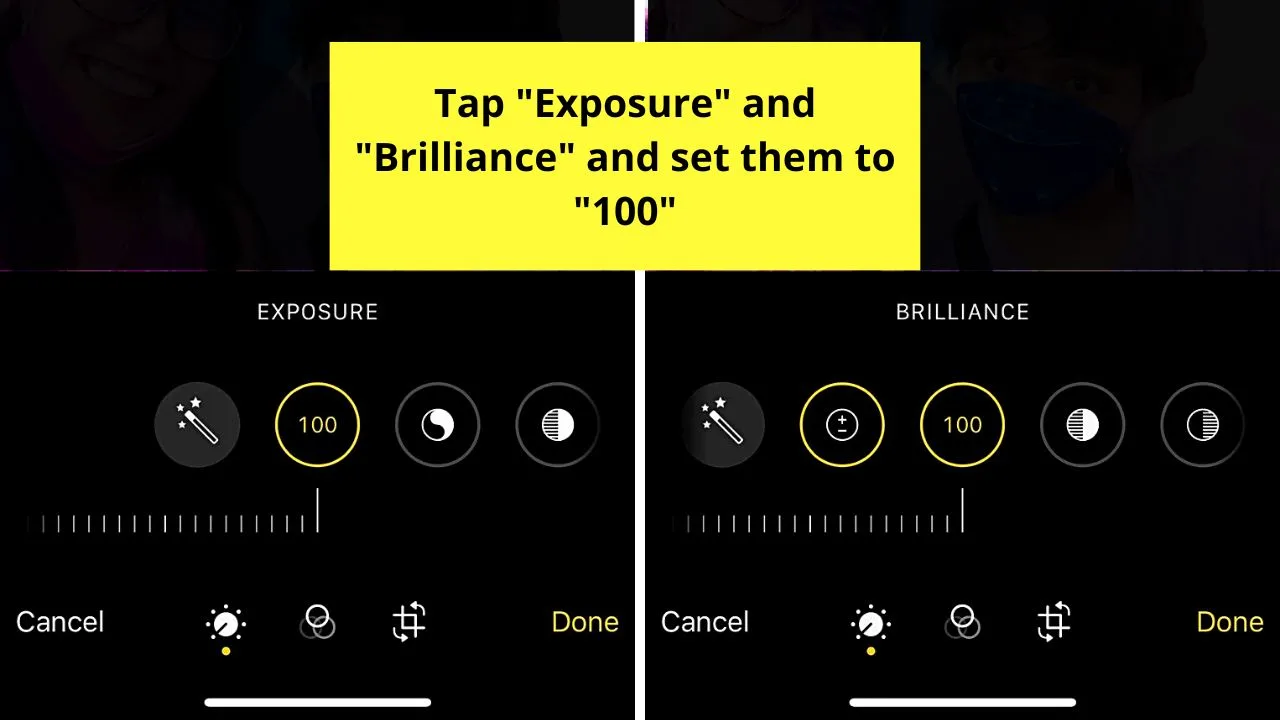
Do note though that this step is optional for the reveal effect, so you can skip this step if you don’t want the added suspense of the reveal.
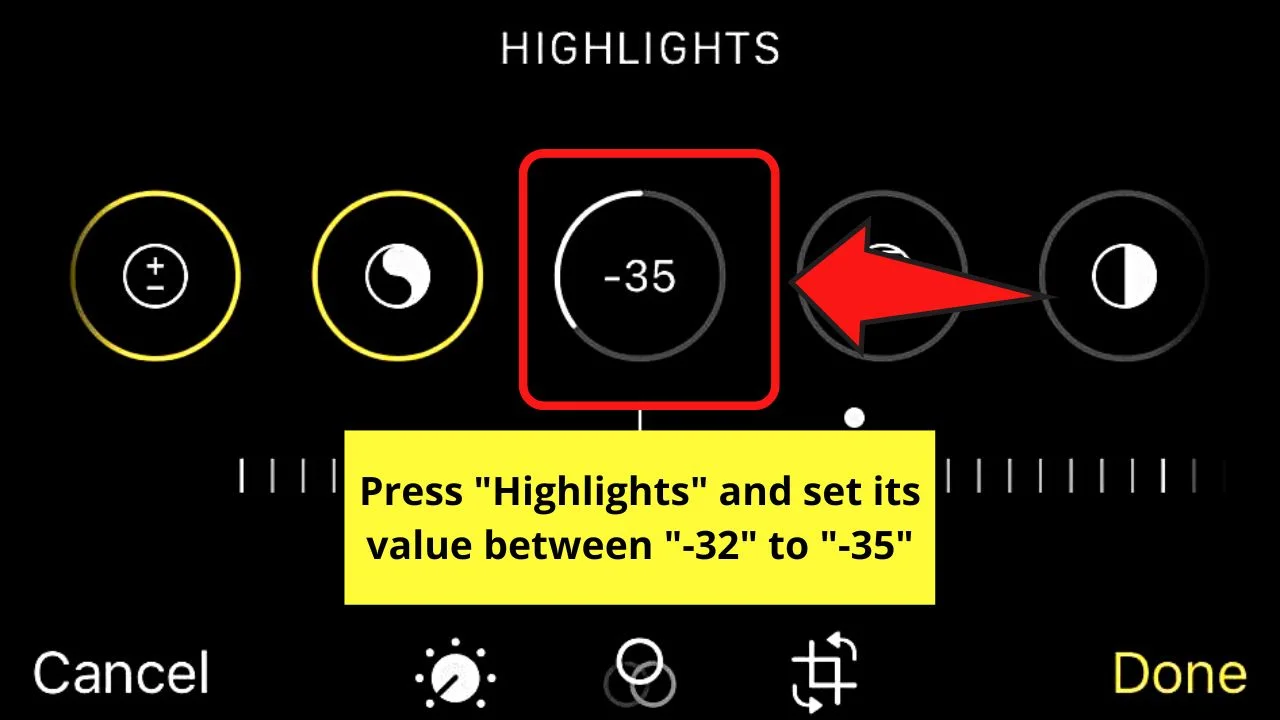
Step 6: Locate “Highlights” and set it between “-32” to “-35.”
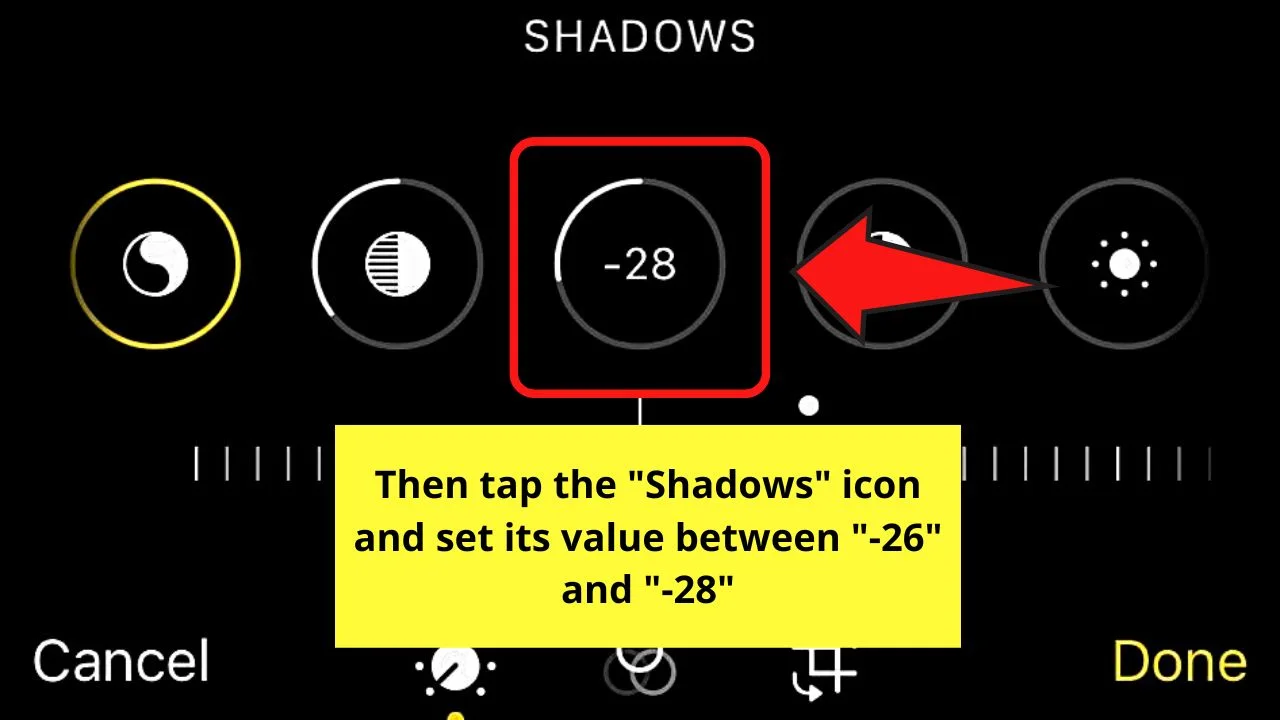
Step 7: Find “Shadows” next and set it between “-26” and “-28” values.
Step 8: Set “Contrast” to “-30” and “Brightness” between “-15” to “-28” next.
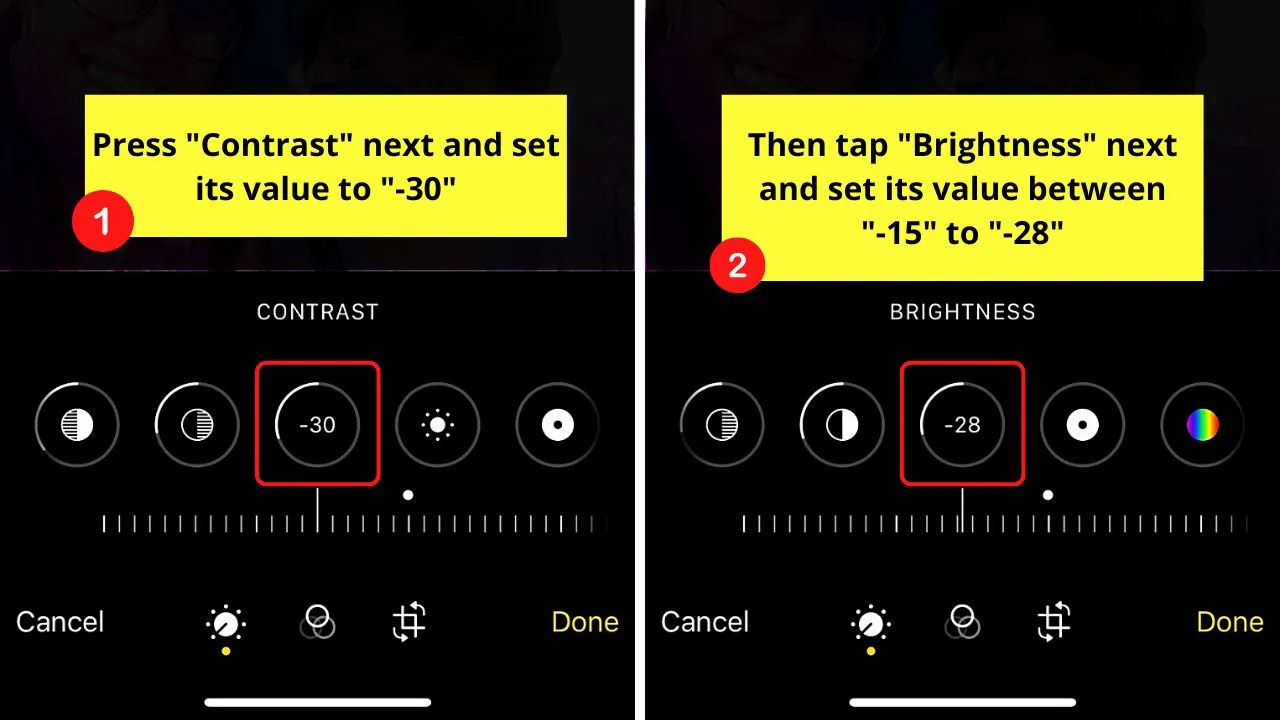
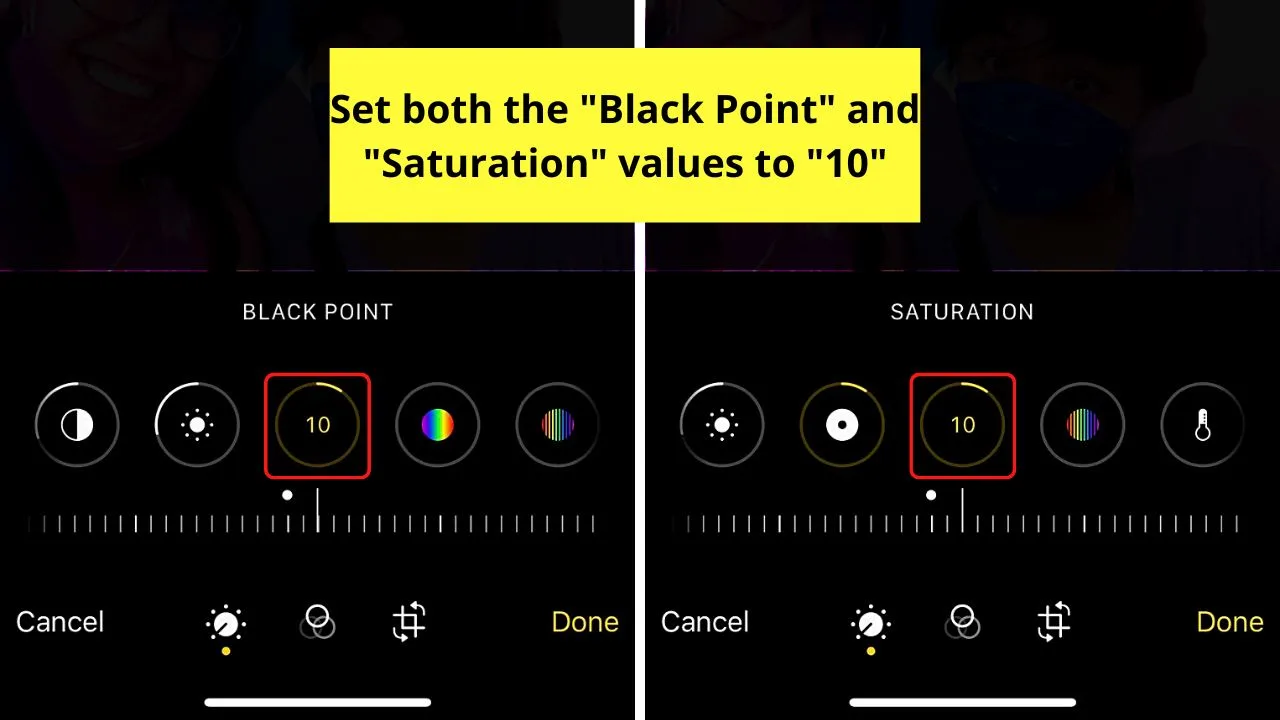
Step 9: Now, tap the “Blackpoint” option and set it to “10.” Do the same for the “Saturation” option.
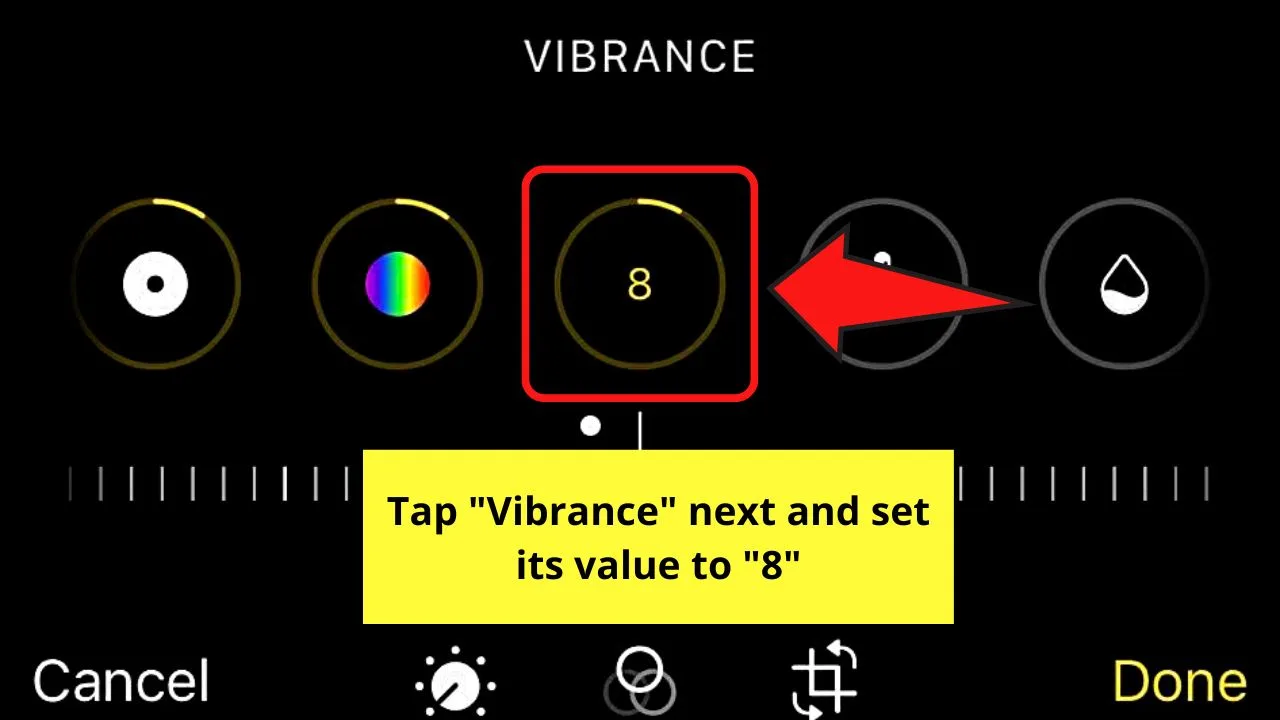
Step 10: For “Vibrance,” set it to “8.”
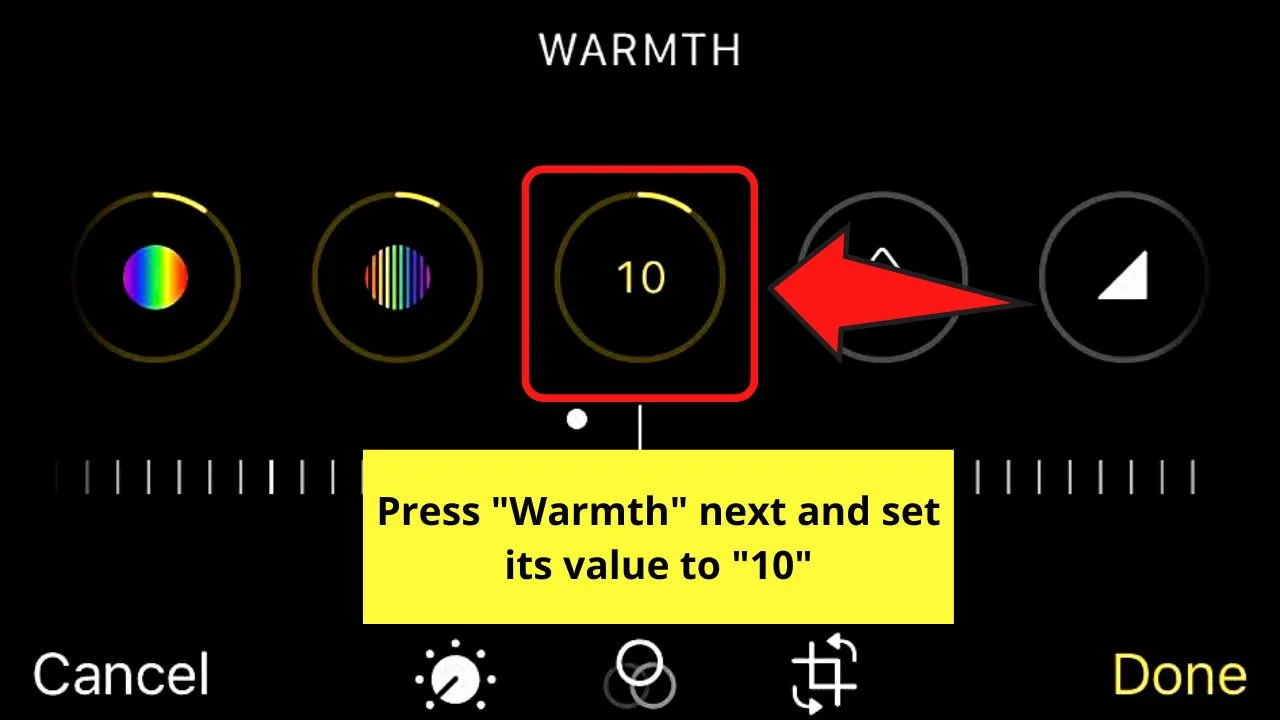
Step 11: Tap “Warmth” next and set it to “10.”
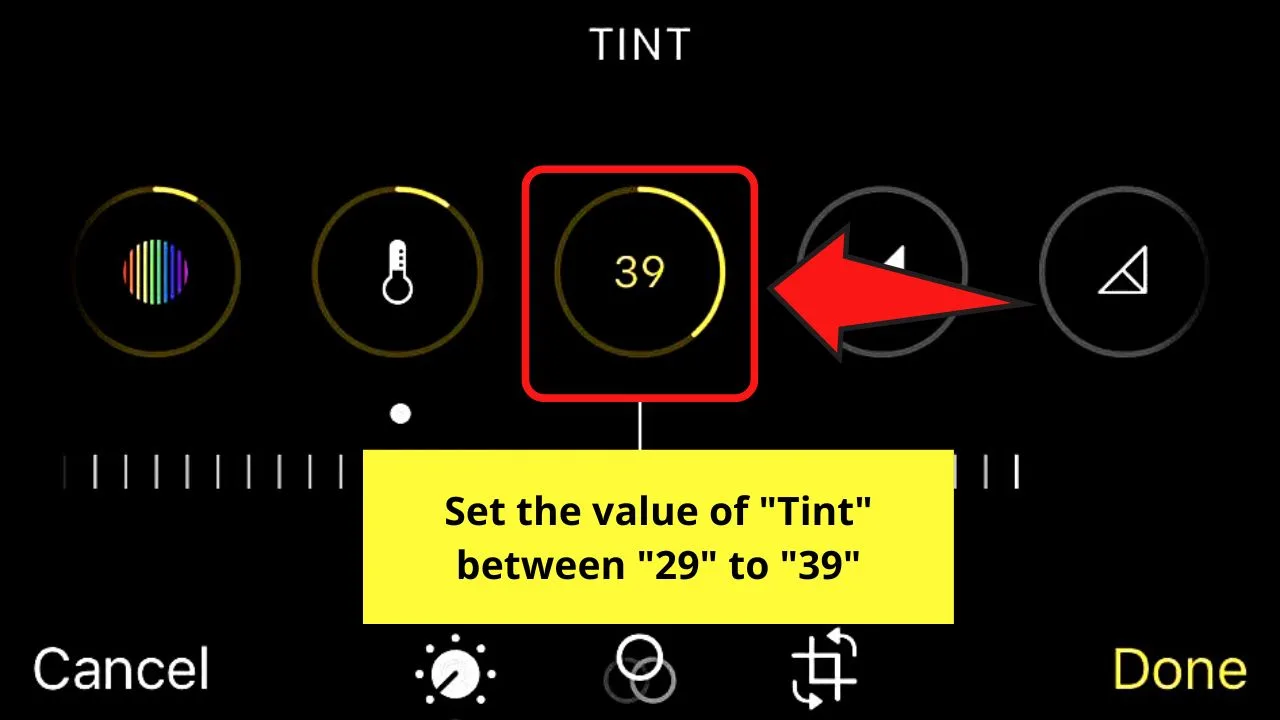
Step 12: Press “Tint” next and set it between “29” to “39.”
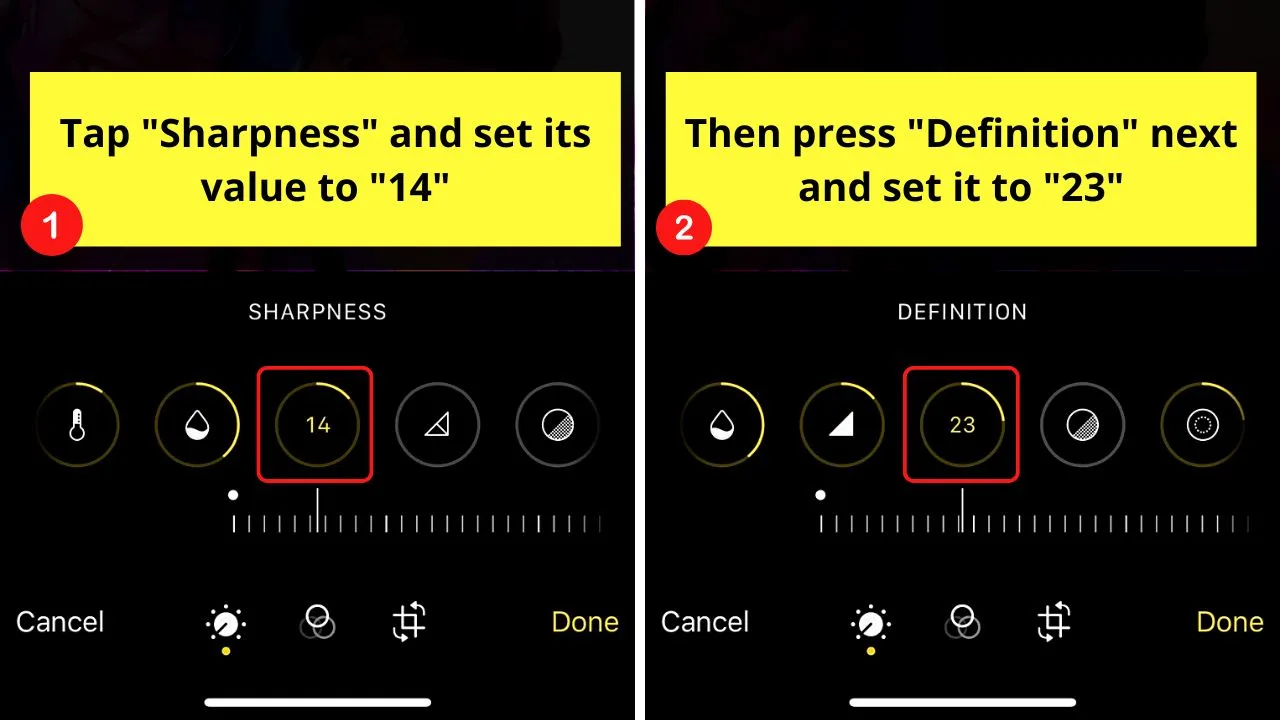
Step 13: Set the “Sharpness” value to “14” and the “Definition” setting to “23.”
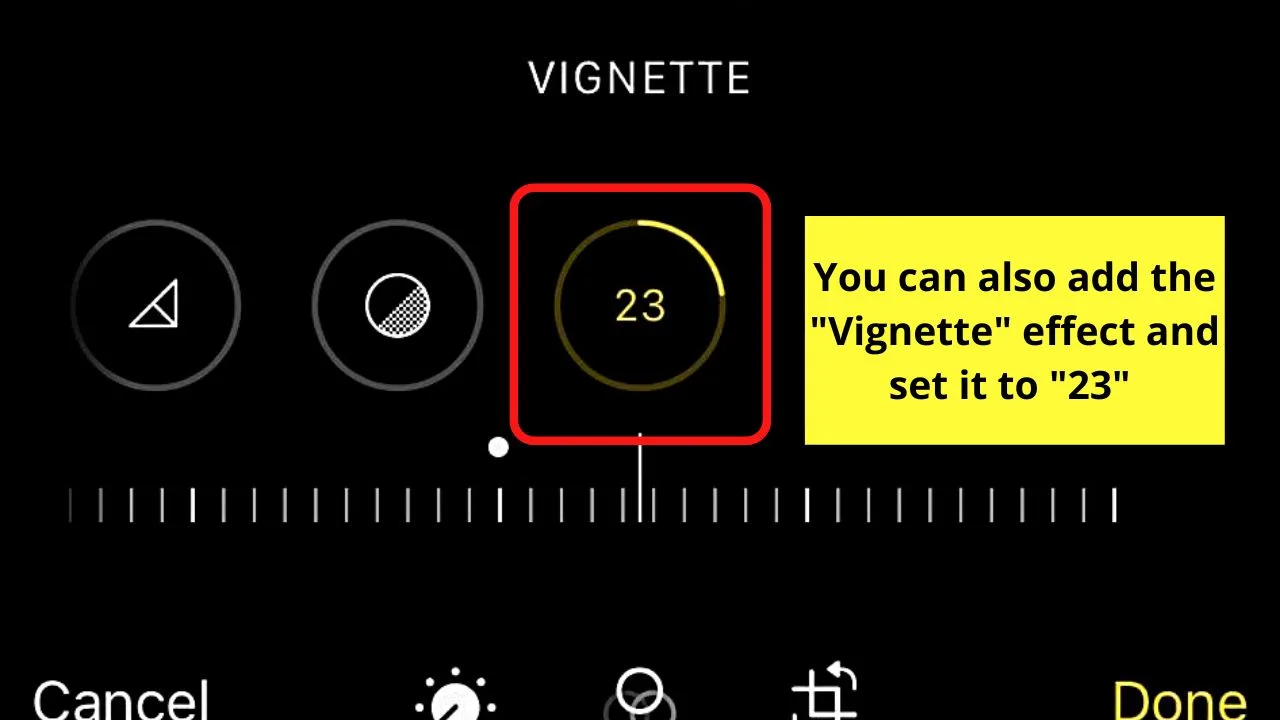
You can even add “Vignette” and set it to “23.”
Step 14: If you opted to turn the “Exposure” and “Brilliance” settings to “100,” bring them back to “0” to reveal how the image looks after tweaking all the settings.
If you’re satisfied with how the photo looks, press the “Done” button and proceed with uploading it to TikTok.
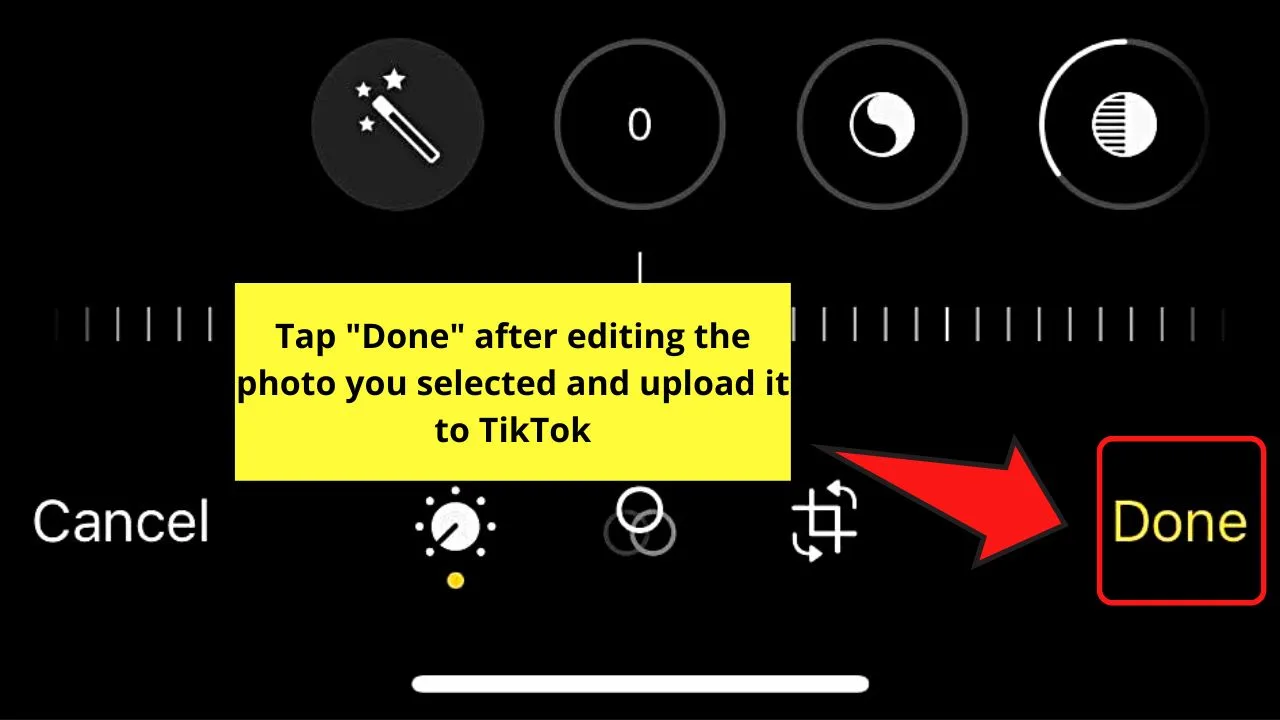
However, while there are specific numbers set for the values of each setting, you can still tweak them a bit until you achieve the desired effect.
Also, this TikTok photo editing formula for iPhone images best works for photos taken in natural light settings.
So, if you want to perfectly achieve that sunkissed glow in your photos, make sure to do the lighting right in the first place.
Frequently Asked Questions about How to Edit Photos on TikTok iPhone
Is it perfectly okay or legal to use the viral TikTok photo editing hack on my photos?
As long as you have no intention to claim the TikTok photo editing hack as yours, then it’s safe to use the formula on your TikTok posts. If you do, then you’ll violate TikTok’s community guidelines on integrity and authenticity, causing the support team to take action on it.
Can I edit the photos within the TikTok app alone?
You can edit the photos within the TikTok app itself. Tap “Filters,” Effects,” “Beautify,” and “Enhance” on the right-side panel of the creator page to start with the editing process. But, take note that the “Beautify” option is only available for photos that have human faces on them.
Can I make a TikTok using a single photo only?
You definitely can create a TikTok using a single photo only. Simply upload the said image to the app, press “Next,” and proceed with editing it like how you do with multiple images and videos.
Conclusion
Editing photos on TikTok has never been easier, thanks to a variety of editing buttons available right within the app itself.
Whether you opt to create a TikTok with a single photo or multiple photos, you can always rely on “Filters,” “Effects,” “Beautify,” and “Enhance” to improve the look of those images.
You can even make the photos go full screen if you want to.
And, if you want to glow up your photos and make them more professional-looking, try the TikTok photo editing hack.

Hey guys! It’s me, Marcel, aka Maschi. On MaschiTuts, it’s all about tutorials! No matter the topic of the article, the goal always remains the same: Providing you guys with the most in-depth and helpful tutorials!
