

By learning how to create columns in WordPress, you can get your message across clearly, and your users can easily scan what you offer.
Multiple methods can be harnessed on WordPress to create a multi-column layout.
Some are easy, some are fiddly, and some are basic HTML.
More styling can be done on self-hosted WordPress websites. But, even with free plans on WordPress.com, you can take advantage of columns.
How to create columns in WordPress
To create columns in WordPress, add a column block (Gutenberg editor). Using the Classic Editor, use the Shortcodes Ultimate plugin to add columns easily. An alternative is using HTML for columns only or HTML tables for columns with borders.
How to make columns in WordPress without a plugin using CSS and HTML
The WP theme customizer simplifies editing your theme stylesheet.
Go to your Appearance menu, select “Customize,” then “Additional CSS.”
Insert the following:
.column-left {
float: left;
width: 33.333%;
}

.column-right {
float: right;
width: 33.333%;
}

.column-center {
display: inline-block;
width: 33.333%;
}
Then, in your WP editor, use the “text” editor and paste the following HTML…
<div class="container">
<div class="column-left">
<h2>Insert column title</h2>
Your content here.
</div>
<div class="column-center">
<h2>Insert column title</h2>
Your content here.
</div>
<div class="column-right">
<h2>insert column title</h2>
Type your text in here.
</div>
</div>
The CSS customizer adds the code to your theme stylesheet. Once added, use the HTML to insert columns.
Create complex column layouts with ease using the WP block editor
There is a block bundled into Gutenberg for creating column layouts.
Click the + icon, type in “columns,” then select the columns block. Next, select the layout you want. There are five options to use up to three columns, just with different widths.


Next is to set up your content within the block.
As this is the block editor, everything is controlled by blocks. The fastest way is to add the paragraph block, bold your column title (if you are using titles), then type in your content for the column.
Alternatively, you can build blocks within blocks.
Add a “heading” block, then a paragraph block, or a text and image block. Design your columns to your liking.
As an example, the layout below uses a two-column layout (70:30) to display the about us content on the left with the images aligned to the right.

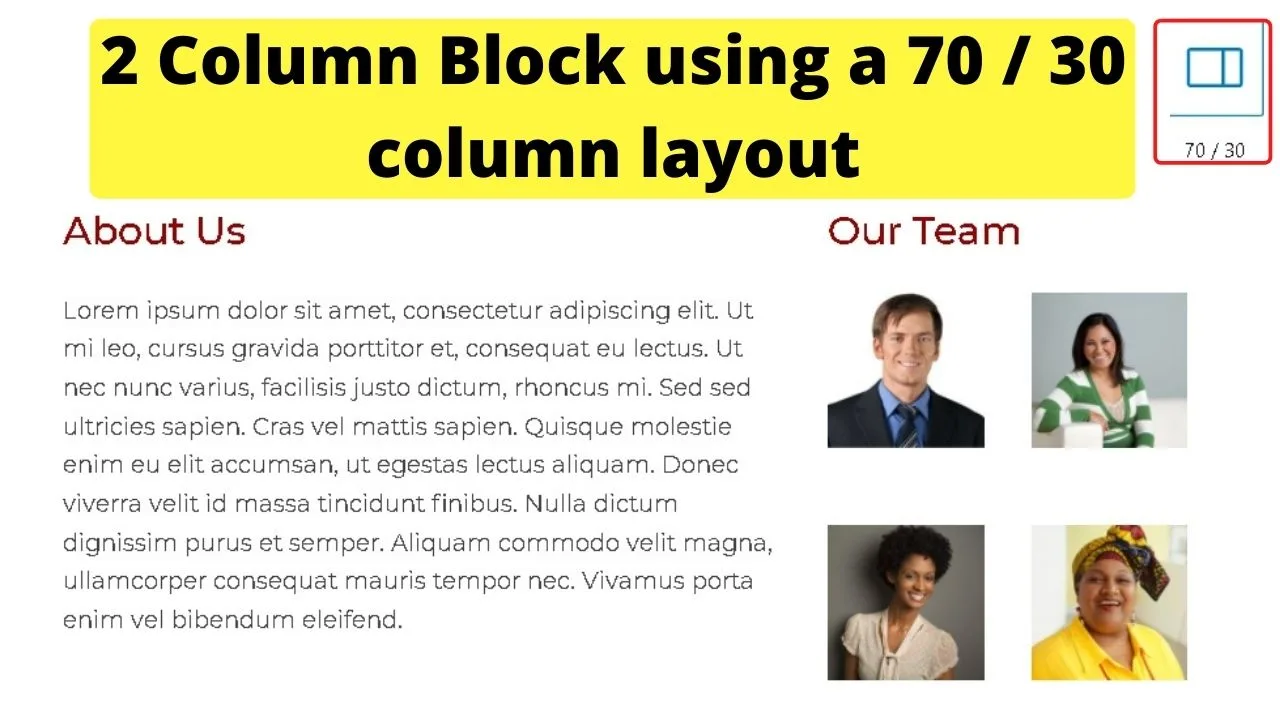
The images are inserted in the second column with two columns of 50:50 stacked beside the paragraph block.


The blocks editor does make it easier to design complex layouts with columns.
Creating a layout like the one above would be time-consuming to code manually with CSS and HTML.
For complex column layouts, it will help to use the block editor.
Use the WordPress Shortcodes Ultimate Plugin
The Ultimate Shortcodes plugin is jam-packed with content styling options. Columns is one of these options, and you can get up to five columns to show on a desktop display.
Go to your plugins page, click “Add new,” and search for Shortcodes Ultimate.
Once installed and activated, a new button appears in your WordPress editor screen beside the “add media” button. Clicking that will load a screen with all available shortcodes.
The columns are a free feature. Shortcodes with a red icon are premium. The others are free.
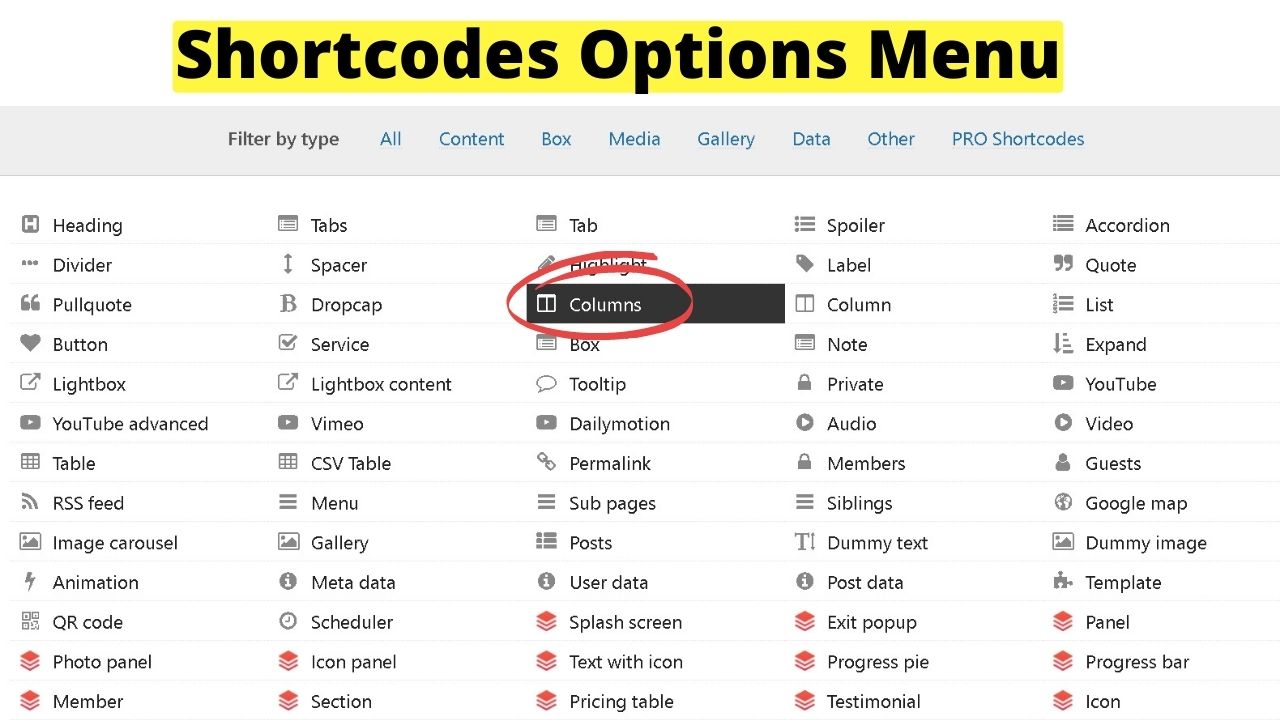
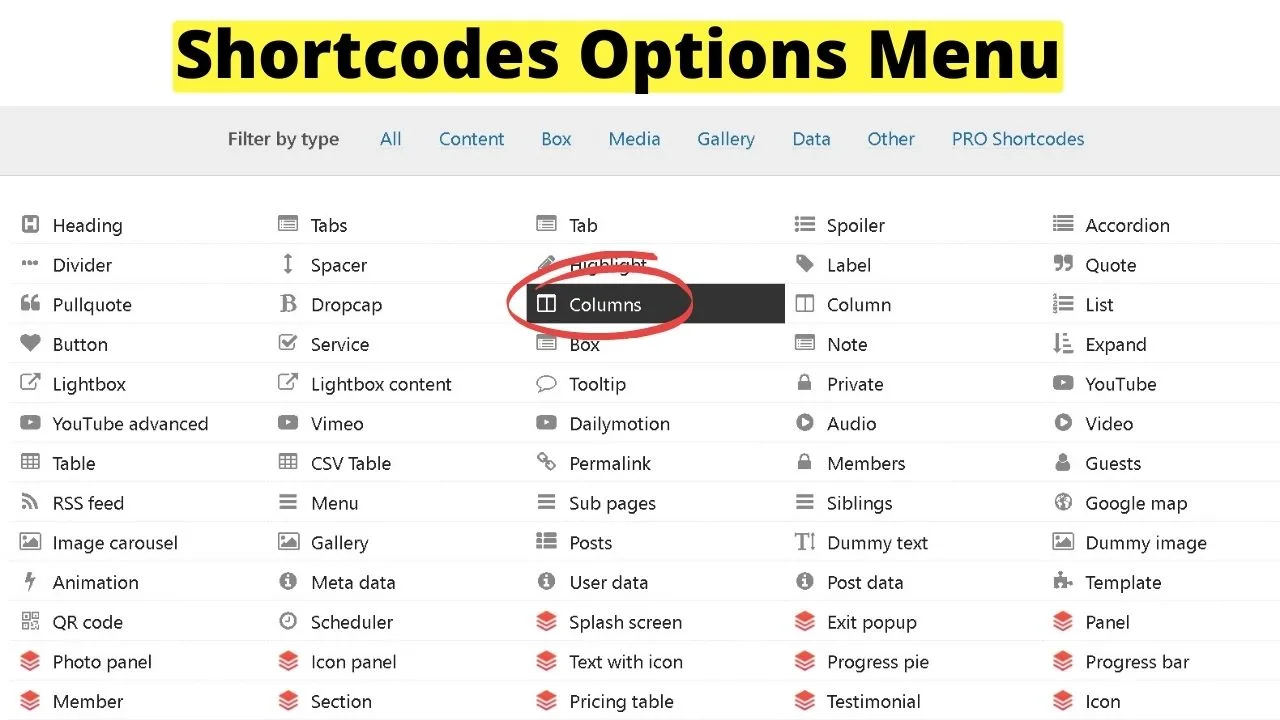
Select the columns, then follow the instructions to style them however you like.
Using the custom CSS they provide on their website, you can add that to your custom CSS on the settings page for the plugin, then add columns with text inside buttons.
Placing this in the text editor…
<h2><span style="color: #ff0000;">Learn More</span></h2>About UsServicesFAQsFeedbackPricing
Where the “1/5” is in the shortcodes above, those numbers control how many columns are inserted. Use “1/3” for three columns.
And of course, if you do use the buttons, you can link the text to go to the pages you want your visitors to go to.
As it is shortcodes, those can be put anywhere on your site. No fiddling around with CSS is required.
If you do not want to add plugins, use the block editor, or use WordPress.com, you can still take advantage of columns with far less styling and customization.
How to create columns in WordPress with HTML
For users of WordPress.com without access to the CSS customizer, HTML within your WordPress editor is the only way to create columns.
HTML is still popular despite being one of the more (ahem) mature computing languages. It gives you the basics for a multi-column layout. Just without fancy styling.
If you are content to have columns without any borders, backgrounds, or content boxes surrounding blocks of text, HTML is the way to go.
In your WP editor, click the text tab to edit your content with HTML and insert the following:
<div style="width: 33.3%; padding: 20px; float: left;">
Three HTML elements control your column layout.
The first is the width. The max-width on any theme is 100% to take up the full size of a screen. For desktops, if you want four columns, you would change the width to 25%. 25 times 4 is 100 so 25% gives you a four-column layout.
The padding is the spacing between the columns. Otherwise, it would be difficult to tell where one block of text ends and the next begins.
The last part is the float element. This is used to float the columns to the left or right of the page.
Each part can be changed to the size of the columns you need. For example, if you only wanted two columns, you would set the width to 50%.
<div style="width: 50%; padding: 20px; float: left;">Your content here</div>

<div style="width: 50%; padding: 20px; float: left;">Your second column content here</div>
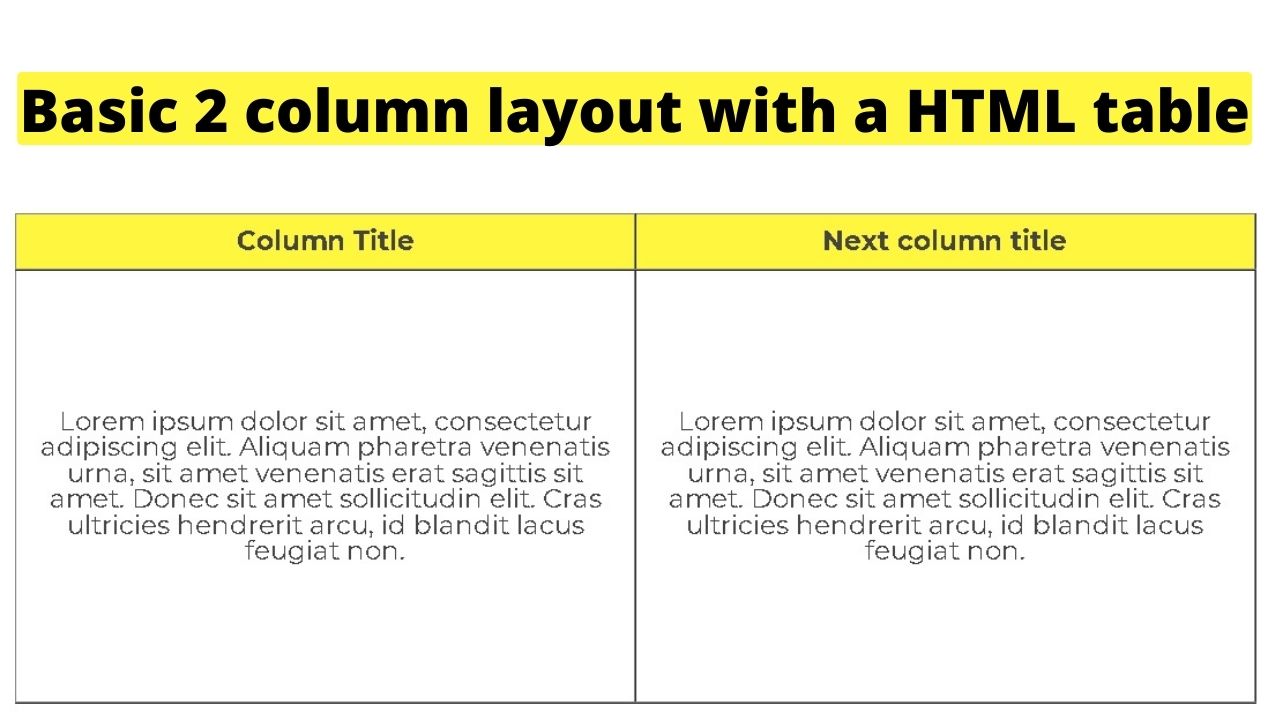
Create an HTML table to add columns with borders in WordPress
Another way to add columns without requiring CSS edits is to create a table in HTML.
The following HTML code creates a two-column table
<table style="width: 100%; height: 48px;" border="”5″" width="”1200″" cellspacing="”50″" cellpadding="”50″">
<tbody>
<tr style="background-color: #fff73f;">
<td style="text-align: center; height: 16px;"><strong>Column Title </strong></td>
<td style="text-align: center; height: 16px;"><strong>Next column title</strong></td>
</tr>
<tr style="height: 16px;">
<td style="height: 300px; text-align: center;">Lorem ipsum dolor sit amet, consectetur adipiscing elit. Aliquam pharetra venenatis urna, sit amet venenatis erat sagittis sit amet. Donec sit amet sollicitudin elit. Cras ultricies hendrerit arcu, id blandit lacus feugiat non.</td>
<td style="height: 300px; text-align: center;">Lorem ipsum dolor sit amet, consectetur adipiscing elit. Aliquam pharetra venenatis urna, sit amet venenatis erat sagittis sit amet. Donec sit amet sollicitudin elit. Cras ultricies hendrerit arcu, id blandit lacus feugiat non.</td>
</tr>
</tbody>
</table>
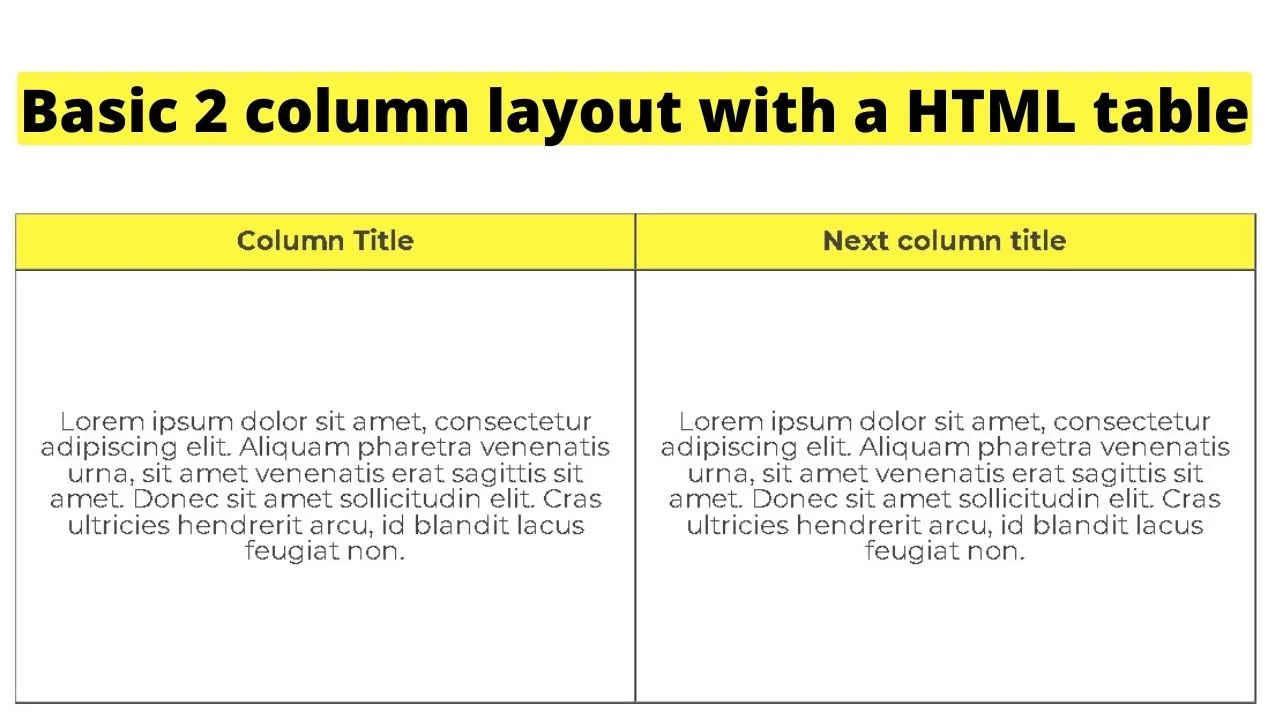
Similar to creating columns with no borders in HTML, the sizing of HTML tables can be adjusted by changing the width and height. As can the background colors.
To create a table in HTML in WordPress, set the “table style” first, then drop it into <tbody> to load the content.
The <tr> is for “table row.” The <td> is for “table details.”
Column titles are set in the row. Use the table details <td> area to insert paragraphs of content inside a column.


Hey guys! It’s me, Marcel, aka Maschi. On MaschiTuts, it’s all about tutorials! No matter the topic of the article, the goal always remains the same: Providing you guys with the most in-depth and helpful tutorials!

