Now that we’re about to enter a new year with 2022 fast approaching, it’s important to treasure the memories we’ve had.
Hence, most of us keep galleries and galleries of photos — printed and digital — to remind us of what has been.
But, if you want to add more nostalgia to your photos, converting your images to black and white’s the way to go.
And, if you’re using Canva, you don’t have to worry one teeny bit about how you’ll achieve this incredible effect.
How to Make Images and Pictures Black and White in Canva
To make images and pictures black and white in Canva, you can lower their saturation or adjust their “Light” and “Color” settings. Adding “Mono” filters and the use of the “Duotone” effect are other ways of achieving the same effect. Lastly, you can add black and white images with “Text to Image.”
Creating Black-and-White Images and Pictures in Canva: 5 Nifty Methods to Choose From
If you’ve been paying attention earlier, there are 3 options for converting a full-color photo into a black-and-white one.
Ensure you have added an image to the page before choosing a method you’ll use.
So, sit back and continue reading for you to add another Canva photo editing technique to your arsenal.
Method 1: Lower Photo Saturation aka Desaturation
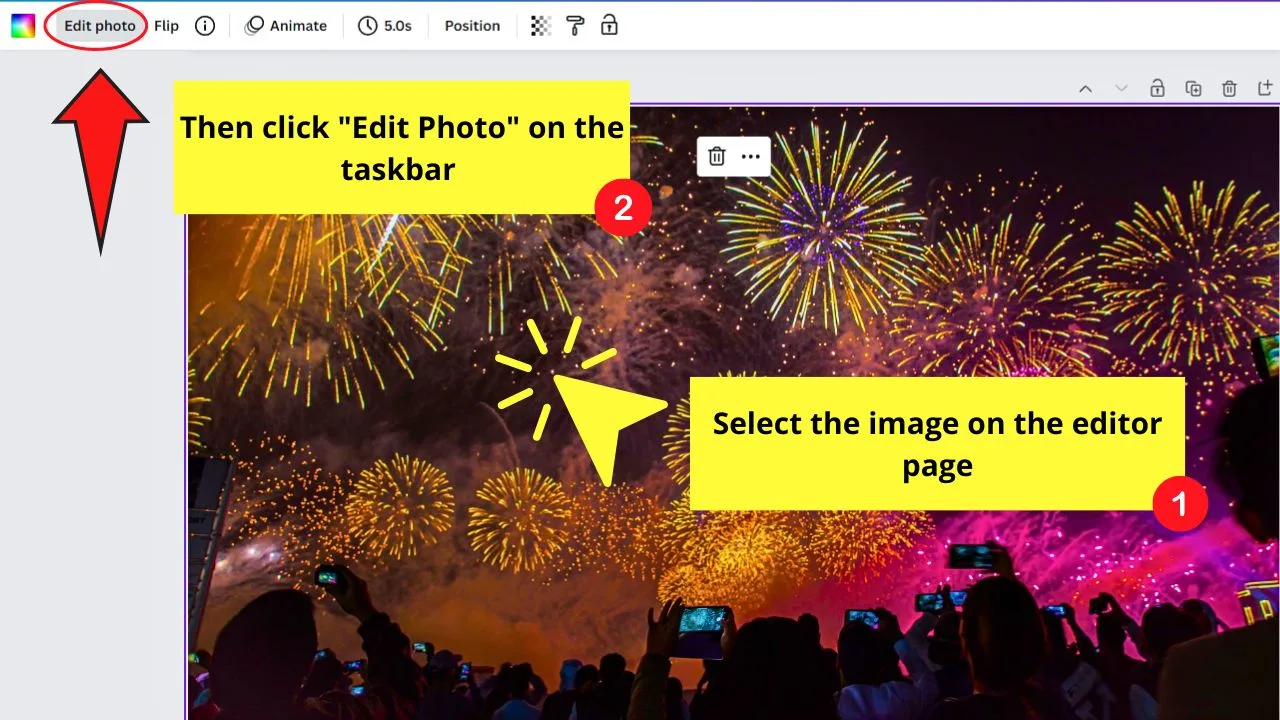
Step 1: Click the image and select “Edit Photo”
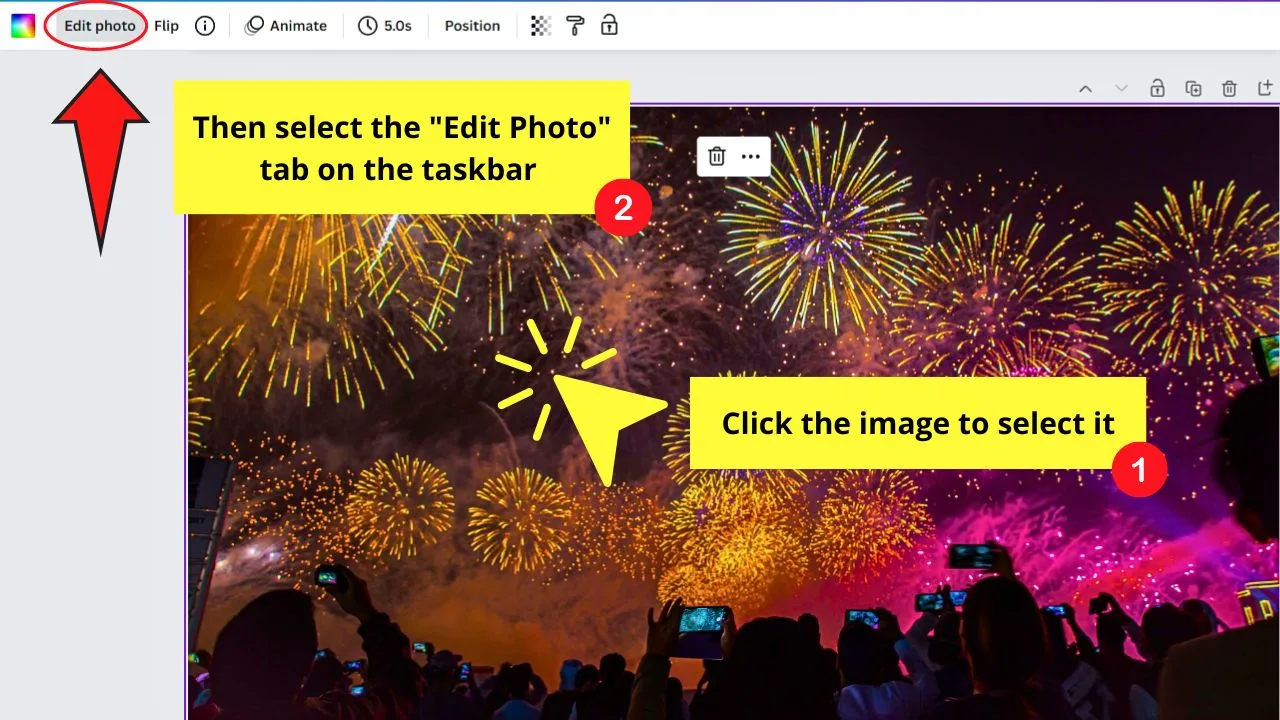
You’ll see this on the Canva editor’s taskbar.
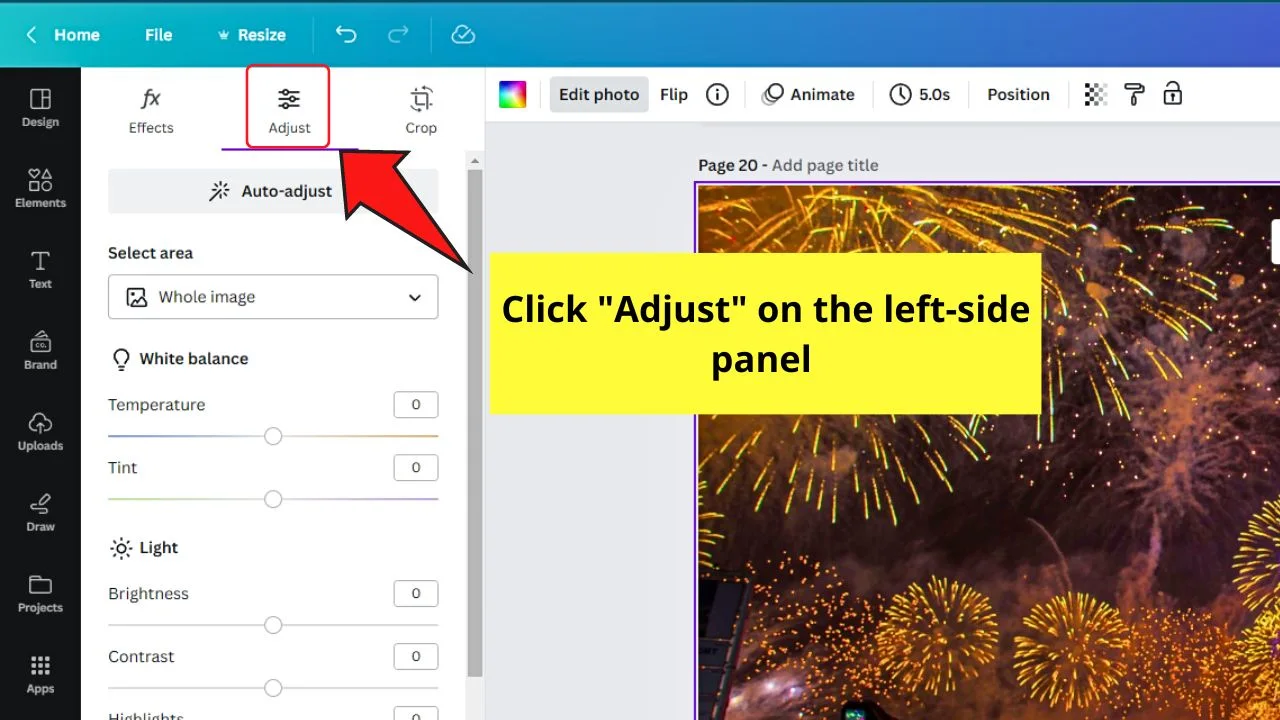
Step 2: Select the “Adjust” tab
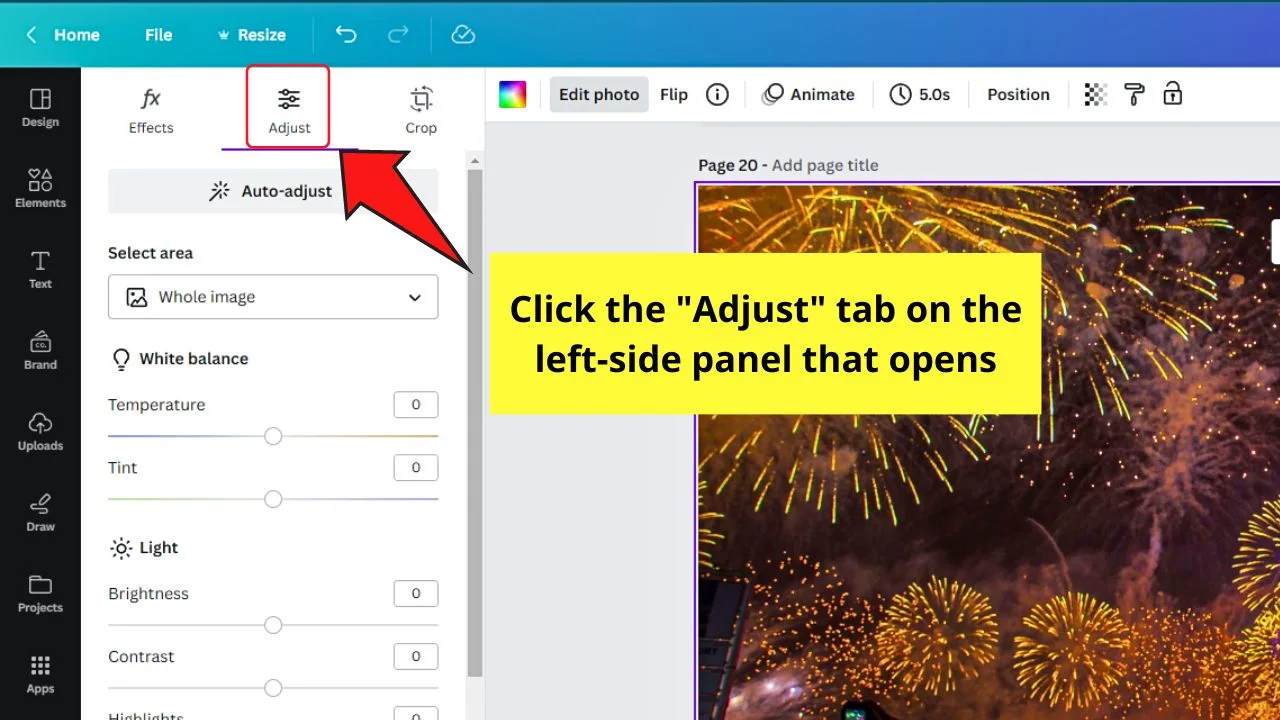
This is the second tab on the left-side panel that opens after clicking “Edit Photo.”
Step 3: Drag the “Saturation” slider to “-100”
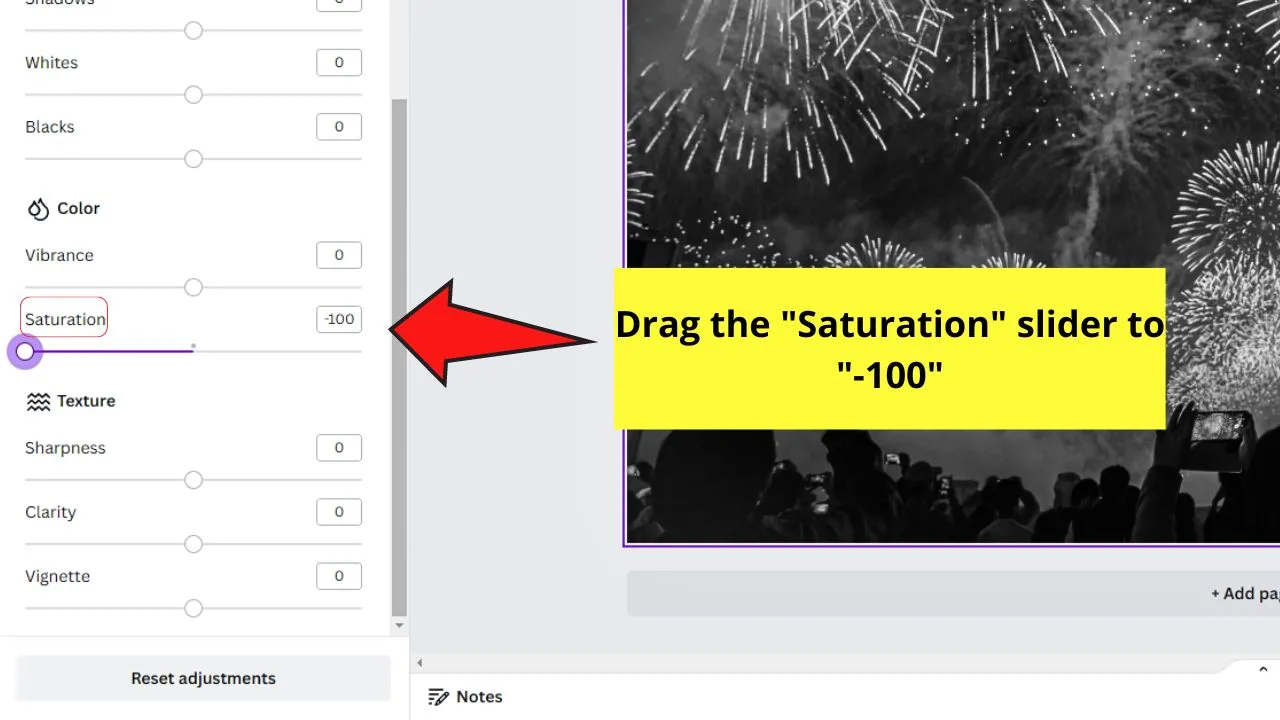
This slider is under the “Color” section after the “Vibrance” slider.
You can also type the saturation value in the box provided for easier changing of the image’s saturation.
Step 4: Drag the “Contrast” and “Brightness” sliders
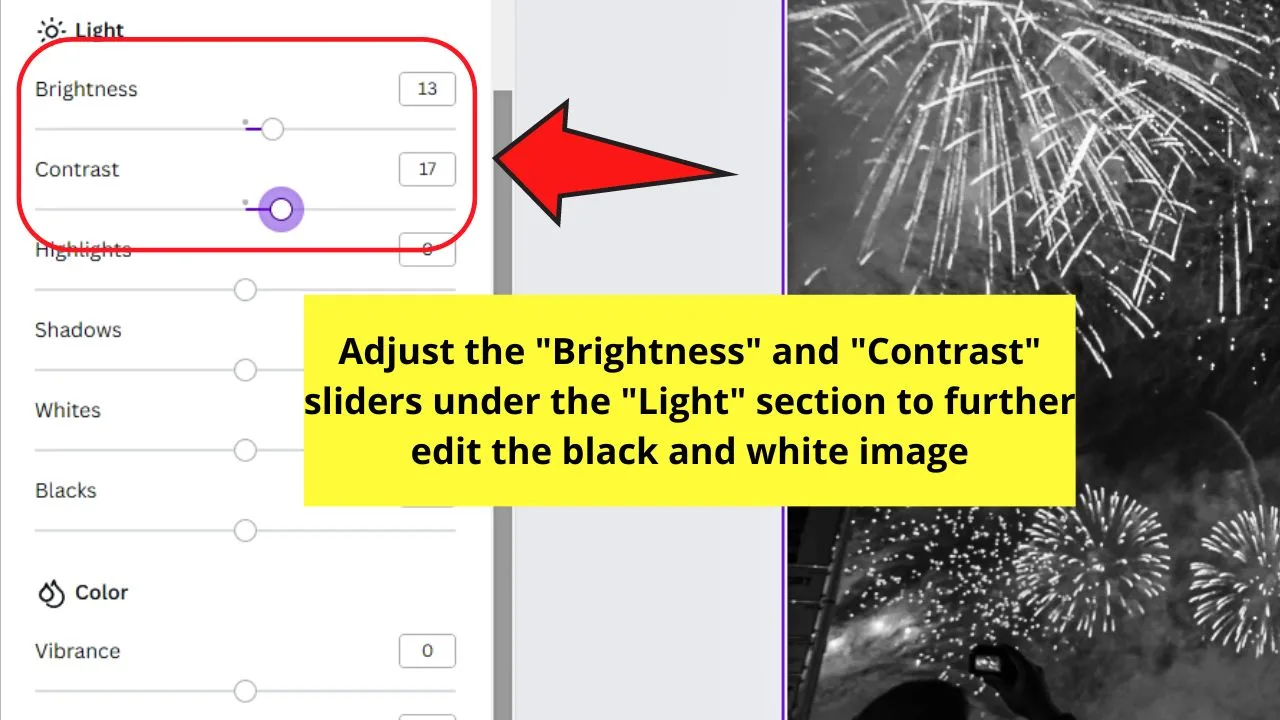
Tweaking these sliders gives the image more depth. But, this step is only optional.
You can skip and end with the third step if the resulting image is good for you already.
There’s no one-click rule here. You can just fiddle with the sliders until you see the photo in the effect that you want to see it in.
But, increasing the brightness and lowering the contrast levels of the photo gives a more aged appearance.
If you increase the contrast and lower the brightness, you’ll end up making the background more obscure.
Method 2: Adjusting the Photo’s “Light” and “Color” Settings
In the previous method, you only tweak the photo’s brightness and contrast to enhance its look after adjusting its saturation.
This time, you use other “Light” settings with these sliders to achieve the black-and-white effect on the image.
Step 1: Select the image and click the “Edit Photo” tab
Step 2: Click “Adjust”
Step 3: Adjust the photo’s “Light” settings
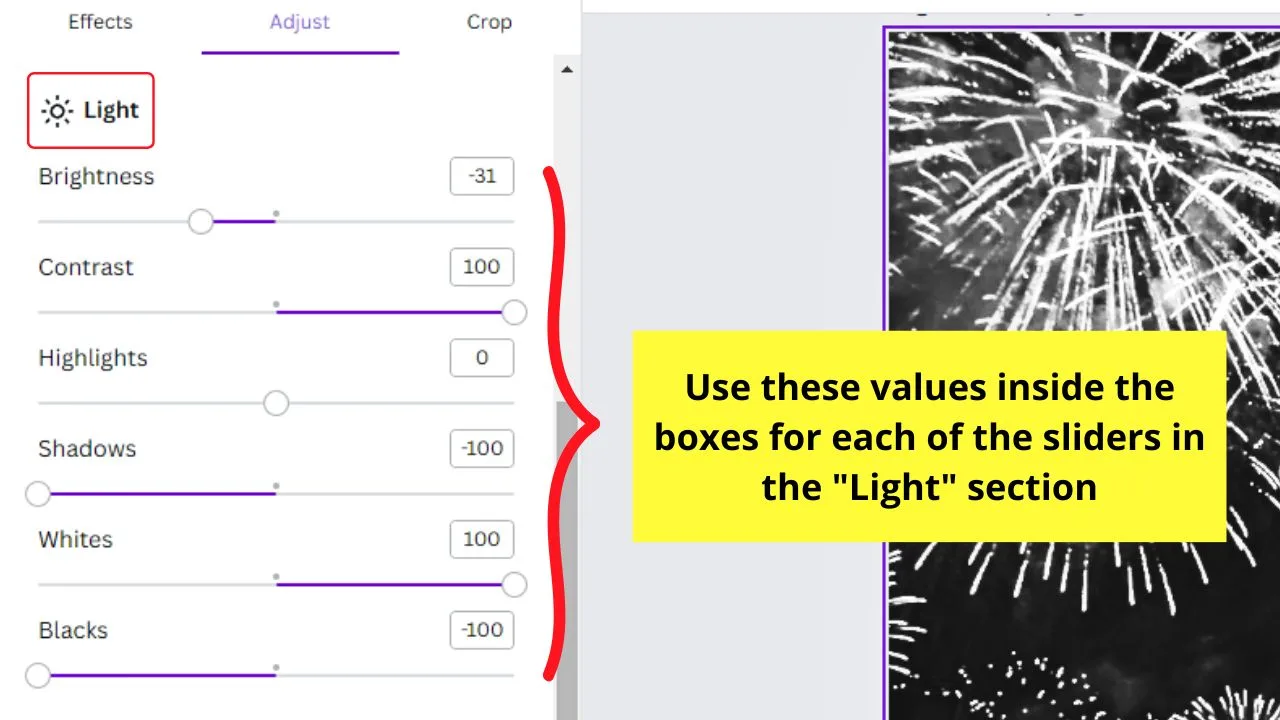
You’ll find both of these sliders under the “Light” section. You can adjust these settings by dragging their respective sliders, but it’s easier to type a value in the box.
If you prefer the second way of adjusting the image’s light settings, these are the values I used:
- Brightness = -31
- Contrast = 100
- Shadows = -100
- Whites = 100
- Blacks = -100
Note that you can always use other values for any of these settings if you prefer the image to have a lighter black-and-white tinge.
Step 4: Adjust the photo’s “Color” settings
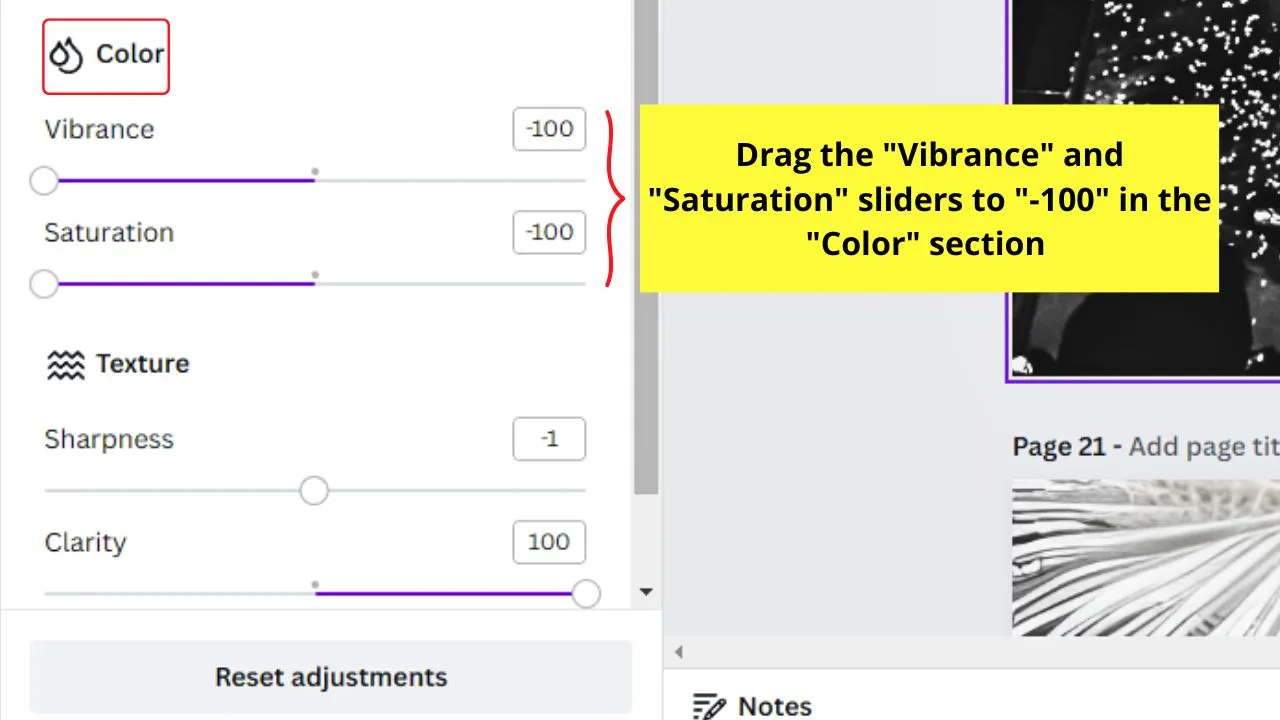
This section is found just after the “Light” settings. You’ll only find two sliders in this section: “Vibrance” and “Saturation.”
The values below are what I used for each of sliders in the “Color” settings section:
- Vibrance = -100
- Saturation = -100
If you have previously tweaked the “Saturation” setting, you can keep it that way. Adjust this setting as needed to balance it out with the other settings of the photo.
Method 3: Add Mono Filters
Step 1: Select the “Edit Photo” tab
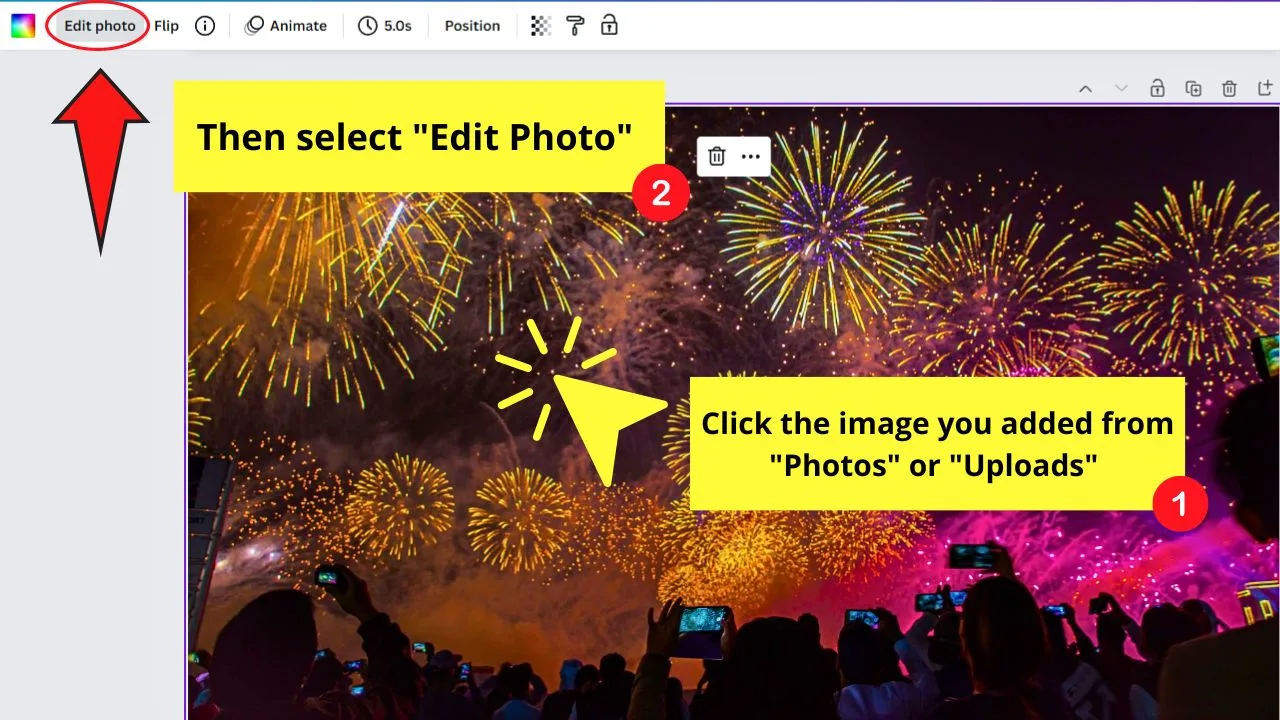
This is the second option on the taskbar after selecting the image added from either the “Upload” or “Photos” section.
Step 2: Click the “See All” button beside “Filters”
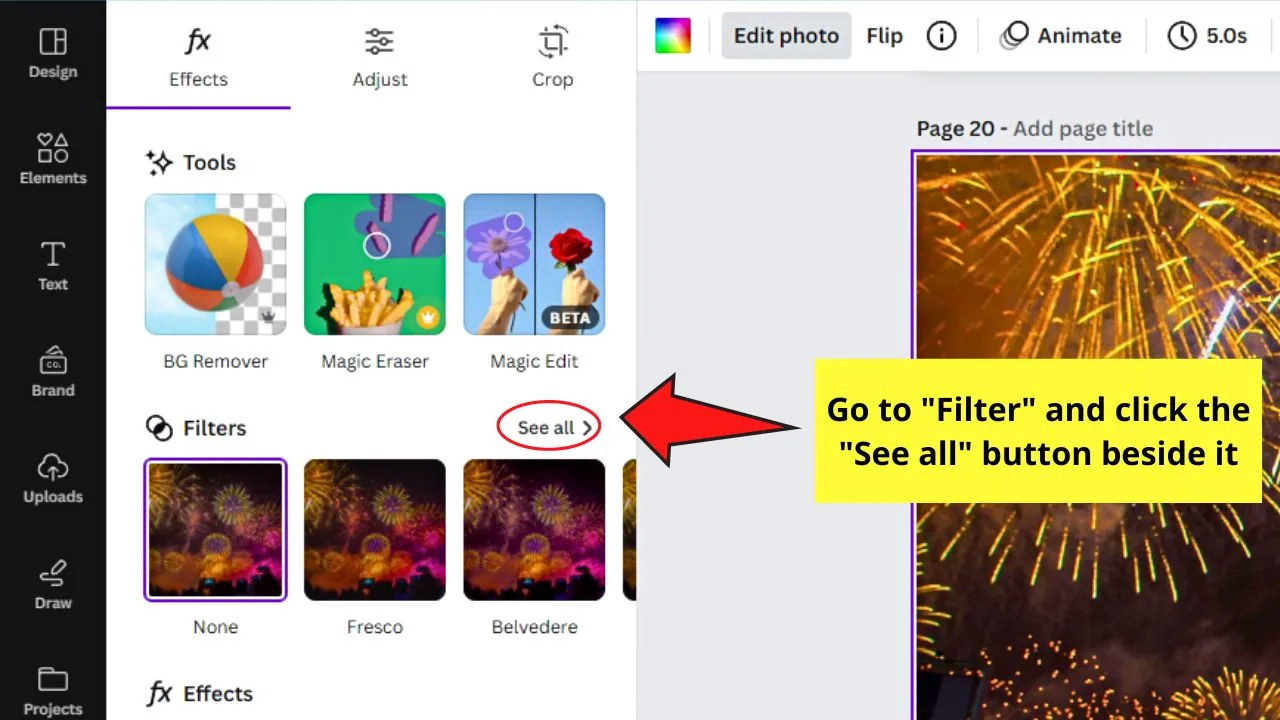
The “Filters” section is the second one you’ll see on the left-side panel in the “Effects” tab.
Step 3: Choose a filter from the “Mono” section
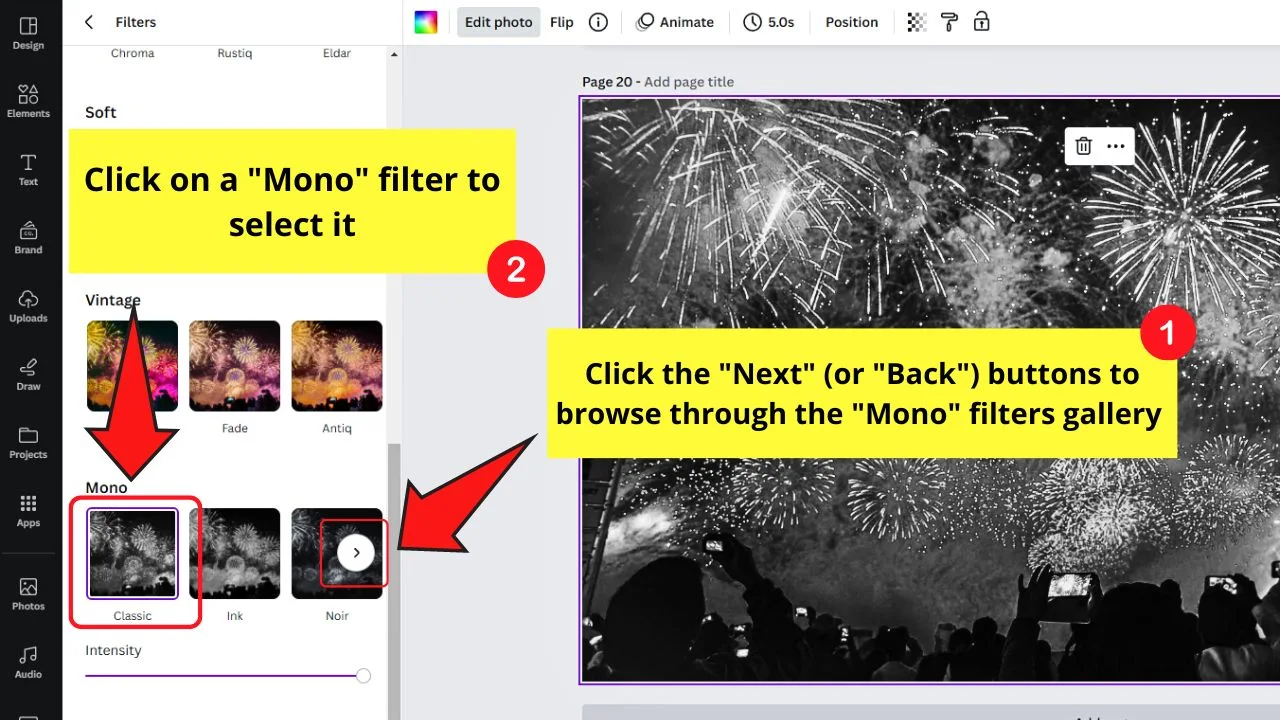
It is under the “Mono” section where all the black and white filters can be seen. Click on “Next” and “Back” to browse through the “Mono” filter gallery.
Then select the “Mono” filter you’ll use. An “Intensity” slider appears under the “Mono” filter you choose.
Step 4: Adjust the intensity of the “Mono” filter you selected
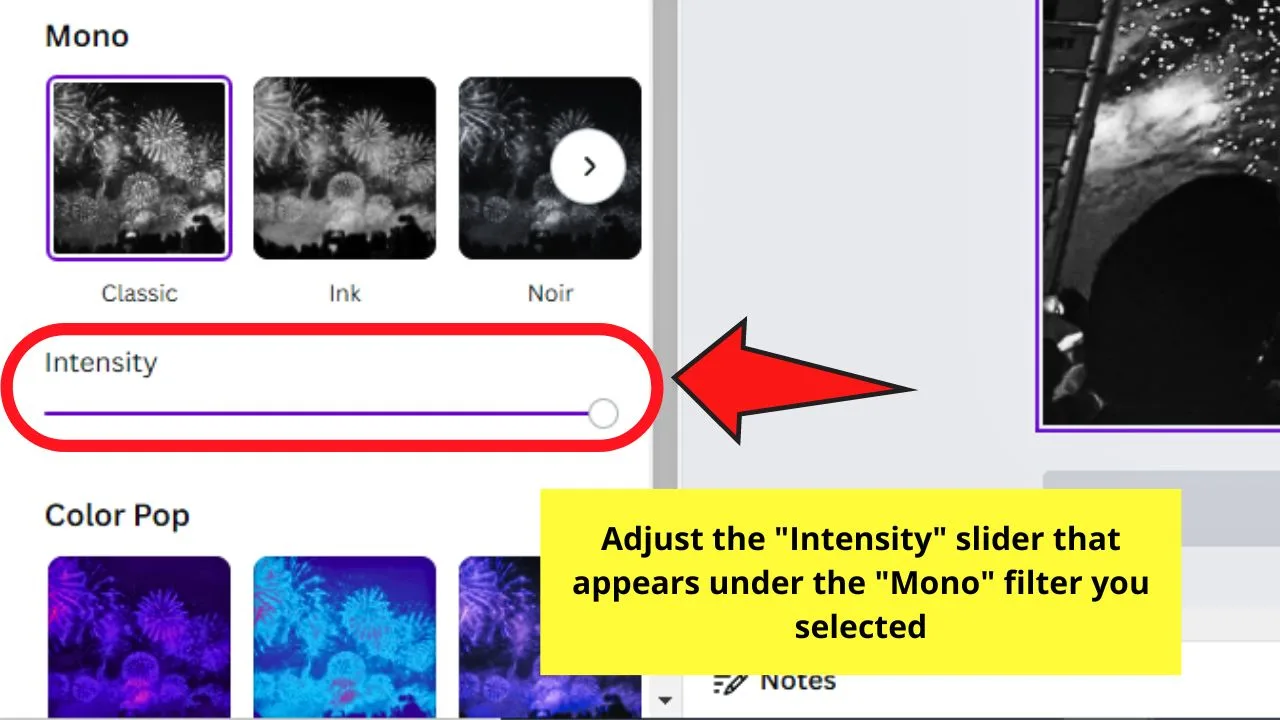
Drag the “Intensity” slider to the right if you want to increase the filter’s intensity on the image.
But unlike the old “Filters” menu, you can’t individually adjust the filter parameters other than its intensity.
Method 4: Use the Duotone Effect
Step 1: Select the “Edit Photo” tab
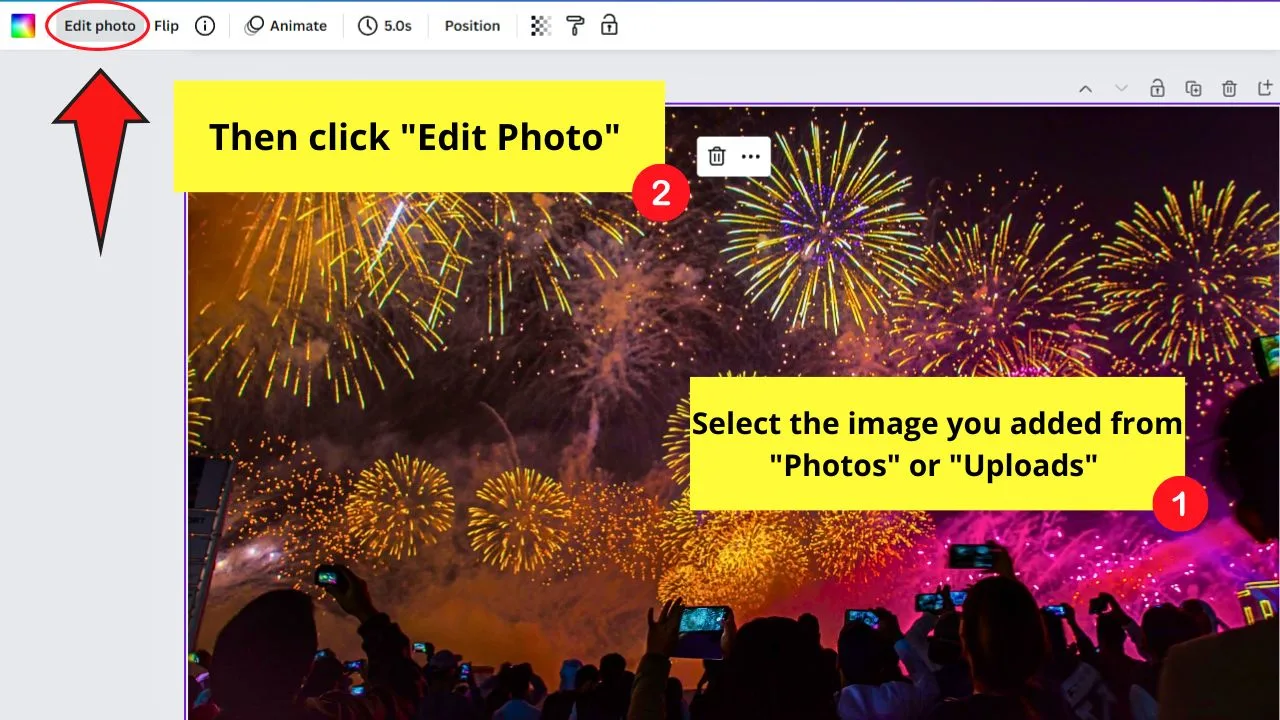
Step 2: Click the “Next” button in the “Effects” section
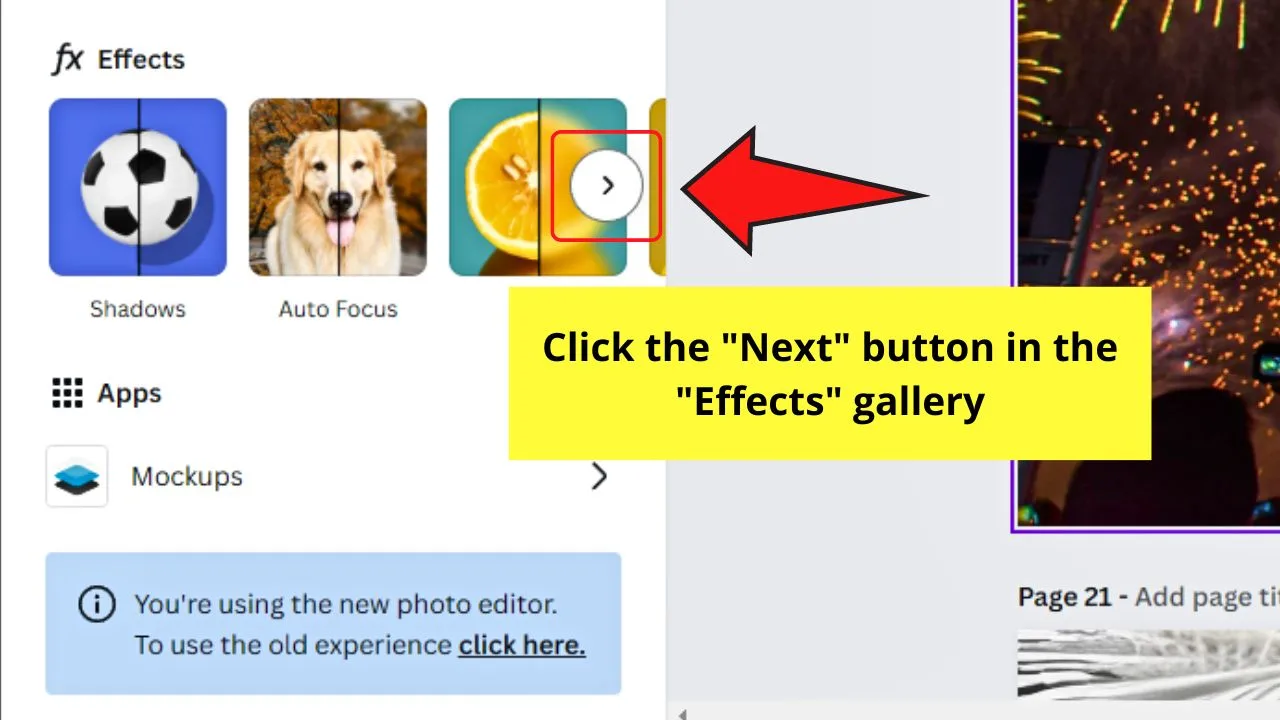
This will reveal the other “Effects” options available.
Step 3: Select “Duotone”
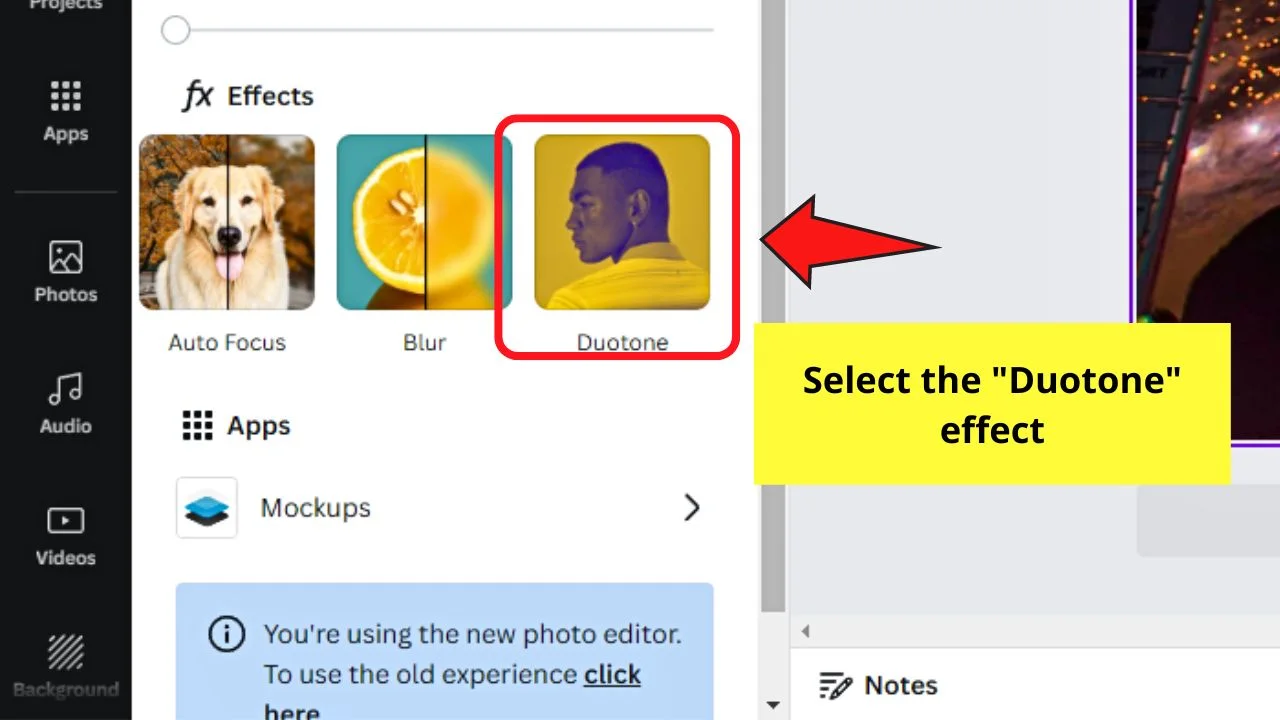
A gallery of duotone filters can then be seen on the panel.
Select any of these filters available. But, for sample purposes, we’ll choose “Sea Blue.”
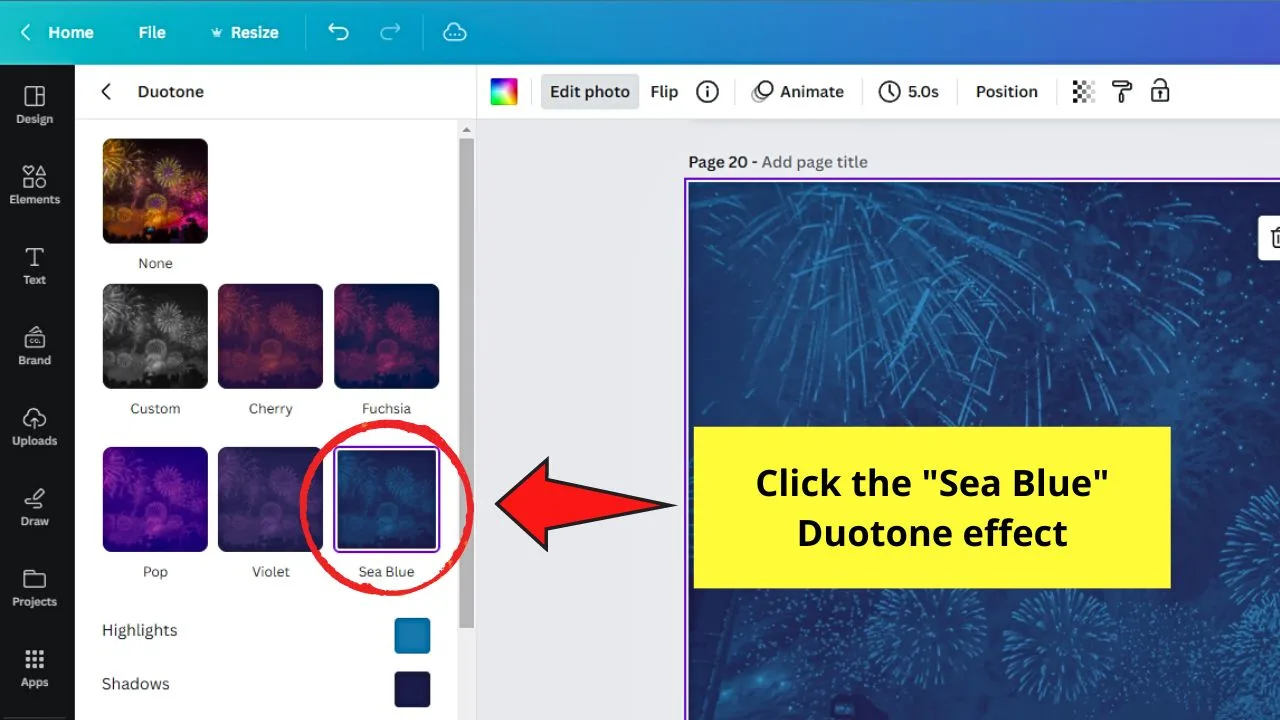
Step 4: In the “Duotone” settings menu, change the “Highlights” and “Shadows” colors used
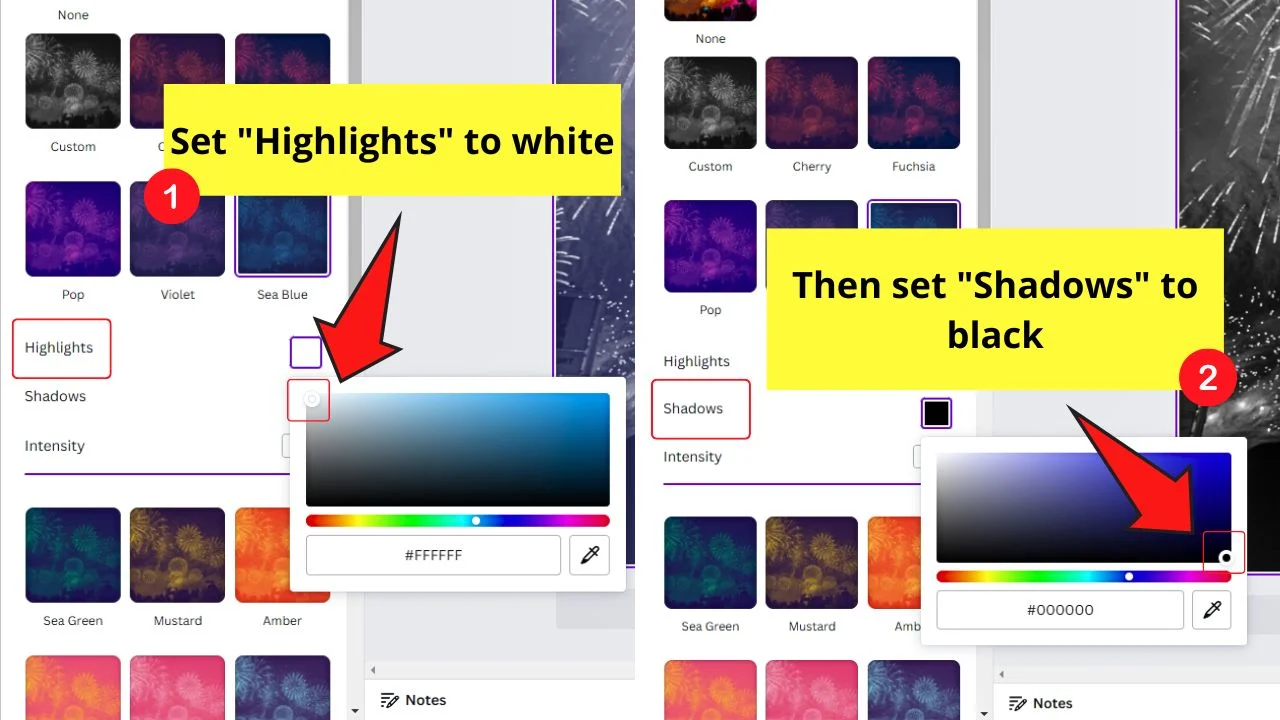
For “Highlights,” change this to white, then select black for the “Shadows. “
But unlike in the old photo editor, you cannot select “white” or “black” from the “Default” color gallery.
Now you’ll have to drag the selector to the white and black areas of the color spectrum box to choose that hue.
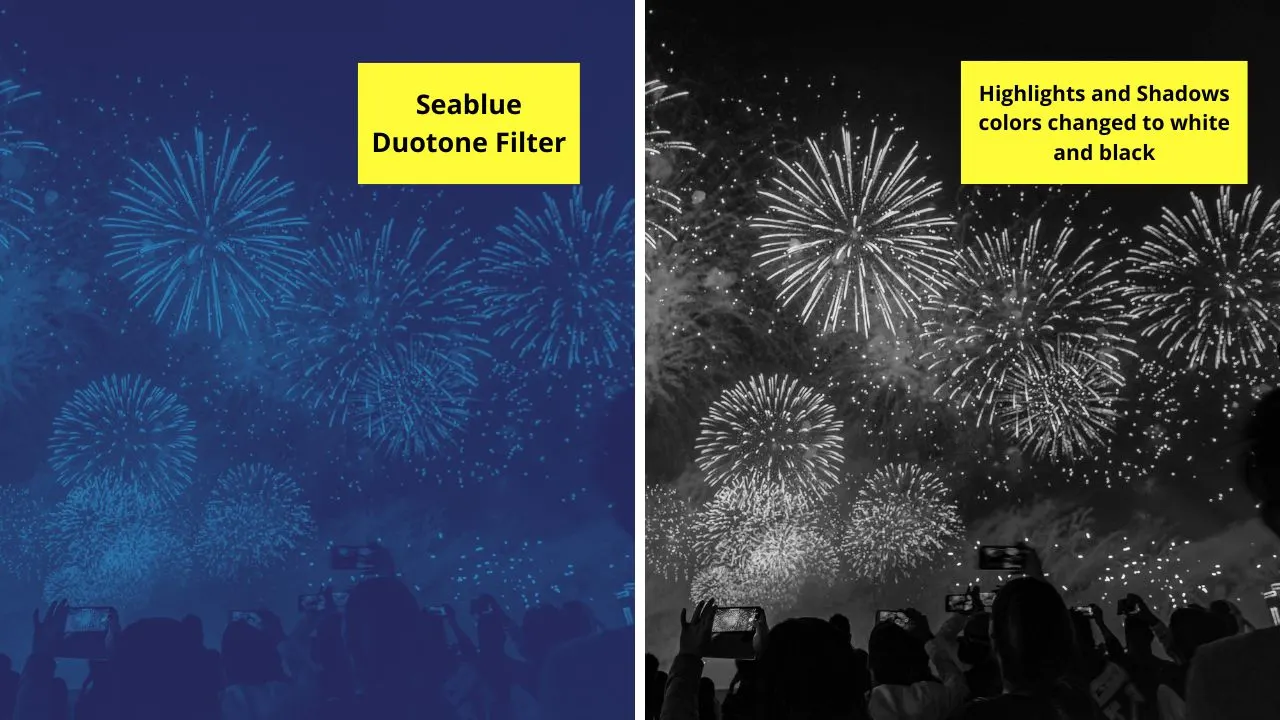
Other than turning pictures black and white, you can also use Duotone to changing the colors of an uploaded image.
Method 5: Add a Black-and-White Photo Using the “Text to Image” App
The “Text to Image” app is one of the latest features added that leverages AI to generate images from text.
Unlike the other methods, using “Text to Image” generates a black-and-white image based on your prompt instead of changing the current one you’re using.
But to use this new feature, install it in your editor first by selecting the “Apps” tab and typing “Text to image” in the search bar. You can also scroll down to find the “Text to Image” icon.
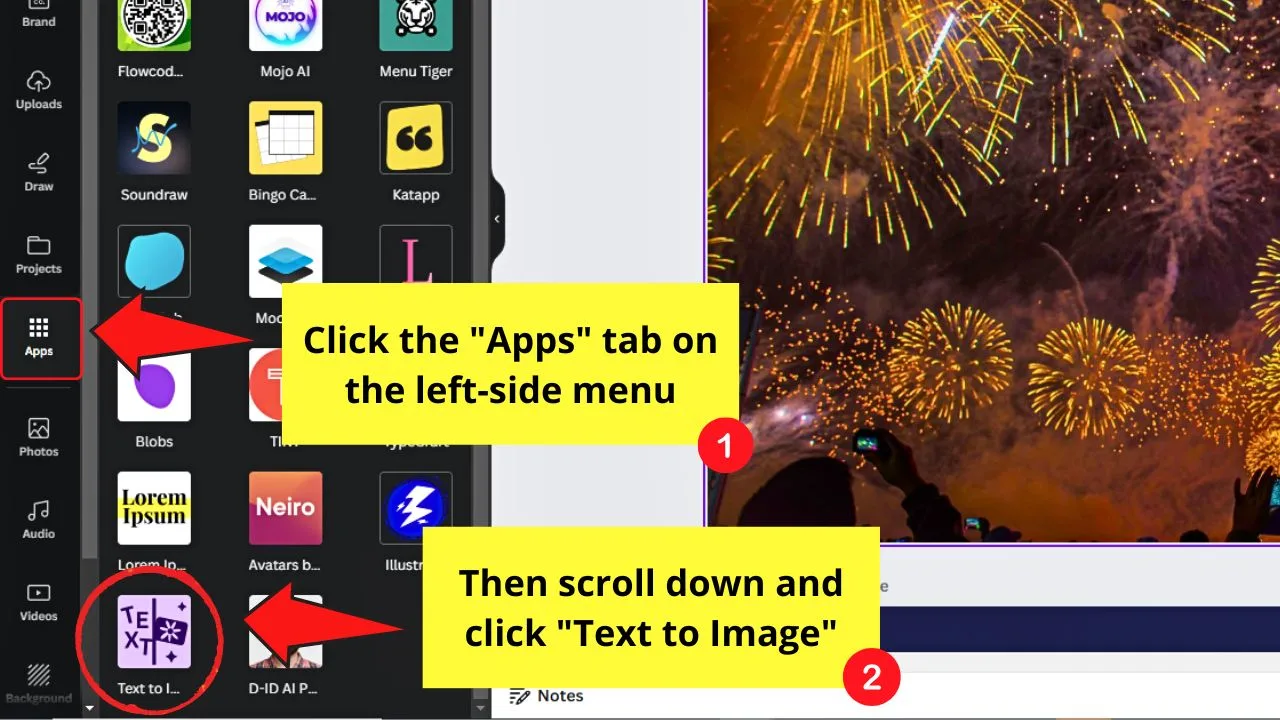
Click it and select the “Open” button to install it in your Canva editor. The “Text to Image” object panel then opens.
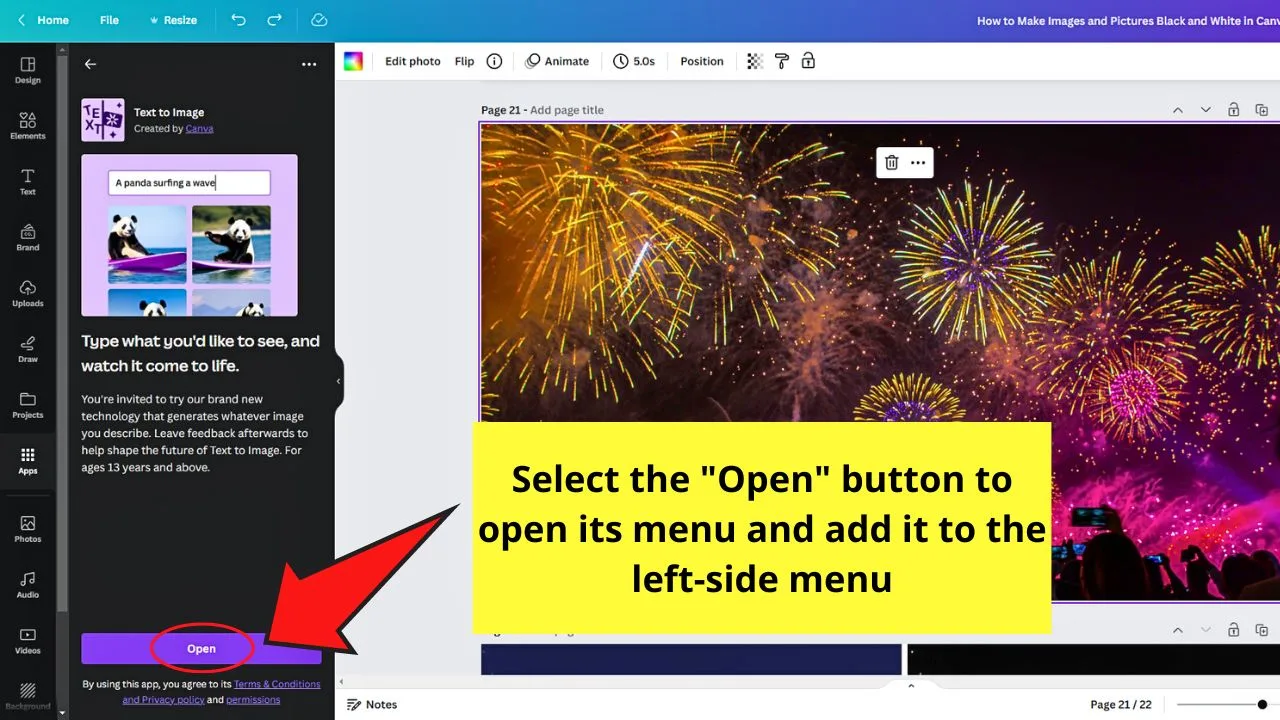
Then do the following steps next:
Step 1: Type your prompt for adding a black-and-white image
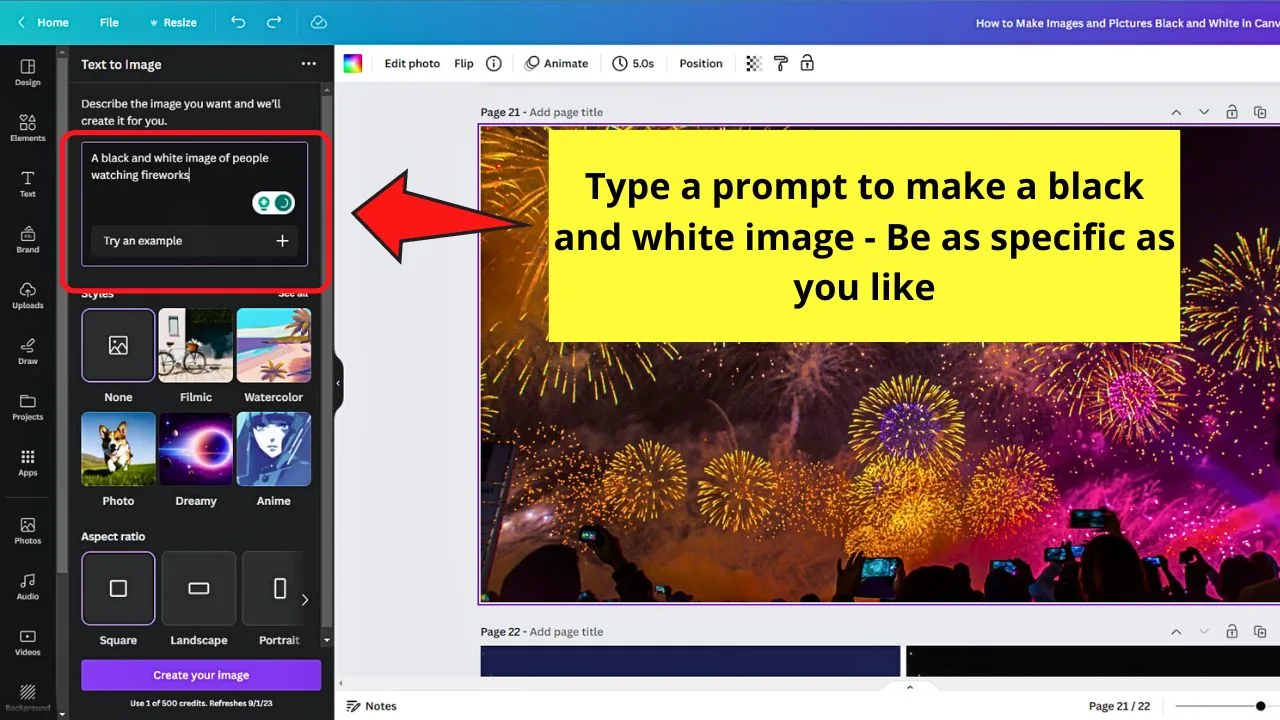
Be as specific with your command here as much as possible; just don’t forget that the photo should be black and white.
Step 2: Select “Create your image”
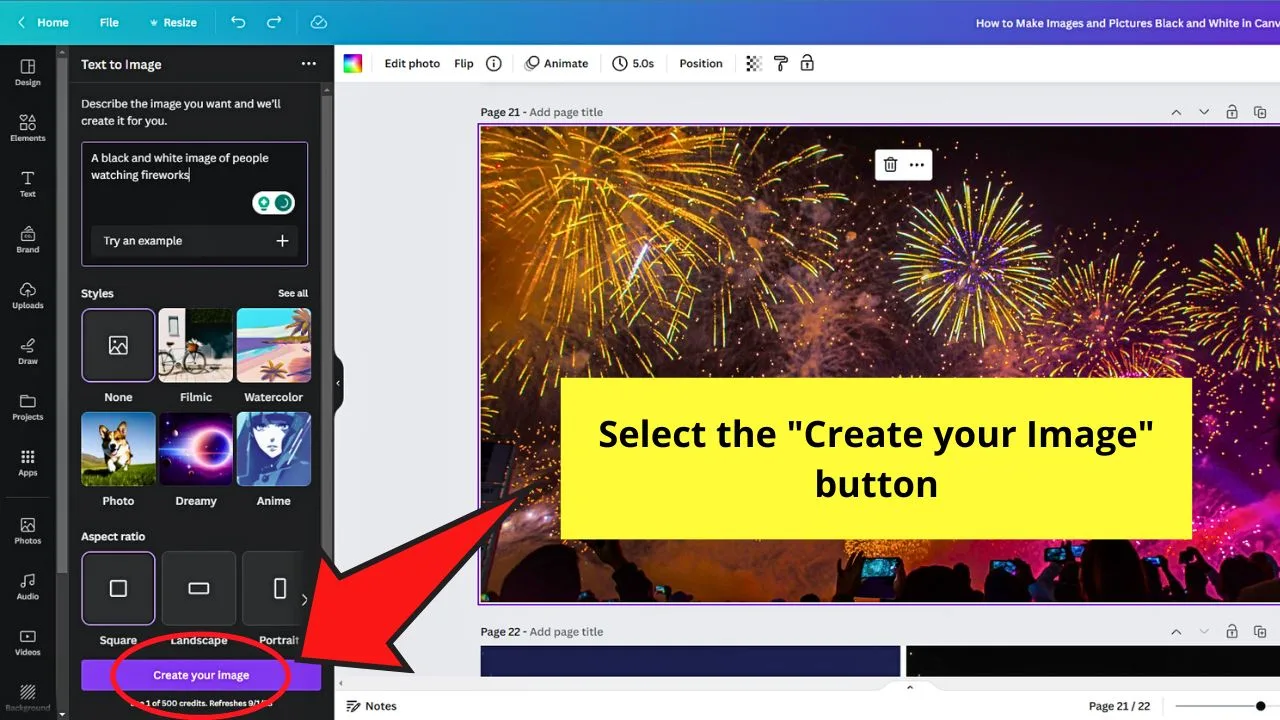
Then allow Canva to process the prompt you made. You’ll see the progress with the colored bar moving toward the right side of the object panel.
Step 3: Click on a black-and-white photo from the generated images
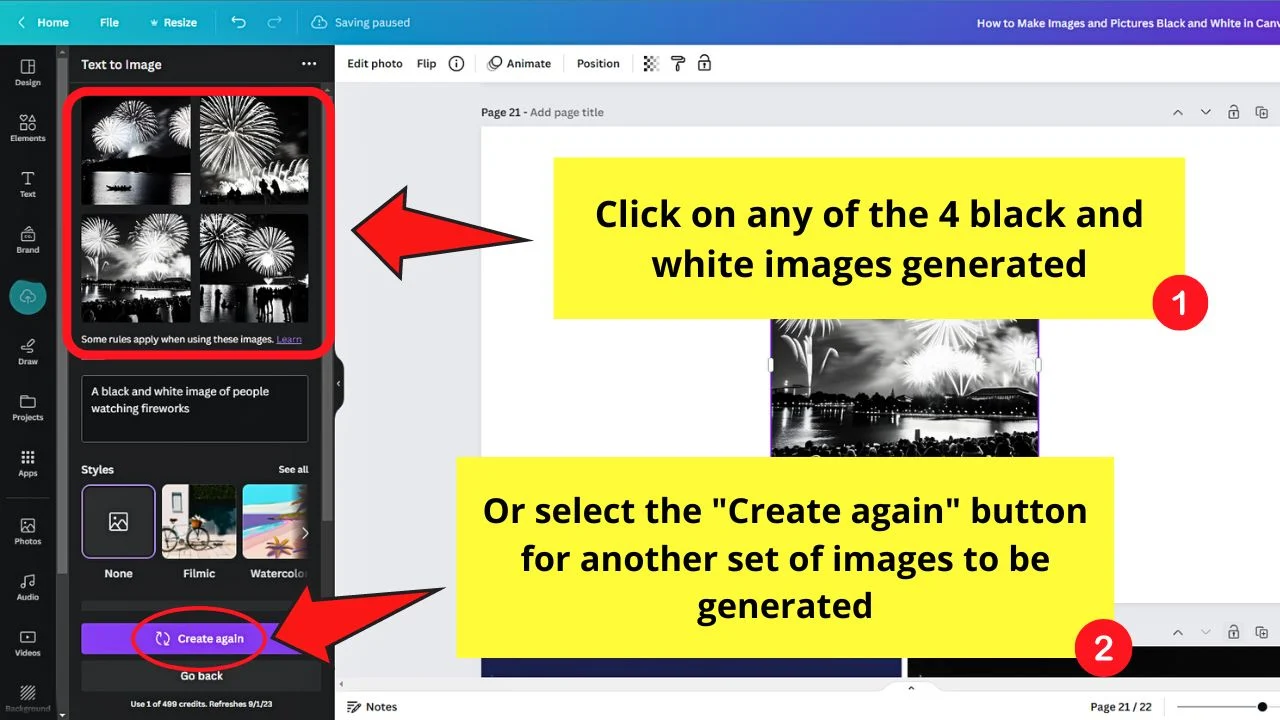
Canva then presents to you four images based on the prompt you entered. Select one of the photos if they are to your liking.
If not, click the “Create again” button for Canva to generate a new set of black-and-white images.
Once you have selected a photo, resize it according to your design.
Perhaps, from among the 5 options presented, you’ll find the “Mono” filters method to be the simplest one to use.
But, if you’re vying for a more freestyle and creative way of turning your photos into black and white, lowering the saturation is the way to go.
Whatever option you use, the important thing is you convert your images and pictures into black and white.
And that’s just one of the reasons making Canva so great for both newbie and expert graphic designers!
Frequently Asked Questions about How to Make Images and Pictures Black and White in Canva
Is there a hex code that I can copy and paste to apply the same black and white filter for other photos?
Like the color hex codes, there are filter hex codes you can use as well. You can find the filter hex code below the Adjustment settings menu. Just save this hex code somewhere so you can quickly paste it into the filter code box the next time you’ll need it.
How do I remove the filter I applied on a photo if I want to make further adjustments?
To remove a photo filter, tap on the picture before clicking the Edit Image button. Head to the Filters section, and in the succeeding menu that appears, select the None tile. This will automatically remove the filter you added to your image.
Are there photo filters exclusive to Canva Pro users?
Unlike the background remover, photo filters in Canva can be used by everyone regardless of whether they’re using the Free or Pro account of the tool.

Hey guys! It’s me, Marcel, aka Maschi. On MaschiTuts, it’s all about tutorials! No matter the topic of the article, the goal always remains the same: Providing you guys with the most in-depth and helpful tutorials!


