

There are many reasons for needing to change the color of an image. You might have a killer artwork that just needs that one final push to make it pop, or maybe you just want to learn something new.
Whatever your reason, you can choose to use Illustrator to convert all the colors in your image to monochrome or simply adjust the color balance of a few colors at a time.
Here are two ways to change the color of an image in Adobe Illustrator.
Changing The Color Of An Image To A Single Color In Illustrator
Place your image on your artboard. Then press the “V” key to equip the Selection tool. Use the Selection tool to select your image. Next, click the embed button at the top of the screen. Then, go to “Edit” on the top toolbar, followed by “Edit Colors” and click on “Convert to Grayscale”. Finally, open the Swatches panel by going to “Window”, then clicking on “Swatches” and select the color you want your image to be.
A quick and easy way to apply a single color to an entire image, this method is useful, quick and easy.
Here’s how to change the color of an image to a single color in nine simple steps.
Step 1:
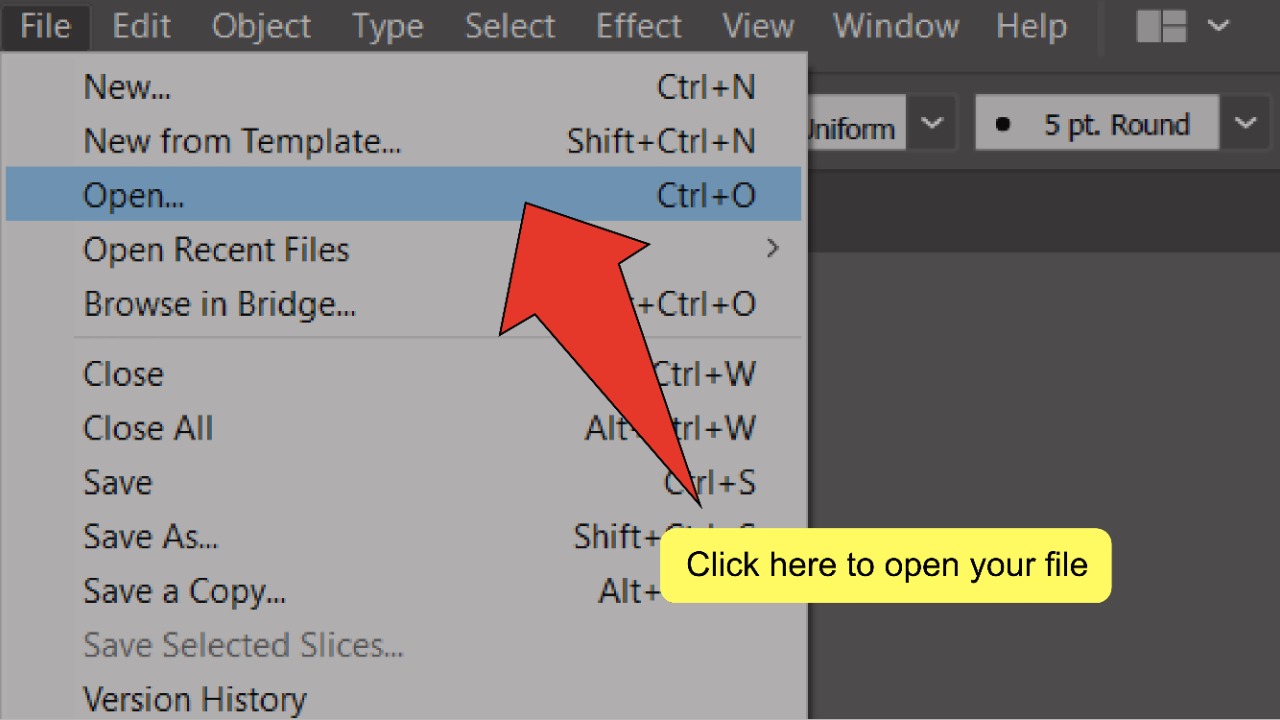
Open your Illustrator file. To start, open your document by double clicking on its corresponding Illustrator file, or if Illustrator is already open, you can go to “File” on the top menu, and then “Open” and choose the file you want to open. To speed things up, you can also use the keyboard shortcut COMMAND+O (MAC) “Ctrl+O” (Windows).

Step 2:
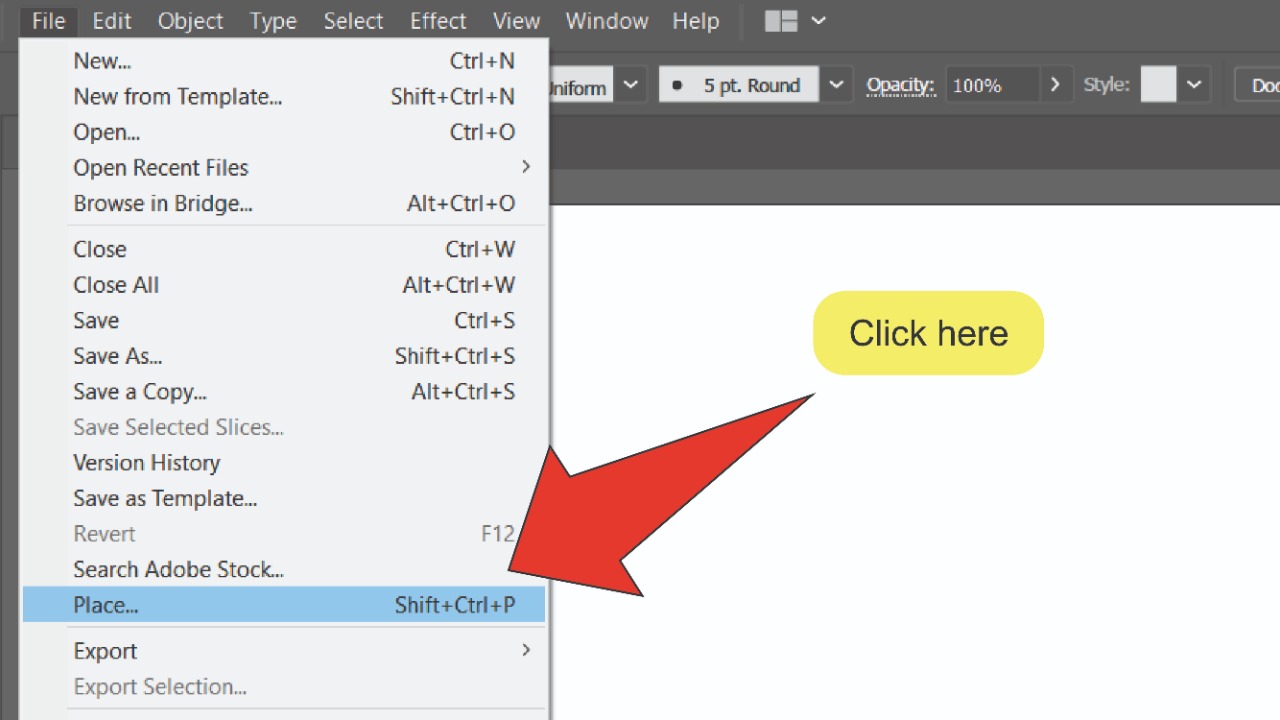
Place your image. Click on “File” on the top menu, then “Place”, or use the shortcut “Shift+Ctrl+P”. Next, select your image and click “Place”.

Step 3:
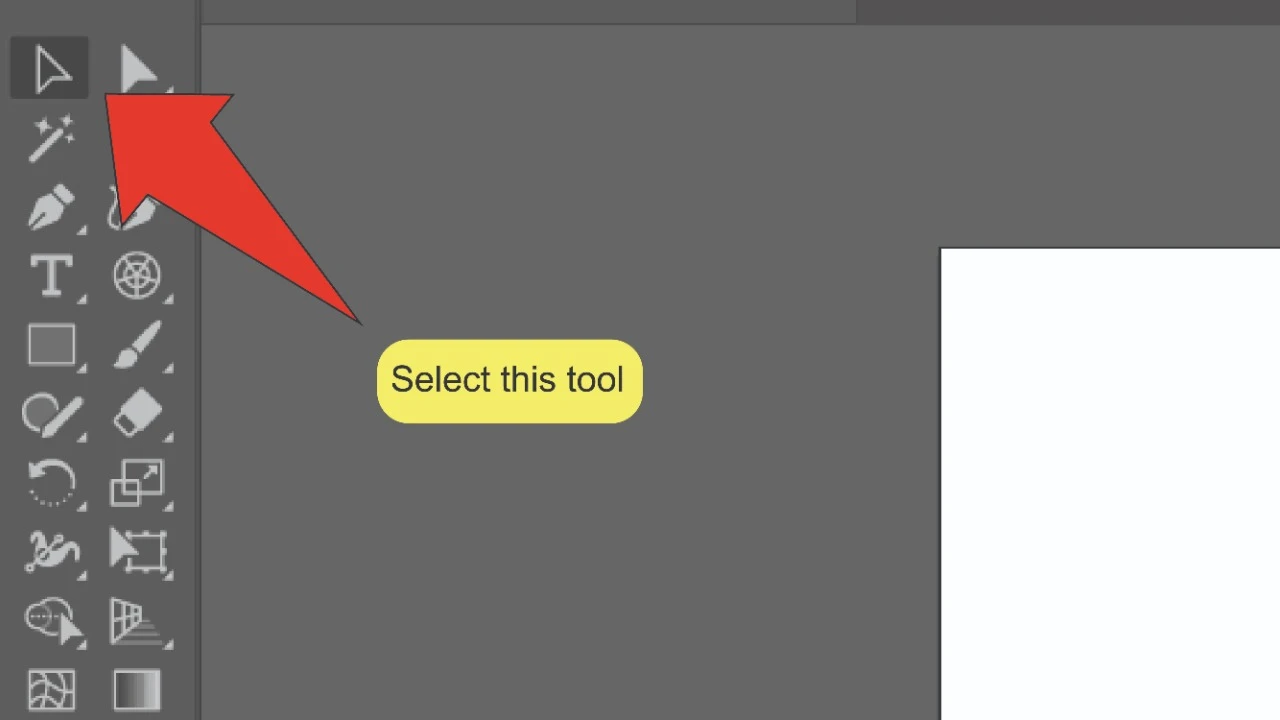
Find and select the Selection tool. Look for the Selection tool, located on the toolbar on the left side of your screen. Alternatively, you can use the keyboard shortcut “V” to quick-select the tool.

Step 4:
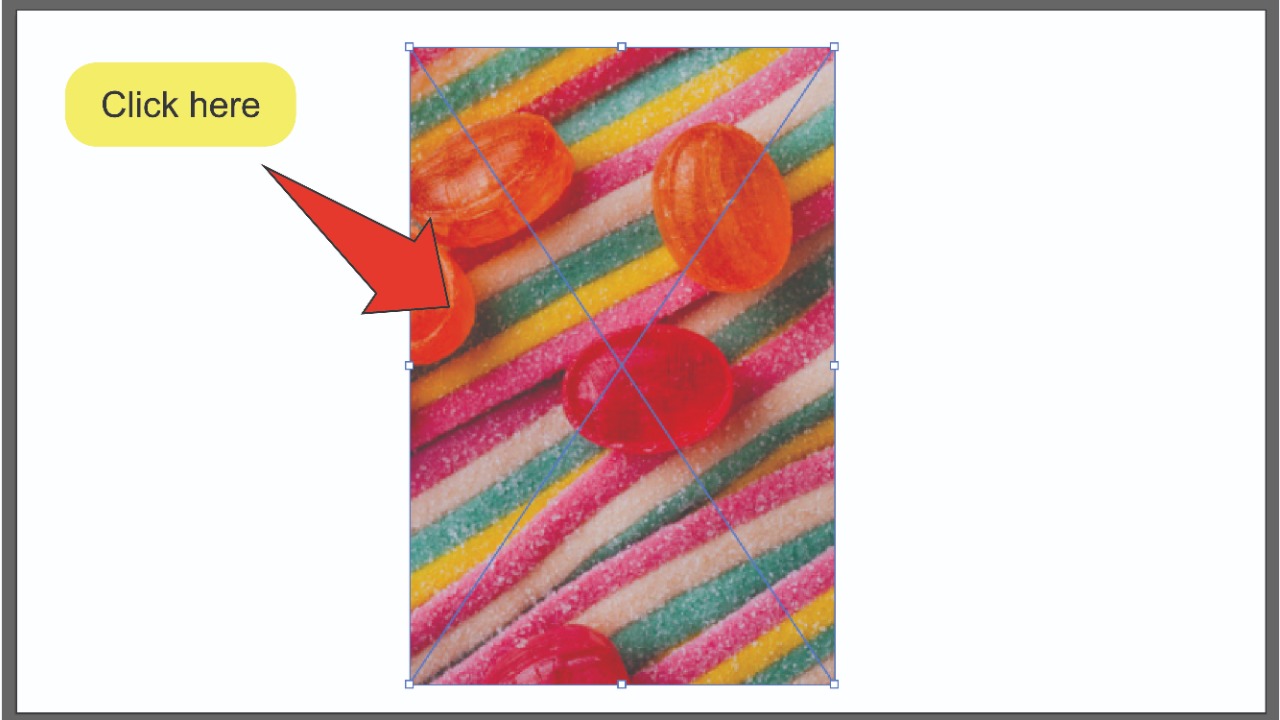
Select your image. With the Selection tool equipped, click on your image to select it. A highlighted border should appear around as well as in an ‘X’ shape across the image.


Step 5:
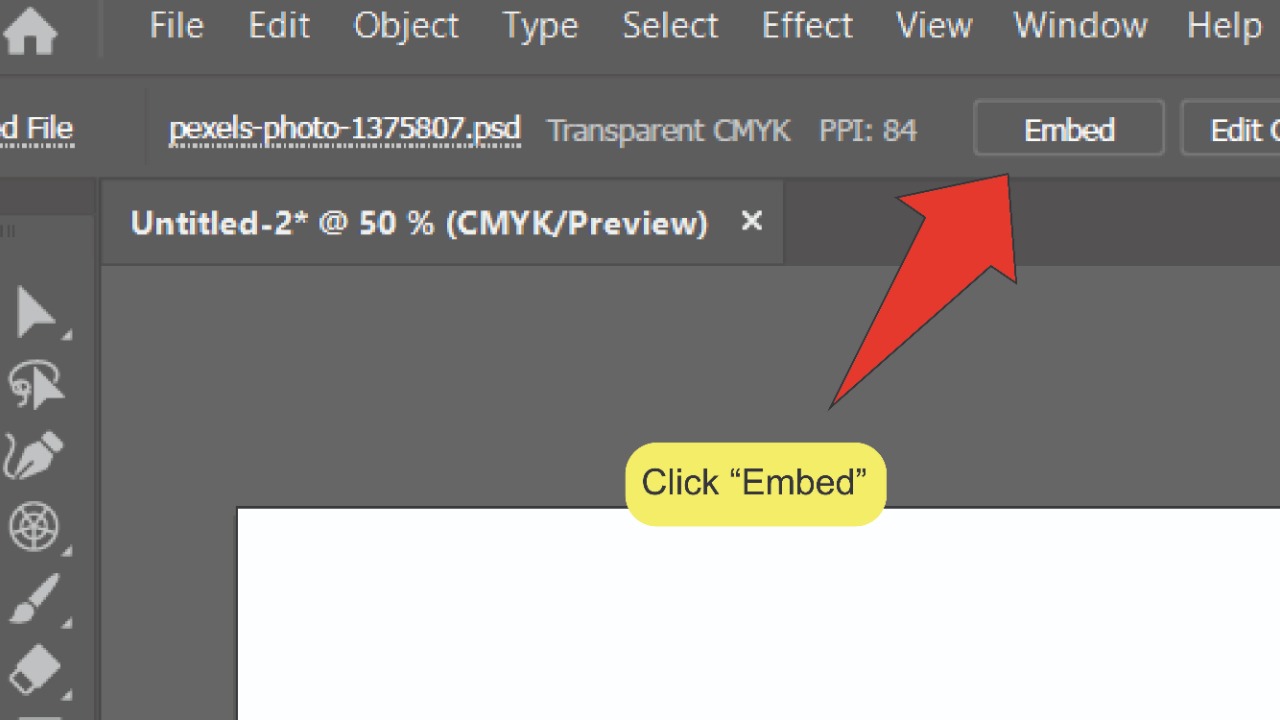
Embed your image. Click the “Embed” button located on the menu at the top of your screen. This will open the “Photoshop Import Options” window. If your image is already embedded, this button will read “Unembed” and no action needs to be taken.

Step 6:
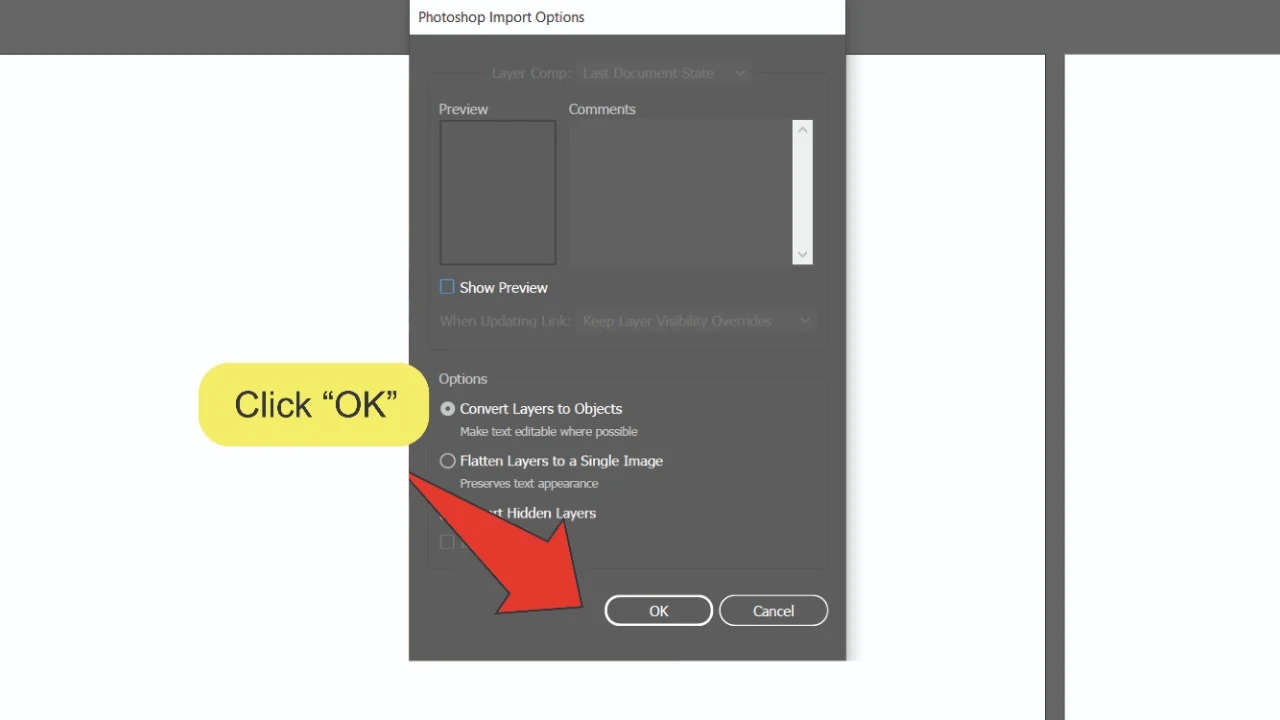
Confirm your Photoshop Import Options. Select your preference under the “Options” section on the “Photoshop Import Options” window, then click the “OK” button at the bottom right of the panel.

Step 7:
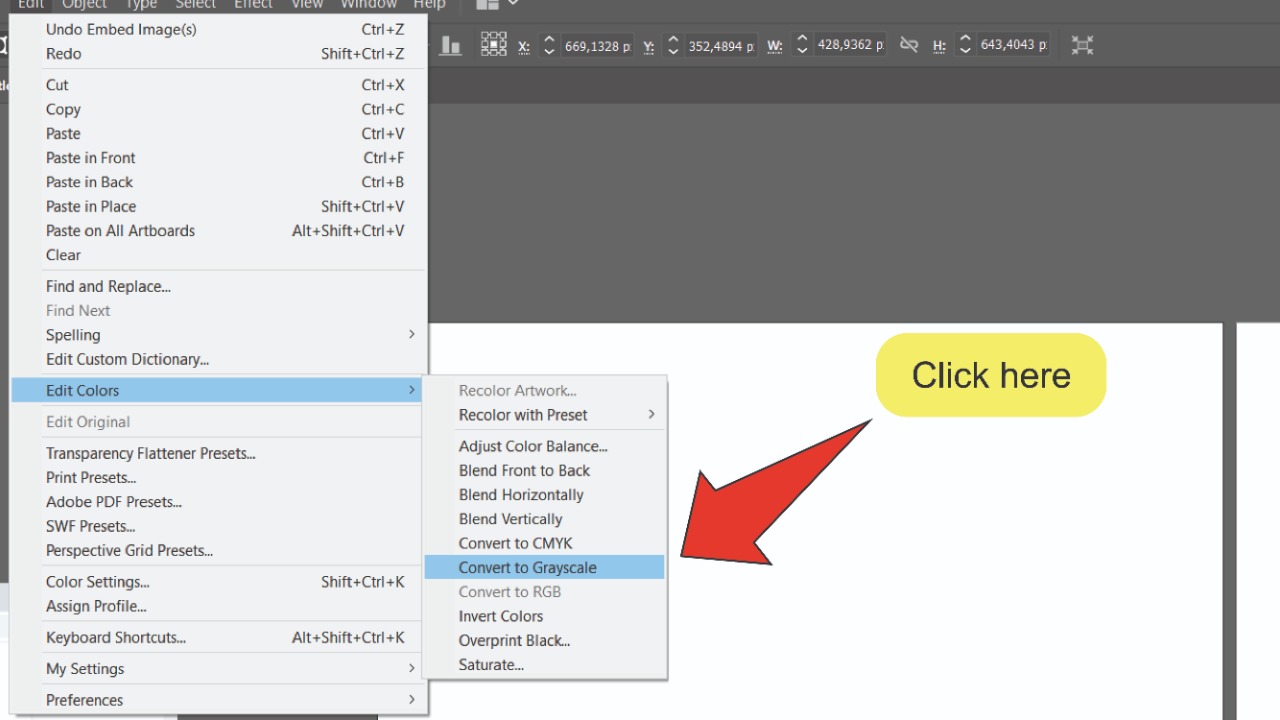
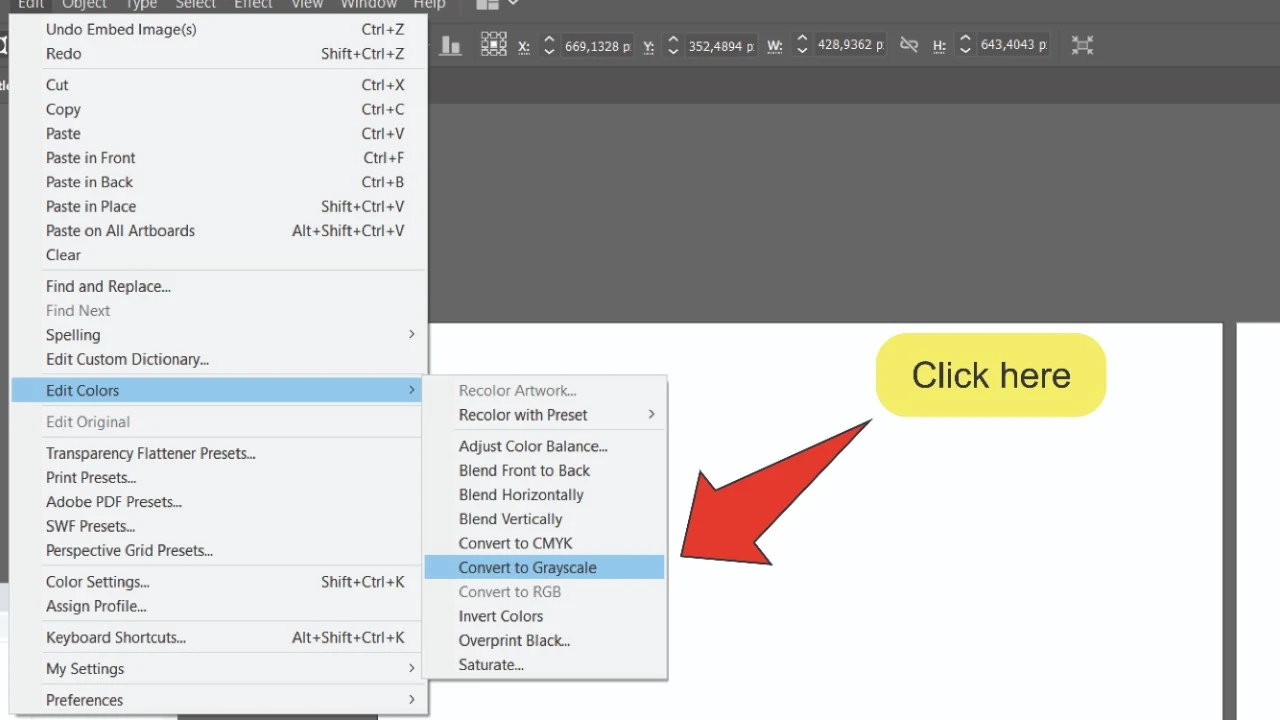
Convert the image to Grayscale. On the taskbar at the top of the screen, go to “Edit”, then “Edit Colors” and click on “Convert to Grayscale”. This will convert all the colors in your image to shades of black and white.
Step 8:
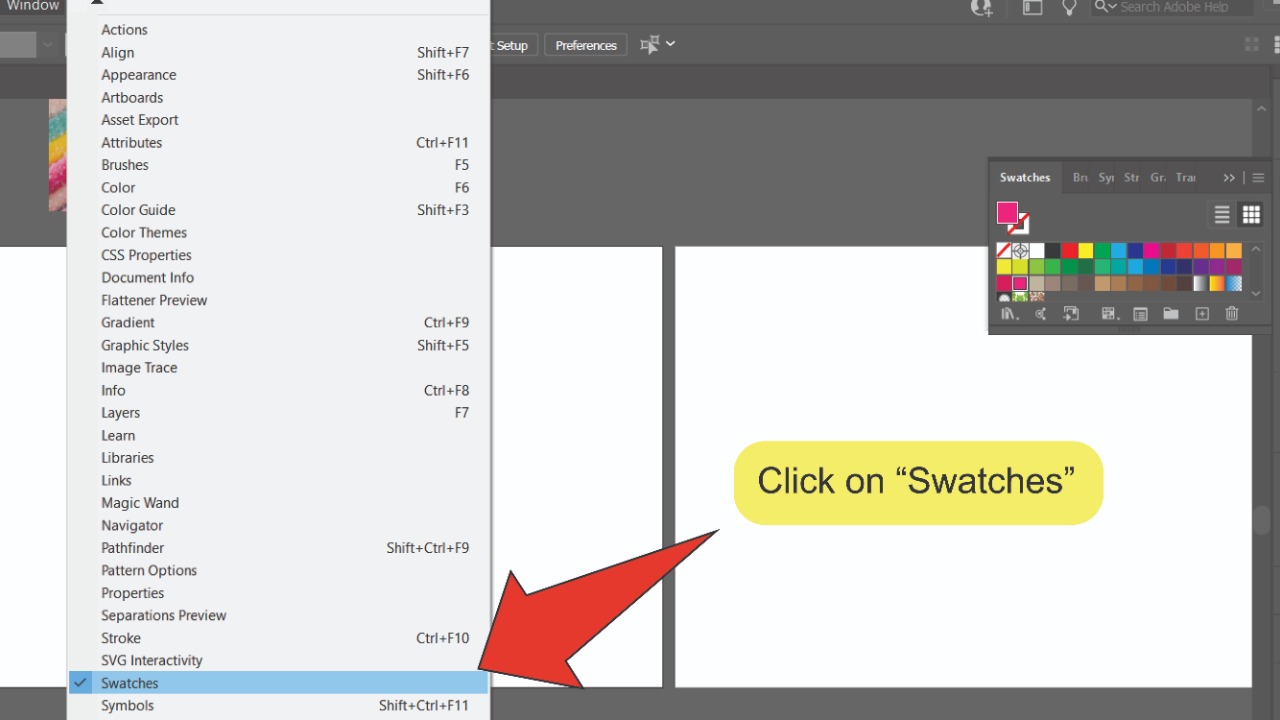
Open the Swatches panel. At the top of the screen, go to “Window” and click on “Swatches”. The Swatches panel should pop up at the right side of your screen.

Step 9:
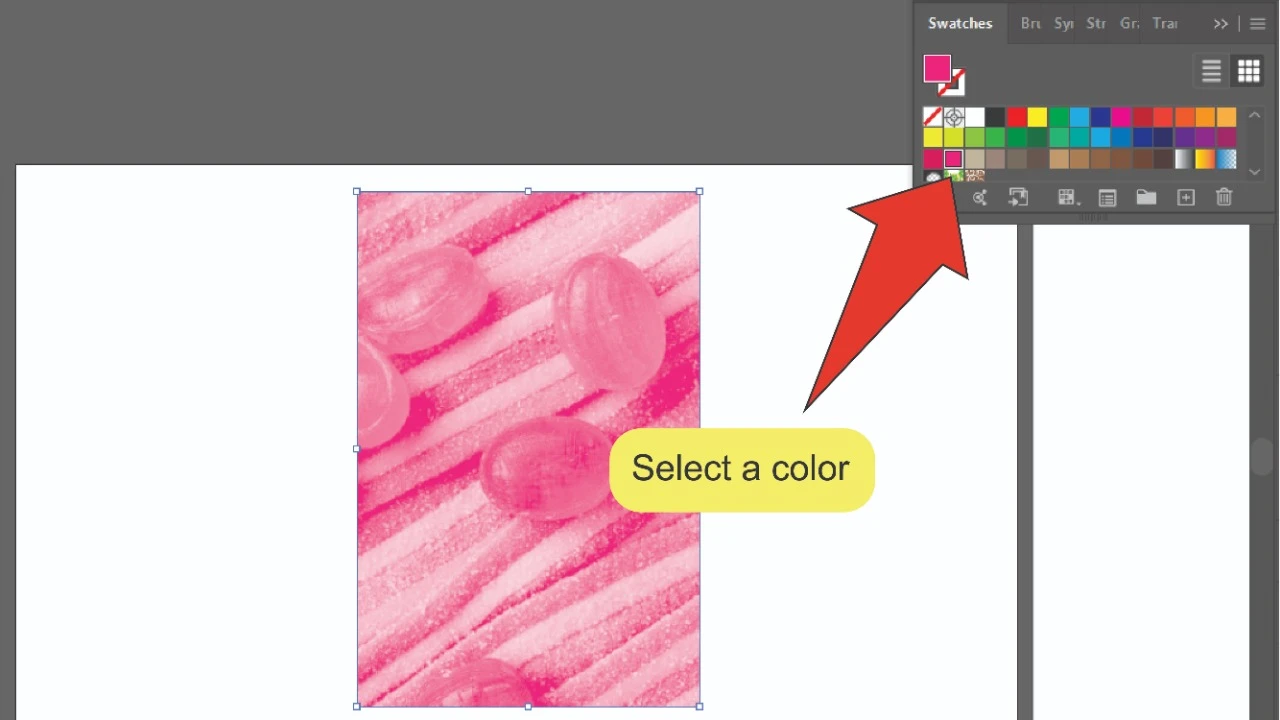
Select a color. Click on any color from the Swatches panel. All the shades of black and white in your image will be converted into different shades of that color.

Changing Multiple Colors In An Image In Illustrator
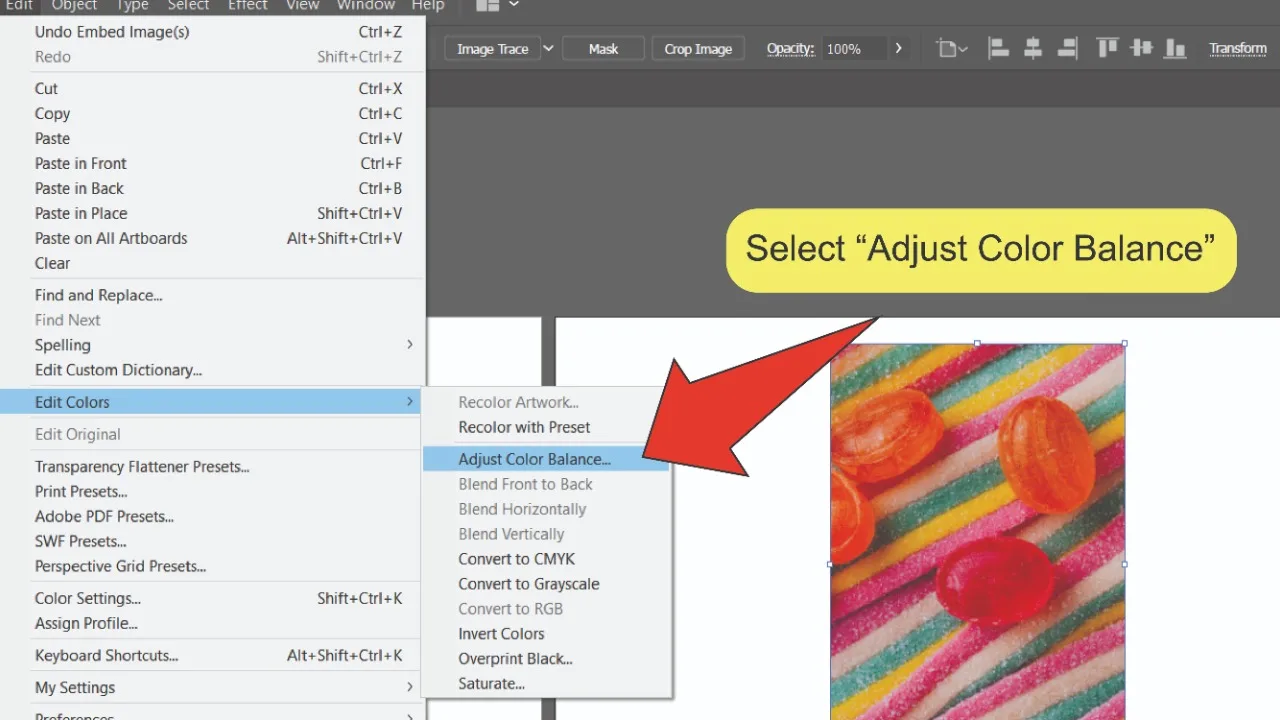
To start, go to “Edit”, followed by “Edit Colors”, then click on “Adjust Color Balance…”. Next, use the sliders on the Color Adjustment panel to adjust your color balance to the desired degree. Finally, click the “OK” button at the bottom right of the Color Adjustment panel.
This method is great for making specific colors in your design stand out and can be completed by following four easy steps. By increasing and decreasing the balance of the base colors in your Illustrator file, you can alter the appearance of your entire.
Here is a step-by-step guide to changing multiple colors in an image in Illustrator.
Step 1:
Open the “Adjust Colors” panel. With your embedded image selected, go to the menu at the top of the screen. Next, go to “Edit”, then “Edit Colors” and click on “Adjust Color Balance…”.

Step 2:
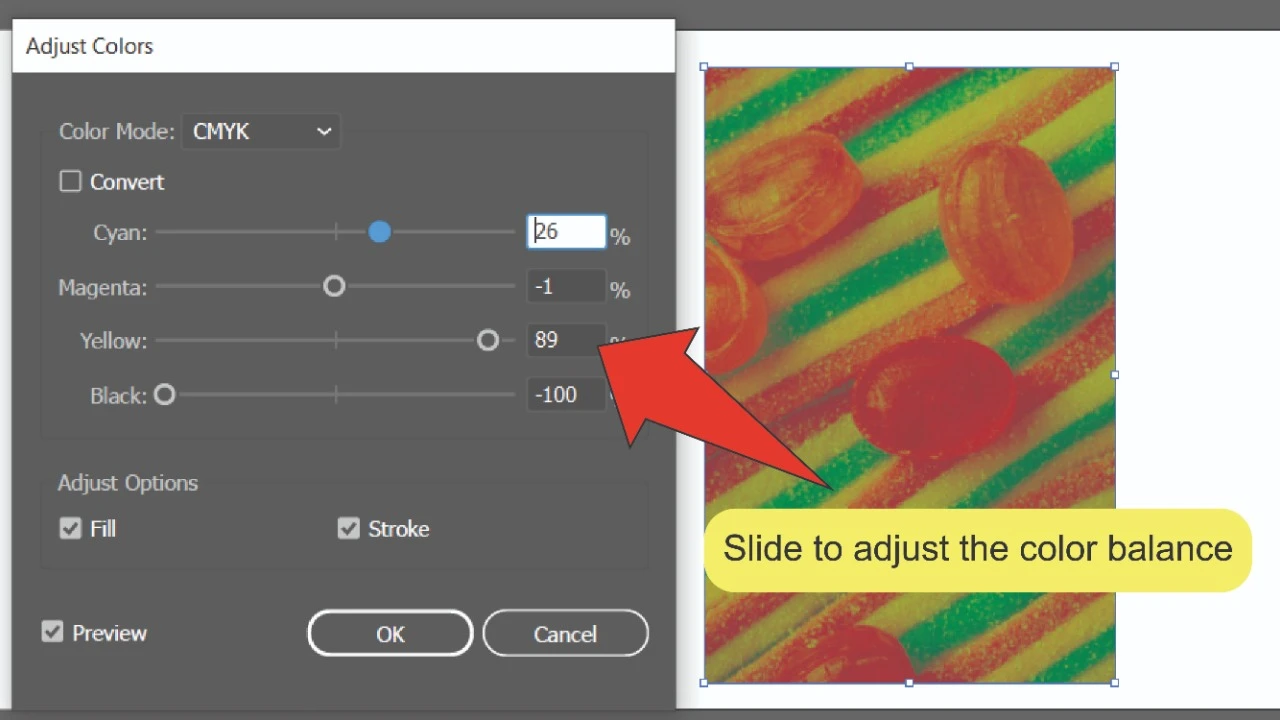
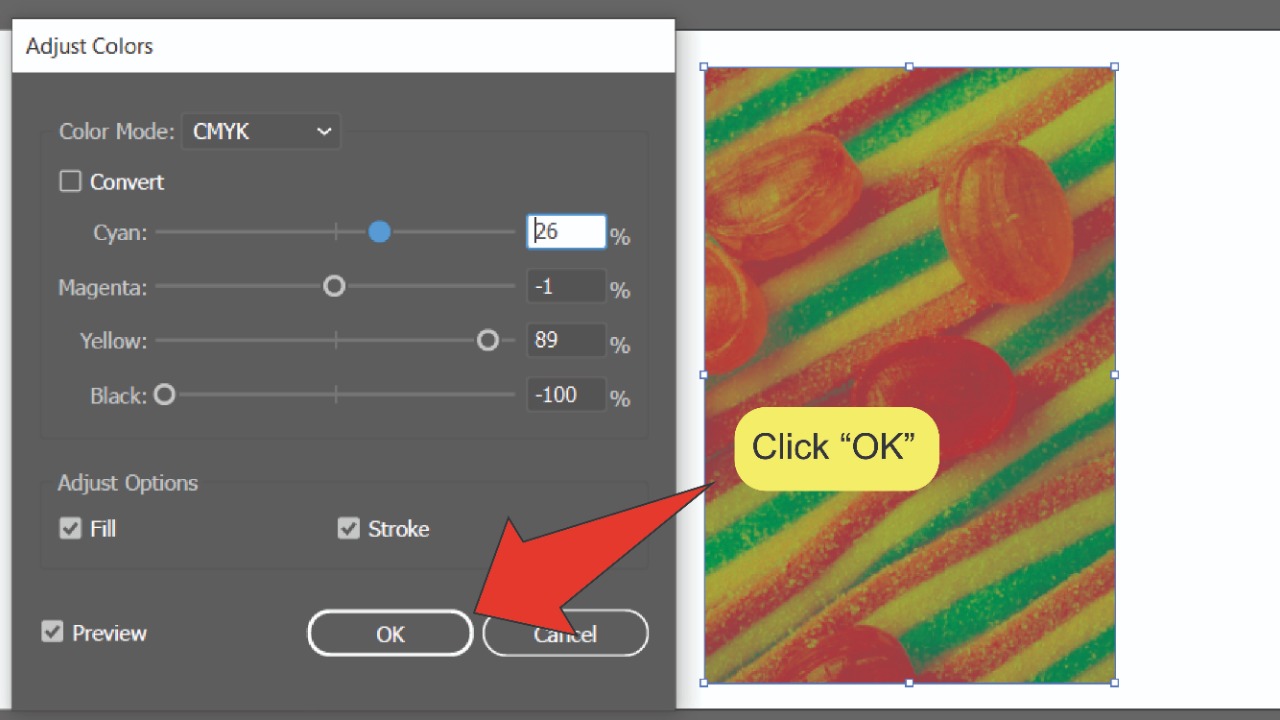
Adjust your colors. Use the sliders on the Color Adjustment panel to adjust the color values of your image. You can also type the value of each color into the text boxes to the right of the sliders. If your file’s color mode is set to RGB, the sliders will be labeled “Red”, “Green” and “Blue”. If your file’s color mode is set to CMYK, the sliders will be labeled “Cyan”, “Magenta”, “Yellow” and “Black”.

Step 3:
Click “OK”. Once you’ve adjusted the colors in your image to the desired level, click the “OK” button at the bottom of the Adjust Colors panel to finalise your changes.

Frequently Asked Questions About How To Change The Color Of An Image In Illustrator
Can I change the color of a single object or area in my image?
Unfortunately, there is no way to change the color of a single area of your image, because Illustrator is more suited to working with Vector images than Raster images. If you want to alter the color of a smaller area of your image, it would be best to use Photoshop instead.


Hey guys! It’s me, Marcel, aka Maschi. On MaschiTuts, it’s all about tutorials! No matter the topic of the article, the goal always remains the same: Providing you guys with the most in-depth and helpful tutorials!

