Canva is known for being easy to use and intuitive in graphics and even editing images and videos. With a few clicks of the mouse, you’re able to edit those pictures and videos the way you want them to appear.
One of the known features in Canva is the “Blur” tool. After adding it to your “Effects” tab, you can begin blurring certain parts of the image.
If you want to blur the whole picture, just drag the “Blur” slider to the right until it gets blurry.
But with the introduction of the new photo editor tool, you’re left wondering where the blur tool is placed.
Don’t worry, as this article will navigate you through the newest design they have for their photo editor.
How to Blur an Image in Canva
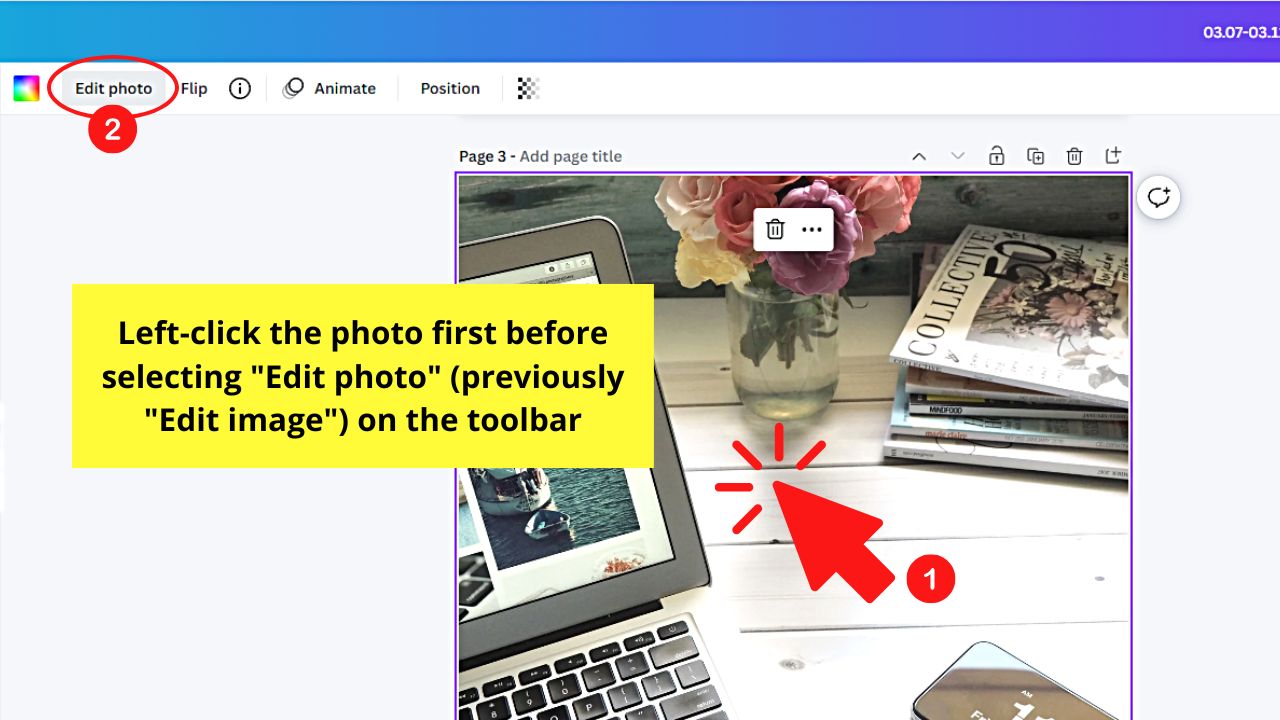
- Left-click the photo and select “Edit Photo”
- Click the “Effects” tab
- Click “Blur” in the “Effects” section
- Drag the “Intensity” slider to adjust the blur intensity
Usually, the new photo editor is what you’ll see after clicking “Edit Image” on the toolbar.
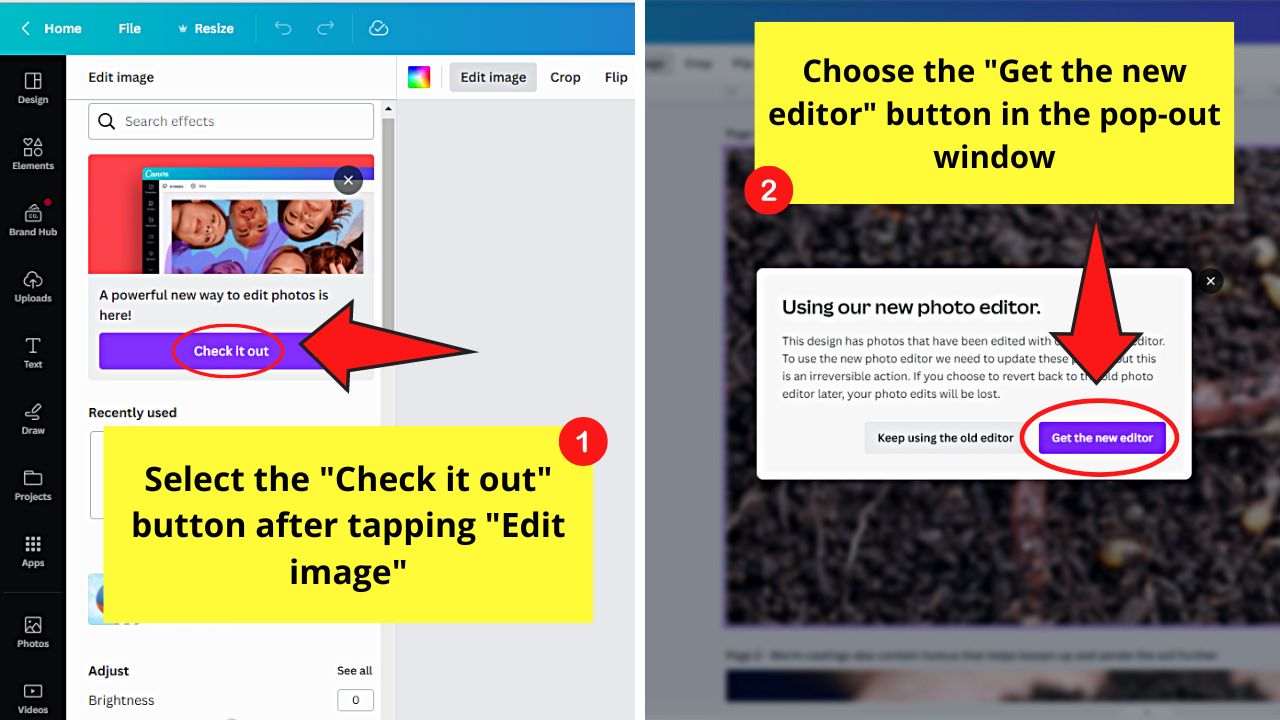
But if you’re still using Canva’s old photo editor, update it first by selecting the “Check it out” button in the notification window. Then select the “Get the new editor” button to make the switch.
After which, you can proceed with blurring images in Canva with the following steps:
Step 1: Left-click the image and select “Edit Photo”

This is the “Edit image” button in the old photo editor of Canva.
You’ll find this option in the toolbar that appears above the selected picture.
Step 2: Select the “Effects” tab
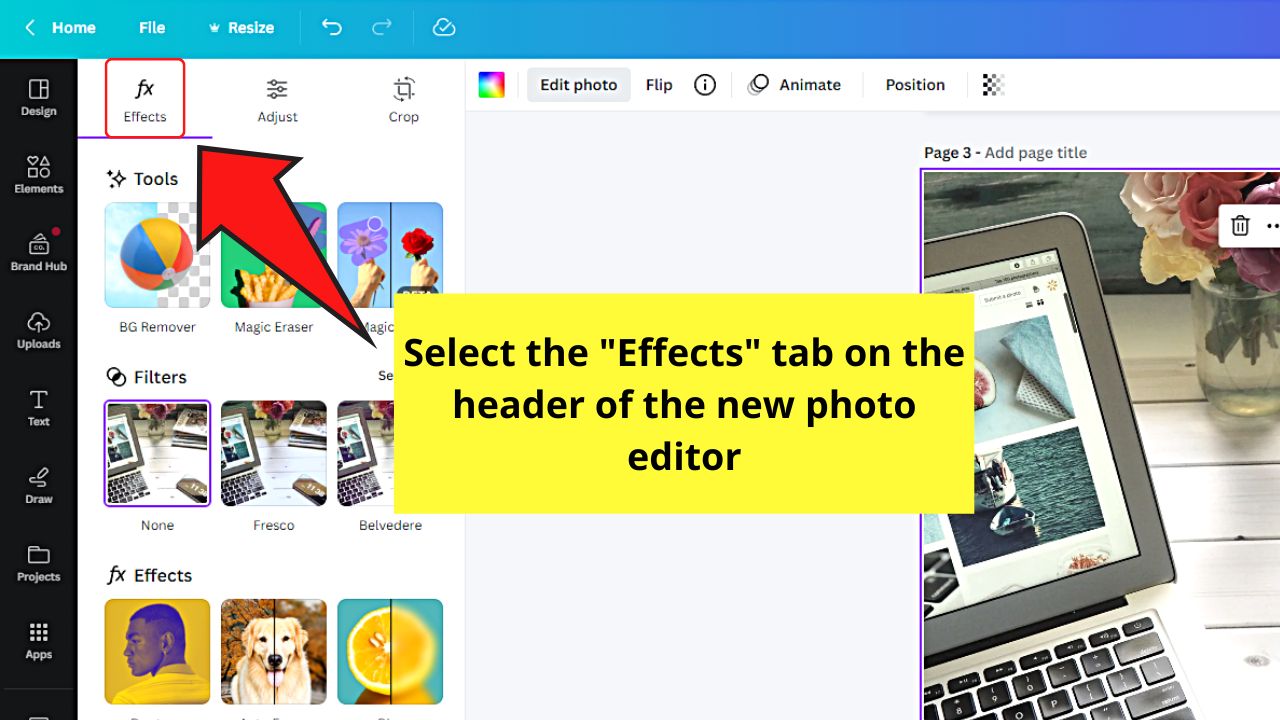
By default, the “Effects” tab is the first panel that appears after switching to the new photo editor mode.
Step 3: Go to the “Effects” section and click “Blur”
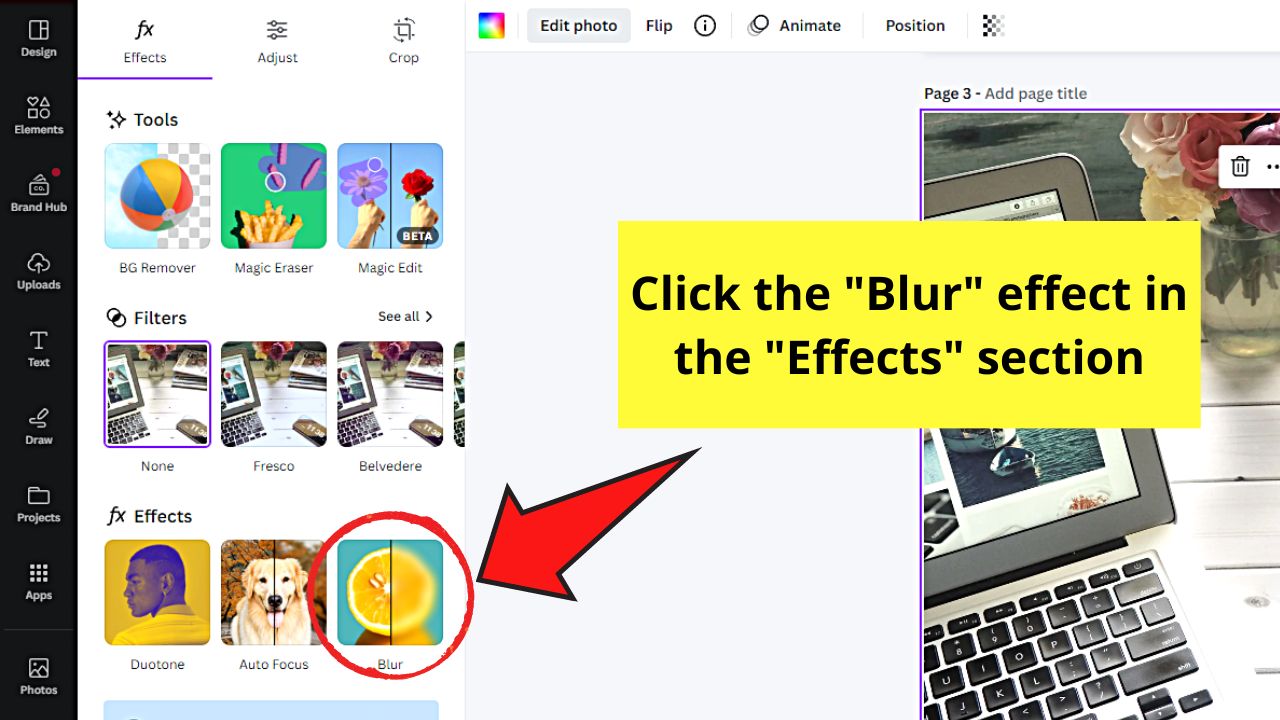
Its thumbnail appears as a lemon with one-half of it blurred out.
Step 4: Drag the “Intensity” slider to adjust the blur’s intensity
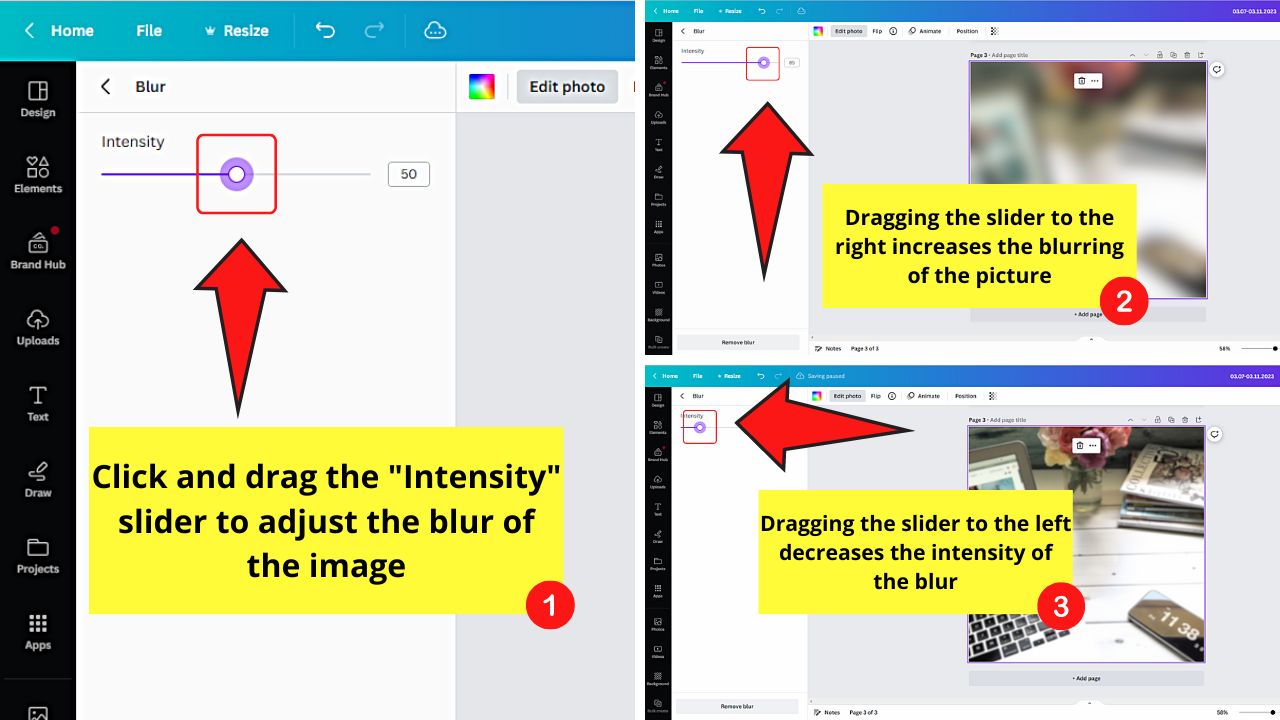
If you drag the slider to the right, the blur will become more intense. If you move the slider to the left, the lesser the intensity of the blur.
You can always click “Remove Blur” if you’re not good with how the picture looks after the adjustments made.
However, this method blurs out the entire photo or image. If you want to blur out certain areas of the picture only, better use the “Autofocus” tool.
How to Blur Part of an Image in Canva 2023
To blur part of an image in the new photo editor of Canva, use the “Autofocus” effect. Click its thumbnail and adjust the slider for “Focus position” to change the part that will be focused. Drag the “Blur intensity” slider to adjust how blurry the part of the image will be.
Otherwise, you can go back to the old-school method of blurring parts of an image in Canva (duplicating the image before blurring it).
You can also switch back to the old Canva photo editor so you can still use the “Blur” brush tool for more precise blurring.
But if you want to try the new way of blurring parts of an image in Canva, follow these steps:
Step 1: Left-click on the image and select “Edit Photo”
You’ll find this option in the toolbar that appears after selecting the photo.
Step 2: Go to the “Effects” section and choose “Autofocus”
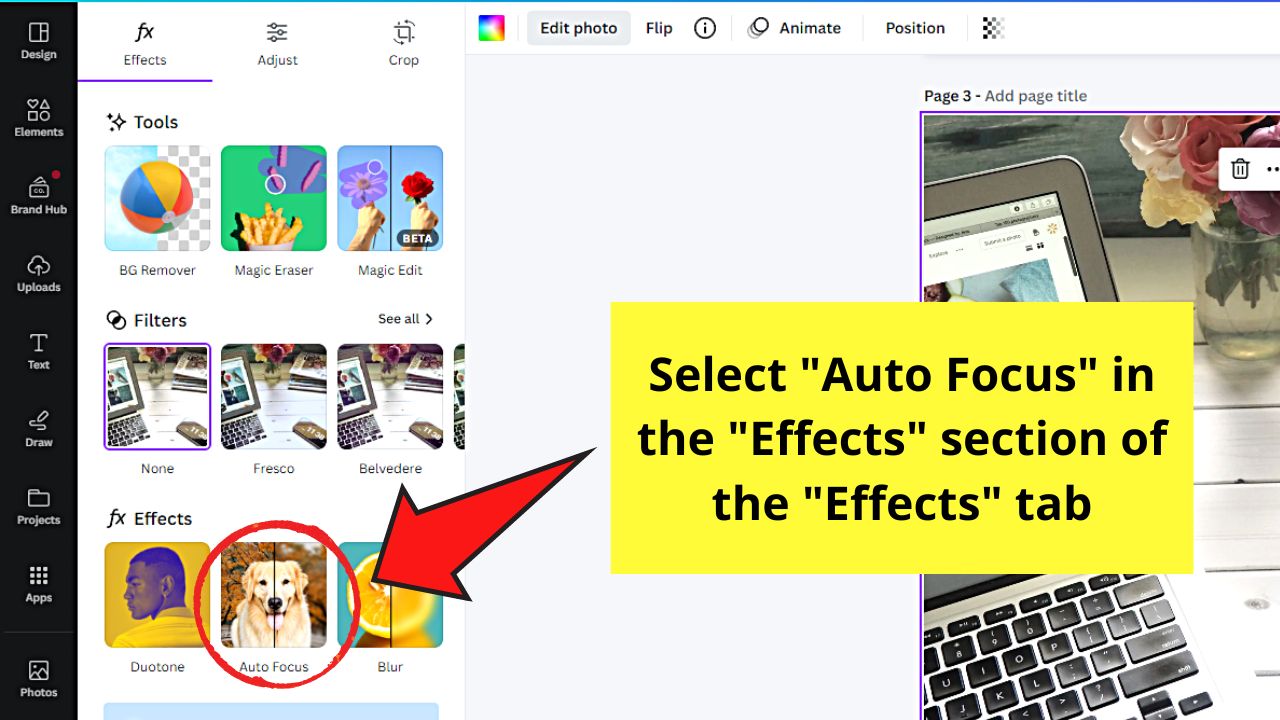
This “Autofocus” thumbnail appears as a dog with half of the image having a blurry background.
Just make sure that the “Effects” tab is selected beforehand.
Step 3: Drag the “Focus Position” slider
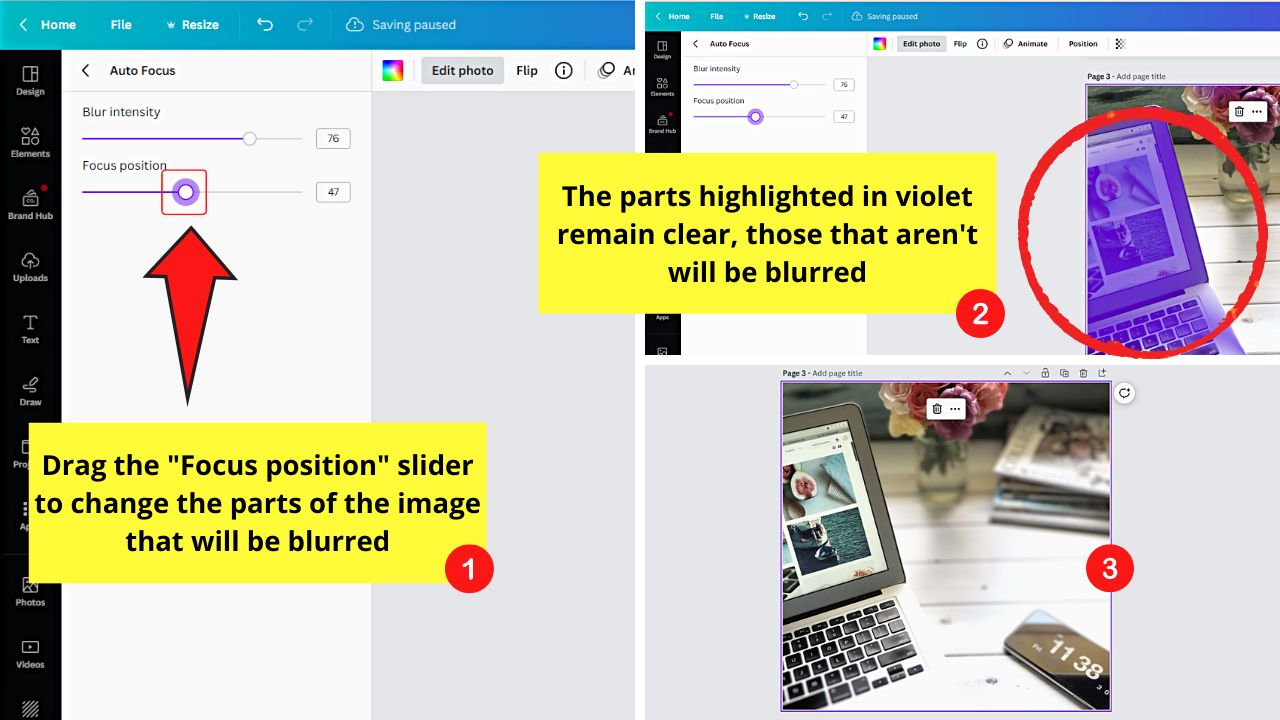
This slider allows you to choose the parts of the image that will be focused. The parts highlighted in violet will remain clear, while the rest becomes blurry.
Continue adjusting this slider until you blurred out the correct part in the picture.
Step 4: Drag the “Blur Intensity” slider
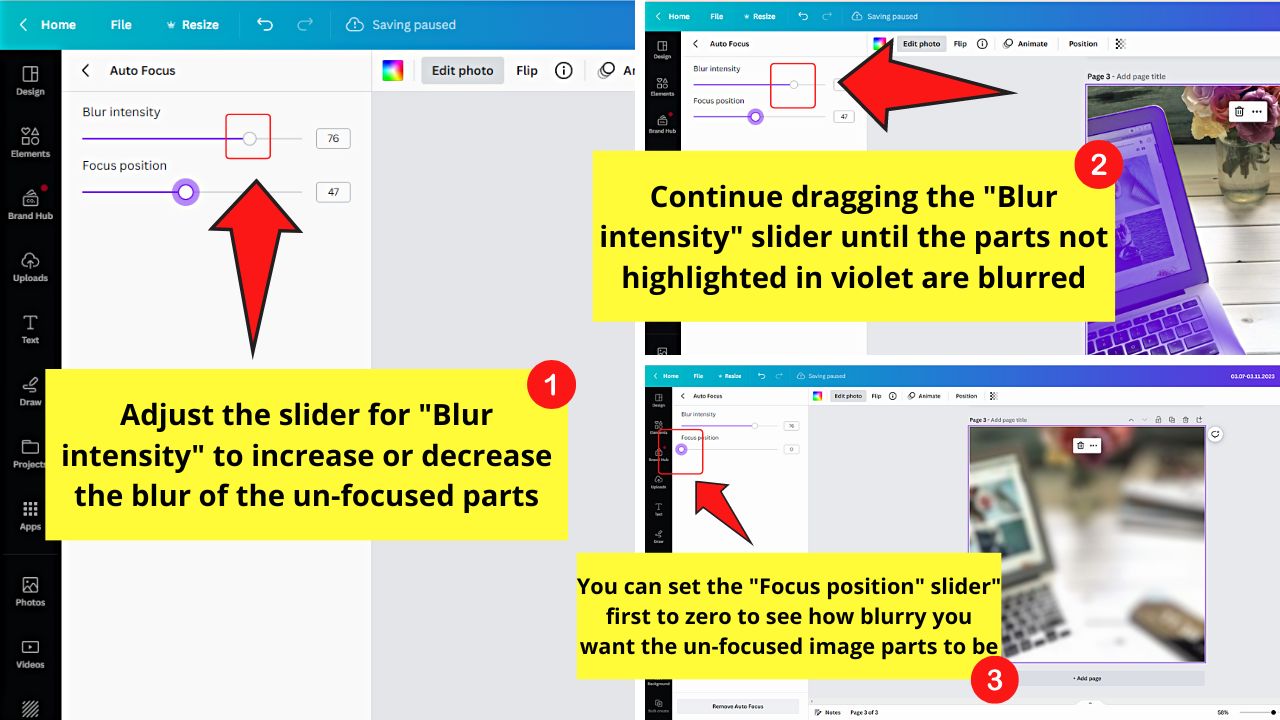
This slider functions similarly to the “Intensity” slider in the “Blur” effect. Dragging this slider to the right increases the intensity of the blur.
Dragging the same slider to the left lessens the intensity of the blur.
If you want to readjust and start from scratch, click the “Remove AutoFocus” button.
Frequently Asked Questions about How to Blur an Image in Canva 2023
Is the new photo editor in Canva exclusive for those having paid Canva plans?
The new photo editor in Canva is not exclusive to those who are on the “Pro” and other paid Canva plans. This feature can be used by those on a free Canva account except for the “Background Remover” and “Magic Eraser” features.
What are the new tools and effects added in the new photo editor of Canva?
In “Effects,” you’ll see “Magic Eraser” and “Autofocus.” Though “Blur” is still present, the “Erase” and “Restore” brushes are removed. In the “Adjust” tab, “Auto-adjust” and “Select area” are added. The classic editing sliders are now divided into different categories.
Can I revert to the old photo editor of Canva?
You still can revert to the old photo editor of Canva. But any edits you made to the photos using the new photo editor will be removed. This means that you’ll have to redo the editing of the images in the old photo editor. The same happens if you switch from the old photo editor to the new one.
Why can’t I find the “Blur” slider in the “Adjust” tab?
In the old photo editor, the “Blur slider” is found above the “Sharpness” slider. In Canva’s new photo editor, they have separated the “Blur” slider and turned it into an effect where you can adjust the blur intensity with a slider.