
One of the most important things to learn about Adobe Illustrator is that it’s resolution independent, because it’s a vector editor.
The document is a collection of individual raster, vector, and text objects, and each raster object has its own number of pixels.
So, if you’re used to working on pixel-based applications on a regular basis, or maybe you’re a new Adobe Illustrator user, this tutorial is a must-read for you!
When you open Adobe Illustrator to create a new document, you will notice that there is no resolution setting available. But don’t worry, you can still configure the DPI in three different scenarios while using this fantastic software!
The first option appears when you select “Advanced Options” from the menu box that shows when you create a new document.
The second is the same setting but somewhat more complete, and you can access it after you’ve generated the document by simply opening the “Document Raster Effect” pane from the top menu’s “Effect” option.
The third scenario differs from the first two because it involves defining the DPI resolution when exporting your graphics to another format, such as PNG, JPG, or PDF.
To gain a better understanding of how this works, keep in mind that vectors can be scaled up and down without losing their appearance, but they can also take on a resolution when printed, rasterized, or exported to other formats.
How to Adjust the DPI in Adobe Illustrator
To adjust the DPI in Adobe Illustrator, select “Advanced Options” from the “New Document” window and pick a resolution preset from the “Raster Effect” drop-down menu. Alternatively, you may return to a more detailed version of the same settings later by opening the “Document Raster Effects Settings” from the top menu’s “Effect” option. This would apply to all of your document’s raster images. On the “Rasterize” menu box, you can also select a resolution for a single raster that will not apply to other pictures by opening the “Resolution” drop-down menu.
How to Adjust the DPI in Adobe Illustrator – Step-by-step Guide
Before I continue, let me first explain why this program uses PPI instead of DPI:
PPI refers to the pixel resolution of a digital image, while DPI refers to the number of ink dots on a printed image.
However, if you export a 300 PPI image and then open it in Adobe Photoshop, for example, you will notice that the resolution on DPI is the same.
There are also two methods for defining raster DPI: The first sets the resolution for all rasterized graphics in your document.
The second selects only one object and rasterizes it individually. The raster has its own DPI, but it has no effect on the resolution of other objects.
So, now that you have all the facts, let’s put them together:
Step 1:
Create a new file.


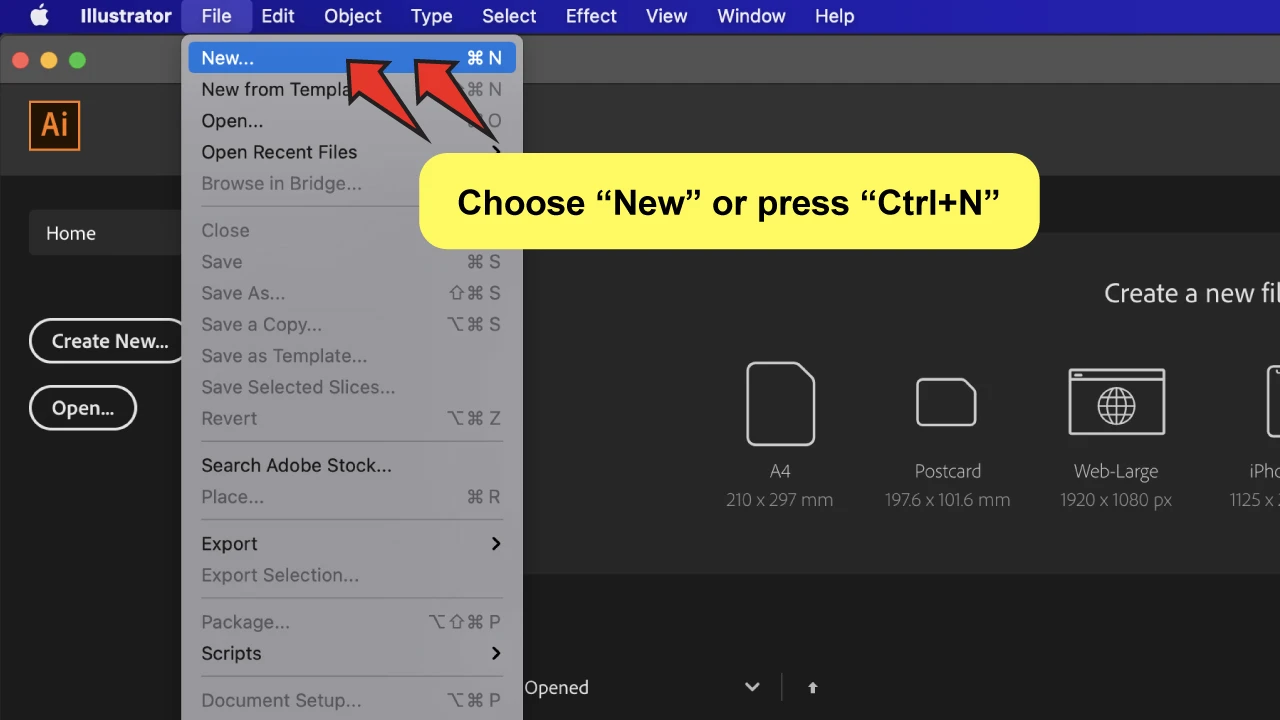
Go to “File” on the top menu, and then “New”, or just click “Ctrl + N” (“Command + N” if you’re a Mac user)
This step is essential so that you can see the menu box that shows up when you create a new file.

Step 2:
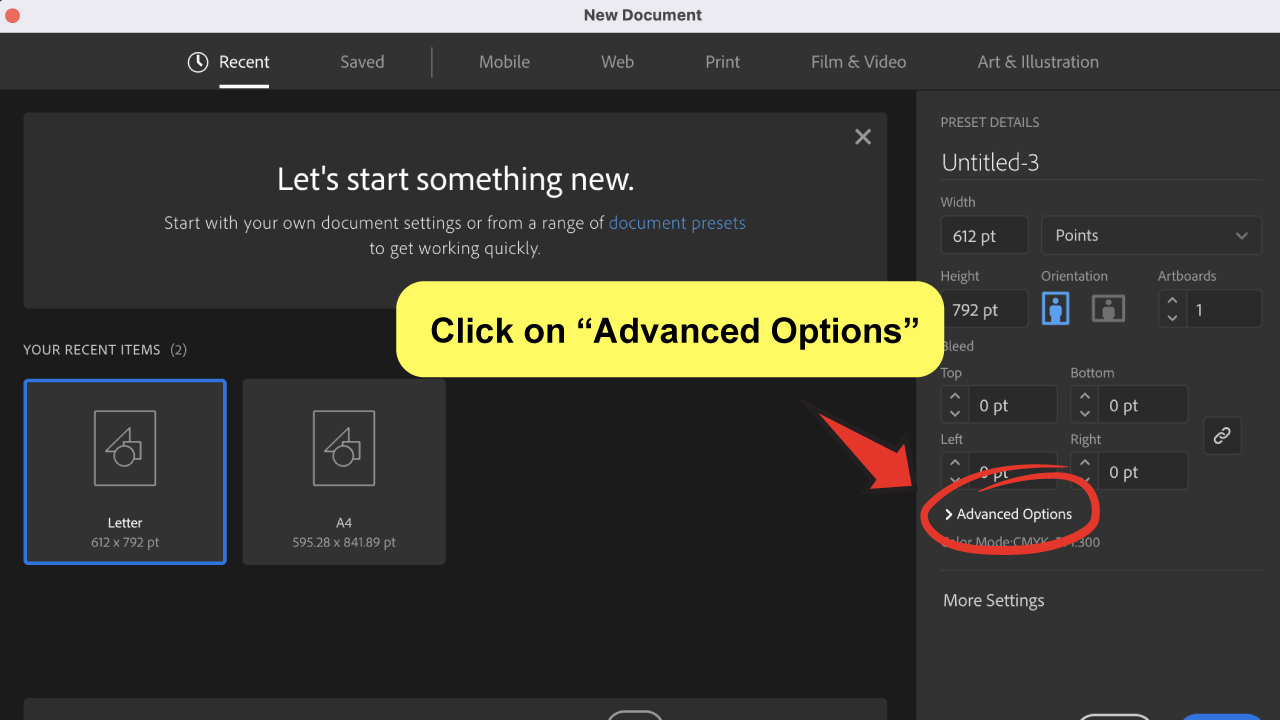
Click on “Advanced Options”.
On the same menu box, find this option right below the “Bleed” settings. Click on it to display the setup options.
You will see there’s already a preset for the “Color Mode” and resolution. To be more precise, it should say: Color Mode: CMYK, 300 PPI.

Step 3:
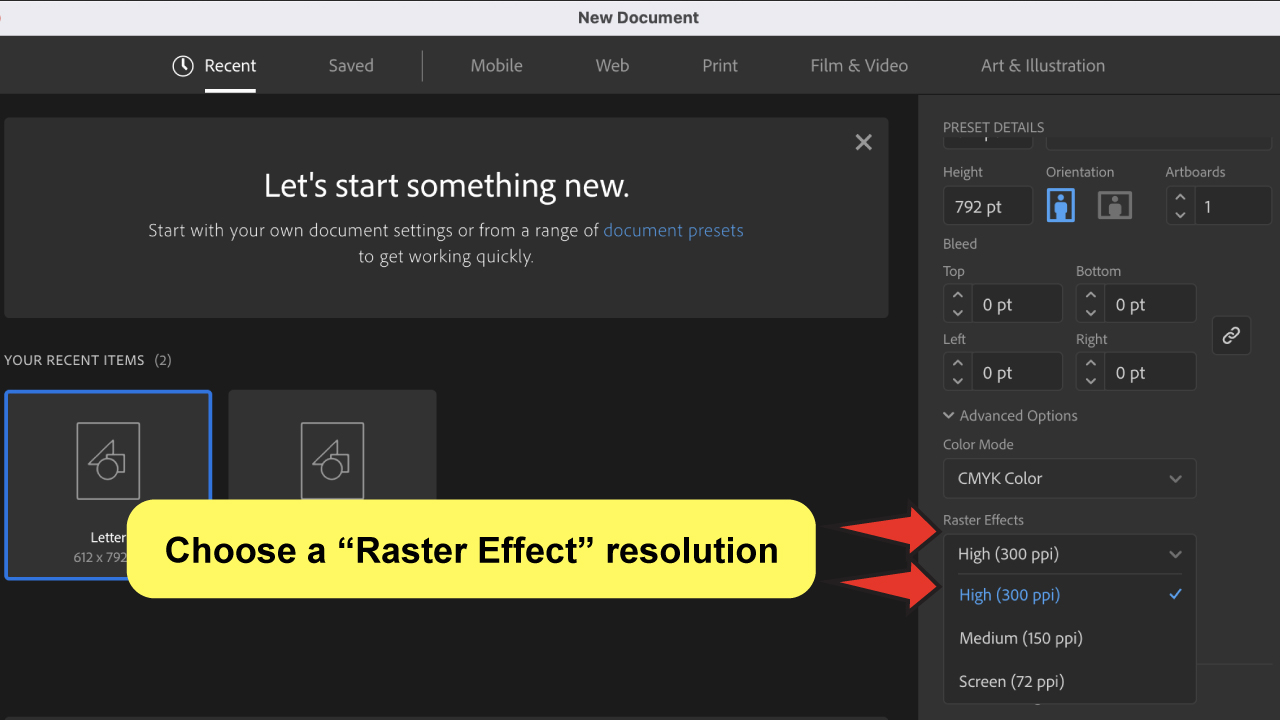
Choose from the Raster Effect PPI presets.
Head over the “Raster Effect” option, located right under the “Color Mode”. You’ll see a drop-down menu with 3 options: High (300 PPI), Medium (150 PPI), and Screen (72 PPI).

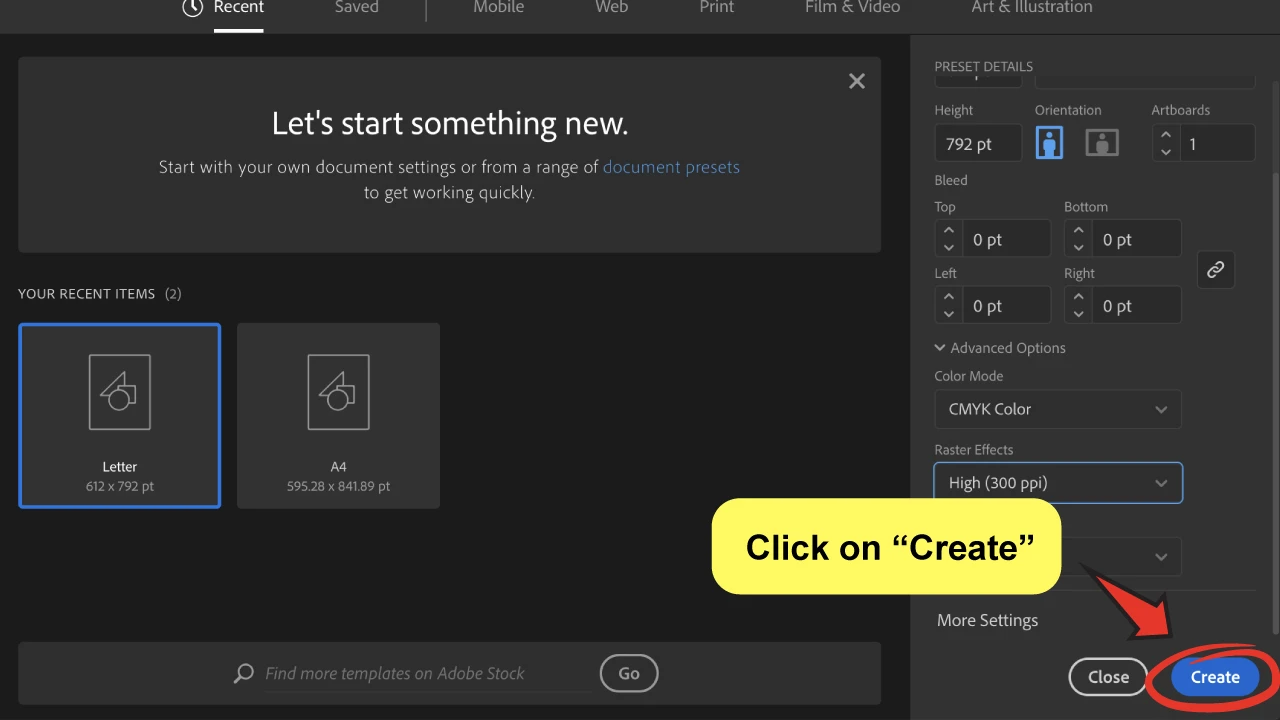
Step 4:
Click on “Create”
You have already defined the quality of all future raster images created on this document.
This does not exempt you from changing it after it has been submitted, so don’t be afraid and click on the “Create” button.
At this step, you could be finished. However, in case you need to change the settings after the document has been created, you will have more options to consider. So, to have an overview of all possibilities, please complete all steps!

Step 5:
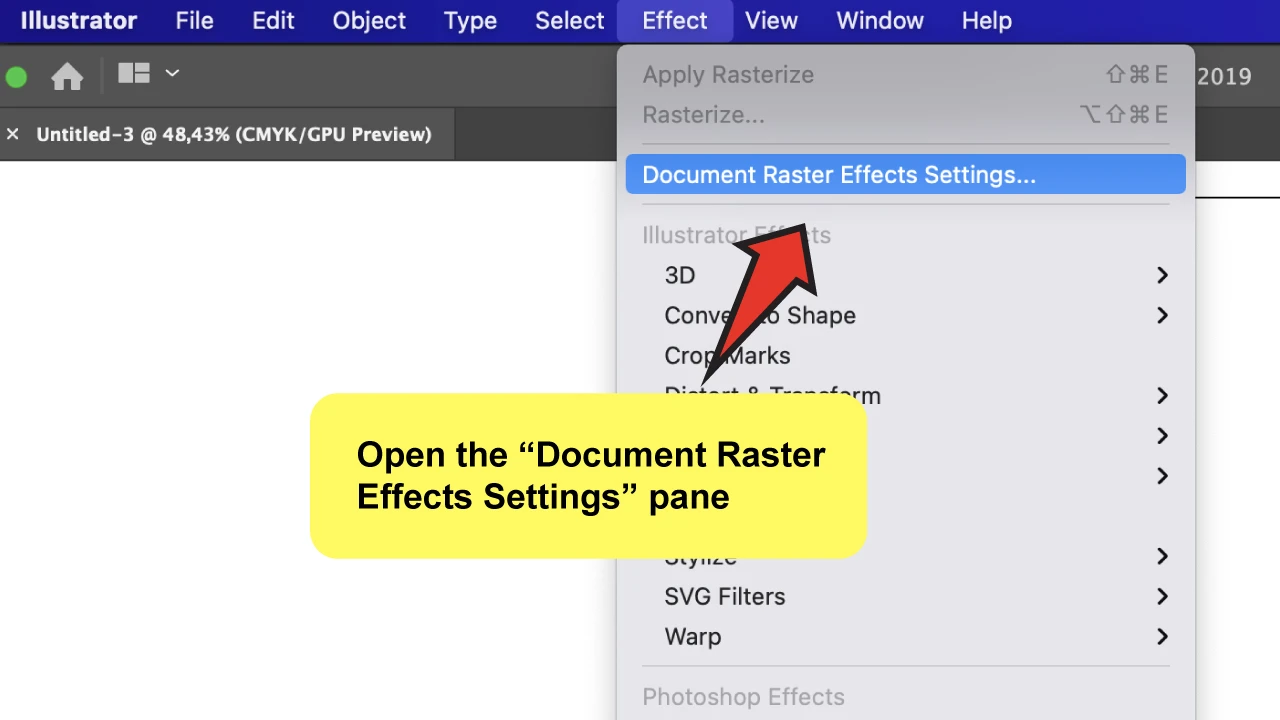
Open the “Document Raster Effects Settings” pane (in case you want to change the resolution again).
Select the “Document Raster Effects Settings” located under the “Effect” option on the top menu.

Step 6:
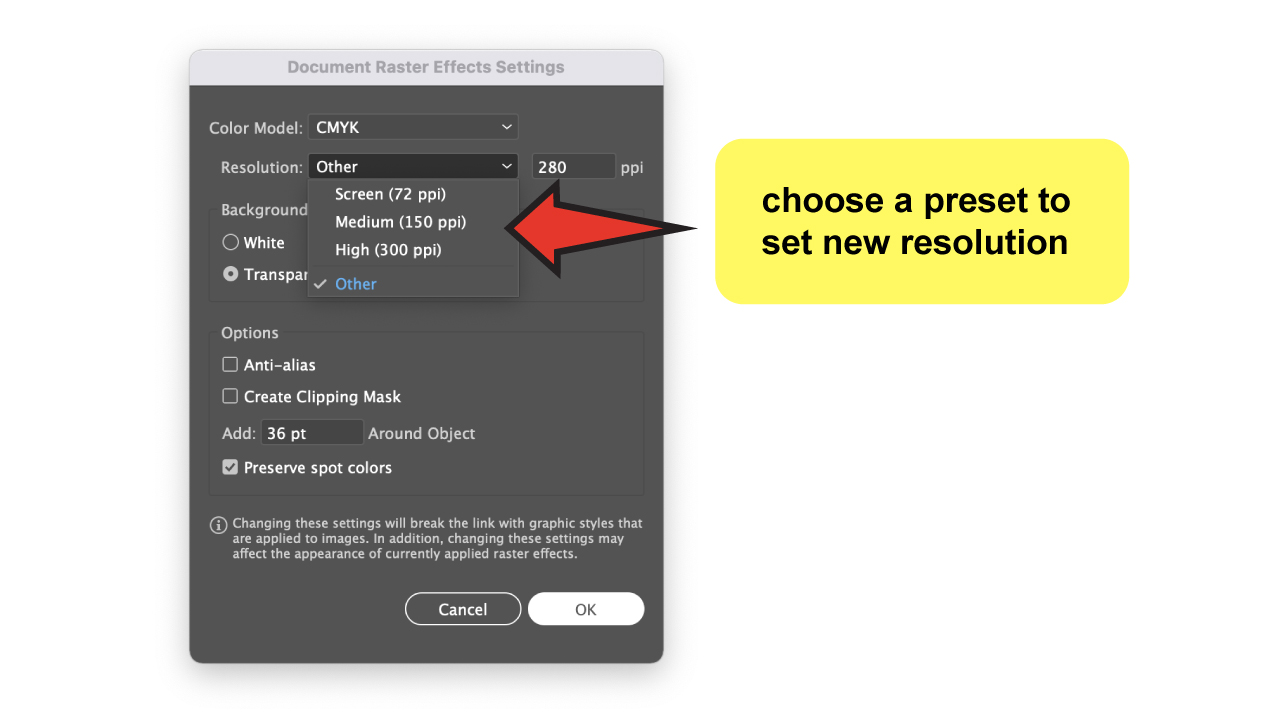
Select your new resolution by choosing a preset or adding a custom DPI.
Once there, you can choose from the same three presets you already know (Step 3).
But here’s the twist: if you click on “Other,” you’ll see a field where you can enter the DPI number you want.
Choose your option and click “OK” to save the changes.

Step 7:
Define DPI while rasterizing a single object.
This option allows you to choose the resolution of a particular item.
Click on “Rasterize”.
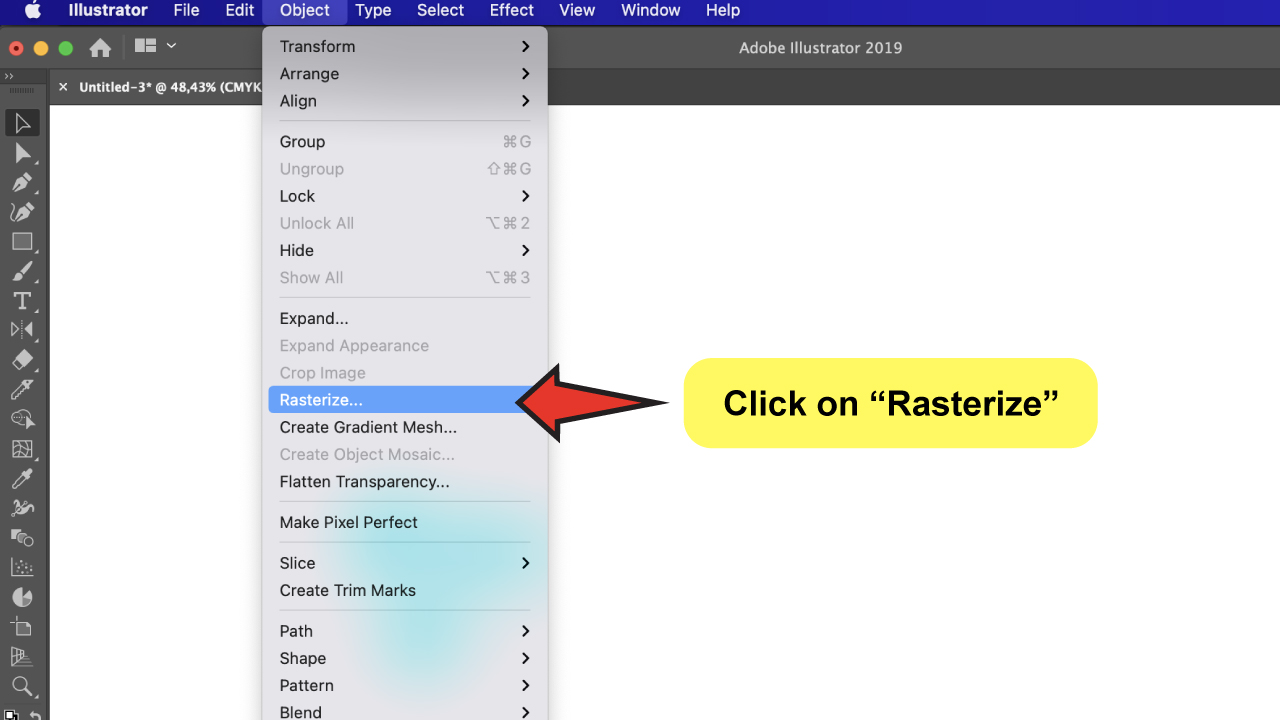

While you’re on the “Rasterize” window, open the “Resolution” drop-down menu to see the available choices.
You will be able to pick “Screen”, “Medium”, “High”, and “Other” once more, but this time you will also be able to select “Use Document Raster Effects Resolution.” If you select this option, the resolution you set in the previous steps will be applied.

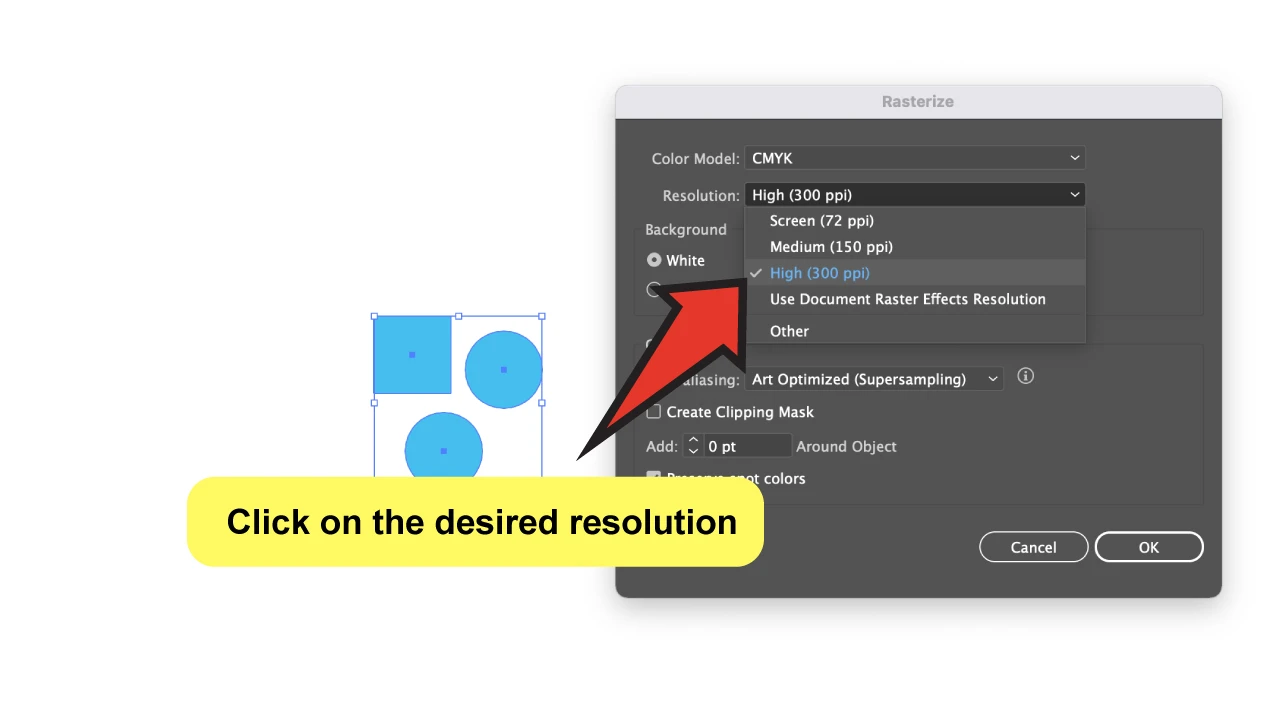
Click on the desired selection and then click “Ok.”
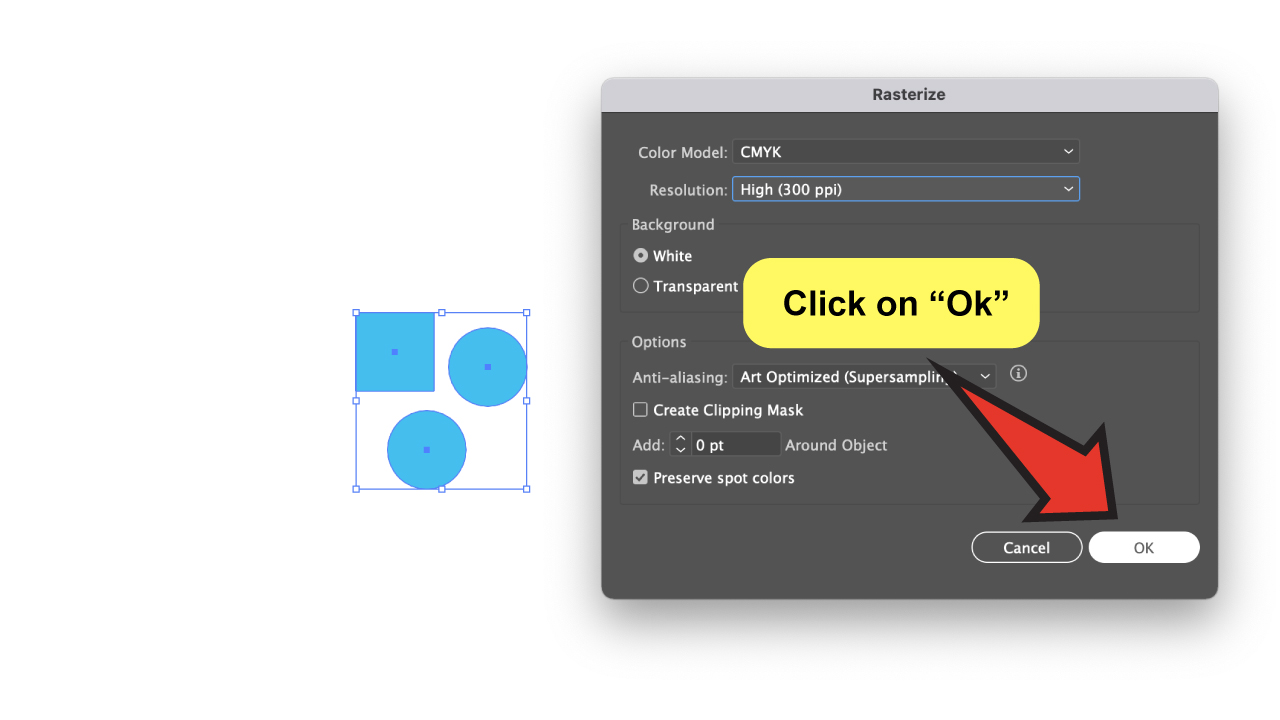

And we are done! Now you can easily do your work without having to worry about resolution issues! Feels great, right?
Frequently Asked Questions About How to Adjust the DPI in Adobe Illustrator
What is a raster?
Raster (or bitmap) images are described by a collection or map of bits within a rectangular grid of pixels or dots.
Can I export my artwork at 300 DPI?
You certainly can! You may export and resize your artwork to any resolution you desire by using one of the “Export As,” “Save for Web,” or “Save As” choices.
Can I change the DPI of linked images?
No, you can’t. The linked images can be placed and re-sized as much as you want, but the resolution would remain the same.


Hey guys! It’s me, Marcel, aka Maschi. On MaschiTuts, it’s all about tutorials! No matter the topic of the article, the goal always remains the same: Providing you guys with the most in-depth and helpful tutorials!

