If you’re aiming for a smooth transition between slides in your CapCut video, add the “Motion Blur” effect.
Motion blur can also highlight movement or motion in a video for a more creative effect.
With what this effect can do, how then can you add motion blur on CapCut mobile?
The first method we are about to show you is applying motion blur as some sort of transition effect (it applies during the transition of one video or image to another).
The second method we will treat further down below adds a motion blur effect to highlight movements or motion within (parts) of a video.
How to Add Motion Blur on CapCut Mobile
To add motion blur on CapCut mobile, follow these steps:
- Tap the video clip on the timeline
- Swipe the bottom taskbar to the left and press “Motion Blur”
- Adjust the “Blur” and “Blend” sliders
- Choose the “Direction” for the motion blur
- Choose the number of times you would like to blur the video
- Press the checkmark to save the “Motion Blur” settings on the video
Whether you’re using CapCut mobile on an iPhone or Android device, the steps you’ll follow are exactly the same.
Step 1: Tap the video clip on the timeline
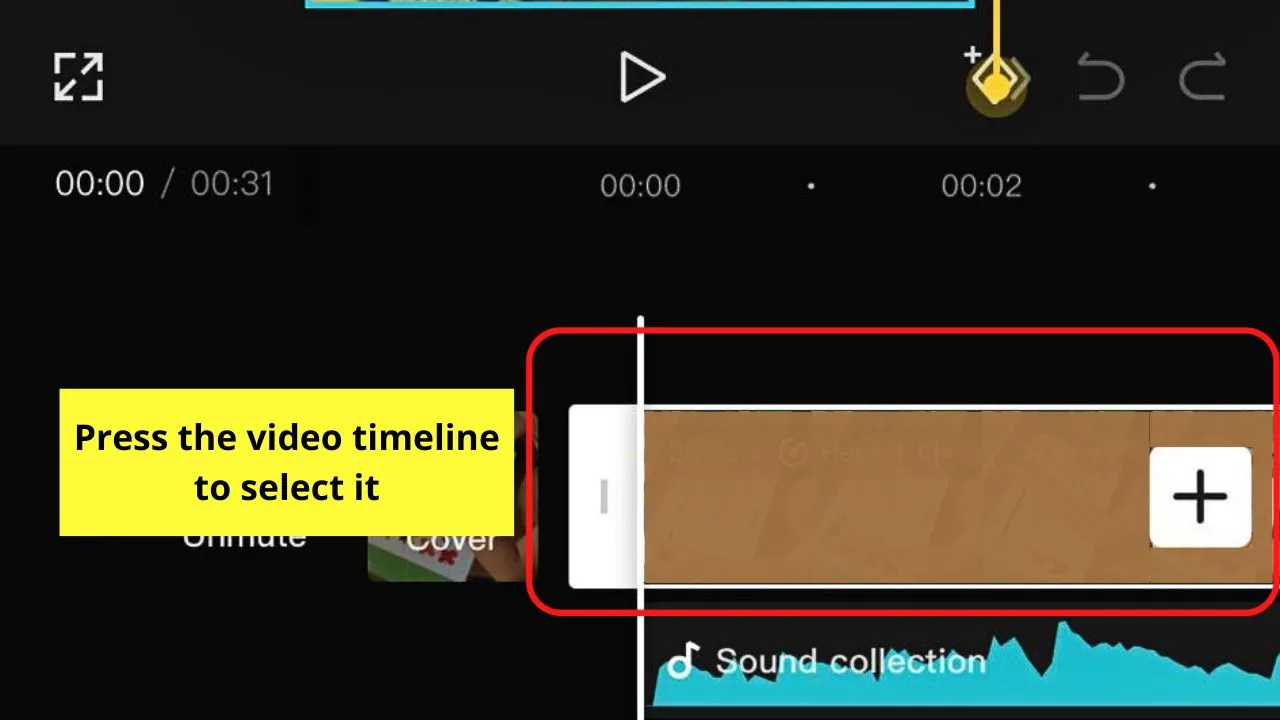
You will know you have chosen the video clip on the timeline as white handles enclose it.
The bottom taskbar then appears on the editing page.
Step 2: Swipe the bottom taskbar to the left and press “Motion Blur”
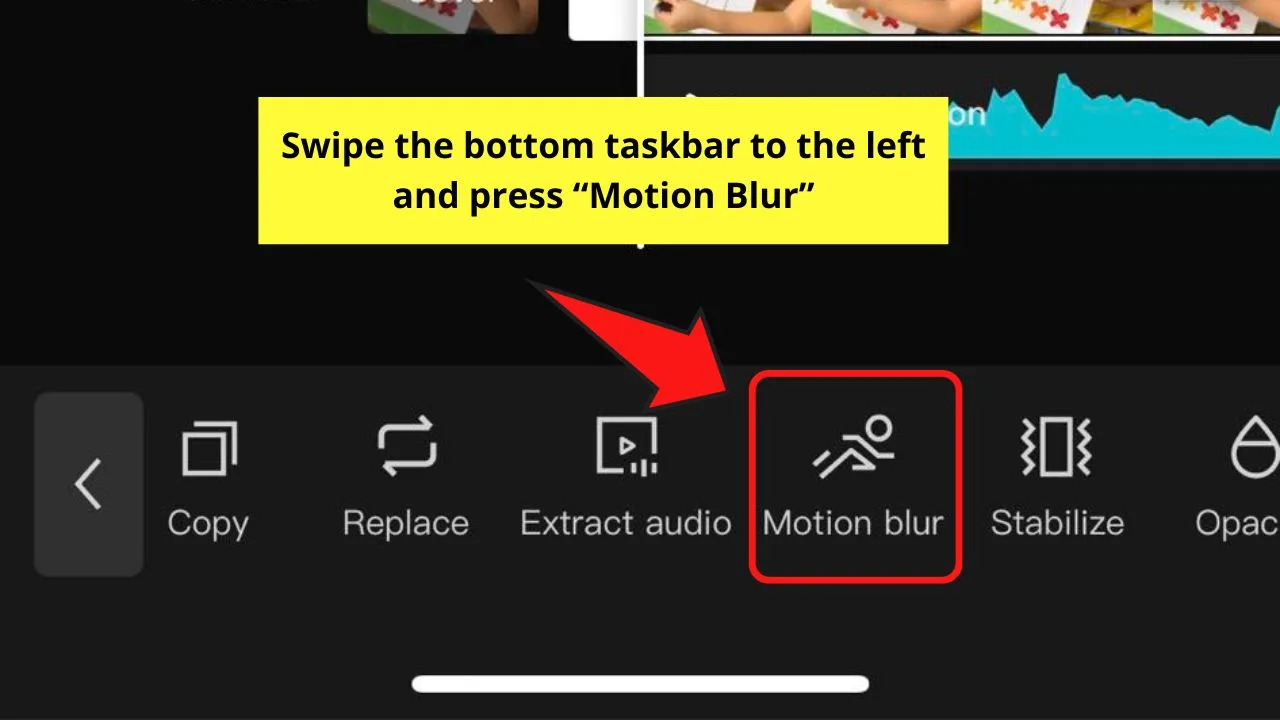
You’ll find this option between “Extract Audio” and “Stabilize.” The “Motion Blur” menu then opens.
Step 3: Adjust the “Blur” and “Blend” sliders
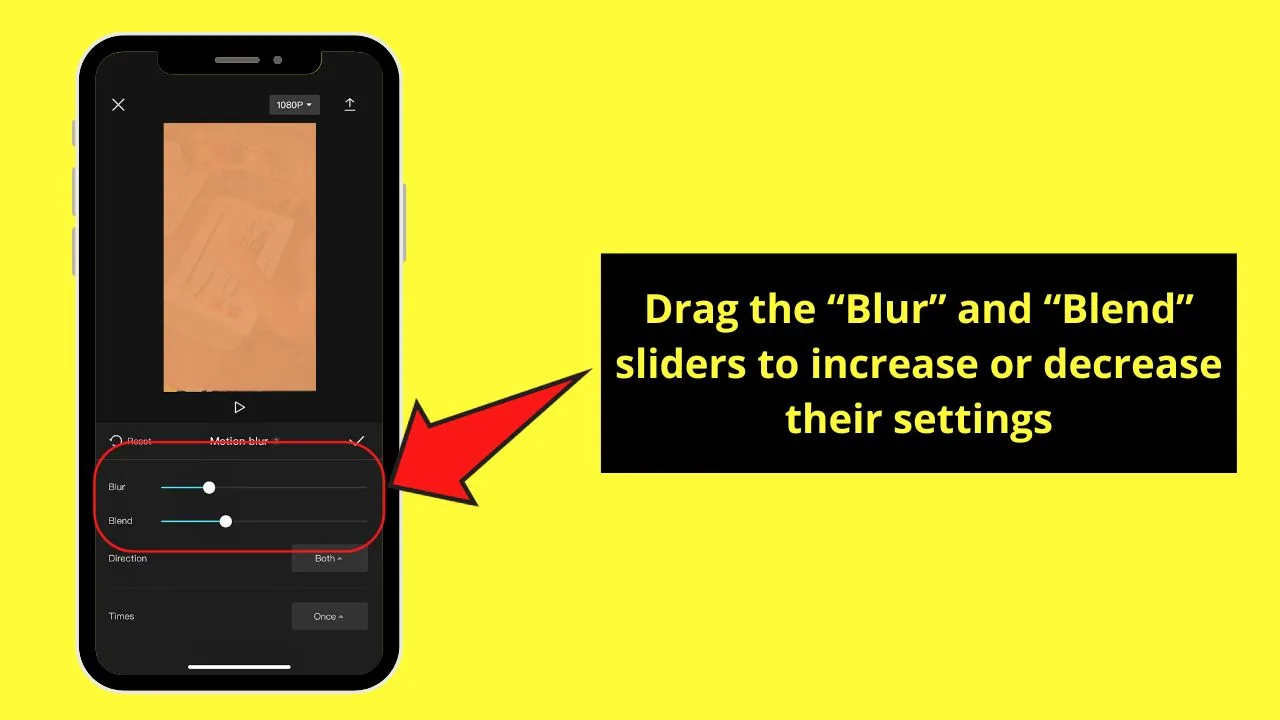
Increasing “Blur” increases the intensity of the blur on the video. If you increase the “Blend” setting, the more CapCut will blend the transition with the scenes in the video.
Just drag the slider to decrease or increase these motion blur settings on the video.
Step 4: Choose the “Direction” for the motion blur
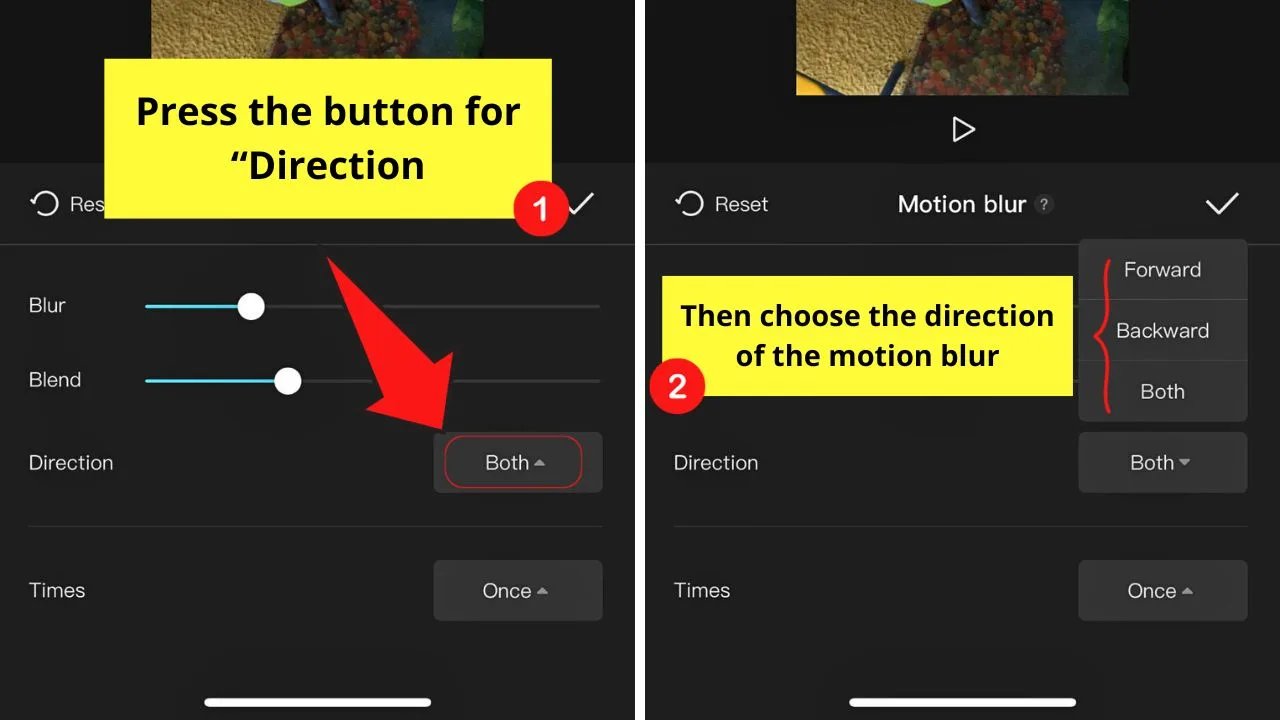
Press the “Down” button of the “Direction” setting to choose in what direction the blur will appear.
There are 3 “Direction” settings available: “Forward,” “Backward,” and “Both.”
Step 5: Choose the number of times you would like to blur the video
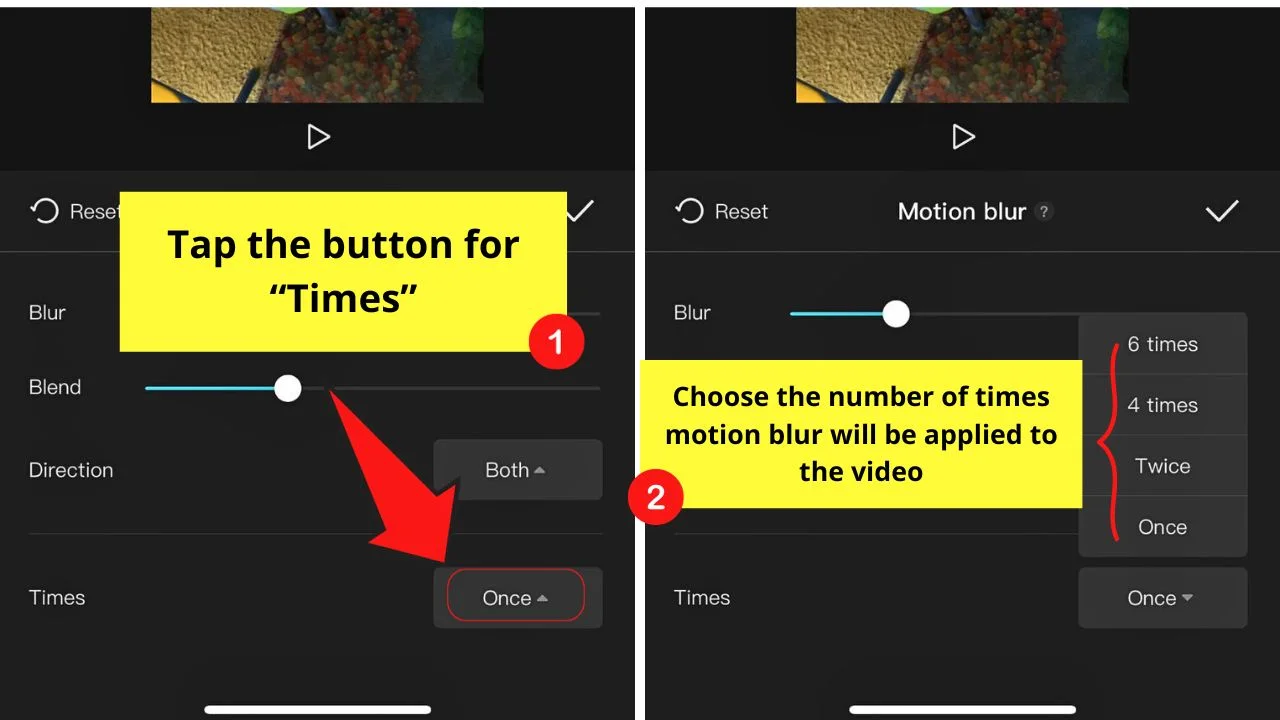
Tap the “Down” button for “Direction and choose from 4 options available: “6 times,” “4 times,” “Twice,” and “Once.”
The higher the number of times motion blur is applied, the smoother the transition between the scenes.
Step 6: Press the checkmark to save the “Motion Blur” settings on the video
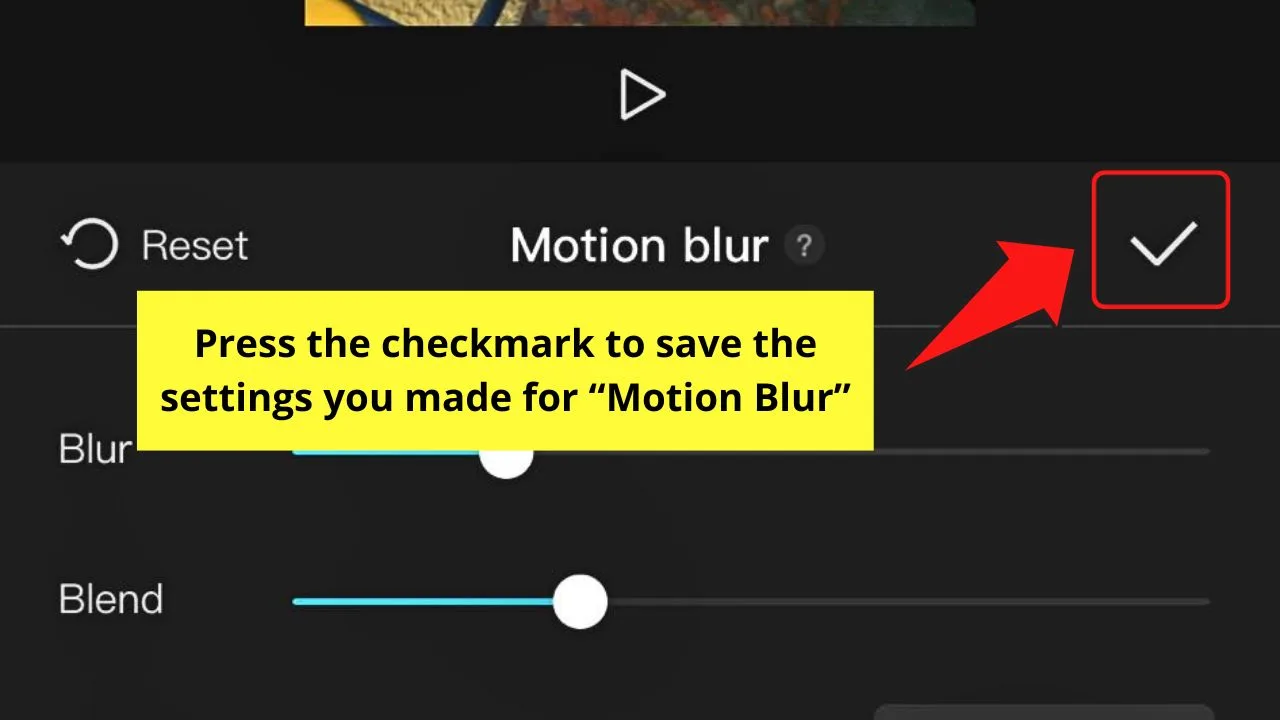
Tapping the checkmark saves the settings you’ve made for “Motion Blur.”
Wait for CapCut to apply “Motion Blur” to your video before continuing to edit it.
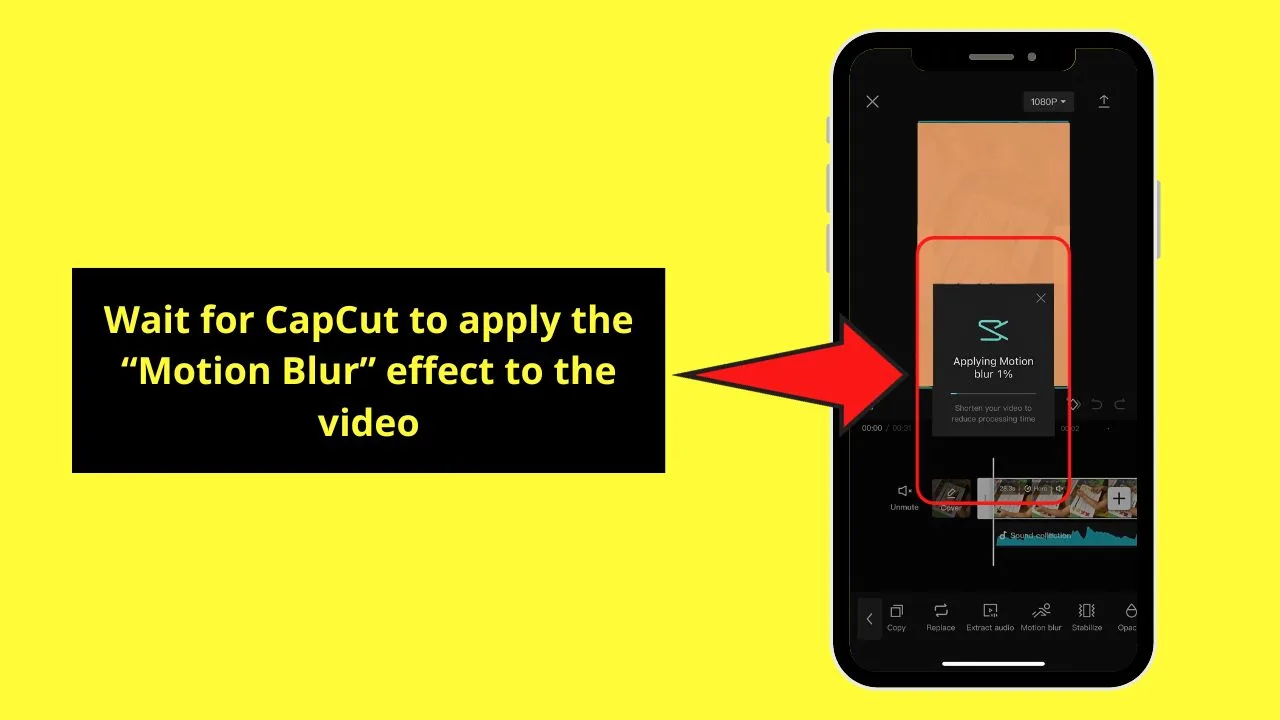
If you previously added other effects or reversed the video, a notification appears. It basically states that those other effects will be canceled if you continue to add “Motion Blur.”
If you’re okay with it, tap the “OK” button.
Now if you want to highlight the movement or motion of a subject in the video, the other method below will help you.
How to Add Motion Blur on CapCut Mobile to highlight motion in the video
This method of adding “Motion Blur” on CapCut mobile highlights a certain movement or motion within the video clip, giving it the feel of increased speed.
Whereas the first method that we showed above is used for transitions between different video clips (or simply images), this second method is applied to a whole video clip or to certain parts of the video clip to create a “dramatic” effect to display and highlight speed or motion.
To add “motion blur” on CapCut mobile to highlight motion in the video, follow these steps:
Step 1: Tap “Effects”
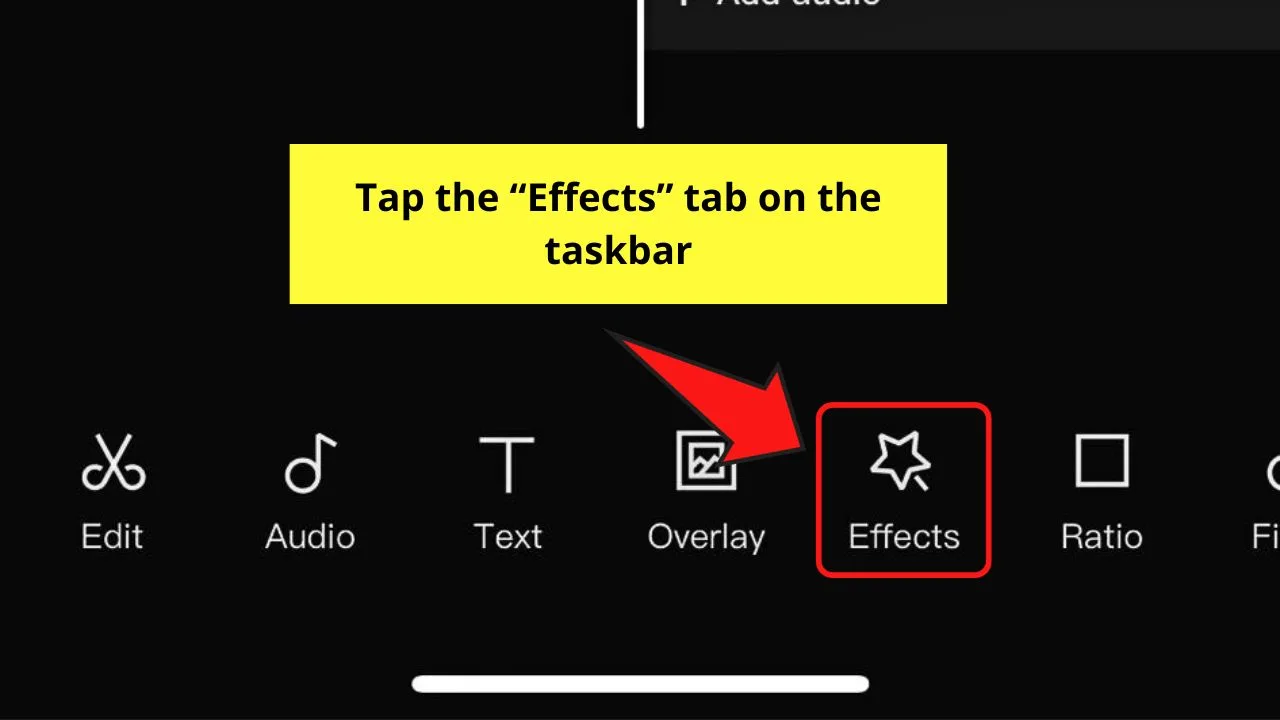
You’ll find this button between “Overlay” and “Ratio.”
Step 2: Choose “Video Effects”
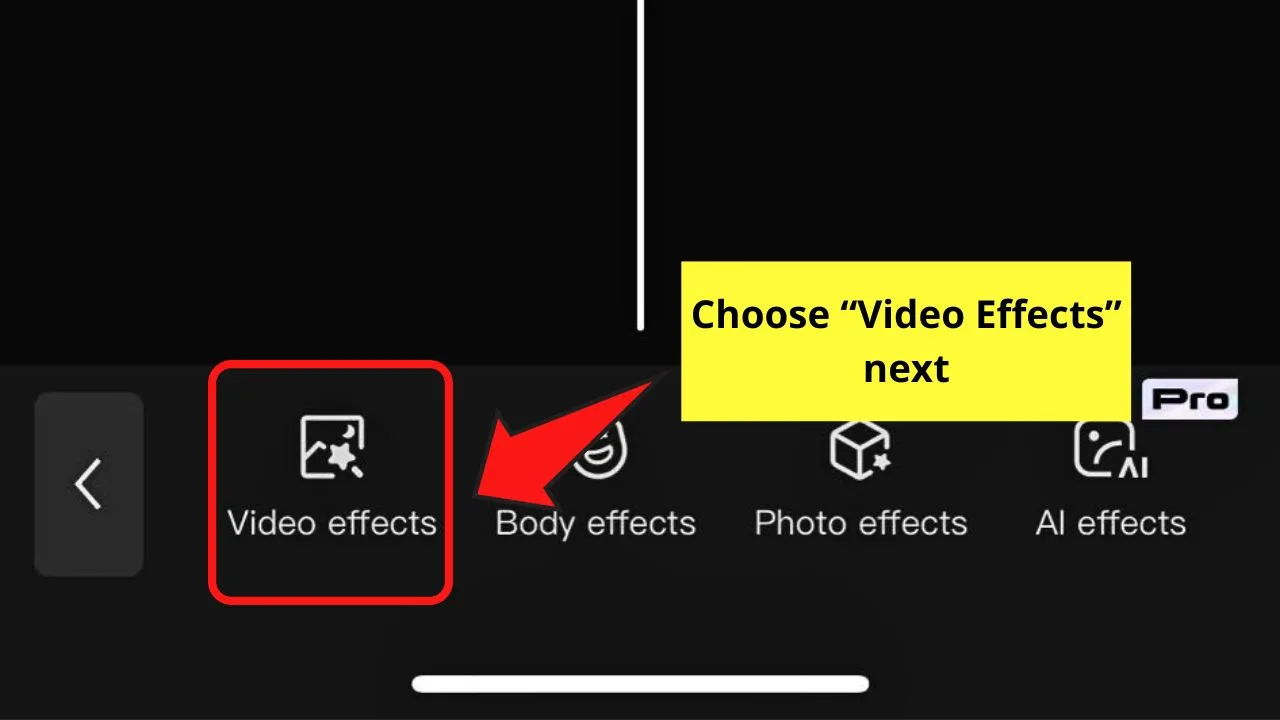
This is the first option on the “Video Effects” taskbar. A menu of all the “Video Effects” options will then open.
Step 3: Press “Lens”
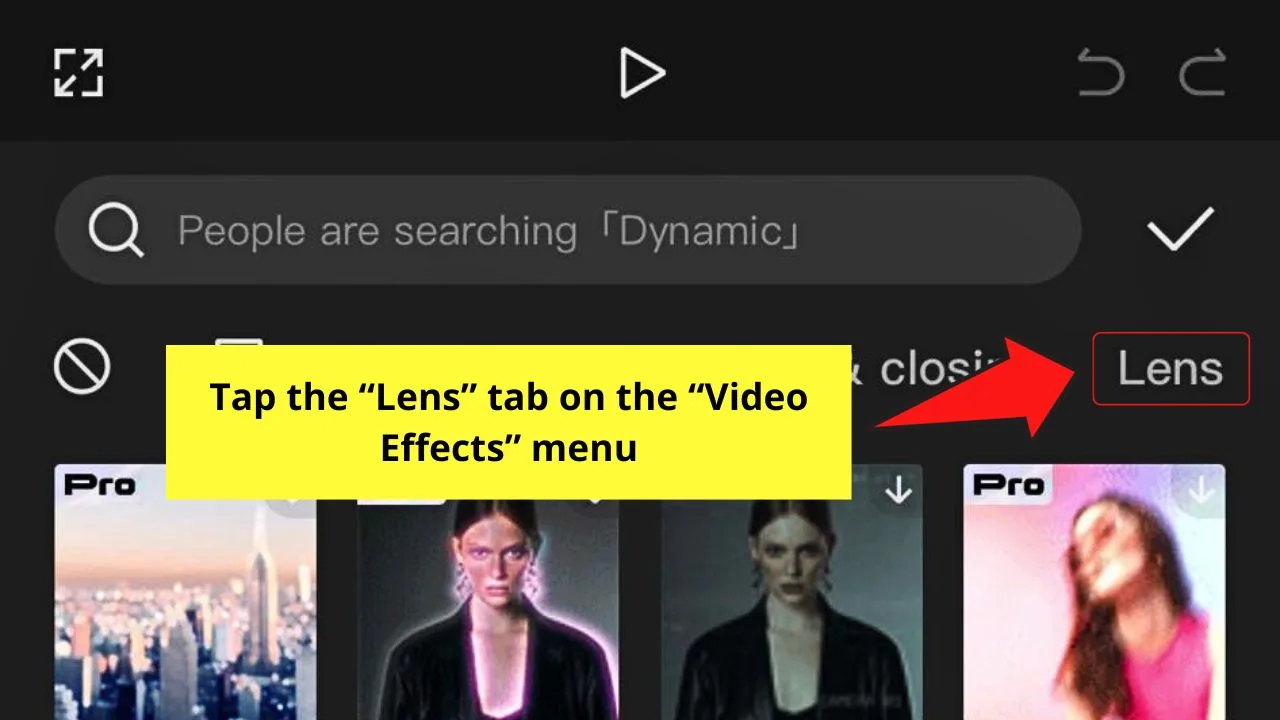
This is the rightmost tab you’ll find under the search bar of the “Video Effects” menu.
Step 4: Swipe up and choose “Motion Blur”
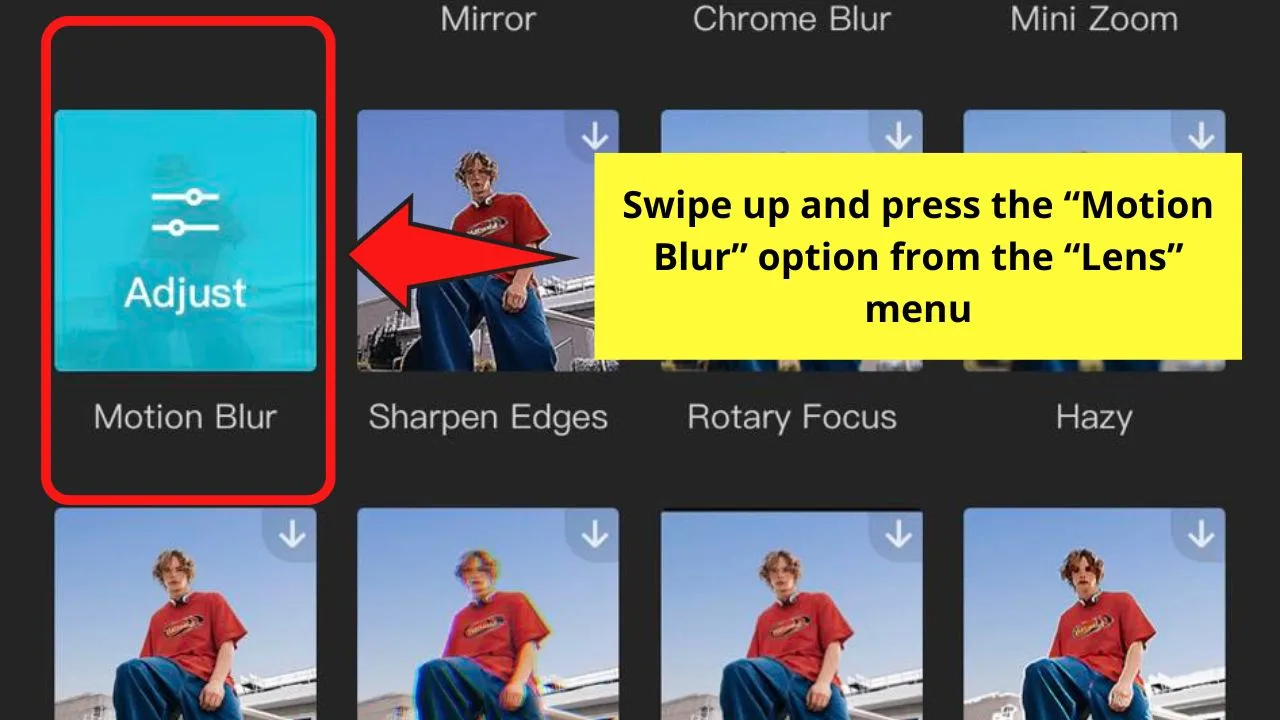
You’ll find this “Lens” effect between “Mini Zoom” and “Sharpen Edges.”
If you need to adjust the settings for “Motion Blur,” press “Adjust” so the “Motion Blur” menu opens.
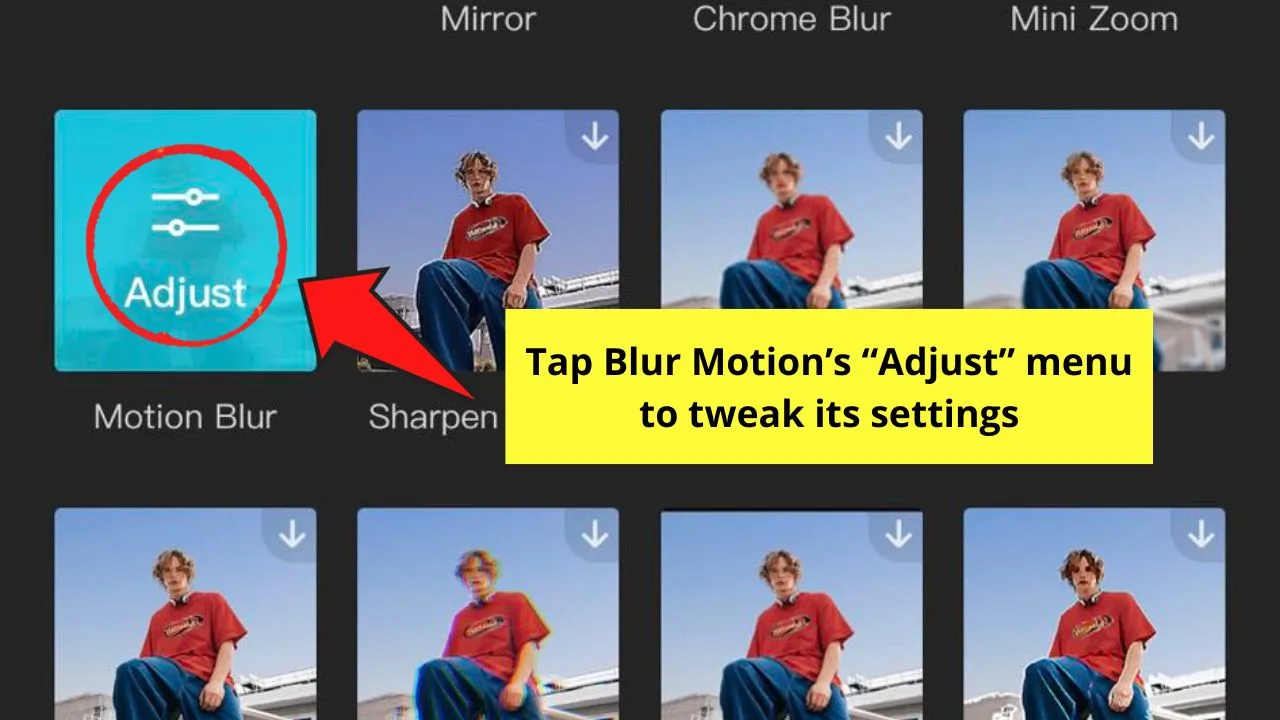
Step 5: Tap the tick symbol
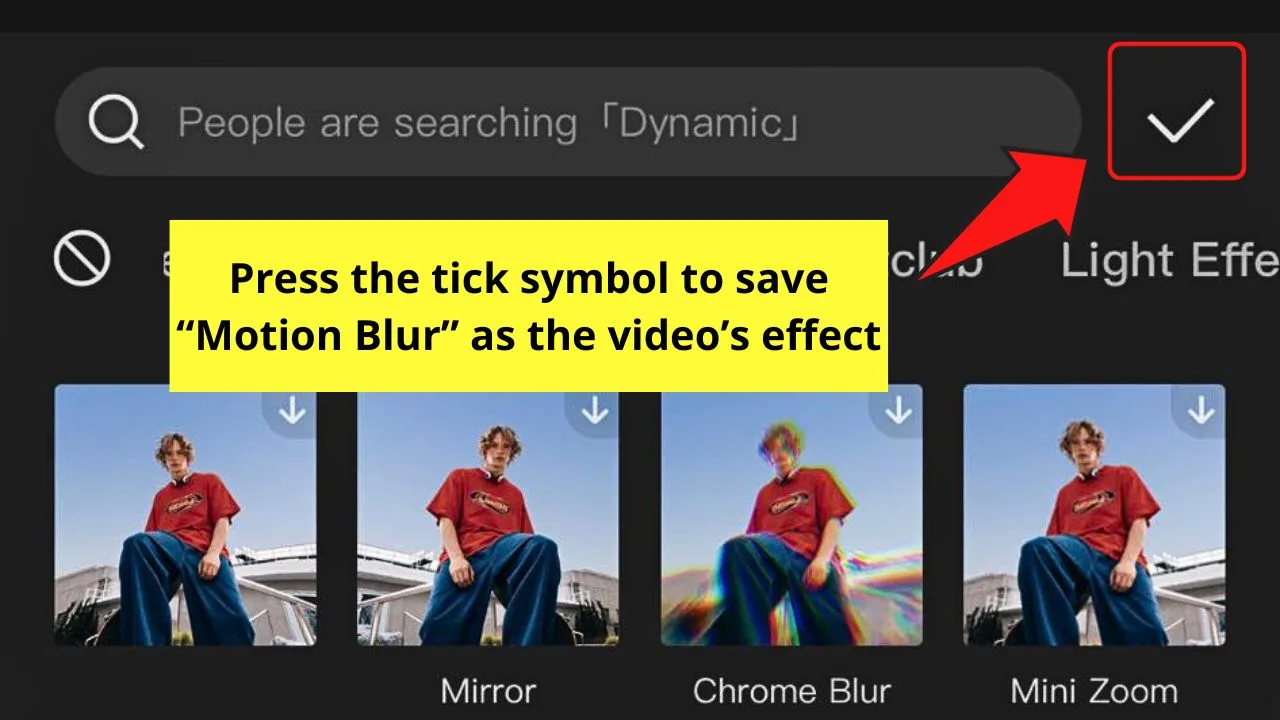
This move will save the settings and the “Motion Blur” effect you added to the video.
You should now see a blurring effect on the moving object.
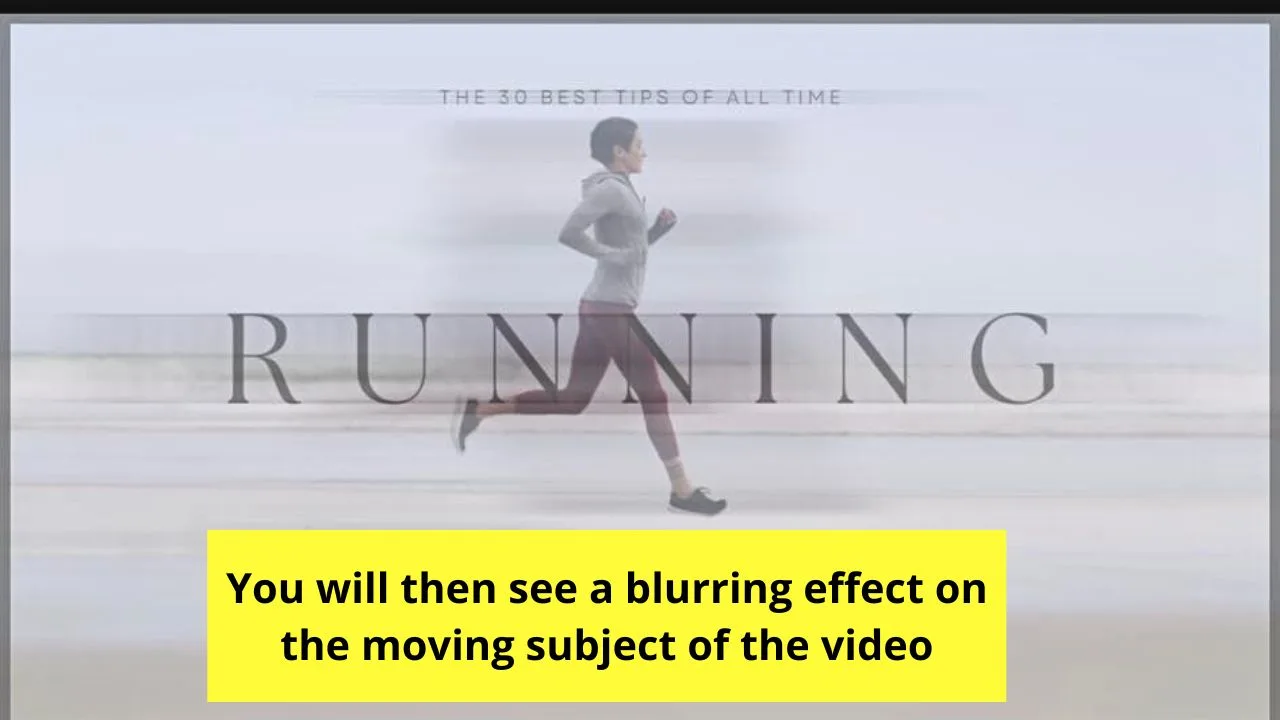
Again, if you have added effects to the project like increasing its speed, adding “Motion Blur” will cancel that effect out.
Whichever of the two methods you use to add motion blur on CapCut mobile, you’re guaranteed to have a more expressive and realistic experience.
Frequently Asked Questions about How to Add Motion Blur on CapCut Mobile
What is the “Motion Blur” effect on CapCut?
“Motion Blur” is an effect you can add to any video that you want to have a smoother transition between scenes. You can also use “Motion Blur” to highlight a certain movement or motion in the video.
Where can I find “Motion Blur” on CapCut mobile?
One way to access “Motion Blur” on CapCut mobile is by tapping on the video timeline. On the taskbar that appears, swipe to the left and press “Motion Blur.” If you haven’t selected the video, press “Effects” on the taskbar and choose the “Lens” tab. Then swipe up to press the “Motion Blur.”
Can you readjust the “Motion Blur” setting of the video on CapCut?
You can readjust the “Motion Blur” setting on the video you’re editing on CapCut. Simply find the “Motion Blur” setting on the bottom taskbar after selecting the video or access it through “Effects.”

Hey guys! It’s me, Marcel, aka Maschi. On MaschiTuts, it’s all about tutorials! No matter the topic of the article, the goal always remains the same: Providing you guys with the most in-depth and helpful tutorials!


