Well done! Your class report is so neat and organized.
You managed to divide your Google Docs document into two columns to make your paper look like a newspaper.
How exactly did you do that?
Well, if you’re curious how to make 2 columns in Google Docs, stay tuned and continue reading.
How to Make 2 Columns In Google Docs
To make two columns in Google Docs, first head to “Format” in the main menu. Then, hover your cursor over “Columns” and click on the 2-column image. If the document already has text, highlight the text you want to divide into two columns before executing these steps.
To make two columns in Google Docs, follow these steps:
Step 1: Open a blank Google Docs document by typing “docs.new” on your browser’s address bar.
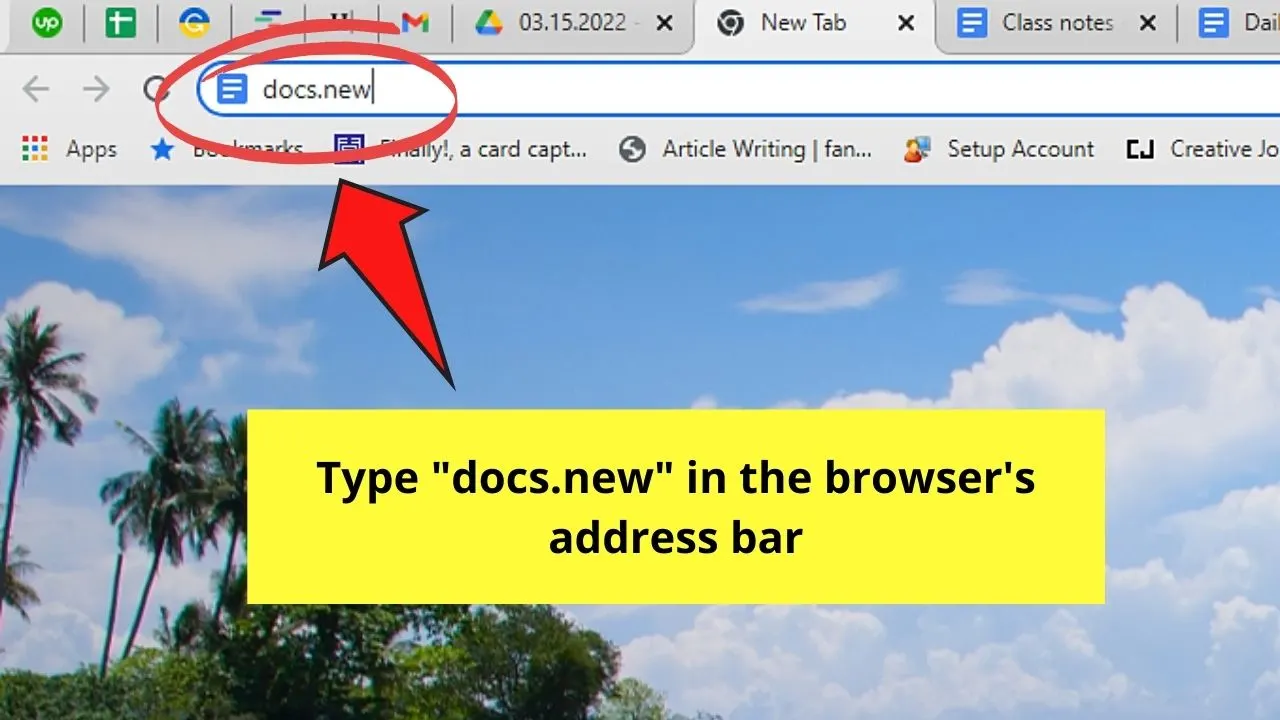
The tab will then load into the new Google Docs document.
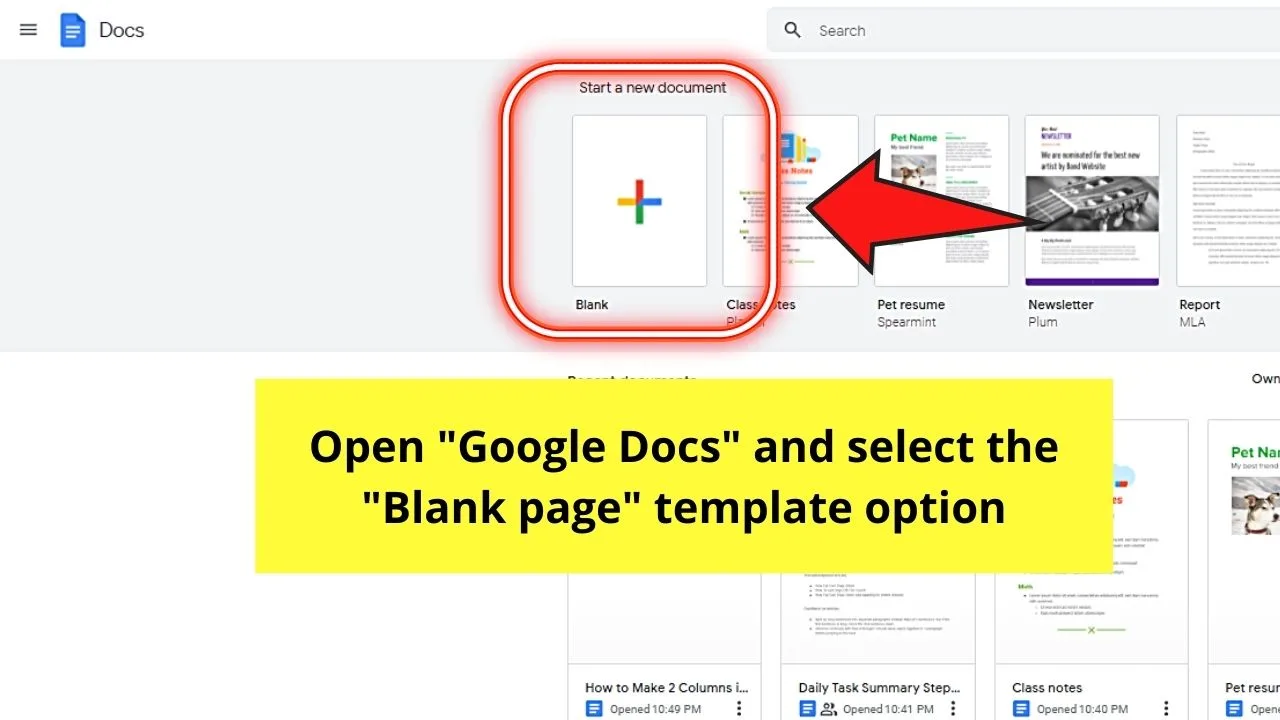
You can also open a blank document by opening Google Docs and selecting the “Blank” page.
Step 2: Once you’re on the new Google Docs file, head to the menu bar and select “Format.”
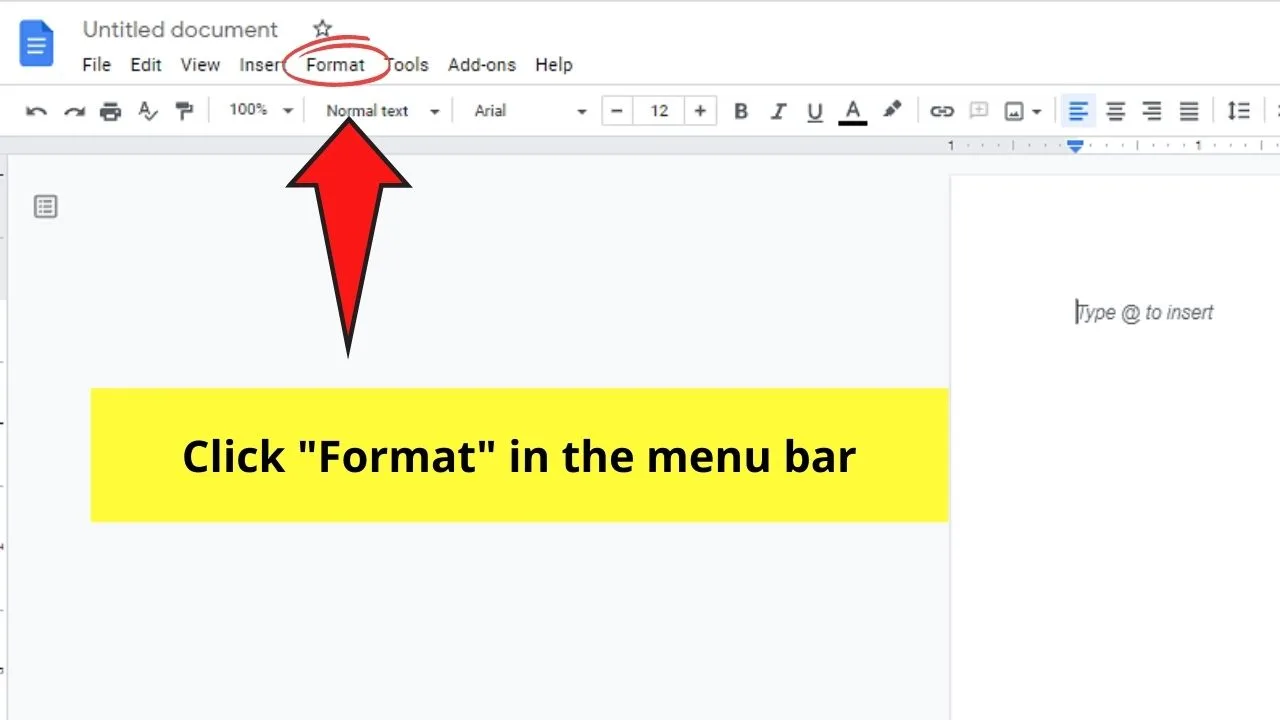
A dropdown menu will then appear offering you various formatting options.
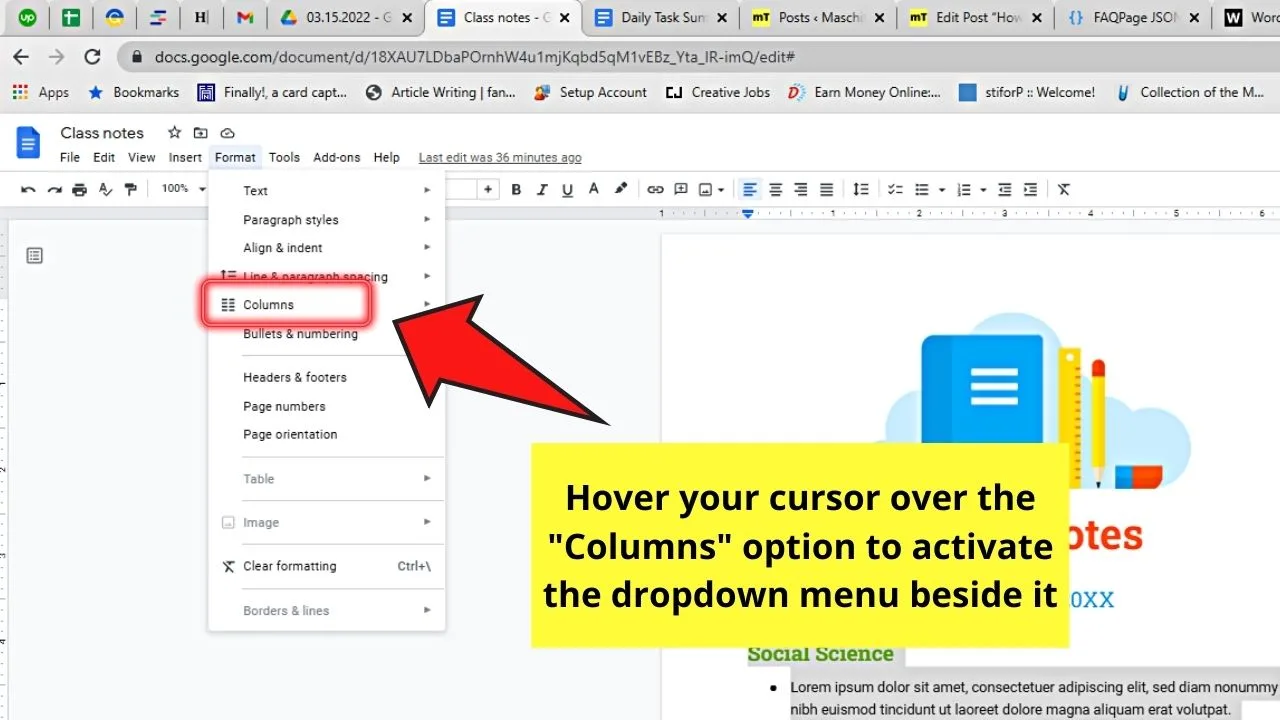
Step 3: In the “Format” dropdown menu, scroll down until you see the “Columns” option.
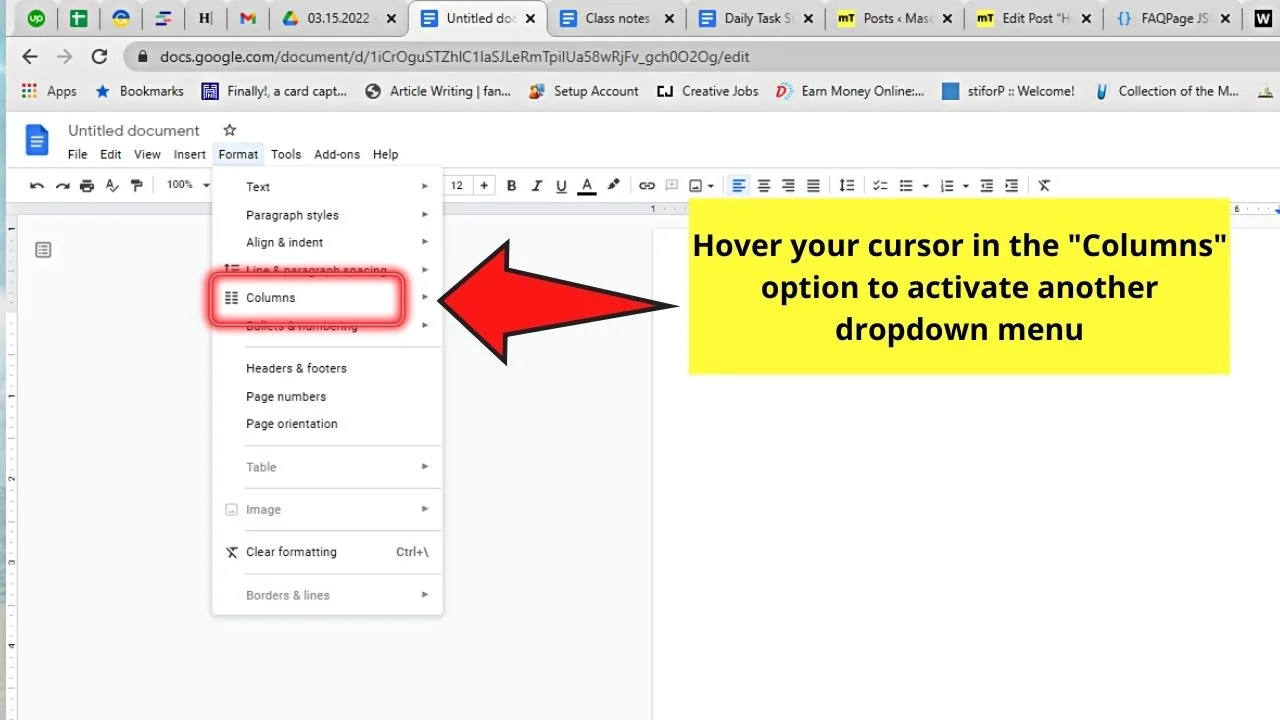
After locating the “Columns” button, hover your cursor over it to activate another dropdown menu.
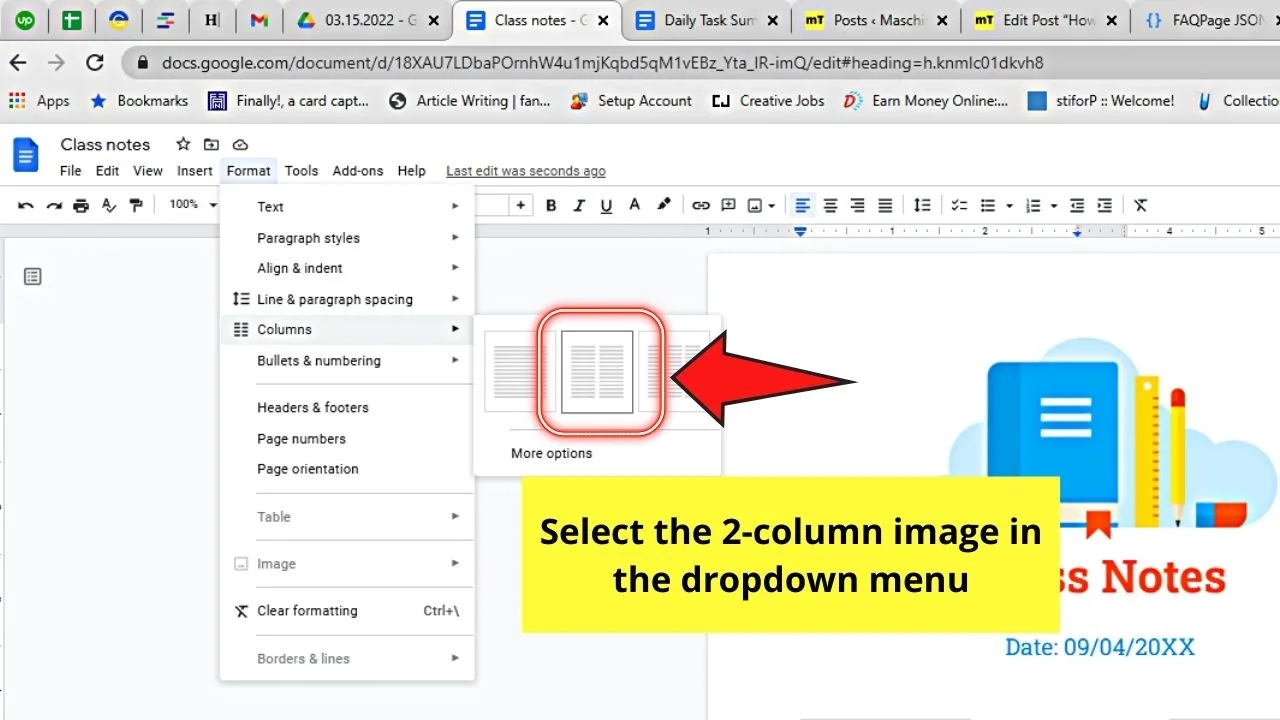
Step 4: In the second dropdown menu that appears, you’ll see 3 column options depicted as images: 1-column, 2-column, and 3-column.
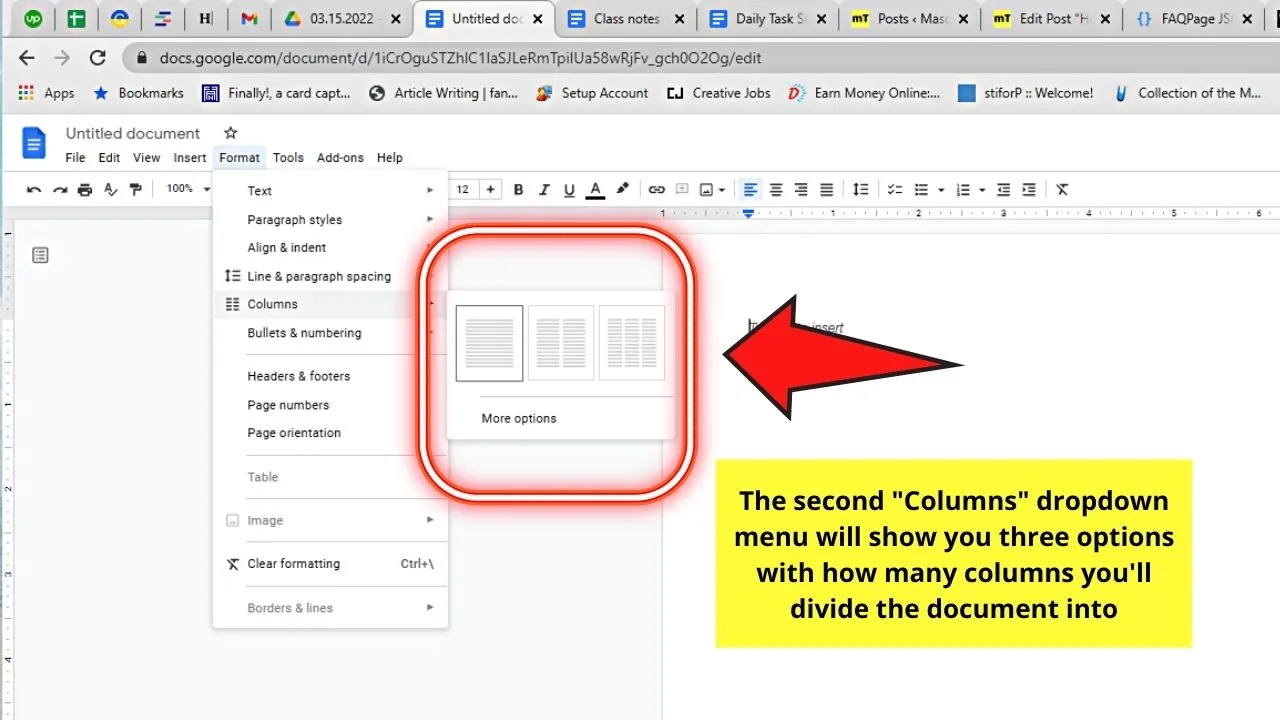
Since we want to make 2 columns in our Google Docs document, choose the 2-column image by clicking it.
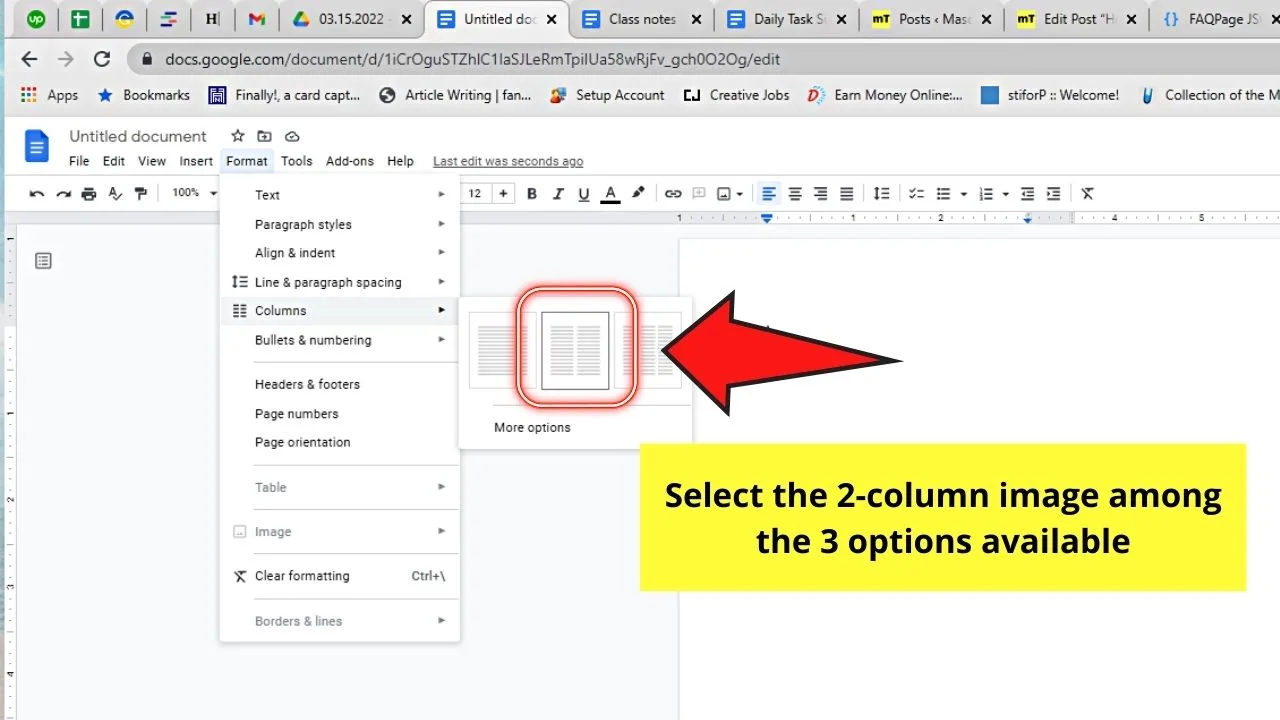
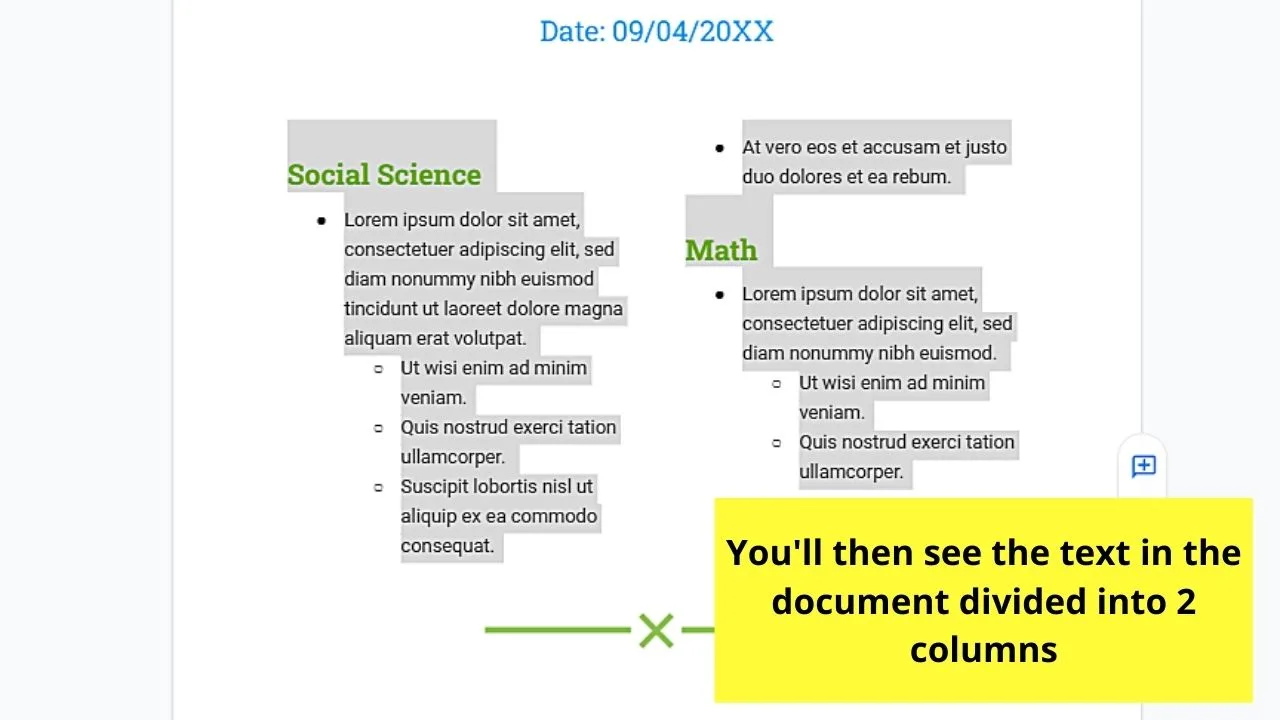
This move then divides the document across all the pages into 2 columns.
Step 5: If, however, you want to add a vertical line between the 2 columns in Google Docs, head back to click “Format” on the menu bar.
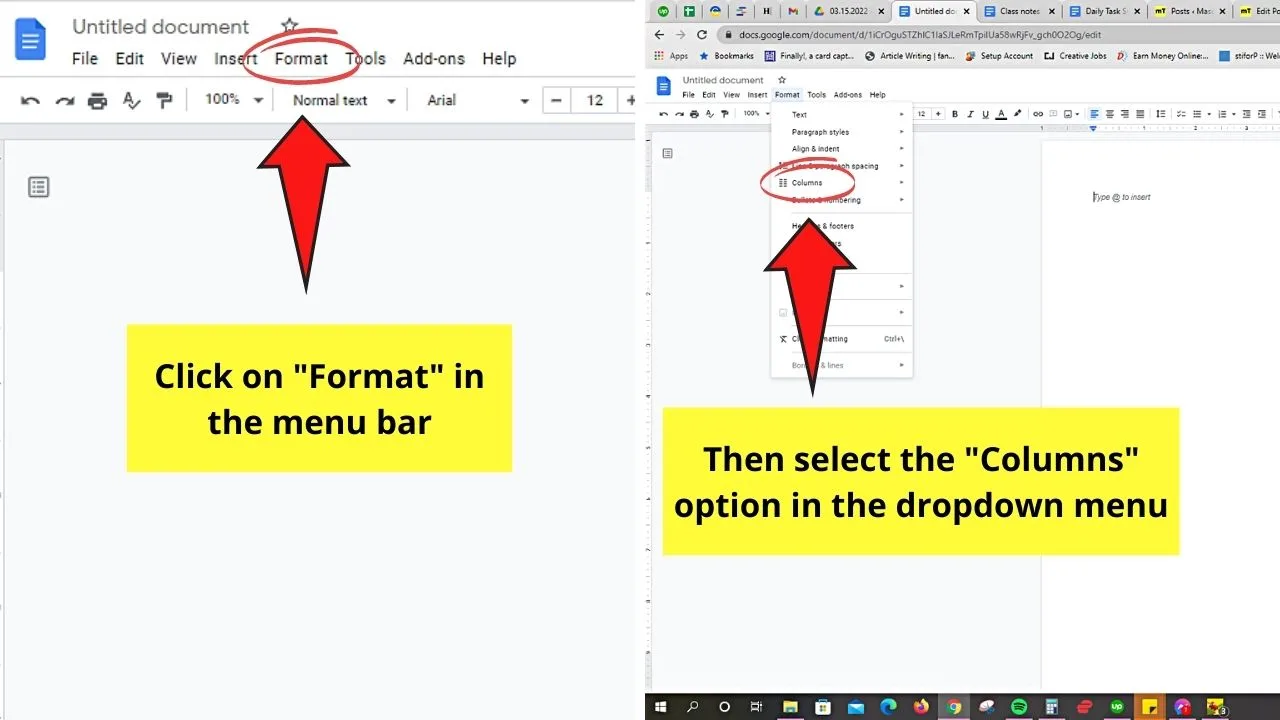
Then, choose “Columns” again.
But, instead of selecting the 2-column image, go downwards and click “More options” instead.
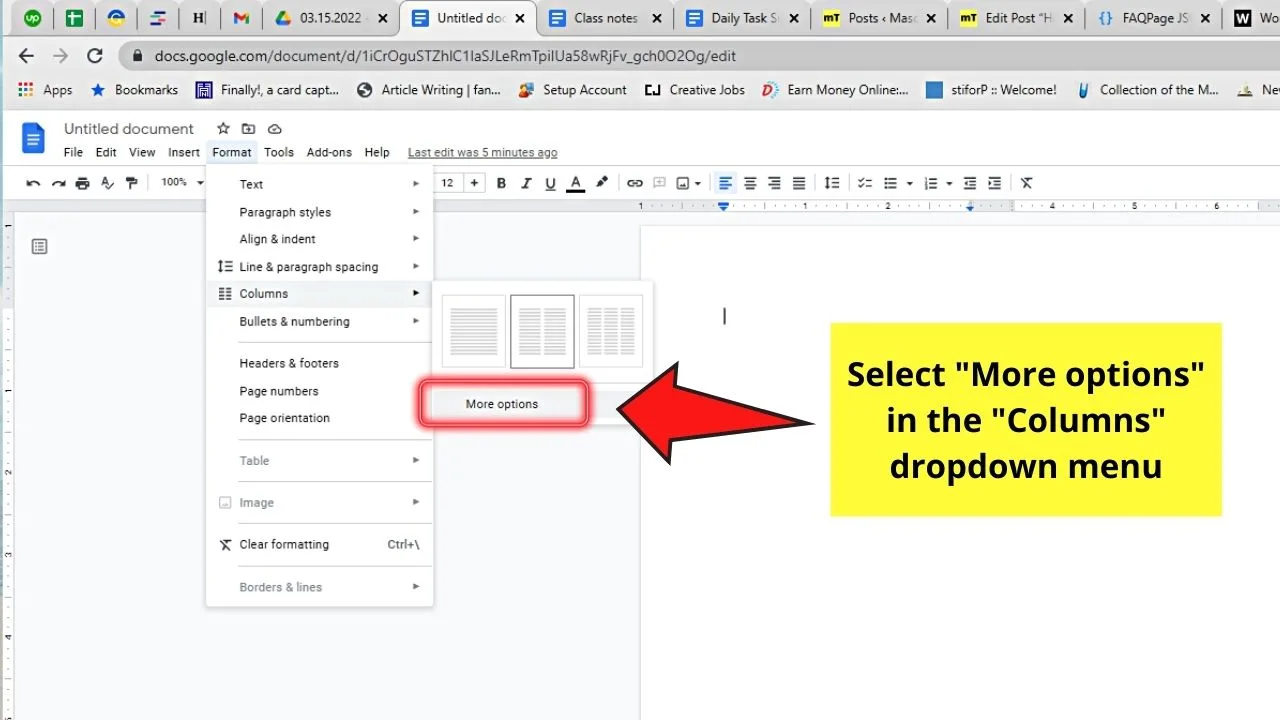
Step 6: In the “More options” dialog box that appears, head to the “Line between columns” box and tick it.
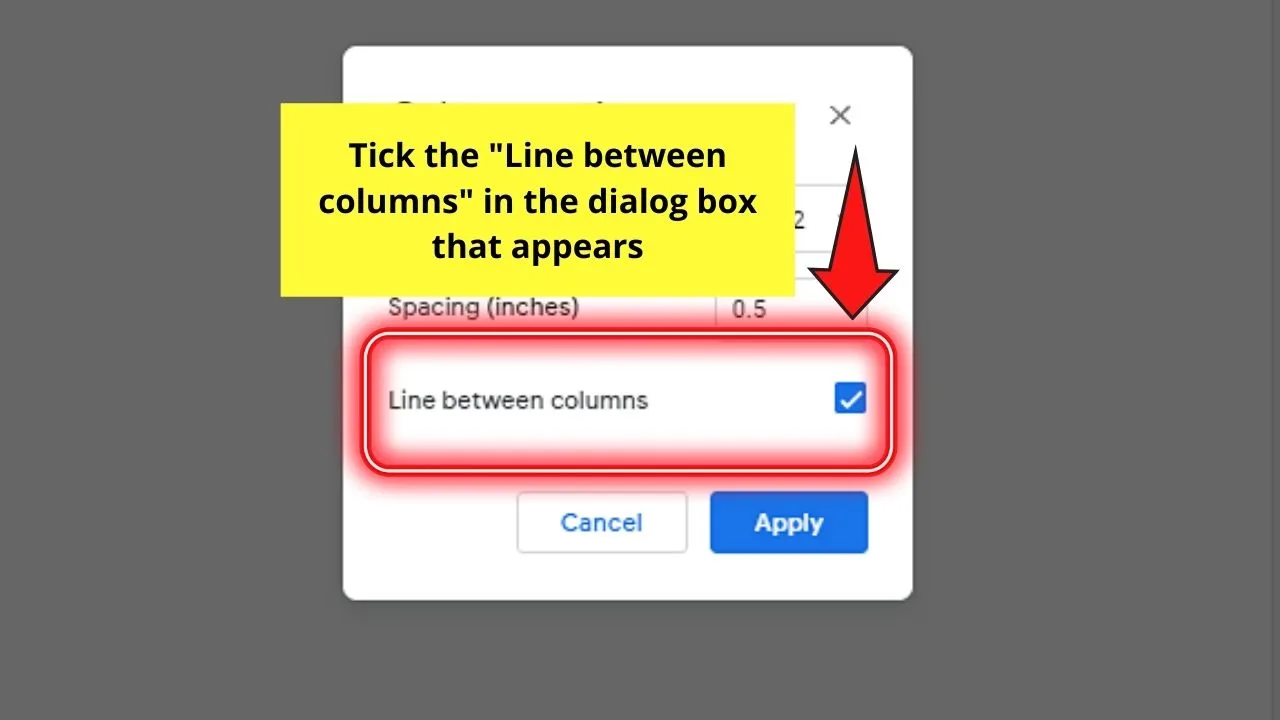
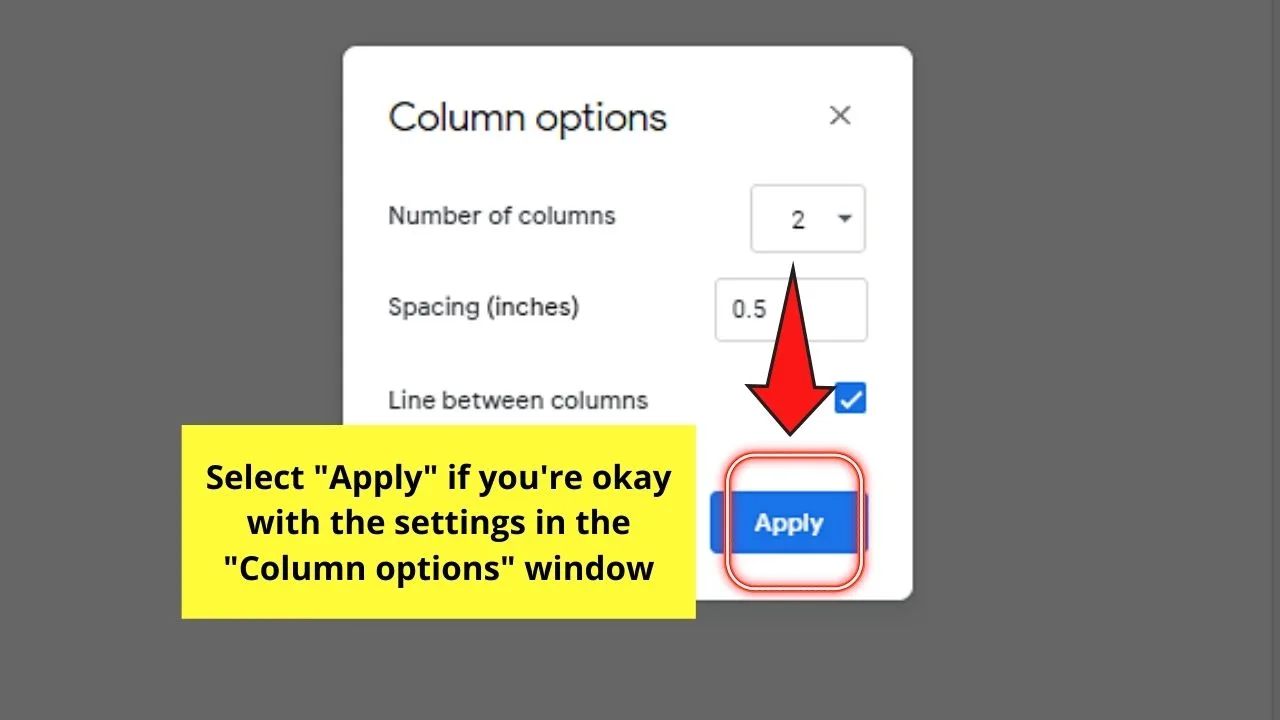
Then, if you’re good with the settings for the “Number of columns” and “Spacing,” click the “Apply” button.
However, you’ll only see the vertical line after adding text to the document.
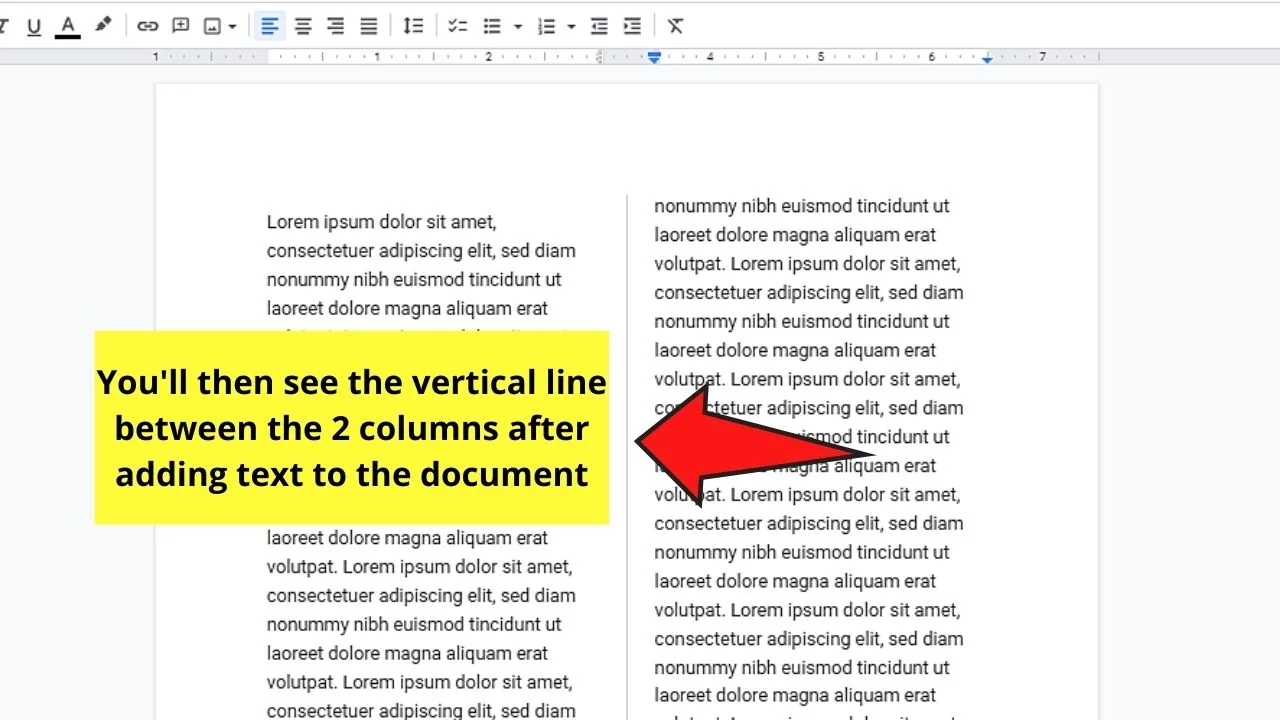
And, just like that, you’ve added a clean vertical line between the 2 columns, making you achieve the feat of a newspaper look.
This is how you make 2 columns on a blank Google Docs page.
How about if there’s already text in the document?
Making 2 Columns in Google Docs with Text in the Document
Step 1: First, highlight the paragraph you want to divide into 2 columns by dragging the cursor over them.
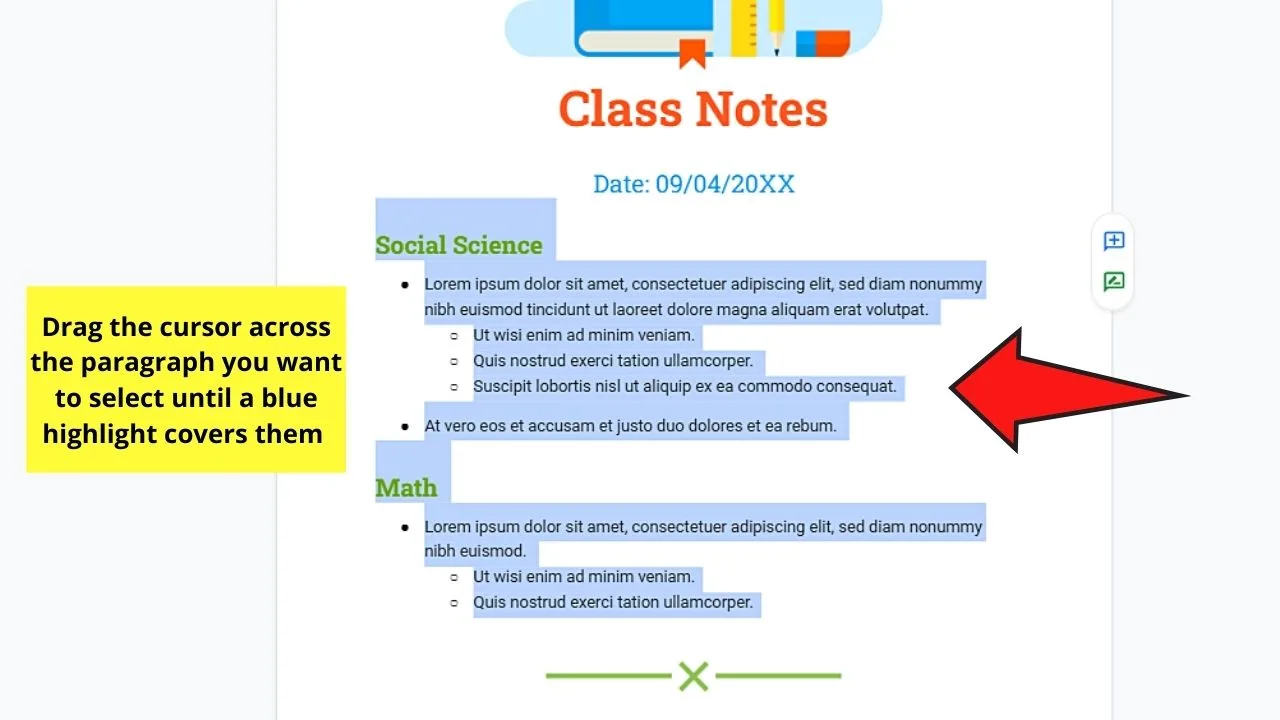
You’ll know you’ve selected the paragraph as it’ll be covered in a blue highlight.
Step 2: Go to the menu bar and select “Format.”
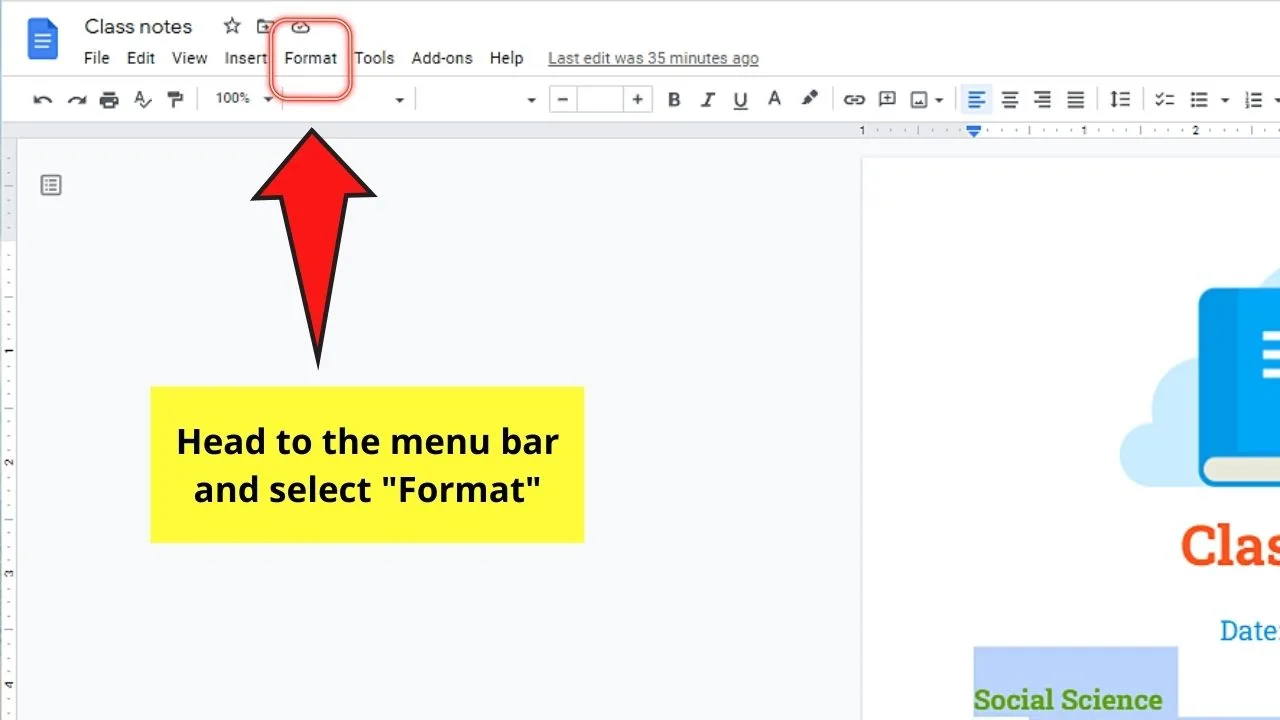
Step 3: Scroll down and hover your cursor over the “Columns” option. This move will then activate a secondary dropdown menu.
Step 4: In the second dropdown menu that appears, click the 2-column image.
This will automatically divide the paragraph you highlighted into 2.
Very simple, right?
You can even do a drop cap in your Google Docs document to make it appear more newspaper-like.
So, are you now ready to format your report and turn it into a 2-column newspaper?
Simply apply the steps mentioned above, and you’ll never go astray.
Frequently Asked Questions about How to Make 2 Columns In Google Docs
Is it possible to write on both columns in Google Docs at once?
By default, the second column you created in Google Docs only gets filled once space runs out in the first. But, if you want to type in both columns at once, add a column break from the “Format” menu. Then, right-click (Windows) or “Ctrl + click” (Mac) and select “Column break” in the pop-out window.
How do you revert or remove the two-column formatting in Google Docs?
To remove the 2-column formatting in Google Docs, highlight the paragraph first (if there’s text involved) before heading to “Format.” Then, select “Columns” and choose the 1-column image. This will then revert the text to a one-column page format.
Can you adjust the measurement of the spacing between your columns?
It is possible to adjust the spacing between columns in Google Docs. Head to “Format” in the menu bar, select “Columns” and click “More options in the second dropdown menu. Then, encode the spacing value in the “Spacing” section before choosing the “Apply” button.

Hey guys! It’s me, Marcel, aka Maschi. On MaschiTuts, it’s all about tutorials! No matter the topic of the article, the goal always remains the same: Providing you guys with the most in-depth and helpful tutorials!


