Adding gradients to your designs in Canva is one way of making them more fun and interesting to look at.
Aside from making a dramatic effect, gradients also allow people to blend two different colors without any one of them affecting the other.
But, whatever purpose you have for using gradients in Canva, the most common one is turning them into your project’s background. How?
Better keep reading and learn the basics of creating gradient backgrounds in the graphic design tool.
How to Make a Gradient Background in Canva
To make a gradient background in Canva, either search for gradients under “Photos” or “Elements” in Canva. In the elements tab, you will find plenty of customizable gradients that let you adjust the color of the gradient (2-color gradients, 3-color gradients, and even 4-color gradients).
Access Canva’s Ready-Made Gradient Backgrounds in the Photos tab
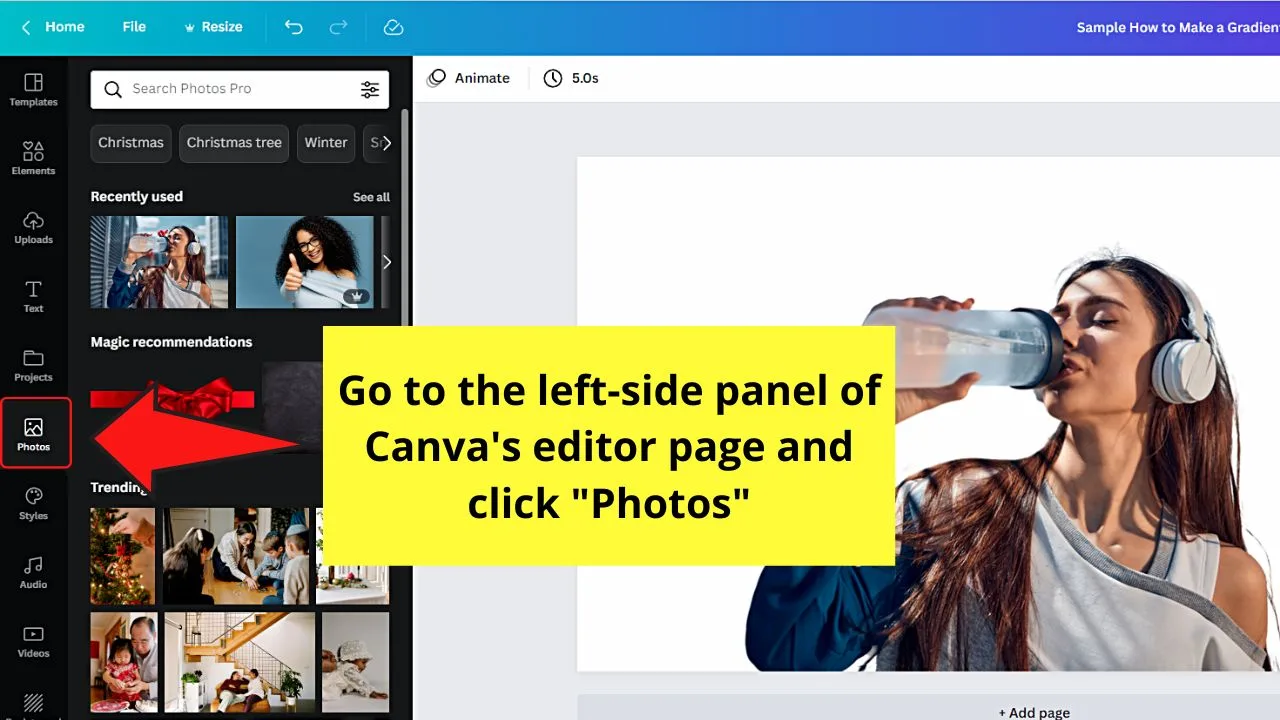
Probably the easiest way to use gradient backgrounds in Canva is to search for gradients in Canva’s “Photos” tab.
There, you will find dozens if not hundreds of ready-made gradient backgrounds that you can simply drag onto your design and then send to the back and use it as a background.
Here’s how you do it:
Step 1: Click on “Photos in the left toolbar.
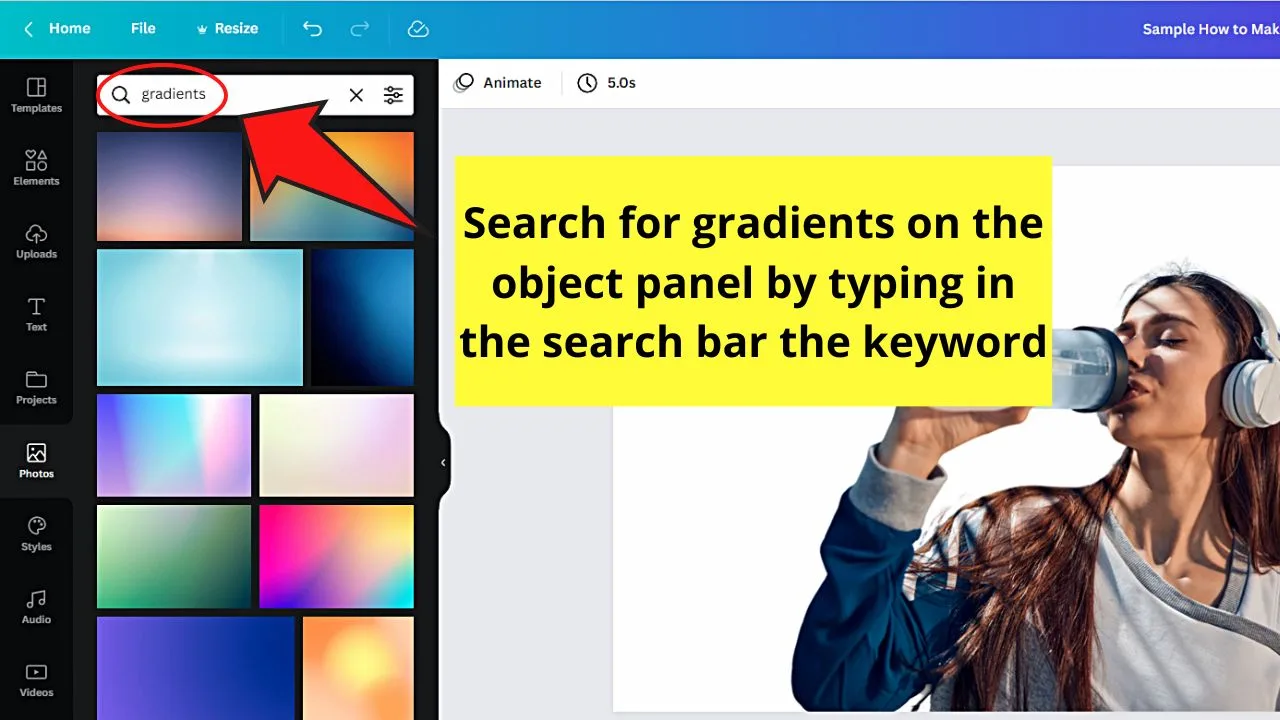
Step 2: Search for “Gradients.”
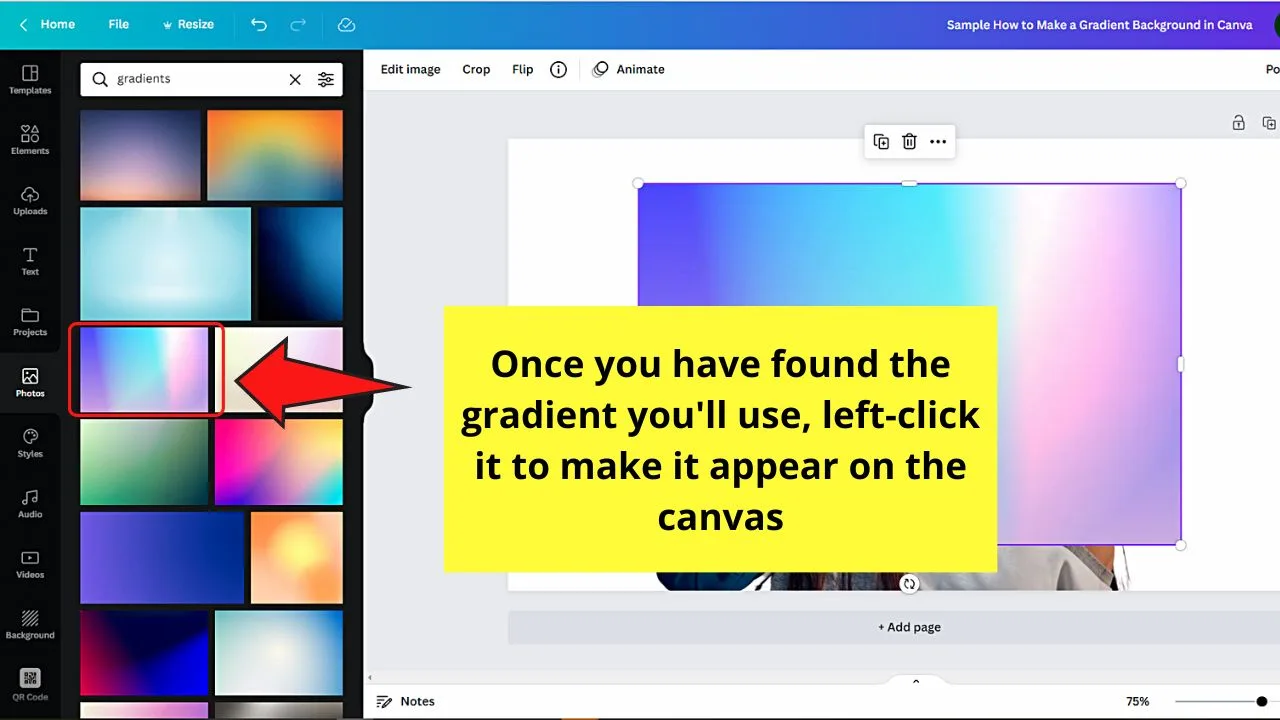
Step 3: Left-click on one of the gradient backgrounds to add it to your design.
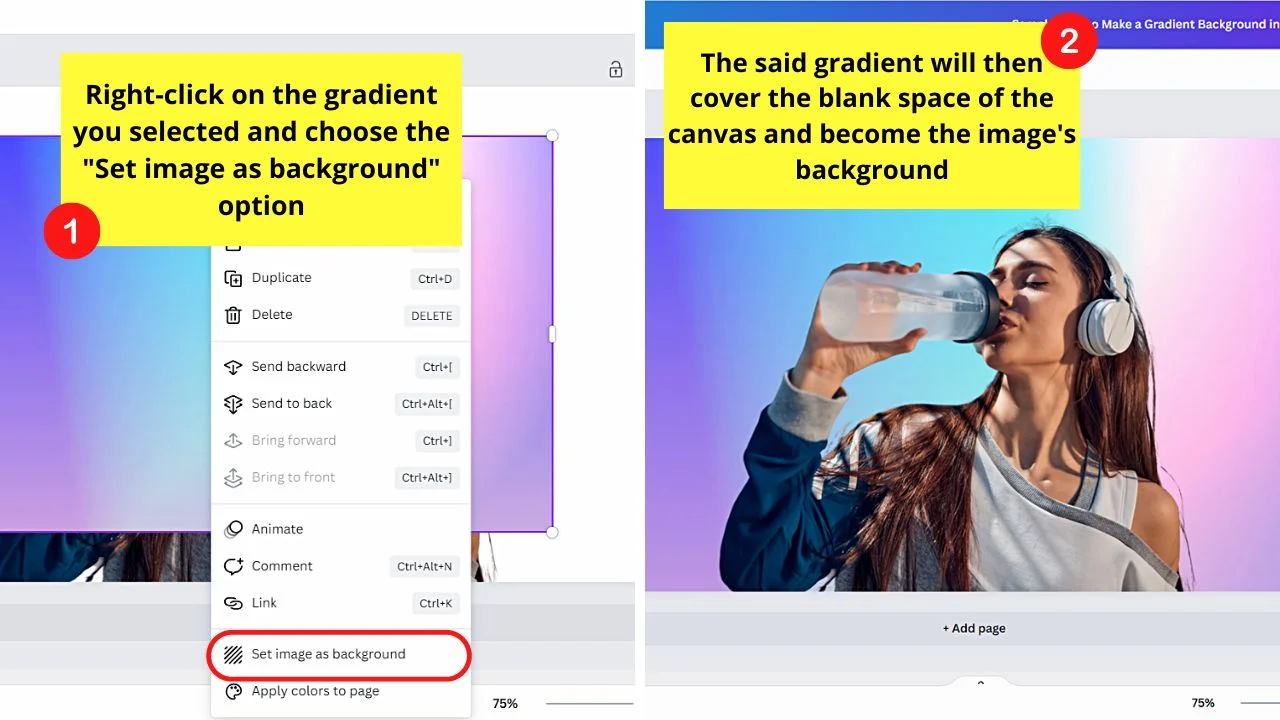
Step 4: Right-click on the gradient background after it has been added to your design and then choose “Set image as background.”
Experiment with Canva’s customizable gradient backgrounds (Elements tab)
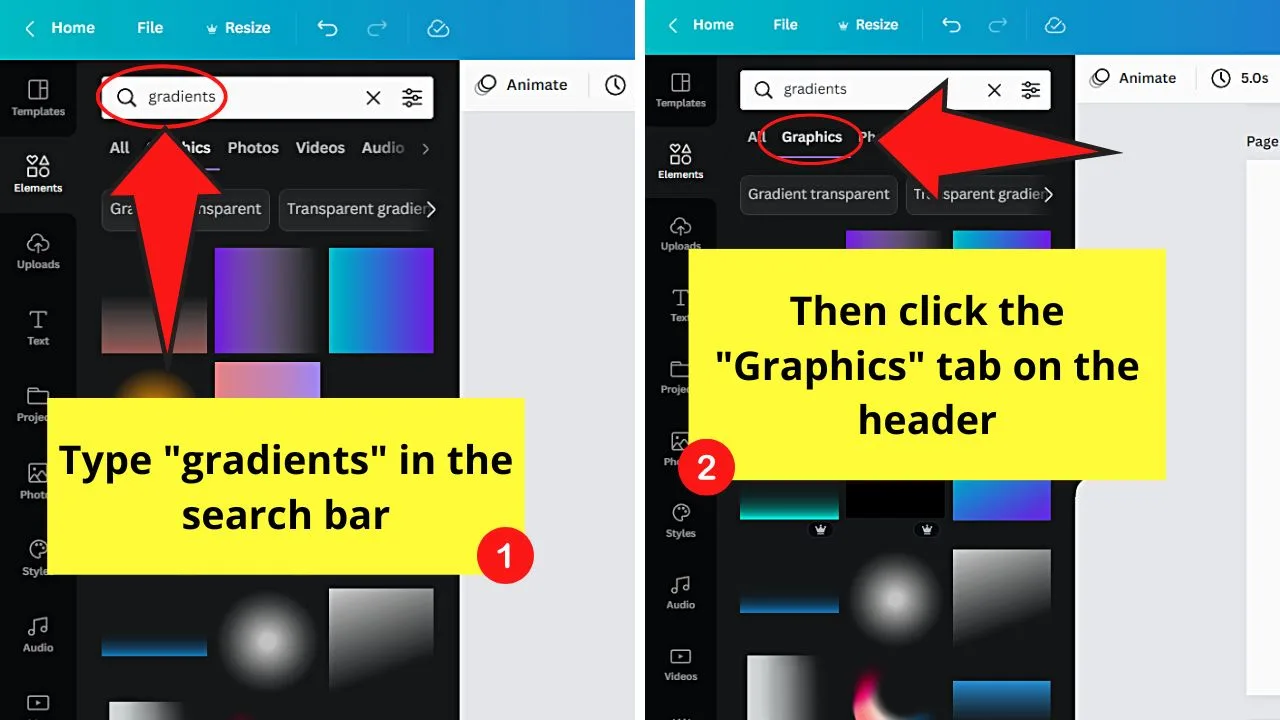
If you want full control over your gradients, then you should search for “Gradients” in Canva’s Elements tab. Make sure to select “Graphics” there, so that you only get gradients graphics rather than just photos of gradients.
Now, the gradients that you will find here are very well suited to serve as gradient backgrounds because many of these allow you to customize the gradient’s colors.
You will find 2-color gradients, 3-color gradients, and even 4-color gradients there. And as all of the colors can be chosen by you, you will end up with an endless amount of options here.
Awesome stuff, right?
Here’s a step-by-step guide for you:
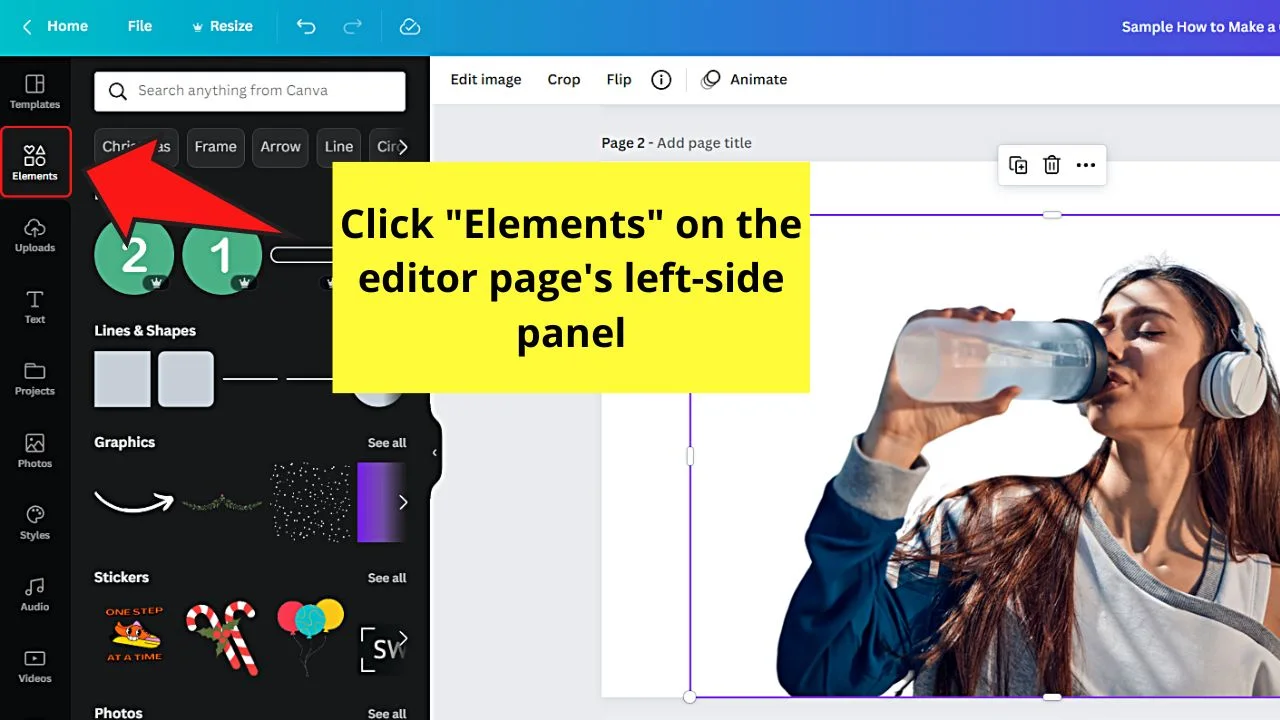
Step 1: Click on “Elements” in the left toolbar.
Step 2: Search for “Gradients” and make sure that the “Graphics” tab is selected.
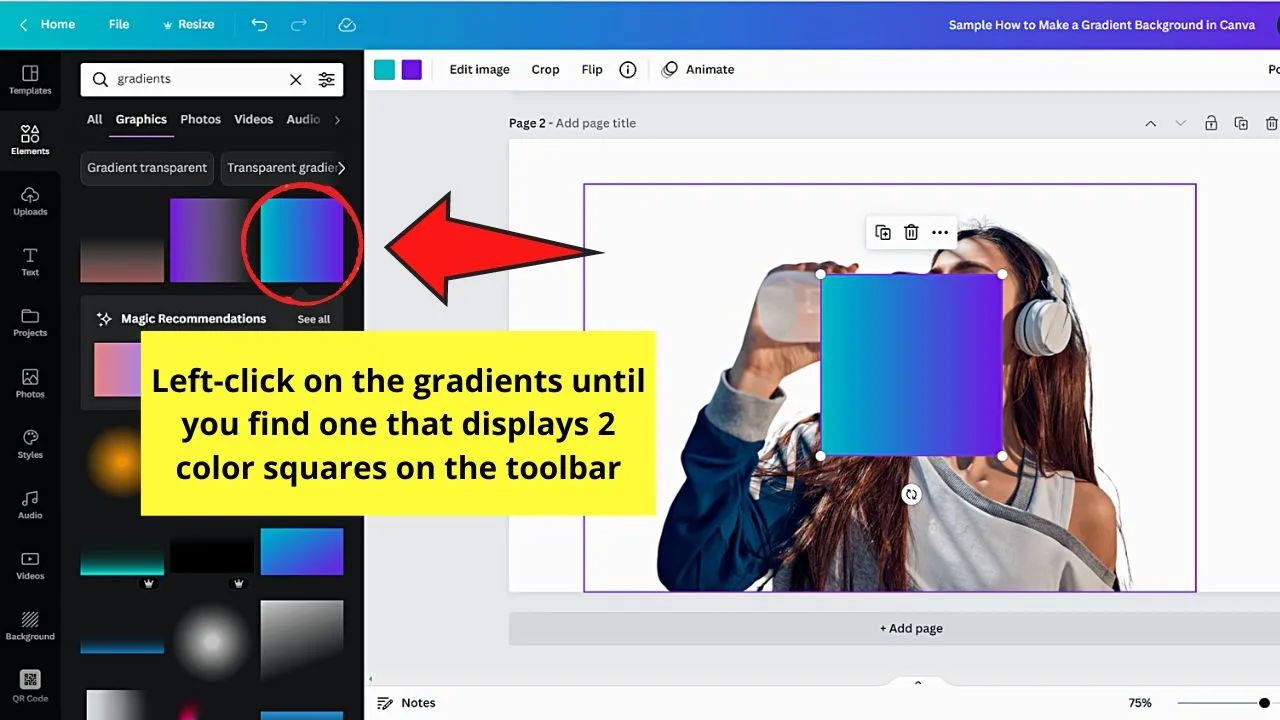
Step 3: Look for gradients that display color squares in the top toolbar after you click on them (very important!)
Step 4: Click on these color squares to customize the colors. You can click any of the default colors found on the “Default” color gallery.
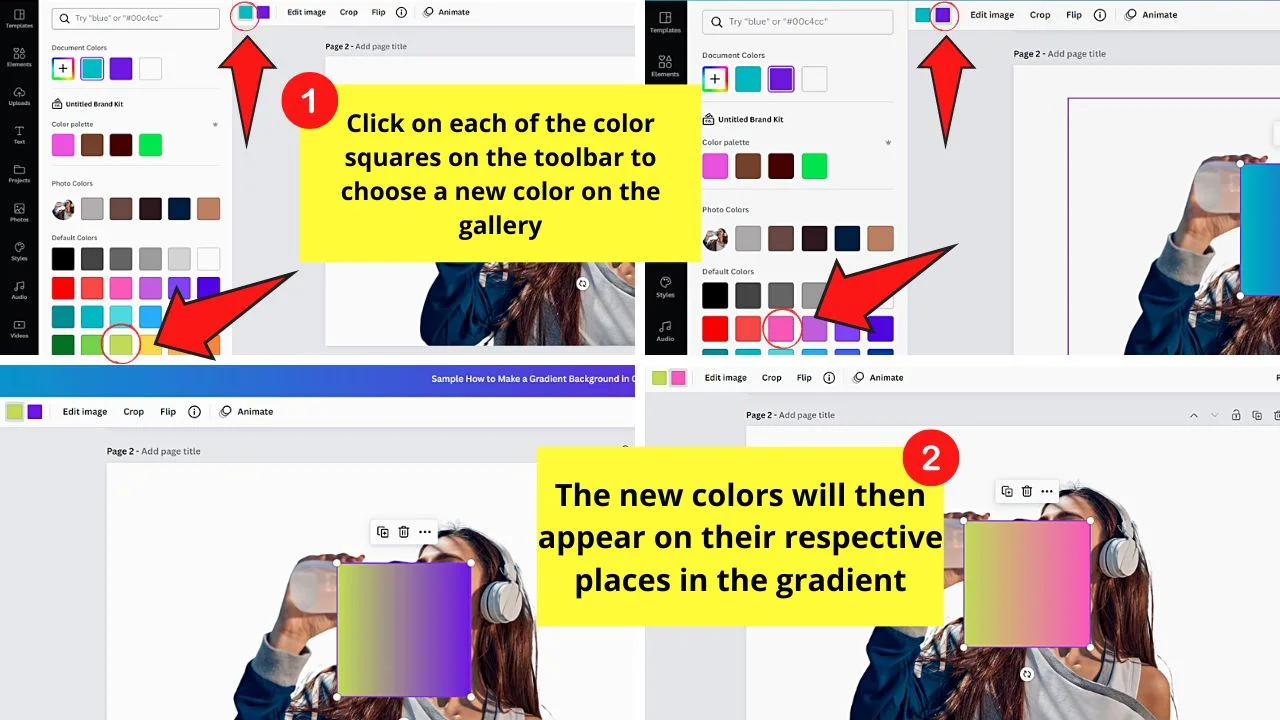
But, if the color you want to use is on one of the photos on the screen, select the rainbow-colored “+” tile and select the eyedropper tool.
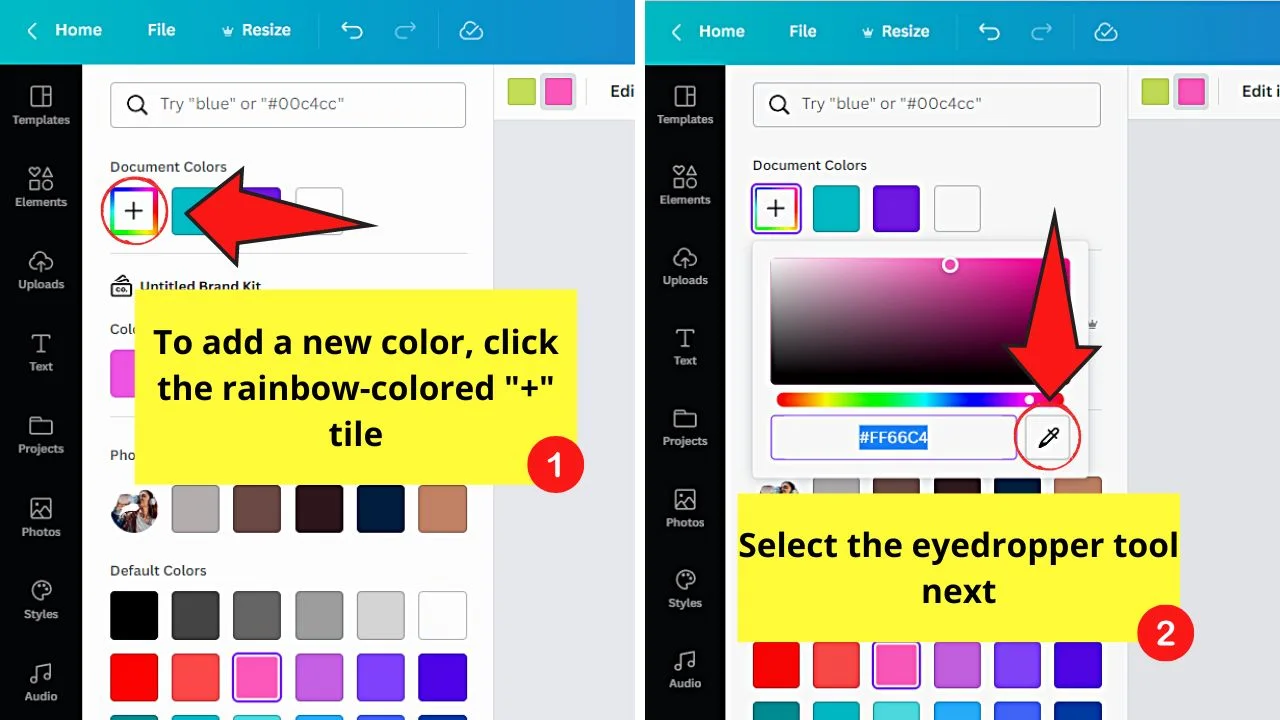
From there, left-click on the image that displays the color you want to use as one of your customizable gradient’s colors.
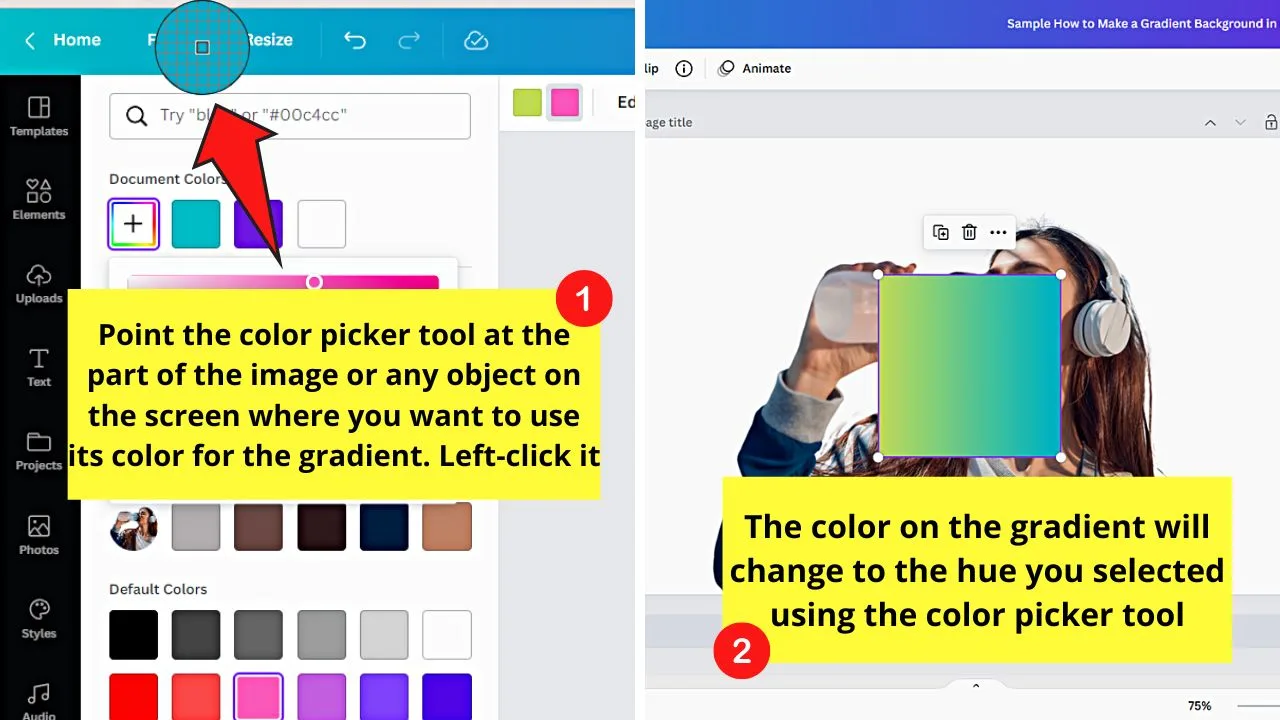
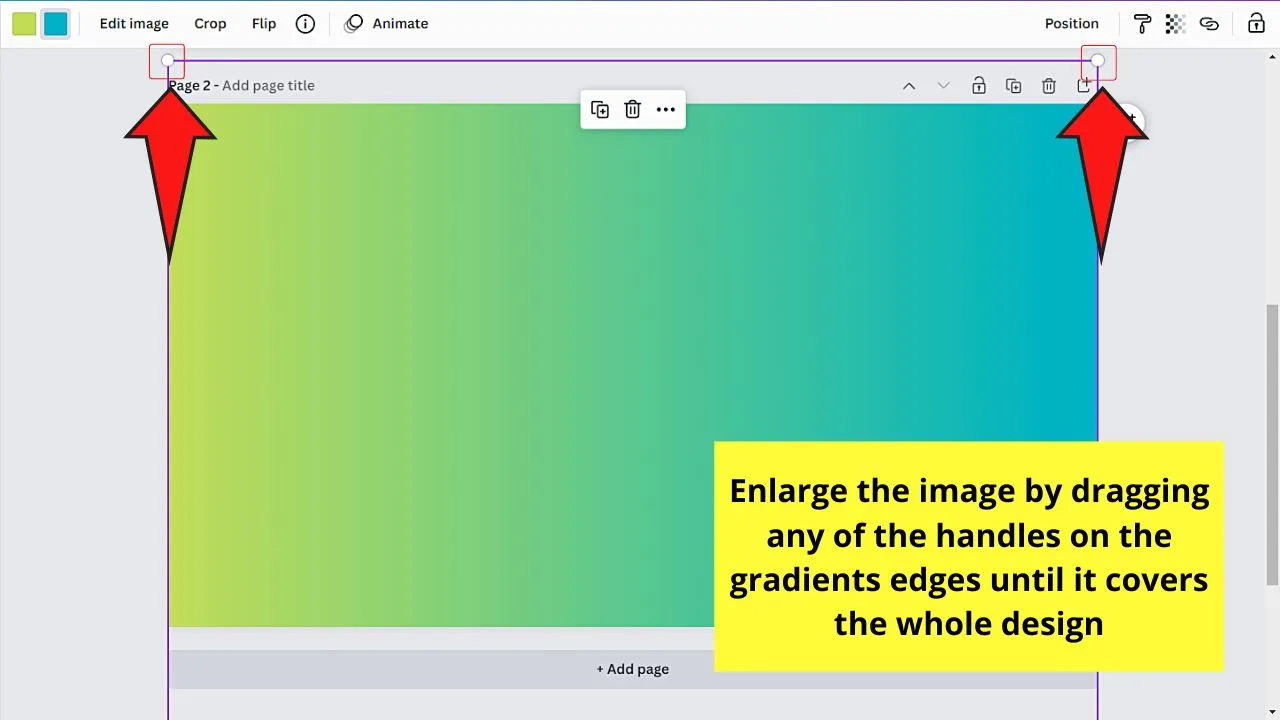
Step 5: Enlarge the gradient so that it covers the whole design.
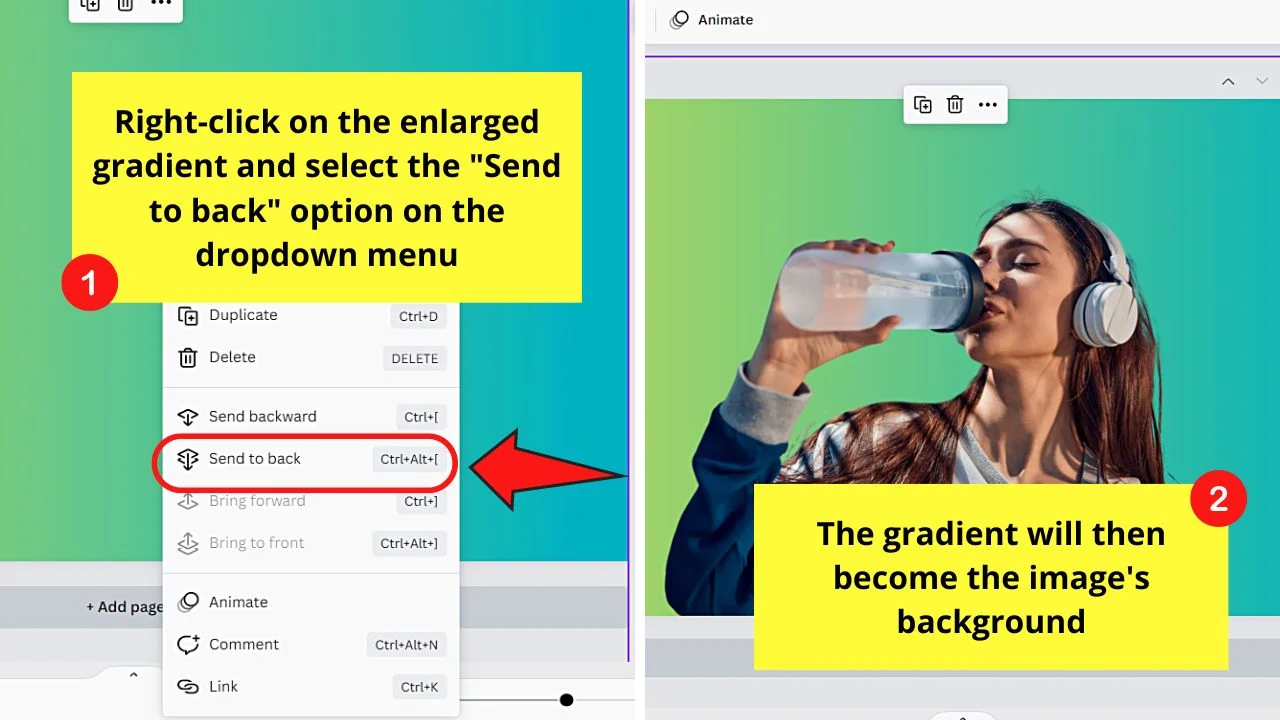
Step 6: Right-click on the gradient and click on “Sent to back” in order to use it as a background.
Bonus Tip: Canva Background Gradient Hack
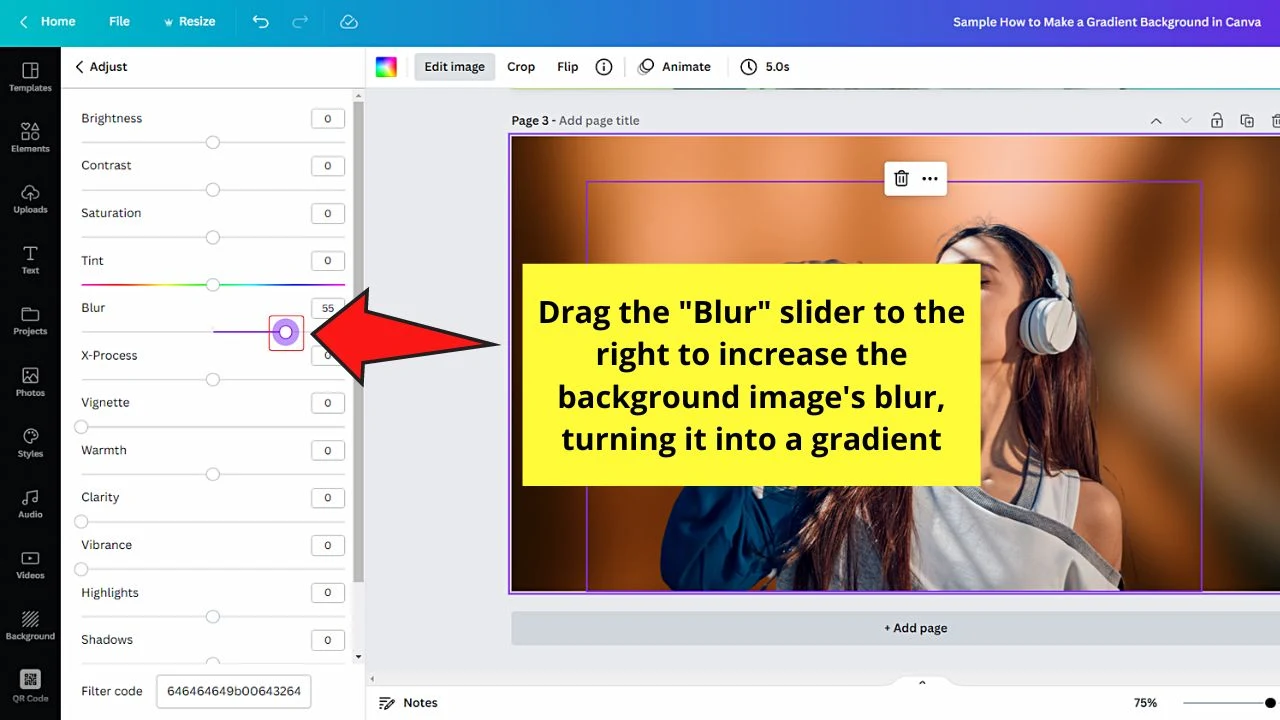
Yet another fantastic way to create an awesome gradient background in Canva is to blur regular Canva photos. With a heavy blur, most photos will turn into an incredible gradient and can then be used as gradient backgrounds.
Here’s how you do it:
Step 1: Click on “Photos” in the left toolbar.
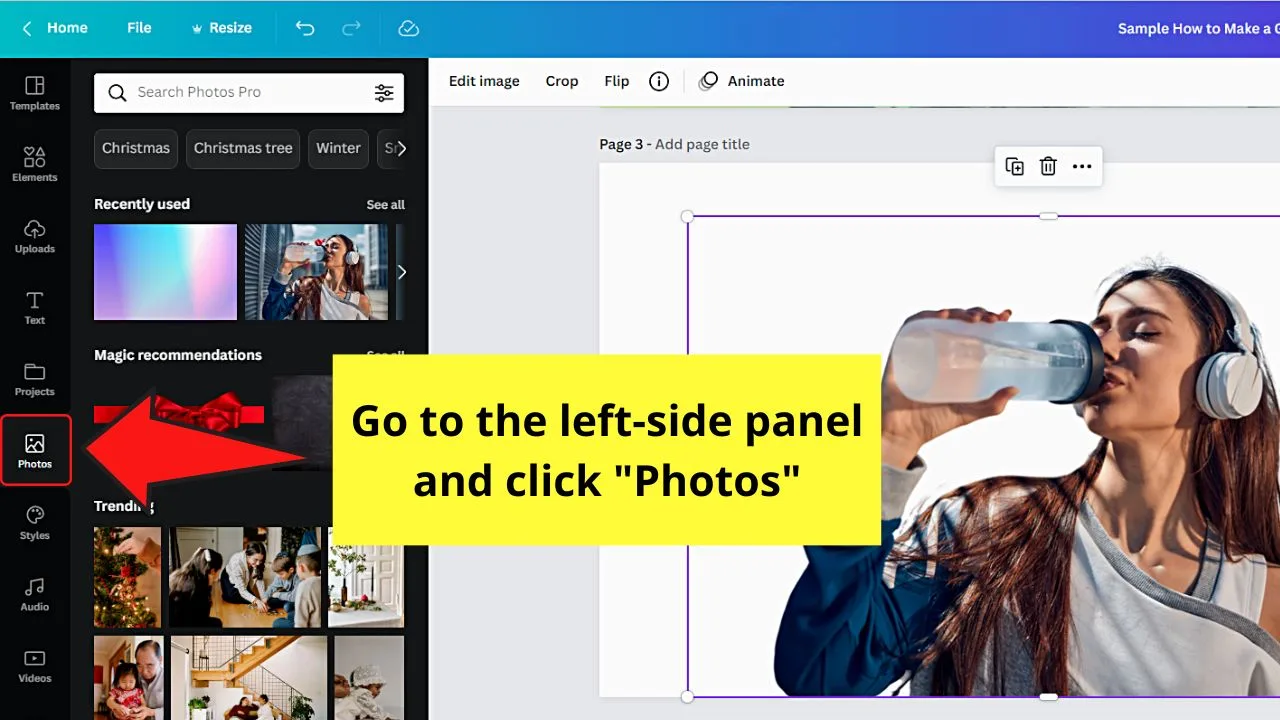
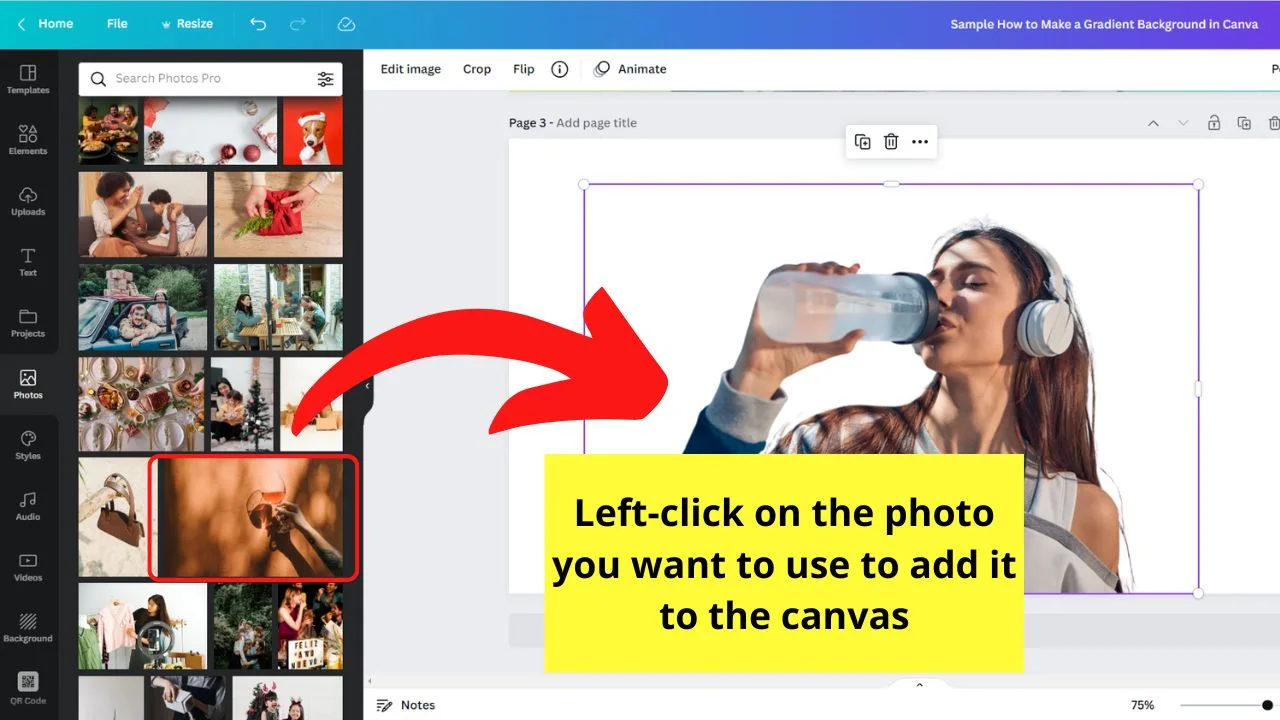
Step 2: Choose a photo (most photos will do the trick) by left-clicking on it. The image will then appear on the canvas.
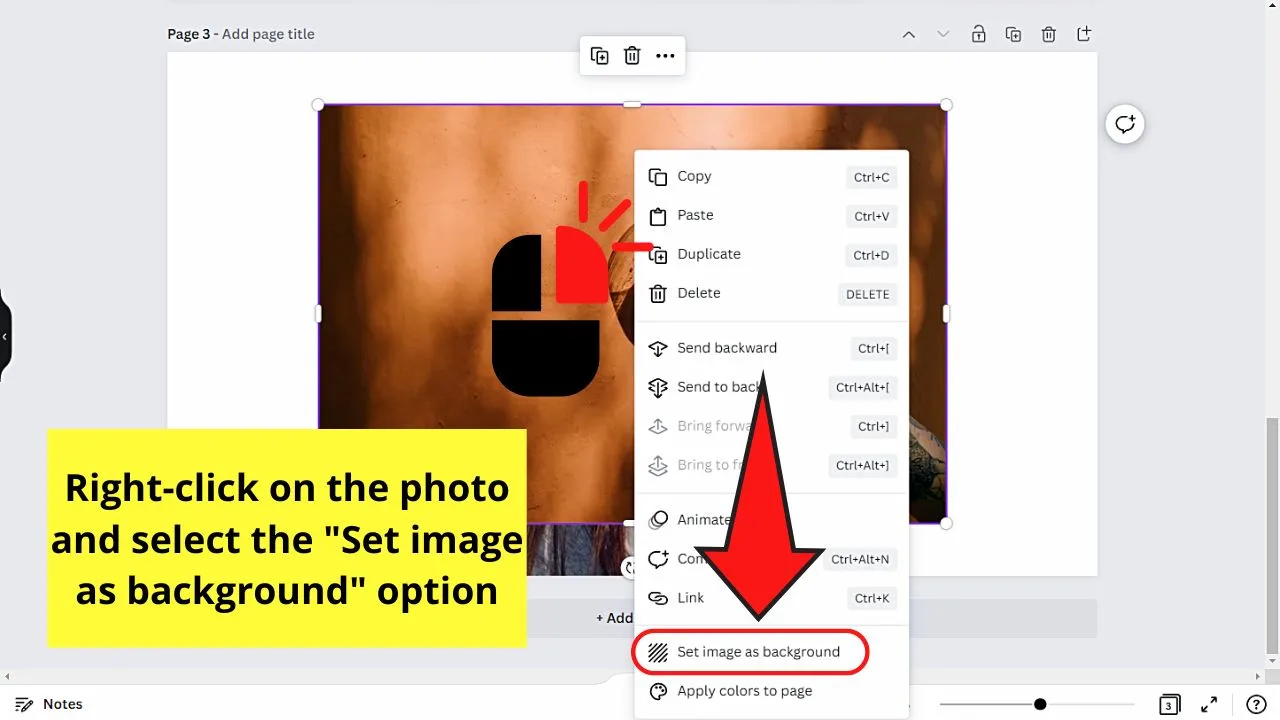
Step 3: Right-click on the photo and choose “Set image as background.”
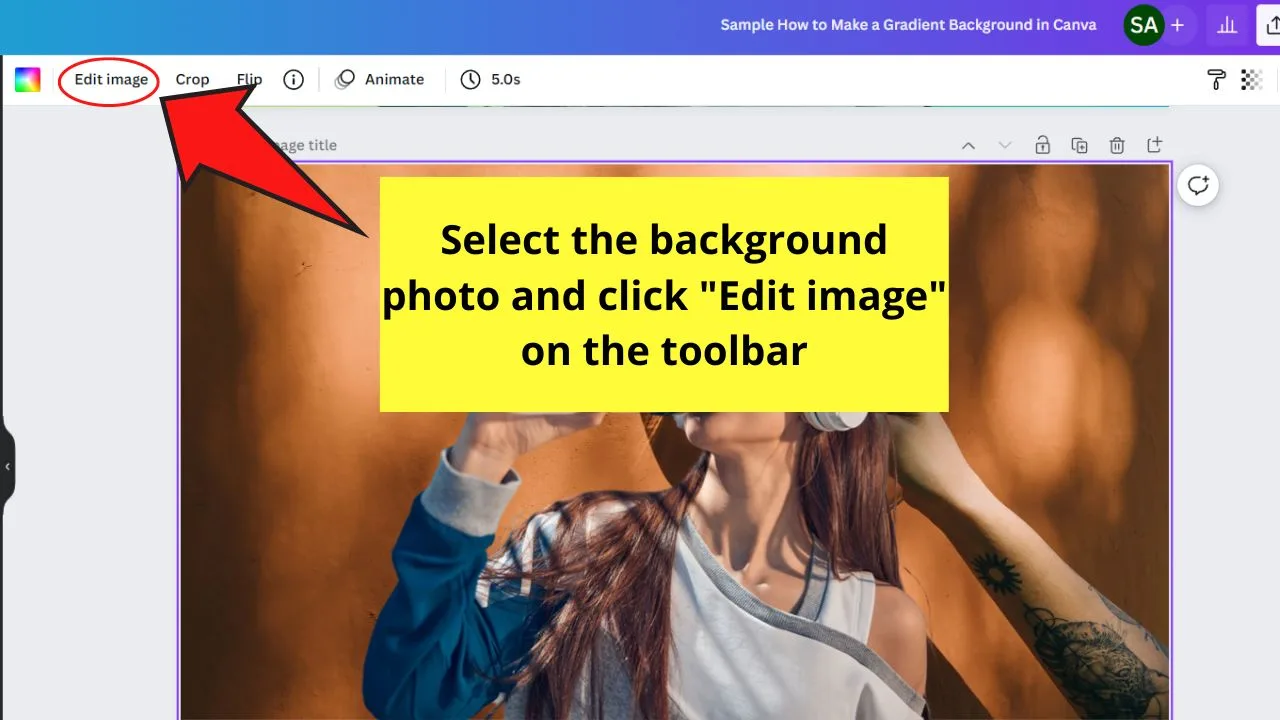
Step 4: Select the background photo and click on “Edit Image” in the top toolbar.
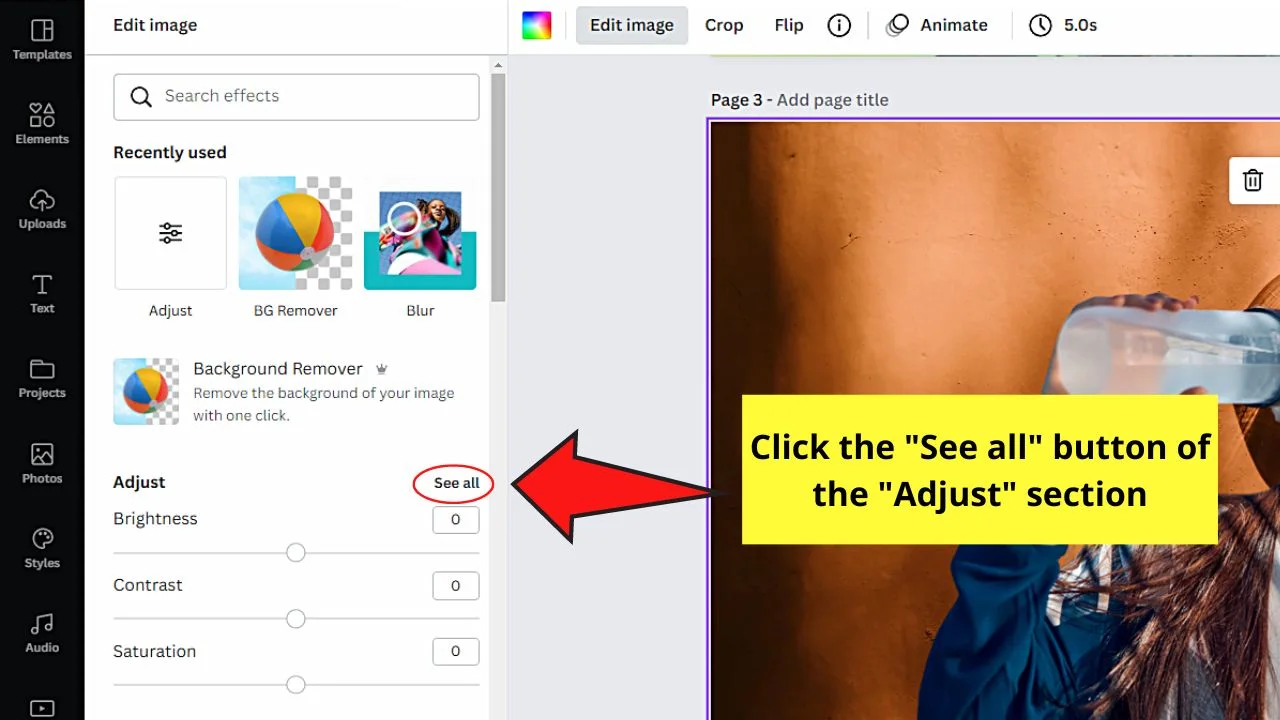
Step 5: Click on “See all” next to “Adjust” to open up the Adjust panel.
Step 6: Move the “Blur” fader to the right to blur the photo.

Hey guys! It’s me, Marcel, aka Maschi. On MaschiTuts, it’s all about tutorials! No matter the topic of the article, the goal always remains the same: Providing you guys with the most in-depth and helpful tutorials!
