

The Eraser tool is the perfect tool for removing portions of images or dividing shapes into different parts. And you can do it all in just three quick steps!
If you don’t know where to start, here’s a full guide.
How To Use The Eraser Tool In Illustrator
Press “Shift+E” to equip the Eraser tool. Then click or click and drag your cursor to erase part of your object or image. To resize your eraser, just press the “[“ bracket key to size it down and the “]” bracket key to size it up. If you hold down “Shift”, then click and drag your cursor, you will erase in a straight line vertically, horizontally or diagonally.
Step-by-step Guide
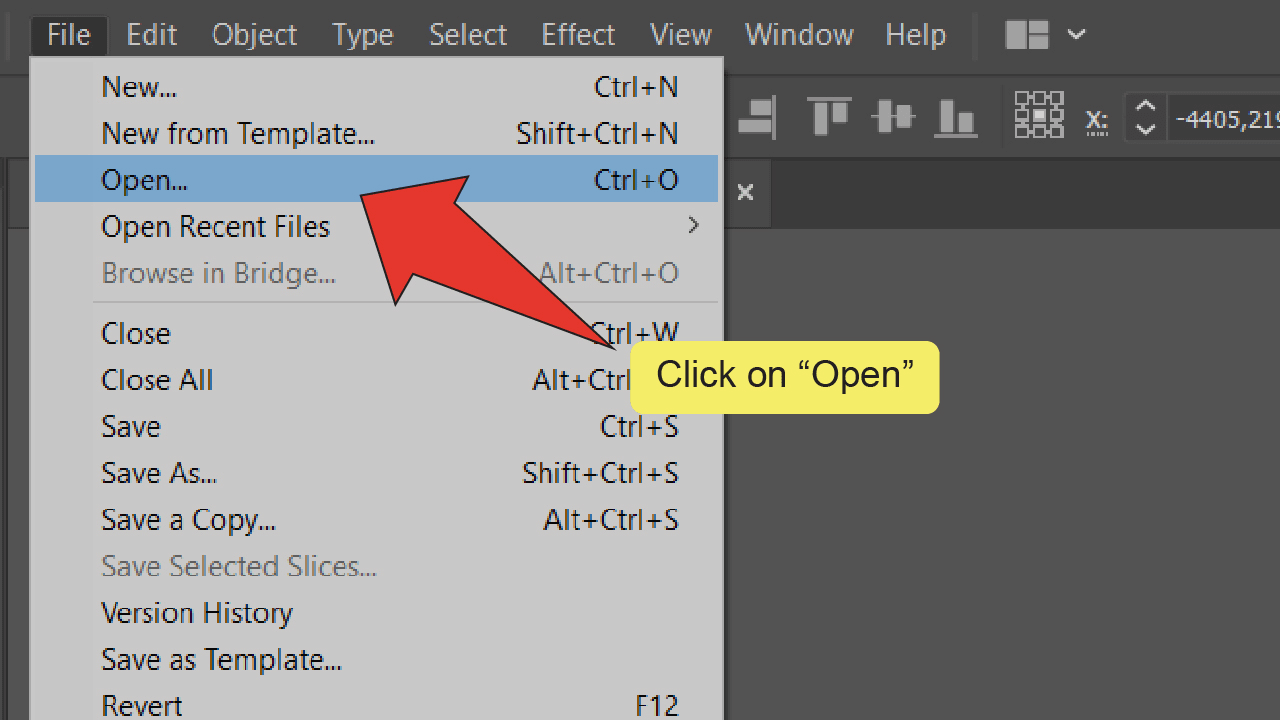
Step 1:
Open your Illustrator file. To start, open your document by double-clicking on its corresponding Illustrator file, or if Illustrator is already open, you can go to “File” on the top menu, and then “Open” and choose the file you want to open. To speed things up, you can also use the keyboard shortcut COMMAND+O (MAC) “Ctrl+O” (Windows).

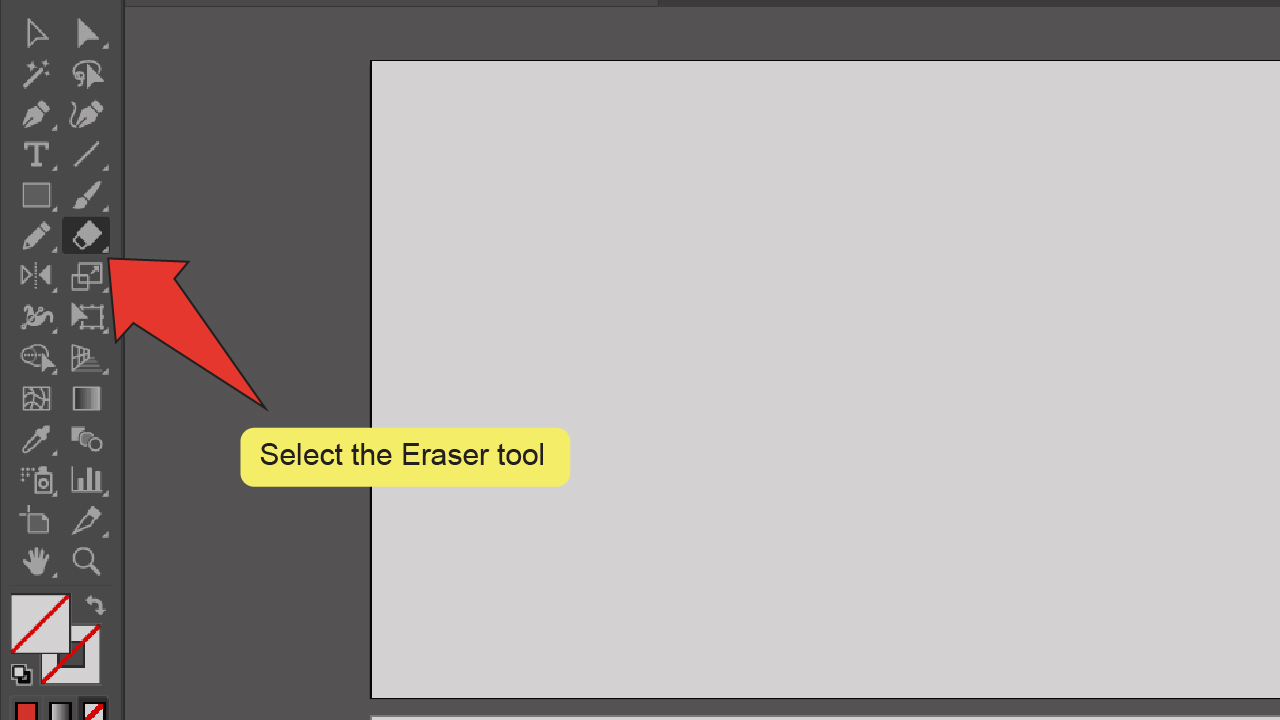
Step 2:
Find and equip the Eraser tool. Look for and select the Eraser tool, located on the toolbar on the left side of your screen. Alternatively, you can use the keyboard shortcut “Shift+E” to quick-select the tool.

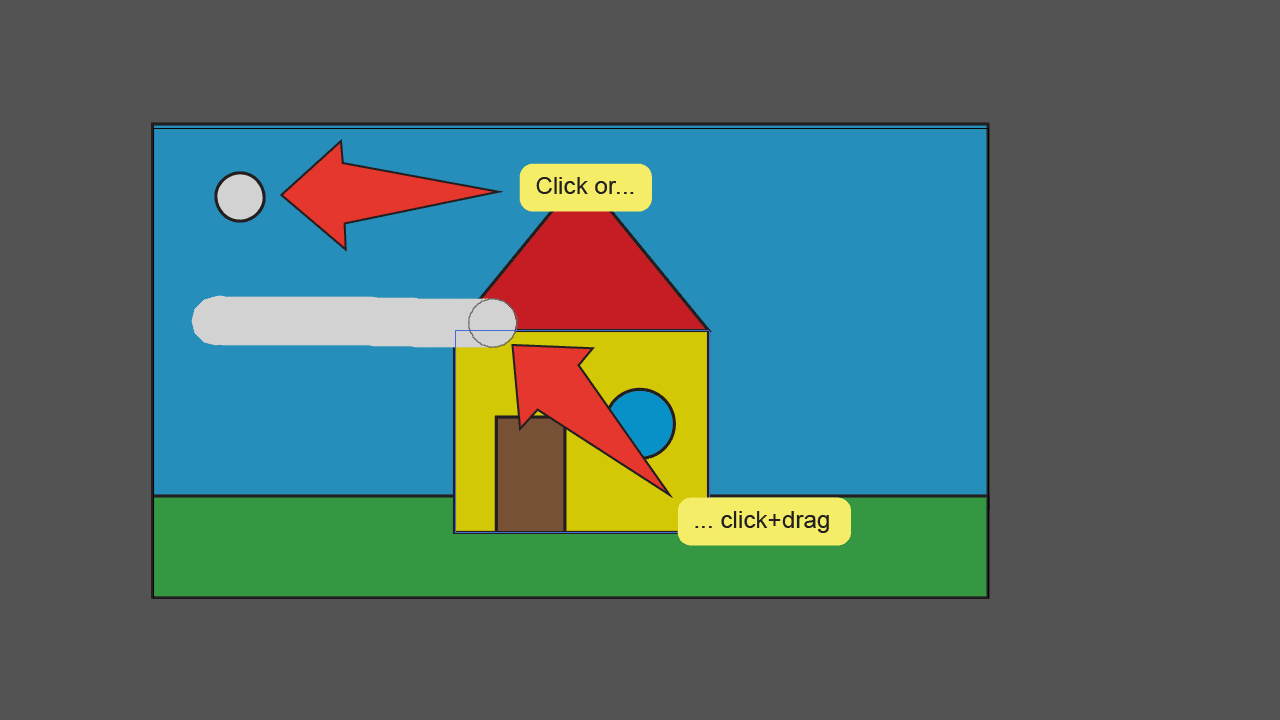
Step 3:
Use the Eraser. To use the Eraser tool, simply position your cursor over the part of your image or object you want to erase and click. To erase a larger part of your image, click and drag your cursor.


Hey guys! It’s me, Marcel, aka Maschi. On MaschiTuts, it’s all about tutorials! No matter the topic of the article, the goal always remains the same: Providing you guys with the most in-depth and helpful tutorials!

