

Mistakes are an inevitable part of the creative process.
That being said, having the right tool to erase them is crucial; you must know this tool like the back of your hand.
Illustrator includes a fully customizable “Eraser Tool” that can easily erase portions of your vector graphics.
By enlarging the eraser size, you can quickly erase large areas of artwork with a single swipe, and if you know all the shortcuts by heart, this would save you a lot of time on your work routine and make your life easier!
How to Make the Size of the Eraser Bigger in Illustrator
To make the size of the Eraser bigger in Illustrator, open the “Eraser Tool Options” by double-clicking the “Eraser Tool” icon on the toolbar. To enlarge, drag the handle to the right in the “Size” section. You can also use the right square bracket key (]) as a shortcut to do so.
Remember that when you’re already in the “Eraser Tool” settings, you can also define the roundness and angle of the eraser brush, which can also affect the size and performance of the eraser.
Those options are handy when you need to be more specific, and you can certainly experiment with some of them to find an alternative that works for you.
Step 1:
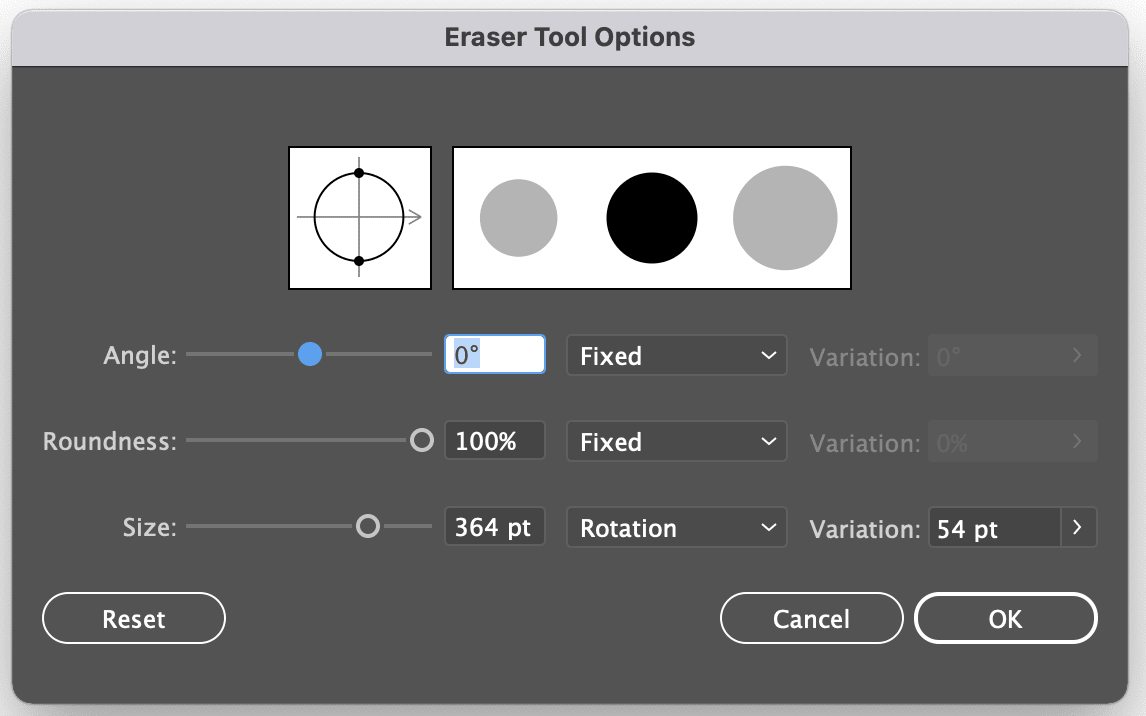
Open the “Eraser Tool Options” panel.
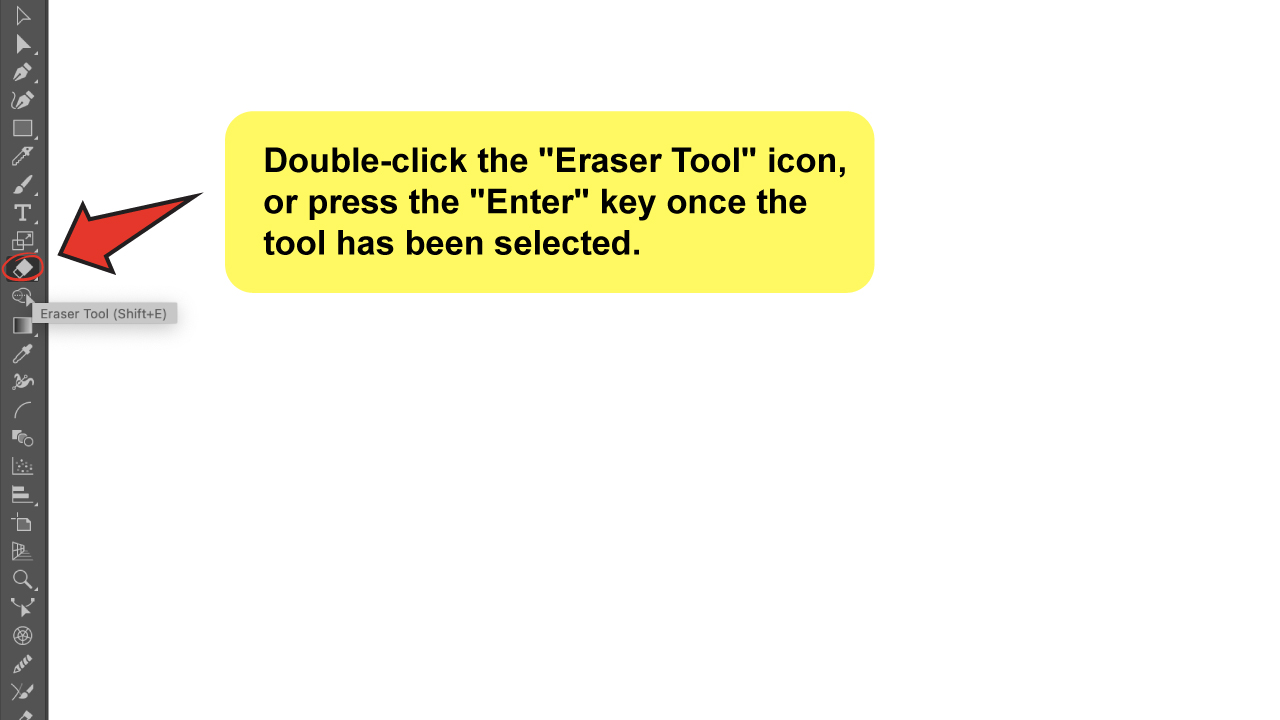
Assuming you are already using the tool and you know how to locate it. You will need to open the “Eraser Tool Options.” There are two ways to open them.
So, feel free to choose the one you feel more comfortable with, as it will lead you to the same result.
The first way is to double-click on the “Eraser Tool” icon on the toolbar, and the second is to press the “Enter” key after the tool has already been selected.
Once there, you can change a few settings, including the size of the eraser.

Step 2:


Changing the size of the “Eraser Tool”.

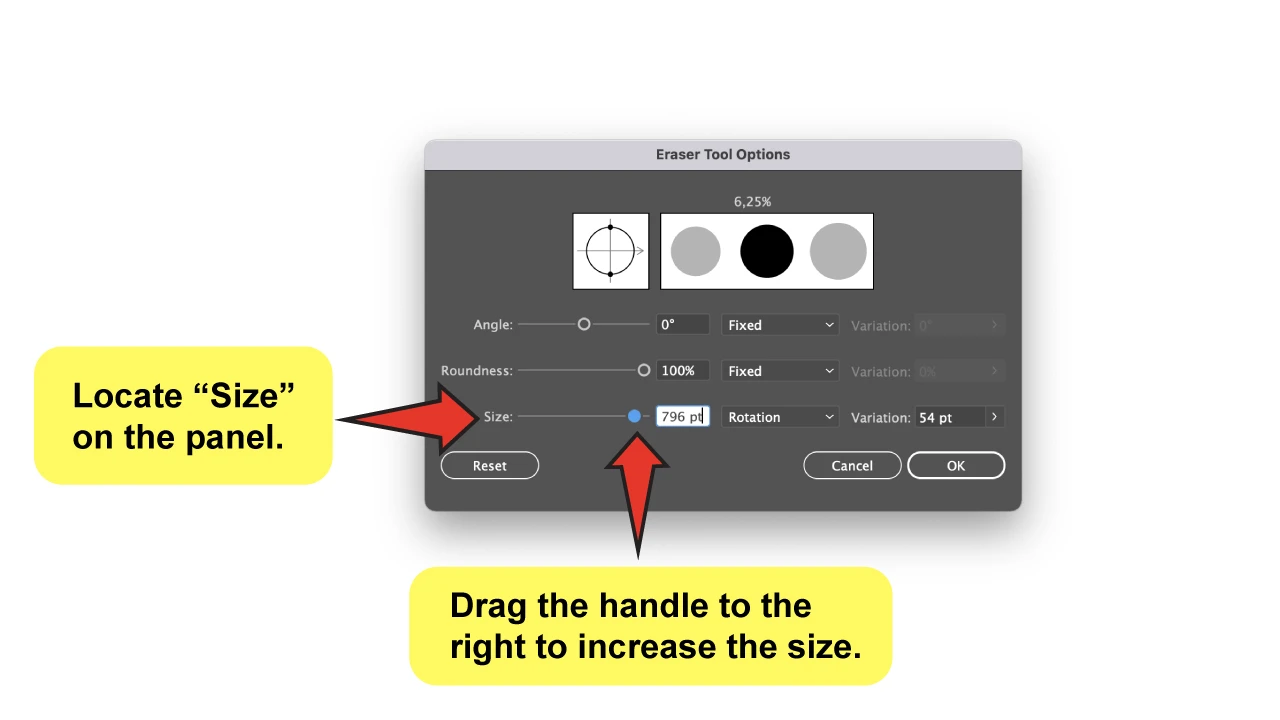
Now that you’ve opened the “Eraser Tool Options” panel, You’ll see the “Size” on the third option.
Simply move the handle to the right to enlarge or to the left to decrease and press the “Ok” button to apply.
If you enjoy shortcuts, there is also a way to make things even easier! Use the right square bracket key (]) to enlarge the “Eraser Tool” size and the left square bracket ([) key to decrease.
You will notice that there are a few options available on the drop-down menu next to the size field.
Those are mostly settings you can change and apply when working with a pen tablet.
Normally, these variables are set to “Fixed” by default, implying a constant angle, roundness, or size. “Random”, on the other hand, indicates a variable angle, roundness, or size.
This is all! It’s super quick and simple.
Frequently Asked Questions About How to Make the Size of the Eraser Bigger in Illustrator
How do I change the “Roundness” of the “Eraser Tool” in Illustrator?
On the “Eraser Tool Options”, “Roundness” is located above “Size.” Drag the handle to the left to ovalize the eraser, or to the right to round it.
How do I change the “Angle” of the “Eraser Tool” in Illustrator?
Locate “Angle” on the “Eraser Tool Options“, and drag the handle to the right to increase the value or to the left to decrease it.
What is the keyboard shortcut for Illustrator’s “Eraser Tool”?
The keyboard shortcut is “Shift + E”.
Is it possible to delete text using Illustrator’s “Eraser Tool”?
This tool does not work on text. To erase parts of the text, first, turn the text into an outline, then use the eraser tool.


Hey guys! It’s me, Marcel, aka Maschi. On MaschiTuts, it’s all about tutorials! No matter the topic of the article, the goal always remains the same: Providing you guys with the most in-depth and helpful tutorials!

