

The color of bullet points can help your content stand out better. It can also make it an eyesore if the colors clash.
On some of the biggest websites online, lists are prominent but rarely are they the generic round black circles that show as standard when you insert a bullet list in WordPress.
Edits need to be done to style your bullets to make them appear how you would like them to. They don’t have to be coded directly from WordPress either.
You can use Unicode characters to insert symbols, replace bullet points with images, or if your existing style is fine, go ahead and add a color styling element to only change the color.
Covered below are the steps to take, the codes to use, and the instructions to edit your WP theme stylesheet or CSS customizer to make your bullets any color, any shape, any character, or any image you want.
How to Change the Color of Bullet Points in WordPress
The easiest method is to edit the theme customizer with CSS. Alternatively, the WP Style.css can be changed to change the bullet point color. Bullet lists are controlled by “li” elements. These can have colors, and the styles can be changed or removed to be replaced with images or Unicode chars.
Changing the colors of bullet points by editing the Theme Stylesheet (Style.css)
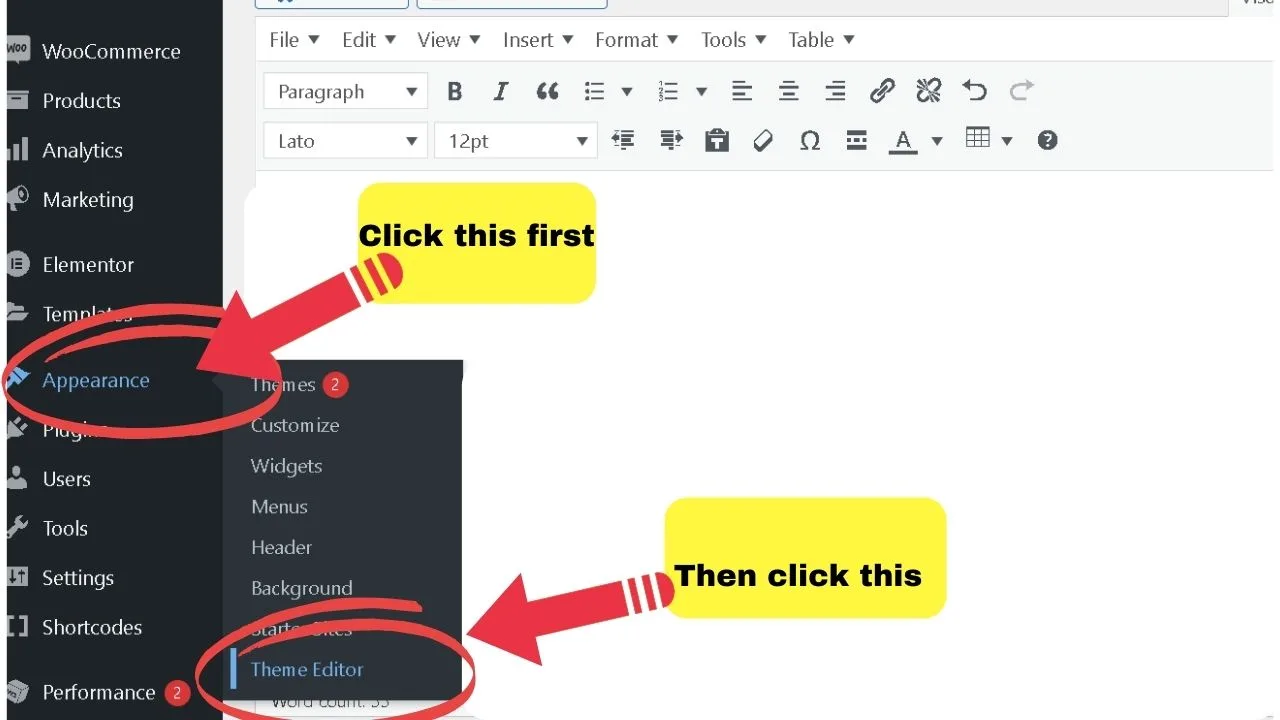
To find your theme stylesheet, scroll the left sidebar menu, hover over the “appearance” menu item, and select the “theme editor” option.

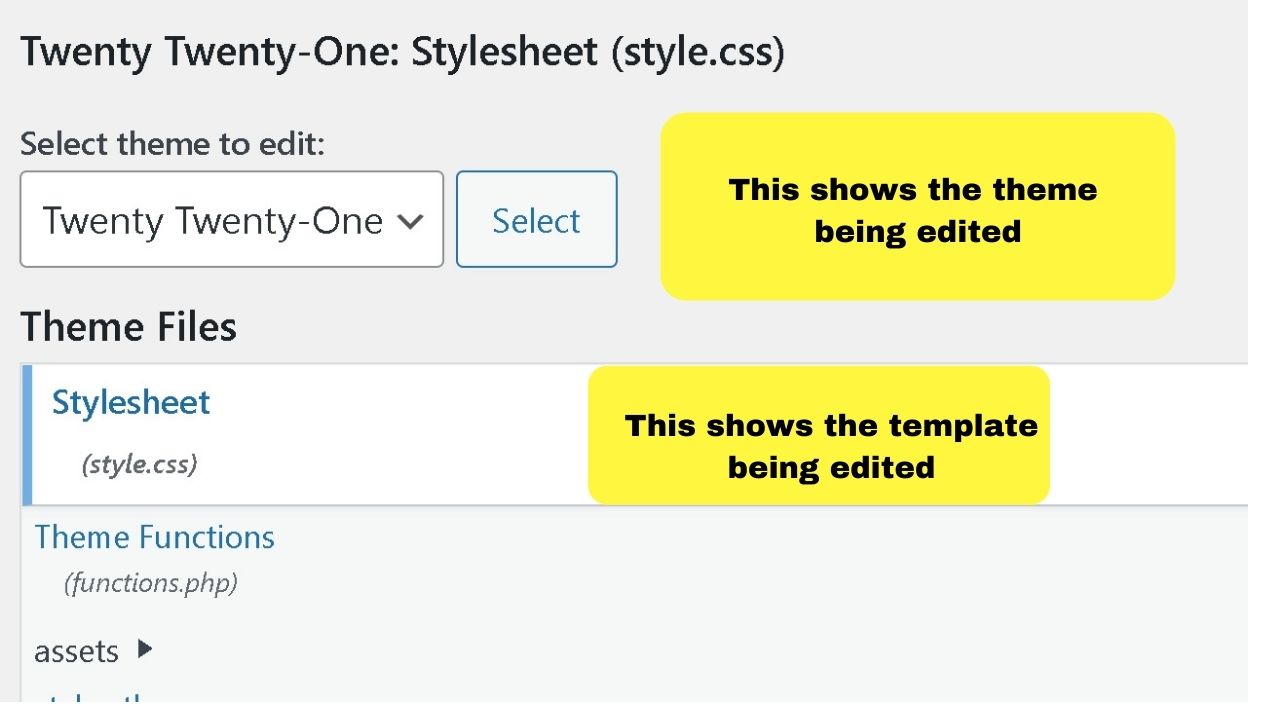
How to locate the WordPress style.css file
The style.css file is the stylesheet for the WordPress theme. If you’re using a framework theme such as Genesis or Divi, there’s likely to be a child theme.
Make your edits to the child theme and not a parent theme, which consists of all the coding in a framework.

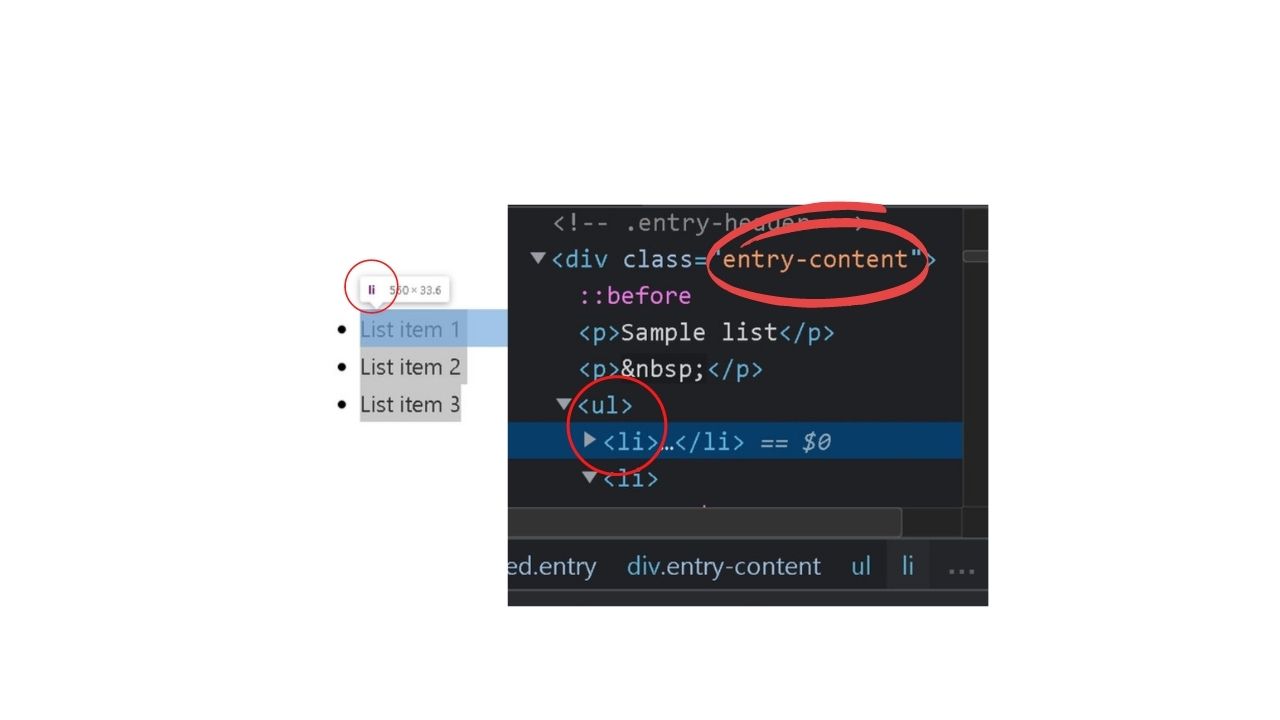
Identify the class name to edit
On each WordPress template, the class name used to control bullet styling differs. The majority use the .entry-content ul li CSS string, others name their list items with markers.
To find the class name, hover over a bullet list, right-click and select inspect. A new screen will open showing the coding behind the content.
The name that shows in the inspector is the element in the stylesheet to edit to change the bullet color or overall styling.
You will need the name of the div element for either updating the stylesheet or editing the WP Customizer. The only difference to editing is where you put the code.

Edit the elements to style your WordPress bullet points
In the vast majority of stylesheets for WordPress templates, the bullets are added in a section specifically for “elements”.
This controls the fonts, list item styles, text color, blockquote styles, and the size, font, and weight of headings.


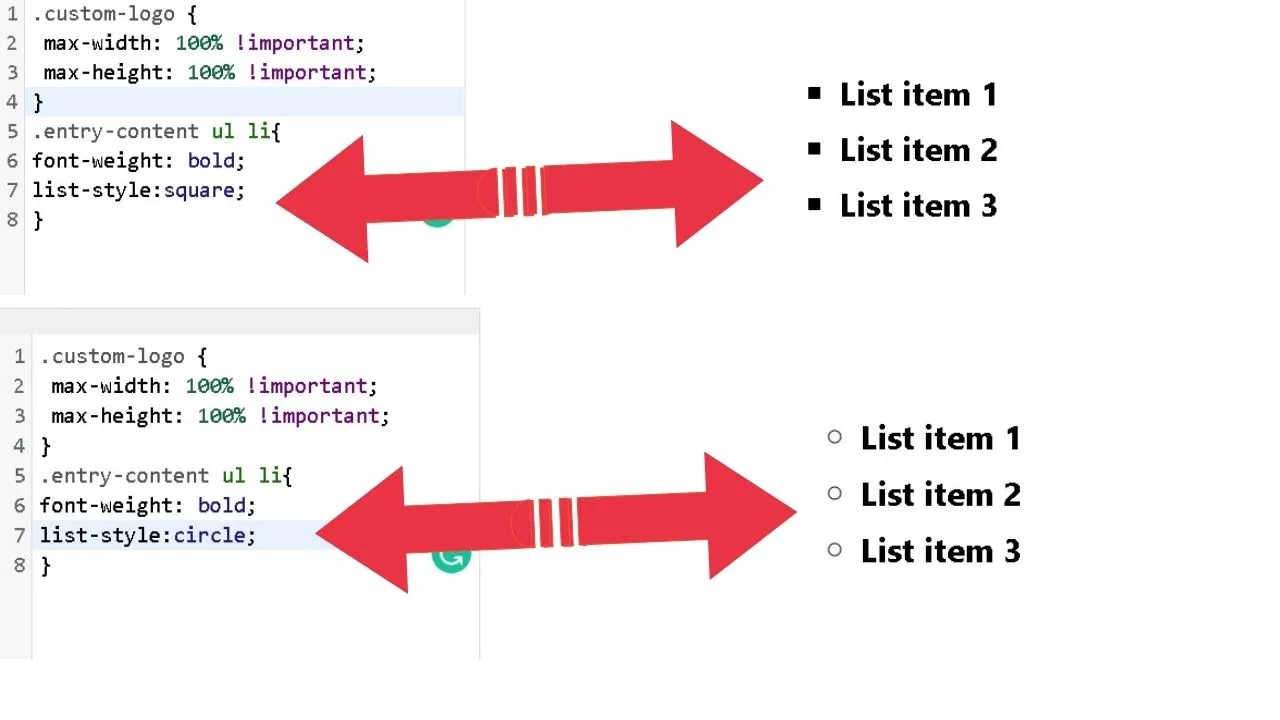
The bullets are list items and those are inserted as “ordered lists” abbreviated in the codes as “ol”, and “unordered lists”, abbreviated as “ul”. Ordered lists use numbers. Unordered lists use bullets. Look for the section that controls the styles of “ul”.
The exact line of code is “ul, li”, usually separated with a line break, then the styling for the bullets is added after the “li” code.

As an example, using the theme Customizer to overwrite those settings makes the bullet list and its items blue.
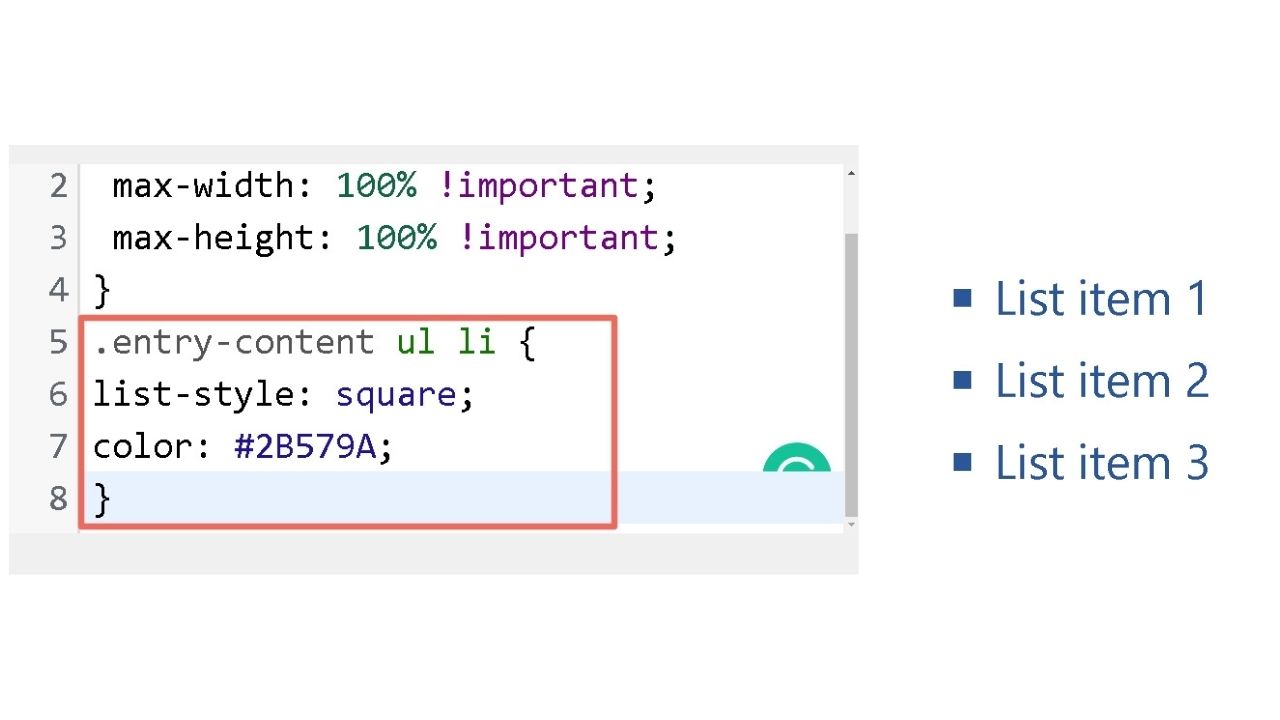
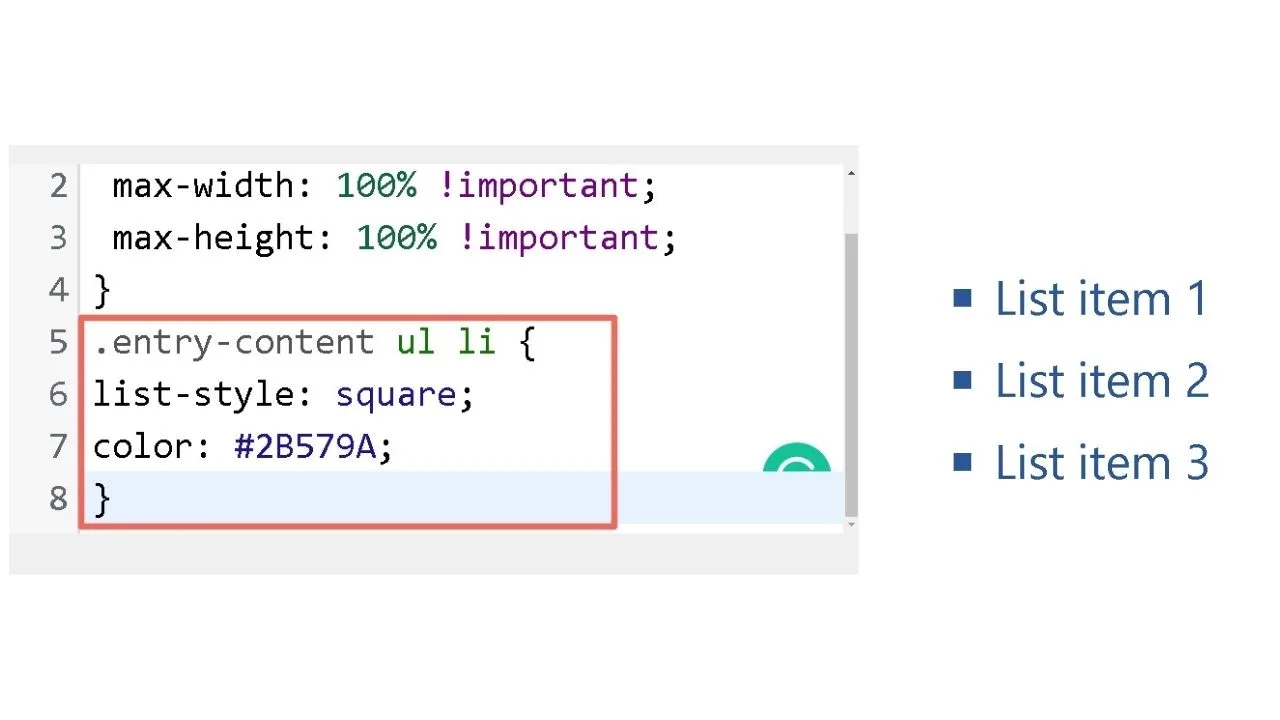
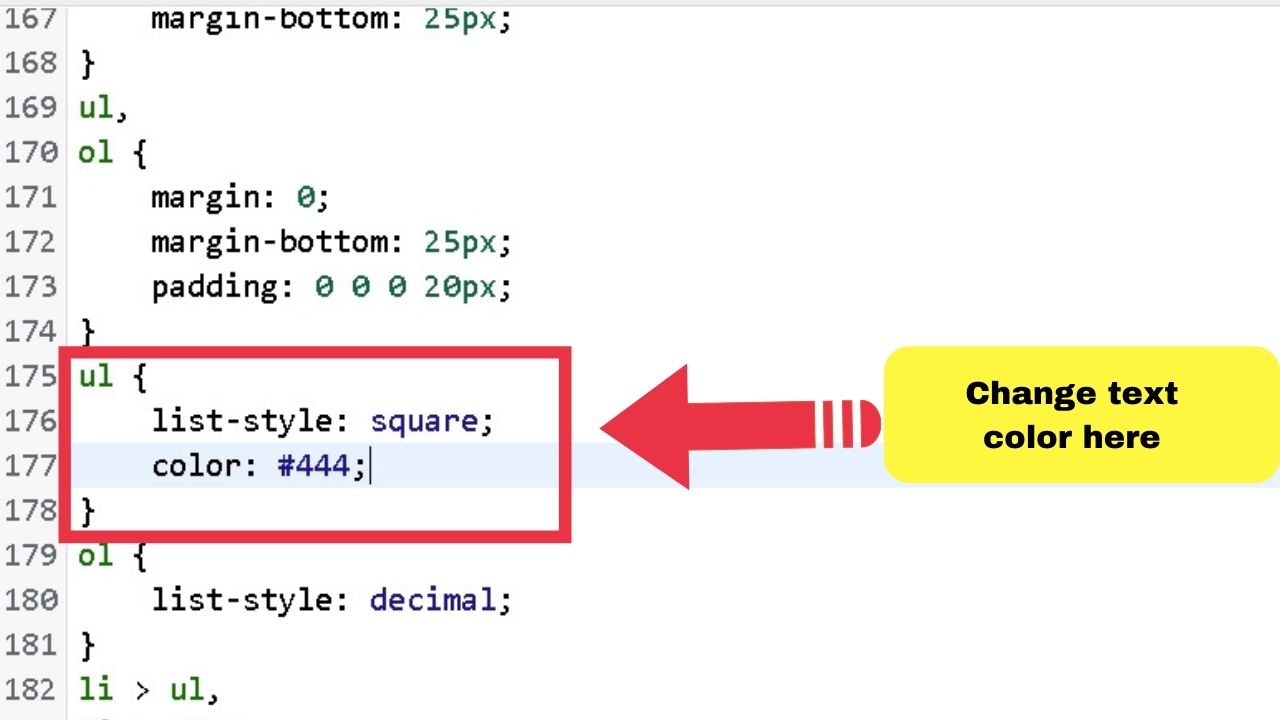
To change the color of bullet points, add the following to the CSS customizer
.entry-content ul li {
list-style: square;
color: #2E89FF;
}
*change the numbers to any hex color value. If you don’t know the hex code, search for any online color picker.
Changing the bullet color without changing the color of the text
The code above will change the bullet color and the text placed within a bullet list.
If you would rather that not happen, you can use the CSS customizer to ignore your theme styling and replace it with your own custom CSS.
Go to your appearance menu, select customize, then use the code below:
ul {list-style: none}
li::before {content: "➣"; color: blue;
display: inline-block; width: 1em;
margin-left: -1em}
The above CSS is using a Unicode character to replace the standard bullet. And since it is using “before” content, only the bullet changes color.
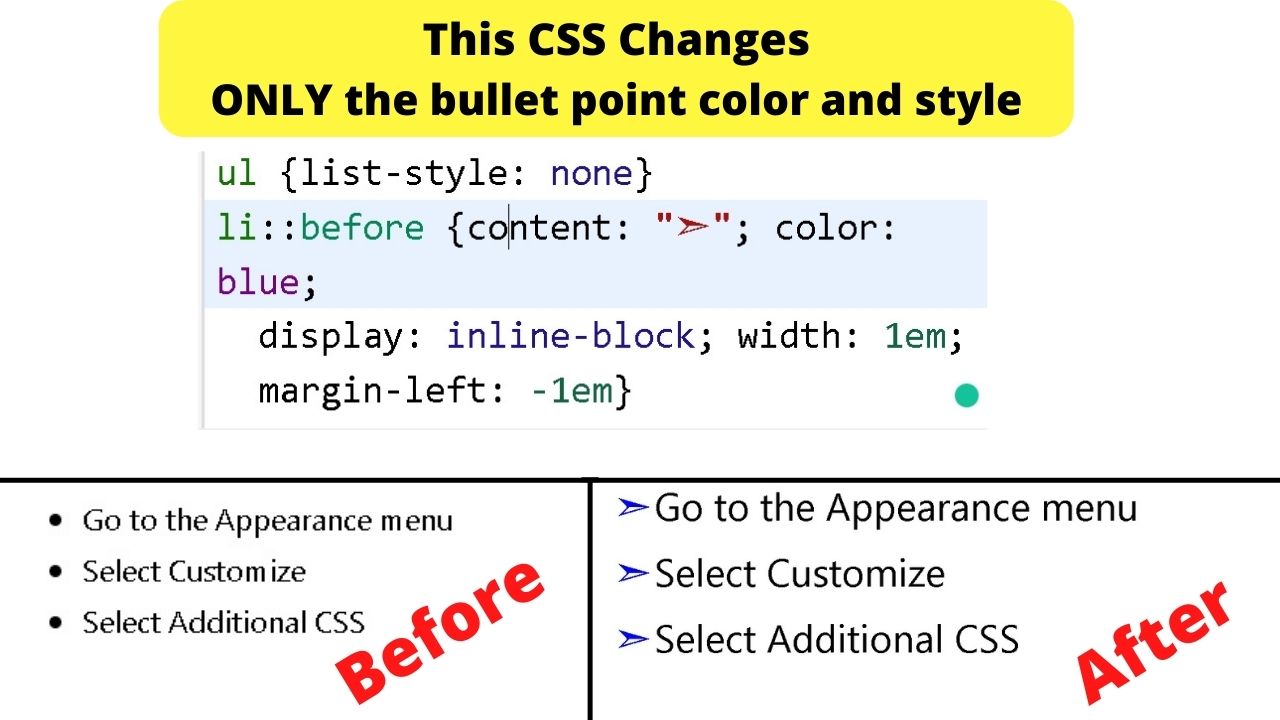
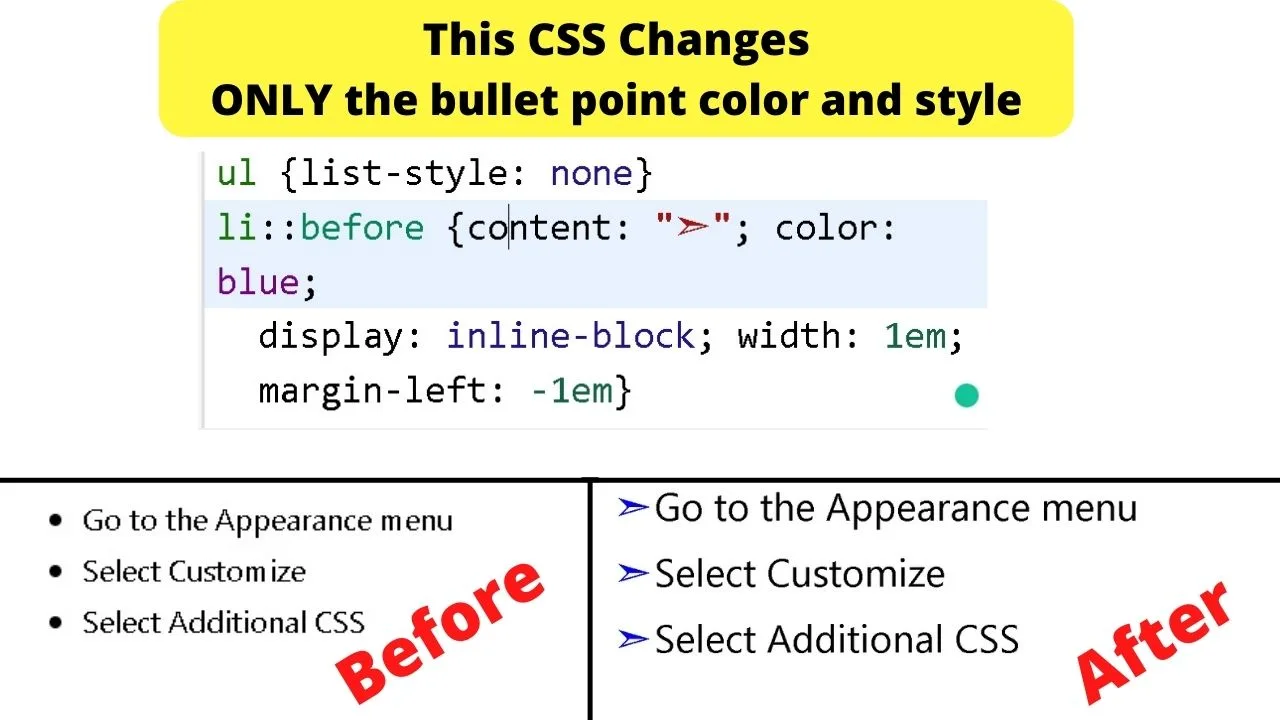
The text remains the same color and font. Only the bullet style changes.
To only use the standard bullet point in a different color, instead of a Unicode character, copy and paste a standard bullet (the circle, square, or whatever shape) in place of the Unicode character.
li::before {content: "•"; color: blue;
Styling WordPress bullet points to your preference
Numerous elements can be changed to make your bullets into the style you want.
You can change the margin padding to increase or decrease the indent, alter the font, the font weight, and the style of bullet.
List-style for bullets can be:
- Circle
- Square
- Disc
- Decimal
Numerical lists can be changed with
- Decimal-leading-zero (01. list item 1, 02. list item 2, etc.)
- Lower-roman (i. list item 1, ii., list item 2, etc.)
- Upper-roman (I. for list item 1, II, for list item 2, etc.)
- None (more on this later)
Here’s how the changes look.

 Swapping out the bullet points for images
In the styles listed above, you may be surprised to see “none” as an option. Why would you want to include a bullet list only to hide the bullets?
You’d be as well learning about how to indent text in WordPress.
The option for no styling is what to set it as when you want to display a background image instead.
The size for images to use for bullets works best at 16 px by 16 px, or 20 px by 20 px. Any larger, you will need to increase the line spacing to make the text-align properly.
To use an image as a bullet, upload it to your WordPress media library first, then copy the image URL.
In the screenshot below, the icon has been resized to 20 x 20.
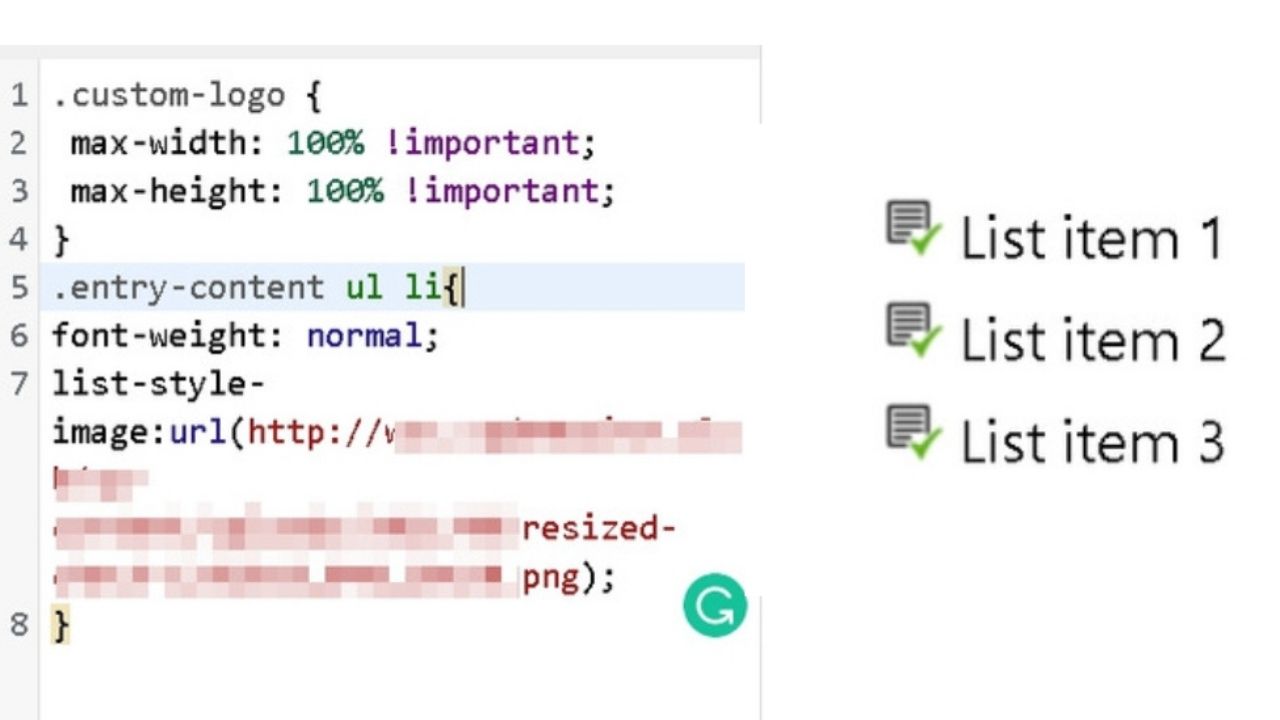

The code to use is
.entry-content ul li {
list-style-image:url(http:www.yoursite.com/wp-uploads/image-title.png);
}
Remember to resize your image first before uploading. Otherwise, you would need to add more CSS code to shrink the image and it will not be of great quality.
Ignoring Images by Using Unicode Characters
Unicode characters are like emojis. There are thousands of characters and not all are smiley faces.
There are options from love hearts that could be used to make a bulleted list of your favorite low-carb foods or crosses to make bulleted lists of things not to do.
To find them, search the web for “Unicode characters”. There are sites devoted to maintaining libraries of them. Some are like niche directories.
To use these, you do not need coding as the characters can be copied and pasted directly in the WordPress theme customizer.
The code needs to be split in two so that there is a “before” section for the image characters to show, and some spacing between the image character and the text characters.
Start by inputting the CSS to alter the bullet list:
.entry-content ul li {
list-style-type: none;
}
Then add a new section to add the character before the list items.
.entry-content ul li:before {
content: "♥";
padding-right: 10px;
color: red;
}
The result should look like this:
Depending on the type of Unicode character, some can have the color changed. In the example above, the heart character was black before the color was changed to red.
However, it will depend on the device displaying the objects. Some do not recognize Unicode the same and may display the character in its original color format.
Frequently Asked Questions related to how to change the color of bullet points in WordPress
Is it better to edit the theme or use the WP Customizer to style bullet points?
WP theme updates can discard edits you make to file templates. The theme customizer maintains changes. Keep in mind that only child themes should be edited. Not the parent theme. After each update, the stylesheet will need to be updated to restore the changes. Changes to the WP Customizer are carried over with WP updates.
Can you change the color of bullet list items and have a different text color?
When you set the color code for list items in CSS, it applies to all list items so only one color can be applied. Using the list-style-type: none; element, images can be added, then the single color would apply to the text. Doing this lets you use any color of image and a custom font color for list items.


Hey guys! It’s me, Marcel, aka Maschi. On MaschiTuts, it’s all about tutorials! No matter the topic of the article, the goal always remains the same: Providing you guys with the most in-depth and helpful tutorials!

