I’m finally done with the research paper.
But, I’ve noticed that one of the tables I added to the research paper isn’t where it’s supposed to show up.
Is there any chance that I can still move the table across the pages in Google Docs?
If you’re feeling stuck, I’ve got the perfect solution for this rather easy-to-solve problem.
How to Move a Table in Google Docs
First, you need to highlight the entire table by clicking and dragging the cursor over it. After selecting the table, click and drag the said table to its new location. But, you can also right-click on the table, select the Cut option in the dropdown menu, and paste it into its new location.
Moving Tables in Google Docs — 2 Basic Steps to Remember
As mentioned earlier, moving tables in Google Docs is such a cinch that even grade schoolers can do it with their eyes closed.
Kidding aside, the steps involved in moving tables in Google Docs aren’t rocket science.
Granting that you’ve already added or inserted the table to your document, basically, you only need to remember 2 steps to get you by with this task.
Step 1: You need to select the table. To do this step, highlight the table first.
Hold and drag the cursor over the table you plan on moving. You’ll then see the rows and columns of the table covered in a blue hue.
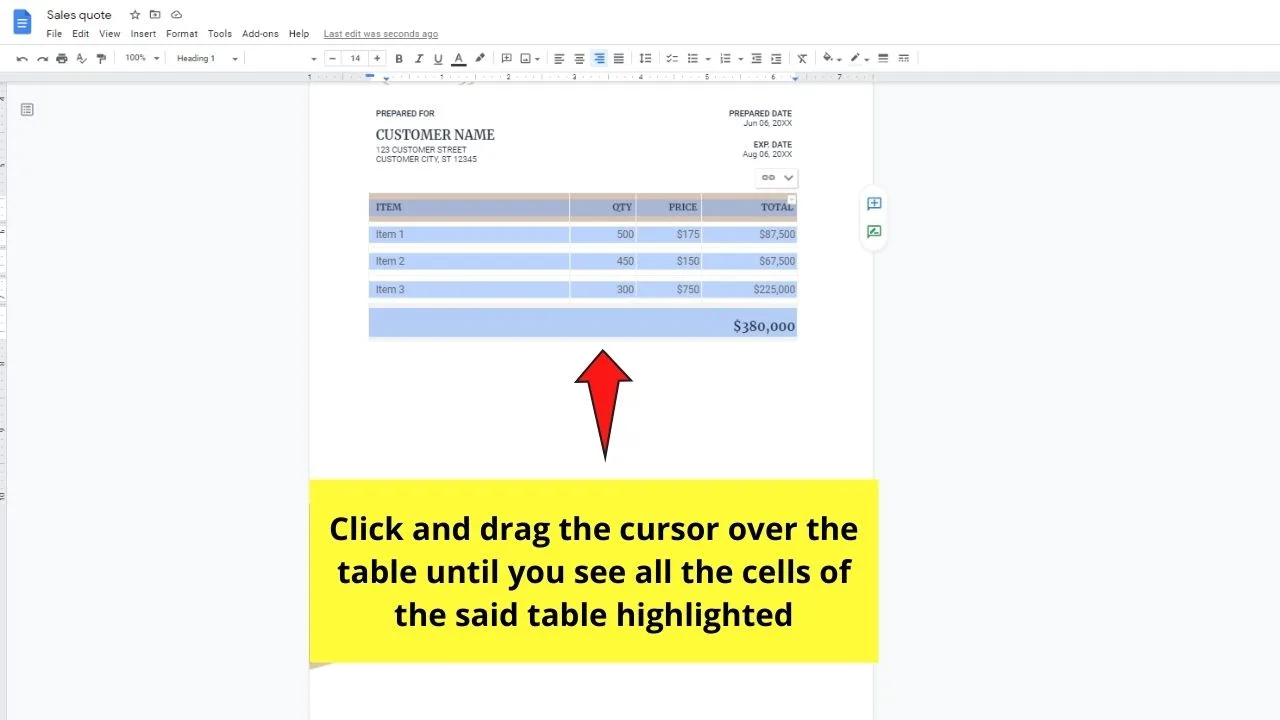
Step 2: Once you’ve highlighted the table with the previous step, simply click and drag the table to the part of the page where you want to put it.
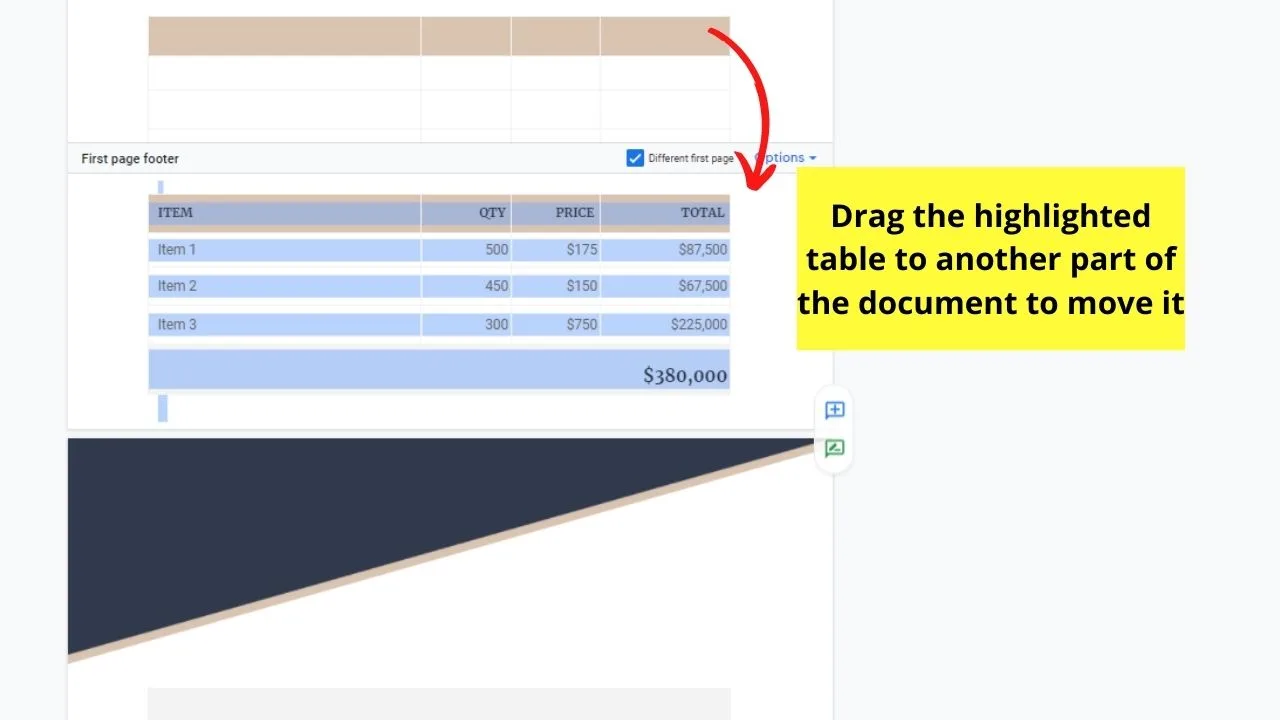
And, just like that, you’ve already moved the table you added to its new location.
There’s no need to fret over this process as there are only 2 steps that you’ll need to remember.
But, if you prefer a workaround to the basics of moving tables across your Google Docs document, here’s what you can do.
Moving Tables in Google Docs Using the Cut Function — A Nifty Workaround
Step 1: Click and drag the cursor over the table you want to move until you’ve highlighted all its rows and columns.

Step 2: Right-click on the selected table until you see a dropdown menu. Once the dropdown menu appears, choose the Cut option.
You can also activate the Cut function by pressing Ctrl/Cmd and X simultaneously on your keyboard.
The table that you previously selected will then disappear temporarily from the document.
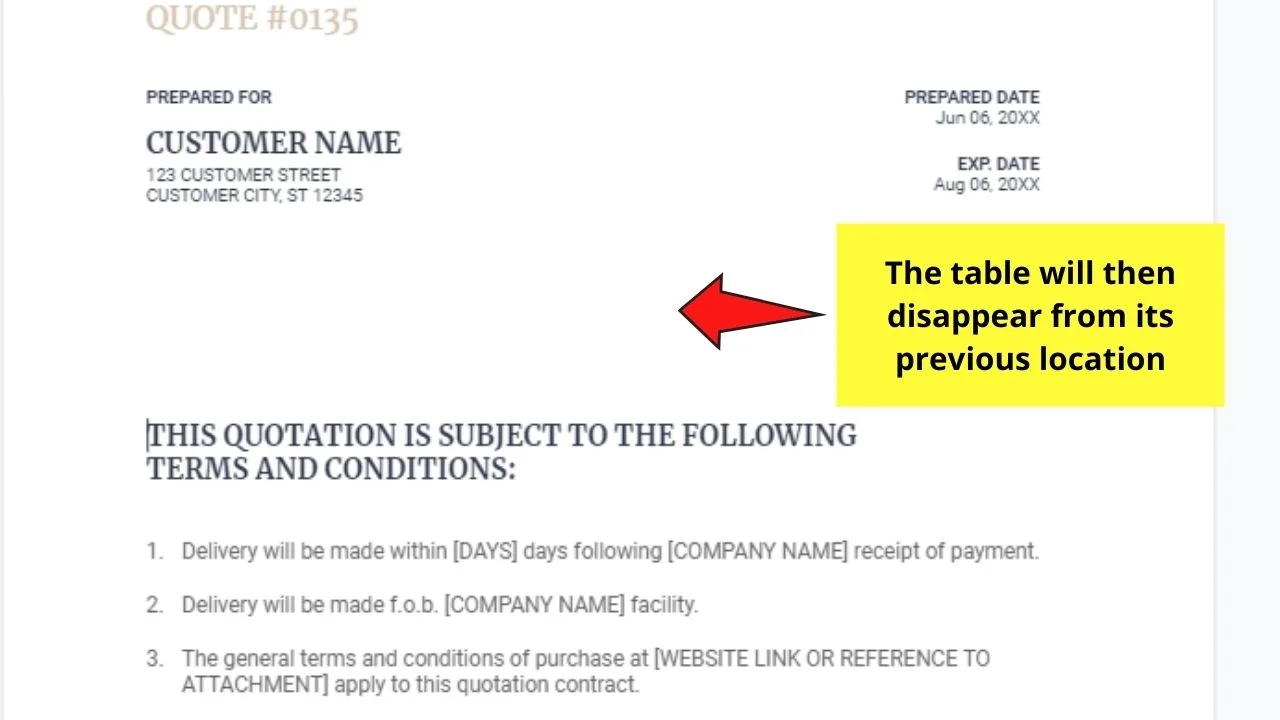
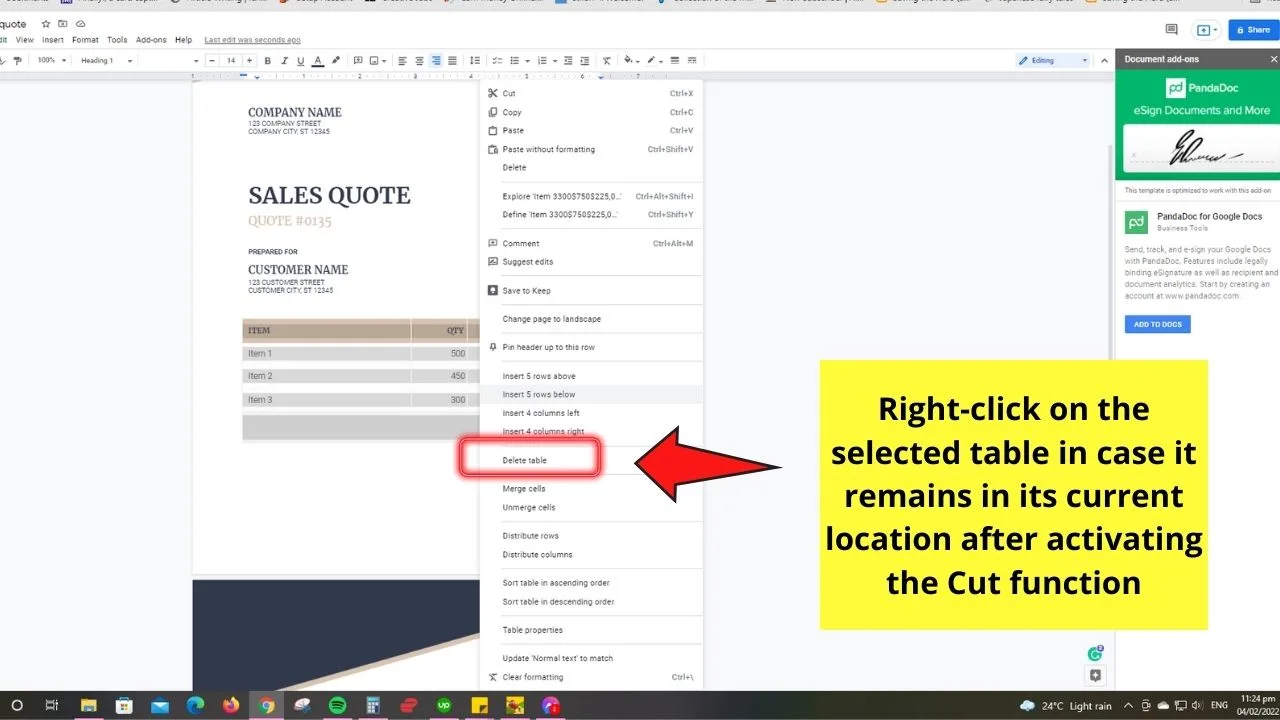
But, in case the table’s somehow pinned in place after selecting the Cut function, right-click on the said table again and choose the Delete table option.
Step 3: Scroll down the document and place the cursor on the part where you want to place the table in.
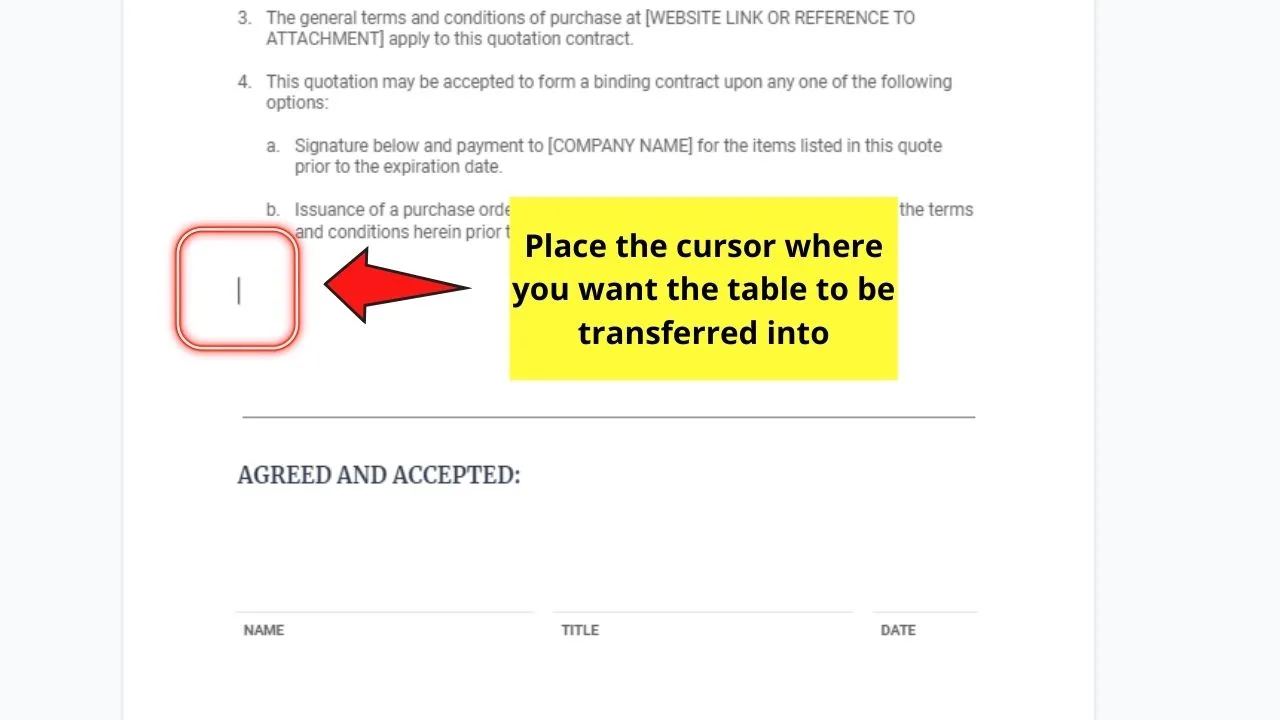
Once you see the blinking cursor on your preferred location, right-click and select Paste in the dropdown menu.

You can also activate the Paste function by pressing Ctrl/Cmd + V simultaneously on your keyboard.
After which, the table then appears on the new location you moved it into.
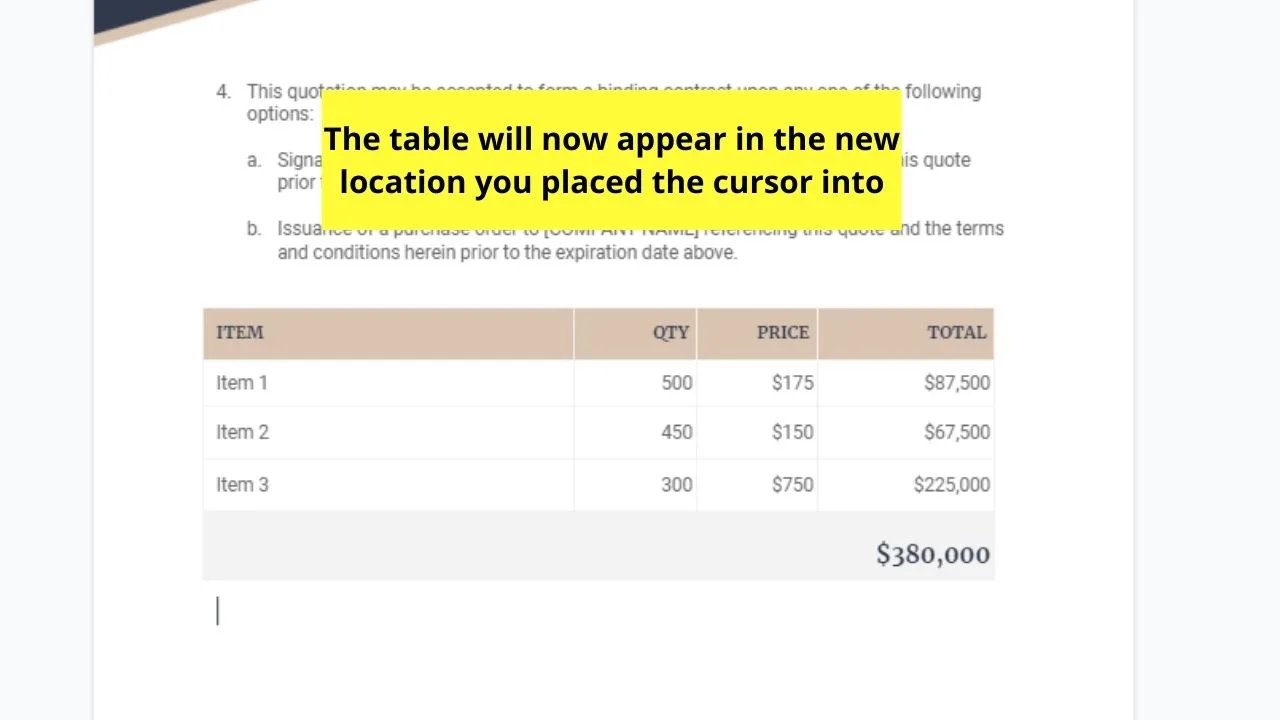
Whichever method you choose to move your tables in Google Docs, there’s nothing wrong with it. Just do what’s more efficient on your part, and you’re good to go.
So, what’re you waiting for? Start moving those tables you’ve added in Google Docs right now!
Frequently Asked Questions about How to Move a Table in Google Docs
Is it possible to move the table to another page on your Google Docs document?
If you’ve properly highlighted the table on your document, it’s possible to move the table to another page. Just ensure that you click and drag the said table until you reach the new location where you plan to put it.
Can you still resize the table even after moving it on your document in Google Docs?
You definitely can still resize the table after moving it to a new location on your document. Just select one of the borders of the said table before you click and drag it to make the table bigger or smaller. You can also adjust the cell sizes with the same method.

Hey guys! It’s me, Marcel, aka Maschi. On MaschiTuts, it’s all about tutorials! No matter the topic of the article, the goal always remains the same: Providing you guys with the most in-depth and helpful tutorials!


