Creating a star shape in Illustrator isn’t difficult.
Unless you enjoy doing things the difficult way!
We don’t, so we are using Illustrator’s “Star Tool” to make stars in Illustrator.
And believe me when I say that once you’ve mastered the tool, you will always want to use it.
Let’s dive right in!
How to Make a Star in Illustrator
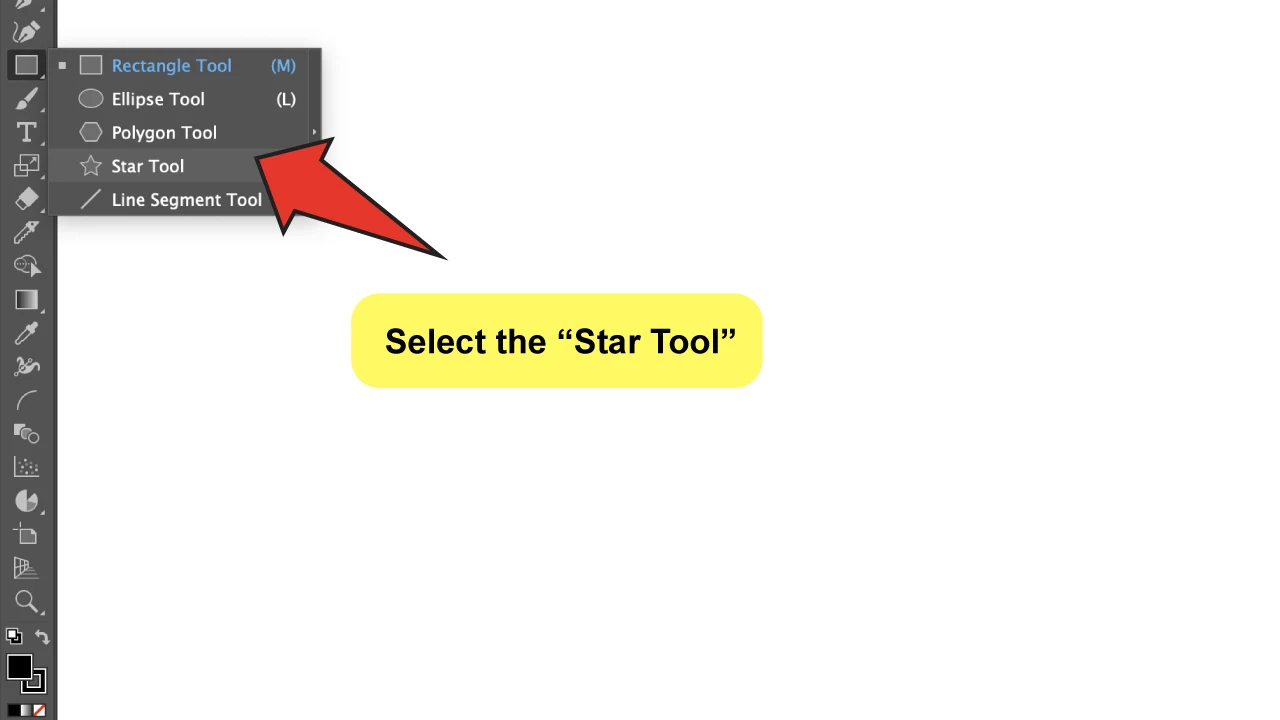
To make a star in Adobe Illustrator, go to the left toolbar and select the “Star Tool,” normally located under the “Rectangle Tool.” Click anywhere on the canvas to define your star by adjusting the radius (1 & 2) and the number of points. Click the “OK” button to confirm.
What does a star look like to you? Does it really need five points? It can be whatever you want it to be!
Think what you can make out of it. Probably, you intend to use this star as part of a simple composition, or maybe you want to duplicate it and make a pattern out of it.
If you feel adventurous, you can use it as a “Clipping Mask,” a “Symbol,” or even a 3D object.
After you finish making the star, you might want to customize it by adjusting the color, stroke, or size. Perhaps even some shadows or gradients could be added as well?
There are so many options available! The “Star Tool” is perfect for creating a star shape, and like any other shape in Illustrator, it can be edited as you want.
To make a star in Illustrator, follow these steps:
Step 1: Select the “Star Tool.”
You can usually find it under the “Rectangle Tool” sub-menu.
Click and hold, and you will see a drop-down menu where you can pick the “Star Tool” from.
You didn’t find it? Don’t be alarmed! You can edit your own toolbar and add anything you are missing by simply clicking on the “Edit Toolbar” button at the bottom of it (It has a three dots icon) and dragging any tool you want into the toolbar.

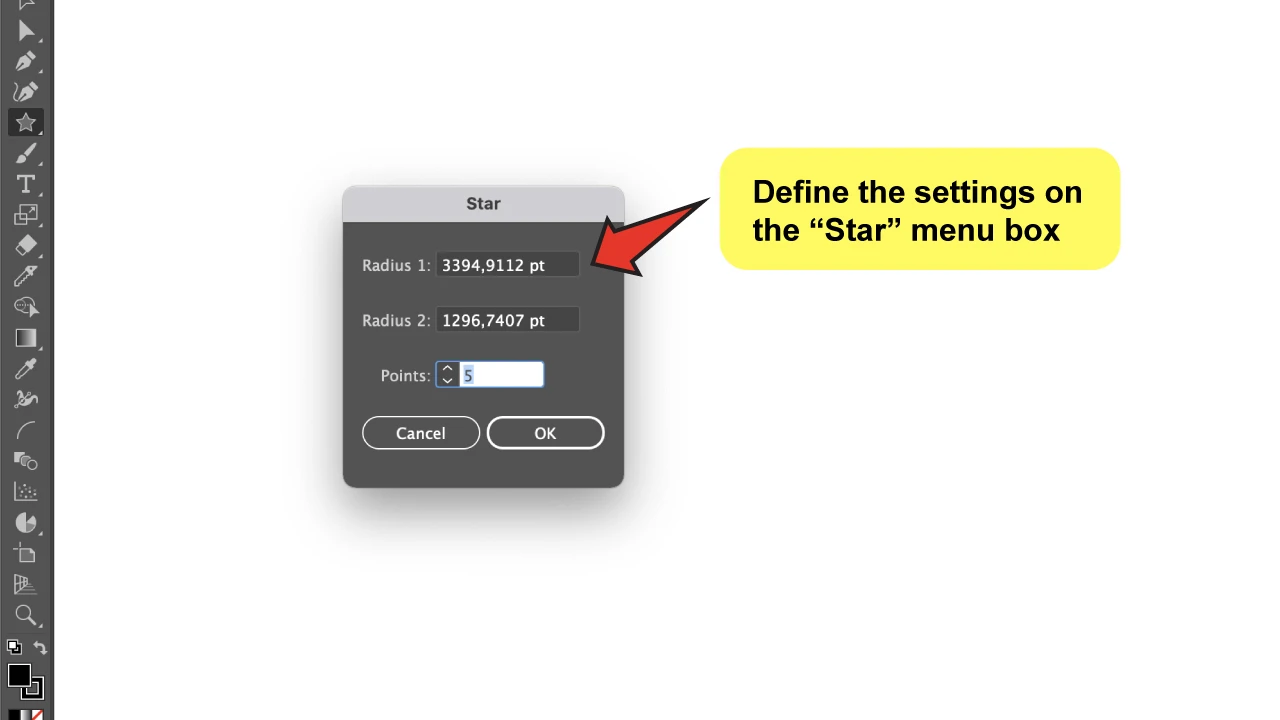
Step 2: Define the Star settings.
Click anywhere on the canvas. You’ll notice a “Star” menu box appear there, and pay attention cause here is where the crucial work is done! This is where you will enter all the values you want the star to have.
First, you need to define the Radius 1, which is the distance from the center of the star to the tip of the star points. And the Radius 2, which is the distance from the center to the inner core of your star.
Lastly, Points, which is the number of points that you will choose for your star to have.

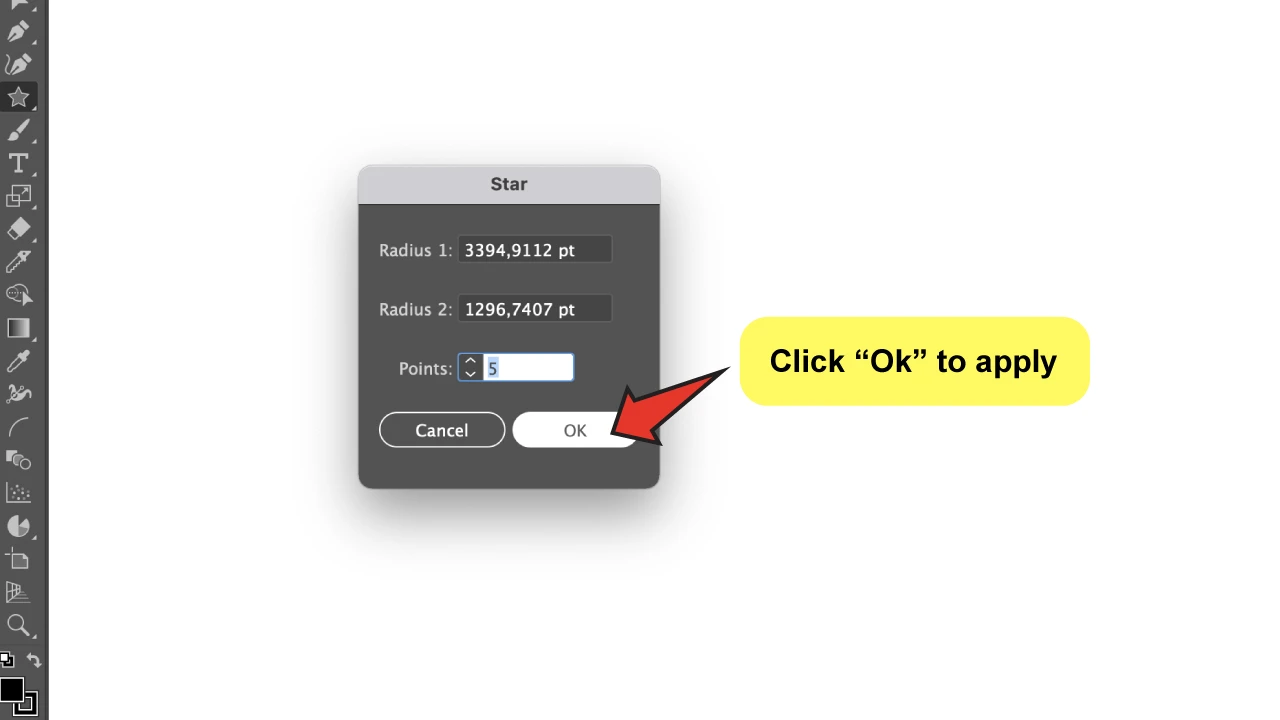
Step 3: Click “OK” to create the star.
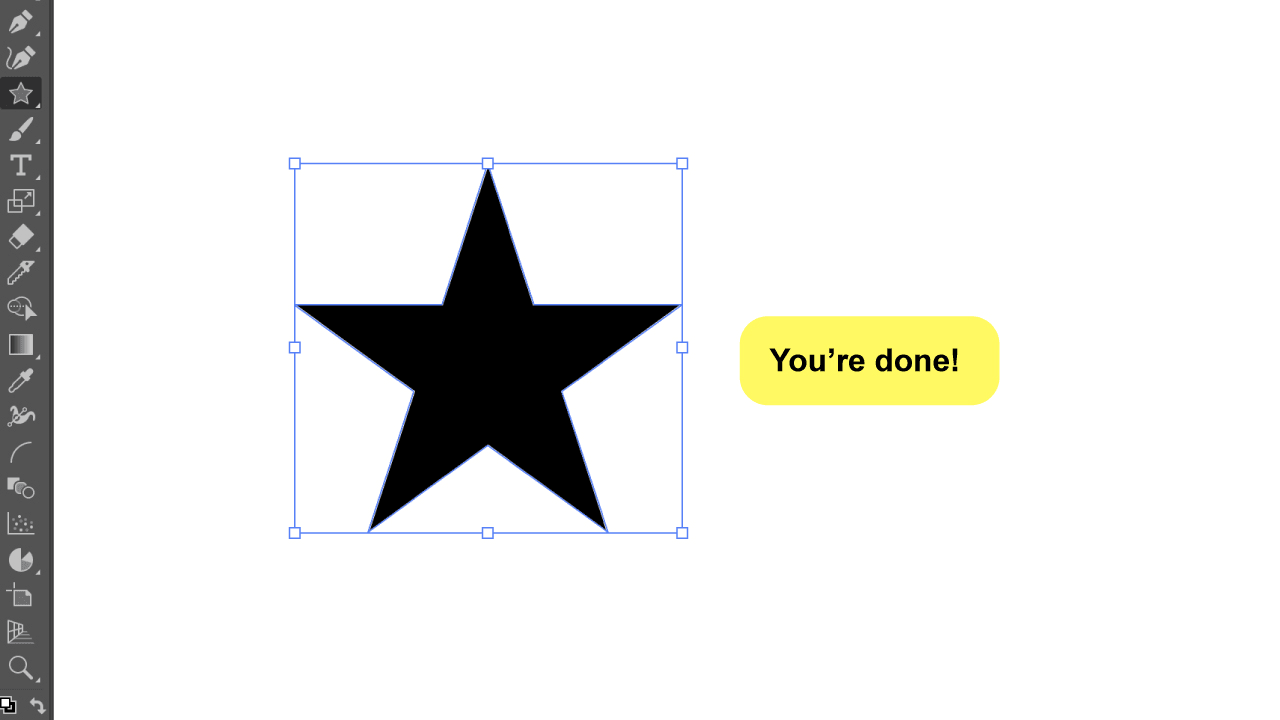
There you have it! A perfect star, shaped in the exact way you wanted it.
Remember that the next star you create will always keep the shape of the last star you created unless, of course, you change the setting again.
I’ve just shown you what I consider to be the most precise method to make a star in Illustrator. However, it’s important to know that you can also build a star by drawing it on canvas using the same tool.
This will represent a more free way to achieve the same result but without the accuracy that the other method provides.
You simply need to click and drag, and you can manage the number of points by using the arrow buttons on your computer while tracing it. “Up” means to increase, while “Down” means to reduce.
The nicest part is that you can freely adjust both radiuses by using the “Control” key (or “Command” if you’re a Mac user) while the process is going.
You can also press the “Alt” key (or “Option” if you’re a Mac user) to instantly reset to a regular star shape.
That’s helpful in case you went too far with the experiment, and the result isn’t what you expected.


Frequently Asked Questions on “How to Make Star” in Illustrator
How can I create a star with round corners in Illustrator?
Simple! When you use the “Direct Selection Tool” (A) to choose the form, you will notice the appearance of these small circular nodes inside and outside the shape. You can adjust the shape’s curvature by moving the nodes inwards and outwards.
Can I add more points to a star in Illustrator?
You can add or reduce the amount of points in your star by just using the arrow keys on your keyboard while you are drawing the “Star” manually.
How do I keep a star at a straight angle while I create it in Illustrator?
It’s really simple! While tracing your star, hit the “Alt” key (or “Command” if you’re a Mac user) and voilà! Your star will perfectly align by itself.
How can I make a copy of the star I made in Illustrator?
You can duplicate the star in the same way that you would do with any other object. Choose “Selection Tool” (V), click on the star you just made, hold and press the “Alt” key (or “Option” if you’re a Mac user), drag anywhere, and release!

Hey guys! It’s me, Marcel, aka Maschi. On MaschiTuts, it’s all about tutorials! No matter the topic of the article, the goal always remains the same: Providing you guys with the most in-depth and helpful tutorials!


