How to Find the SSID on the iPhone
- Press “Settings”
- Tap “Wi-Fi”
- Look for the name of the WiFi network with a checkmark on it
No matter the reason for finding the SSID on your iPhone, there are only 3 steps needed to see it.
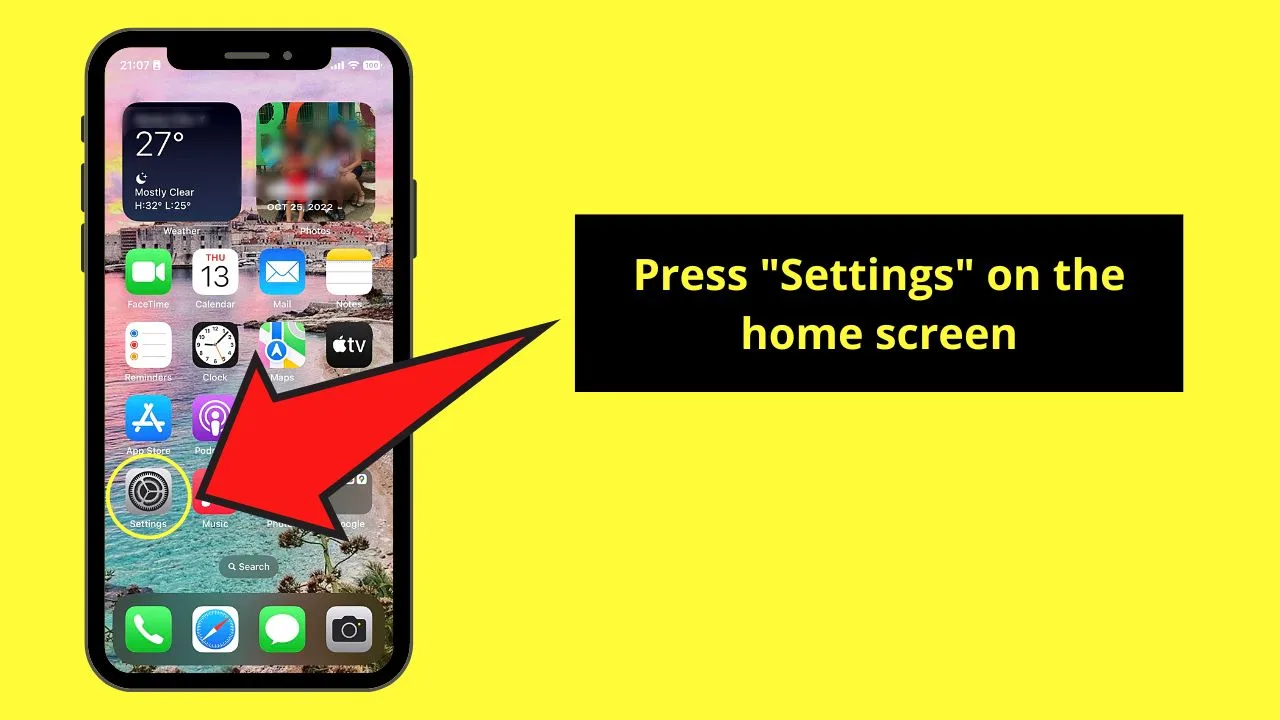
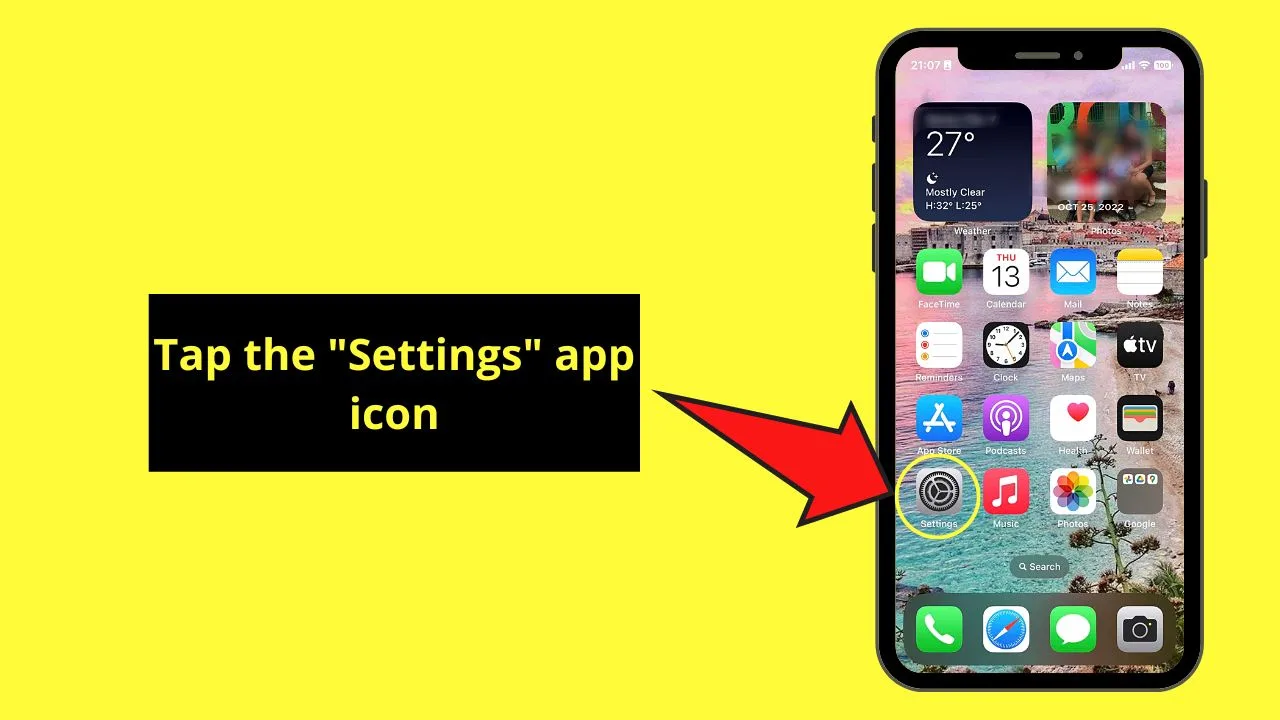
Step 1: Tap the “Settings” app icon
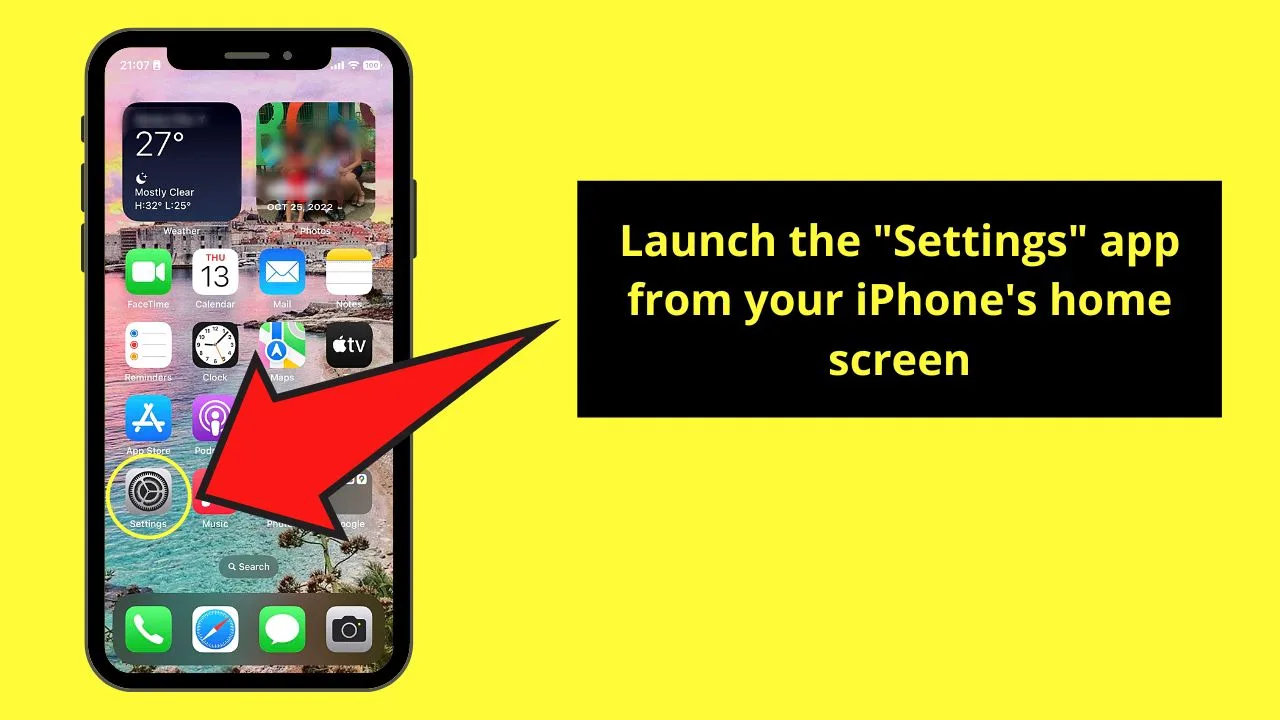
This icon appears as a gear on your iPhone’s home screen.
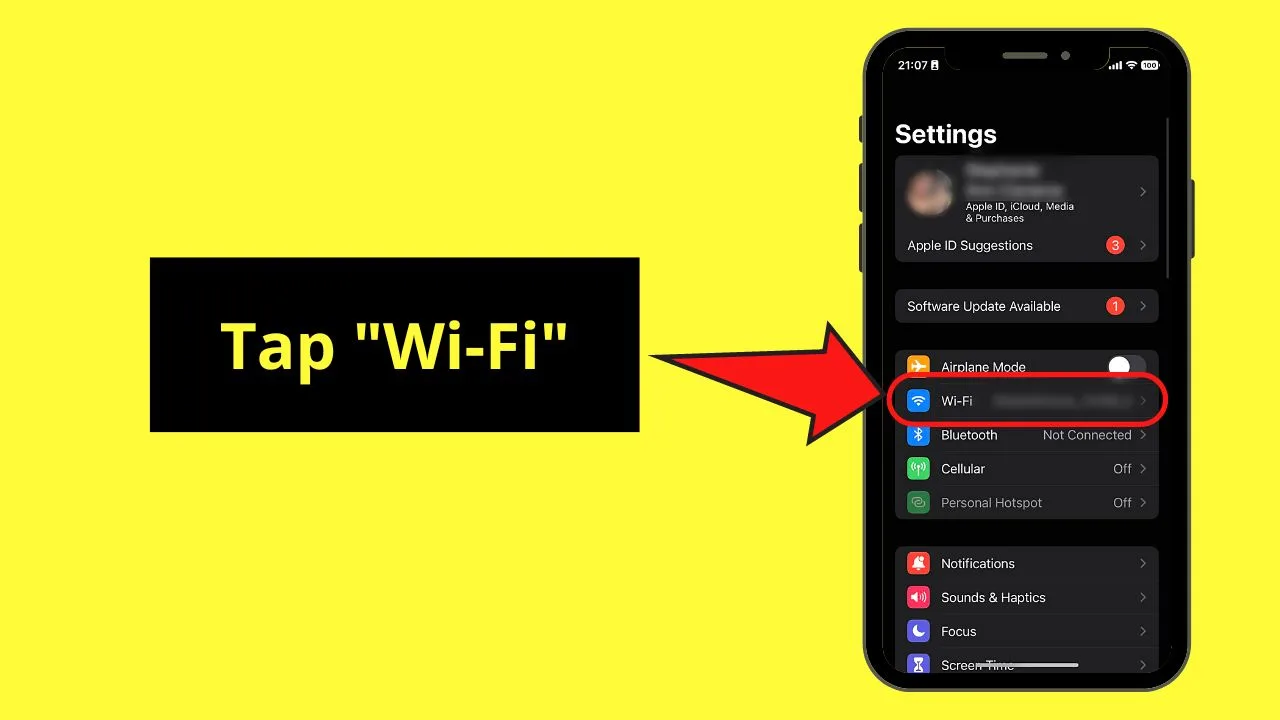
Step 2: Press “Wi-Fi”
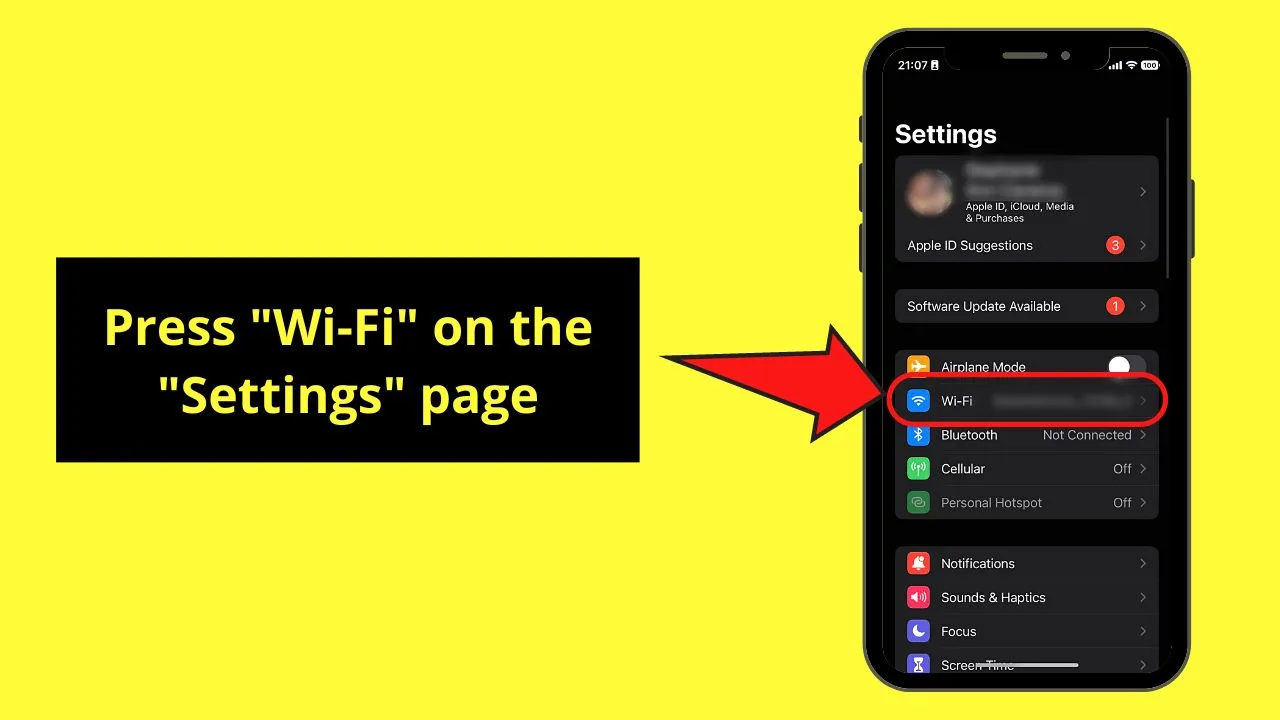
This option appears between “Airplane Mode” and “Bluetooth.”
If you’re already connected to a network, you’ll already see the SSID of the WiFi network.
Step 3: Look for the name of the WiFi network with a checkmark on it
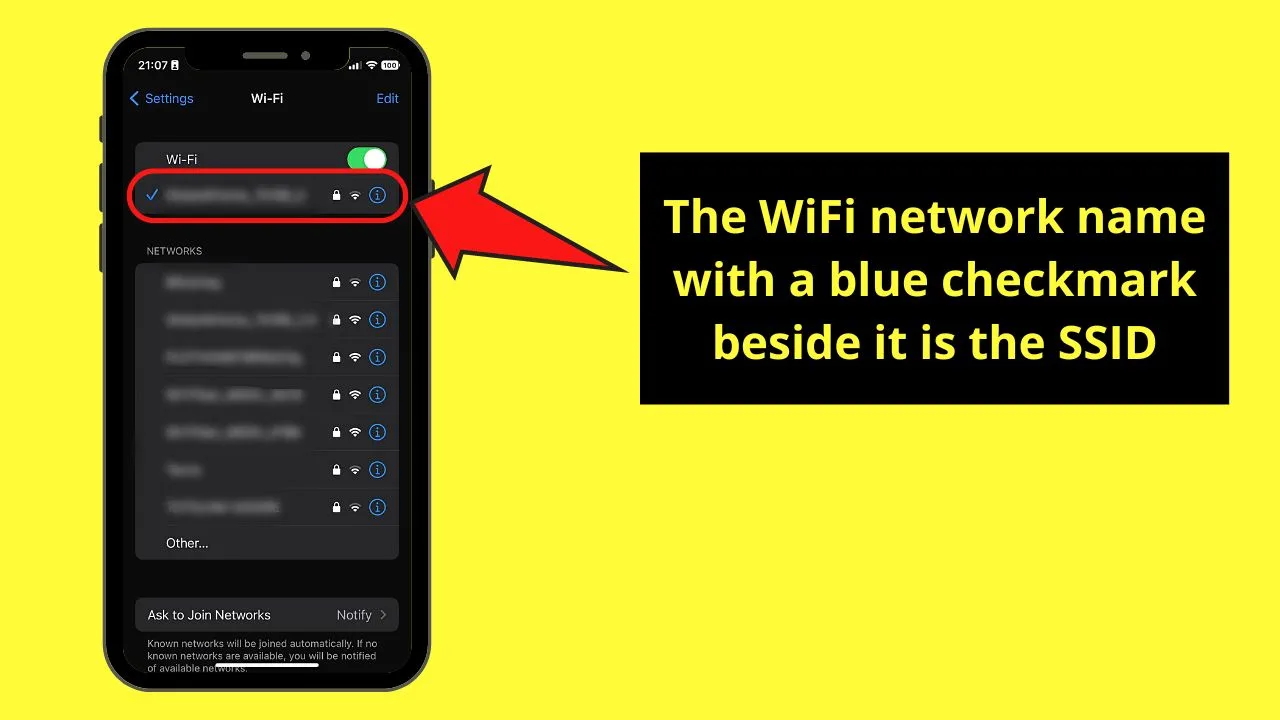
The WiFi network name that has a checkmark beside it is the name is its SSID. You can then tap the “Info” button beside it to see other details related to it.
If you somehow can’t connect to the WiFi, you can press “Forget this Network” and manually set up the connection. This includes typing the password again.
Why Can’t I Find the WiFi’s SSID on the iPhone?
More often than not, tapping the “Wi-Fi” button on your iPhone’s control center automatically connects it to your preferred (or default) network.
In case you can’t see the WiFi’s SSID, its broadcast may have been disabled. It’s also possible that the WiFi router is not yet powered on or something is obstructing the s signal.
If that’s the case, manually add the WiFi network’s SSID to the list.
Step 1: Press “Settings”
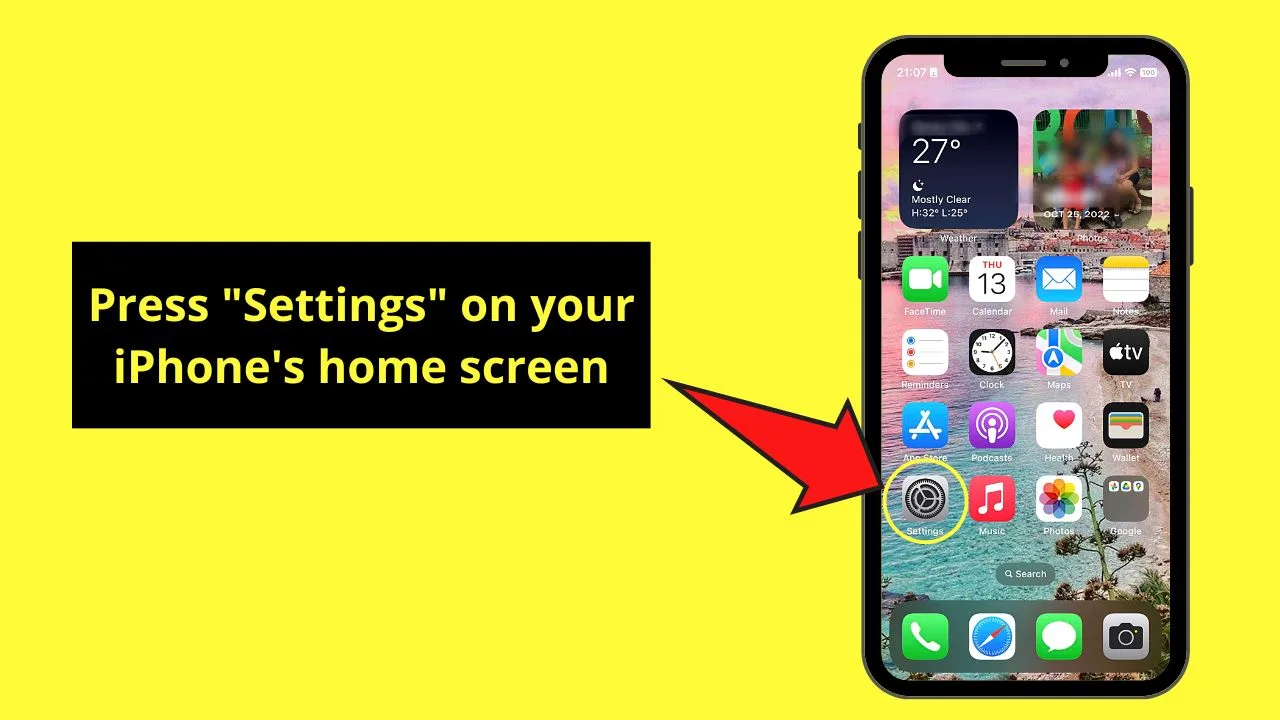
Step 2: Choose “Wi-Fi”
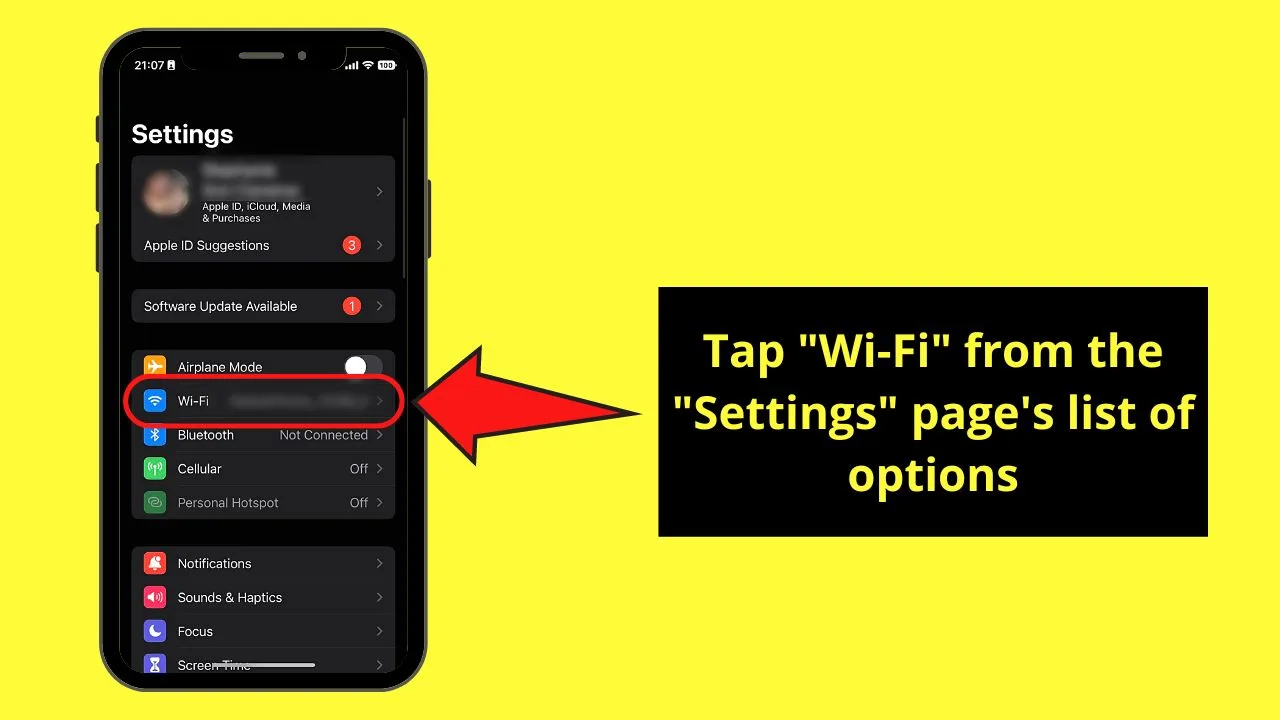
Step 3: Tap “Other”
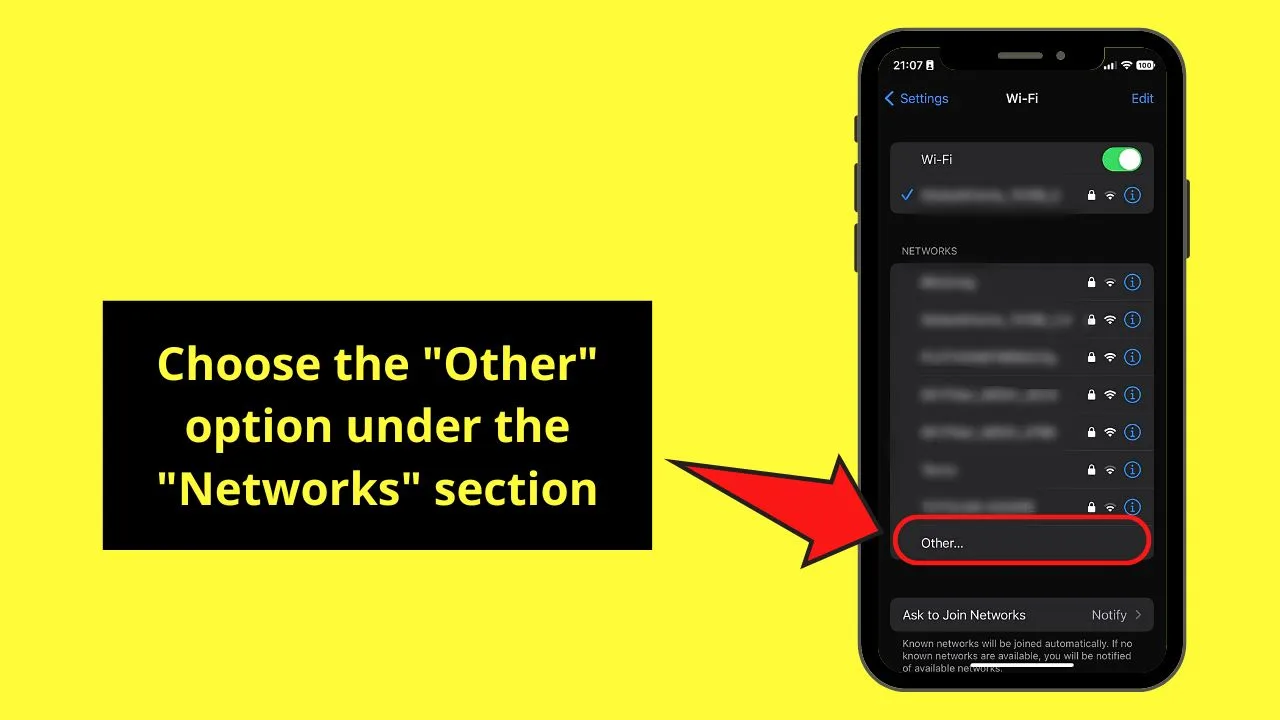
You’ll find this as the last option in the “Networks” section.
Step 4: Type the WiFi’s SSID and other details needed
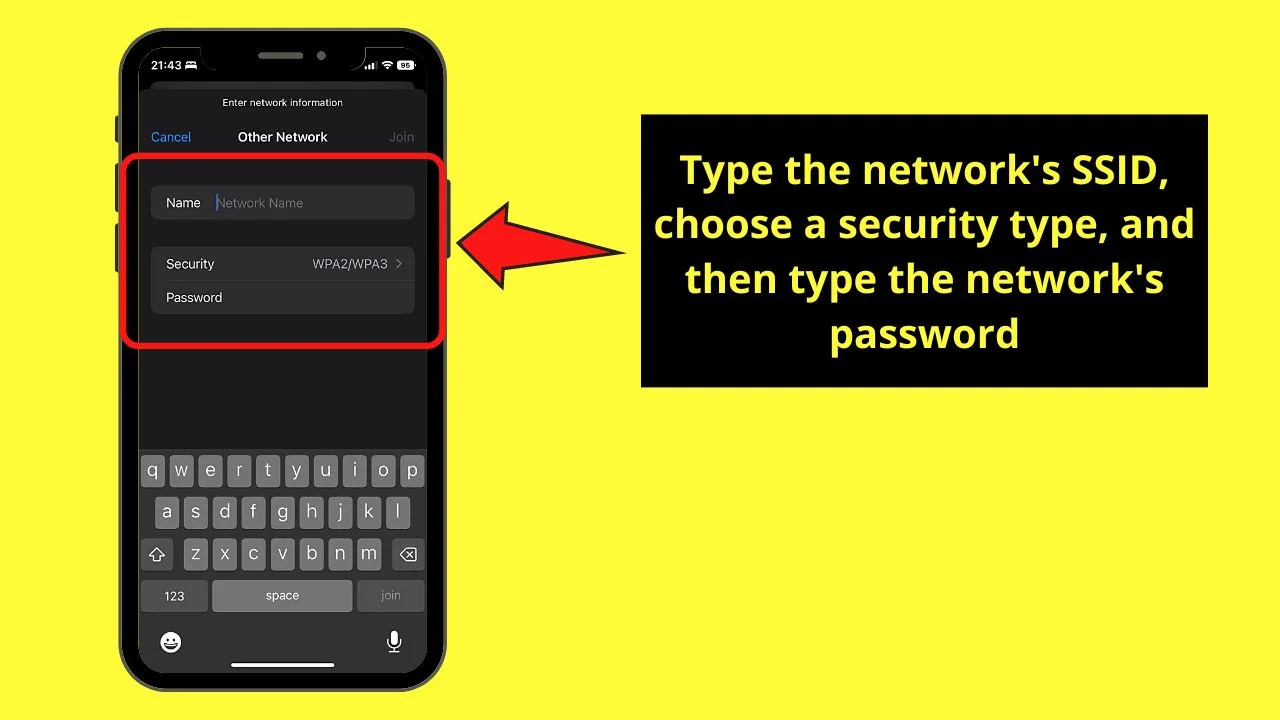
Since your iPhone can’t detect the SSID of the WiFi network, you need to manually input it instead.
Type the SSID in the “Network Name,” then choose its security type before typing its password.
Step 5: Press “Join”
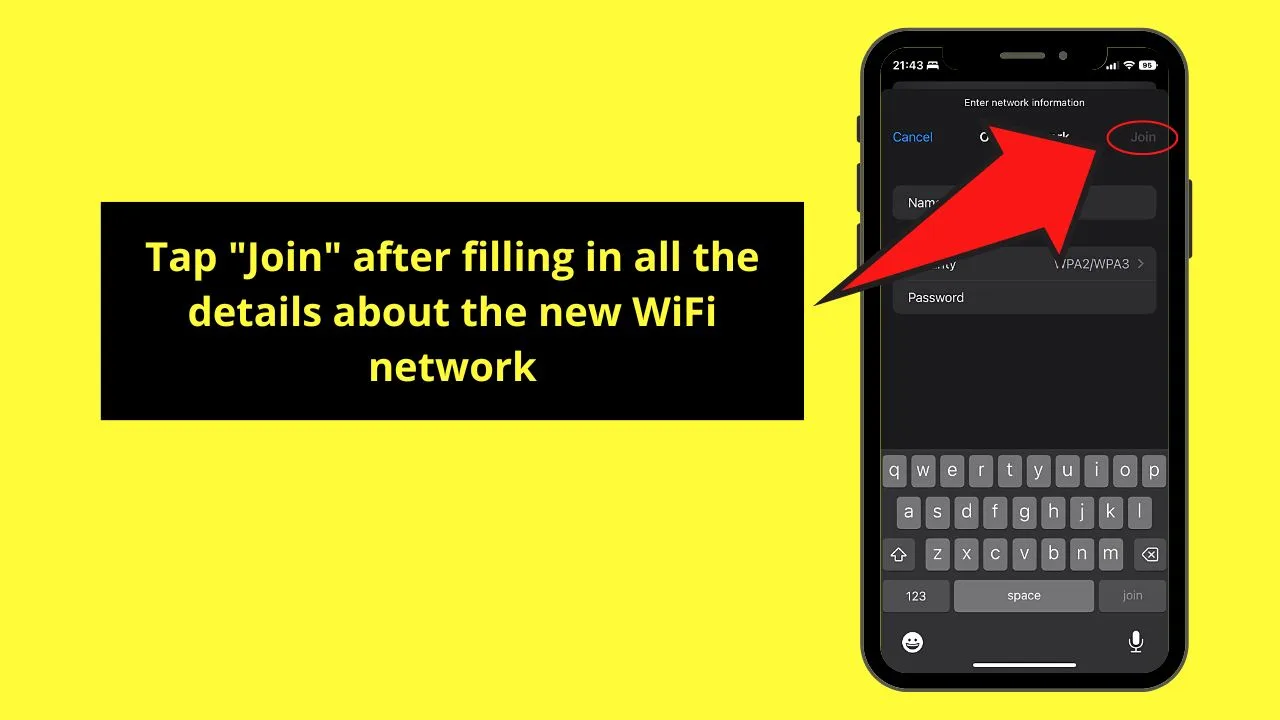
You’ll find this button on the upper right of the “Other Network” page. This will only be available for tapping if you have filled out the sections mentioned earlier.
If you’re successful in connecting with the WiFi network, a blue checkmark icon appears beside its SSID. It will then move from “Networks” to just under the “Wi-Fi” toggle.
How to Manually Connect to a Detected SSID on the iPhone
Though iPhones can easily detect the SSIDs of nearby WiFi networks, you sometimes have to establish the connection manually. This happens if your iPhone can’t detect the SSID.
But if the iPhone has detected the WiFi’s SSID but doesn’t have the blue checkmark icon beside it, follow these steps.
Step 1: Tap “Settings”
Step 2: Choose “Wi-Fi”
Step 3: Press the SSID of the WiFi network
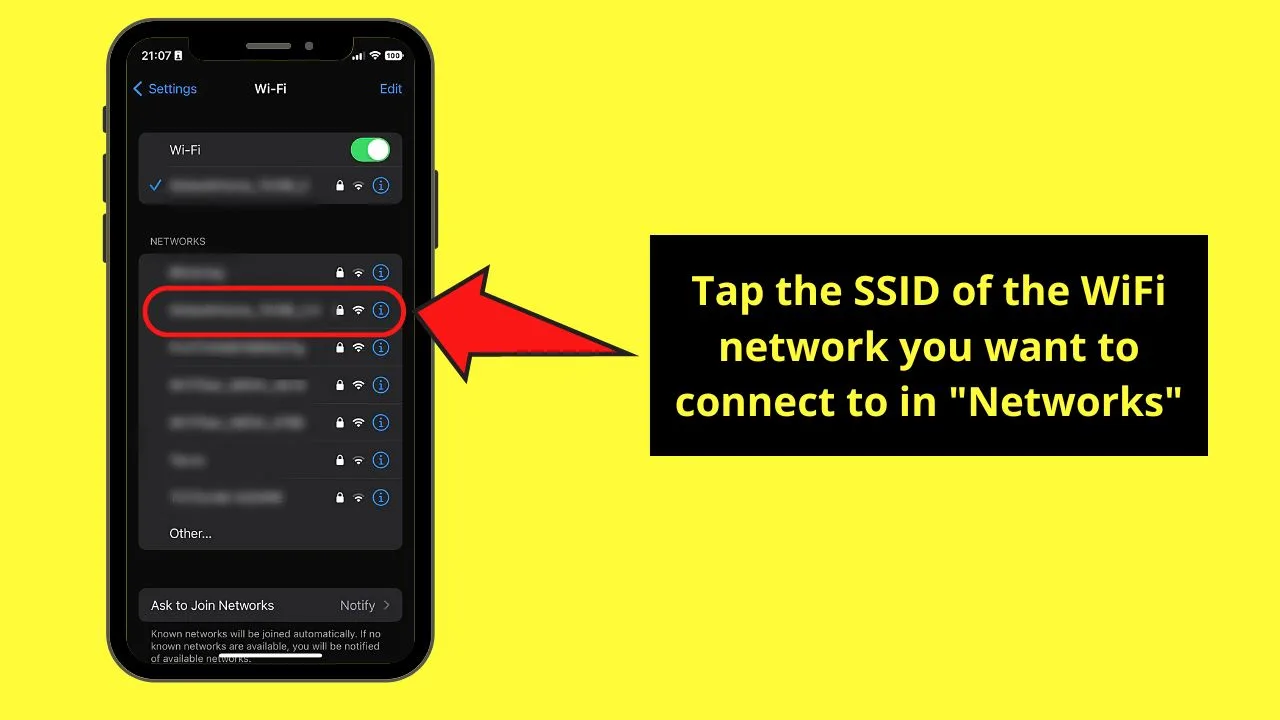
You’ll find this under the “Networks” section with other SSIDs the iPhone has detected.
But as you haven’t connected to any of them, you won’t see a blue checkmark icon beside them.
Step 4: Type the password
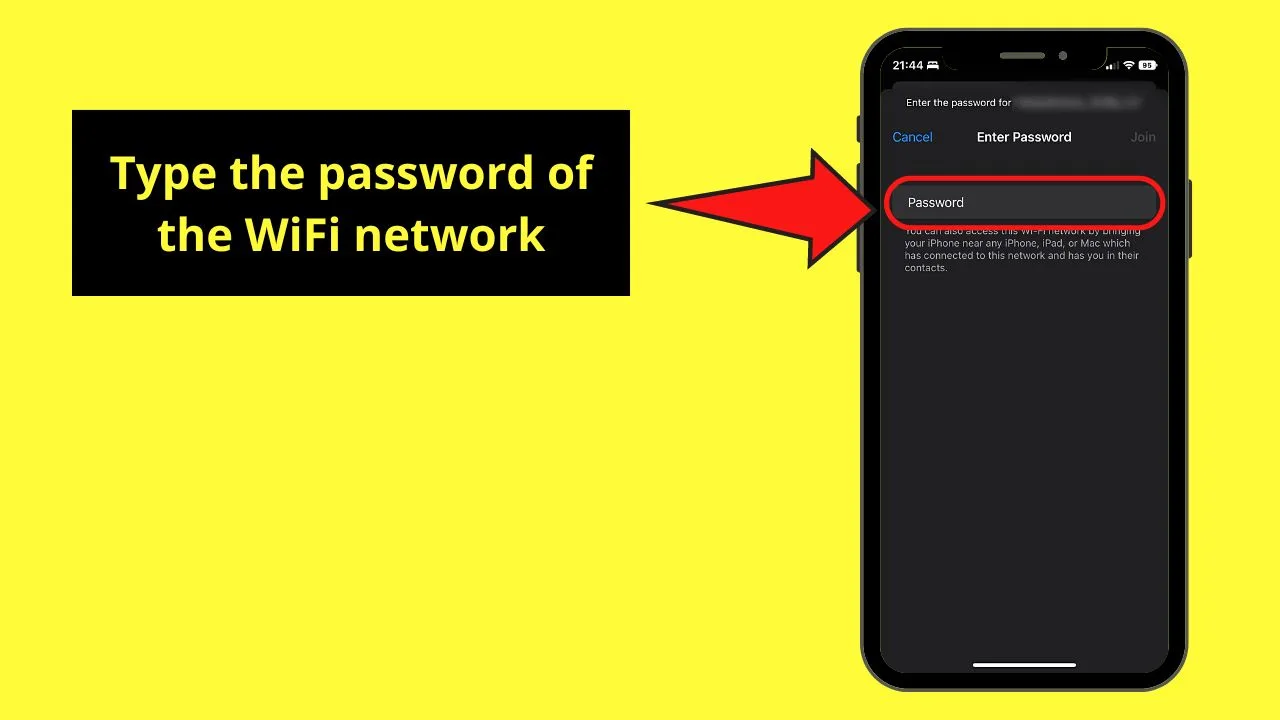
Step 5: Tap “Join”
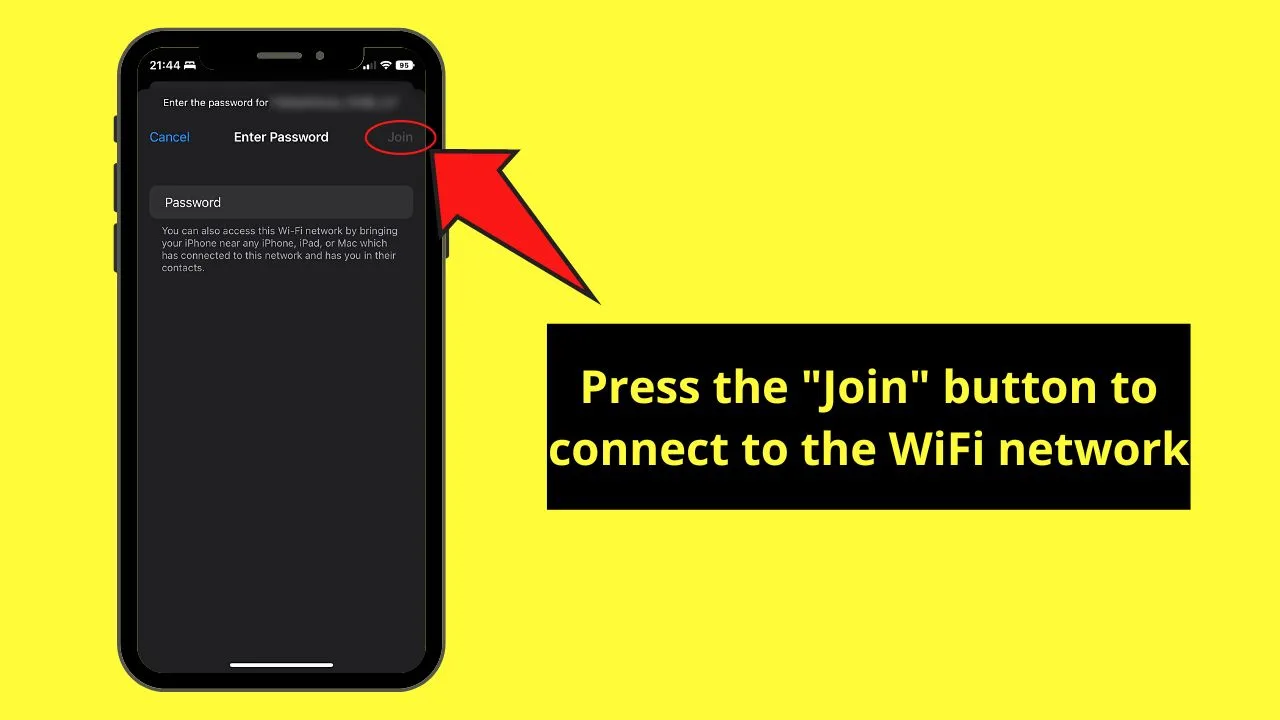
If you have entered the correct password, a blue checkmark icon appears beside the SSID. It will then be moved from the “Networks” section to just below the “Wi-Fi” toggle.
But once you disconnect from that WiFi connection, the password should be typed again. To prevent this, tap the “Info” icon beside that SSID and press the toggle for “Auto-Join.”
In this way, your iPhone will automatically connect to that SSID once it is detected by the device.
Changing Your iPhone’s SSID
How many of you know that you can share your iPhone’s internet connection through a hotspot?
Technically, a hotspot is a physical location where someone can connect to the Internet — in this case, your mobile data.
But unlike WiFi connections, the SSID of a hotspot corresponds to the name of the device the internet connection is coming from, which is obviously your iPhone.
By default, your iPhone’s SSID is its device name. For your friends or relatives to easily find your SSID if they want to connect to it, better change it.
Step 1: Press “Settings”
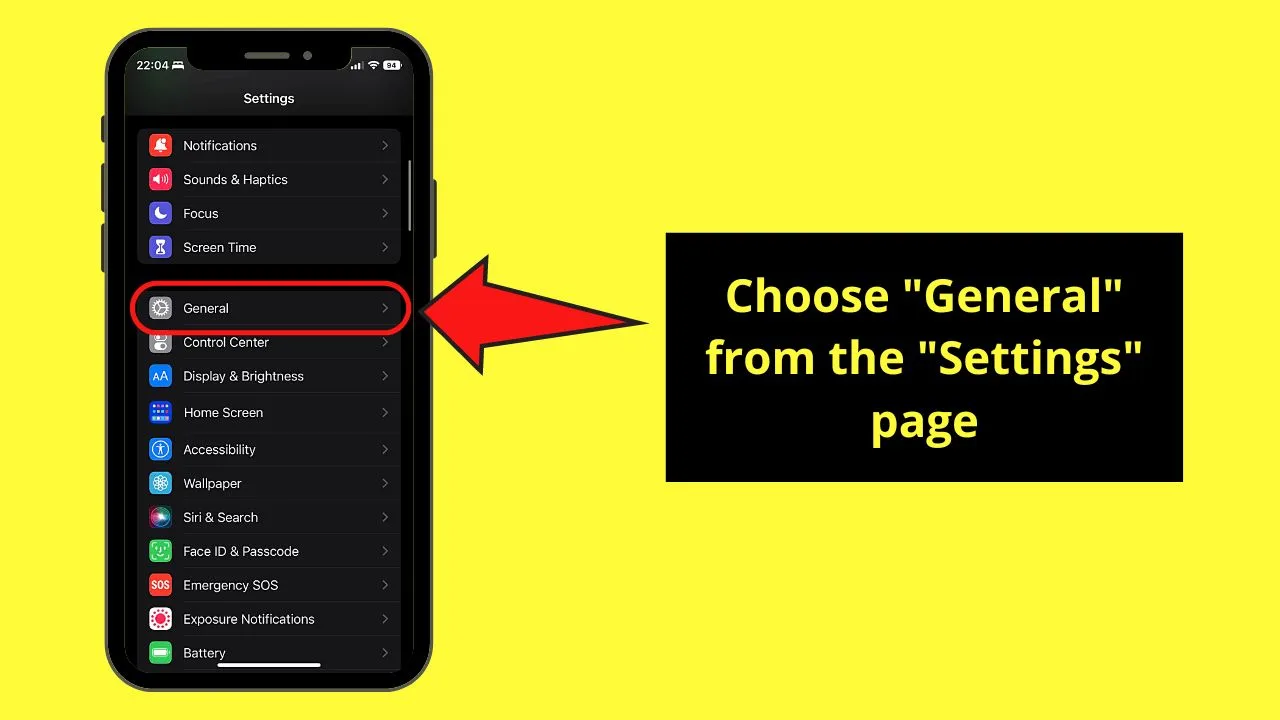
Step 2: Tap “General”
Step 3: Choose “About”
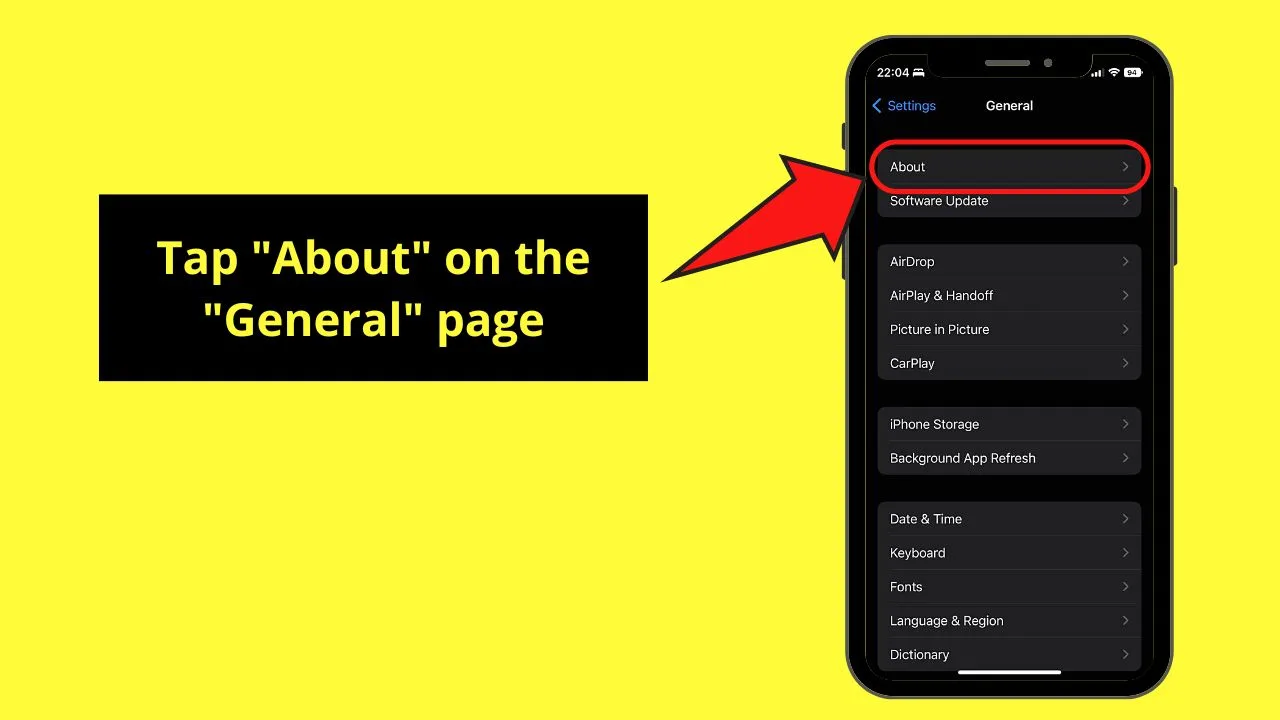
This is the first option that appears on the “General” page.
Step 4: Press “Name”
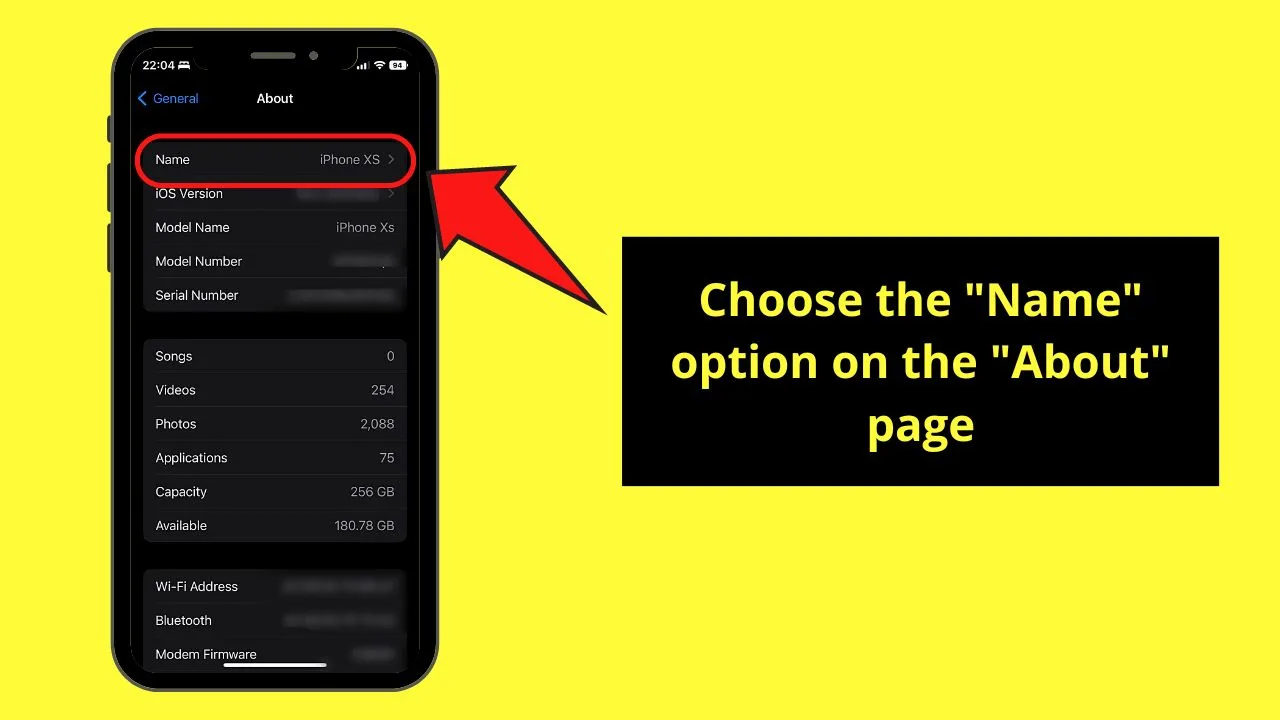
Again, like “About” on the “General” page, this option is the very first you’ll find. You will then see your iPhone’s name set as the SSID.
Step 5: Type your new SSID and tap “Done”
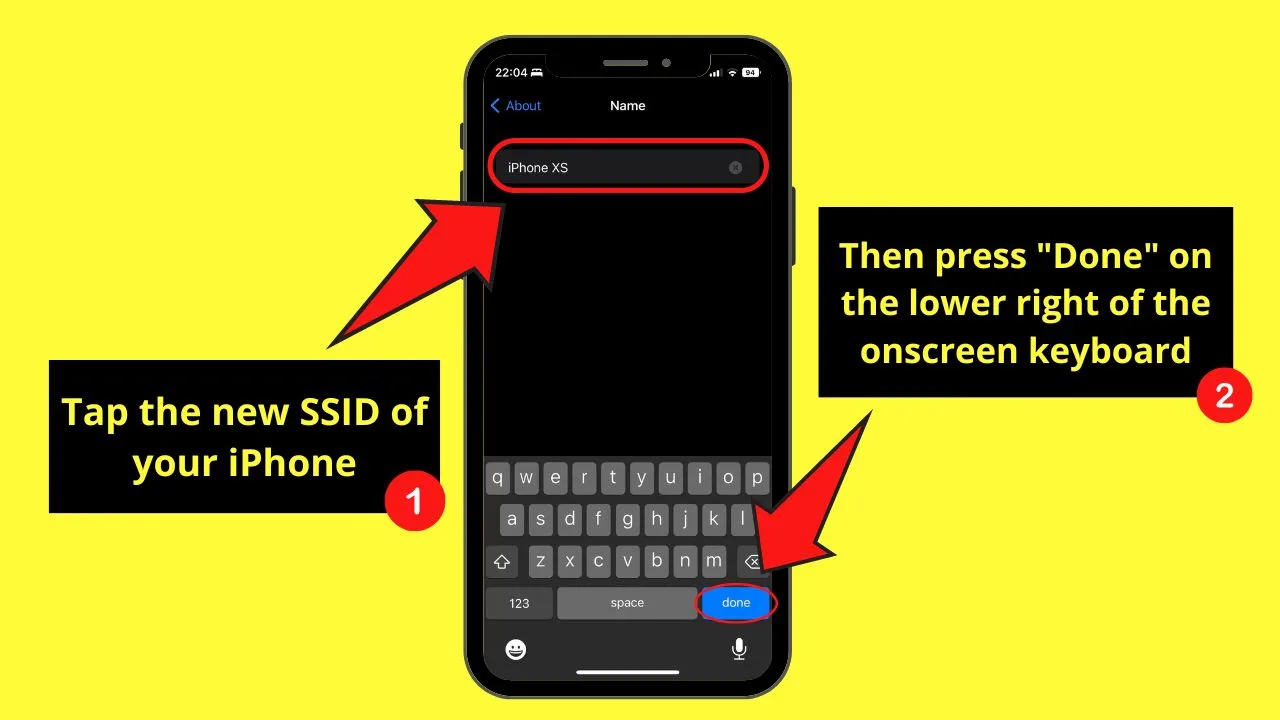
Since the name of your iPhone device is the default SSID, delete it first before typing a new name. Then, press “Done” on the lower right of the onscreen keyboard.
You will then be redirected to the “About” page, where you can continually press “Back” to go back to the main “Settings” page.
Then, you can tell the person who wants to connect to your iPhone’s data connection what your SSID is. That way, your iPhone becomes a hotspot device.
Frequently Asked Questions about How to Find the SSID on the iPhone
How many characters make up an SSID?
Since an SSID is a technical term for the WiFi network’s name, it can only have up to 32 characters max length. This is defined by the 802.11 standard.
How does an iPhone connect to a WiFi SSID?
Once you tap the “WiFi” button on the control center, the iPhone scans for nearby networks. Any WiFi or mobile data network it detects will be listed under “Networks” on the “Wi-Fi” page of the “Settings” app. Once you find the SSID of the Wi-Fi network, tap it and enter its password. Press “Join.”
Can you share your iPhone’s mobile data connection to an Android device?
You can share your iPhone’s mobile data connection to an Android device. Just make sure that the Android phone’s “WiFi” button is turned on so it can detect your iPhone’s SSID. Once it appears on the Android phone, the person can just press its SSID and enter the keyword to connect to it.

Hey guys! It’s me, Marcel, aka Maschi. On MaschiTuts, it’s all about tutorials! No matter the topic of the article, the goal always remains the same: Providing you guys with the most in-depth and helpful tutorials!


