As experts say, it’s vital to nail the consistency of your logo and business identity integrated with your branding.
Now, if you’re using Canva for graphic designing, the tool’s got what you need to stay organized — your brand kit!
But, how can you create and even use a brand kit on your future Canva designs?
How to Create Brand Kits in Canva
To create brand kits in Canva, do the following steps:
- Log into your Canva account and click the “Brand” tab
- Select the “Add New” button
- Type the name of the brand kit and click “Create”
- Add a logo in the “Logos” section
- Keep the color palette generated or add a new color palette
- Choose the fonts for the brand kit’s text assets
- Add brand photos, graphics, and icons to the brand kit
- Click “Back to Brand”
Step 1: Log into your Canva account and Select “Brand”
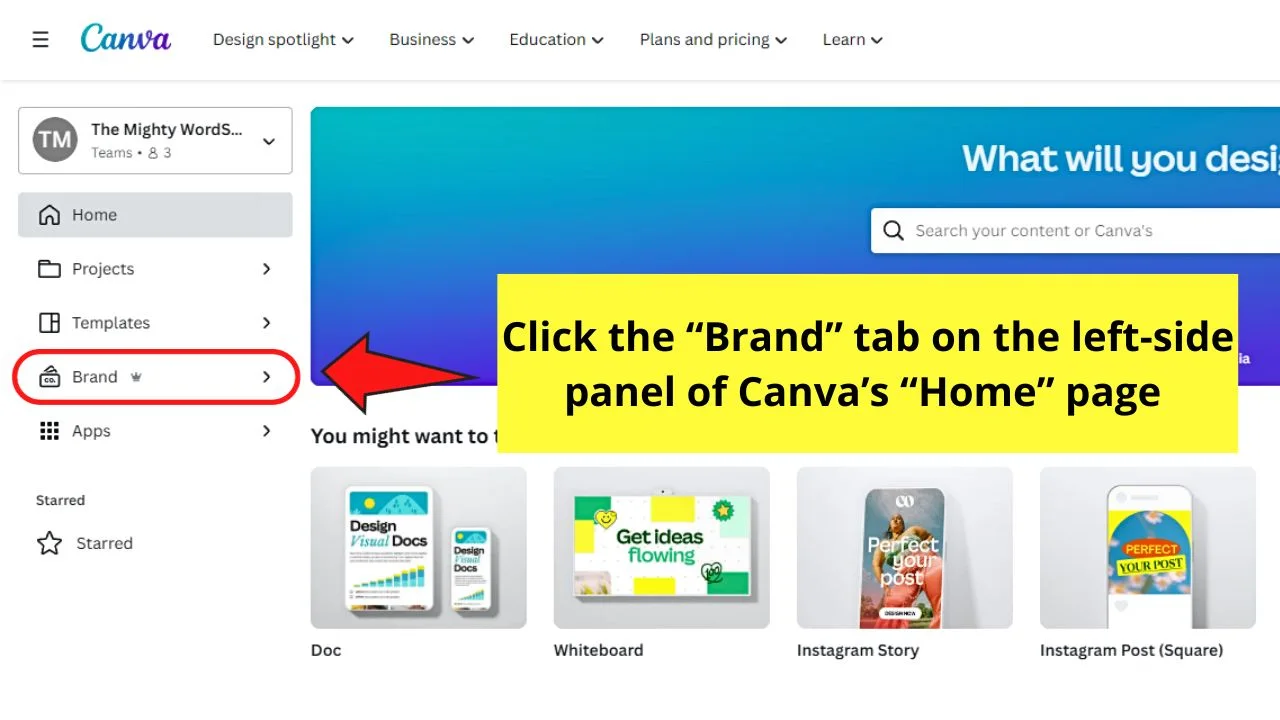
You’ll find this button on the left-side panel of the “Home” page, between “Templates” and “Apps.”
You’re then redirected to the “Brand Kit” page. If you have existing brand kits made, you’ll see them displayed on the page, too.
Step 2: Click “Add New”
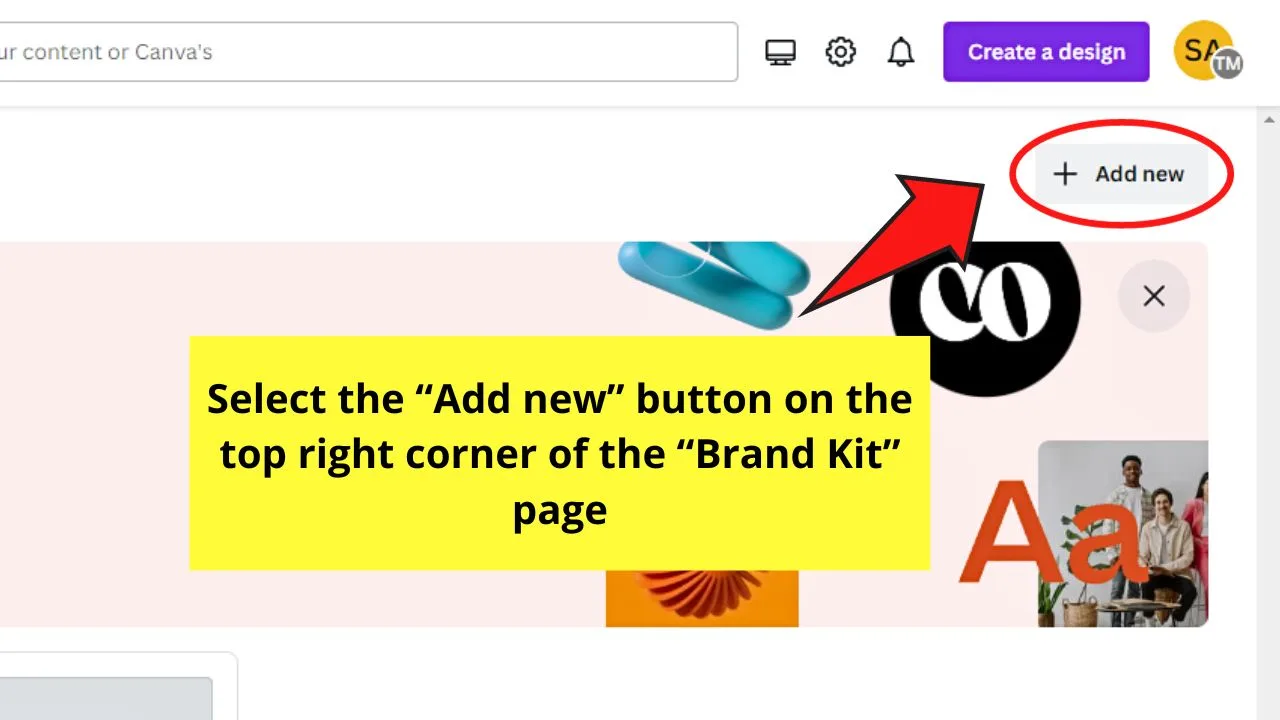
You’ll find this button on the top right corner of the “Brand Kit” page.
A window then appears.
Step 3: Type the new brand kit’s name and select “Create”
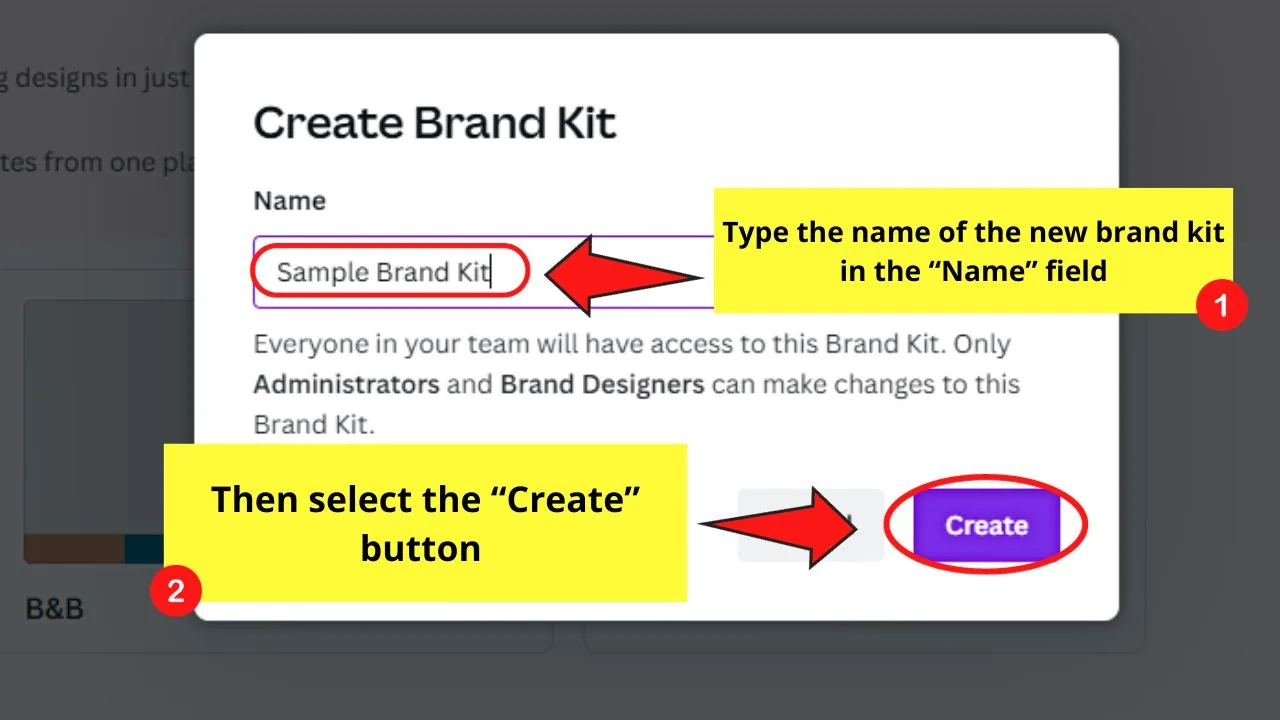
The “Create” button will only become colored once you have entered the new brand kit’s name in the “Name” field.
Once the “Create” button turns purple, click it. The newest brand kit page then opens.
Step 4: Add a new logo to the brand kit
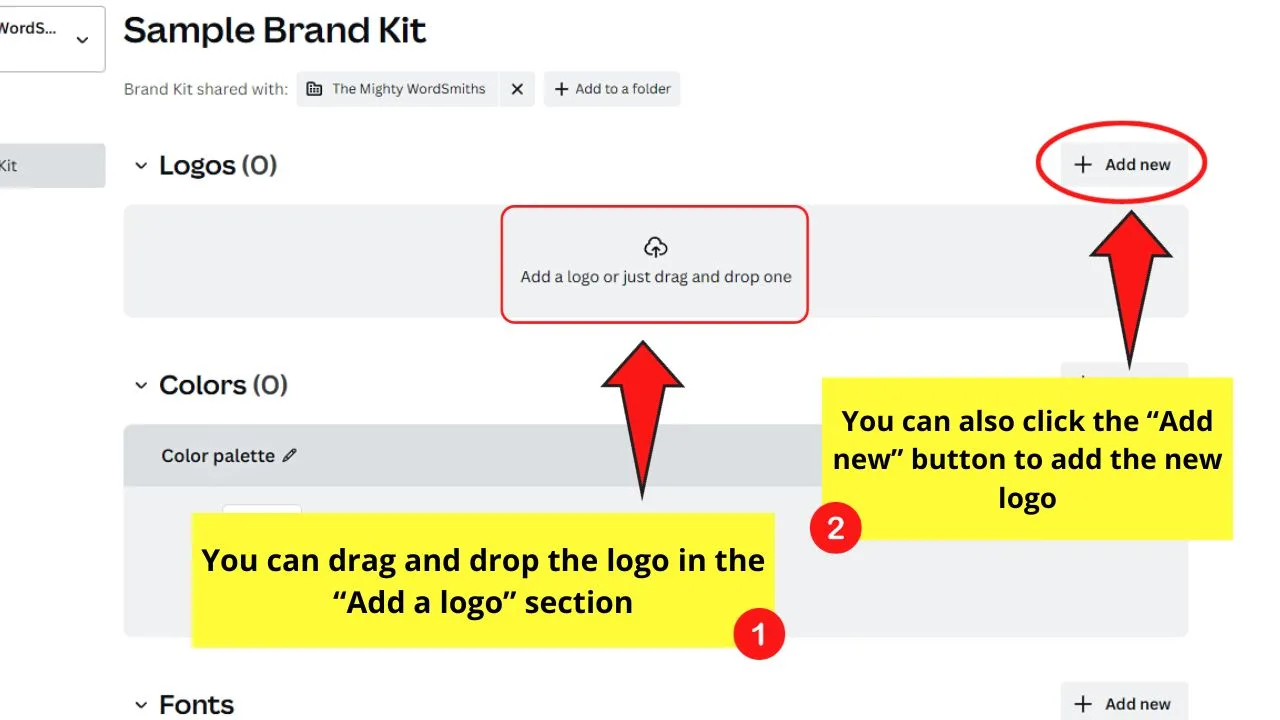
One way to do this is to drag and drop the logo in the “Add a logo or just drag and drop one” section in “Logos.”
Another way is to select “Add new” and find the logo.
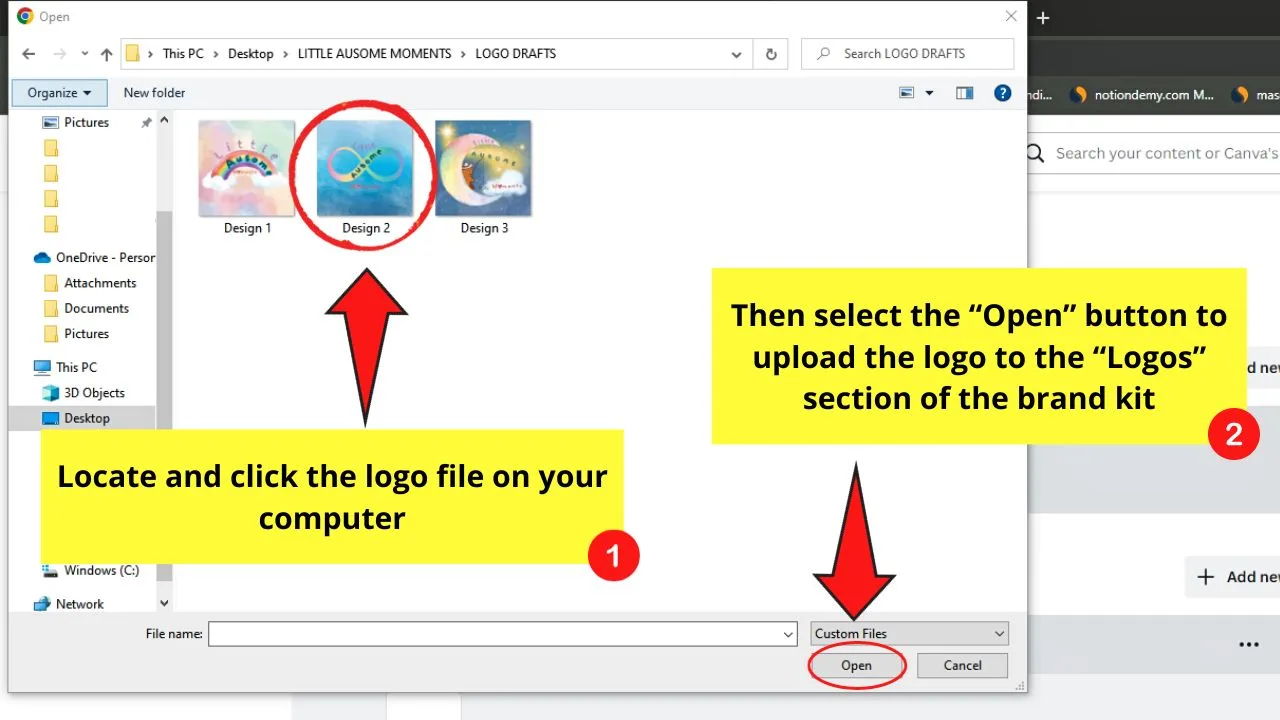
Then click “Open” to upload it.
Step 5: Keep the color palette Canva generated or add a new one
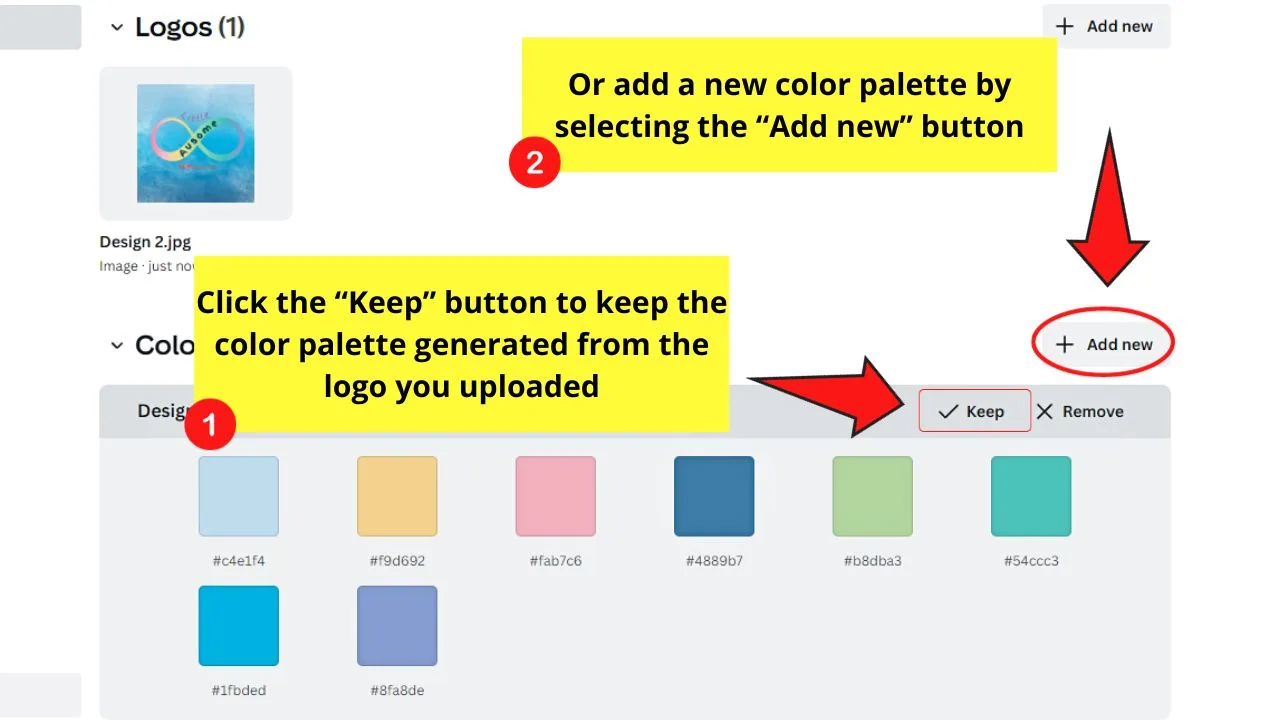
Once the logo appears in the “Logos” section, a new color palette is generated. The colors are based on the hues found on your uploaded logo.
If you’re good with the generated color palette, select “Keep.” Otherwise, click “Remove.”
Then select the “Add new” button twice instead to find new hues on the color slider.
Step 6: Assign the fonts for the text assets of the brand kit
Like other Canva designs, you can add text boxes to any design you’ll create from your brand kit.
But to do this, you have to set the brand’s font styles and sizes to keep the brand identity.
Do take note there are 8 text types for the brand kit:
- Title
- Subtitle
- Heading
- Subheading
- Section header
- Body
- Quote
- Caption
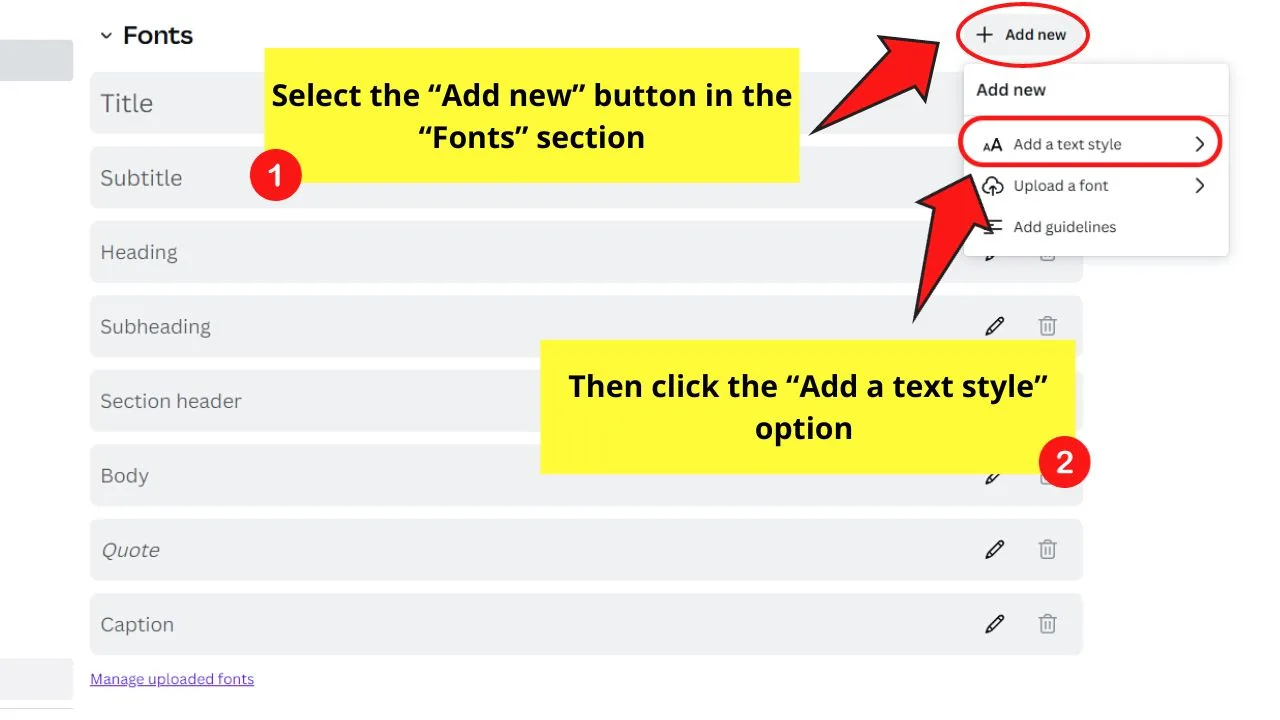
To do this, you can select the “Add new button on the top right corner of the “Fonts” section.
Then select “Add a text style” and select the text type where the font will be used.
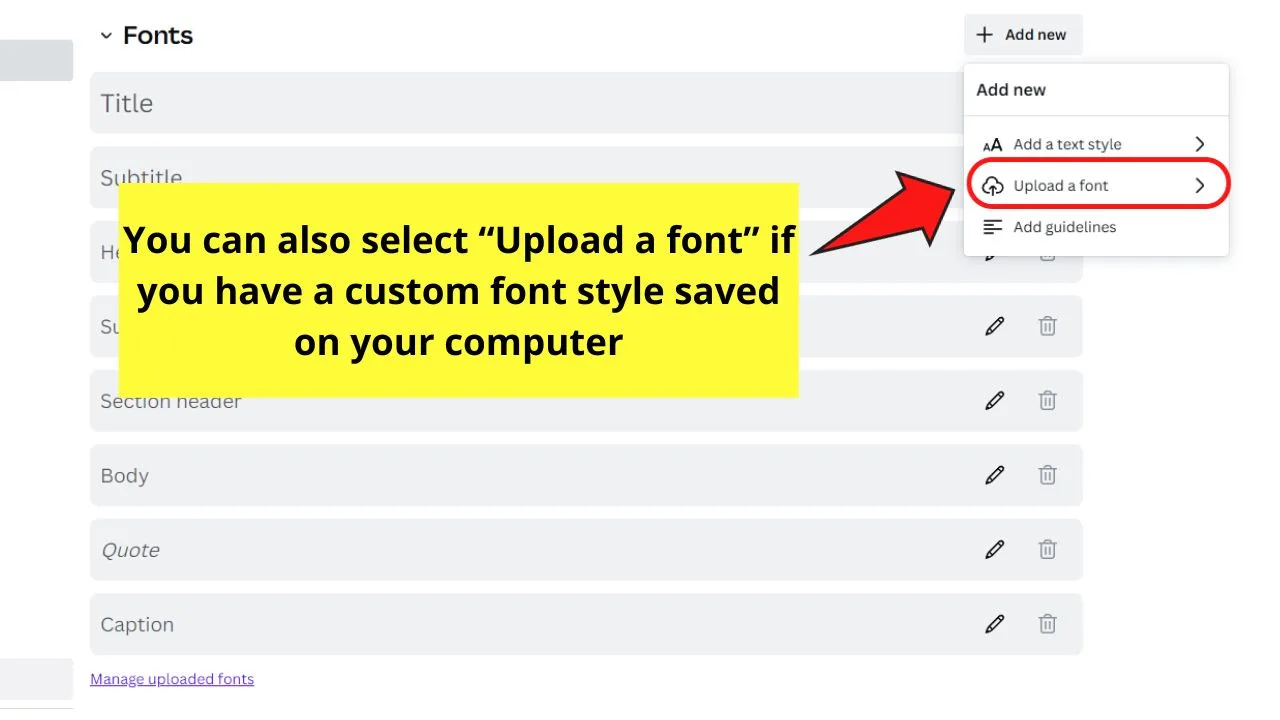
You can also select “Upload a font”
Another way is to click the pencil icons on each text type found in the “Fonts” section. Then select “Choose a font” to open the font menu.
Click on the font you’ll use.
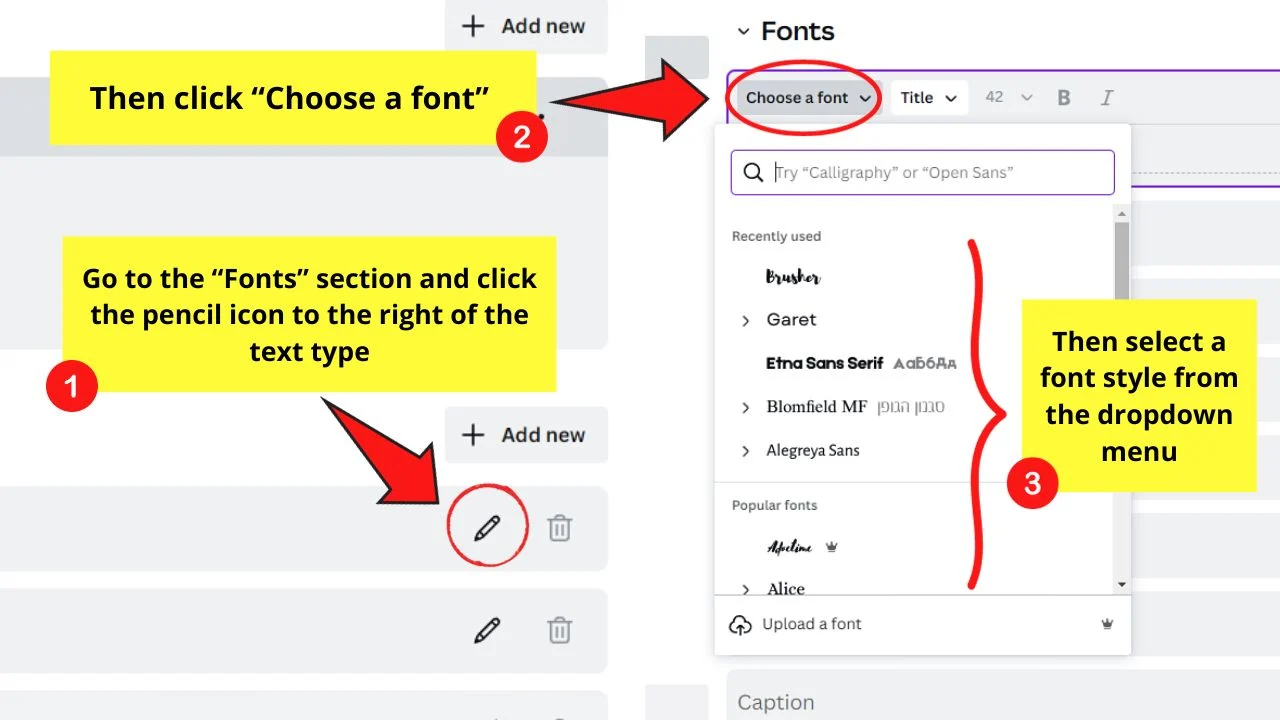
Repeat until each text style has assigned fonts.
Step 7: Add photos, graphics, and icons to the brand kit
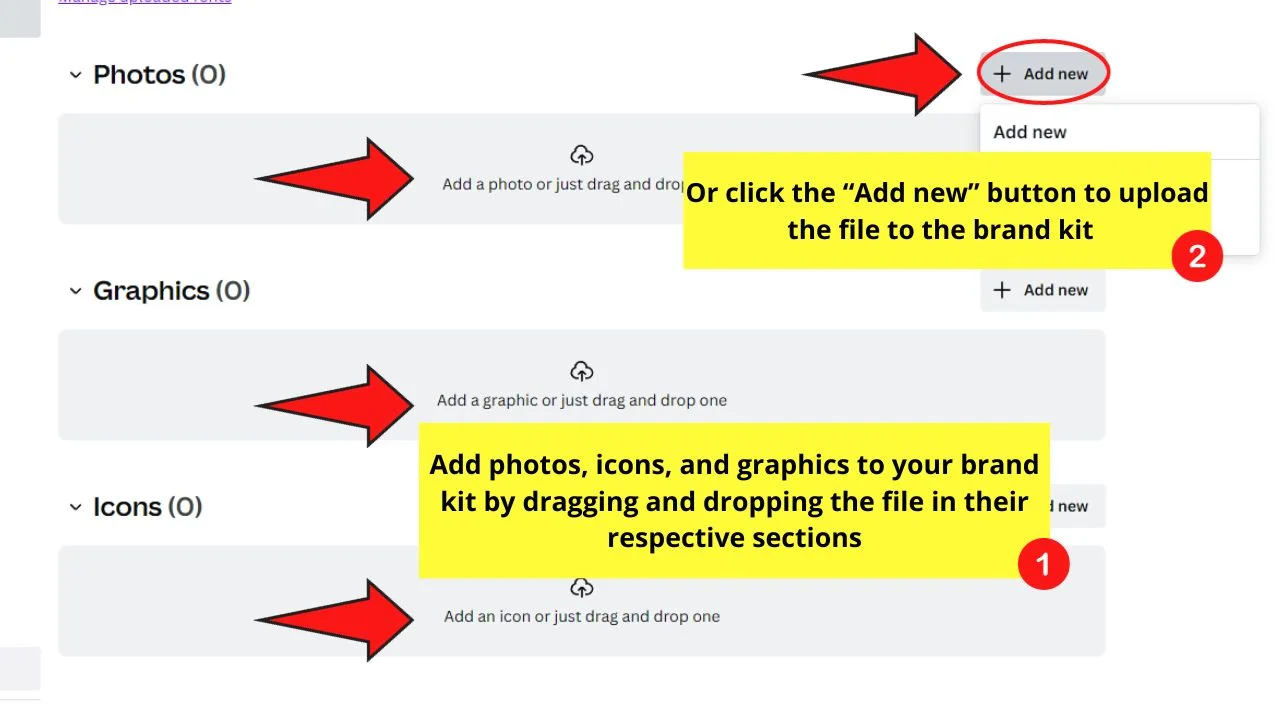
Adding them to the brand kit has the same process as when you added its logo.
You either drag and drop the files to their respective sections or select the “Add new” button on their upper right corners.
Step 8: Select “Back to Brand”
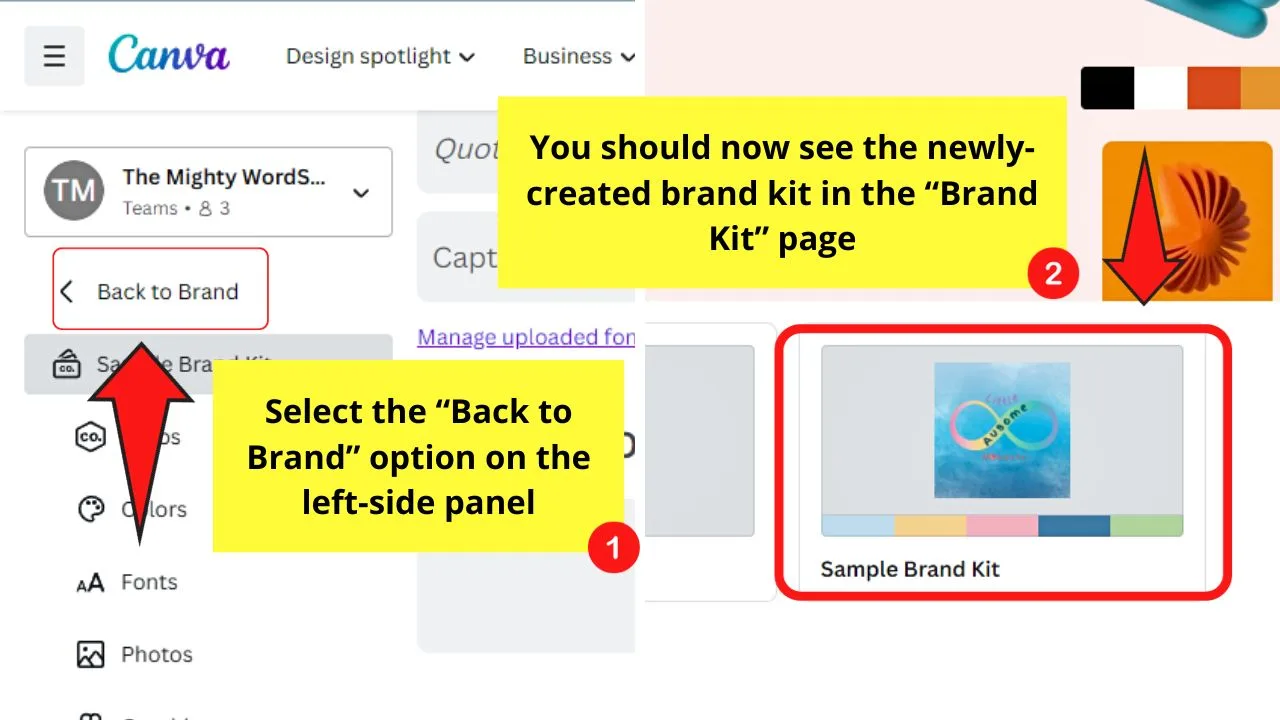
Do this step only after adding all the items needed in a brand kit. You’ll find this button on the left-side panel, between the Canva profile icon and the name of the new brand kit.
You should now see the newest brand kit featured in the “Brand Kit” section.
And, after setting all those up, you’ve successfully created your brand kit on Canva! Quick, right?
But, now that I’ve taken my time in creating my brand kit, how then do I use them for my designs?
Don’t fret. Continue reading below for you to find out.
How to Use Brand Kits in Canva
To use brand kits in Canva, do the following:
- Open a design file or create a new Canva design file
- Select the “Brand” tab
- Select the brand kit for the design
- Choose a brand template for your design
- Add your brand’s logo to the design
- Select the brand colors to be used
- Add text to the design using the brand fonts created
- Add photos, graphics, and icons to the design
Step 1: Open an existing design file or create a new Canva design
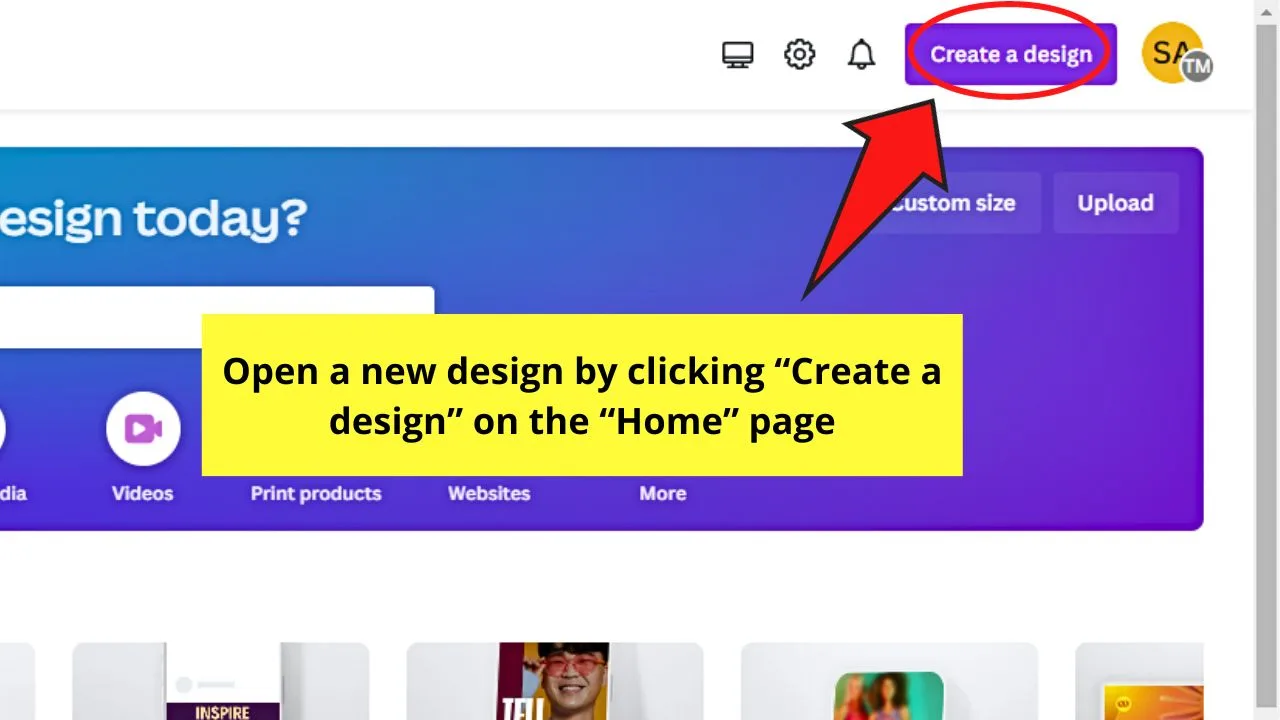
You can also open an existing file by clicking on it once.
Step 2: Click the “Brand” tab
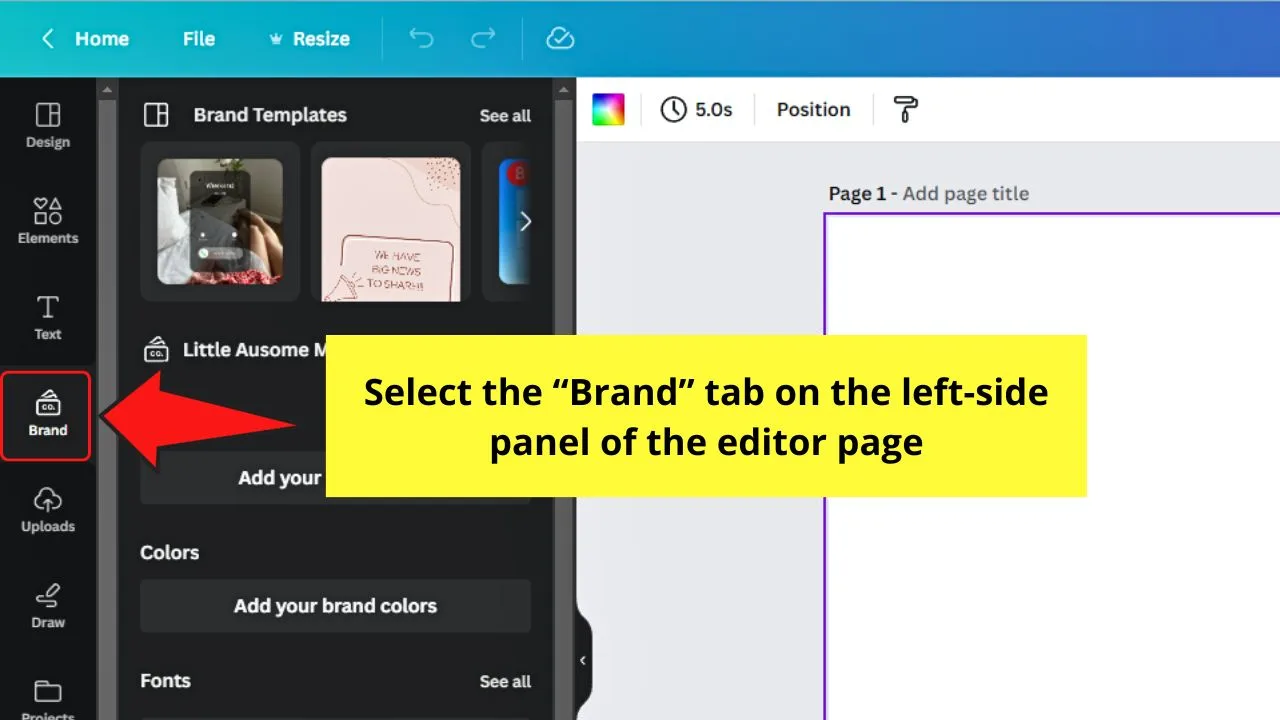
You’ll see this option on the left-side panel of the editor page, between “Text” and “Uploads.”
Step 3: Select the brand kit you’ll use
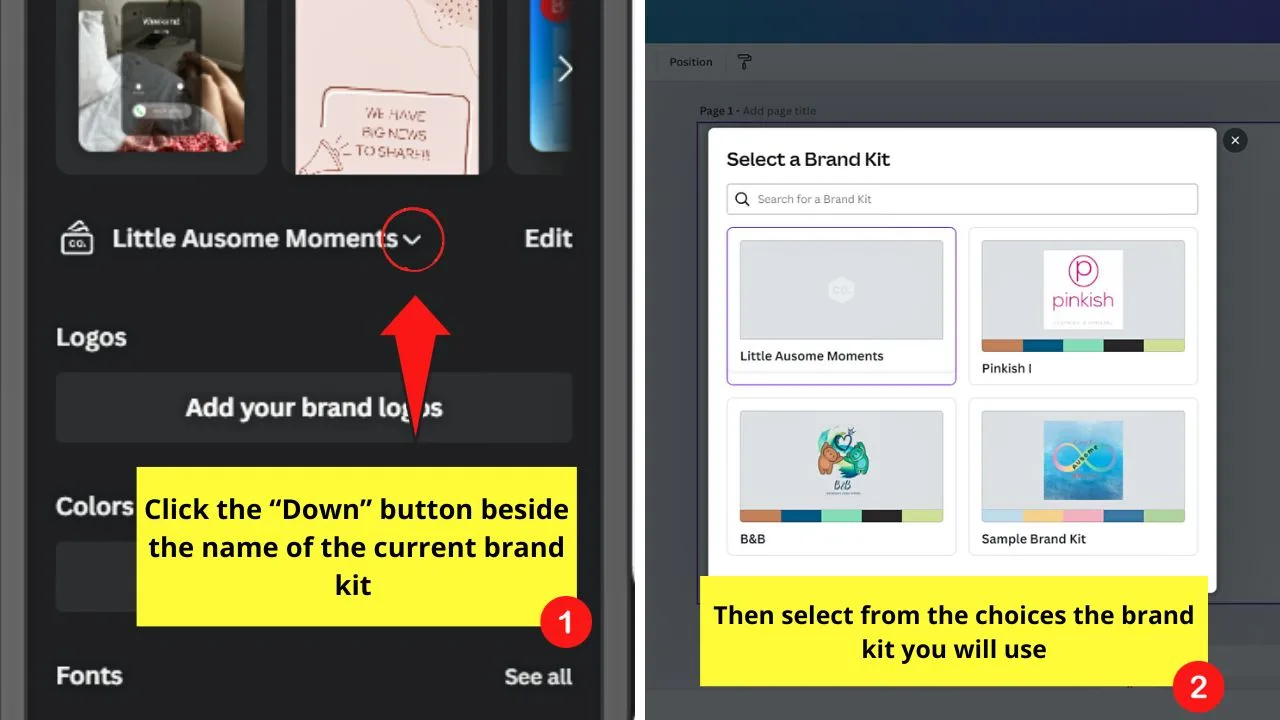
You click the “Down” button of the current brand kit selected to open a window. Then click on the brand kit you’ll use for the design.
The brand kit’s name and its assets should now appear on the “Brand” panel.
Step 4: Select a brand template
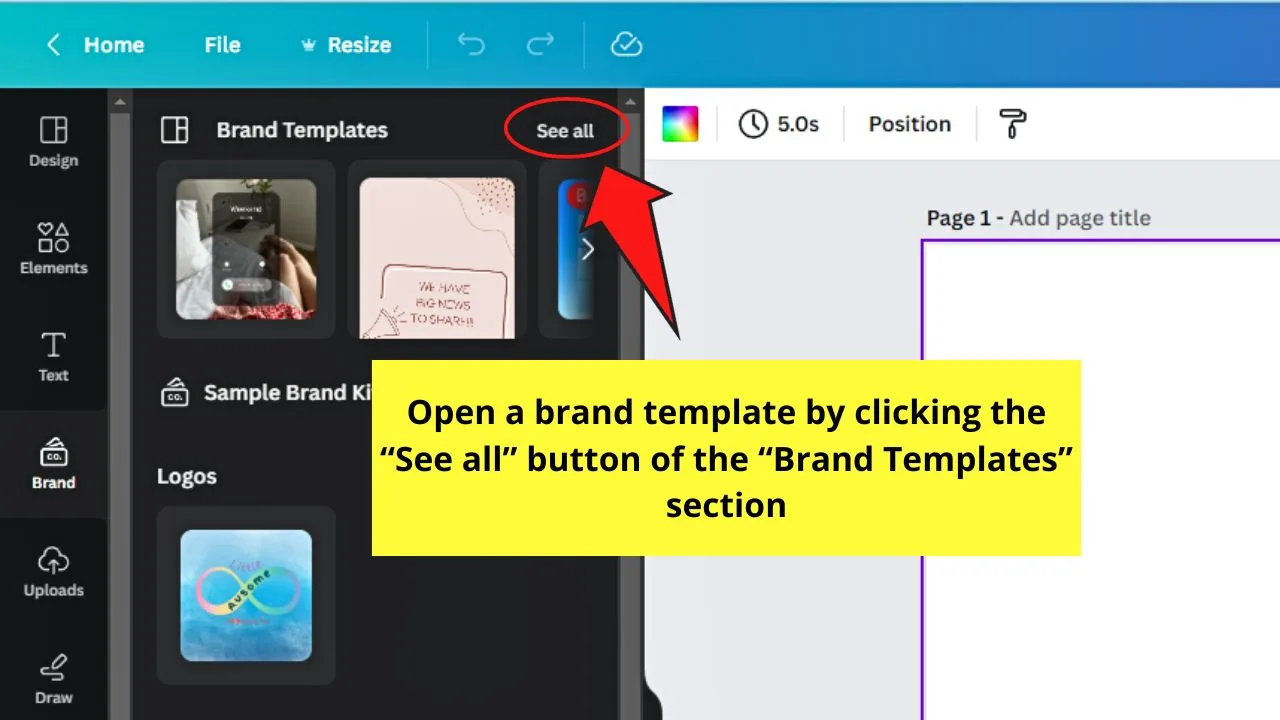
Go to the “Brand Templates” section and click the “See all” button.
You should now see all the available templates you can use for creating your design.
Step 5: Add the brand logo to your design
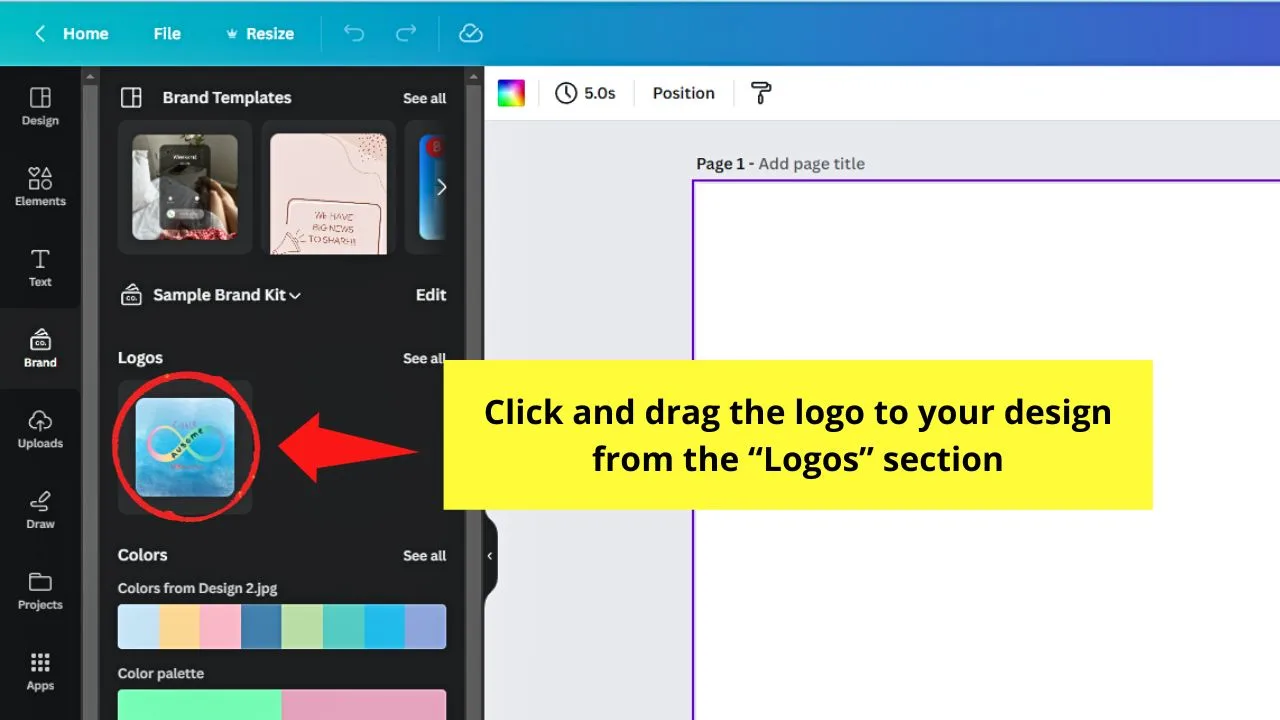
This step is optional though. But to maintain brand identity, it’s better to add the kit’s logo or the favicon you created.
Just drag and drop or click the logo in the “Logos” section to add it to the design.
Step 6: Select the brand colors to be used
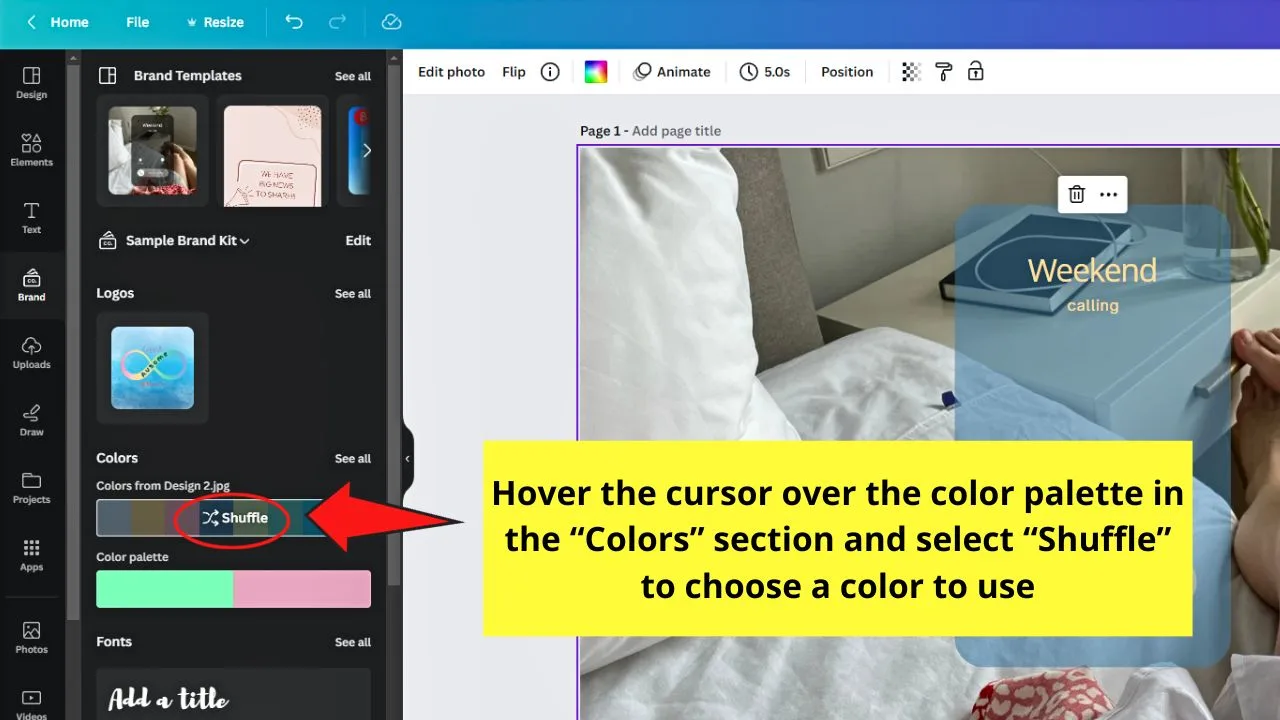
All the color palettes you created will appear in the “Colors” section. Hover your cursor over the color palette and select “Shuffle” to select the color you’ll use.
Continue clicking until you achieve the color combination you want.
Step 7: Add text elements to your design
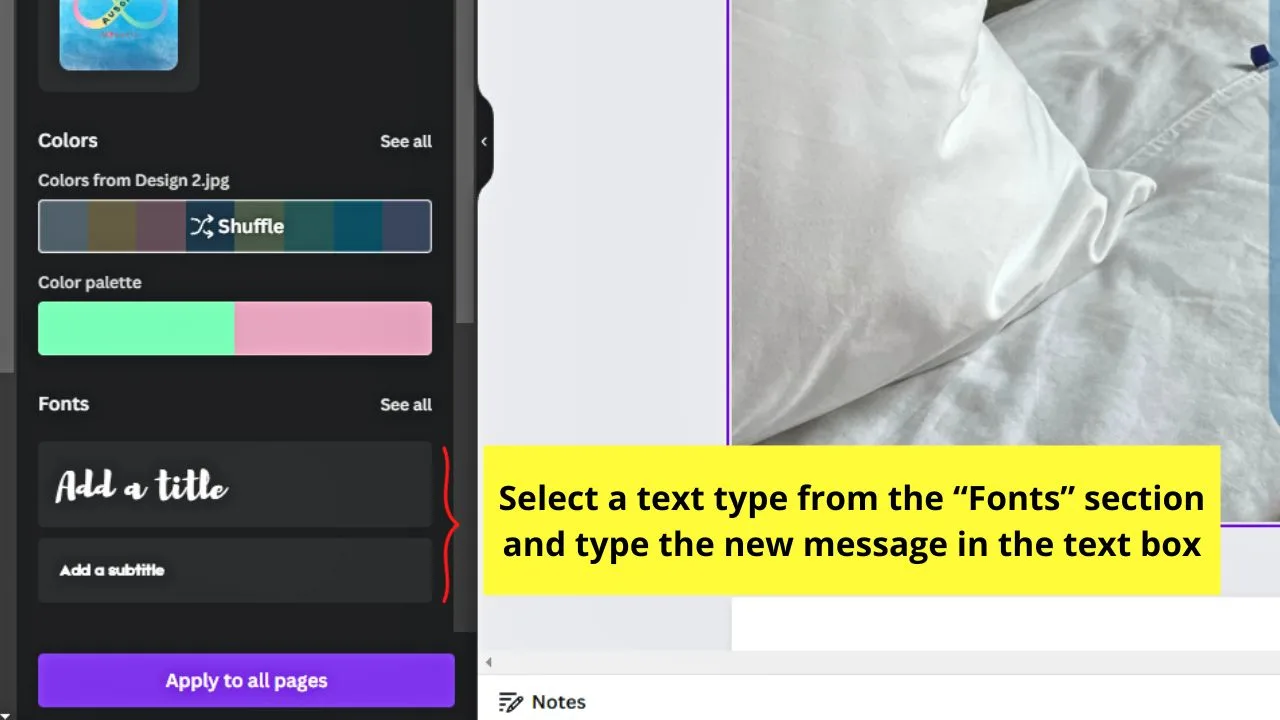
You can either edit the existing text added to the design or add a new text box.
The best way to ensure you’re using the brand fonts is to select the text type from the “Fonts” section of the “Brand” panel.
You can then proceed with typing the text inside the text box. Repeat until all the design’s text elements follow the font styles of your brand kit.
Step 8: Add photos, graphics, and icons to the design
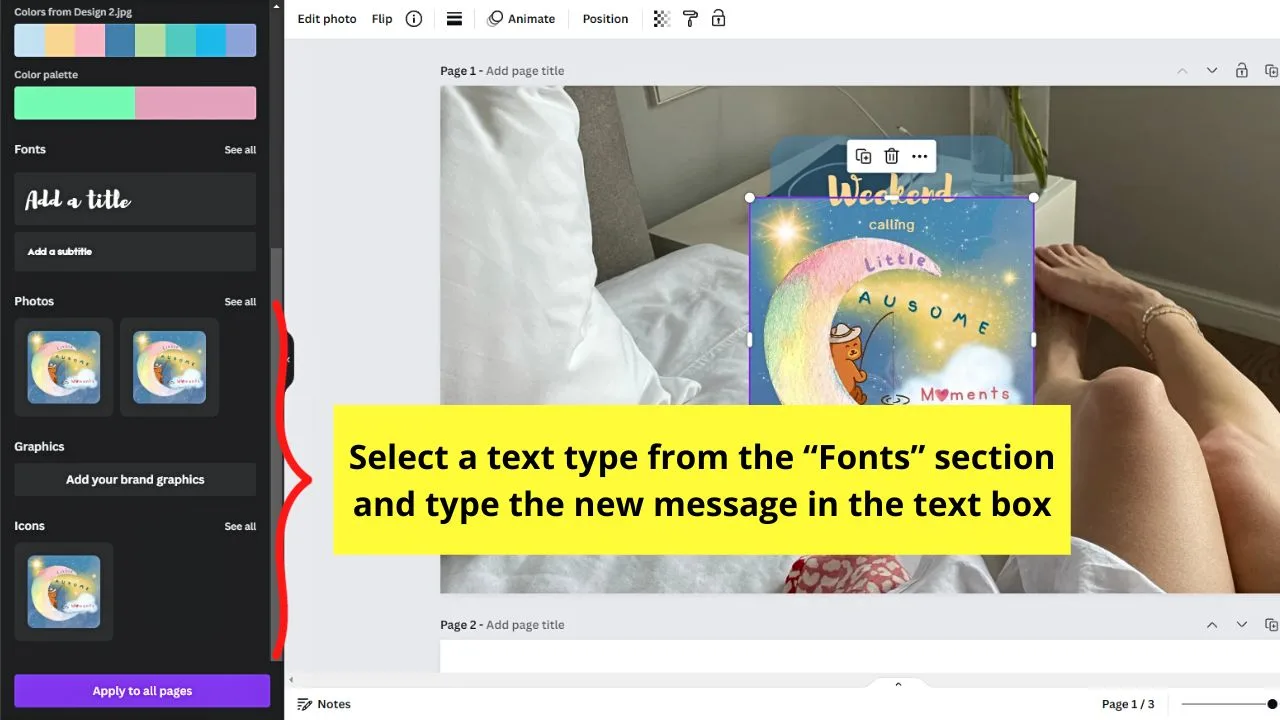
Like your brand logos, any photo, icon, or graphics added to the brand kit will appear on the object panel.
You can either click on them or drag and drop them to the design so they’ll be used.
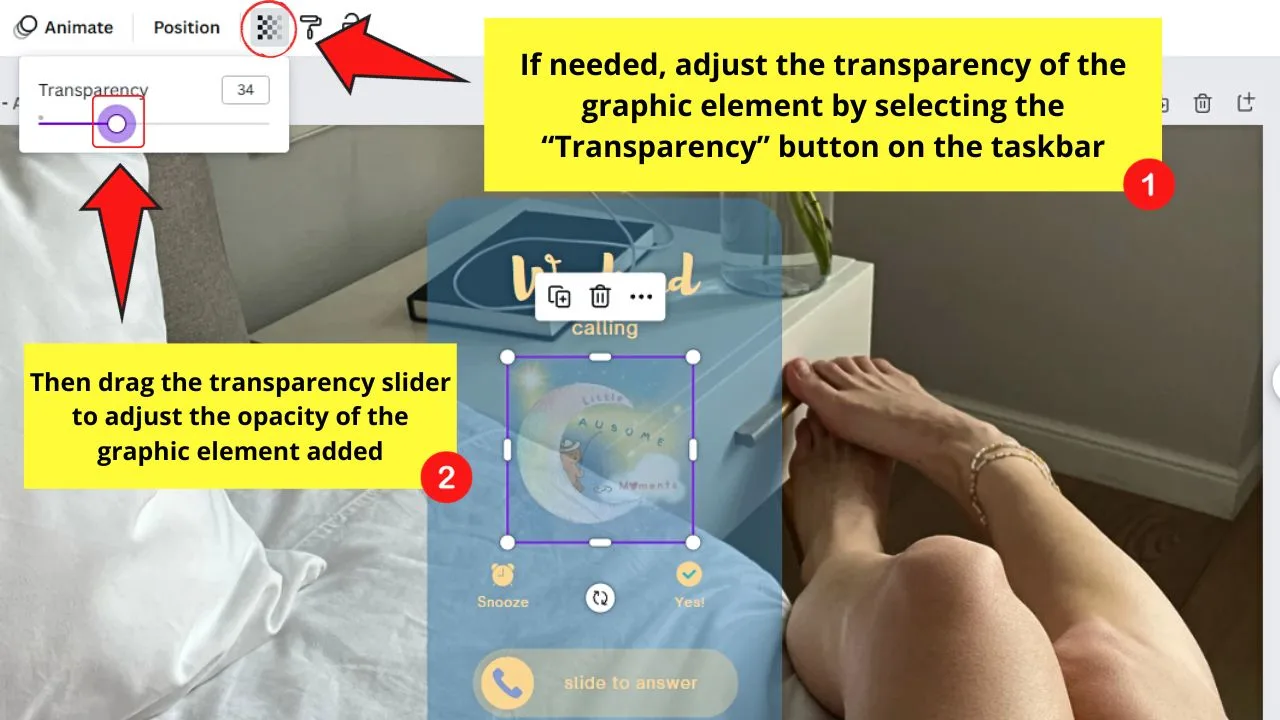
If you need any of these elements to blend with the design, you can select the “Transparency” button and adjust its slider.
Continue editing the design until you achieve the look you want. Once done, select the “Share” button and click “Download.”
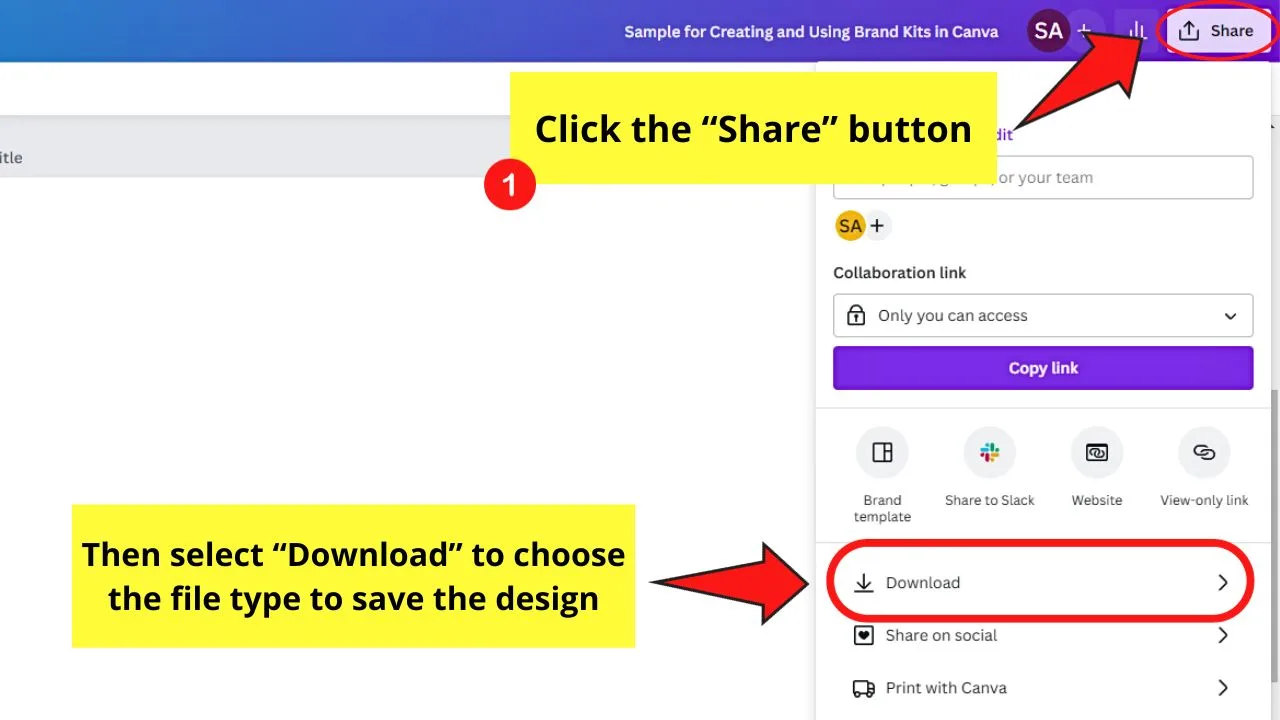
So, that’s basically how you use your brand kits if you’re creating a design from scratch.
But, even if you’re simply using a template, you can also customize it using your brand kit.
Tap on the design elements that are editable, change the colors, and use the font styles for your text using the process mentioned earlier.
Frequently Asked Questions about How to Create and Use Brand Kits in Canva
Can you create a brand kit if you’re a free account user in Canva?
The Brand Kit selection is still available for Canva free users. But, you cannot edit them like how Pro, Enterprise, and Educator Canva users can. So, it’s best to upgrade to Canva Pro first before you create your brand kit.
How do you customize a template’s color with your brand kit?
As mentioned earlier, simply tap on any editable element on the template you’re using. Then, head over to the editor toolbar and click the color picker tool (the colored tiles). From there, select from your color palette the hue you’d like to use for that particular element.
Can anyone in the team create a brand kit?
Unfortunately, only team administrators, template designers, and owners are allowed to set up and edit the brand kits. Members can only use the brand kit when designing as they’re not given the same access as the three above.
How many font styles is advisable to add when creating your brand kit?
Graphic design experts recommend limiting the font styles to 3 to avoid making your design visually cluttered. This will ultimately confuse your potential customers.

Hey guys! It’s me, Marcel, aka Maschi. On MaschiTuts, it’s all about tutorials! No matter the topic of the article, the goal always remains the same: Providing you guys with the most in-depth and helpful tutorials!


