

Canva has made graphic designing so much easier thanks to its intuitive features. From the one-click background remover to the new Canva Docs, you only need to choose what you’ll use when designing.
Even if you’re creating templates for your brand, you can always use the pre-made templates from Canva and customize them with your brand kit.
How? You’ll know exactly the steps to applying a brand kit to templates in Canva in the next sections below.
How to Apply a Brand Kit to a Template in Canva
After choosing a template to work on, click on “More” and select “Logos” to use your brand logo. Then click “Designs” > “Styles” and choose your brand kit. Then, select the font style and the colors by clicking “Brand Fonts” and “Primary colors” or “Secondary Colors.”
Whether you’re using a new brand kit or have multiple brand kits made, you can always apply them to any pre-made templates in Canva.
For a more detailed take on this process, you can always refer to the steps below.
How to Use a Canva Template
Step 1: Choose a template to use by clicking “Templates” on the left-side menu of Canva’s home page.
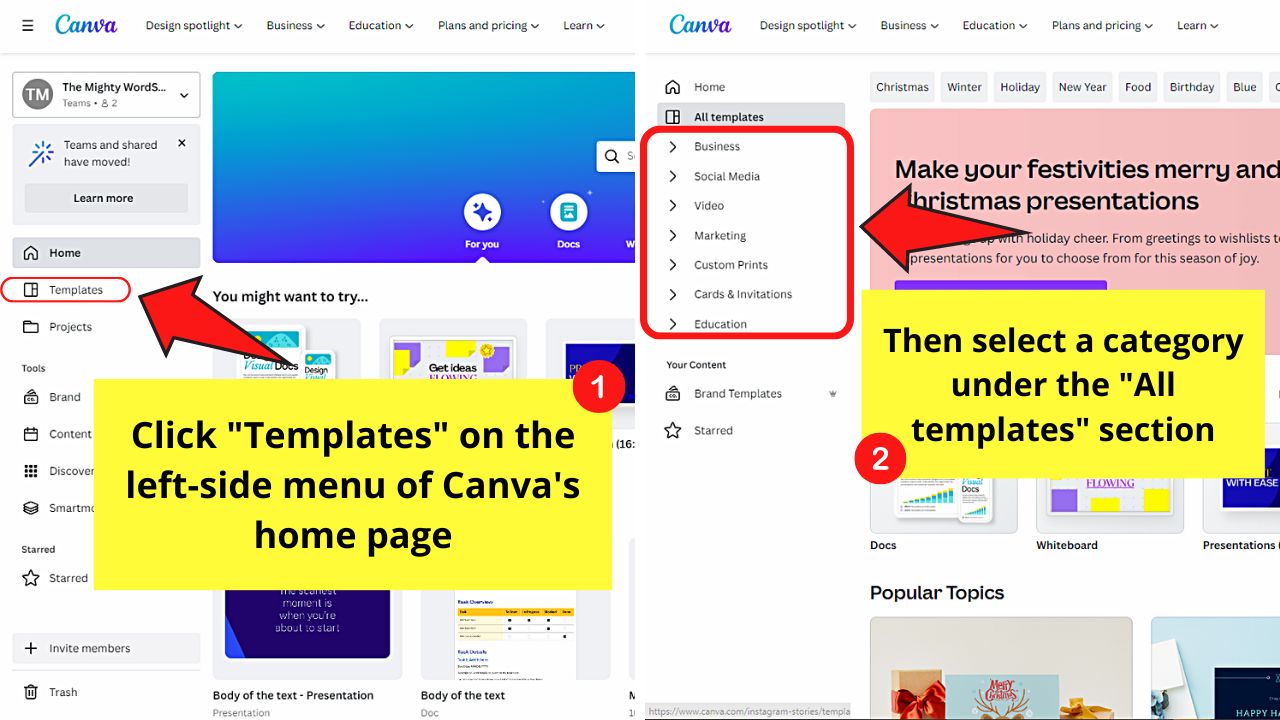

Then select a category before choosing a template from the gallery that appears.
But, you can always click on the “Print Products” button under the “What will you design today?” section for a shortcut.
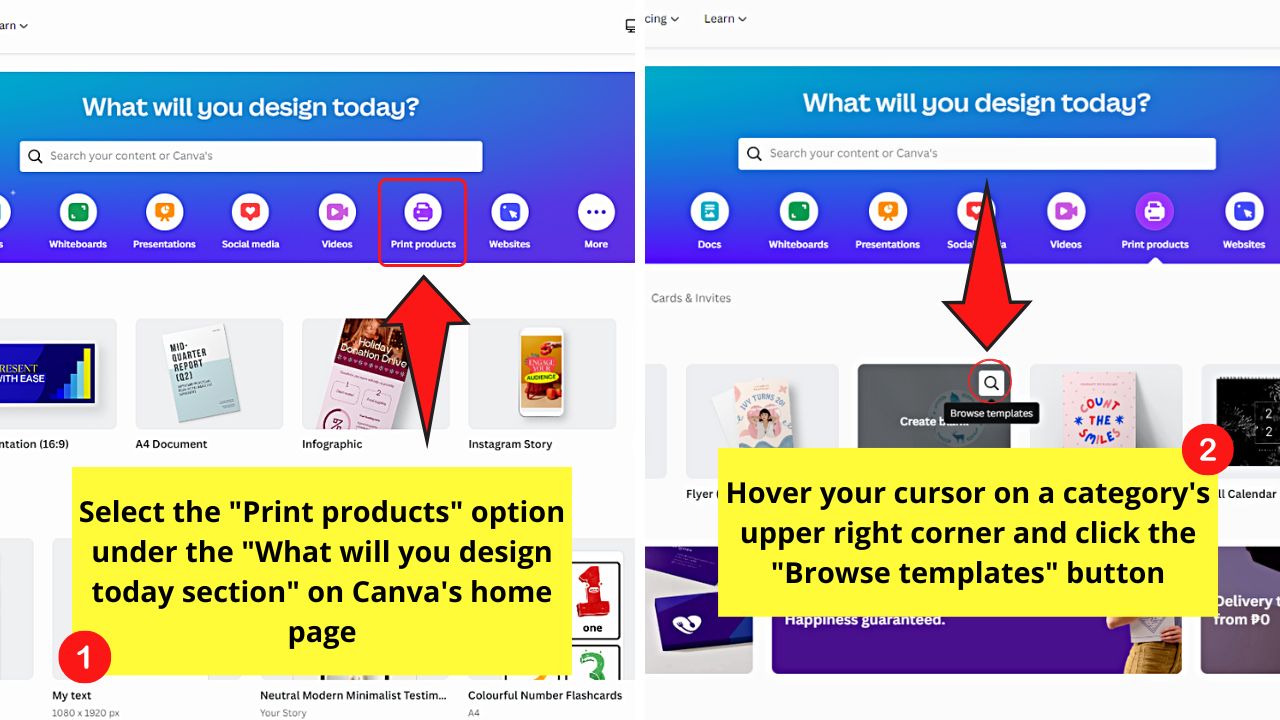

Then, select a category from the choices and click the “Browse templates” button. This button appears as a magnifying lens on the upper right of the category thumbnail when you hover the cursor over it.
Once you have selected a template, hover your cursor on the upper right of its thumbnail. This will make the meatballs menu appear.
Step 2: Click the meatballs menu and select the “Customize this template” option.


This move will open the template on a new editor page where you can begin making the adjustments.
How to Add Your Brand Logo to a Template


Step 1: Select “More” on the left-side panel and choose the “Logos” option.
But, if the template you’re using has a logo in it, delete it first.
![]()
![]()
If you already added the “Logos” tab, directly click it from the left-side panel.
![]()
![]()
Step 2: Click and drag the logo from the object panel to the canvas to position it.
![]()
![]()
In case you haven’t uploaded the logo you designed, click “Upload your Logo” on the same object panel and find its file from your computer files.
![]()
![]()
Just make sure that the logo has a transparent background so it’ll easily blend with the template you’re designing.
![]()
![]()
Step 3: Resize the logo if needed by dragging the crop marks surrounding it.
![]()
![]()
How to Edit a Template Using Your Brand Kit
Step 1: Select the “Designs” tab on the left-side panel to customize the template according to your brand style.
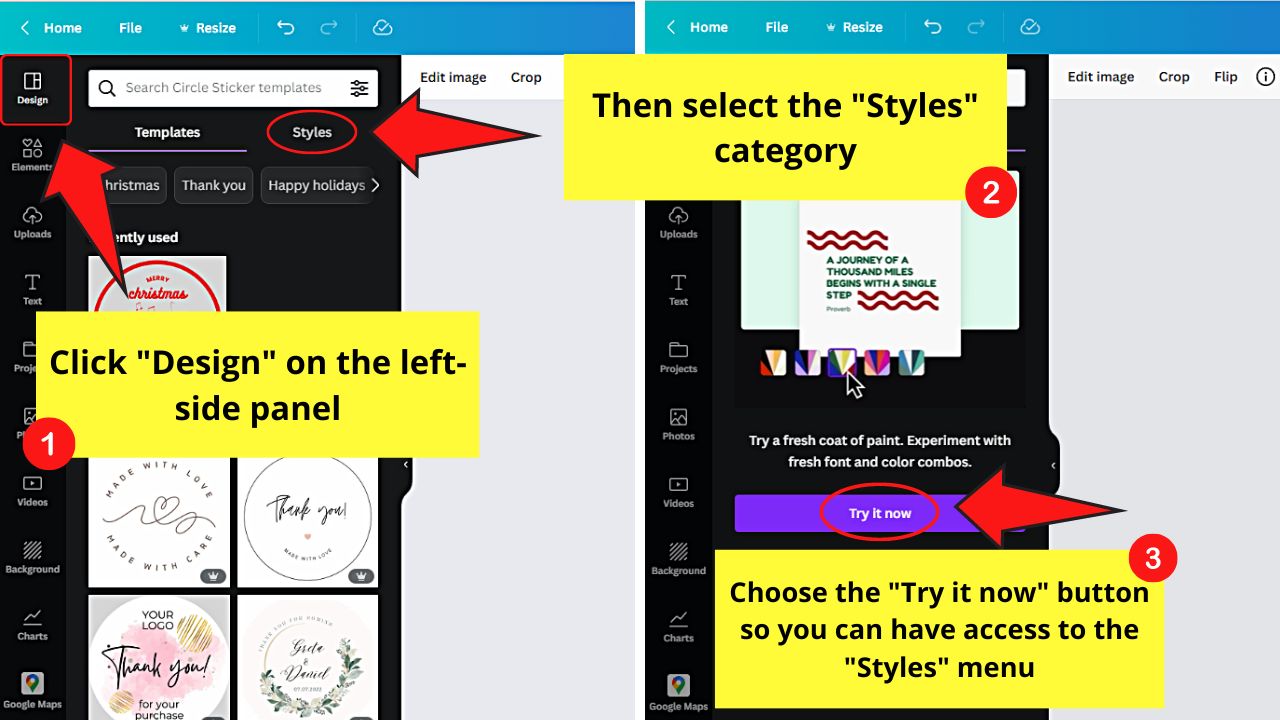

Then click the “Styles” tab to use a Canva brand kit you created. In case it’s your first time using the “Styles” section, choose the “Try it now” button.
You’ll then see all the brand kits along with their corresponding color palettes, font sets, image palettes, and combinations.
Step 2: Click the “v” button beside the brand kit name to switch between the multiple brand kits you created.
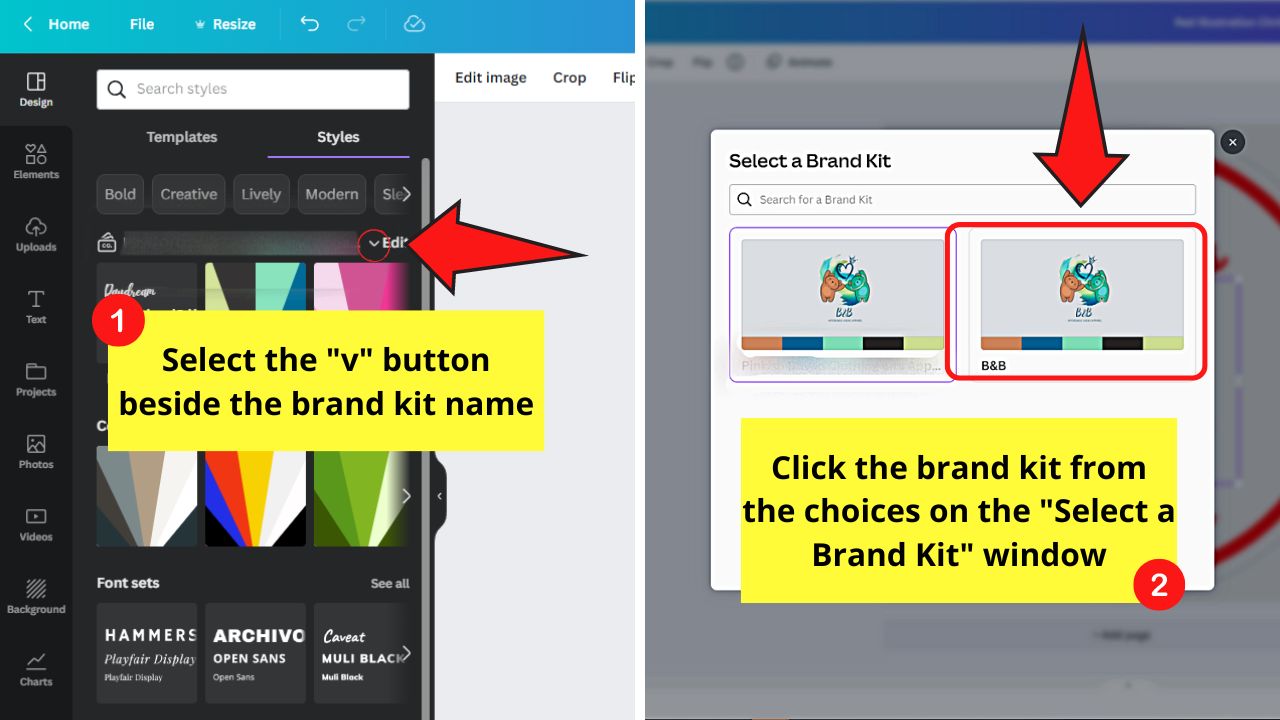
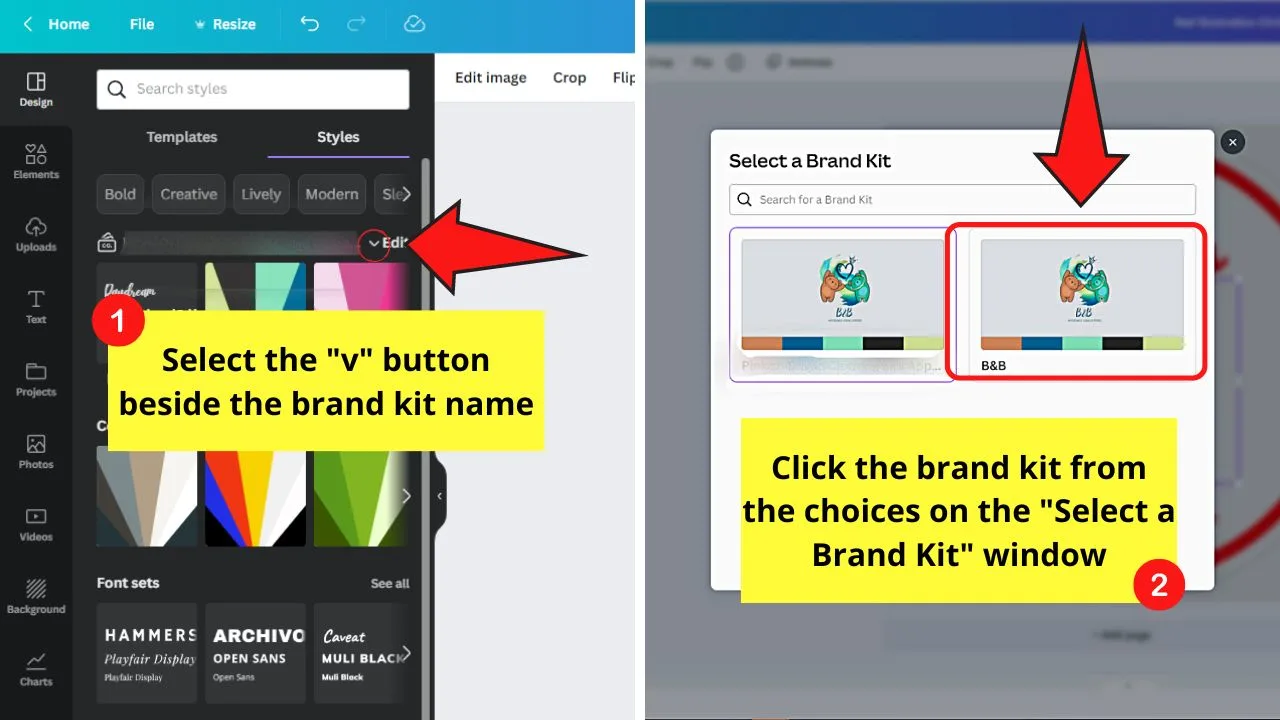
Then click on a brand kit thumbnail in the “Select a brand kit” window.”
How to Apply the Font Styles of Your Brand Kit to a Template
Step 1: Change the fonts used across the template by clicking on the “Brand fonts” thumbnail.

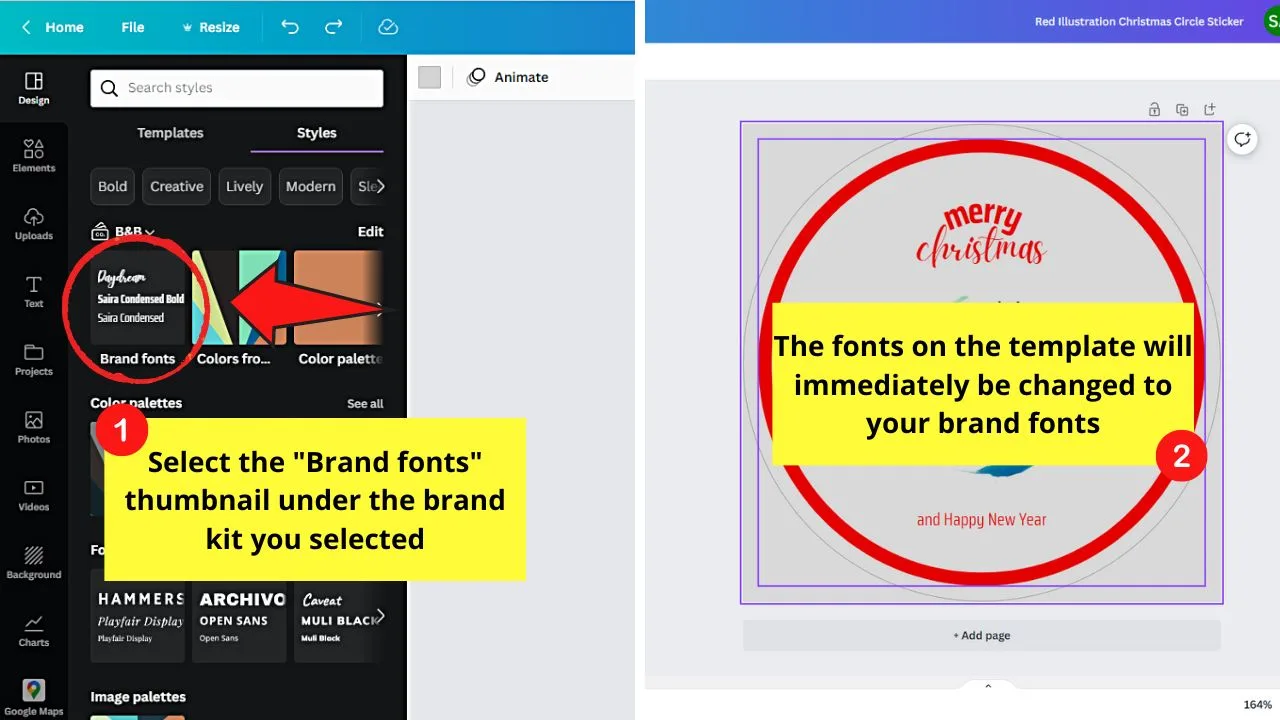
Then, select the purple “Apply to all pages” button to switch all the fonts in the template to the brand fonts you assigned. But, this button will only appear if there’s more than one page on the template you chose.
If there is only 1 page on the template, Canva will automatically switch the font style originally used on the template with the brand fonts you assigned.
A “Style applied across all pages” notification will then appear after making the selection.
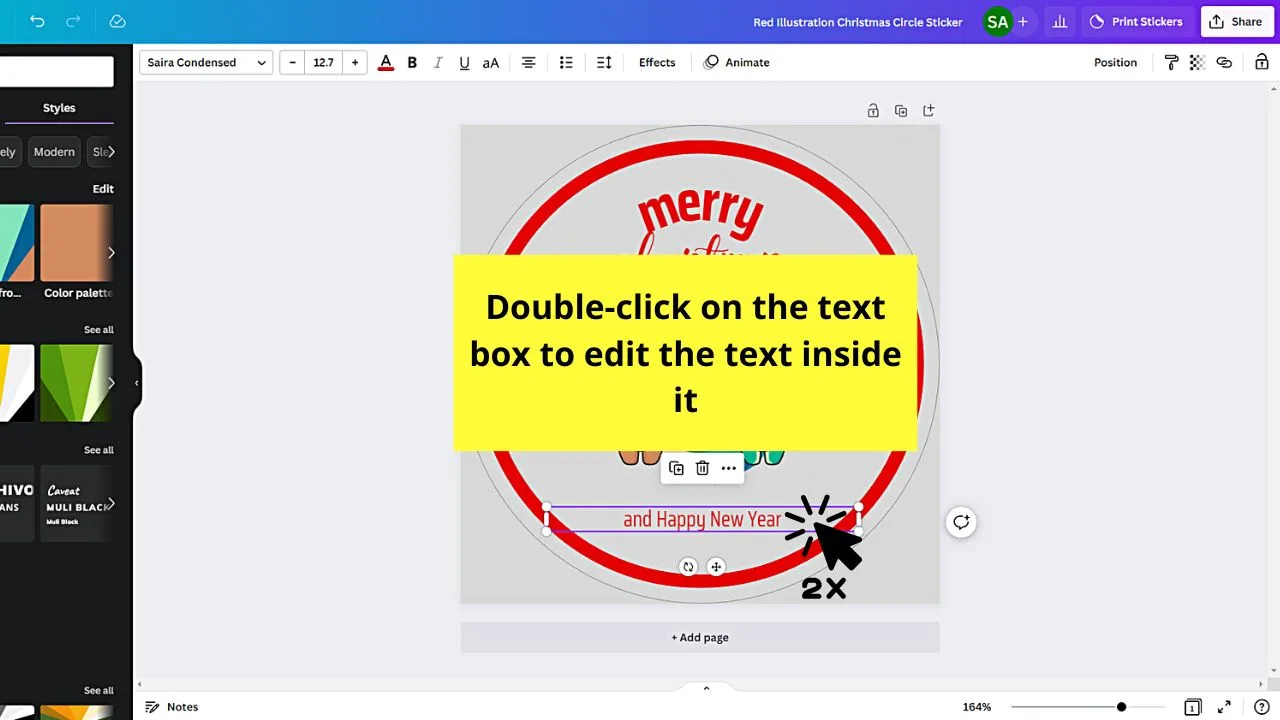
Step 2: Edit the text by double-clicking on the text boxes.

You can also resize the individual text boxes by clicking and dragging on the handles surrounding them.
If you need to adjust their position, hover your cursor until it takes the shape of a 4-headed arrow. Reposition the text box by clicking and dragging it to the part of the template where it’ll be positioned.
Step 3: Individually change the font style of the text box by double-clicking it.


Once the text’s highlighted, select the “v” button of the “Font style” box on the toolbar and choose a font style from your brand kits.
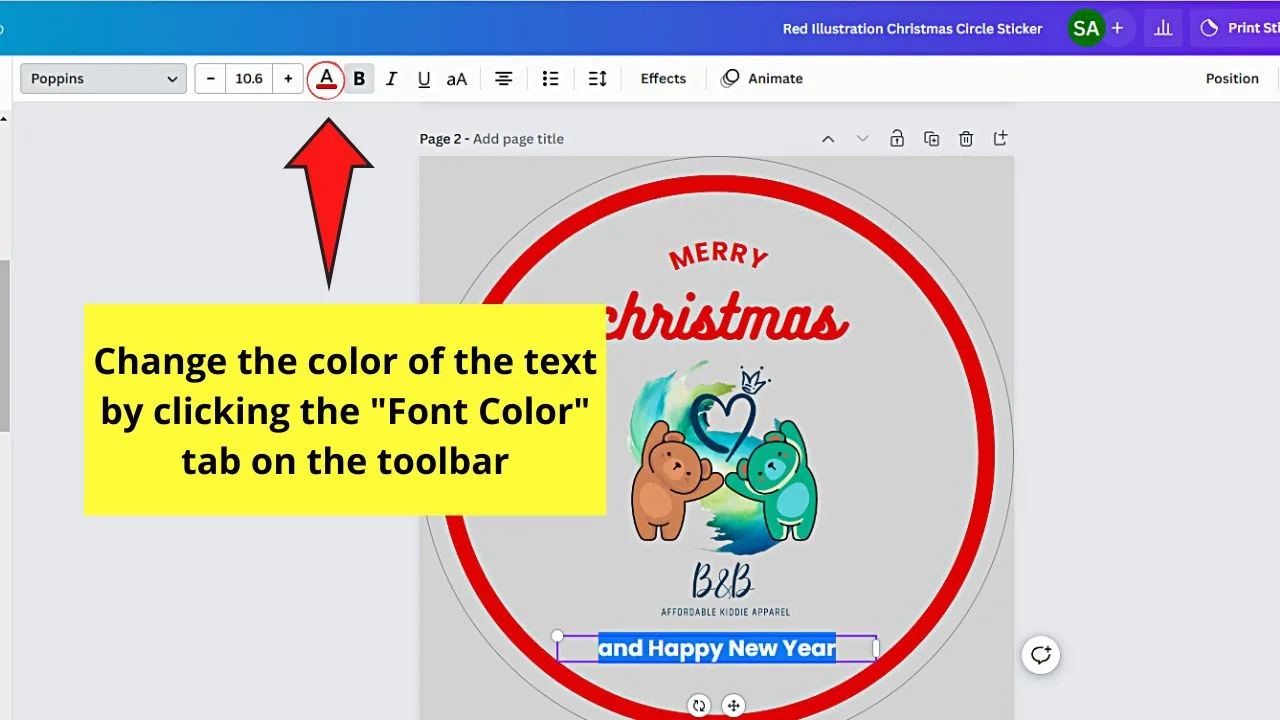
Step 4: Click the “Font Color” button on the toolbar to change the font color used on the text.

How to Change the Template’s Color Scheme With the Color Palette of Your Canva Brand Kit
Step 1: Change the template’s color scheme by clicking either the “Primary Colors” or “Secondary Colors” thumbnail.

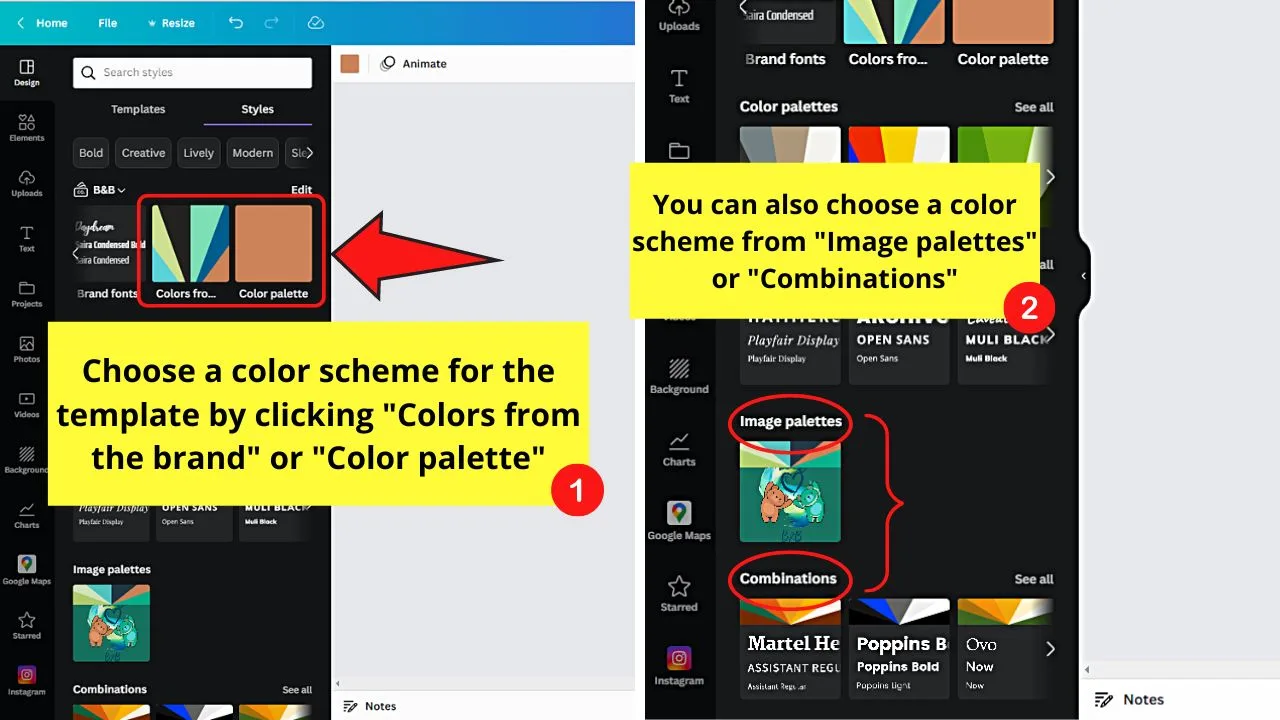
In case these options aren’t available, select between the “Colors from Logo” or the “Color Palette” thumbnails. You can even click “Image palettes” or “Combinations” if you want to.
Step 2: Click the “See all” button in the “Color Palettes” section.

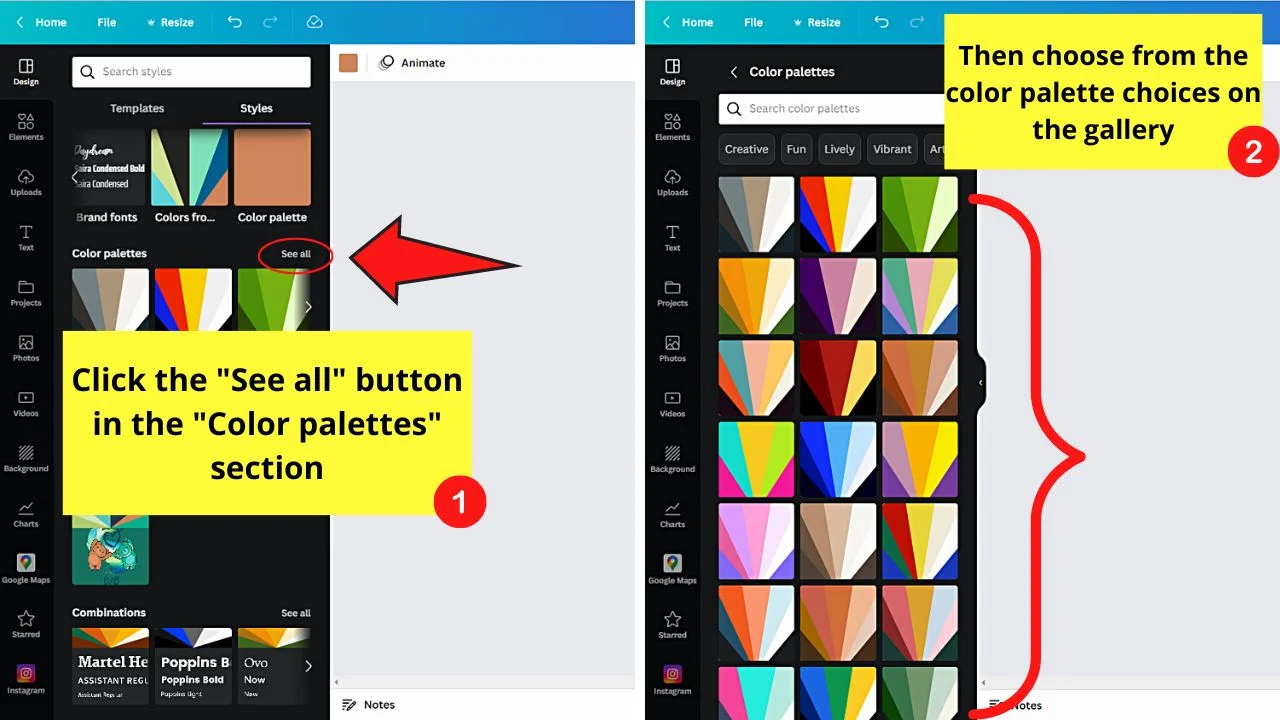
This move will enable you to have a look at the other palettes available not found on the brand color palette you created.
The template’s color scheme will automatically be changed based on the color combination you selected.
Then, you can proceed with adding other design elements to your customized Canva template. To add other design elements to the template, click “Elements” on the left side panel.


Once done editing the template, click “Share” on the menu bar.


Then, choose whether you’ll download the template by clicking the “Download” button or share it to your social media by selecting “Share on Social.”
But, if you prefer to order printed copies of the Canva template, select the “Print” option on the menu bar.


Then choose the pages you’ll print, as well as the size, paper finish, and the number of pieces you’ll print.
Then, click “Checkout” to complete your print order. If you’re not sure whether you’ll proceed with your print order, select “Add to Cart” instead.


Frequently Asked Questions about How to Apply a Brand Kit to a Template in Canva
How do I add a new brand kit to my account on Canva?
Before you can add a new brand kit to your Canva account, you should be on Canva Pro first. After upgrading, click the “Brand” tab on the home page’s left-side menu. Then, make sure to click the “Brand Kit” tab and select the “Add New” button.
What is a brand kit in Canva?
A brand kit in Canva is a collection of fonts, logos, colors, and images that visually describe your brand. These brand assets and design choices can then be used on your Canva projects to make them consistent with your brand identity.


Hey guys! It’s me, Marcel, aka Maschi. On MaschiTuts, it’s all about tutorials! No matter the topic of the article, the goal always remains the same: Providing you guys with the most in-depth and helpful tutorials!

