
Who doesn’t love animations in their videos, right?
Using the right animation and speed spells the difference between hooking your audience or making them skip for another footage.
But, if you’re a Canva user, not only will you be able to add fun animations, but you can also find a way to change the animation speed — even with the most unconventional methods.
How to Change the Animation Speed in Canva
Unfortunately, you cannot truly adjust the animation speed in Canva. There’s indeed a timing function but it only lets you adjust the speed of individual slides and pages. However, if you do use this function intelligently, it can be used as a workaround to manipulate the actual animation speed.
Changing Animation Speeds in Canva: Possible or Not
Adding animations to your designs in Canva is so easy that you can create a whole video reel of it in under 5 minutes (if you’re on the expert level already).
But, can you adjust the animation speed itself?
If you’ve been paying attention earlier, there is no way that you’ll speed up or slow down an animation’s speed.
Even if you make use of the clock icon (situated on top of your Canva project), what it actually does is just alter the duration of the entire slide/page you placed the animation onto. Whether you select a text or a page animation, the actual speed of the animation itself can not truly be adjusted. But, you can alter the duration of a particular page or slide to give the illusion that you changed the animation speed — even if technically you didn’t.
What happens here is simply that you make the duration of each slide/page really short and then you add more elements page after page. I guess you get the idea.
So, if you want to make use of this magical trick, please read on.
Canva’s Edit Timing Function (Clock symbol/stopwatch symbol)
After opening a video design file in Canva, you’ll notice a stopwatch icon (or clock symbol) with the 5.0 s text beside it sitting on the top left corner of the editor toolbar.
That button controls the play duration of that particular page. By default, Canva sets the timing per page to 5 seconds.
To change that, all you need to do is (granting you’ve already added an animation style to the page):
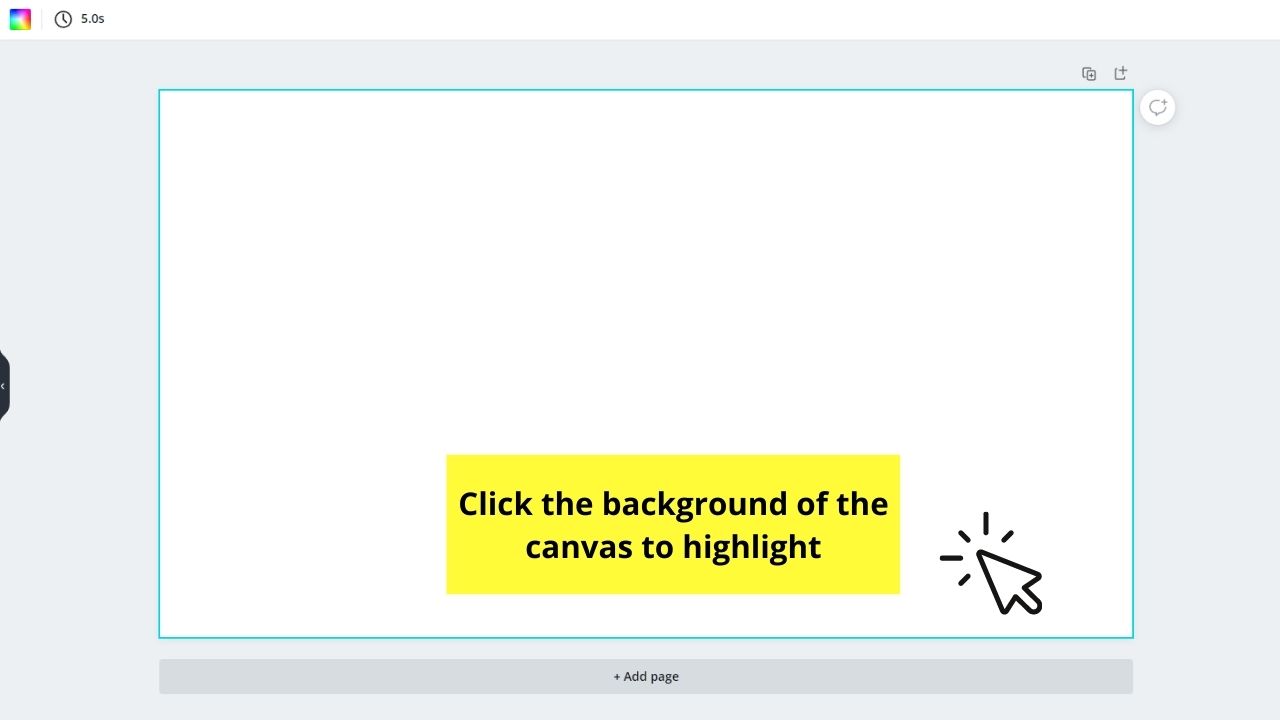
Step 1: Click once on the background of the canvas you’re currently working on.
![]()
![]()
Step 2:Choose the watch icon on the editor toolbar’s left side.
![]()
![]()


Step 3:In the dropdown menu that appears, you’ll see a slider with a box stating the duration of that page.
![]()
![]()
You can adjust the slide or page duration in 2 ways.
One you can drag the slider sideways to adjust the length of time the page or slide is played.
![]()
![]()
The second way is to directly type inside the box the speed that you want.
Just click inside the box, type the numbers inside it, and press Enter on your keyboard to save the changes.
![]()
![]()
Repeat these steps for all the pages on your video design.
But, with that said, you don’t need to have the same duration for each page or slide in your design.
That’s just one of the various reasons that make Canva great. You can do so much customization within the tool.
So, if you want to see how exactly you can do this on your design, keep reading.
Customizing Duration for Animated Slides on Your Canva Designs
Step 1: Click on the background of the page you want to animate. You’ll know you’ve selected it as a faint line surrounds the page.

Step 2: Once the page’s highlighted, select the color picker tile on the editor toolbar so you can change its background color.
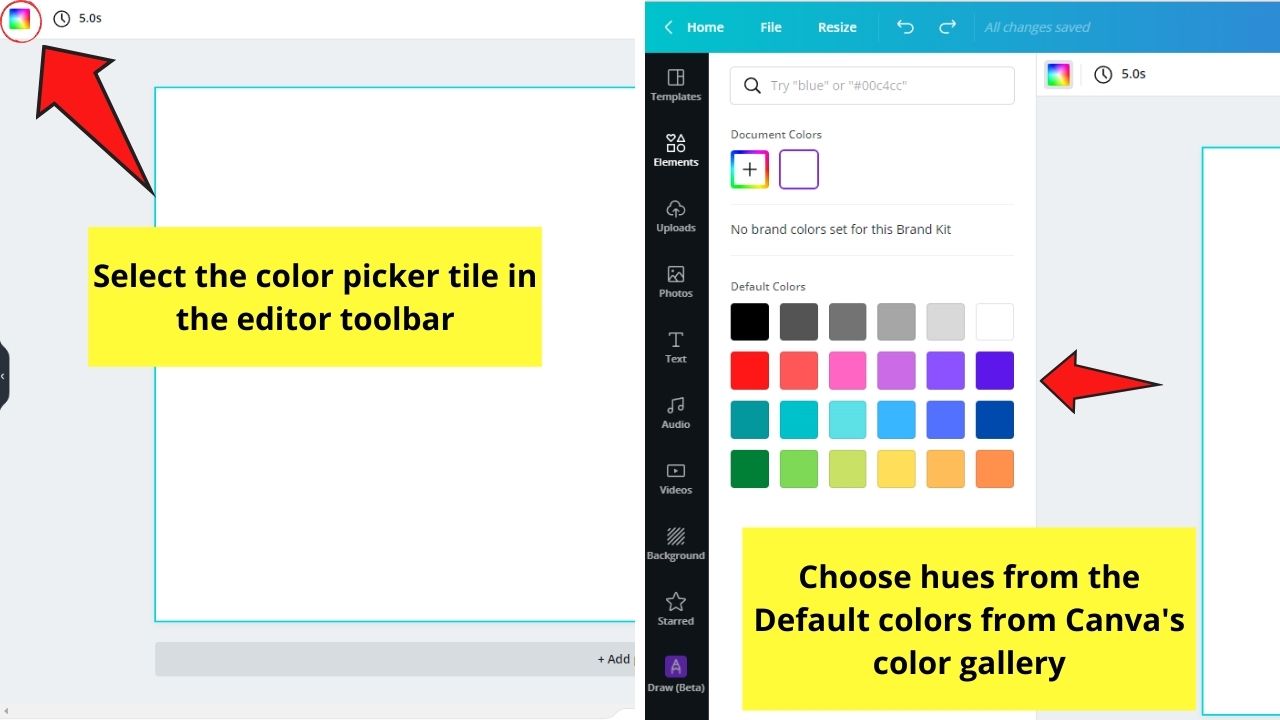
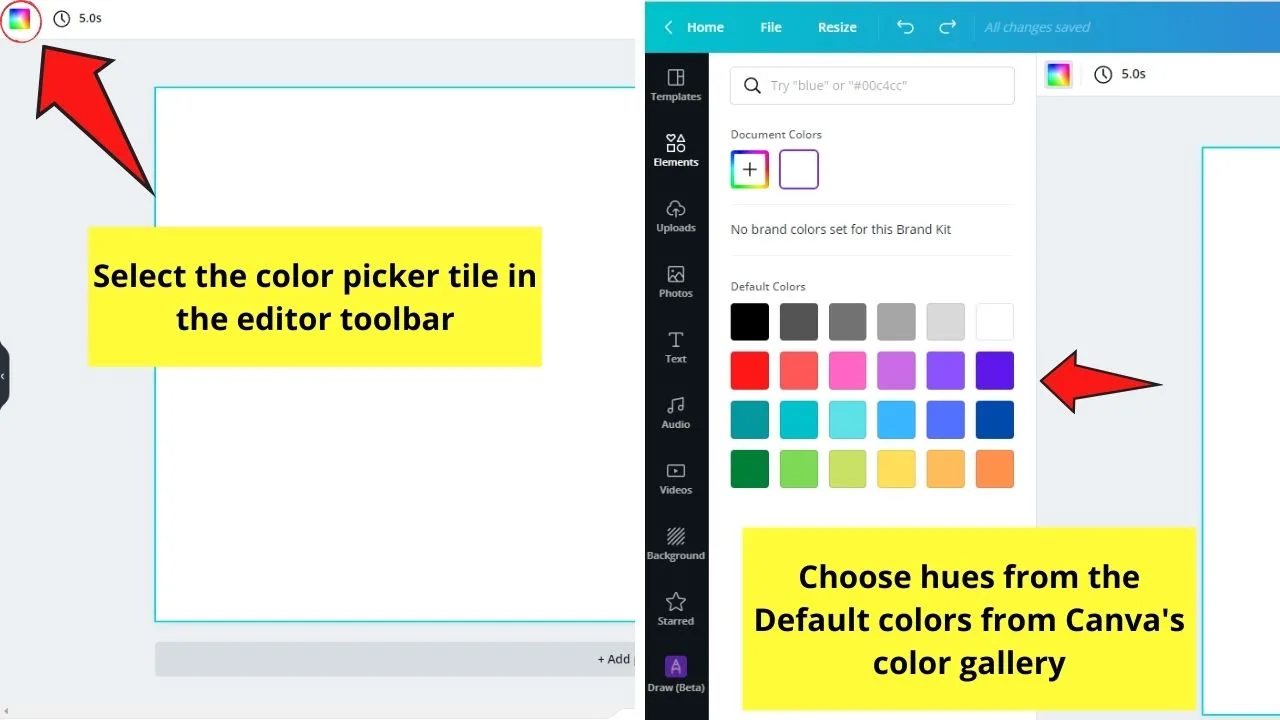
You can choose a hue from the default colors available in the gallery.
But, if they don’t fit your design, use the search bar function to type the keywords of the color and discover various palettes.
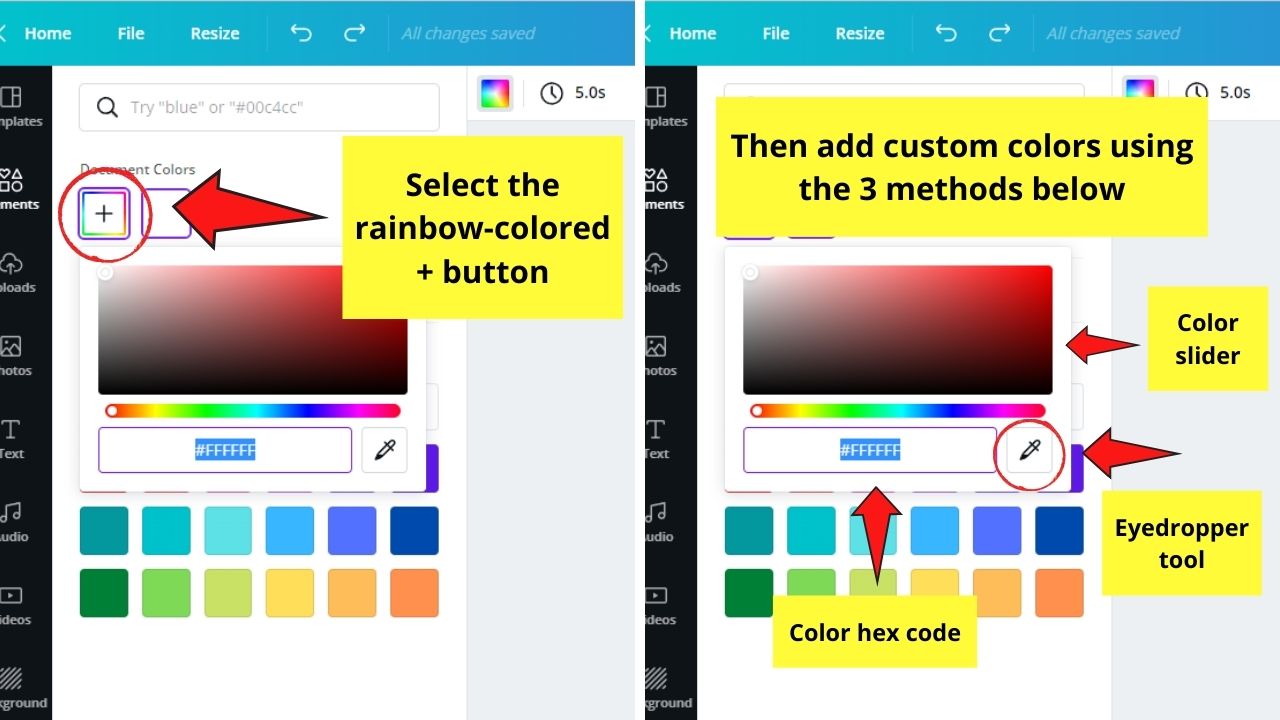
You can also select the rainbow-colored + button to choose custom colors through the color slider, inputting the color hex code, or using the eyedropper tool.

Whatever method you choose, just pick out a color and click its tile for it to be applied on the canvas.
Step 3: Then, start adding elements to your design.
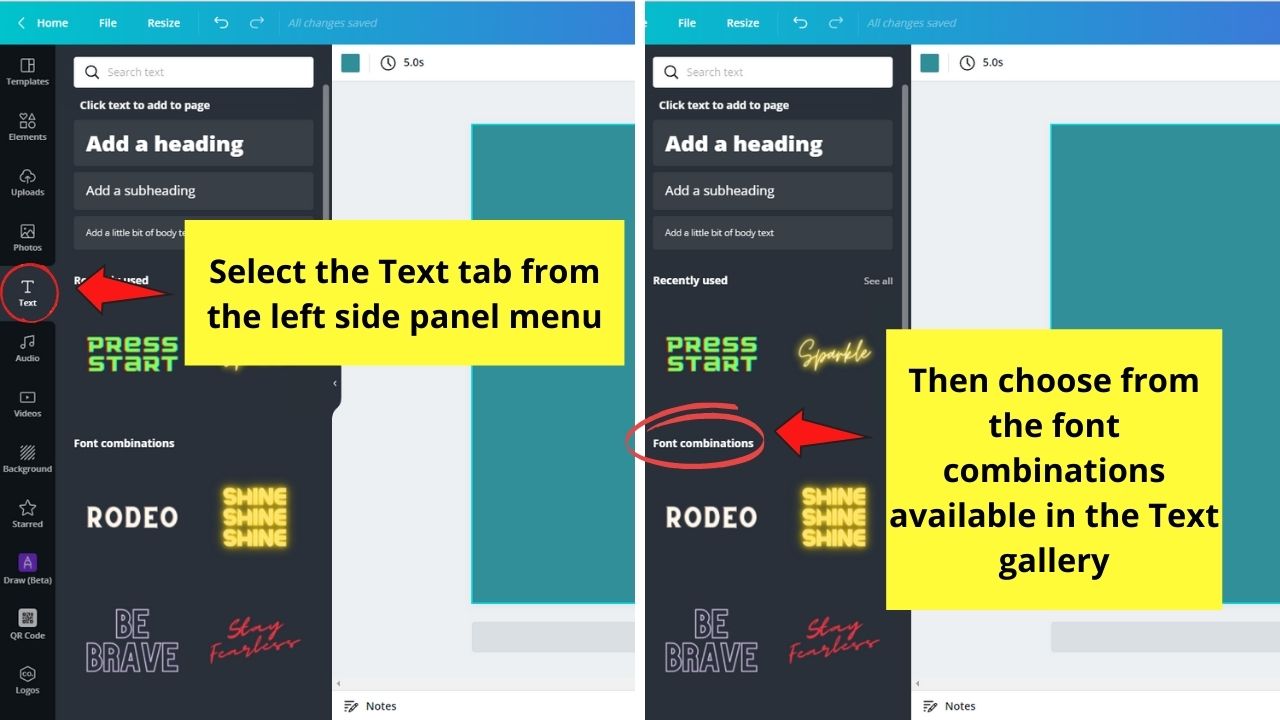
You can begin adding text. To do this, head to the left side panel and select the Text tab. Scroll down to use the pre-made font combinations available.

If, however, you prefer a shortcut, you can press the T button found on your keyboard, and a text box’s automatically added to the canvas.
Adjust the text box’s position and resize it accordingly.
Step 4: Now, duplicate the first page by clicking the Duplicate page button on the upper right of the page.
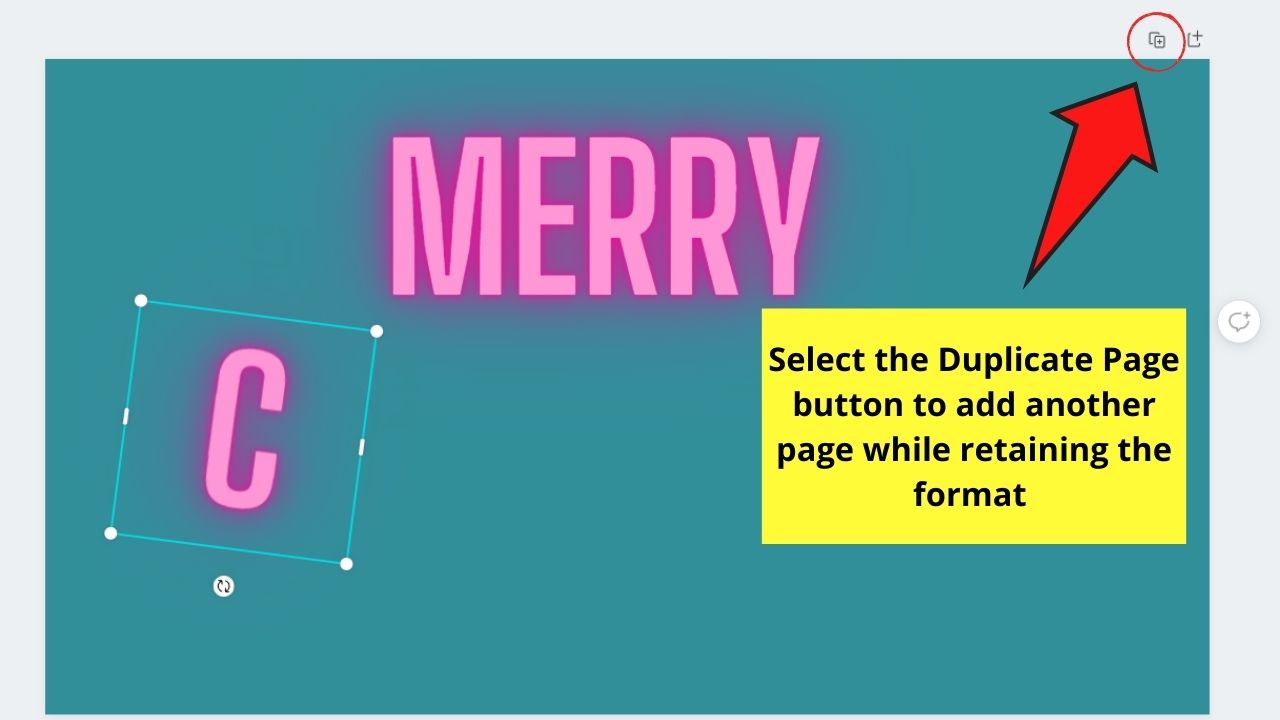

This move will then add another page to your project file while retaining the format of the previous page.
Step 5: Continue to add text boxes to your design by following the instructions in Step 3 of this section.


Keep on duplicating pages and adding text boxes until you complete the message part of your design.
Step 6: Once you’re done adding text boxes and have reached the final slide, head to the Elements tab on the left side panel and click on it.
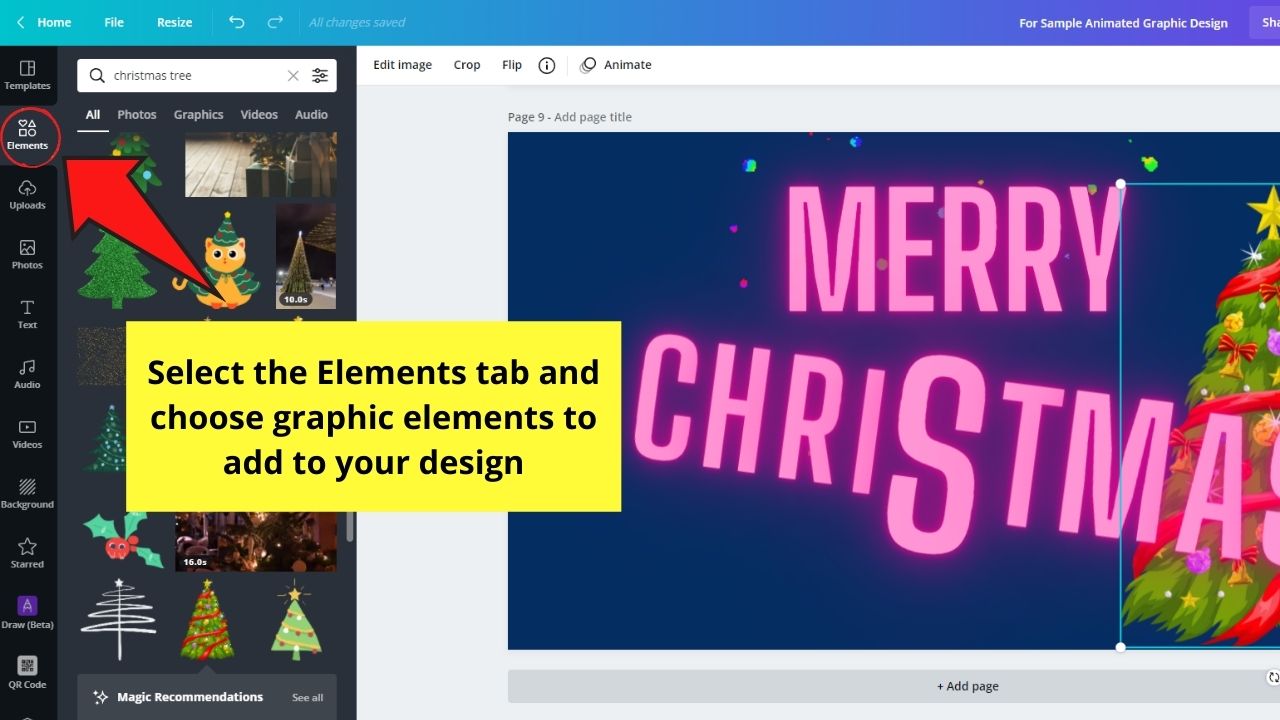

In the gallery that appears, you can choose to add static graphic elements or animated ones, depending on what works best for your design.
Step 7: Now, add animations to each page of your design.
Click the background of the page, then select the Animate button on the editor toolbar.

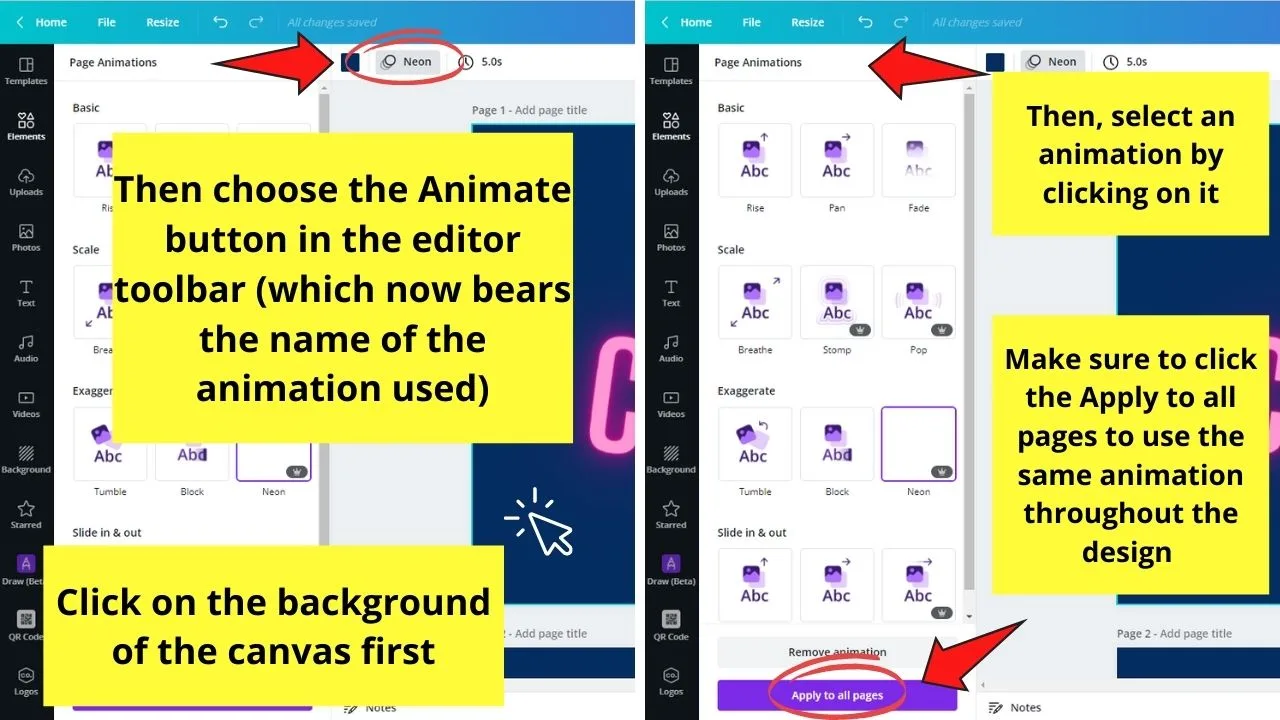
You’ll then see a gallery of page animations available. Select one by clicking on it.
Just make sure to select the Apply to all pages box so that the animation you select will be the one used for all the slides of your design.
Step 8: On the final page of your design, select another animation style for the text or other elements.
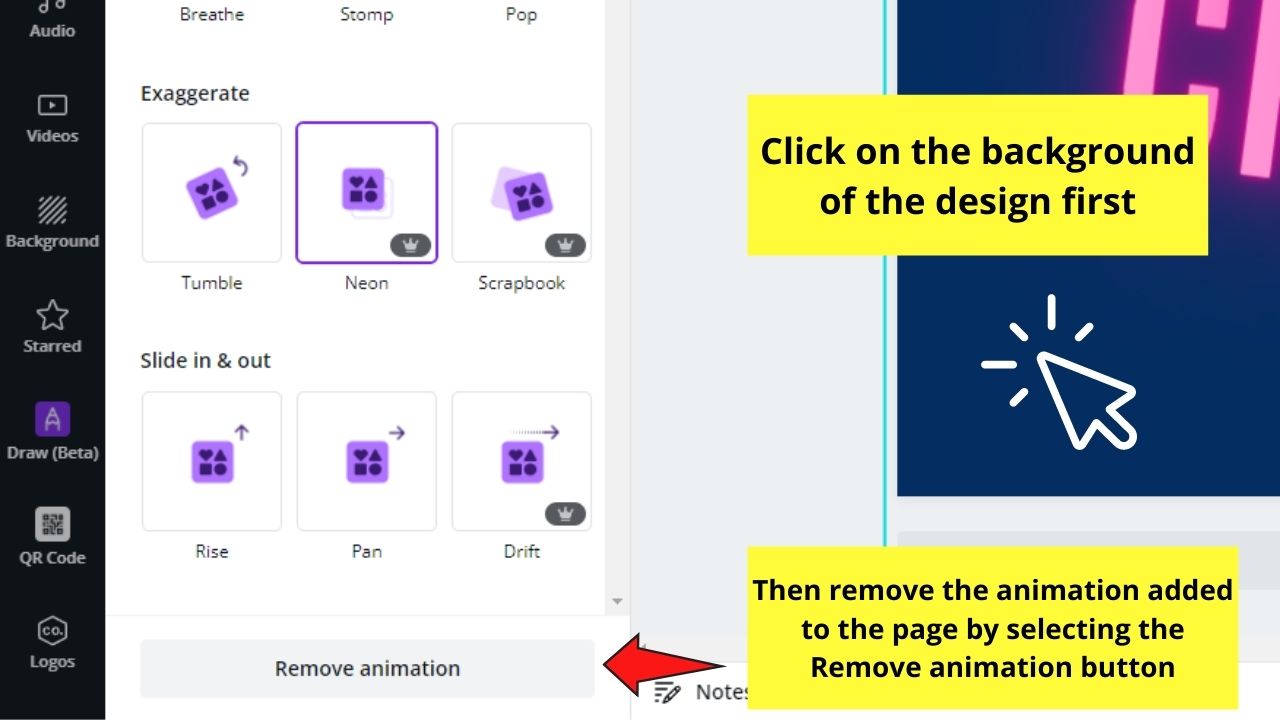

Just click on the background, select the Animate button, click the Remove Animation button, and choose an animation for that individual element.
Step 9: Once you’re done adding animations, adjust the duration of each page.

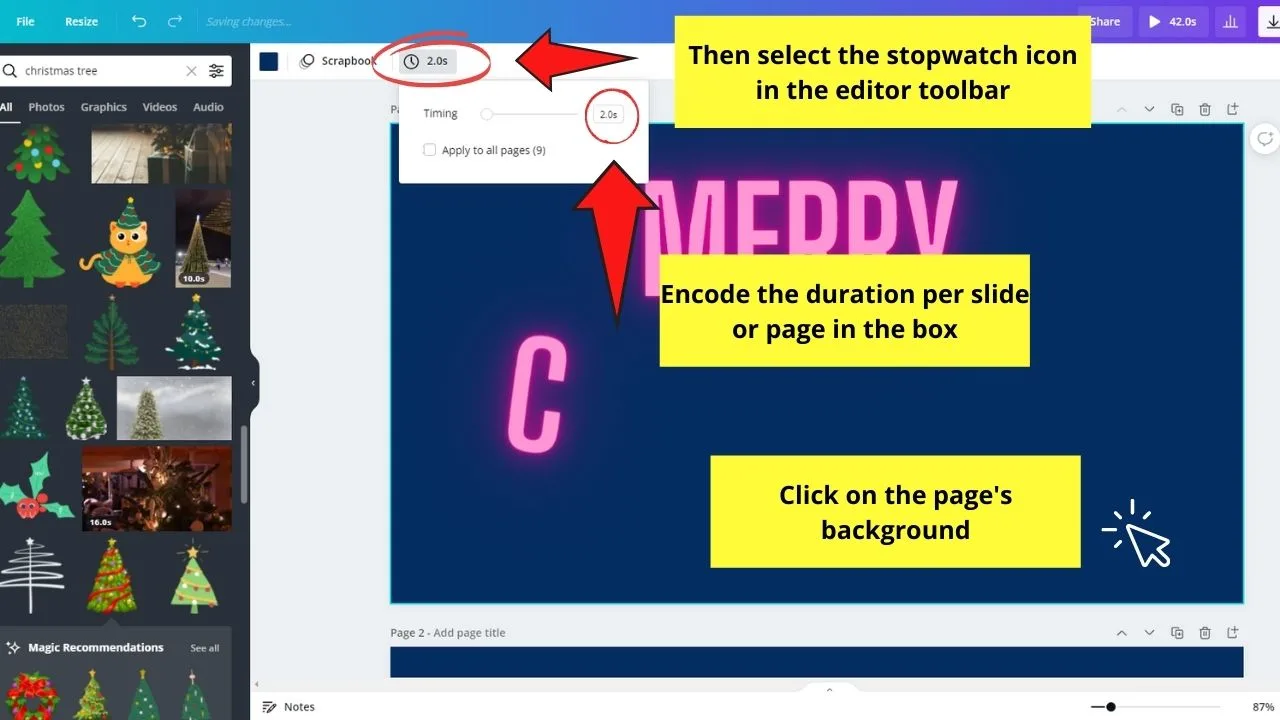
Click on the background of the first page, select the stopwatch icon, and input the duration in the box.
Continue changing the duration of each page until you reach the final page.
If, however, you want a spell-out effect on your design, you’ll have to drag the slider until the 0.1-second mark for each page until the word’s complete.
Step 10: Watch the preview of your animated graphic by selecting the Preview button on the menu bar.


If you’re satisfied with the end result, click the Download button within the Preview window and select the MP4 file type.

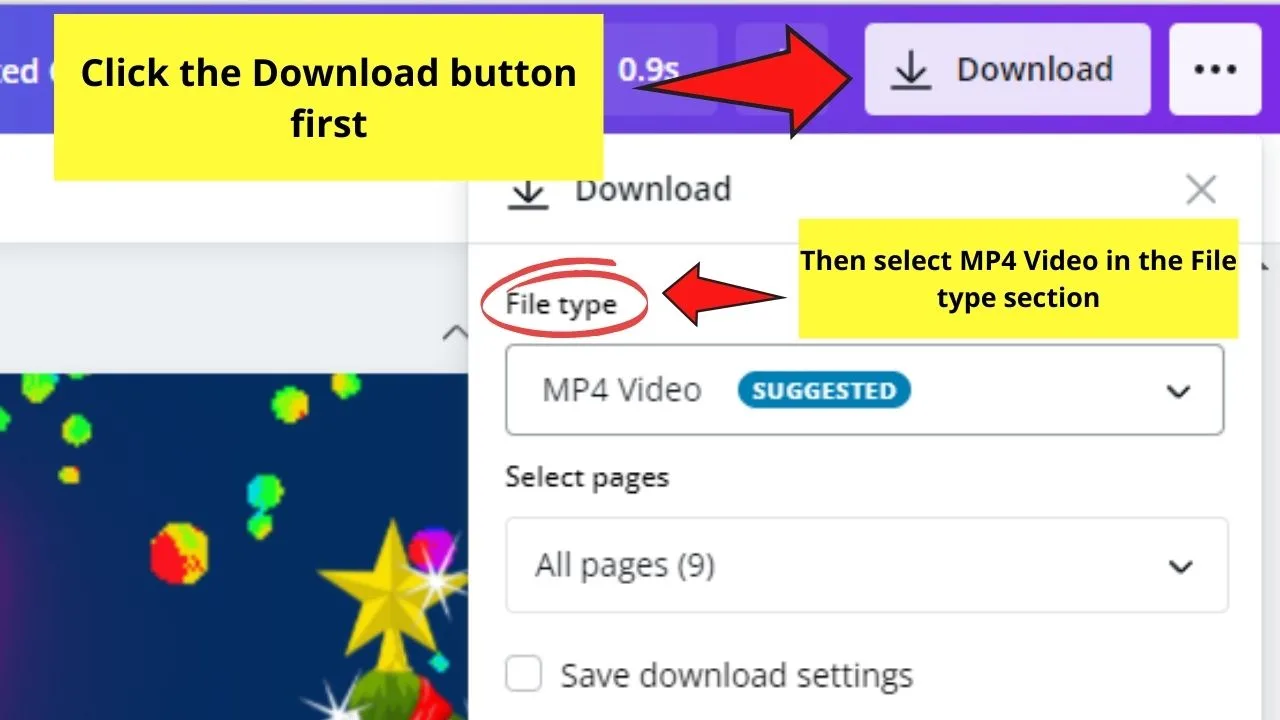
You can also choose the GIF option, but any sounds you add won’t appear on the downloaded design.
Select the pages you want to download (which is all of them, by the way) before you click the Download button.
Why Changing Duration of Animated Pages is Important
As everyone knows, more people shift to visual content to gain the information they need about certain subjects.
And, while most prefer watching videos, footage won’t be that eye-catching if you merely have someone talking for the most part.
Thus, to grab your audience’s attention, animated graphics in your videos will be a big help to achieve this goal. Plus, it helps keep your viewers engaged with your footage.
But, to gain the most of your audience’s engagement, you’ll need to keep the footage short — otherwise, you’ll bore them to death.
Hence, the need to adjust the duration of your animated graphics to maximize viewership.


Hey guys! It’s me, Marcel, aka Maschi. On MaschiTuts, it’s all about tutorials! No matter the topic of the article, the goal always remains the same: Providing you guys with the most in-depth and helpful tutorials!

