Everyone knows Canva as the easiest graphic design tool that has ever been created.
With its drag-and-drop feature, you can easily add any picture, video, element, or even text to your project canvas.
But did you know you can create a slideshow presentation in this nifty graphic design tool?
If you didn’t know that’s possible, it’s high time you should. Especially now that you can adjust the duration of each slide, creating a video in Canva has never been easier.
How to Change the Duration of Slides (Pictures) in Video Projects
To change a slide’s duration in Canva video projects, you have to select a slide first. Click on the clock icon (Edit timing button) found on the Canva toolbar. Then, either drag the slider to the right to increase the duration or manually input it on the box. Click the “Done” button after.
Step-by-Step Guide in Altering Slide Duration in Canva Videos
For those who are new to Canva, you’ll find yourselves lucky as editing a slide’s duration wasn’t incorporated in the app previously.
Technically, each slide you’ll add to your video presentation has a default setting of 5 seconds.
But, thanks to the developers, you can now change the default slide timing with a few simple steps, which you’ll find out in a bit.
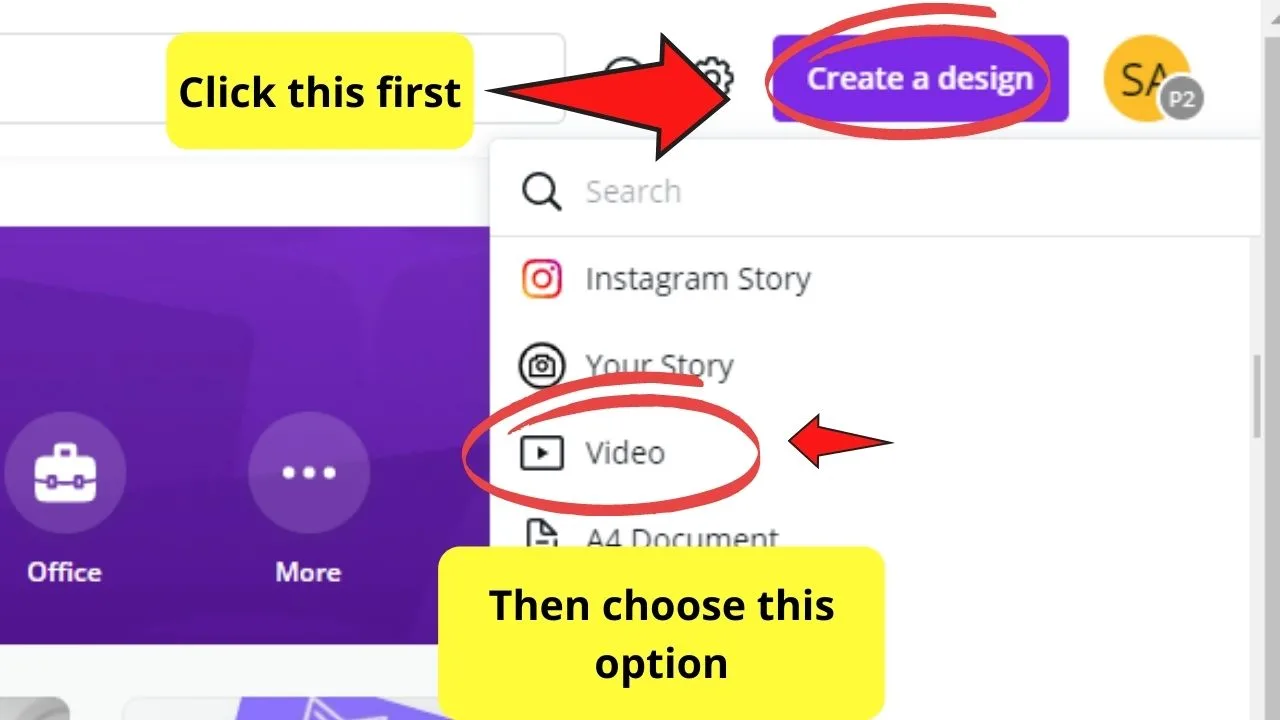
Step 1: Create a new design file by clicking on the “Create a New Design” button on Canva’s home page.
Step 2: On the dropdown menu that appears, select “Videos.”
Step 3: Once a blank canvas appears, head over to the left-side menu on your Canva screen and tap “Photos.”

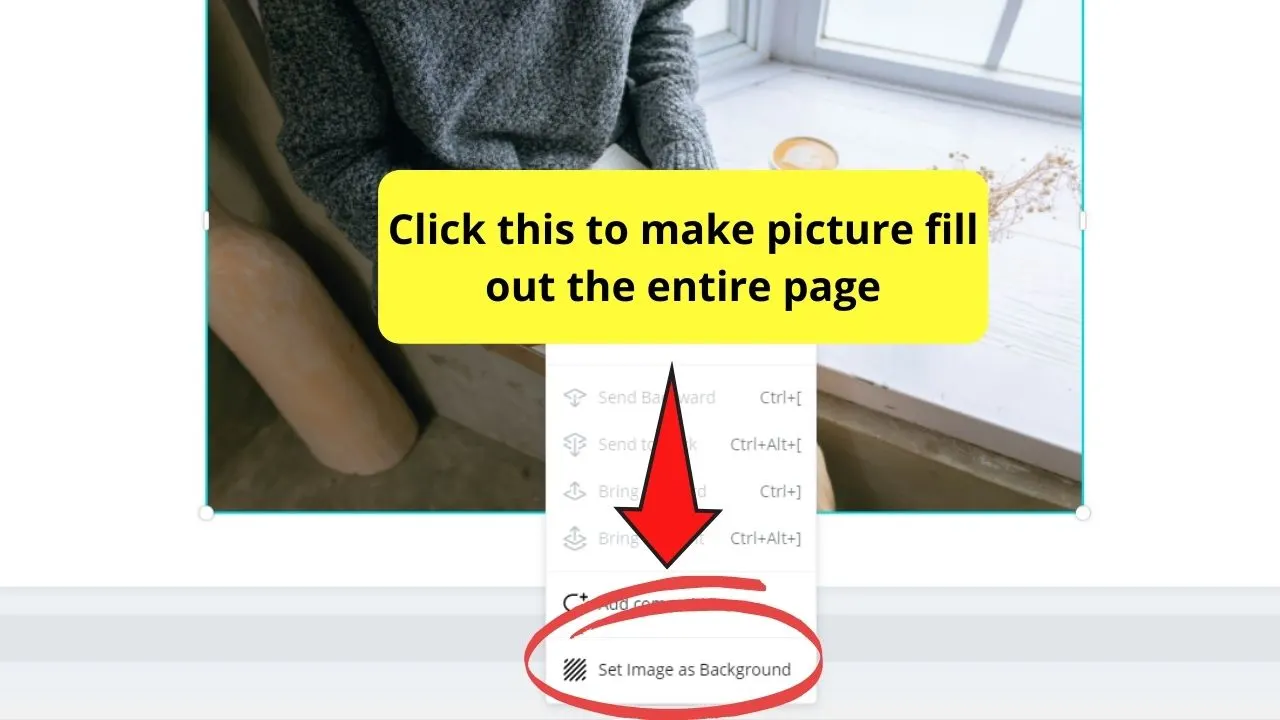
Step 4: Scroll down and select the pictures you’d like to use for your slide. Right-click on the image and choose “Set as Background Image” to make it fill up the entire page.
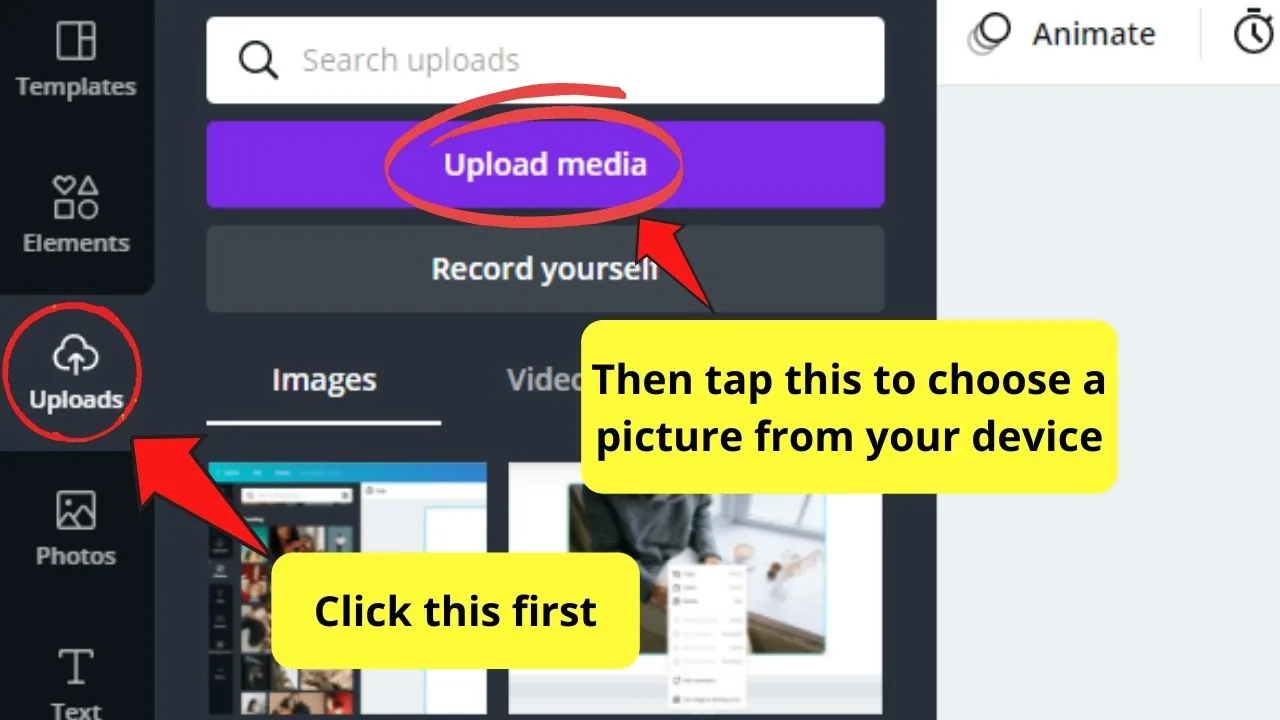
Step 5: You can also upload images from your device, but you’ll have to head over to the “Uploads” tab instead. Once your pictures are successfully uploaded, follow the same procedure in adding pics to your project.
Step 6: Click on the slide you’d like to change its duration on your presentation to select it. A white toolbar above your project template will then appear.
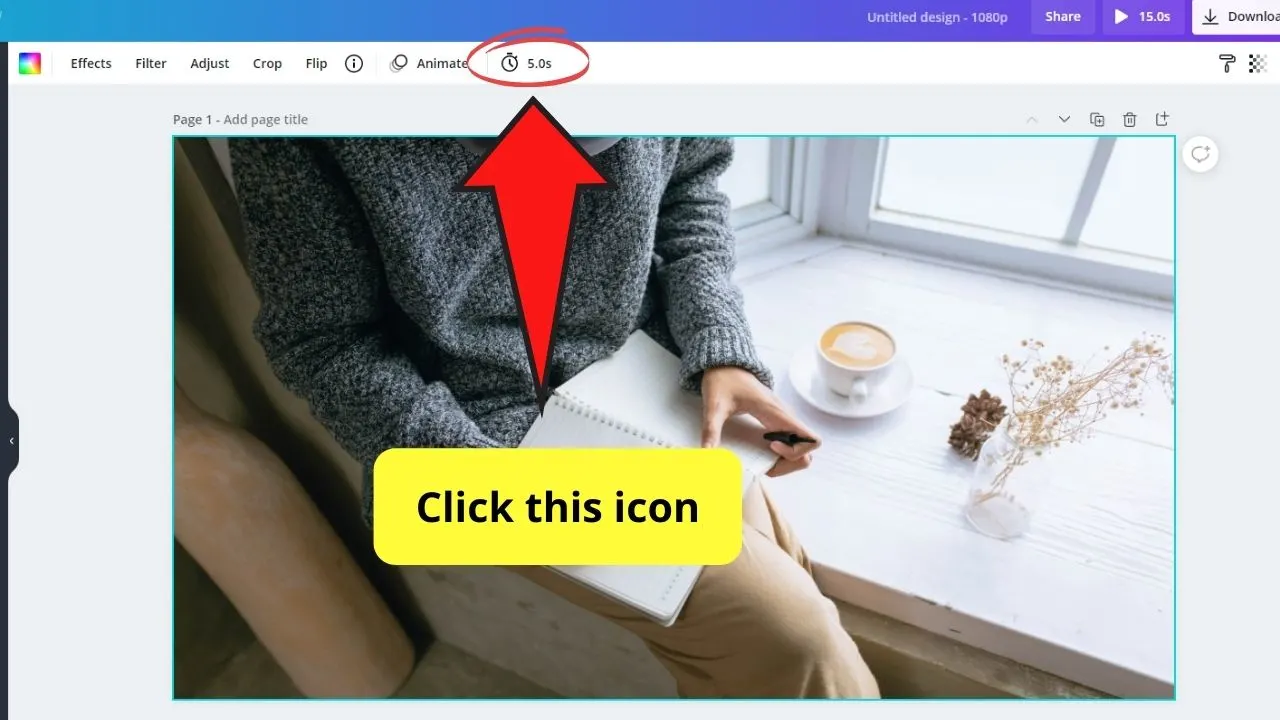
Step 7: Tap the “Edit Timing” button on the toolbar. This button appears as a pocket watch icon with the “5.0s” text written beside it.
Step 8: Increase the slide’s duration by clicking and dragging the white circle on the “Timing” slider. You can also input how many seconds you’d like that slide to last by typing the number on the box beside the slider.
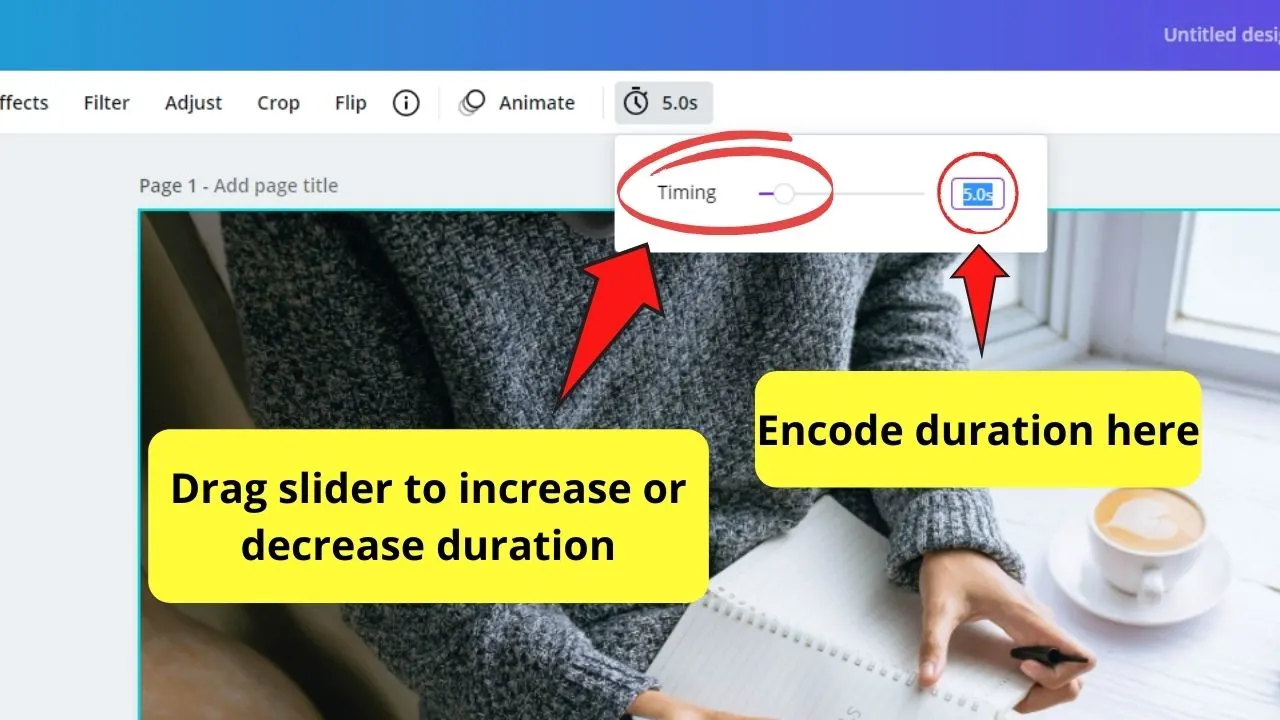
Step 9: Once you’re satisfied, hit the purple “Done” button below the dropdown menu. You can also click on another page to exit the Timing editor.
Step 10: Watch the preview of your video by clicking on the purple “Play” button above the toolbar.
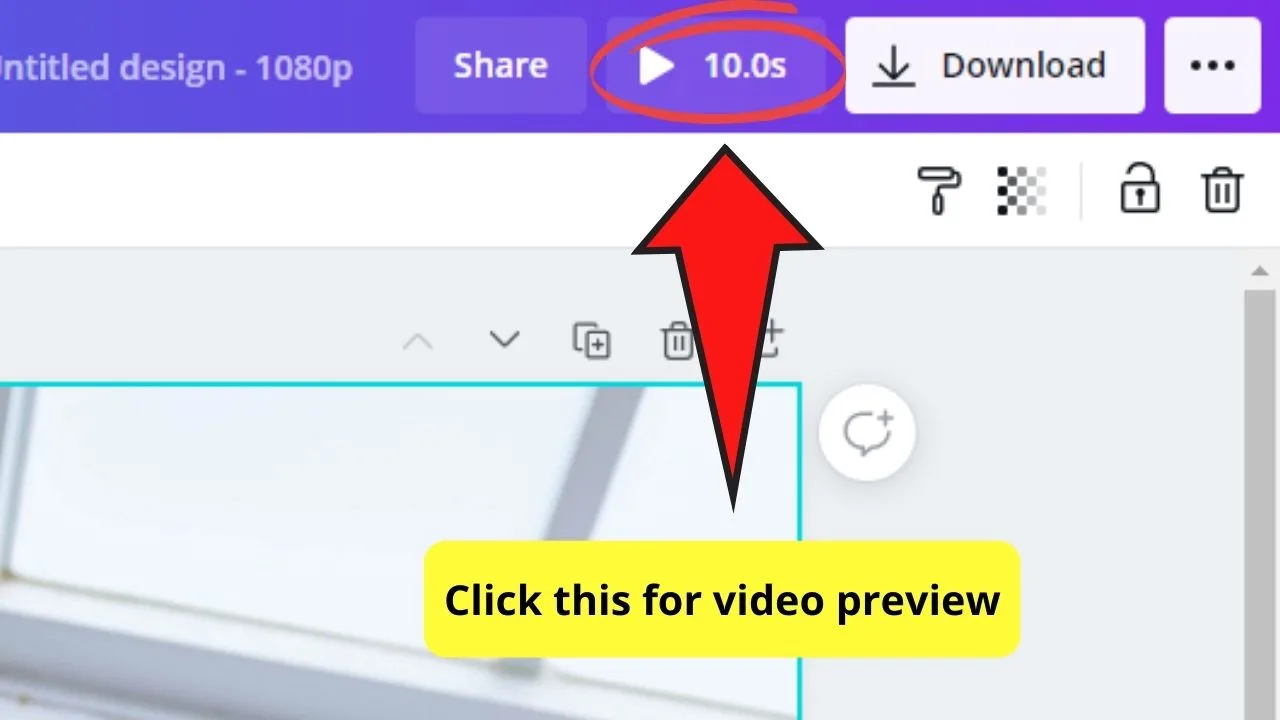
And, just like that, you can already adjust each slide’s duration. Simply repeat the steps mentioned above for every slide that you’ve added to your project.
Unfortunately, though, you cannot edit the duration of the slides as a batch.
Hence, no matter how many pictures you added to your project, you have to individually adjust each slide’s duration.
But, do the same steps apply when you add a video to your project?
Cropping Videos in Canva: The How-Tos
Now, what if you want to add a video instead of a photo to your presentation? Can you still adjust its duration as well?
Good news, Canva’s got you covered on this. It’s only that you’ll need to follow a different series of steps to adjust the video length.
And, if you’re familiar with how to crop videos in other video editing tools, you’ll find that such a process works in the same way in Canva.
Step 1: On the left-side menu, either tap the “Uploads” tab (footages from your device) or click “Videos” if you want to use stock videos from Canva’s gallery.
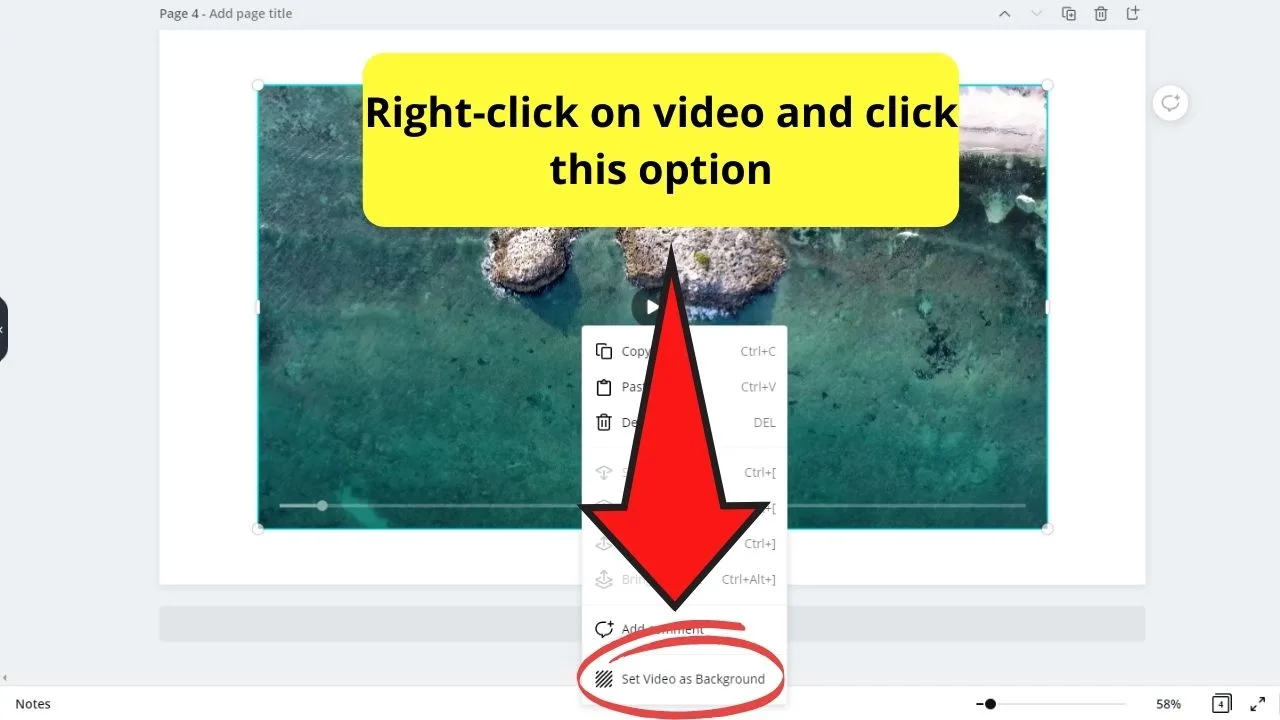
Step 2: Once you’ve chosen the video you’ll use for your project, click and drag it to the blank canvas. Right-click on the video and set it as a background image.
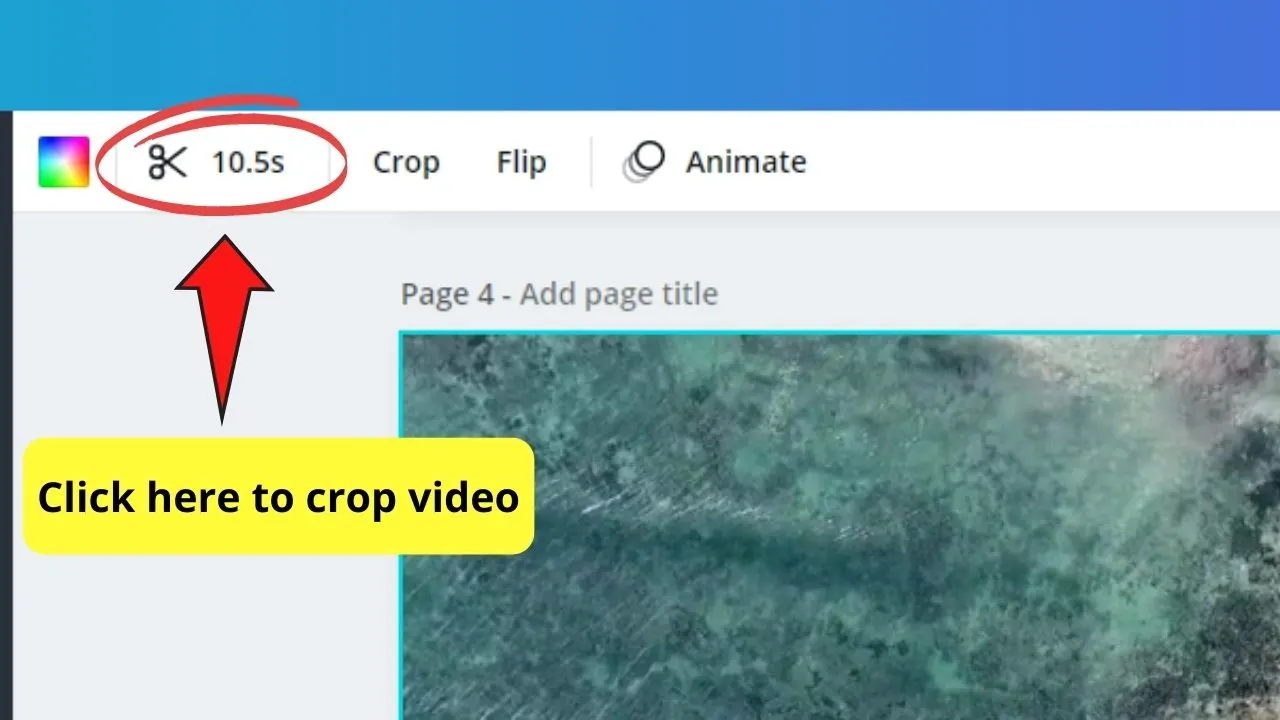
Step 3: To adjust the video’s length, click on the footage and tap the “Crop” tab on the toolbar. This button appears as a pair of scissors with the video length written beside it.
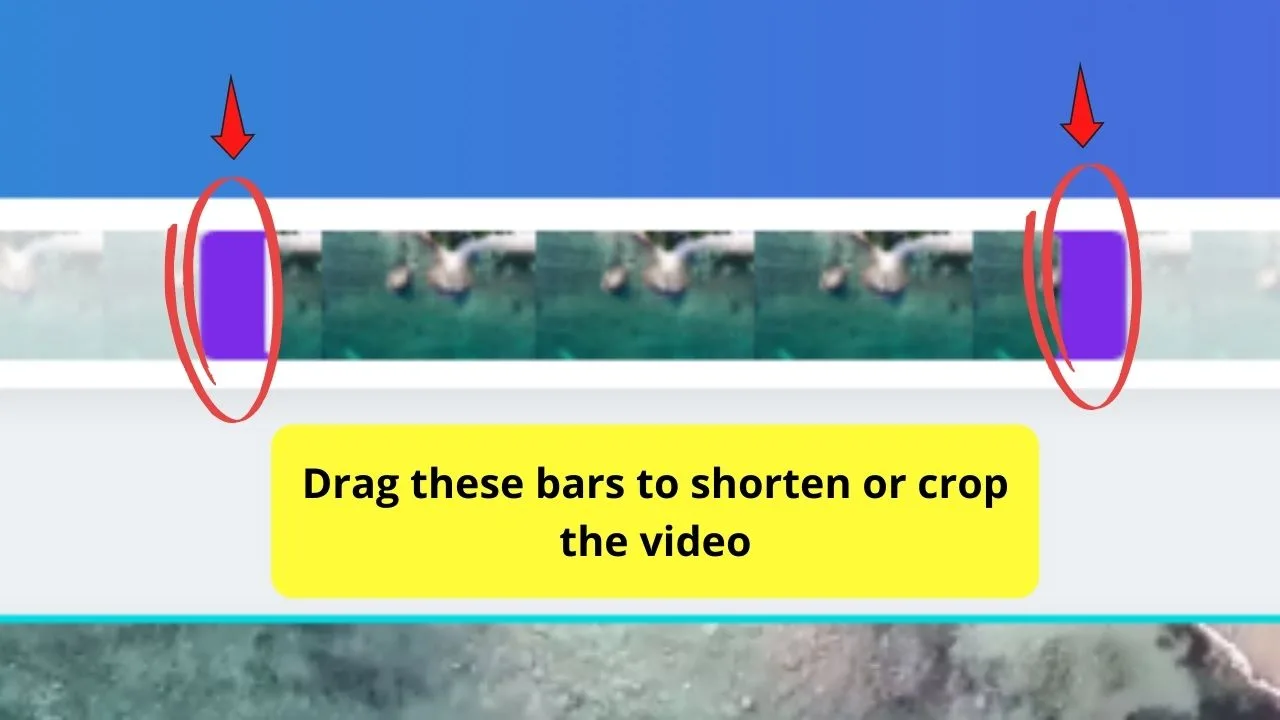
Step 4: Click and drag on the purple bars found at each side of the video clip to adjust the footage’s duration.
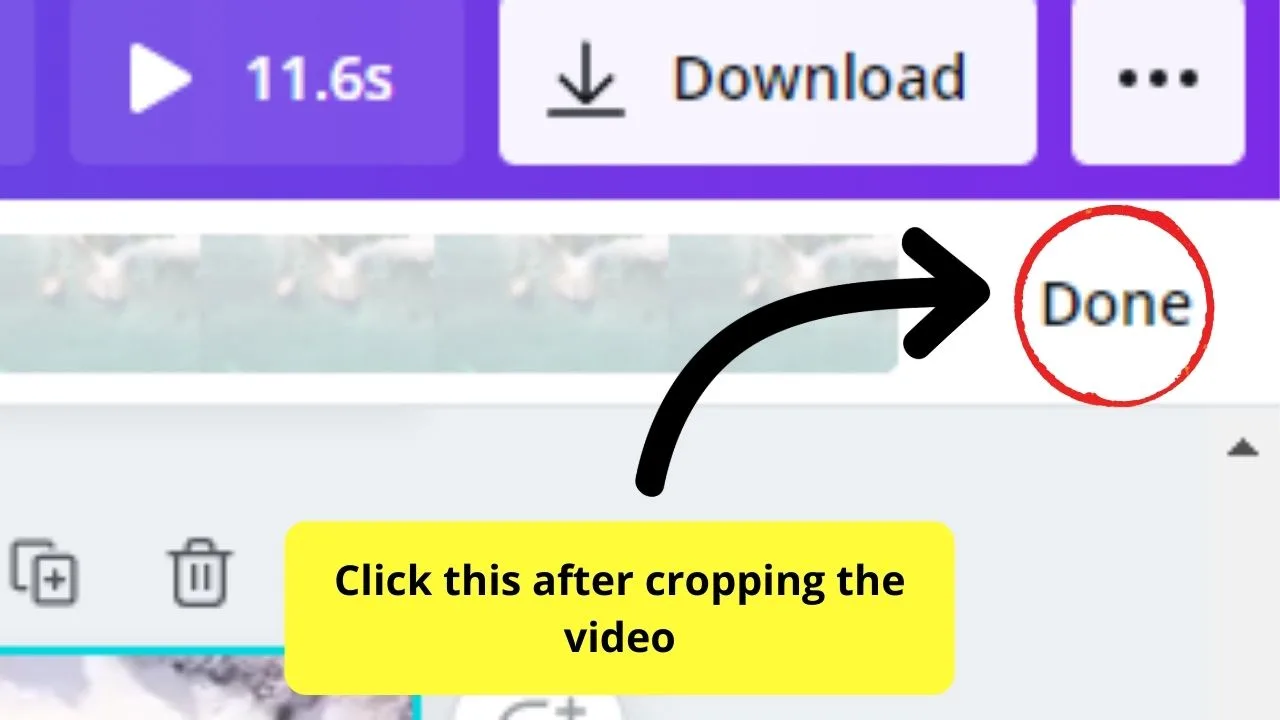
Step 5: Once satisfied with the video length, click the “Done” button found at the rightmost part of the adjuster tab.
Though you cannot find all the features of a video editing tool in Canva, what’s good is that you can still cut the part that you’d like to use.
And, just like that, you’re already a pro at changing the duration of slides in Canva!

Hey guys! It’s me, Marcel, aka Maschi. On MaschiTuts, it’s all about tutorials! No matter the topic of the article, the goal always remains the same: Providing you guys with the most in-depth and helpful tutorials!


