

Working with different artboards can make your creative process more organized, especially when you deal with several canvases on the same project.
Instead of creating a new document for each canvas and ending up with tons of different files, you can create multiple artboards in the same project.
This will keep your project clear and tidy.
How to add multiple artboards in Illustrator
New (additional) artboards can either be added upon document creation or added later on by selecting “Window” from the main menu followed by “Artboards.”
How to add multiple artboards in Illustrator upon document creation
Go to “File > New” on the top side menu, or press “Ctrl + N” to open a new document. A new window will pop up. Find the “Artboards” or “Number of Artboards” box (depending on your version of Illustrator) and set the number of artboards you need.
This method will show you how to set the number of the artboards at the very beginning, when you create a new document.
Step 1: Open a New Document
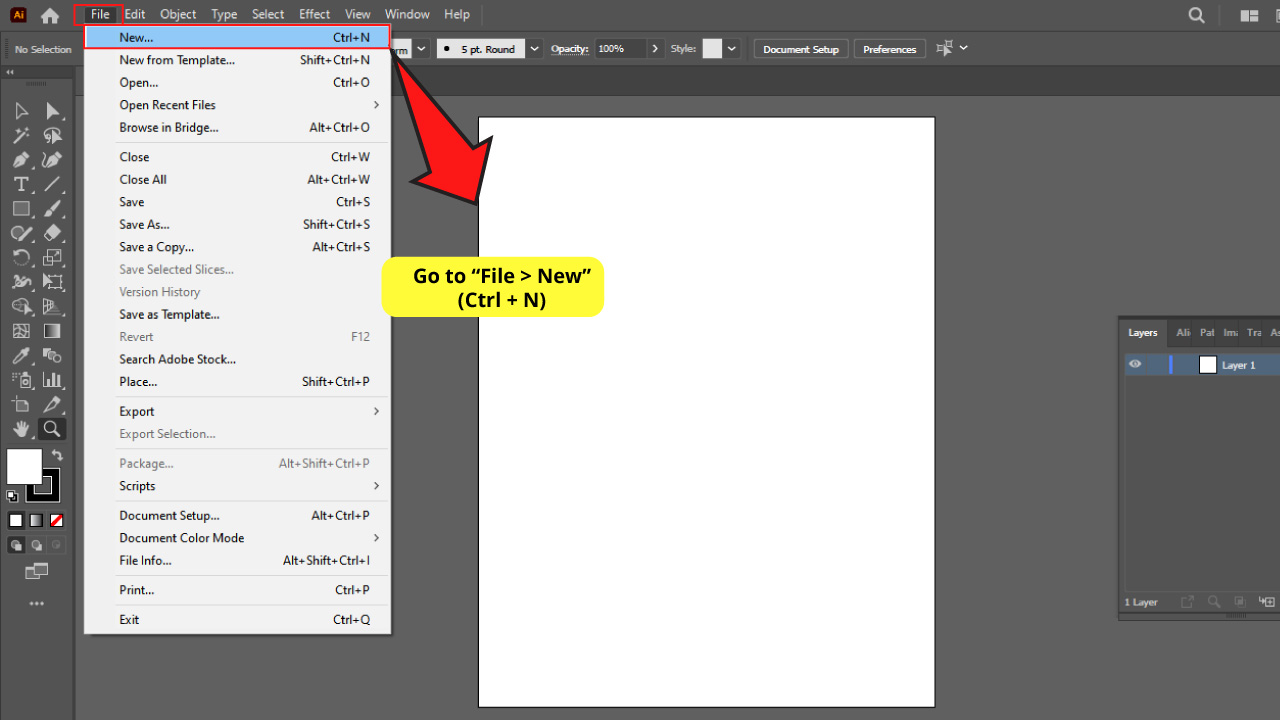
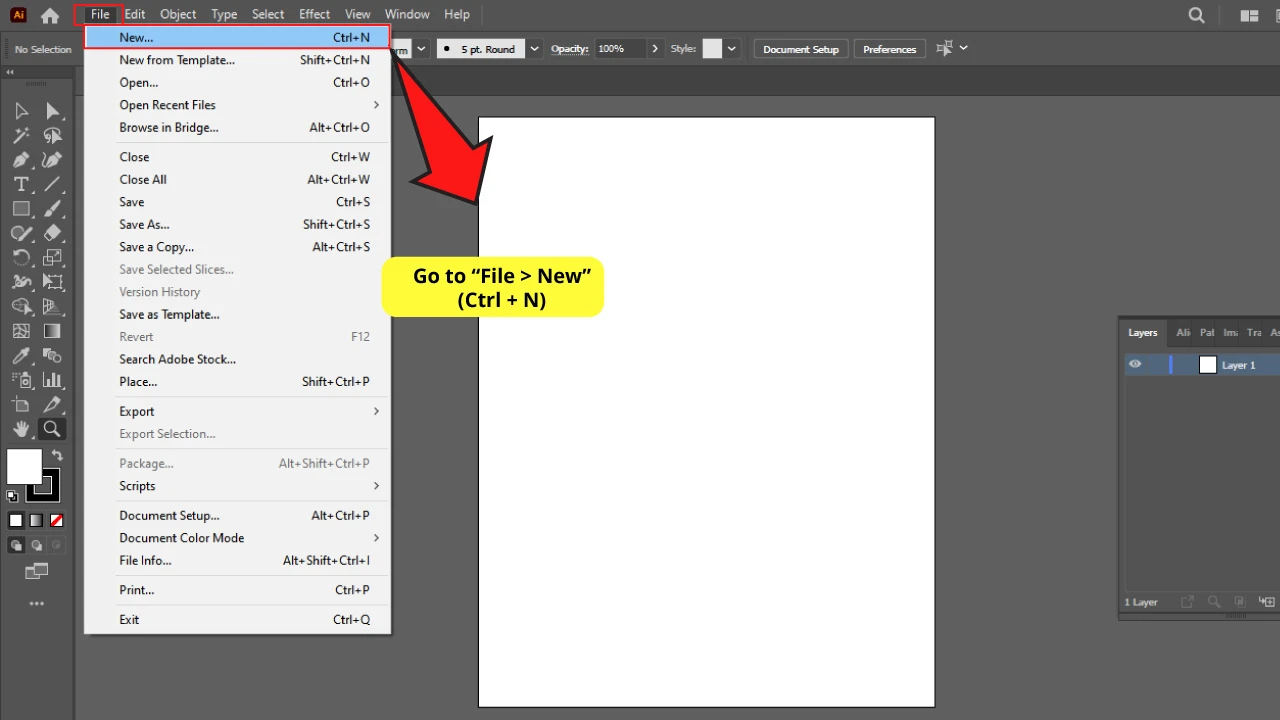
Click on “File > New” on the top side menu or use “Ctrl + N” to shortcut it.
Step 2: Set the numbers of artboards and then confirm
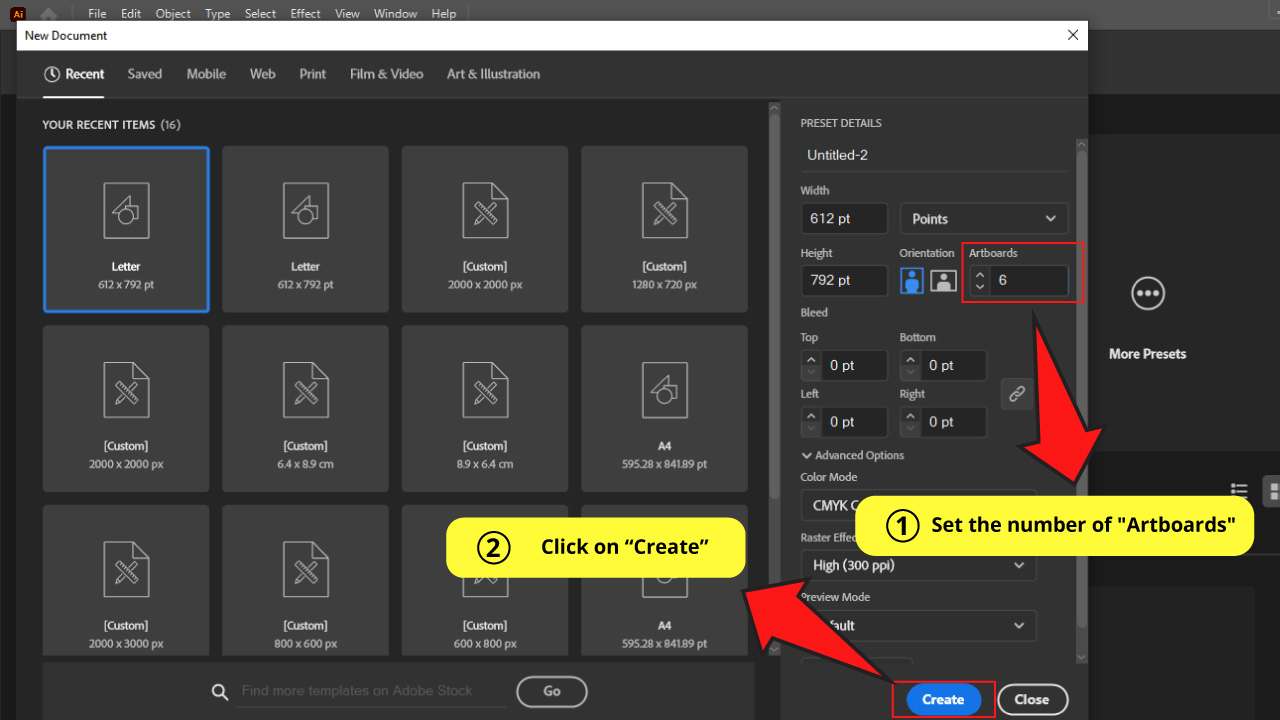

Find the “Artboards” or “Number of Artboards” box.
The name may vary depending on your version of Illustrator.
Set the number of artboards you are going to use. For this example I’m going to use 6 artboards.
When you’re done, click on “Create” or “OK” to save it.
You can actually add, delete or change the order of the artboards at any time, so don’t worry if you don’t know how many artboards you need yet.
Make sure to check Method 2 to learn how.


The Result

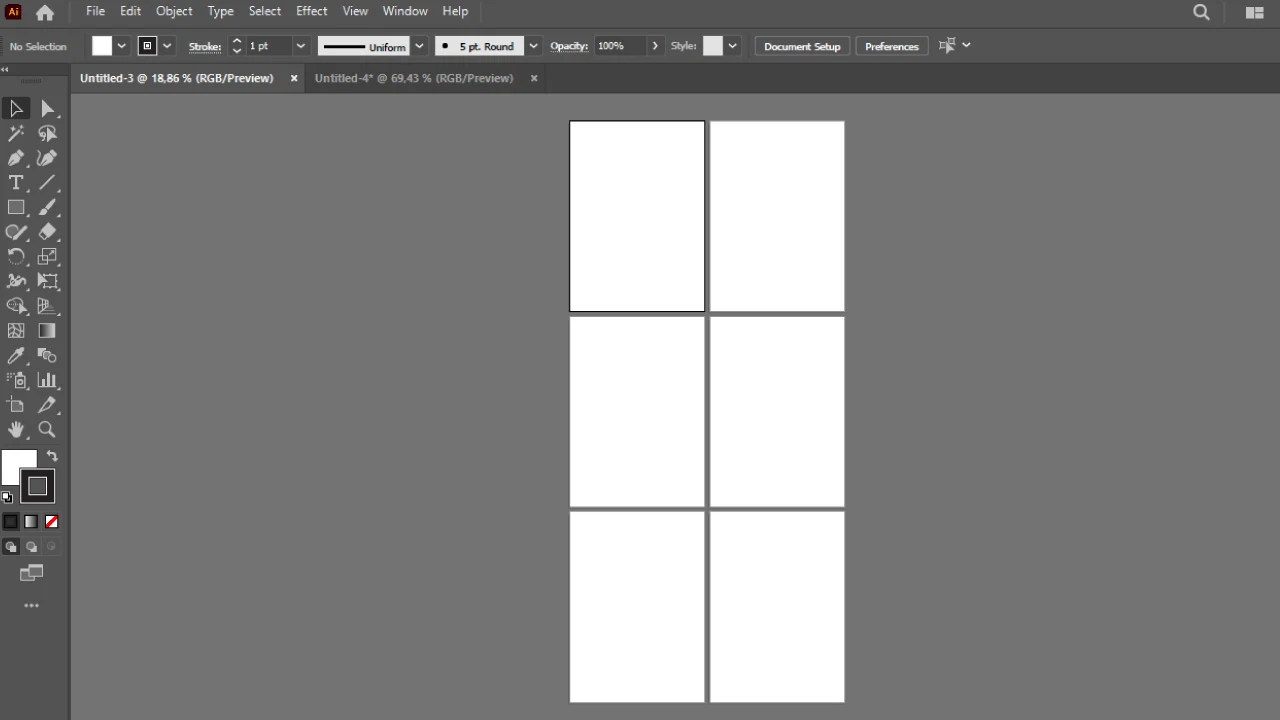
This is how 6 artboards created from the “New Document” settings look like.
If you are interested in this topic you may also want to check this article about “How to Change Canvas Size in Illustrator”.
How to make multiple artboards in Illustrator using the artboards panel
Click on “Window > Artboards” on the top side menu to open the “Artboards” panel. Here you can add or delete artboards by clicking on “New Artboard” or “Delete Artboard” respectively. You can also change the order of the artboards.
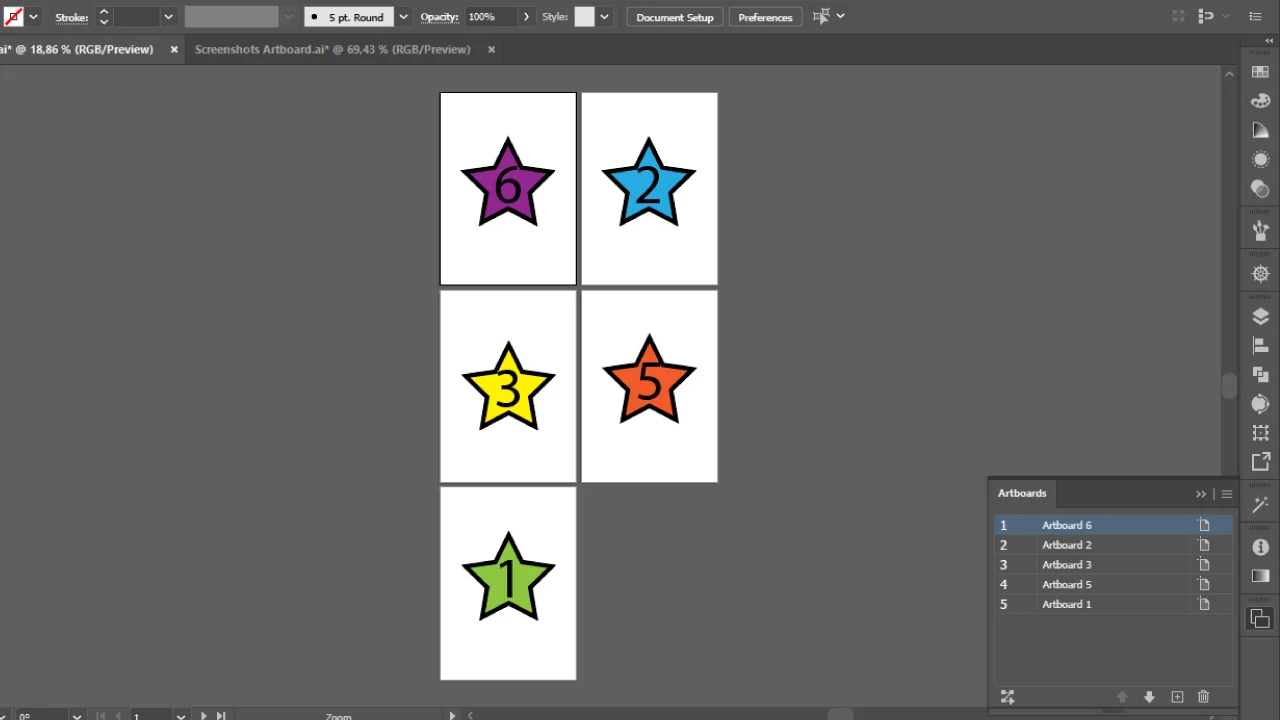
This method will show you how to add, delete or change the artboard’s position at any stage of your working process. Stars with different numbers on the artboards will help us understand these next steps better.
Step 1: Open the “Artboards” panel

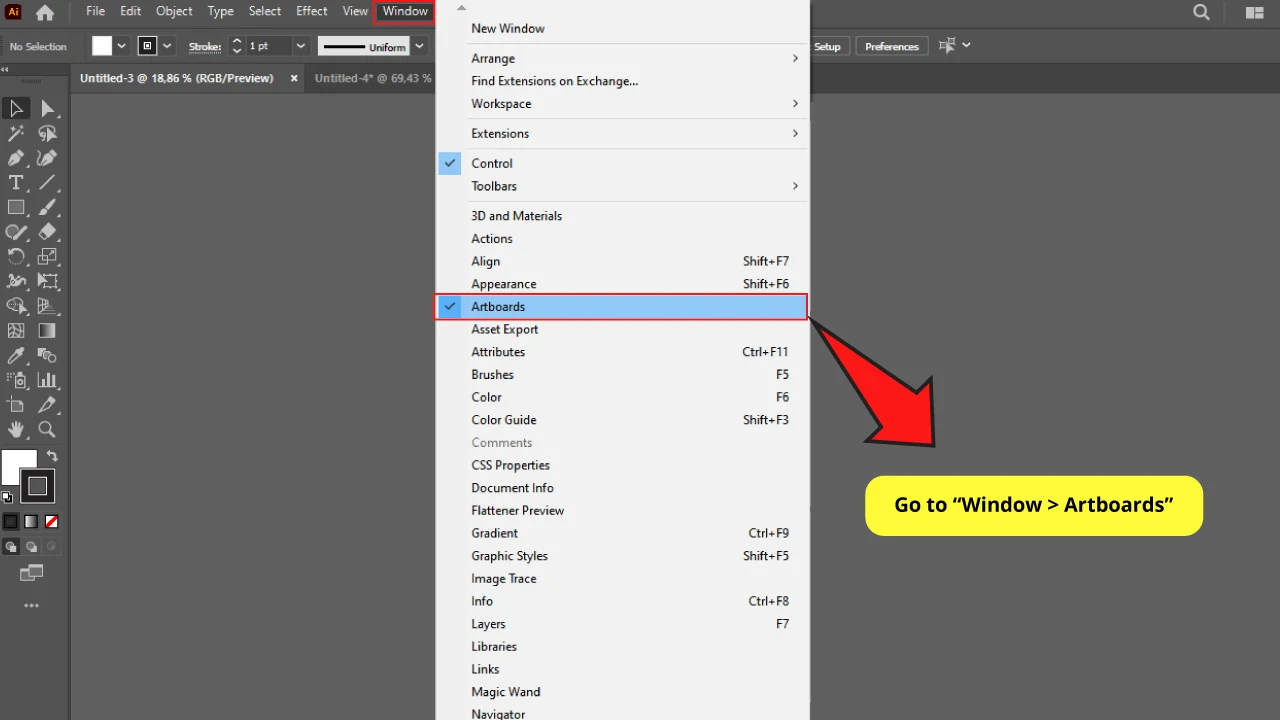
Click on “Window > Artboards” on the top side menu to open the “Artboards” panel.
Step 2: Add or delete artboards
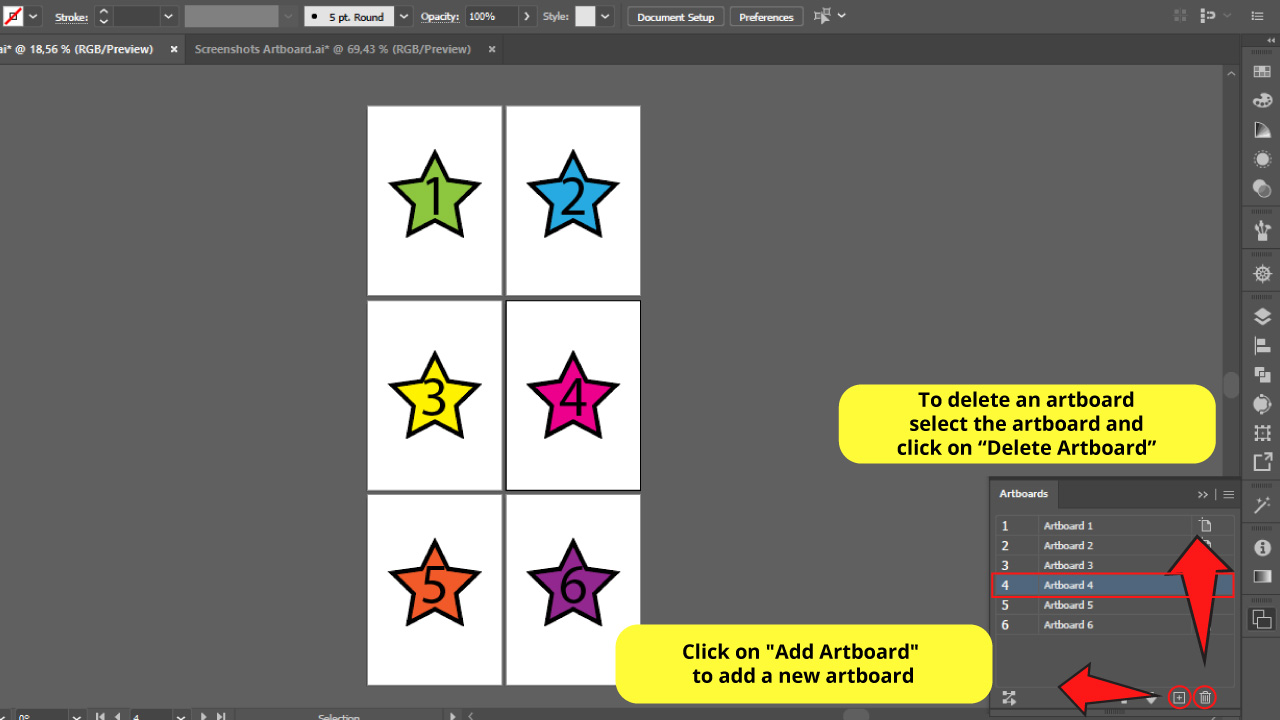
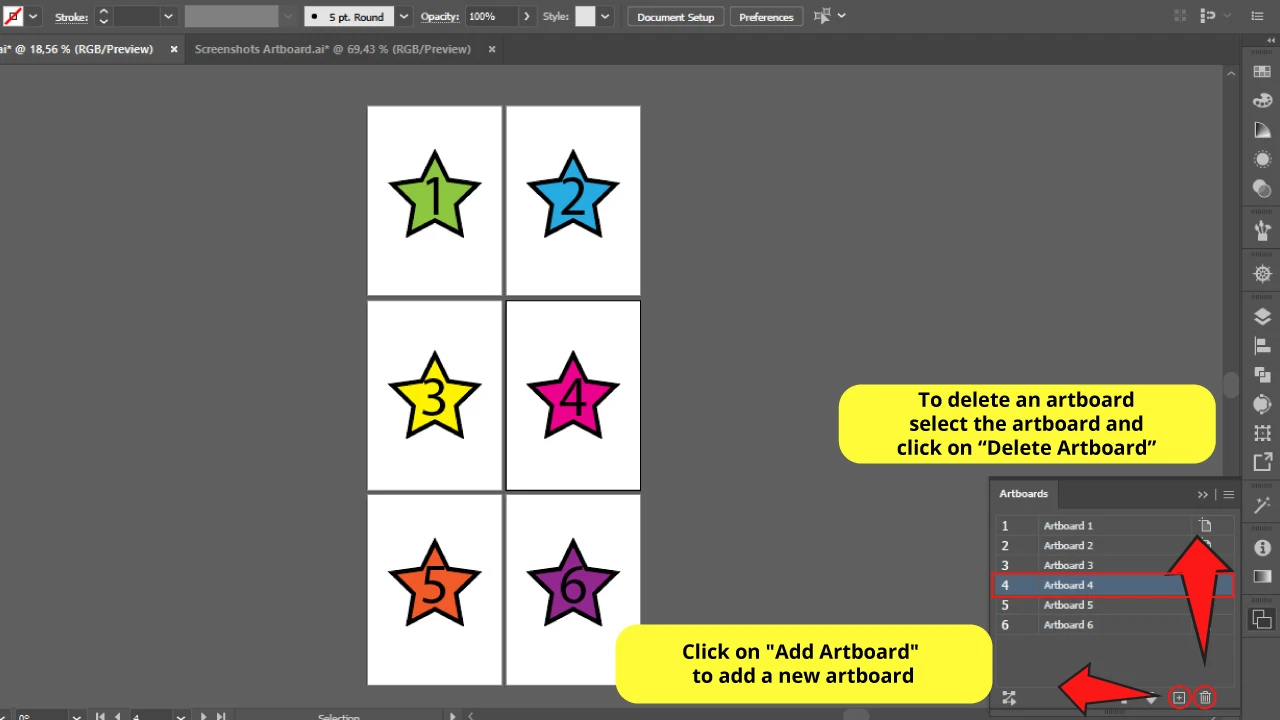
You can easily manage your artboards from this panel.
To add artboards just click on “New Artboard”.
To delete artboards, first click on the artboard you want to delete to select it, and then click on “Delete Artboard”.
I’m going to delete Artboard 4.
Step 3: Reorder Artboards
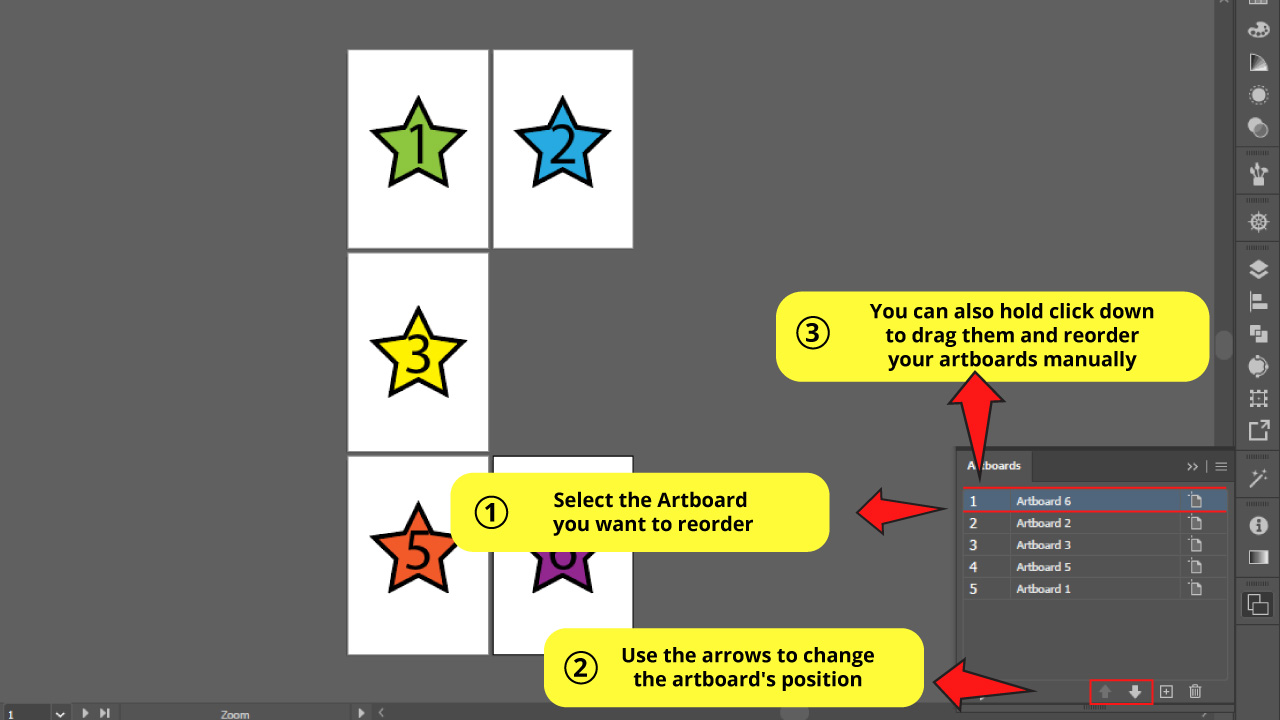
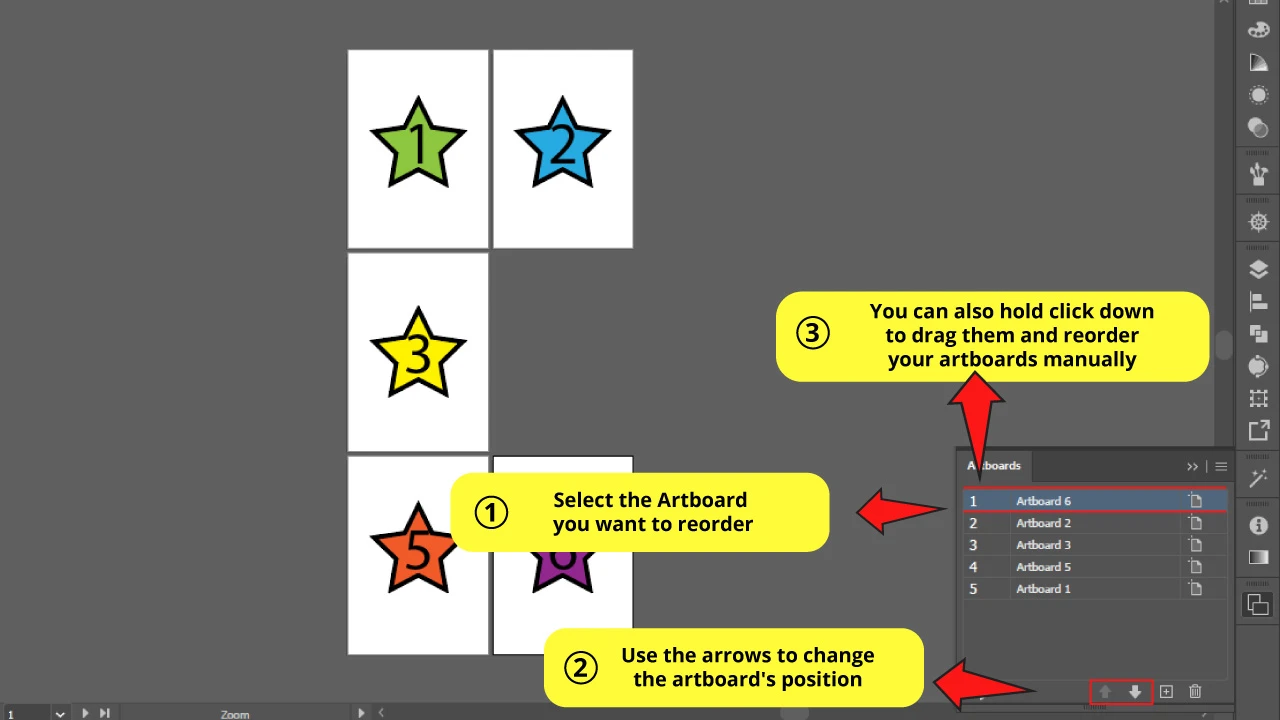
You can also change the order of the artboards from here.
Select your artboard from the list and use the arrows “Move Up” or “Move Down” that you can find at the bottom of the panel. You can also hold the click down on any “artboard” item and drag it to manually reorder your artboards.
I’m going to swap “Artboard 1” for “Artboard 6”.
As you can notice, even if you change the order of the artboards this won’t be displayed in your Illustrator workspace until you rearrange it all.
Step 4: Rearrange Artboards
If you added or deleted any artboards using this method, you will notice that now the artboards look disarranged. Even more, if any order changes were made, these changes won’t be displayed yet.
To solve this, you can fix them by using the “Rearrange All Artboards” function.
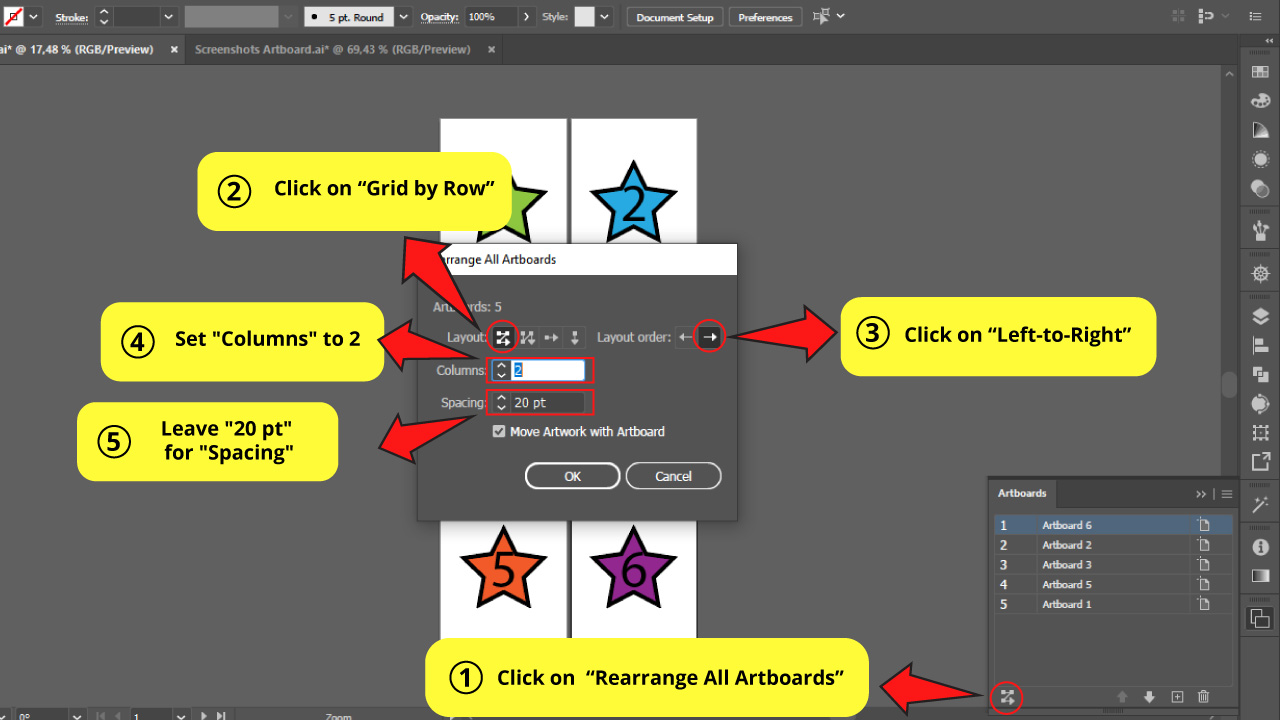
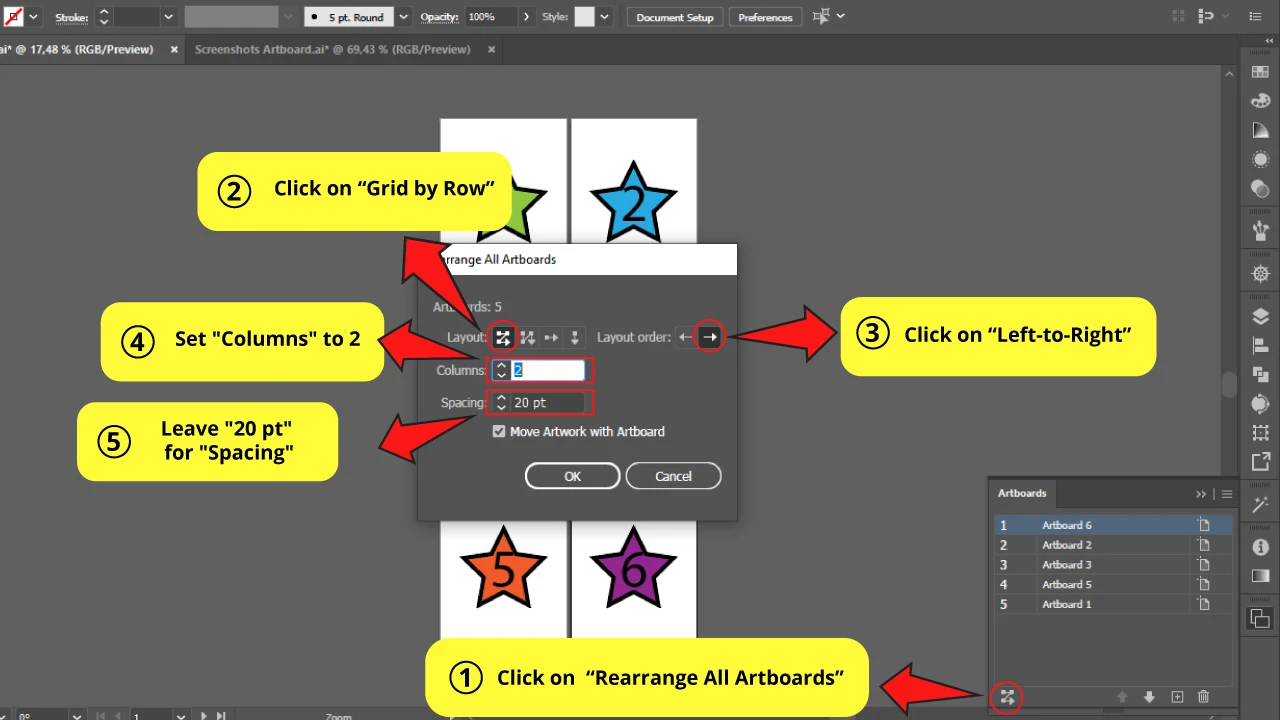
Click on “Rearrange All Artboards” and set your preferences.
Select your Layout settings between “Grid by Row”, “Grid by Column”, “Arrange by Row” or “Arrange by Column”. I’m going to use “Grid by Row”.
Layout order can be “Left-to-Right” or “Right-to-Left”. I’m going to select “Left-to-Right”.
For the “Columns” number I’m going to set 2.
And for the “Spacing”, 20 pt works perfect for me.
Learn more about how to rearrange artboards in this full article about “How to Rearrange Artboards in Illustrator”.
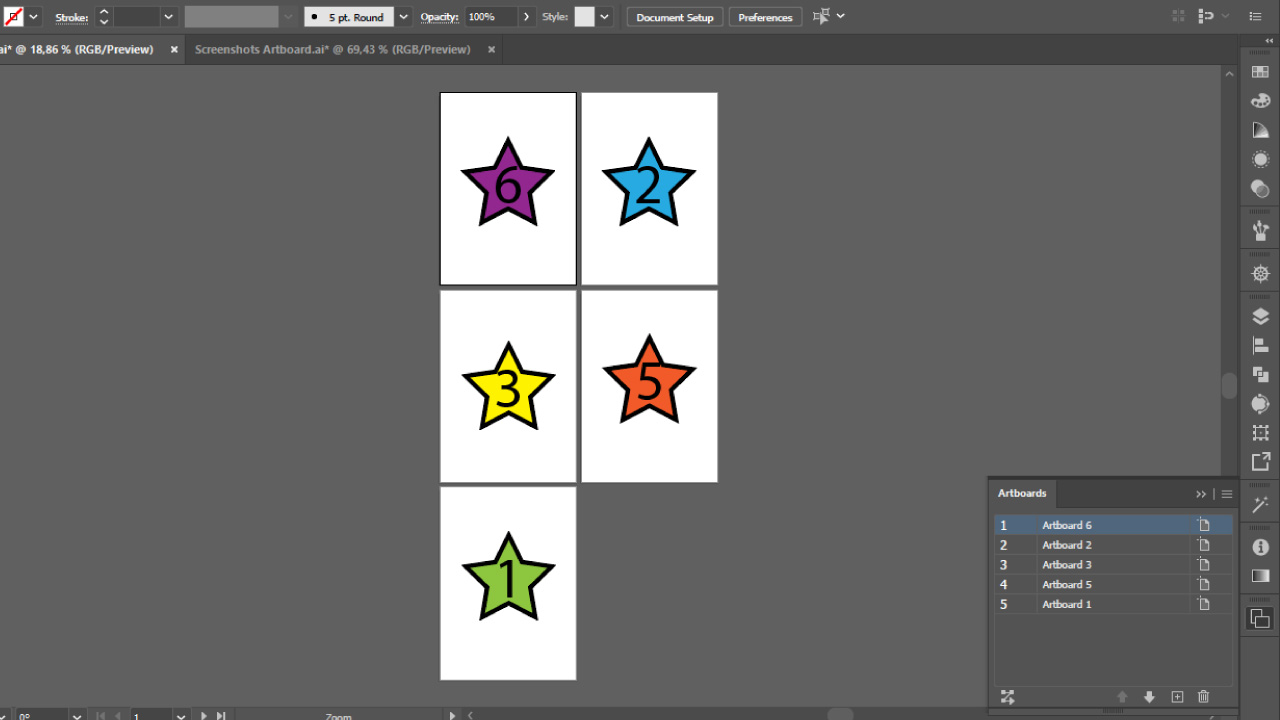
Step 5: The result
You can also check this complete tutorial on “Introduction to Artboards” to know more about this subject.
Frequently asked questions on “How to Make Multiple Artboards in Illustrator”
Can I change the amount of the artboards at an advanced stage of my current Illustrator document?
The number of artboards can be adjusted at any moment. To do so in a current project, simply click on “Window” in the main menu and then select “Artboards.” There, you can adjust the number of artboards that you would like to add to your project.
Can I change the order of my artboards in Illustrator?
The order of the artboards can be adjusted to your liking. Simply click on “Window” in the main menu and the choose “Artboards.” Now, in the lower-left corner of the artboards menu, click on “Rearrange all artboards” to rearrange the order of the your artboards.


Hey guys! It’s me, Marcel, aka Maschi. On MaschiTuts, it’s all about tutorials! No matter the topic of the article, the goal always remains the same: Providing you guys with the most in-depth and helpful tutorials!

