If you own an iPhone or a Samsung Galaxy, one of the coolest things you can do is capture a live photo. For those who don’t what live photos are, these are photos that are moving.
Though the movement only lasts for 3 seconds, it’s a fun way to relive memories rather than use still photos. Think of it like an instant GIF-maker right within your iPhone.
While live photos are fantastic, social media apps like Instagram don’t support this format.
Don’t fret, as there are 2 methods you can do to post live photos on Instagram without compromising quality.
How to Post Live Photos on Instagram
One way to post live photos on Instagram is to save them as a video on your iPhone. Then just open the Instagram app, press “+” and find the video from your phone’s gallery. You can also apply the “Boomerang” effect to upload the live photo as an Instagram story.
Do note though that the “Live” photos feature is only available for iPhone 6 and above models.
Also, update your Instagram app first so all the cool features in editing photos will be available.
Method 1: Convert Live Photo to Video
This method is the best option if you don’t want to use third-party apps to post your live photo on Instagram.
Also, this is the best method of posting live photos on IG if you simply want to add them as a new post.
Step 1: Press the “Live” button on the camera app
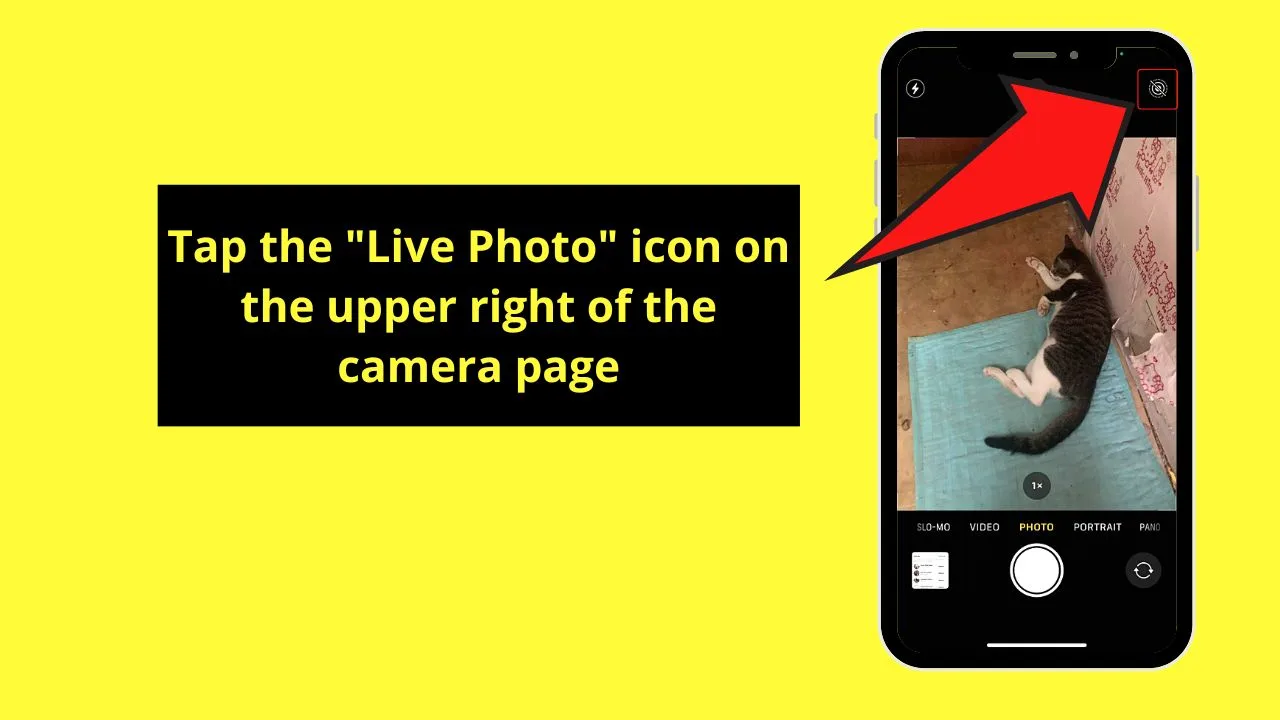
This icon initially appears as a target icon with a slash across it on the upper right corner of the camera app. It turns yellow after tapping on it once.
Step 2: Press the “Capture” button
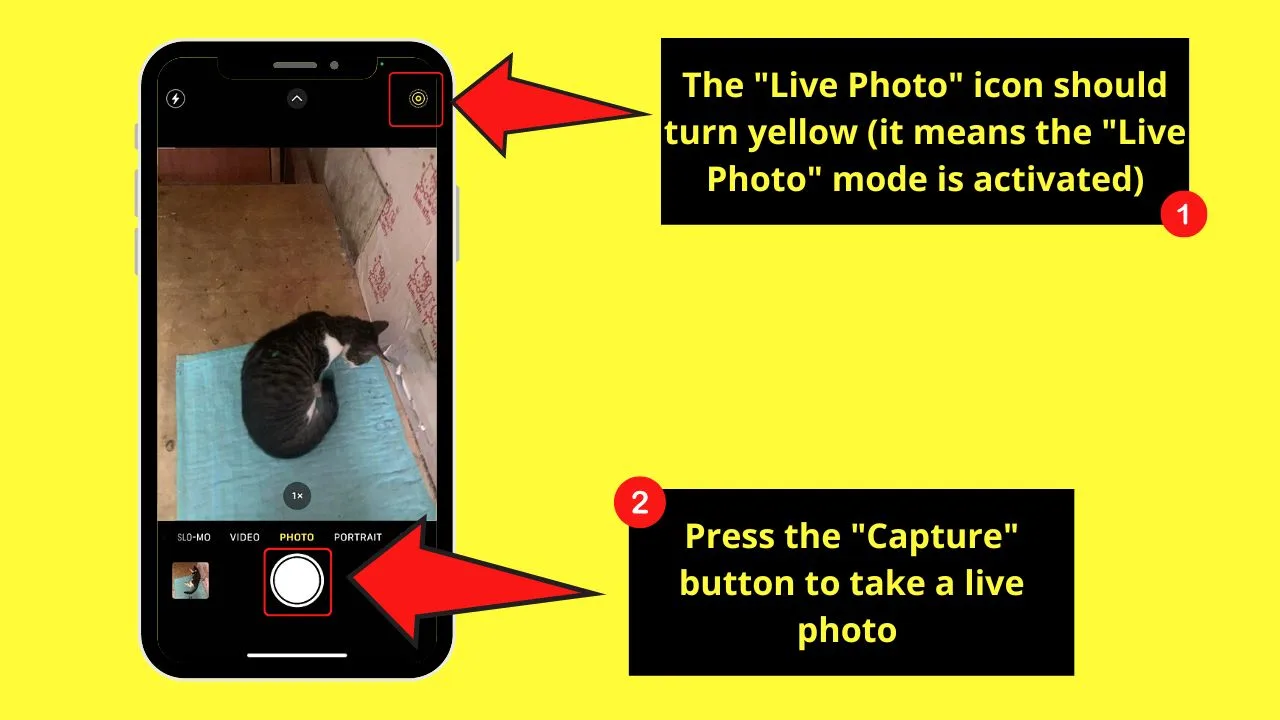
This button is the white circle in the middle of the bottom menu. Tapping on this button will then record your “live” photo.
Step 3: Tap the “Preview Gallery” button
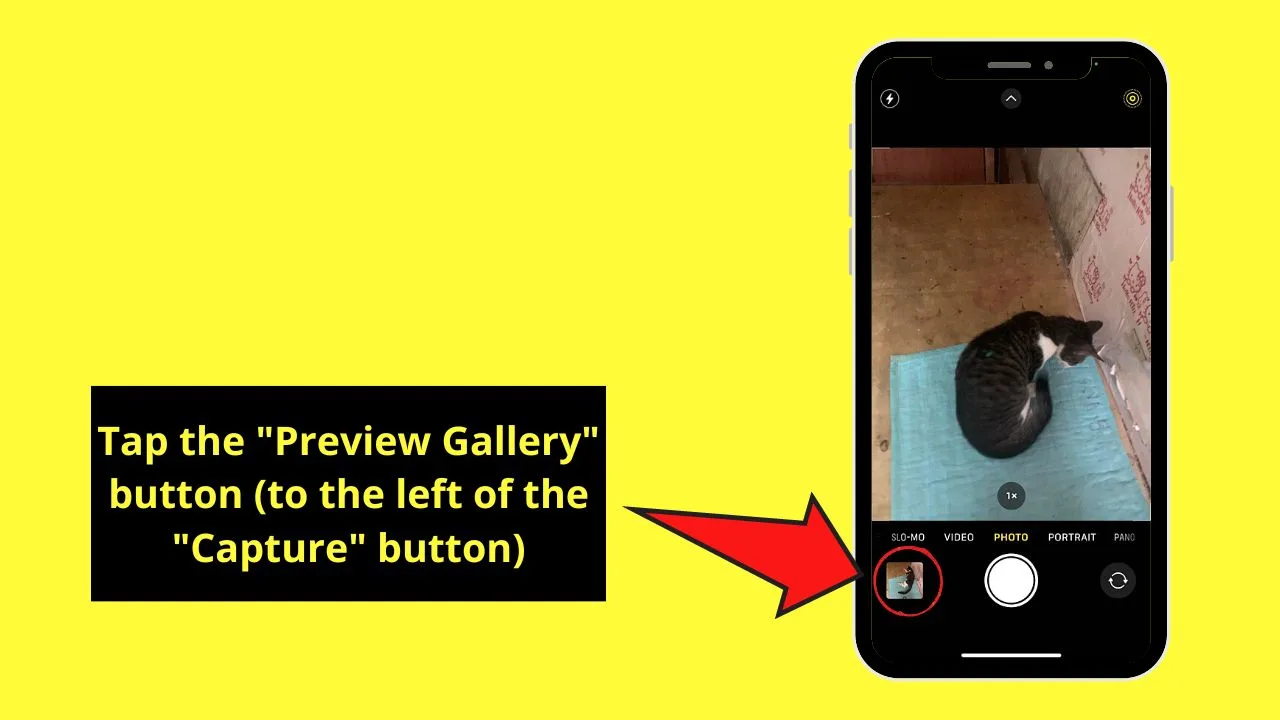
This button is the square icon on the lower left of the camera app. It features the latest picture you captured. In this case, it’s the live photo.
Step 4: Press the meatballs menu
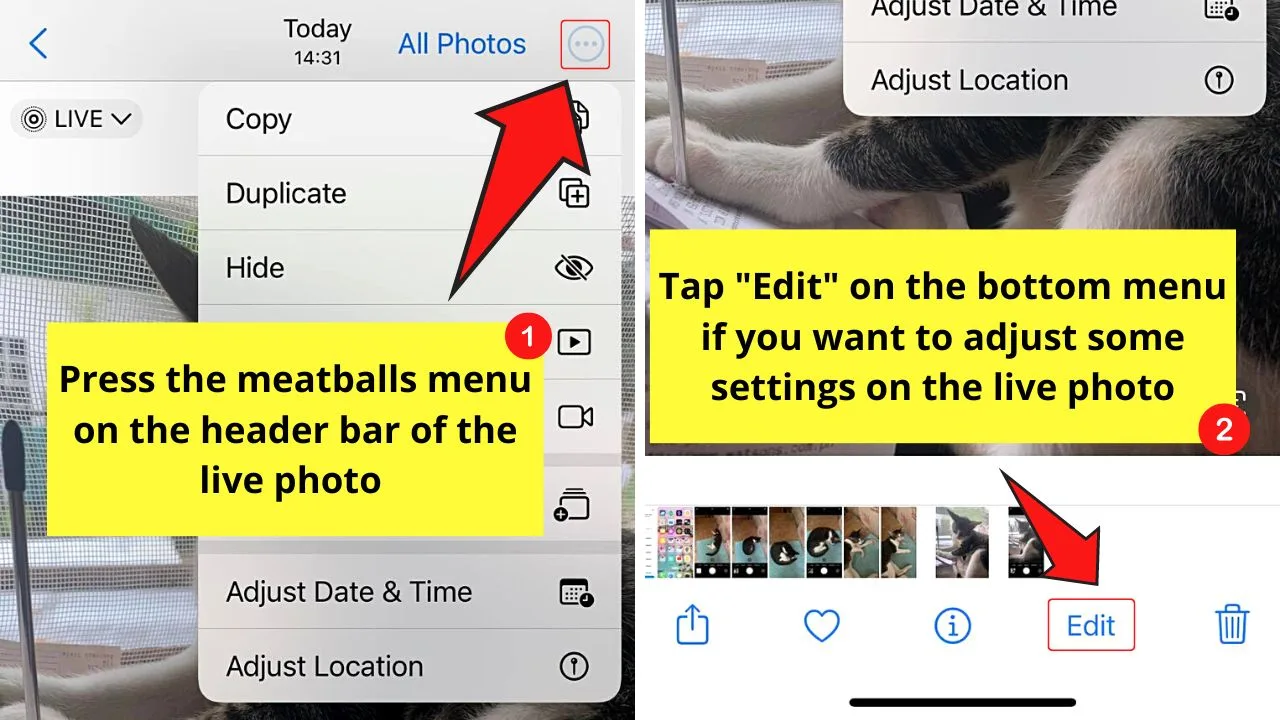
You’ll find this ellipsis-looking icon on the upper right of the live photo you’re viewing.
But, if you want to add some fun elements to the live photo or crop it first, tap “Edit” on the bottom menu.
After you’re done editing, press the meatballs menu and proceed to the next step.
Step 5: Choose “Save as Video”
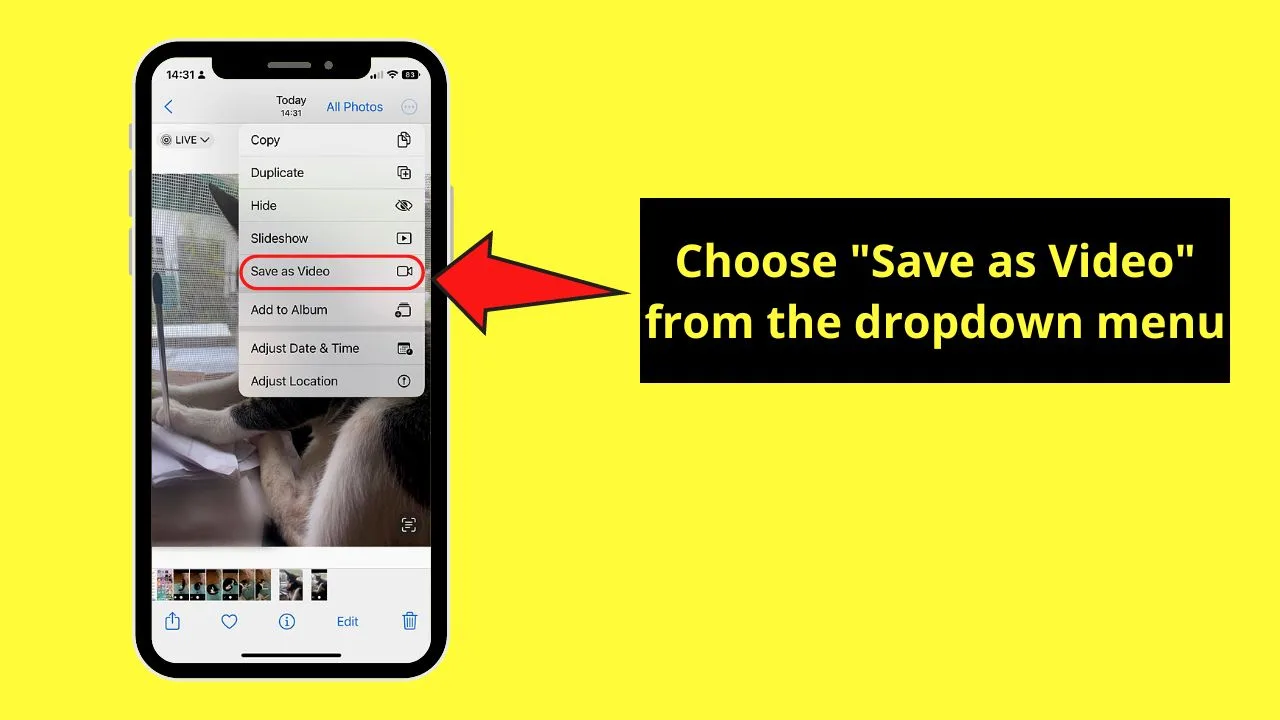
This option appears between “Slideshow” and “Add to Album.”
Step 6: Open Instagram and press the “+” button
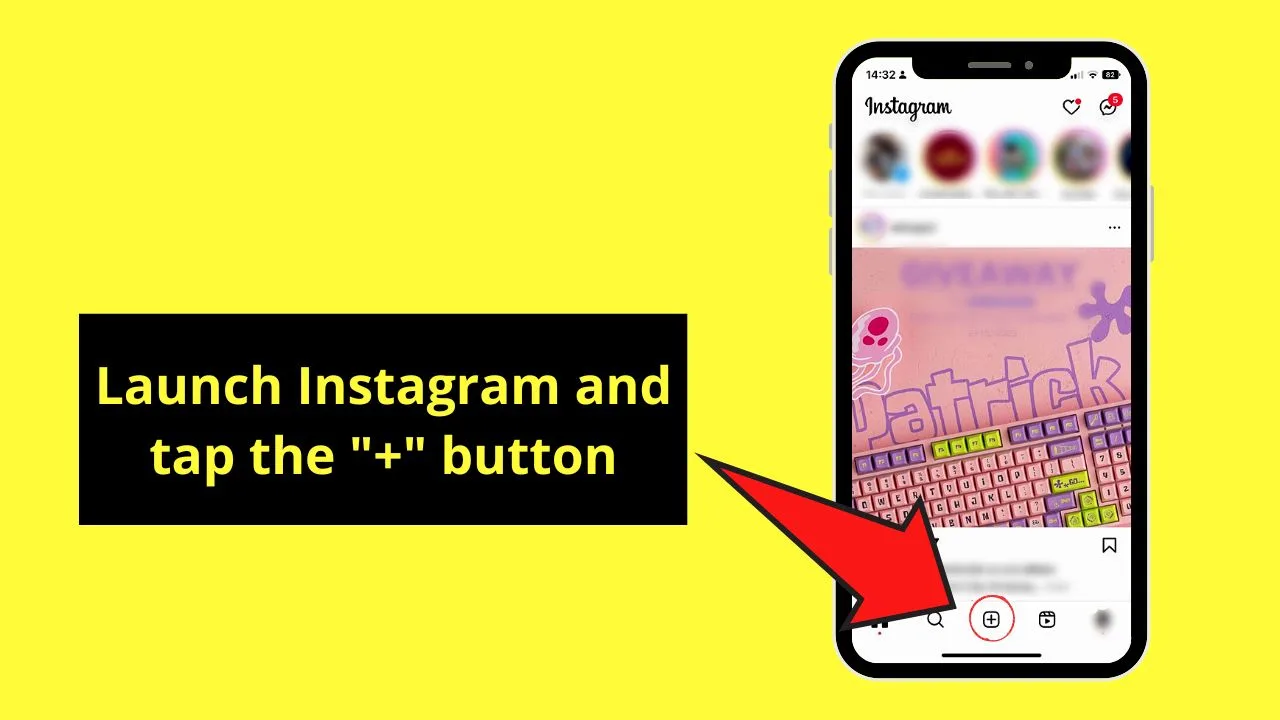
With recent updates, the “+” button on the upper right of Instagram’s home page is now in the middle of the bottom menu.
You are then redirected to the “New post” creator page.
Step 7: Swipe up the gallery and tap the video
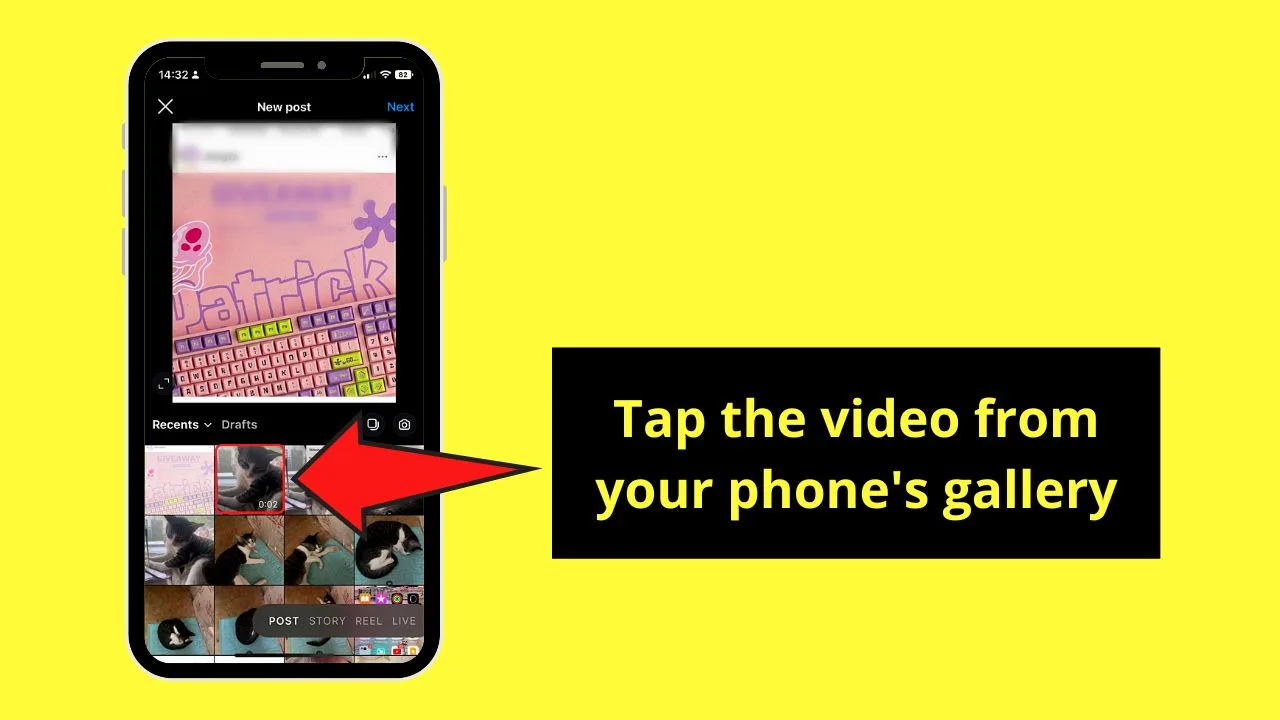
It’s easy to spot the video as you’ll see its duration in the lower right of the thumbnail.
After choosing it, the video appears in the preview window.
If you need to fit the whole live photo/video, you’ll have to press the “Expand” icon on the lower left of the preview window.
Step 8: Press “Next”
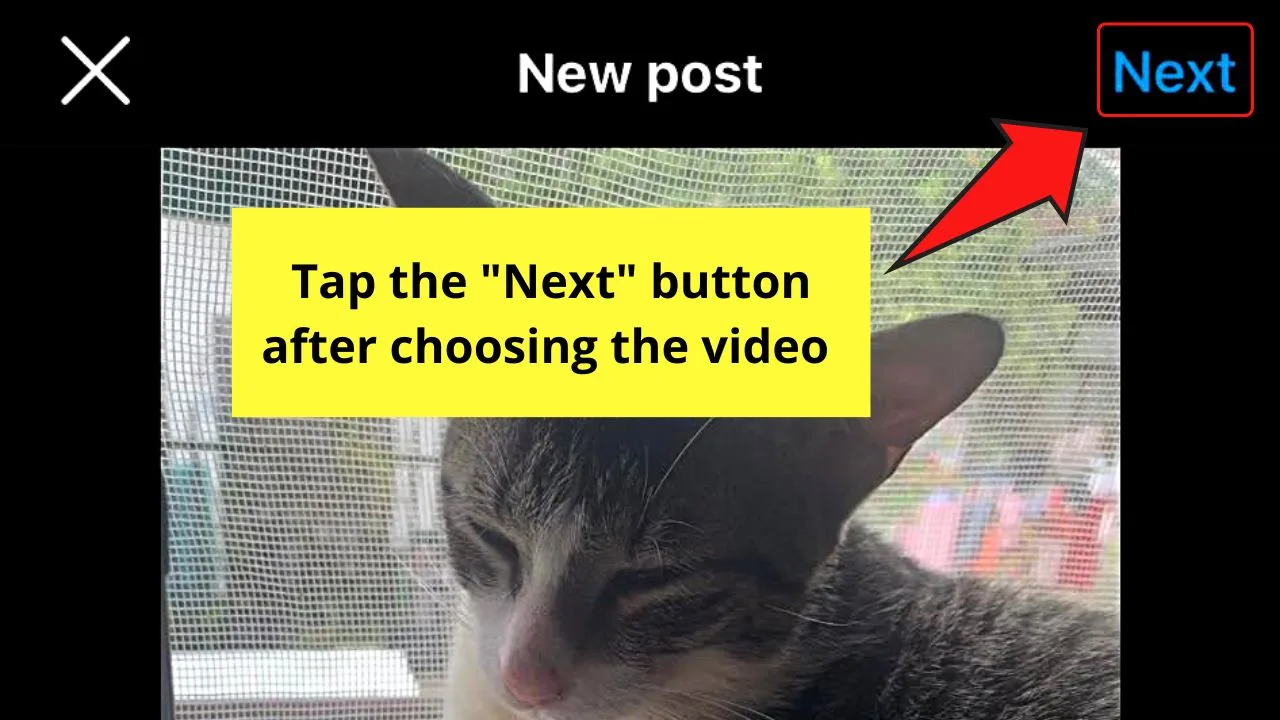
Step 9: Edit the video
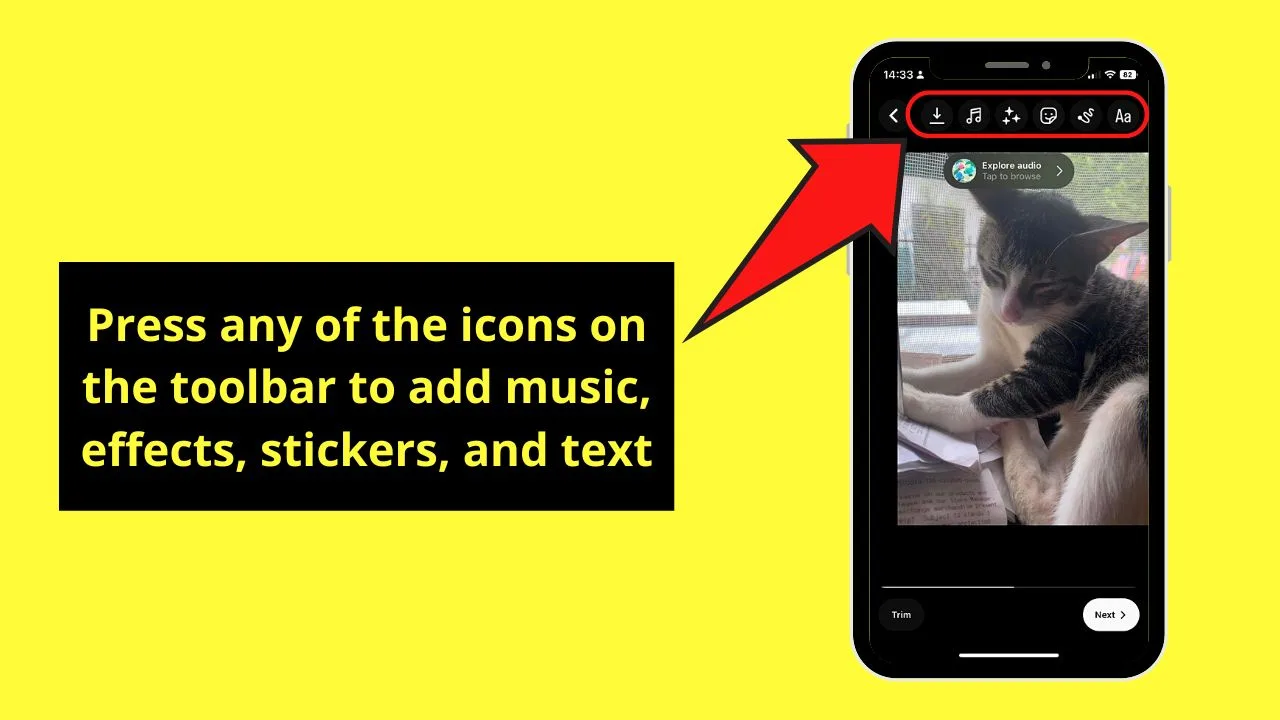
Add music, effects, stickers, and text by pressing on their respective icons on the toolbar above the video.
Step 10: Press “Next”
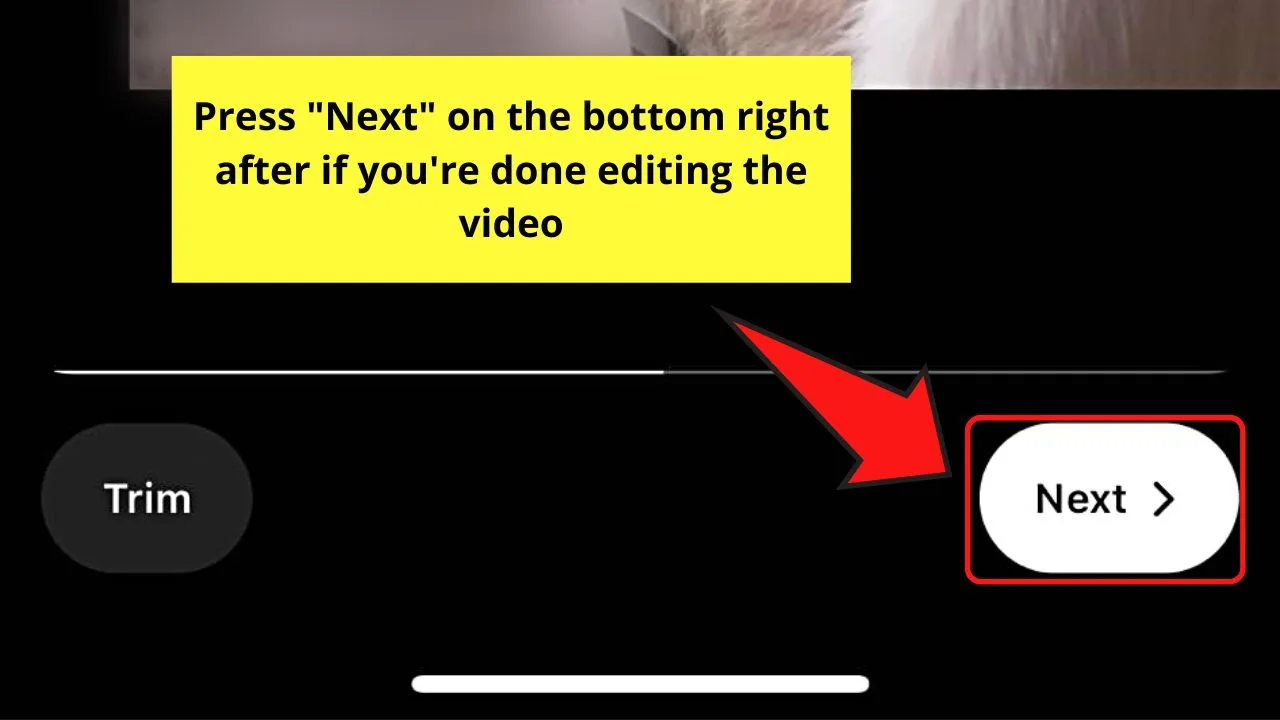
Step 11: Edit your post and tap “Share”
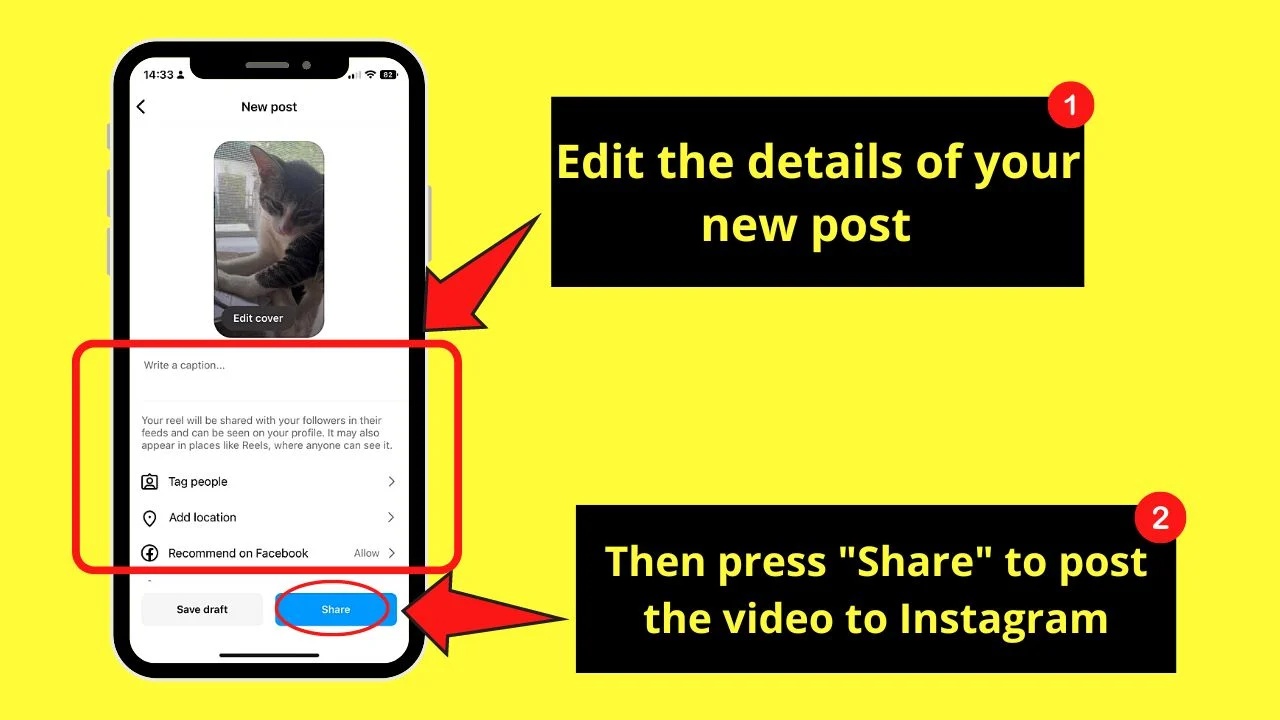
Before you can upload your new Instagram post, you can type your caption in the “Write a caption” section.
You can also tag people and add the location if you want to. You can also opt to share the post to your Facebook account as well (that’s if you have linked them).
Otherwise, press the blue “Share” button. Then, just wait for the upload process to finish to see your live photo as an Instagram post.
If you’re unsure of posting yet, press “Save draft,” access the draft later, and continue editing it.
Method 2: Convert Live Photo to a Boomerang on Instagram Stories
This “Boomerang” effect makes a video, or in this case, a live photo, move in a constant loop. Think of how GIFs work.
After converting your live photo to a boomerang, you can then post it on Instagram.
Step 1: Open the “Story” creator page
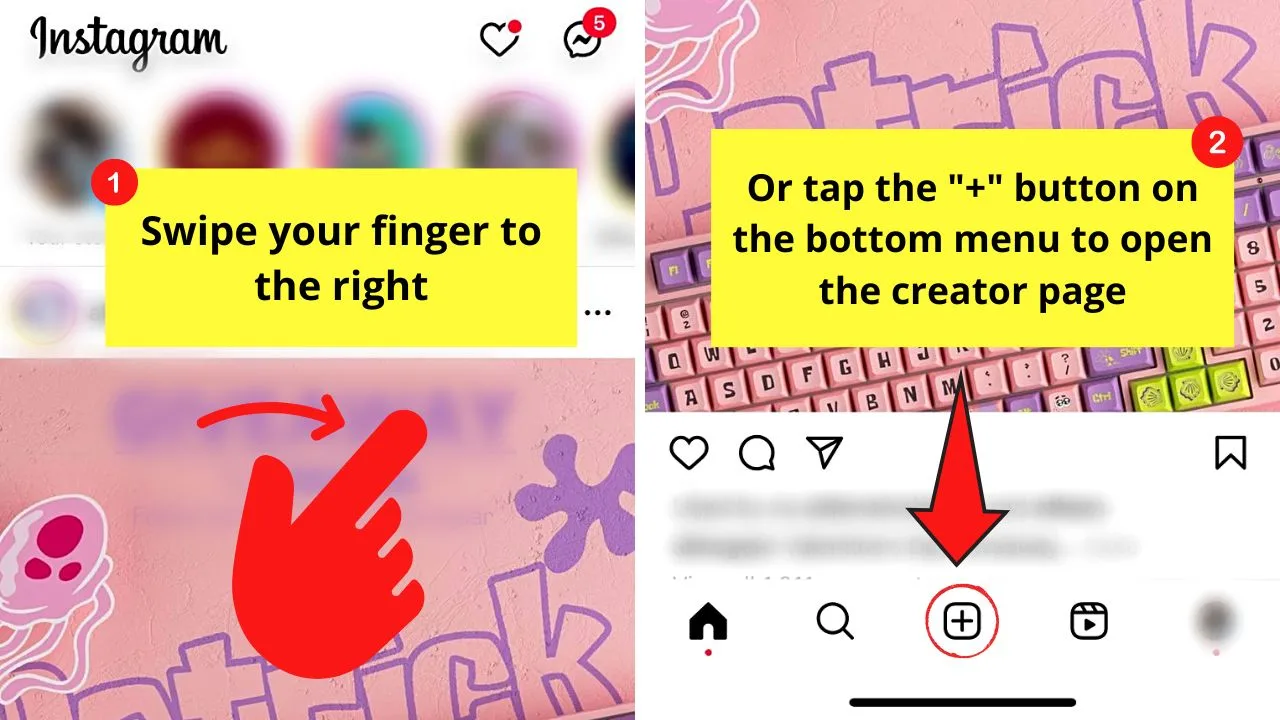
Either swipe your finger to the right or press the “+” button in the middle of the bottom menu of the “Home” page.
Just make sure that the “Story” option is the one highlighted on the bottom menu of the creator page.
If another option’s highlighted, you won’t be able to go to the next step.
Step 2: Press “Boomerang”
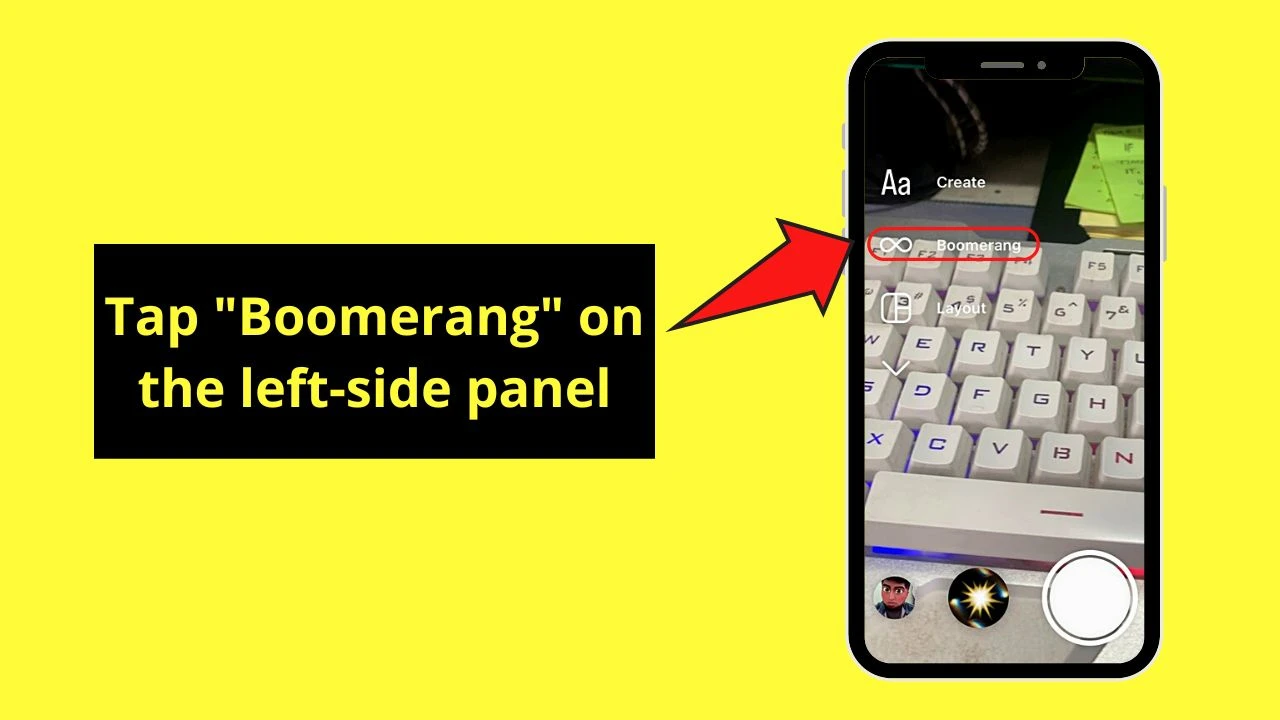
Its icon appears as an infinity sign on the left-side panel of the “Story” creator page.
After choosing it, the “Boomerang” icon appears inside the “Capture” button.
Step 3: Tap the “Gallery Preview” button
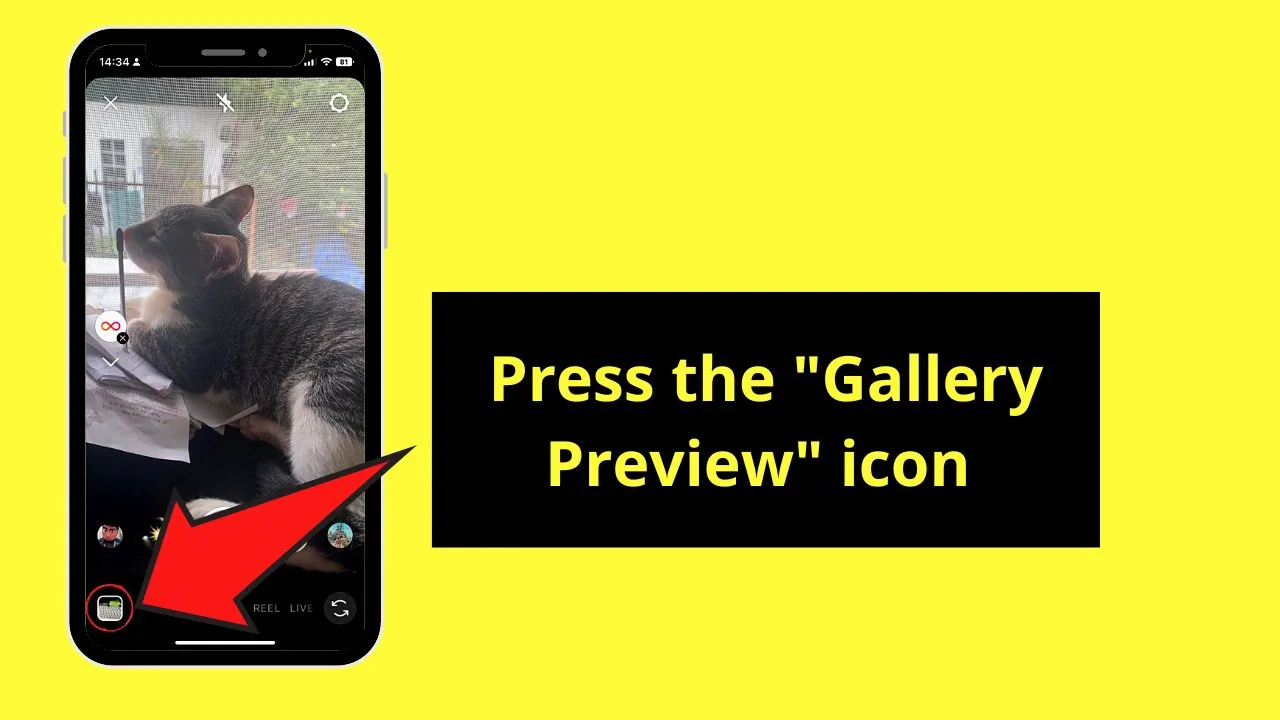
This icon appears as a square featuring the latest photo or video in your iPhone’s gallery. You’ll find this on the bottom menu’s left side.
Step 4: Swipe up and choose the live photo
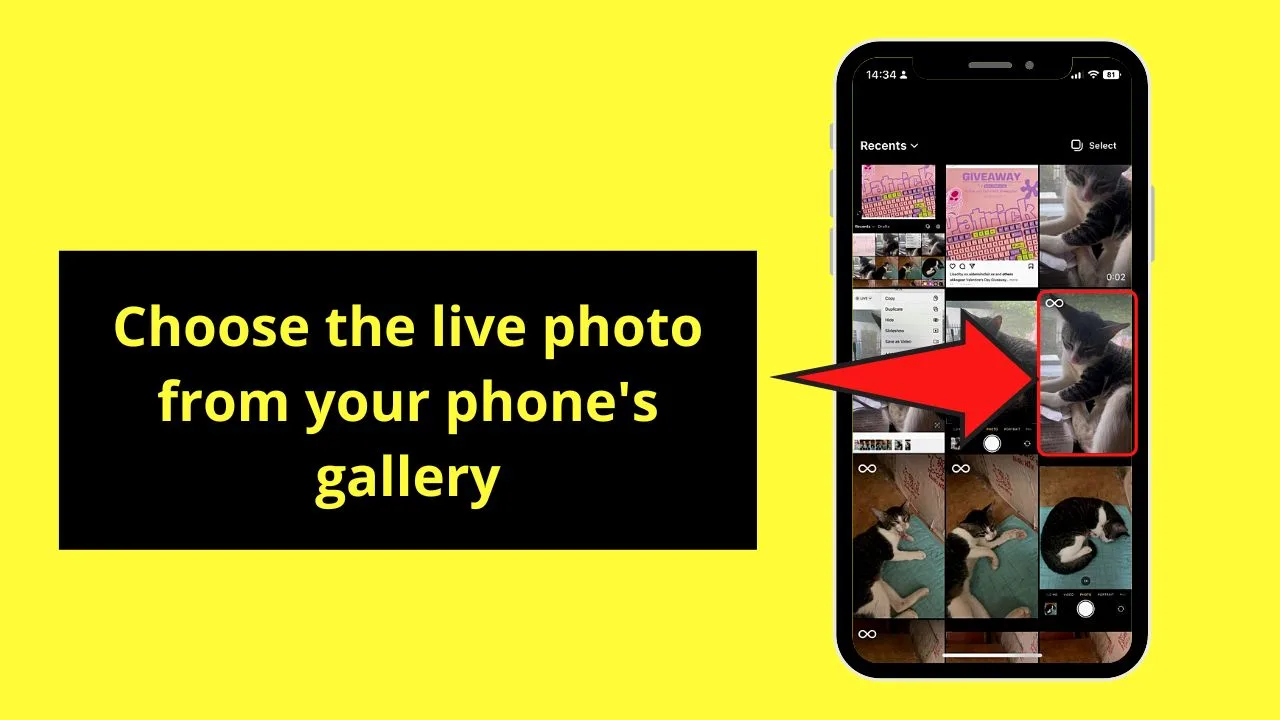
You will know the picture in the gallery is a live photo as the “Boomerang” icon is found on the thumbnail’s upper right.
Step 5: Tap “Boomerang”
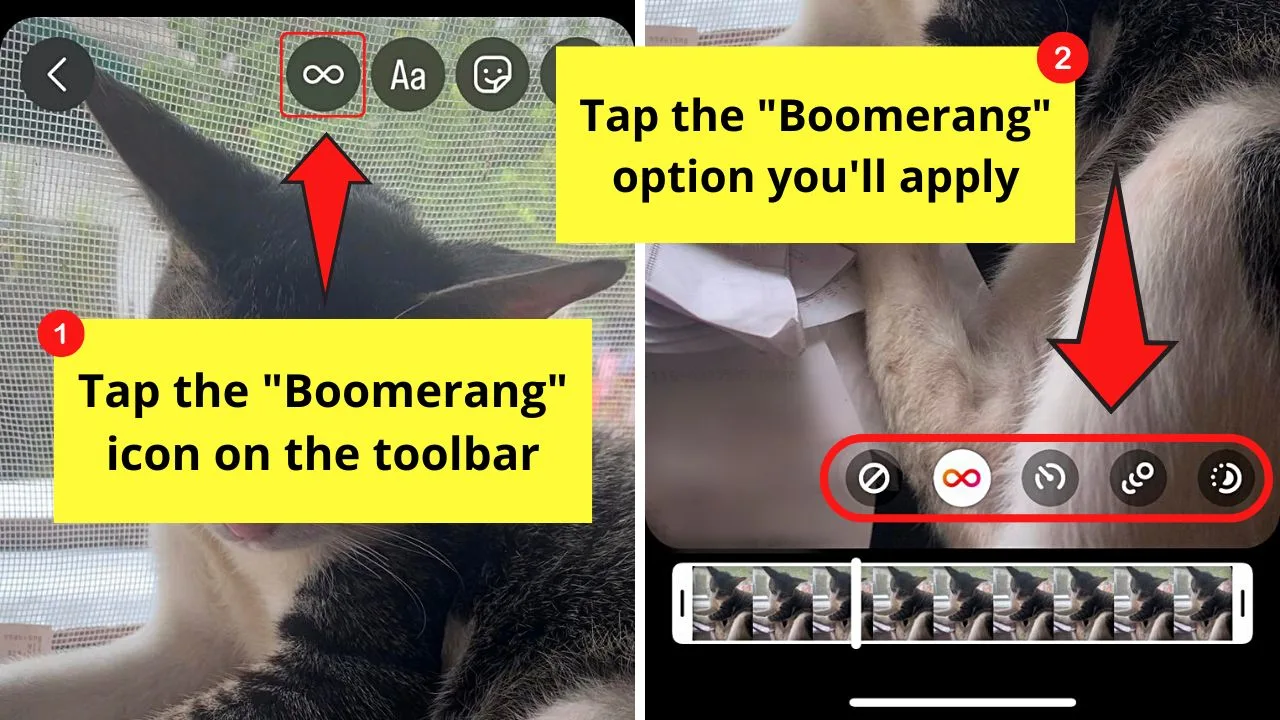
This button on the toolbar will allow you to choose what type of boomerang you want to post. There are 4 options: Classic, Slow-mo, Echo, and Duo.
Whatever you choose, make sure to tap its icon to apply it to the live photo.
Step 6: Tap “Done”
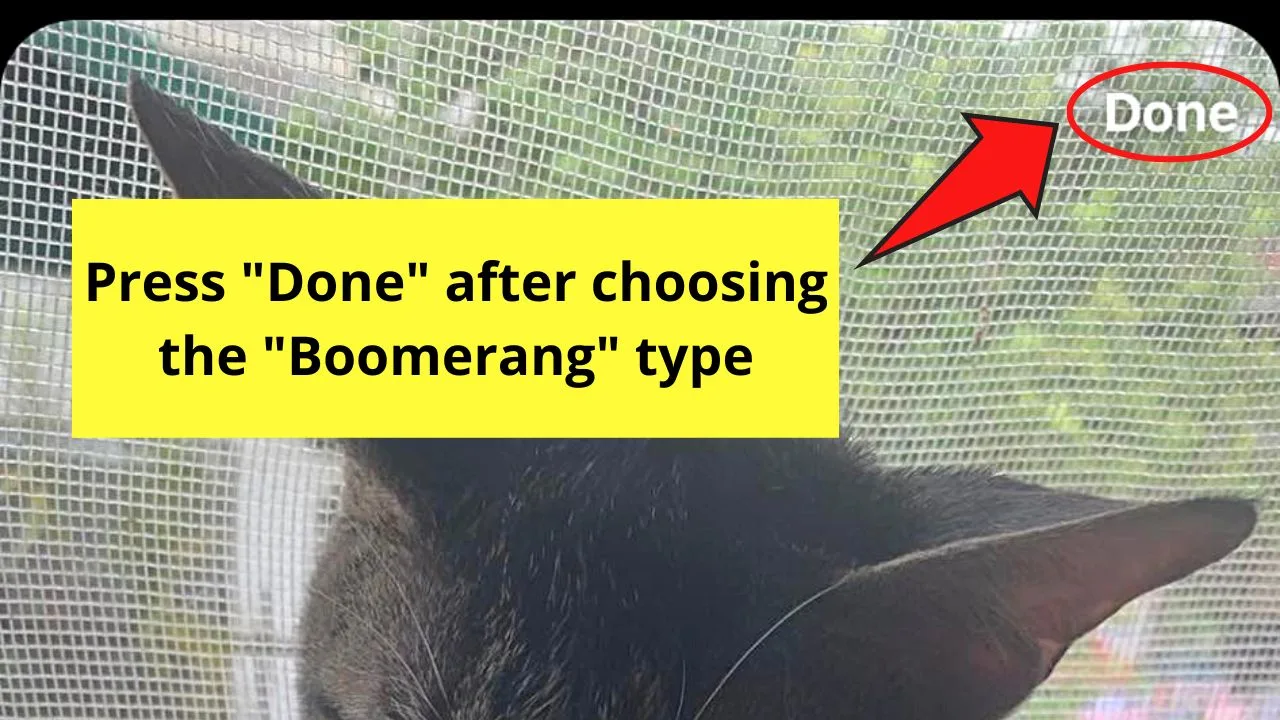
This will redirect you to the “Story” creator page. You can then add effects, text, stickers, and even music without a sticker.
Step 7: Choose your IG story’s audience
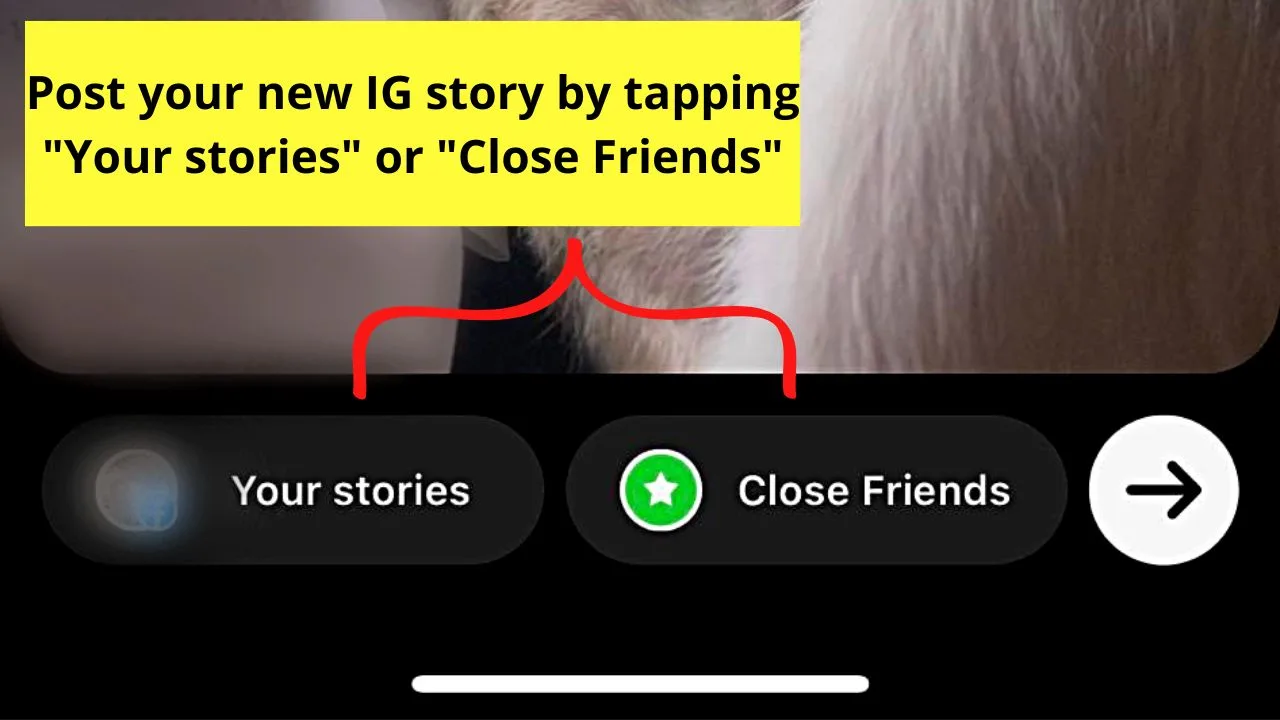
If you want to post your new Instagram story publicly, choose “Your Stories.”
If, however, you want your new IG story to be a CFS (Close Friend Story), tap “Close Friends” instead.
Wait for Instagram to finish uploading your new story.
With any of the two options, you can now post live photos on Instagram seamlessly.
Frequently Asked Questions about How to Post Live Photos on Instagram
Why can’t you directly post live photos to Instagram?
You cannot post live photos directly on Instagram as they’re not supported on the app. However, if you want to upload live photos as a new IG post, you must first convert them to a video.
How is a boomerang different from a live photo?
Though boomerangs and live photos both are animated images, their difference lies in their duration. Live photos are 1.5 seconds long. Boomerangs, on the other hand, only have a 1-second duration. This makes boomerangs a half-second shorter than live photos.
How do you change a live photo into a boomerang?
To convert a live photo to a boomerang, open the “Story” creator page. Choose “Boomerang” on the left side panel. Choose the live photo and tap the “Boomerang” icon on the upper menu to tap a boomerang type you’ll use. Press “Done” so you can edit and eventually post the live photo as an IG story.
Are live photos only exclusive to iPhones?
Though “Live” photo is most popular on iPhones, some Android phones like Samsung Galaxy have their version of it in the form of “Motion Photos.” Both of them allow people to create animated images right within their phones.

Hey guys! It’s me, Marcel, aka Maschi. On MaschiTuts, it’s all about tutorials! No matter the topic of the article, the goal always remains the same: Providing you guys with the most in-depth and helpful tutorials!


