

Hiding tags in WordPress is done with CSS. You can make the tag element invisible, or you can force it not to display. Both are simple edits.
Let’s dive right in.
How to make tags invisible in WordPress
To make tags invisible in WordPress, use the browser inspector to find the class name of the tag taxonomy. Most themes use “post_tags”. Type the class element into the “Additional CSS” with either visibility:hidden, or display:none. Hiding it loads the element; the latter disables tags from loading.
First, check your WordPress theme options
All WordPress themes have different functions. Some provide you with a one-click ability to disable and enable certain elements.
Others require you to use CSS to control your website appearance.
To see if your theme provides the single-click option to make your tags invisible, click on the customize option in your appearance menu. (located on the left sidebar of your WP admin dashboard).
Look for a section labeled “blog settings”. If the option is available, there will be a check box to either show or hide the post meta.
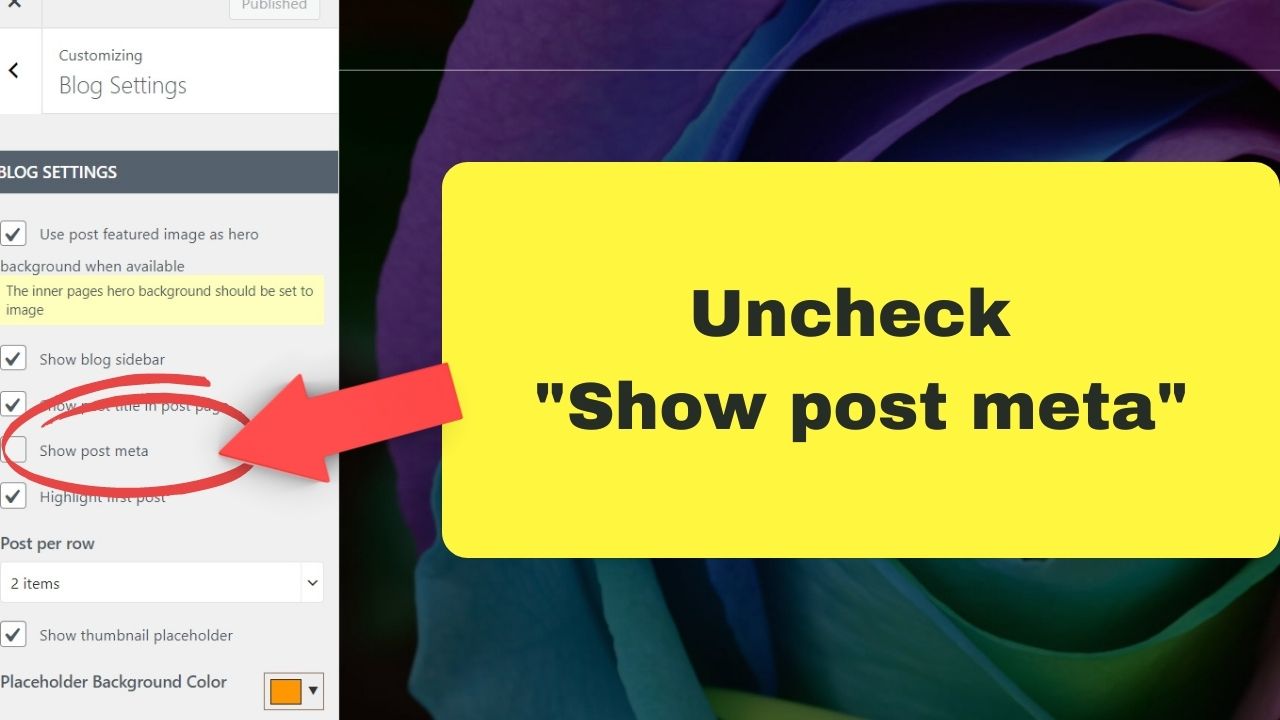

Post meta is more than your tags. It includes the post date, author name, categories, and tags. If you set up custom taxonomies, the hide post meta will hide those too.
If you want to keep some meta visible, such as your categories to help with navigation, editing your CSS will be required.
Very few themes are coded to target individual elements like WordPress tags only.
Most will keep the settings broad by disabling or enabling all post meta rather than one or two elements only.
To do that, you need to edit the CSS (stylesheet.css). The fastest way is to use the WordPress CSS Customizer.
To use it, you need to identify the class element that controls the tags on your WordPress theme. No theme is coded the same.
How to find the tag element to hide with CSS
Most modern browsers have an inspect mode. In Chrome, right-click on the element of a page you want to edit, then select inspect.
The source inspector will load, showing the source code for the element highlighted.
The part you need is the <span class> element.


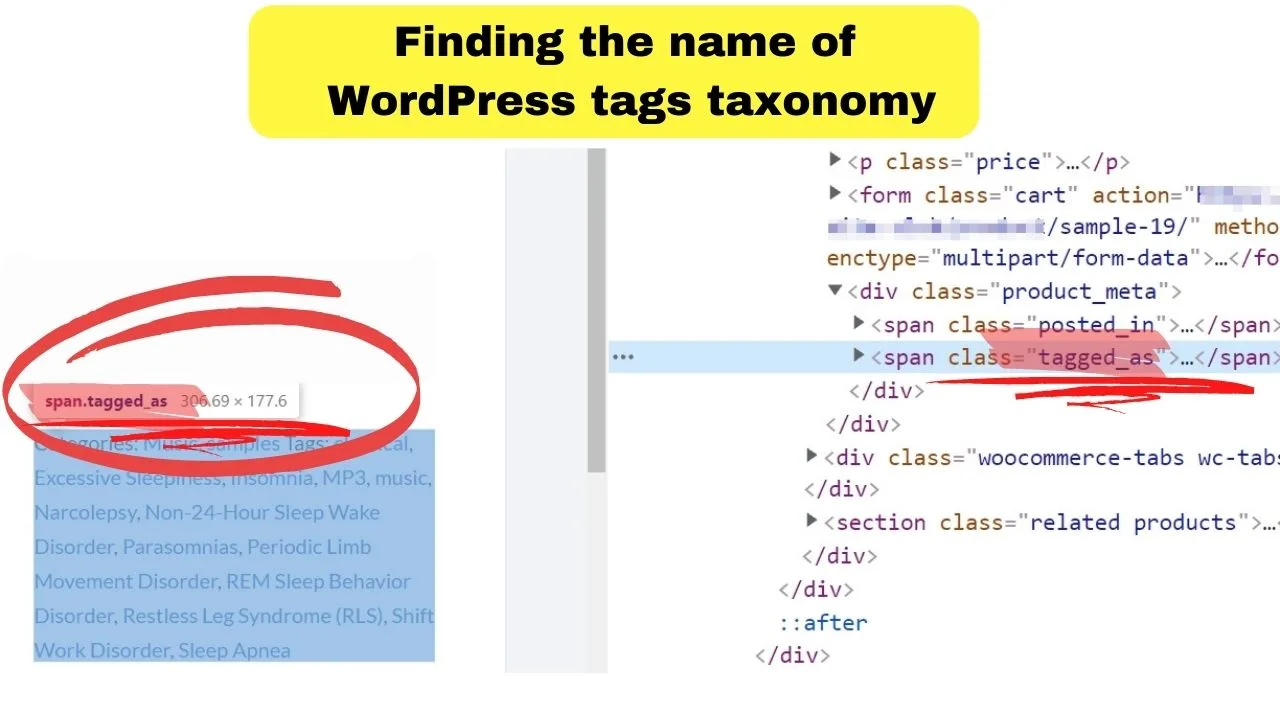
On WooCommerce product pages, tags are controlled by the class “tagged-as”. On blog posts, tags are set by whatever the theme developer named the class. Usually, it is post_tags.
Use your browser inspect tool to identify the name of the element controlling your tags.
Then, go to your WP admin dashboard, scroll to the “Appearance” menu on the left sidebar, select “customize,” then select “Additional CSS”.
Insert the code:
.tagged_as {
visibility:hidden
}
In the example code above, “tagged-as” is the code used on a WooCommerce product page. Replace “tagged-as” with the class name for your theme.
Depending on how many tags you have used when you set up the product or blog post, there may still be a lot of white space.
Hiding the visibility still loads the tags. It just doesn’t show.
If the code leaves too much white space, or you would rather not have the tags load at all, use the CSS code: display:none.
.tagged_as {
display:none
}
What is the difference between visibility and display in CSS?
The visibility:hidden CSS code loads the element but hides it on the page view. It is like white text on a white background. It is there, but it cannot be seen.
The display:none code stops the element from loading.
Screen readers will not read the hidden text either. What cannot be seen will not be heard.
When you only have a small number of tags to make invisible, the difference will be barely noticeable. The empty white space becomes apparent when you use visibility:hidden on a page with dozens of tags.
How to make tags invisible on certain pages of WordPress
When you want to keep tags on the rest of your site visible but hide them on certain pages, you can use CSS to hide the element only on a single page.
You can also target multiple pages with the same code just by adding more CSS blocks into the Additional CSS section.
When logged into WordPress, go to “all posts” and either preview the post you want to hide tags on or hover the preview button. When logged in, the post ID shows in the URL of WordPress domains.
Yoursite[.]com/wp-admin/post.php?post=388&action=edit
In the example URL, 388 is the post ID. Use the post ID for the post or page you want to hide the tags on.
.post-id-388 .tagged-as {
display:none;
}
As before, you can use the display:none code to stop the element from loading, or you can make it invisible but still present in the background by using the visibility:hidden code instead of display:none.
How to Use WordPress Tags Correctly
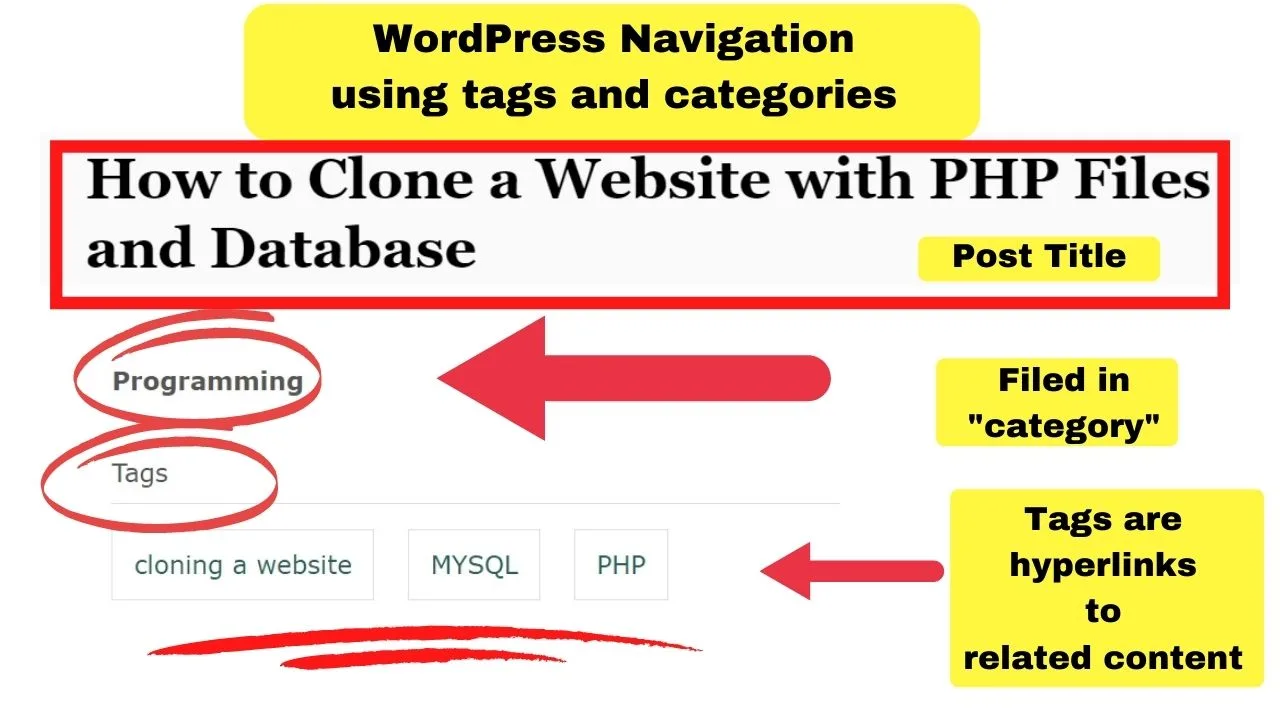
The purpose of WordPress tags is to assist in website navigation. The technical term for them in WordPress is a taxonomy.
The two most common taxonomies are categories and tags. Both are there to help structure your content; to help users find what they want.
Correct use of tags in WordPress
To categorize products in WooCommerce stores and to add an additional search function to a WordPress website.
Users click on a tag, and if you have them organized correctly, all other related/relevant posts or products get returned.
Incorrect use of tags in WordPress
Adding keywords to your post, thinking that it will enhance search engine optimization. It will not.
WordPress tags are a taxonomy. The purpose they serve is to add structure to your website. It is similar to your categories, but the core difference is that you do not need to use them.
With categories, you need to include one category per post.
Otherwise, it will be published to the uncategorized category, making your website look and feel like it is not properly maintained.
WordPress tags, on the other hand, are a supporting taxonomy to categories. Use them to help visitors find related posts while keeping your categories broad.
Tags used to be important in terms of SEO in the past. In the present day, not so much.
Example use case of tags for micro structuring content
Using this site as an example, one category is “programming.” There are numerous programming languages. PHP, Python, Ruby, SQL, JavaScript, C++, etc.
On a niche programming website, each language could be a sub-category.
Rather than adding a subcategory for every language, posts can be tagged with the relevant one. WordPress supports an infinite number of sub-categories.
Generally, more than two or three sub-categories will make navigation tedious. It becomes too much clicking for a user to reach their destination.
What is the difference between WordPress categories and tags
- Categories are hierarchical
- Tags are not
You can have a category and sub-categories. You cannot have sub-tags. Tags are designed to be singular keywords or really short keyword phrases.
In practice, a category for programming could be split into two. Client-side and Server-side. Those could be top-level categories. Sub-categories would be the languages for the two.
> /category/client-side
> JavaScript
> CSS
> HTML.
> AJAX
> /category/server-side
> Python
> Ruby on Rails
> SQL
> Perl
Instead, the structure of this site uses tags for navigating posts within categories.
The difference is the number of clicks a visitor needs to perform to reach a destination. A sub-category is an extra click for the visitor.
Tags narrow the topics, adding to relevancy without needing to restructure categories.

Always keep user experience in mind when structuring your content. Use tags in WordPress to make navigation easiest for your users.
When tags become clutter, editing the CSS is how to make the tags invisible in WordPress.
Then, you can restructure or organize your site to implement tagging correctly, then remove the CSS to make tags visible when the job is complete.


Hey guys! It’s me, Marcel, aka Maschi. On MaschiTuts, it’s all about tutorials! No matter the topic of the article, the goal always remains the same: Providing you guys with the most in-depth and helpful tutorials!

