
Whether you’re a professional designer trying to make it in the big leagues, an amateur trying to stand out or just looking to learn a new skill, knowing how to make a GIF is the perfect skill for anyone! But where to begin?
Adobe Illustrator is a great tool for easily creating the frames (still images) of your GIF, but Illustrator doesn’t have the ability to convert still frames into a GIF, so you will need to export your frames from Illustrator and use its Motion workspace to convert them into a GIF.
For your convenience, this guide will show you how to use Illustrator and Photoshop to create a GIF.
Making A GIF In Illustrator – Quick Guide
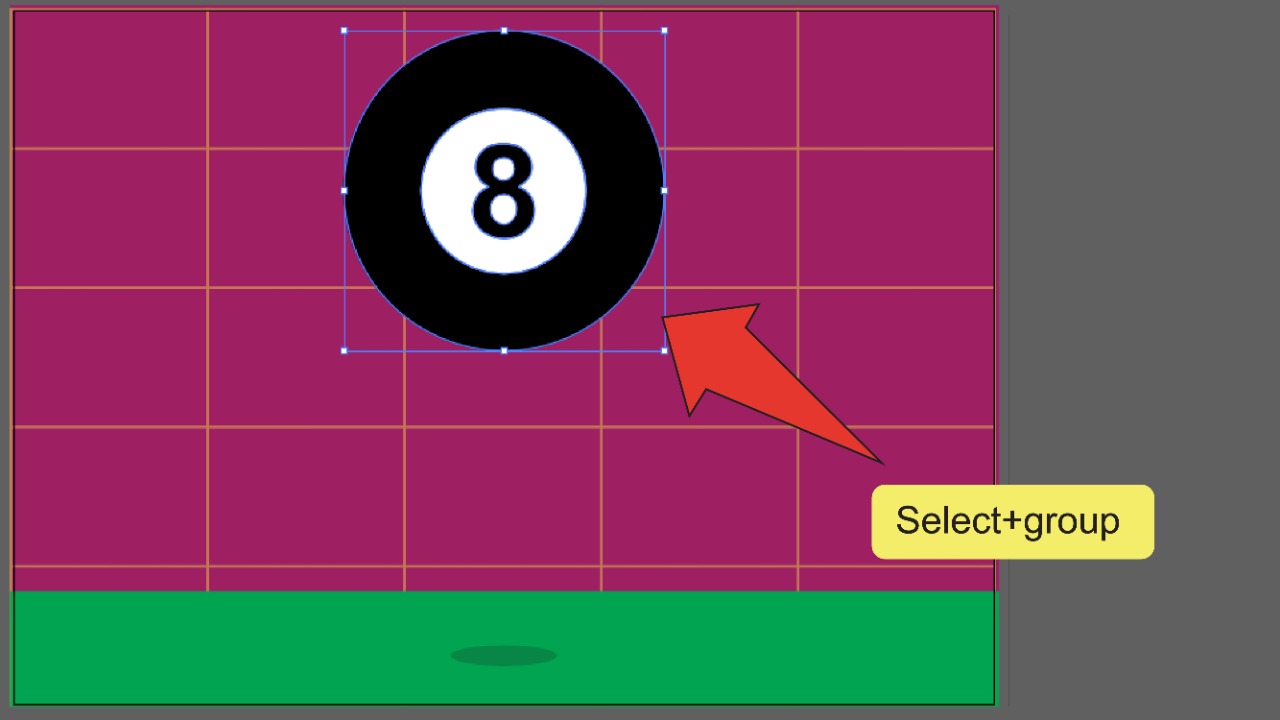
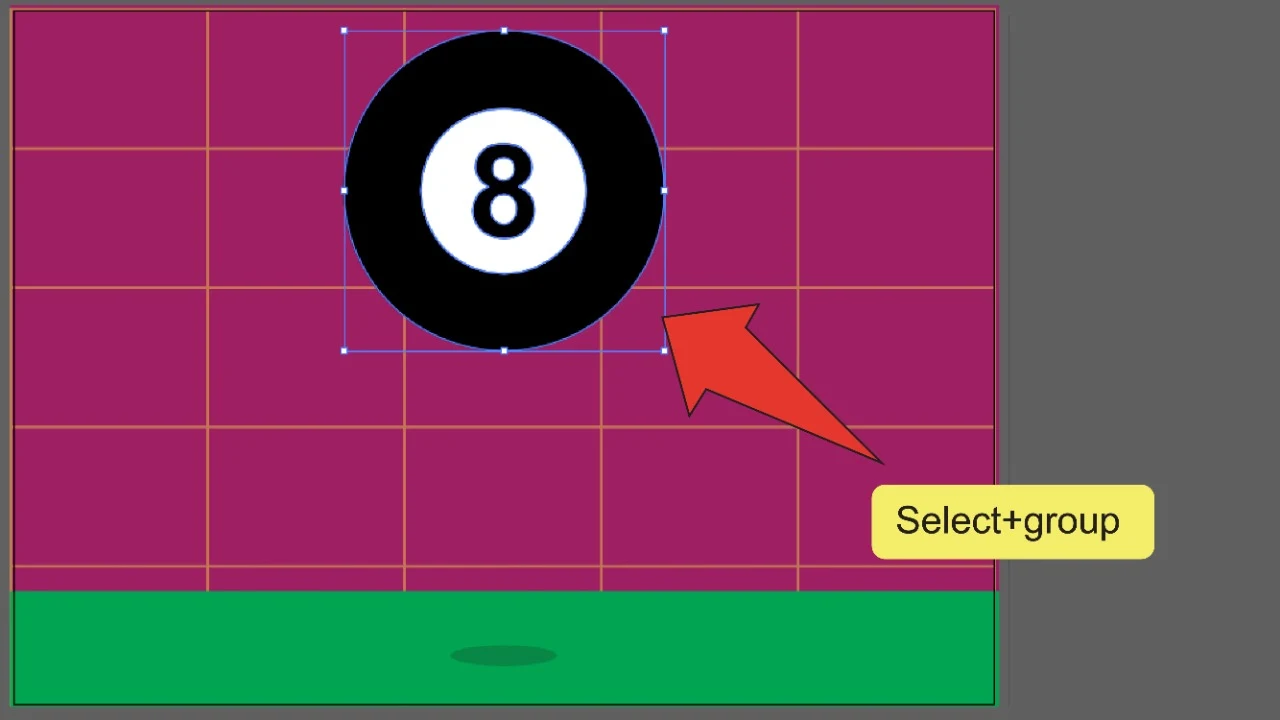
- Equip the selection tool and “Shift+click” each relevant object in your image.
- Press “COMMAND+G” (MAC) OR “Ctrl+G” (Windows).
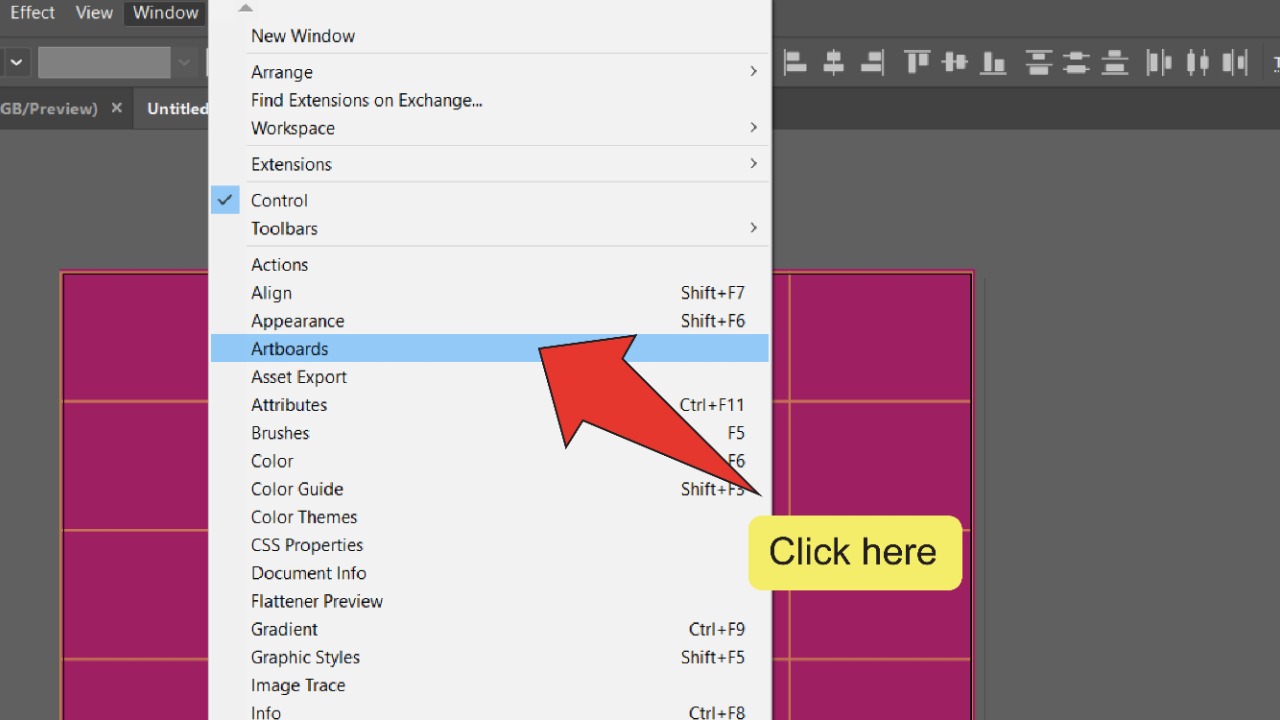
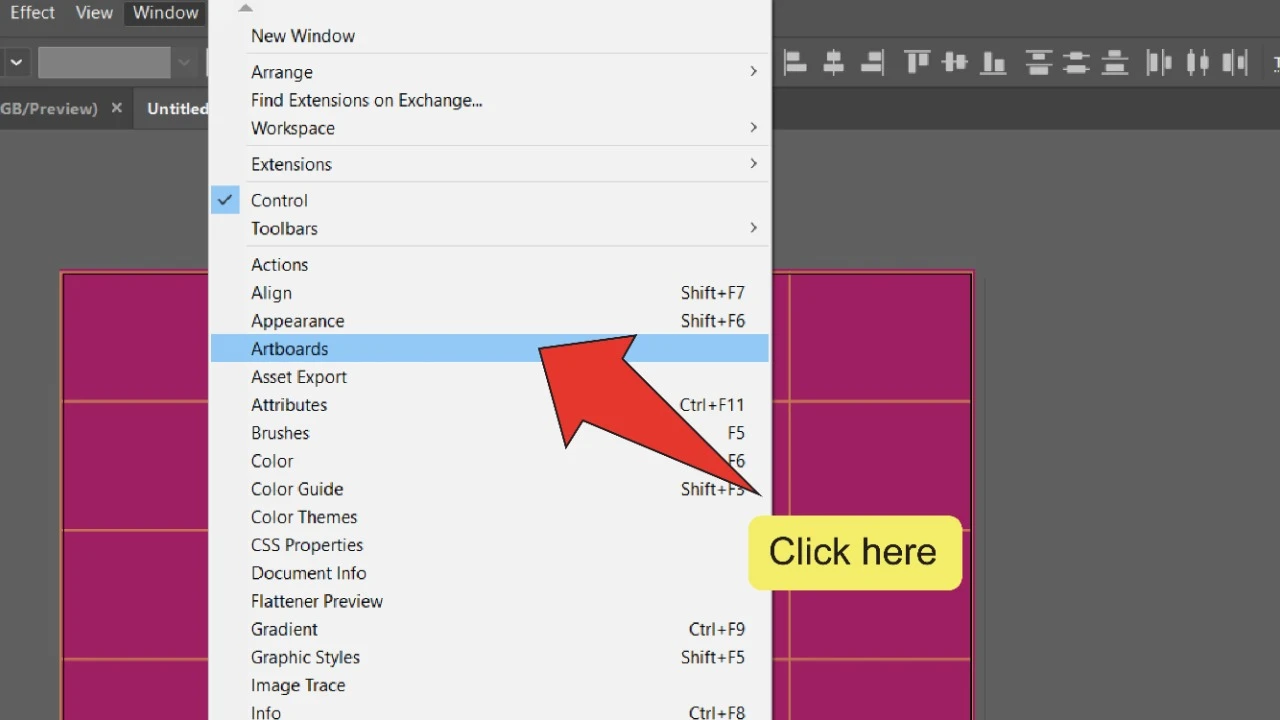
- Go to “Window” and click on “Artboards”, then create enough artboards for your GIF.
- Rename your artboards so they’re in sequential order.
- “Click+drag” your cursor over your entire image, then press “COMMAND+C” (MAC) OR “Ctrl+C” (Windows).
- Go to the next artboard and press “COMMAND+V” (MAC) OR “Ctrl+V” (Windows).
- Adjust your image on the new artboard.
- Repeat these steps until all your frames are complete.
- Press “Alt+COMMAND+E” (MAC) OR “Alt+Ctrl+E” (Windows).
- Select your artboards and press “Export Artboard”.
- In Photoshop, go to “File”, then “Open” and click on your first frame. Select “Image sequence”, then click “Open”.
- Set your frame rate.
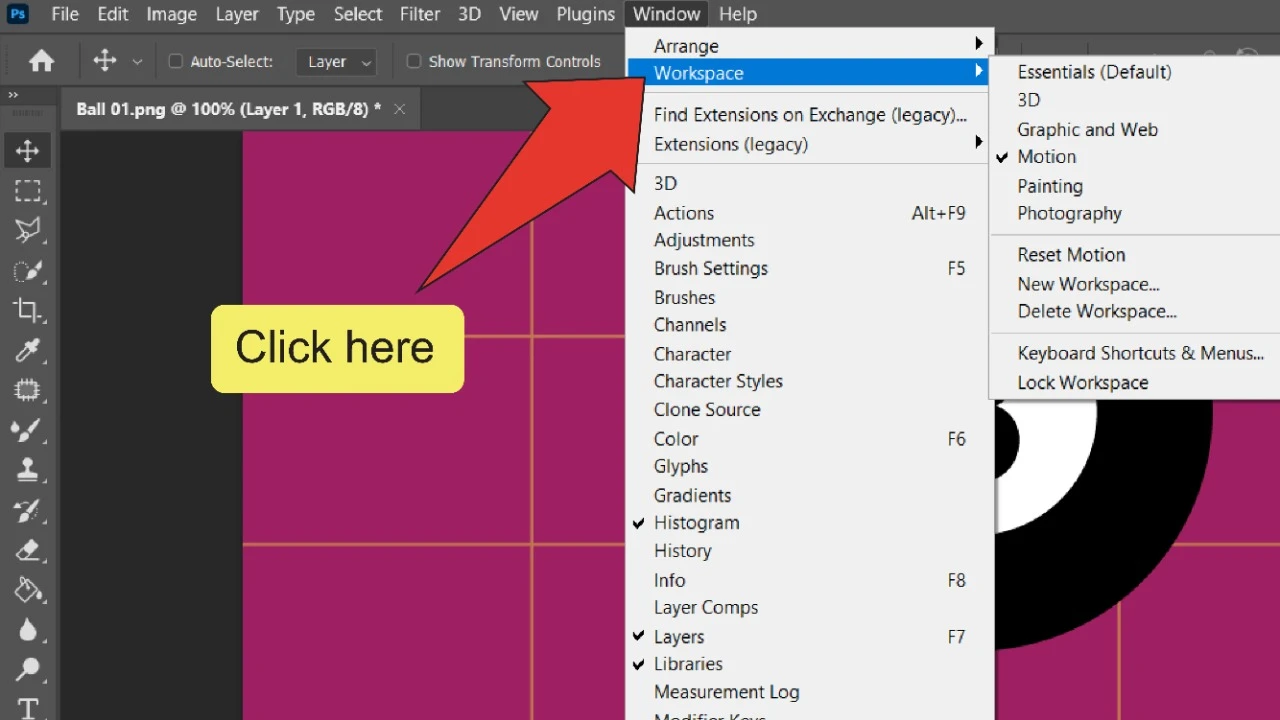
- Go to “Window”, then “Workspace” and click on “Motion”.
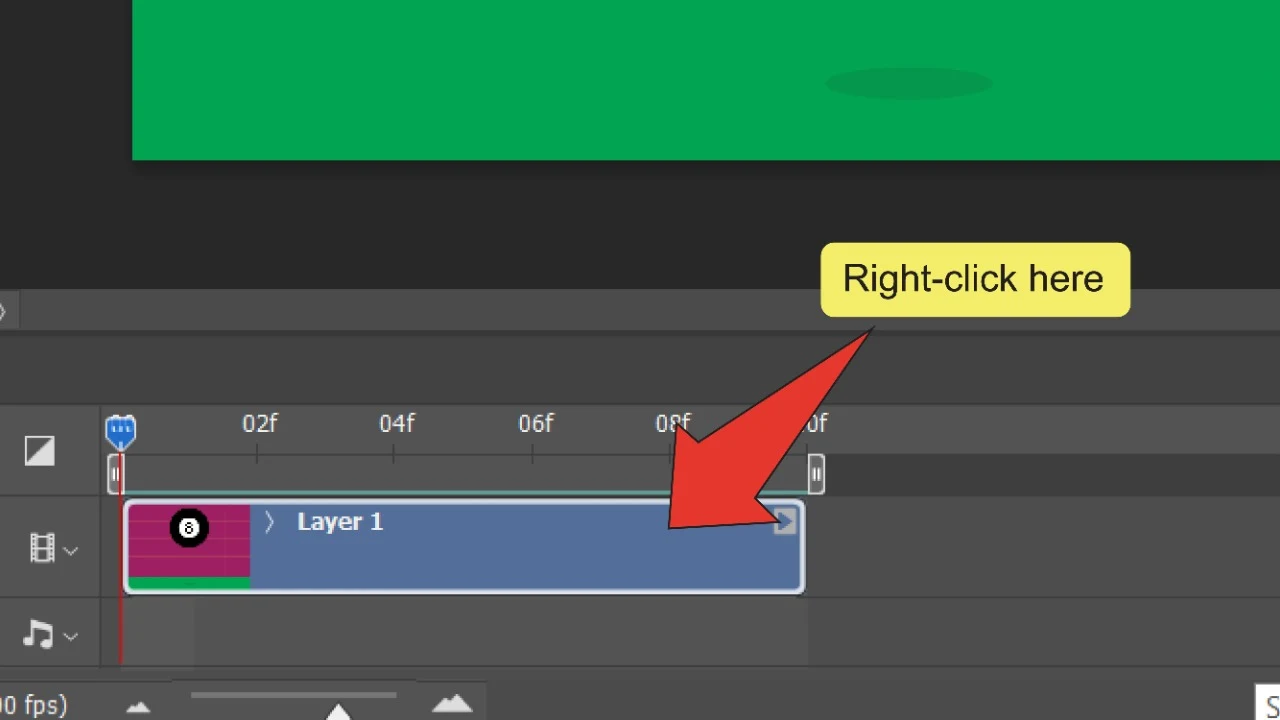
- Right-click on your workspace to edit the GIF’s speed and duration.
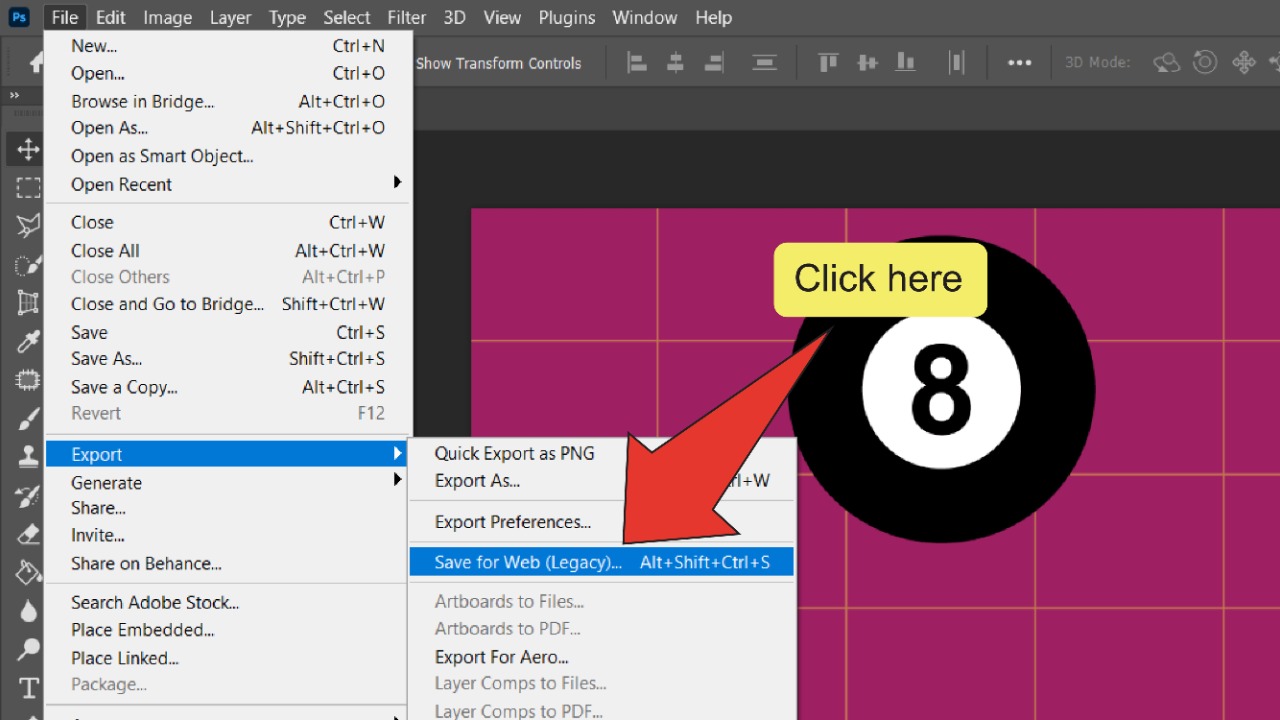
- Press “Alt+Shift+COMMAND+S” (MAC) OR “Alt+Shift+Ctrl+S” (Windows) and export your GIF.
Making A GIF In Illustrator – Detailed Guide
Step 1:
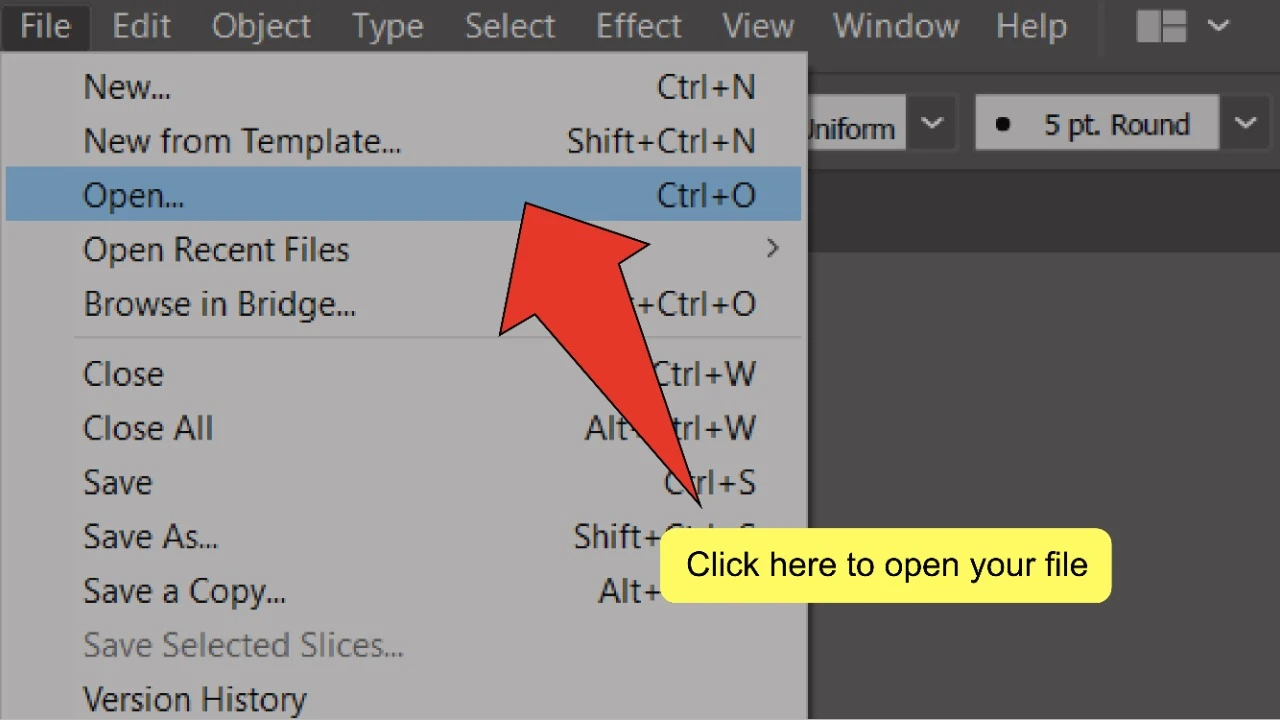
Open your Illustrator file. To start, open your document by double-clicking on its corresponding Illustrator file, or if Illustrator is already open, you can go to “File” on the top menu, and then “Open” and choose the file you want to open. To speed things up, you can also use the keyboard shortcut “COMMAND+O” (MAC) or “Ctrl+O” (Windows).

Step 2:
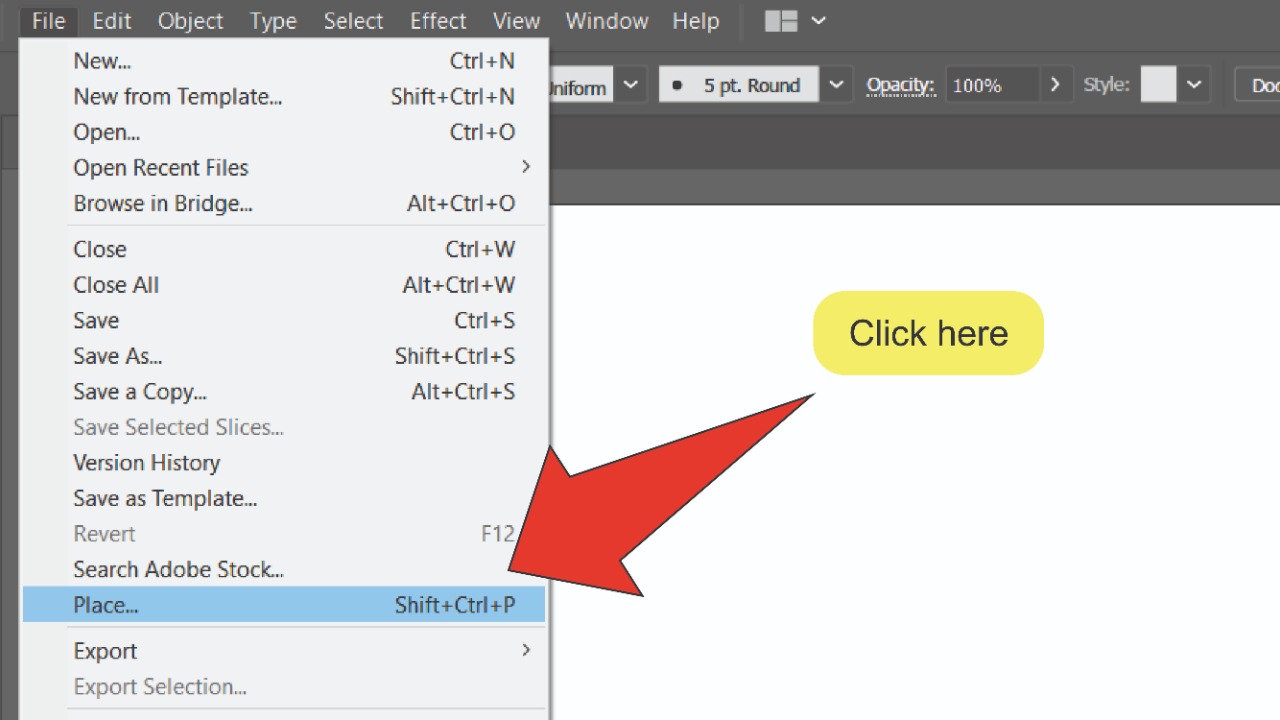
Place or draw your objects. Import and place the object(s) you want to animate on your artboard, or draw new objects using the Pen tool (keyboard shortcut “P”) or the Paintbrush tool (keyboard shortcut “B”).

Step 3:
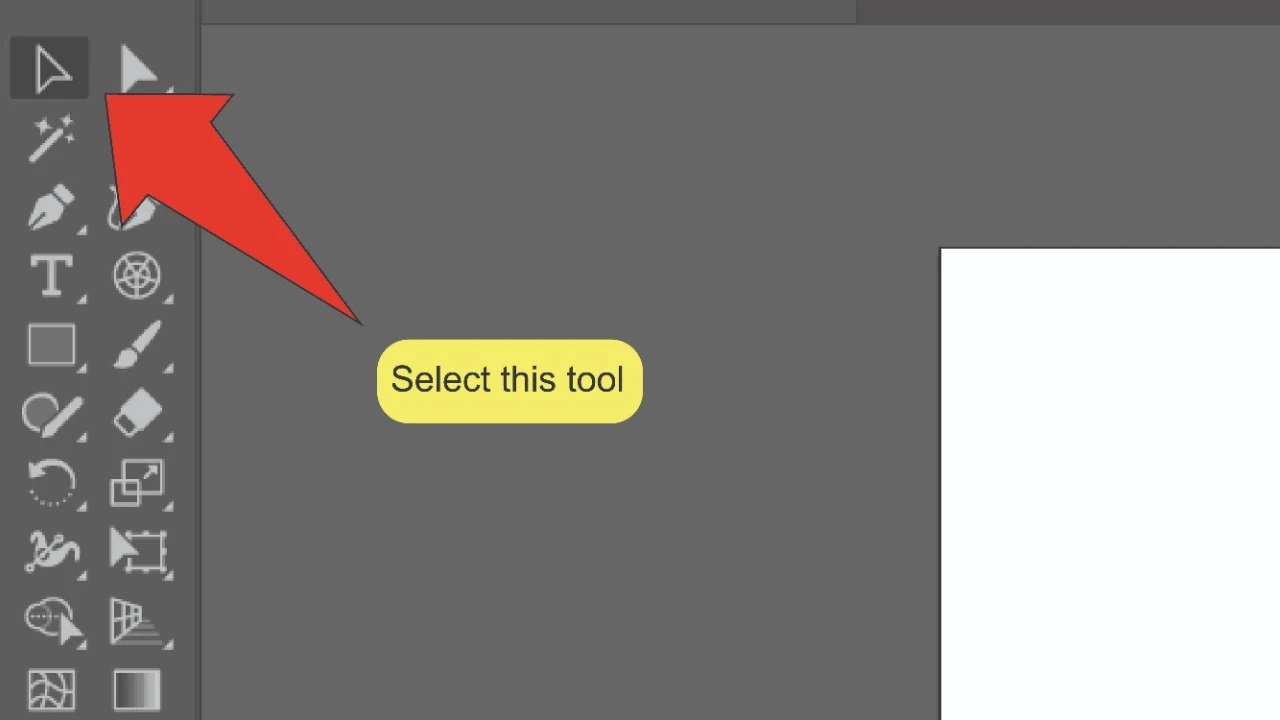
Find and select the Selection tool. Look for the Selection tool, located on the toolbar on the left side of your screen. Alternatively, you can use the keyboard shortcut “V” to quick-select the tool.

Step 4:
Group your objects. It will be easier to animate your image if all the objects that need to be moved are grouped together. If the object you’re animating consists of multiple smaller vector objects, press and hold the “Shift” key, then click on each object individually to select it. Next, press “COMMAND+G” (MAC) or “Ctrl+G” (Windows) to group them together.
Step 5:


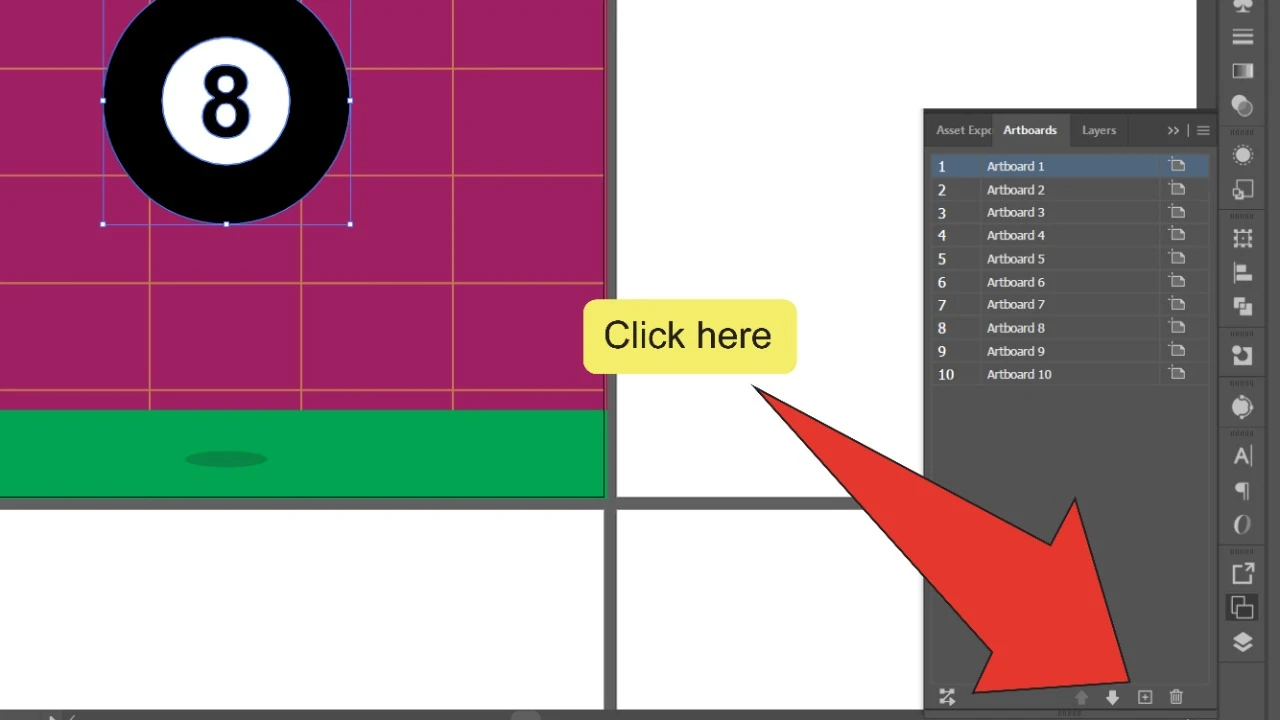
Open the Artboards panel. At the top of your screen, go to “Window” and click on “Artboards”. The Artboards panel should open up on the right side of your screen.
Step 6:
Create More Artboards. Click on the “New Artboard” icon on the Artboards panel to add a new artboard. Repeat this step as many times as necessary to achieve the amount of frames you’ll need to have in your GIF.

Step 7:
Establish a naming convention. Double click on the name of the artboard titled “Artboard 1”. It will turn into a text box. Retype the name of your artboard, followed by its number in your sequence (eg. “Ball 01”) into this text box.
It’s important to write each number so it fits into the final sequence of your frames. So, if your GIF has 10 frames, your first artboard should be numbered “01”, but if your GIF has 100 frames, it should be numbered “001”.


Step 8:
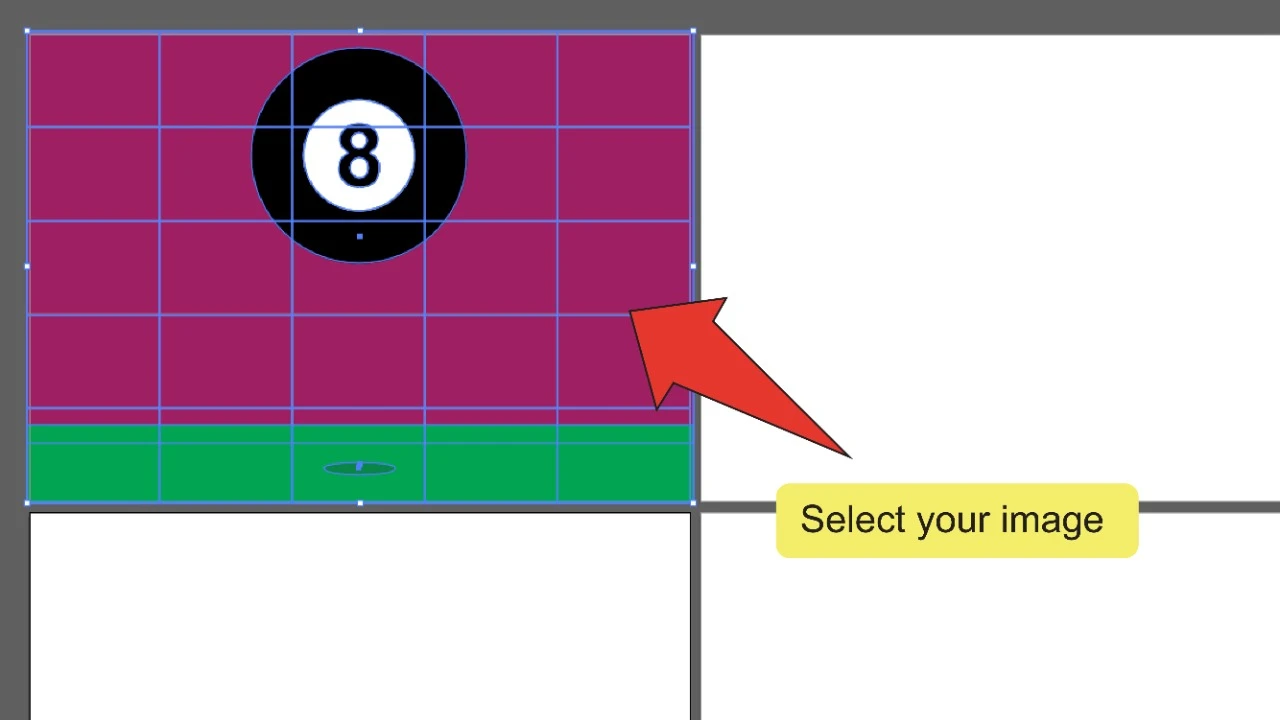
Select your entire image. Hold down the “Shift” key and click on each object in your image. You can also click and drag your cursor over the entire image to select all of it at once.

Step 9:
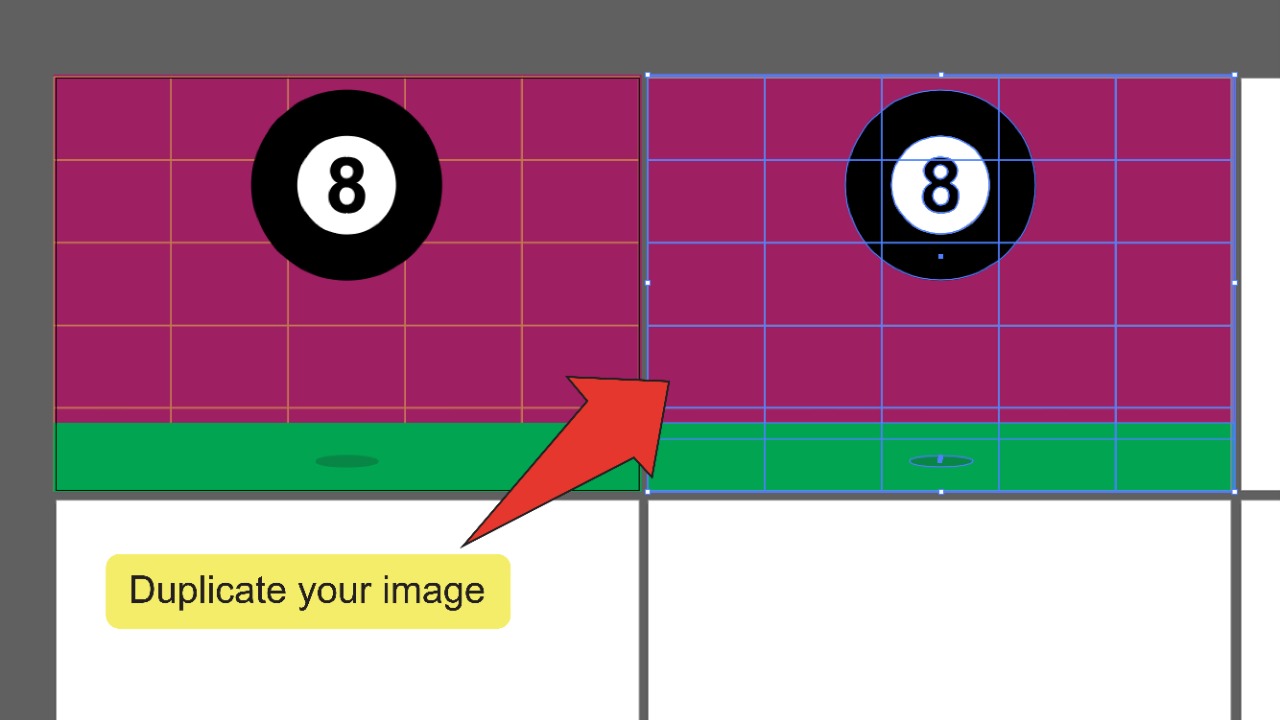
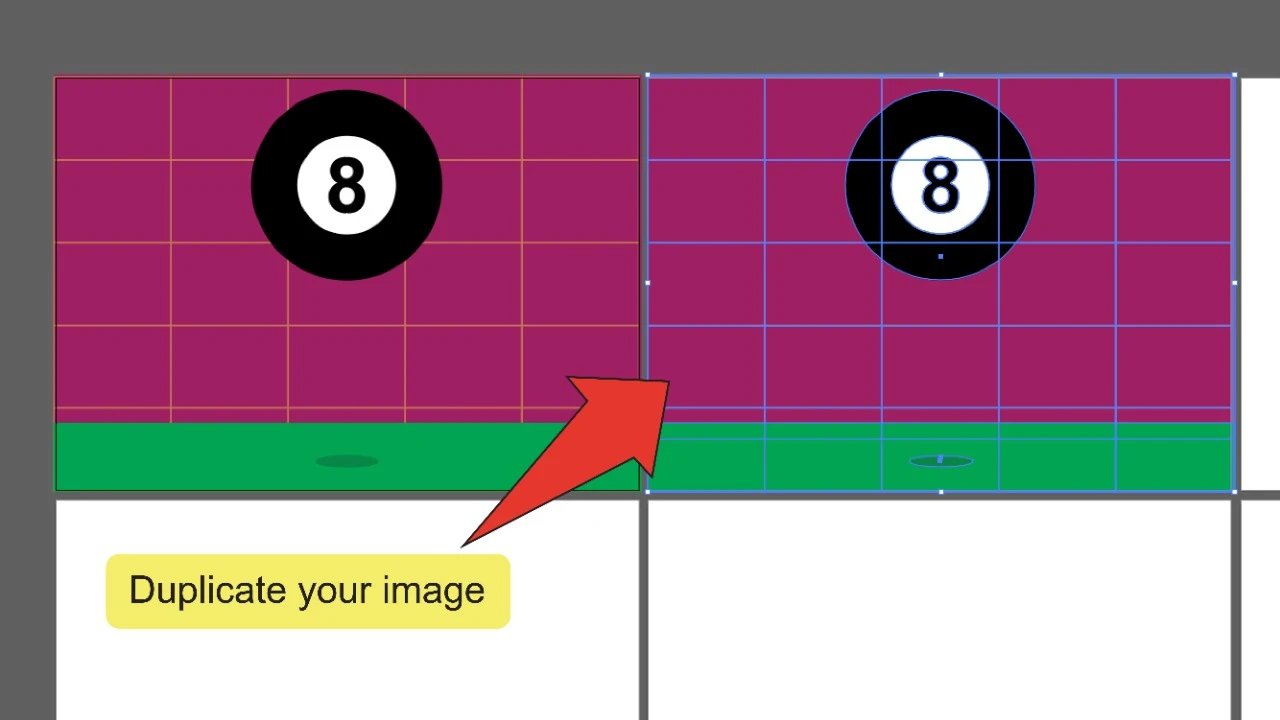
Duplicate your image. Use the keyboard shortcut “COMMAND+C” (MAC) or “Ctrl+C” (Windows) to copy the selected objects on your first artboard. Next, go to your second artboard and press “COMMAND+V” (MAC) or “Ctrl+V” (Windows) to paste them. Repeat this step on each subsequent artboard as you alter the position of your objects. To save time, you can also press and hold the “Alt” key and click and drag your entire composition to copy it.
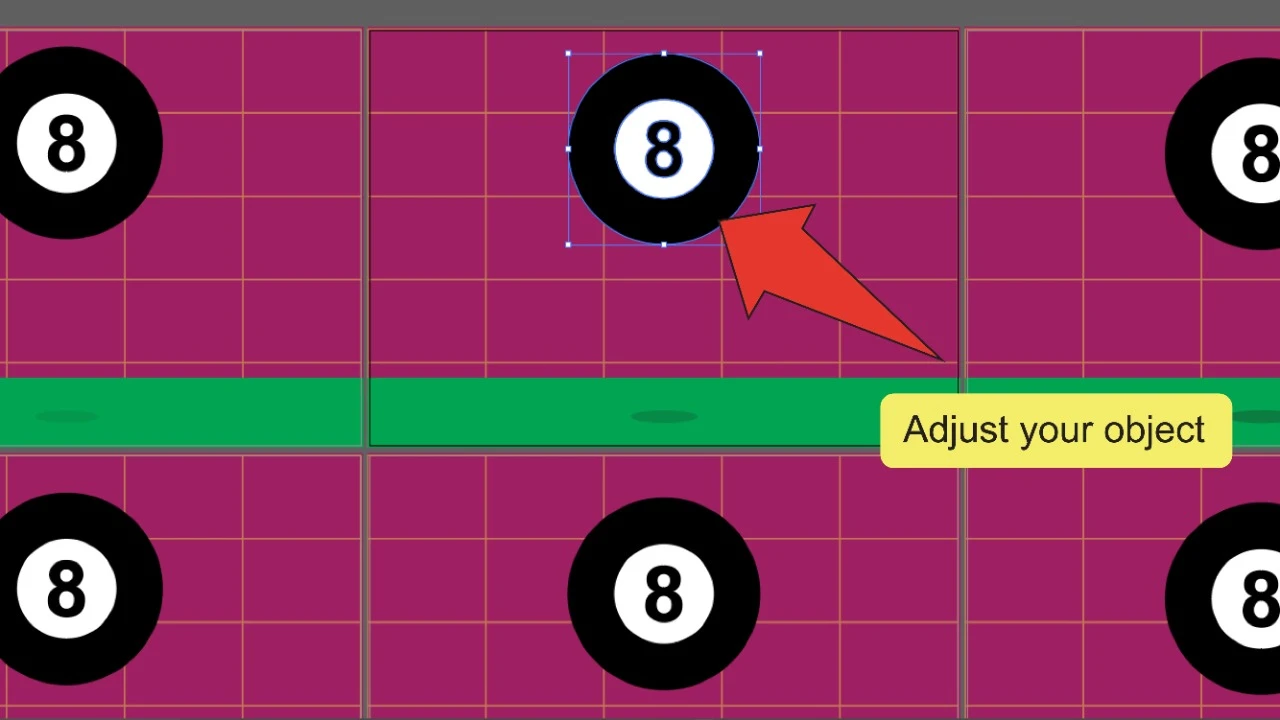
Step 10:
Adjust your frames. Click on the object/grouped objects you want to animate on your duplicated layer and alter its size, shape or position slightly.

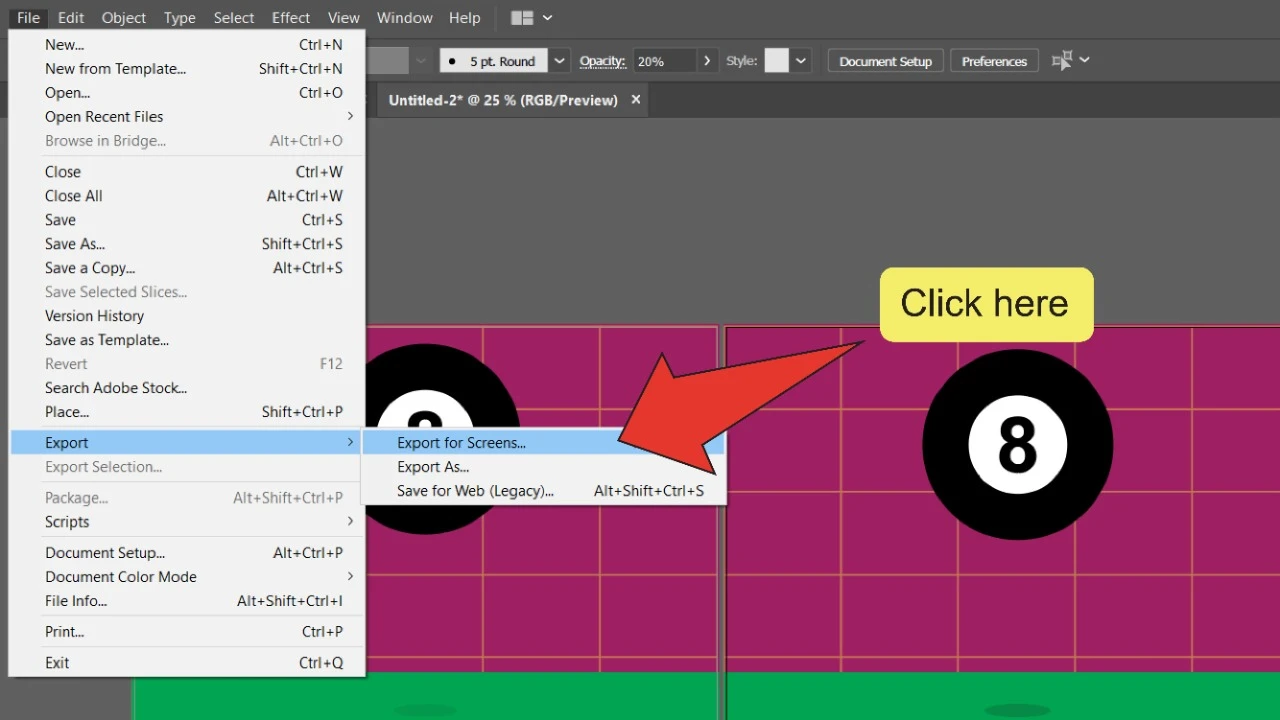
Step 11:
Start exporting your frames. Once all your adjustments are done, go to the menu at the top of the screen and click on “File”, followed by “Export” and then “Export for Screens…”. To speed things up, you can also press “Alt+Ctrl+E”.

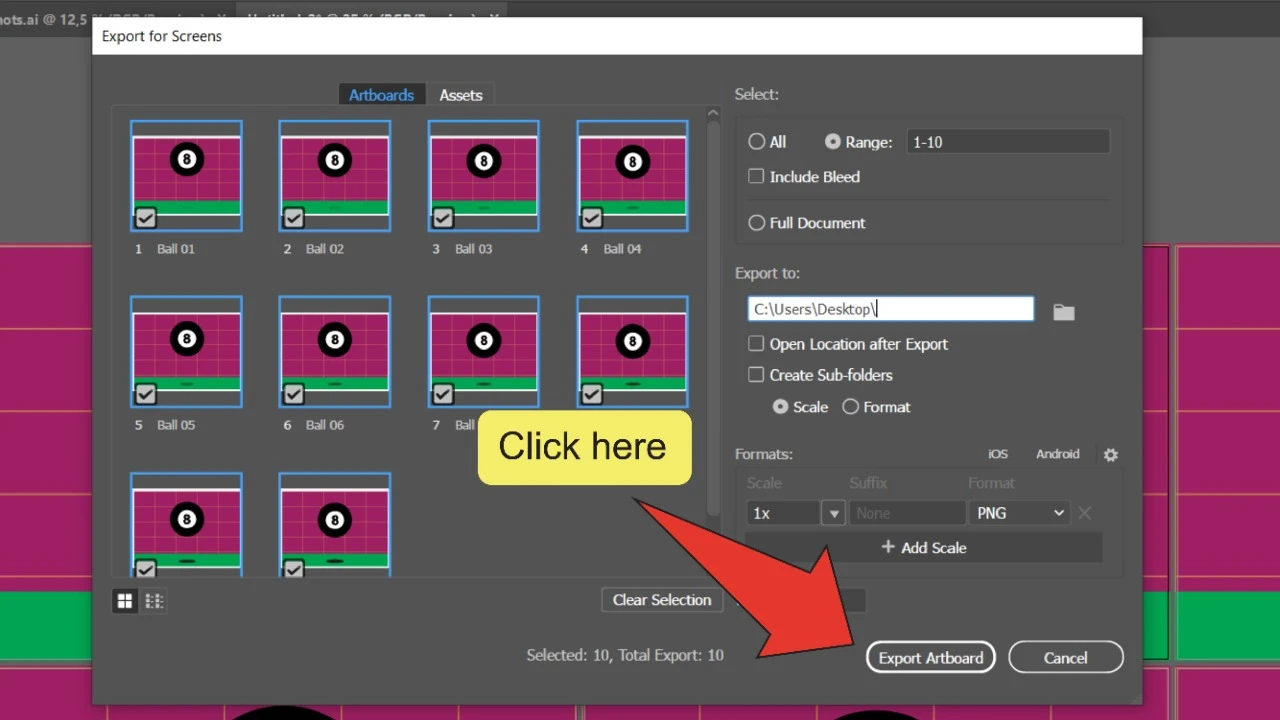
Step 12:
Finish exporting your frames. On the Export for Screens window, make sure all your frames are selected, then press the “Export Artboard” button.

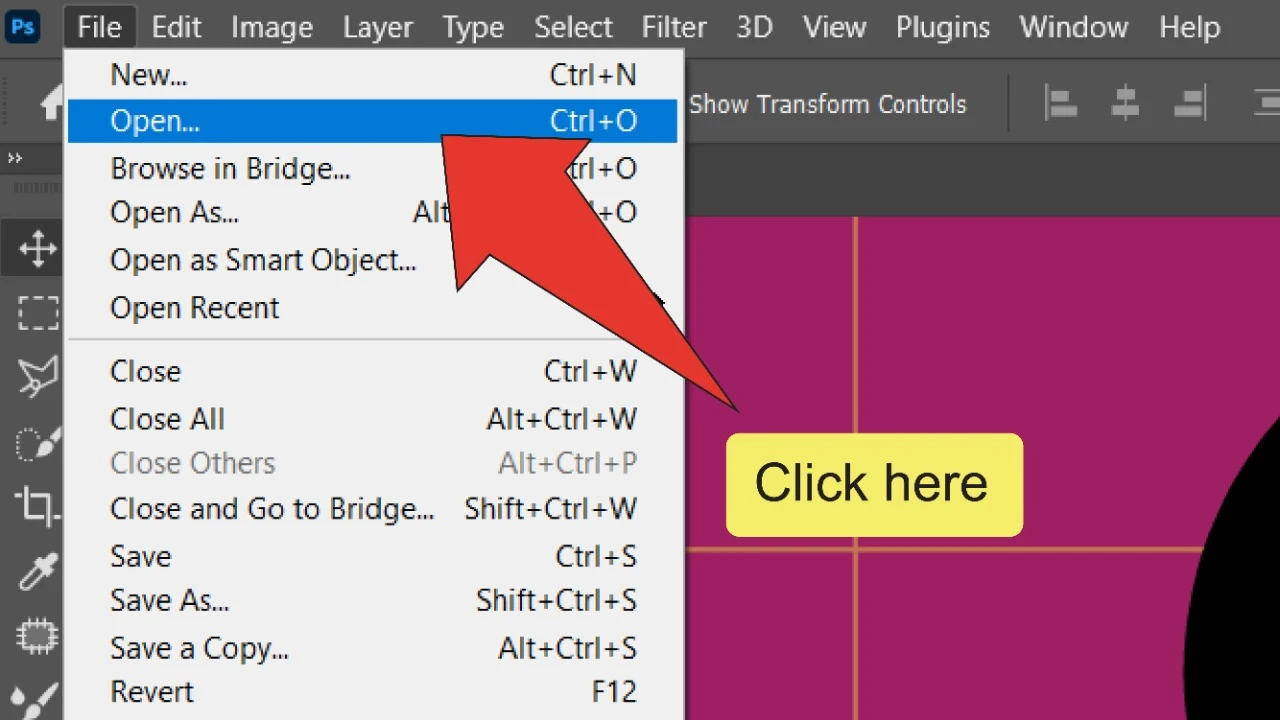
Step 13:
Open your frames in Photoshop. Open the Adobe Photoshop application and go to “File”, then “Open” and click on the first frame in your sequence. Next, make sure that you have “Image sequence” selected then click “Open”.

Step 14:
Set your frame rate. On the Frame Rate window, select the amount of frames in your gif per second via the drop-down menu.


Step 15:
Open the Motion Workspace. On the top menu, go to “Window”, then “Workspace” and click on “Motion”.

Step 16:
Set your duration and speed. Right-click on your GIF in the workspace to edit its duration and speed.

Step 17:
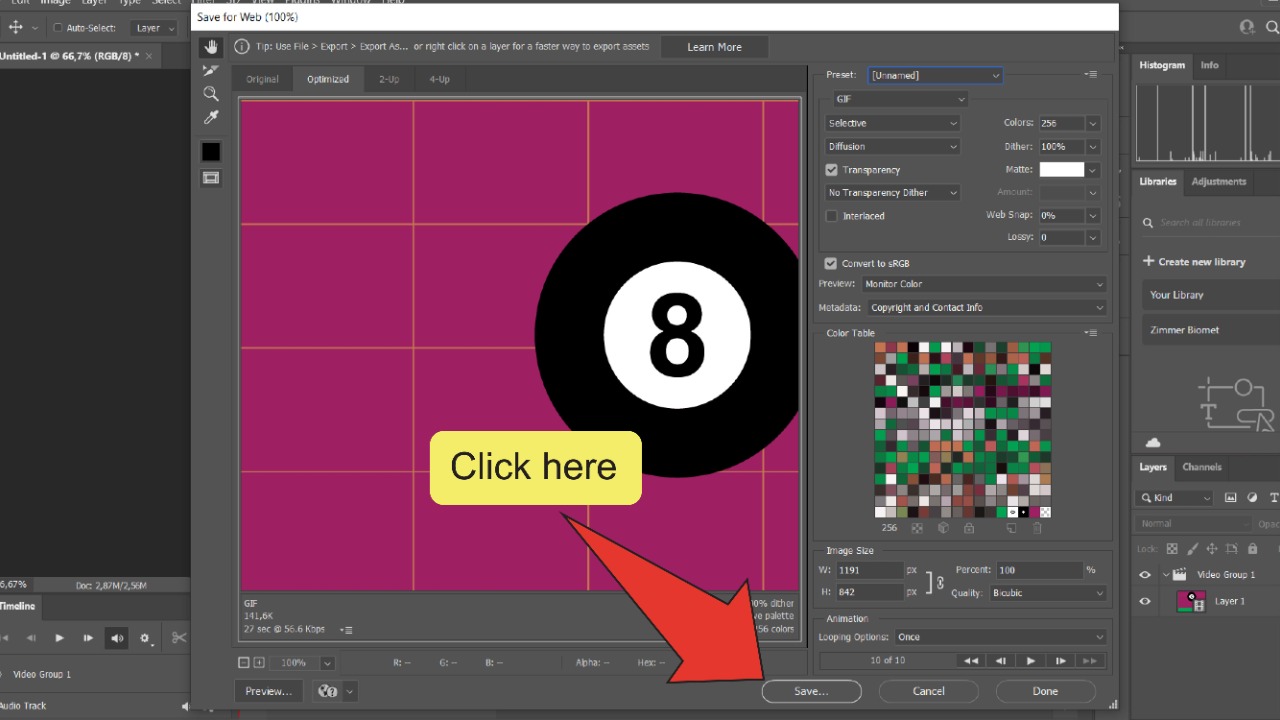
Open the Save for Web window. Go to “File”, then “Export” followed by “Save for web”.

Step 18:
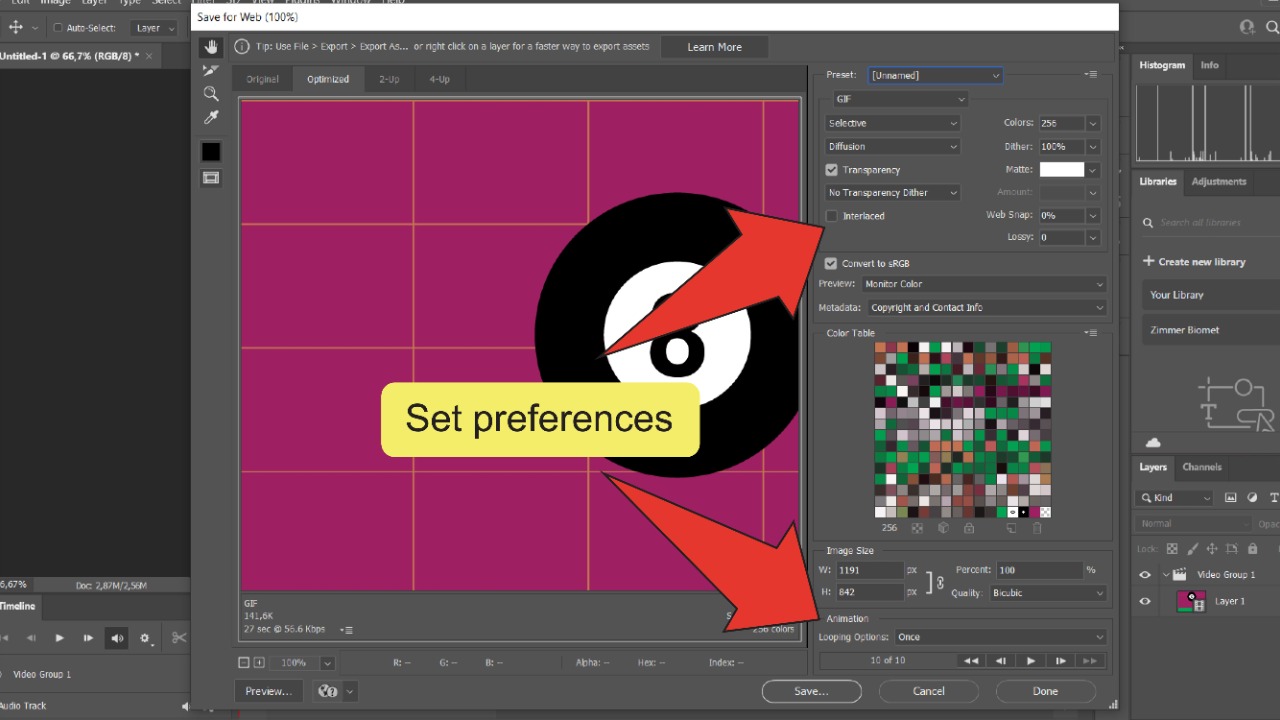
Define your GIF settings. On this window, set your GIF presets and, most importantly, Looping Options.

Step 19:
Export your gif. Finally, click the “Save” button and select your GIF’s destination to export your GIF.

Frequently asked questions about “How to make a GIF in Illustrator”?
Is it possible to make a GIF solely using Illustrator?
To make a GIF, you will need both Adobe Illustrator and also Adobe Photoshop (or a comparable software). It is not possible to complete the whole process in Adobe Illustrator alone.
What other software than Illustrator and Photoshop may I use to create GIF’s?
If you are looking for something simple, you can give Canva (online tool) a try. Canva is not primarily a GIF creation tool but it does offer the ability to export projects as GIFs. Another tool would be EZGIF (ezgif.com).
What dimensions should my GIF be?
This heavily depends on what you are using your GIF for and also on the platform you are going to use your GIF on. For instance, if you are creating a GIF for Discord, then the maximum size is 128 x 128 px.


Hey guys! It’s me, Marcel, aka Maschi. On MaschiTuts, it’s all about tutorials! No matter the topic of the article, the goal always remains the same: Providing you guys with the most in-depth and helpful tutorials!

