

Are you ready to make your emails stand out?
Creating an impressive e-mail signature in Canva is the way to go.
In this guide, we’ll help you create a flawless Canva email signature, from designing the header to adding clickable social media icons. Let’s enhance your email communication!
How to Create an E-mail Signature in Canva
First, create an image holder using Canva frames. Drop your photo inside the frame. Add text boxes to insert your name, business name, and contact information. Create clickable icons by opening a new Canva file with a 50 x 50 px dimension. Save everything in PNG before uploading them to your e-mail account.
Creating E-mail Signatures in Canva
E-mail signatures are fast becoming a fad nowadays.
Not only are they eye-catching, but e-mail signatures are like the logos you create for your business — they help you establish your identity.
As such, it’s crucial to learn how to personalize the way you correspond with your potential clients using e-mail signatures.
What you put on your e-mail signature depends on your style. But, there are 7 major components or details that you shouldn’t forget to include:
- Your photo
- Your Name
- Designation/Profession
- Business Name (if applicable)
- Website (if applicable)
- E-mail account
- Clickable icons for social media (optional)
Do note though that while they’re important, not all those details apply to you.
But, we’ll cover all the bases and help you learn to create your e-mail signature from scratch.
To begin, let’s start with creating the e-mail signature header itself.
Creating the E-mail Signature Header
Step 1: Create a new design using the Create a Design button on Canva’s homepage.


Step 2: Select Custom Dimension and use this measurement: 500 x 200 px.


However, ideal sizes for professional-looking signatures range from 300-600 px in width and 70-200 px in height.


Keeping your e-mail signature dimensions small prevents it from distracting the recipient from the content itself.
Step 3: Once you’re on the editor page, head over to Elements and click the Frames category.

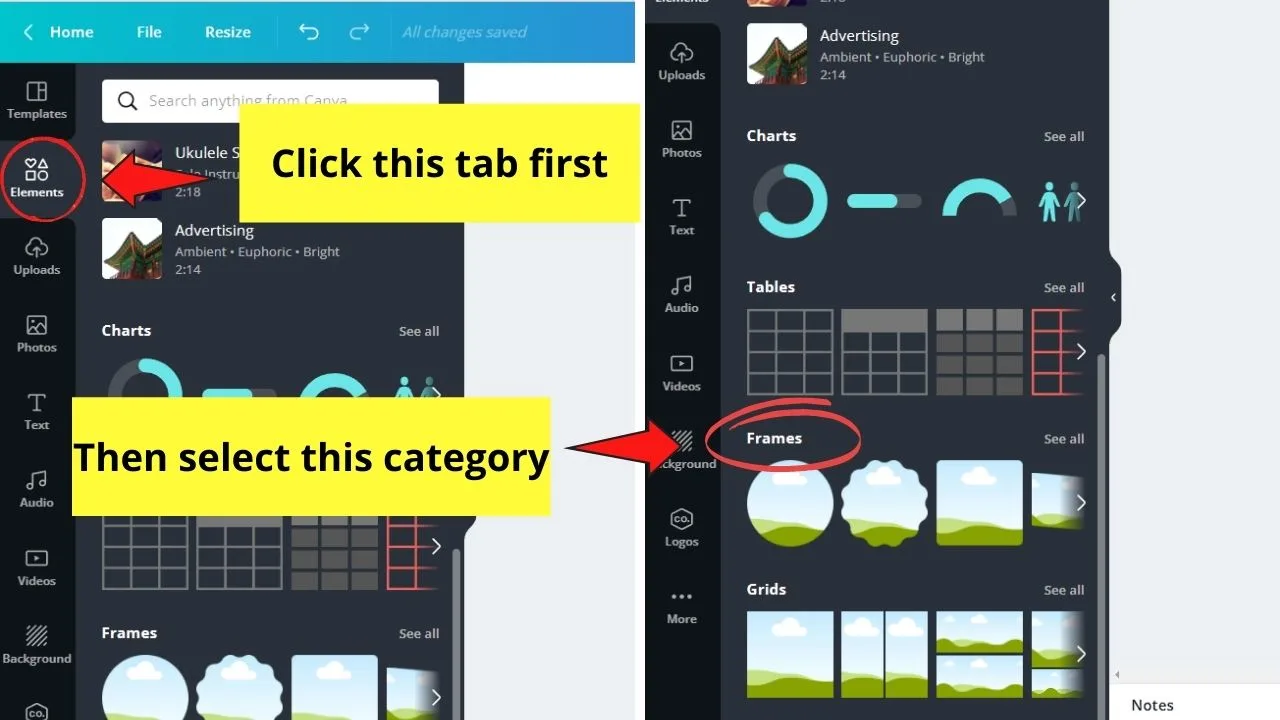
If you cannot locate the Frames category, use the search button function and encode frames in it.
Select a frame you’d like to use.
Technically, there’s no specific frame recommended for an e-mail signature.
But usually, the round frames work best (perhaps as they look cleaner or more sophisticated).
Step 4: If you want to add a border, you can do so by adding a circle from the Lines and Shapes category.
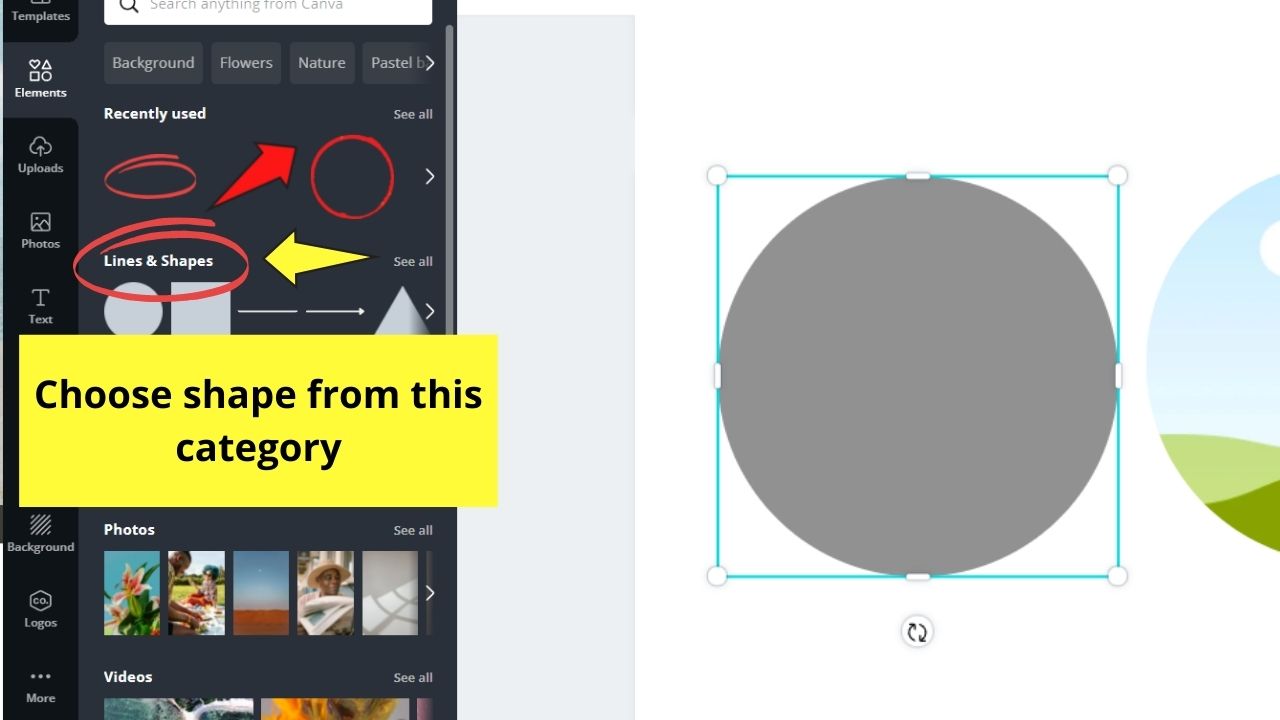

Like adding frames, you can also use the search function button and encode circles on it.
However, if you prefer using Canva keyboard shortcuts, then pressing the C button on your keyboard is enough to make a circle appear on the canvas.
Step 5: Change the fill color of your circle by tapping on it to make the color picker box appear.

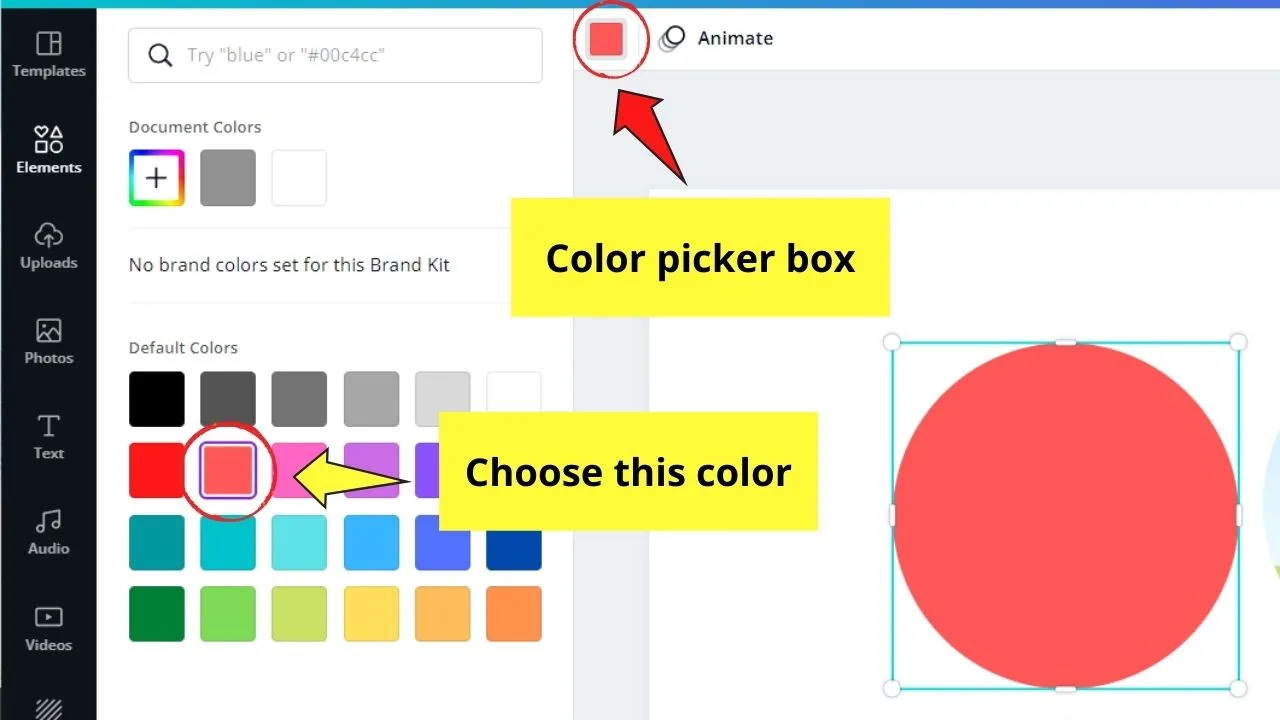
Tap on the color picker and select what color shades you’ll use.
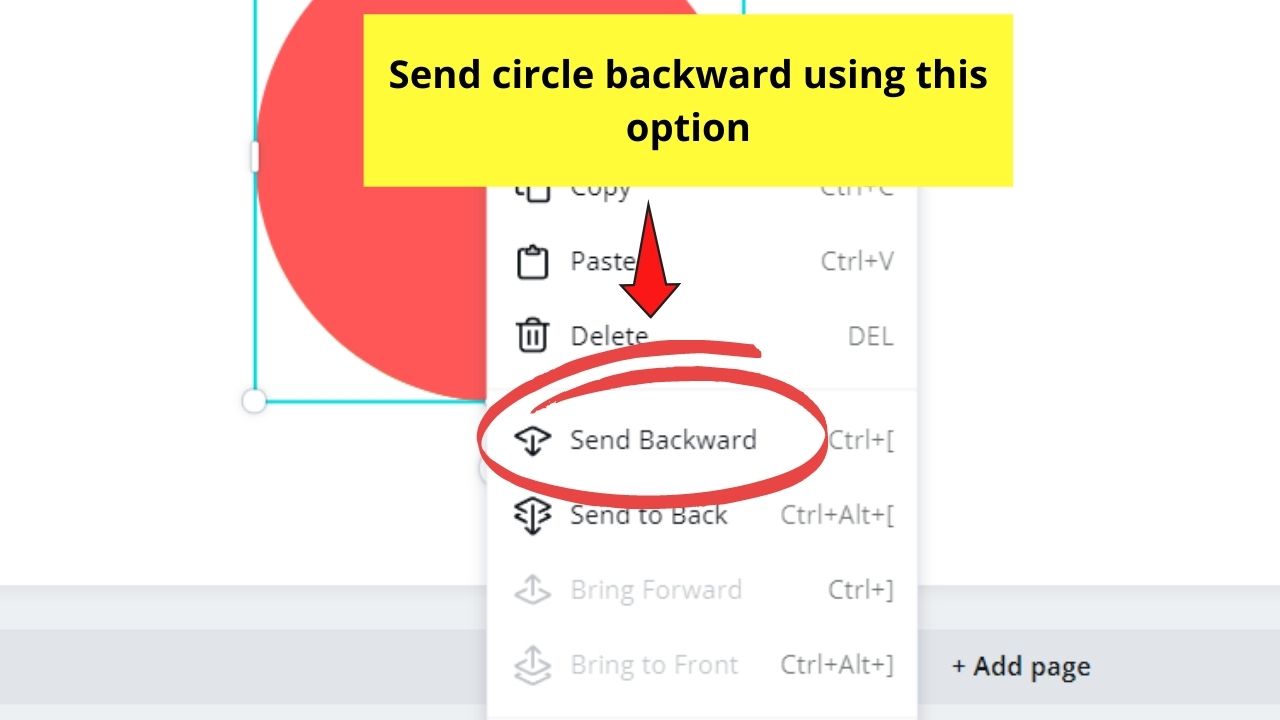
Step 6: Place the round shape behind the frame by right-clicking on it and selecting the Send Backward option.

Step 7: Resize the round frame to make it smaller than the circle using the white handles.
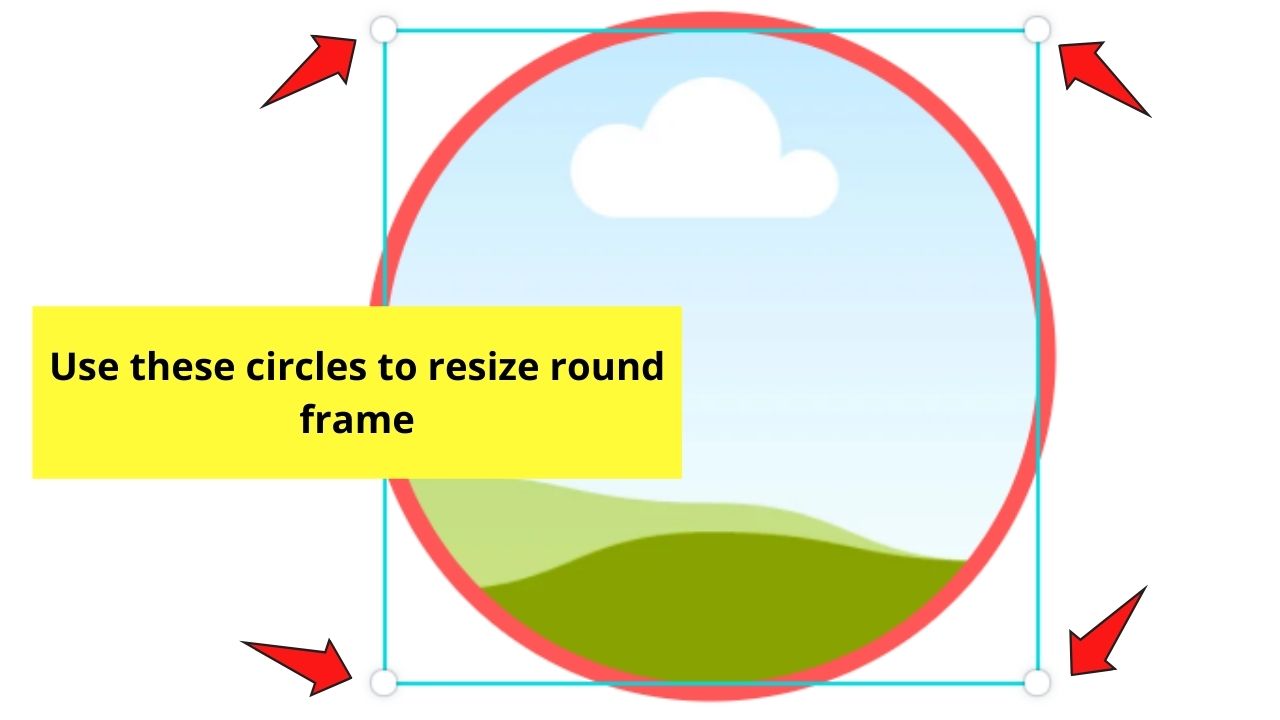
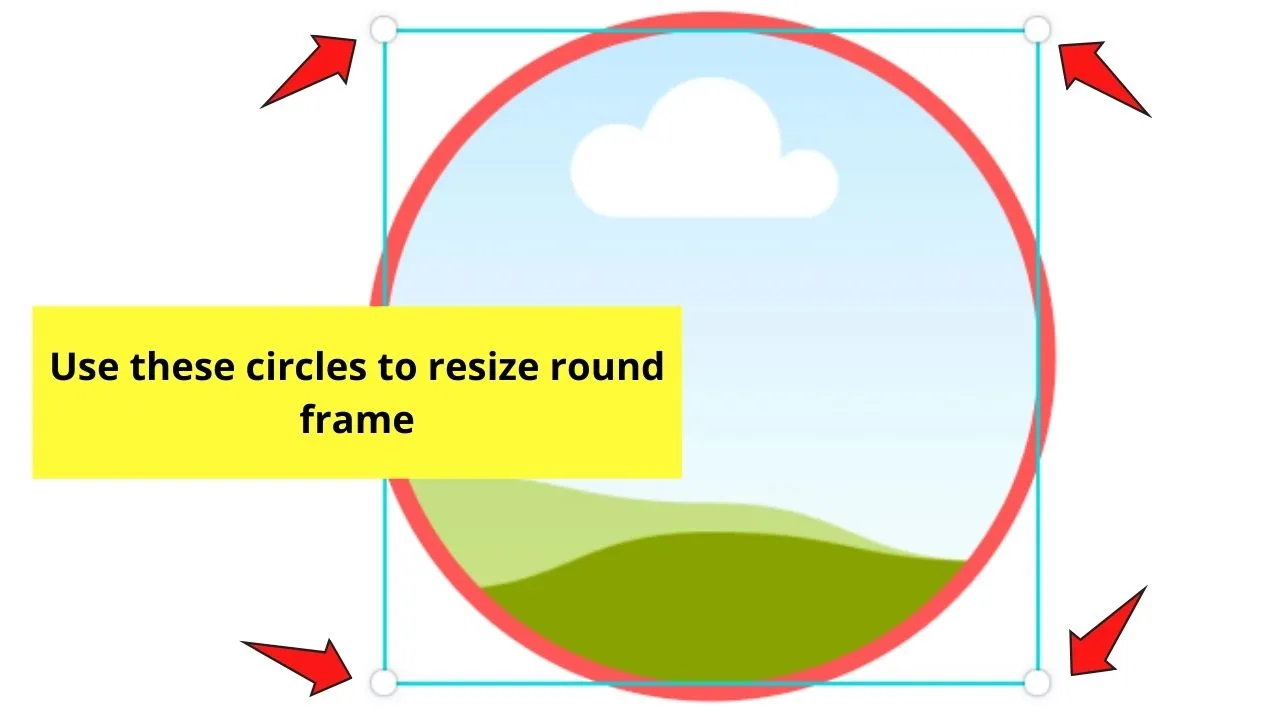
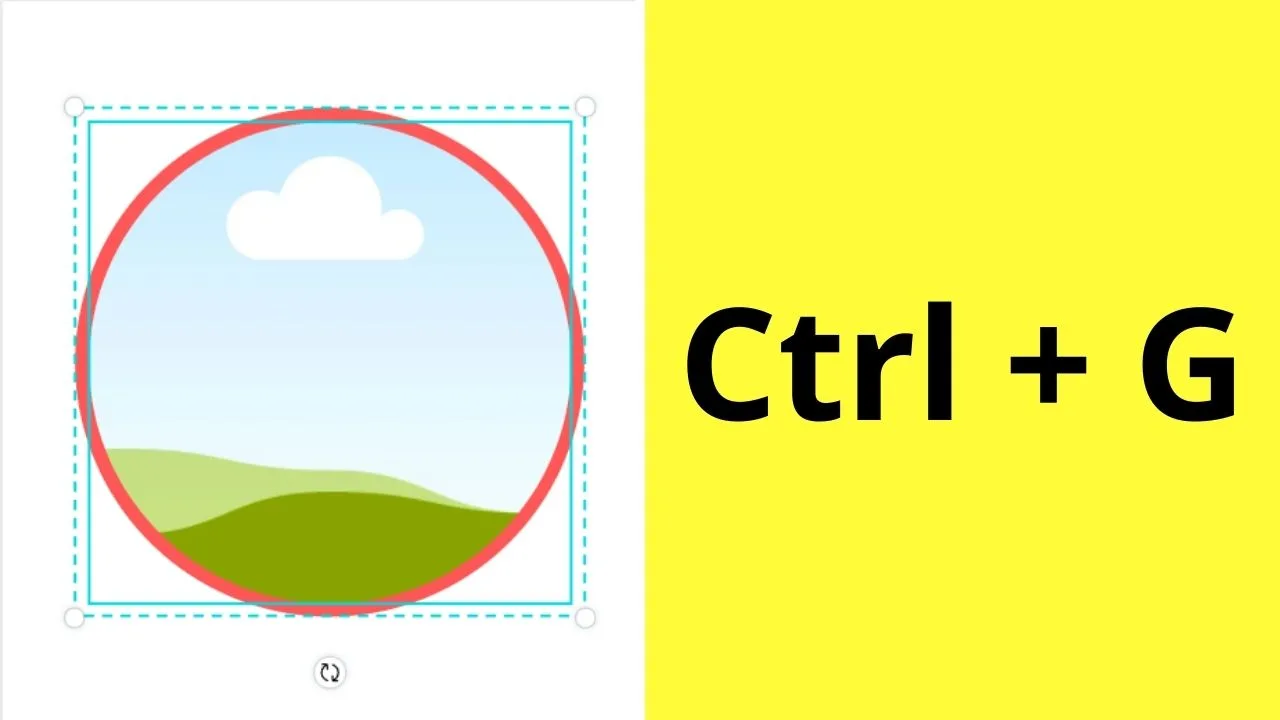
You can also at this point group the frame and its circle border by highlighting them both and pressing Ctrl and G simultaneously.

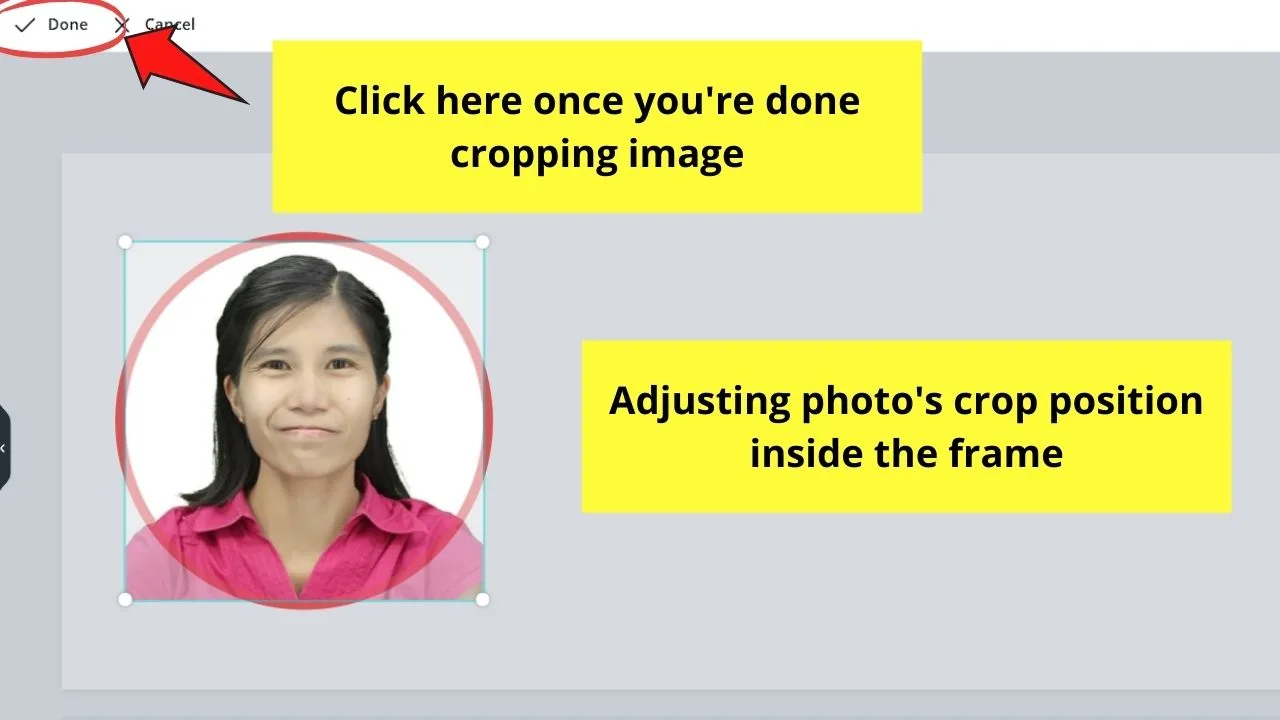
Step 8: Add your picture using the Uploads tab. Once the image’s uploaded successfully, drag it towards the round frame.


Adjust the crop positioning by double-clicking on the image and dragging it sideways. Click Done or tap outside the frame to save the changes made.

Step 9: Add text boxes by tapping on the Text tab on the side panel menu.
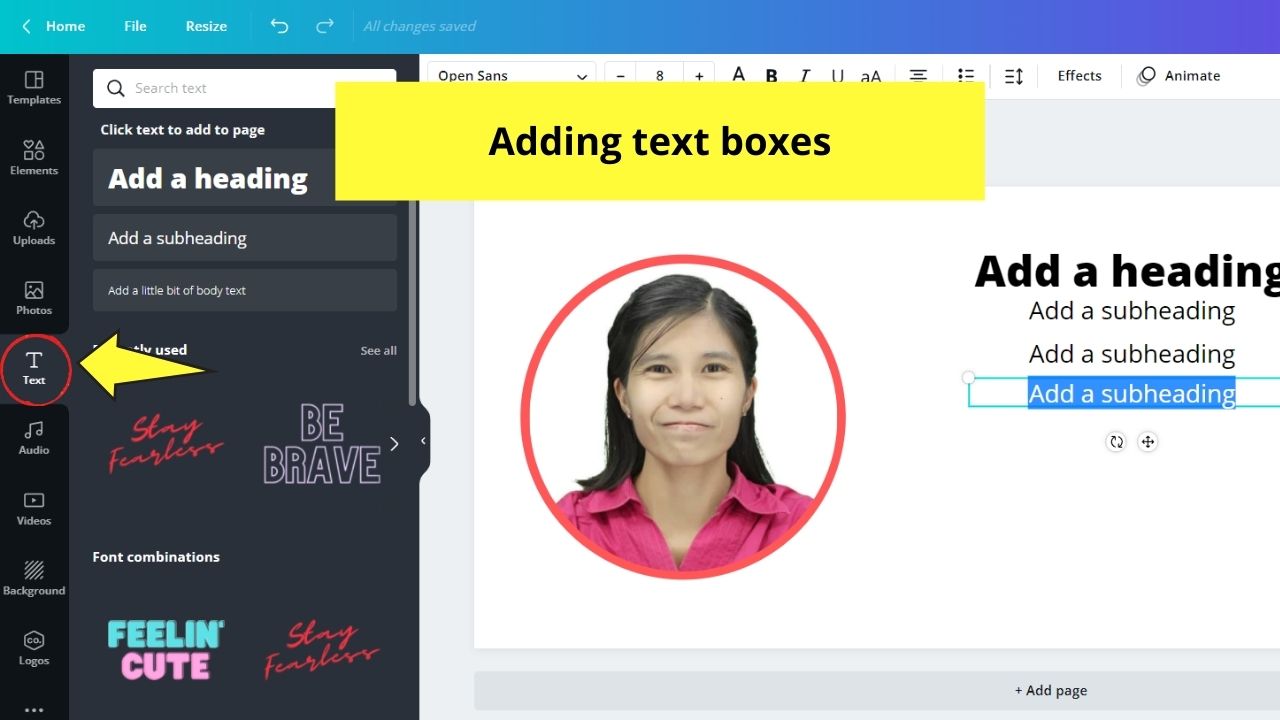

Use the heading text box for your name, the subheading for your designation, business name, and contact details.
You can also directly add a text box in Canva by pressing the T button on your keyboard. Then, just resize it by dragging the white handles.
Edit the text boxes accordingly by typing your name, business, and contact details accordingly.


You can also read about how to change the text color in Canva if you want to further customize your e-mail signature.
Step 10: Once you’re done, save the image as a PNG file.
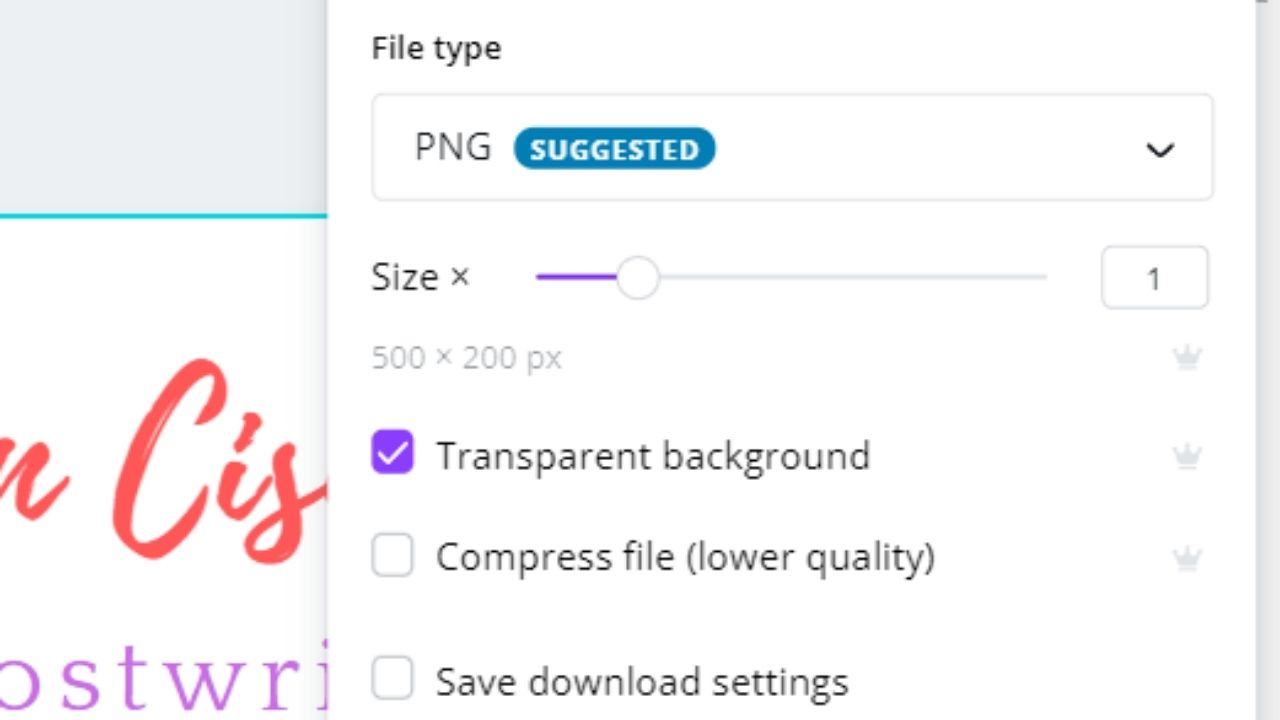
Make sure to tick the Transparent Background box to make your e-mail signature more professional when uploaded to your e-mail account later on.
Now, if you want your clients to directly engage with you through social media, you can incorporate clickable icons.
But, how do you create clickable icons?
Clickable Icons: How to Create Them in Canva
Step 1: Open a new design file through the Custom Dimension option. Use the 50 x 50 px size.
![]()
![]()
Step 2: On the editor page, head to the Elements tab and search for social media icons you’d want to use.
![]()
![]()
Click the icons to make them appear on the canvas.
Step 3: Customize the icons by changing their colors according to your Brand Kit (if you have one).
Simply tap on the icons for the color picker button to appear on the editor toolbar.
![]()
![]()
Whatever size you use for the icons, ensure each one of these icons has the same size.
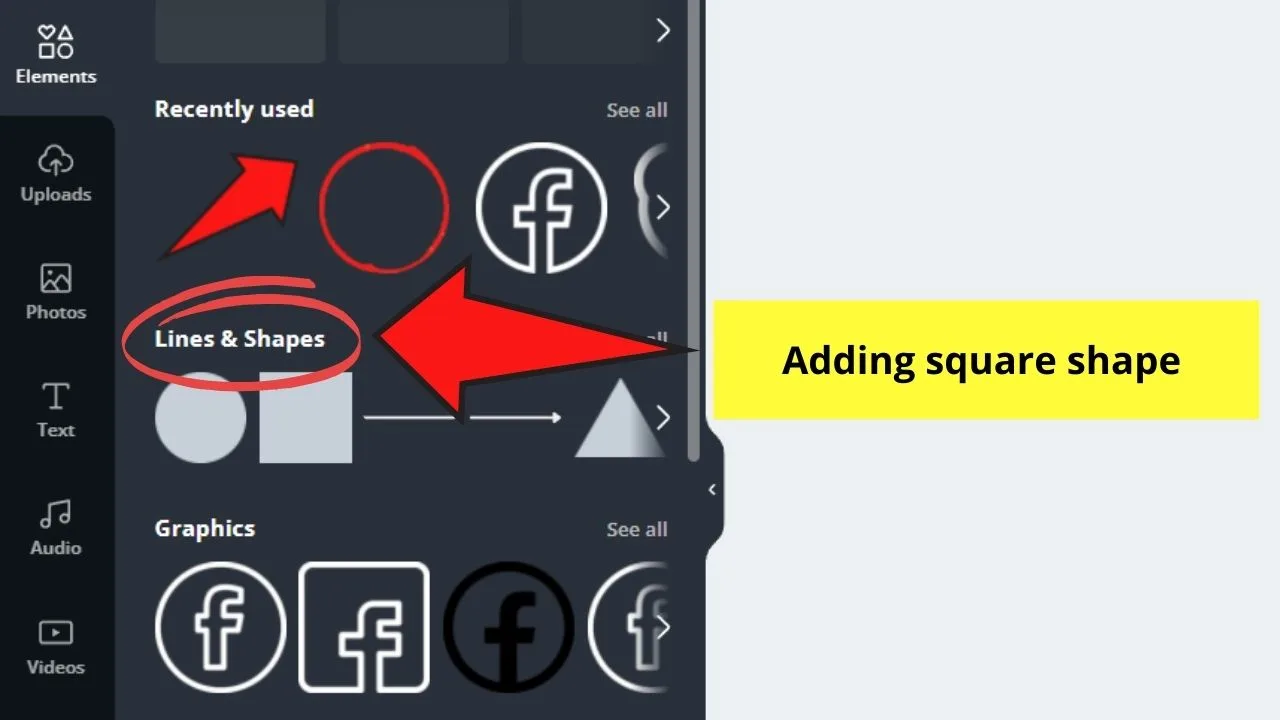
If you want to use some sort of a guide, you can add a square shape from the Lines and Shapes category under the Elements tab and fill it with your brand color.

Step 4: Repeat steps 1 to 3 until you complete all the social media icons you’ll need.
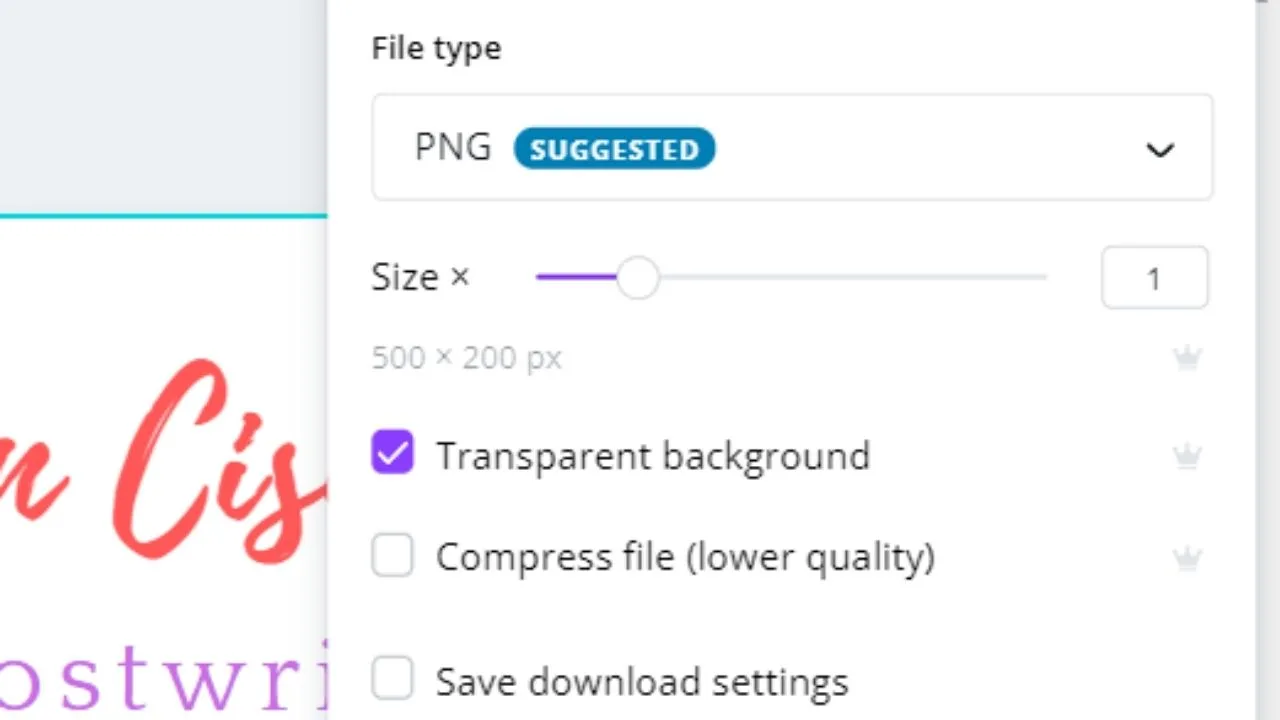
Step 5: Once you’re done, download your social media icon design. Tap the Download button, select PNG as the file type and tick the Transparent background box before saving the design.
![]()
![]()
Now that you’re done creating your e-mail signature in Canva, all you have to do is bring them all together on your e-mail.
Uploading E-mail Signature to E-mail Account
Note: For example purposes, I’ll focus on Gmail or Gsuite as this is the most common e-mail provider used.
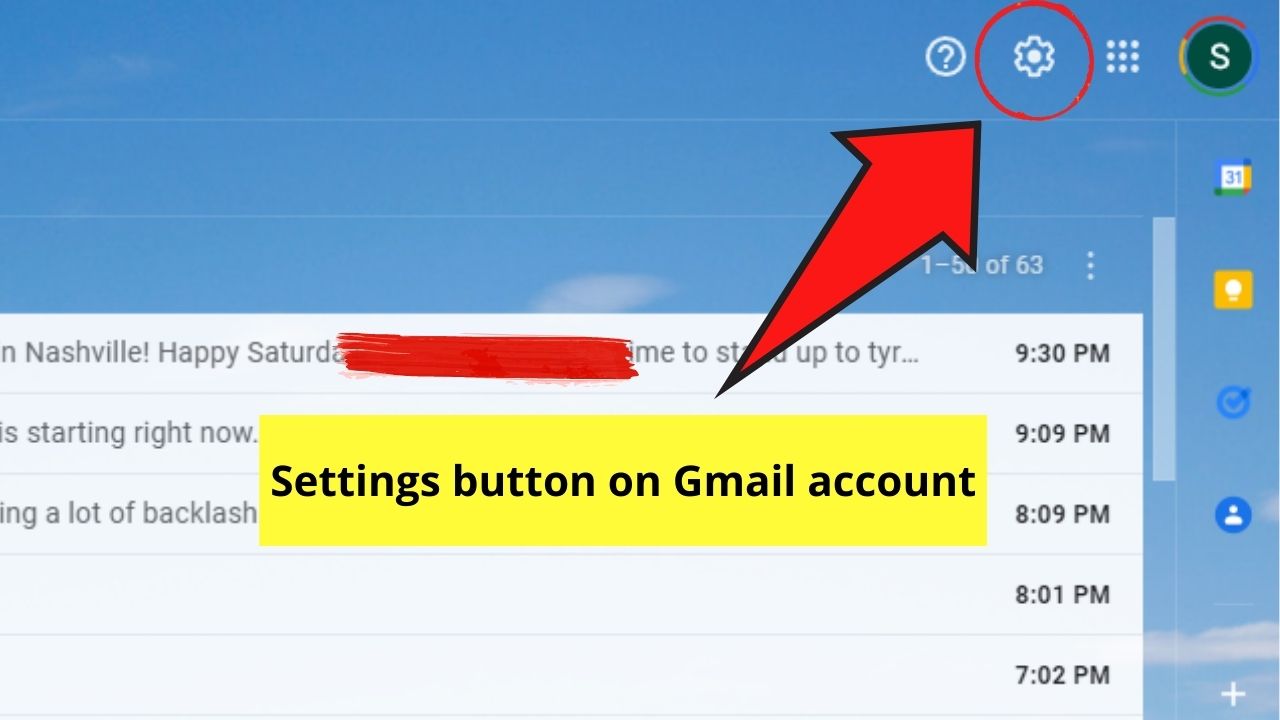
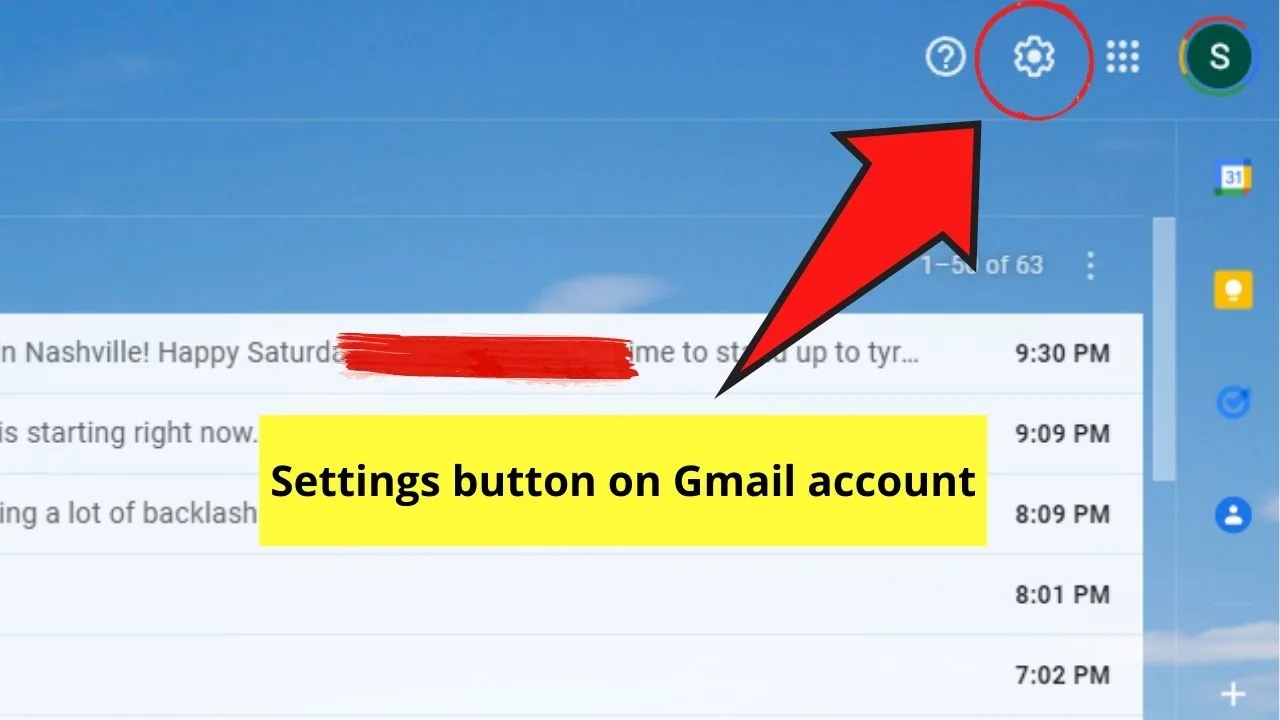
Step 1: On your Gmail account (or Gsuite if you availed of it), head to Settings. Tap the See all Settings button before scrolling downwards until you find the Email Signature part.
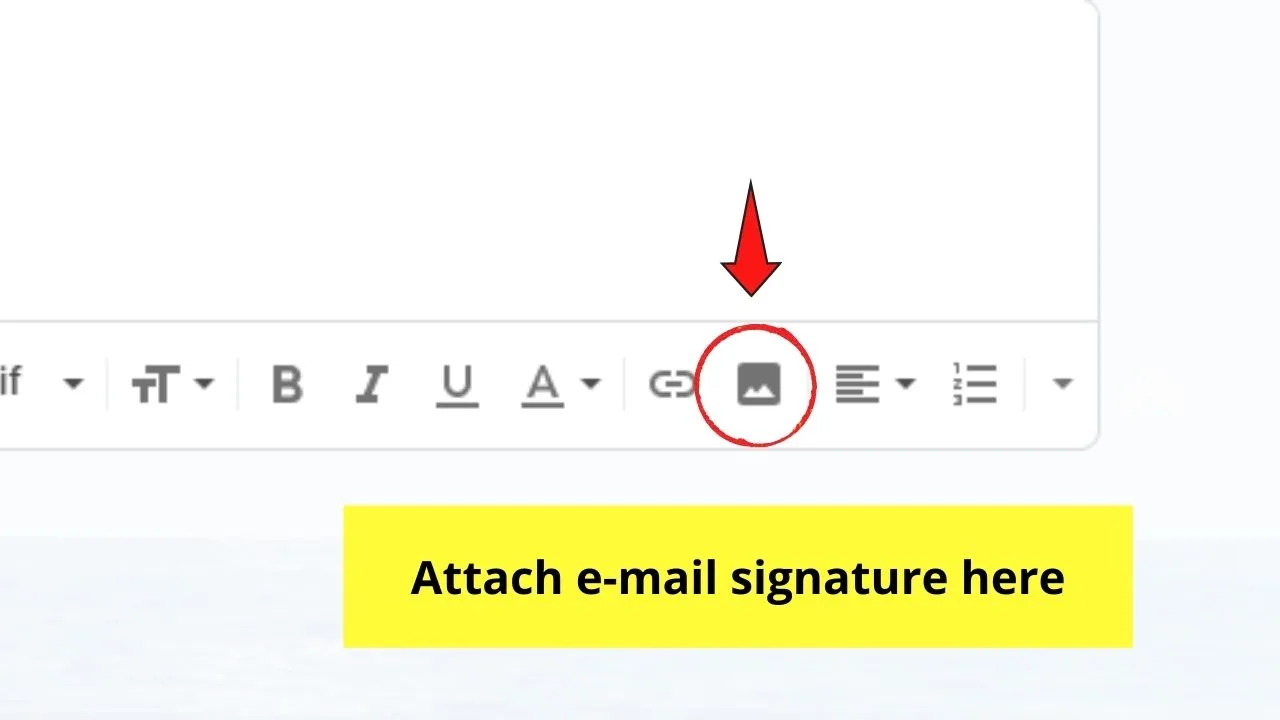
Step 2: On the blank box provided, upload the e-mail signature you created.

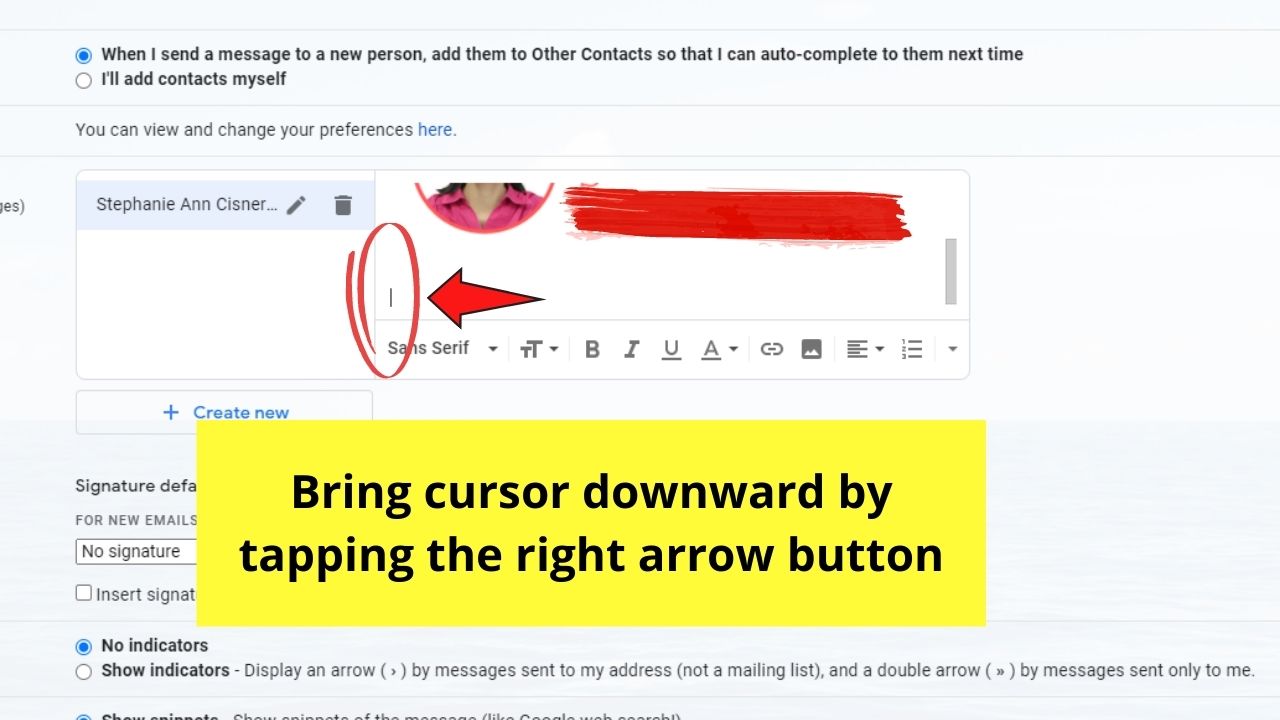
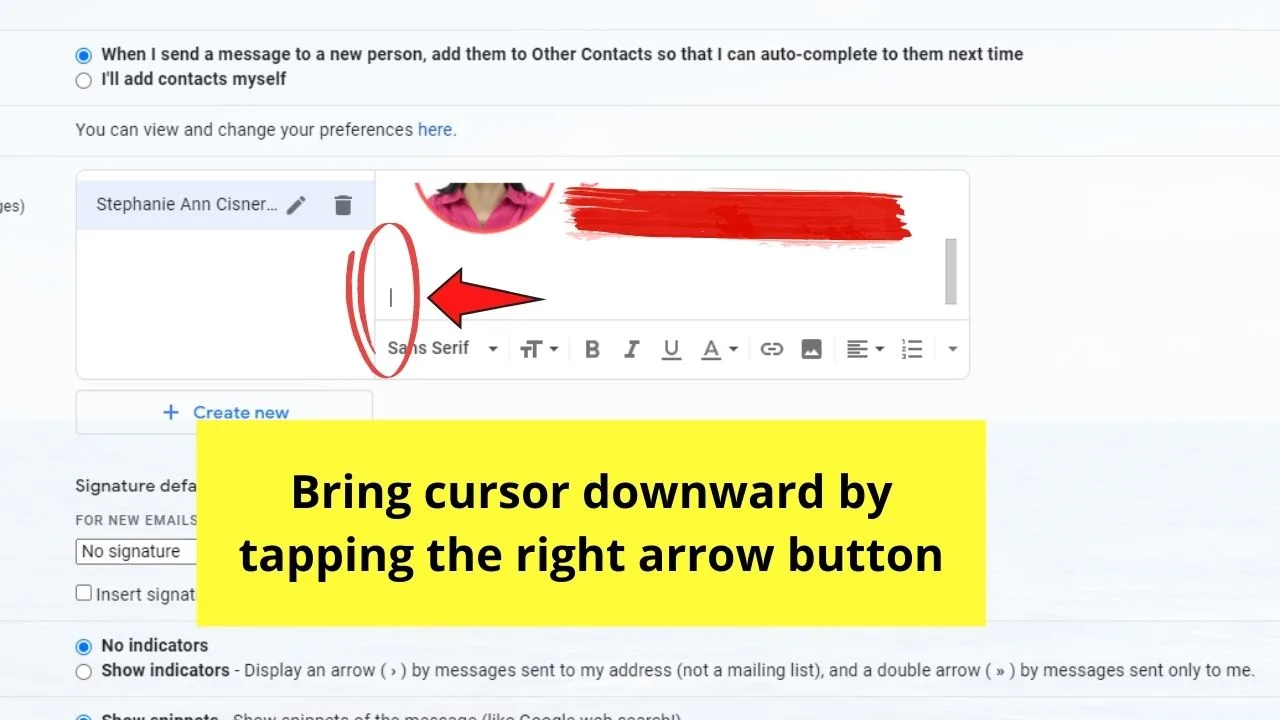
Step 3: Bring the cursor downward before uploading the social media icons you created earlier.
Step 4: Highlight the icons you uploaded and add the URL through the hyperlink option. Do the same if you also indicated on your e-mail signature your business website.
![]()
![]()
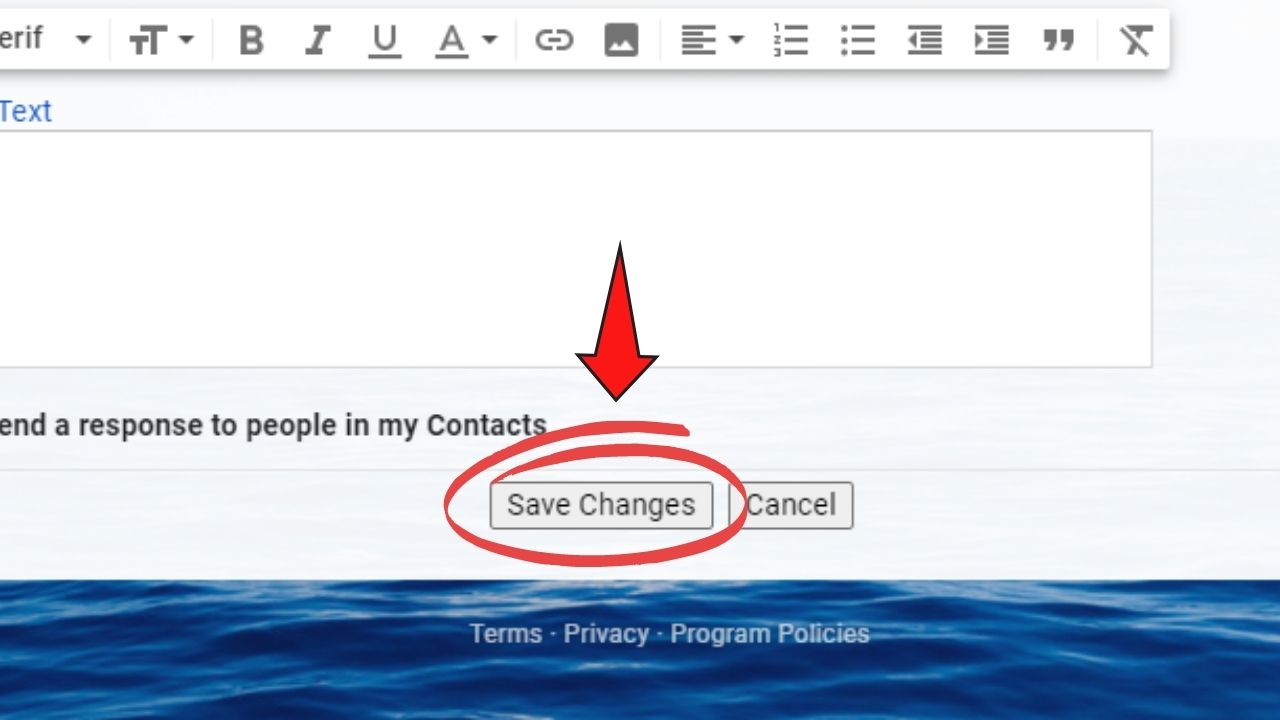
Step 5: Once you’re satisfied with how your e-mail signature looks, press the Save button.

Now that your e-mail signature’s live, it’s time for you to send a trial or test e-mail to see if everything’s working as it should be.
If not, then don’t fret and just go back to the settings category to adjust what needs to be adjusted.
Frequently Asked Questions about How to Create an E-mail Signature in Canva
Is it mandatory to place a border around your frame?
While placing a border for your photo is good, it isn’t compulsory to add one. It depends on how you’d like your photo to look on your e-mail signature, as well as on your branding.
What’s the advantage of using a transparent background for your e-mail signature?
Using a transparent background makes your e-mail signature blend beautifully with the e-mail’s background. As most backgrounds are white, not using a transparent background can make your e-mail signature stand out more. However, it isn’t mandatory to use a transparent background.
How big should your e-mail signature’s dimensions be?
The height for your e-mail signature should range between 70-200 px, while the width should be anywhere between 300-600 px. This is to make the e-mail signature small enough and not distract your client while reading the e-mail’s contents.


Hey guys! It’s me, Marcel, aka Maschi. On MaschiTuts, it’s all about tutorials! No matter the topic of the article, the goal always remains the same: Providing you guys with the most in-depth and helpful tutorials!

