When you take a photo on most smartphones, it almost always saves the image as a JPEG (Joint Photographic Experts Group), or .jpg file format.
The reason is to do with storage because JPG files are compressed to reduce the file size.
These are handy for digital viewing or photo sharing online.
The PDF is a universal file format supported by all browsers. It comes in super handy for printing images. In particular, multiple images. Like printing your own photo book.
Regardless of the device that you are using, you can convert a JPG to PDF without any third-party software, although that is an option if you need more control over the quality of images.
How to convert a JPG to PDF
Devices have virtual printers to “Print to PDF”. Smartphones can send files to Drive to Print to PDF. On Windows 10, the Photos app can convert multiple JPGs to PDF. To edit and convert JPGs, upload photos to Canva (free version), then download them as PDF. For file conversion only, use a free JPG to PDF converter.
Method 1: Use a Virtual Printer
The majority of computers and smartphones have virtual printers installed. These are capable of converting almost any file type into a PDF.
The purpose of this is to simplify document sharing, regardless of the software installed on the system.
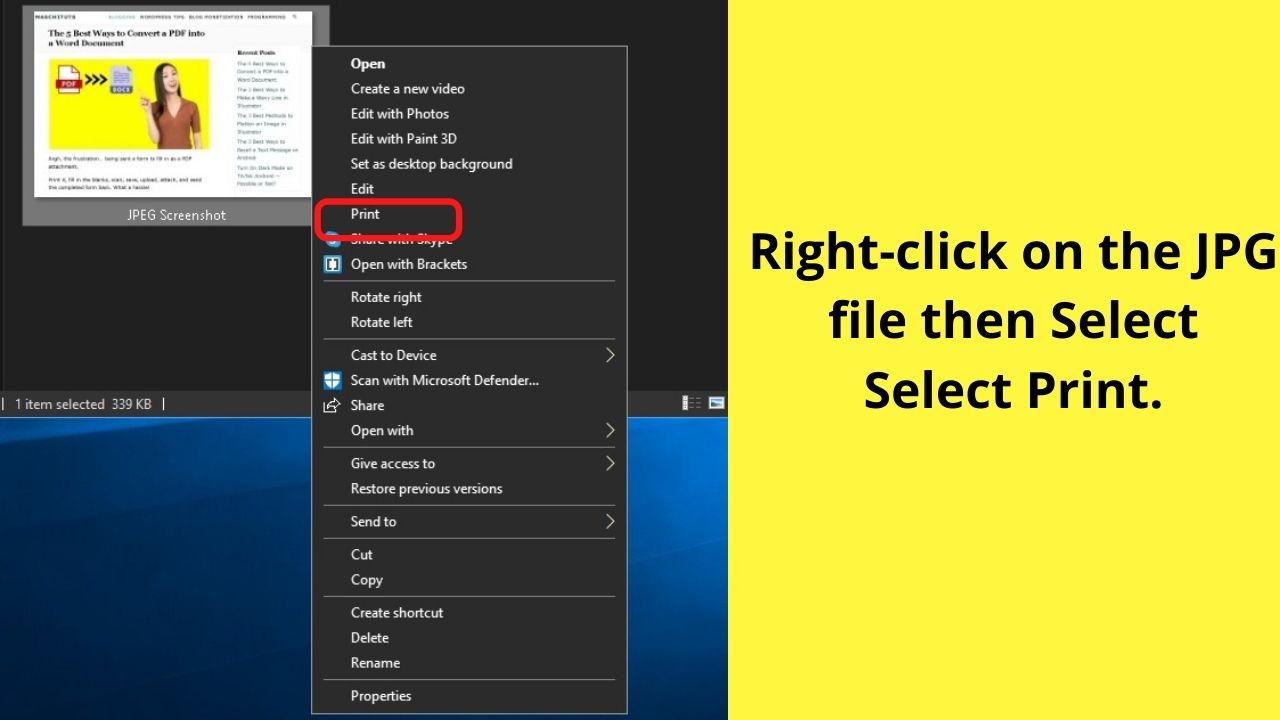
Step 1: Right-click on the JPG file you want to convert to PDF and select print
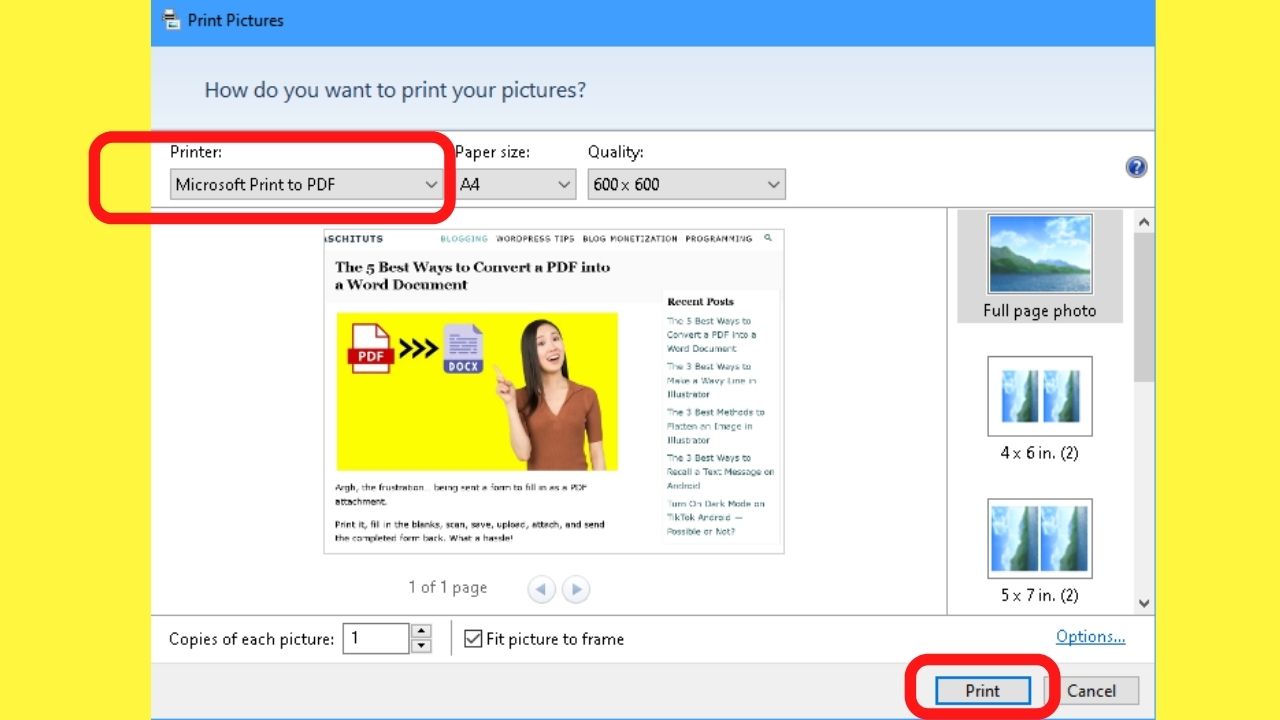
Step 2: On the next screen, a prompt appears asking “how do you want to print your pictures?” Click the printer menu and select “Microsoft Print to PDF”
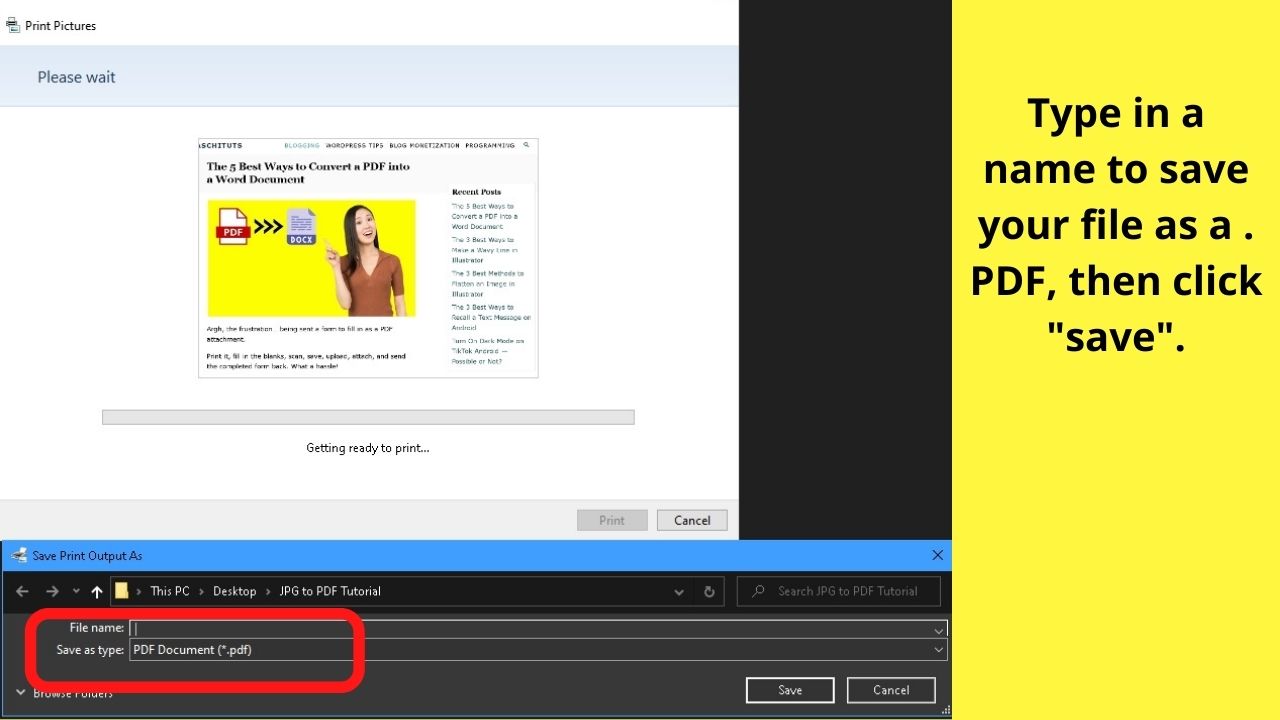
Step 3: Save the file to your computer
Once saved, the PDF is created and stored in the folder you selected.
Microsoft Print to PDF not showing?
If Print to PDF is not showing then it is likely disabled in the system programs and features. To enable Microsoft Print to PDF functionality,
- In the search bar, type “Windows Features”
- Select the option for “Turn Windows Features on or off”
- Check the box beside “Microsoft Print to PDF”.

On a Mac? It is just as easy to convert JPG to PDF
- Double-click on the JPG you want to convert
- Open with the “Preview” app
- Select “Export as PDF”.
- Give the new file a name and tap export.
The only difference is the wording.
Windows has “Print to PDF”. The macOS uses “Export as PDF”. They both do the same thing. Tap into the system’s virtual printer to convert files into PDF.
Method 2: Use the Photos app on Windows to convert multiple JPG files to PDF
The default photo viewer on Windows 10 systems is the Photos app. Whenever you double-click a photo, this is the app that should be launching to view them.
If you have added another photo viewing or image editing app to the system, the other program may be set as the default app to open photos.
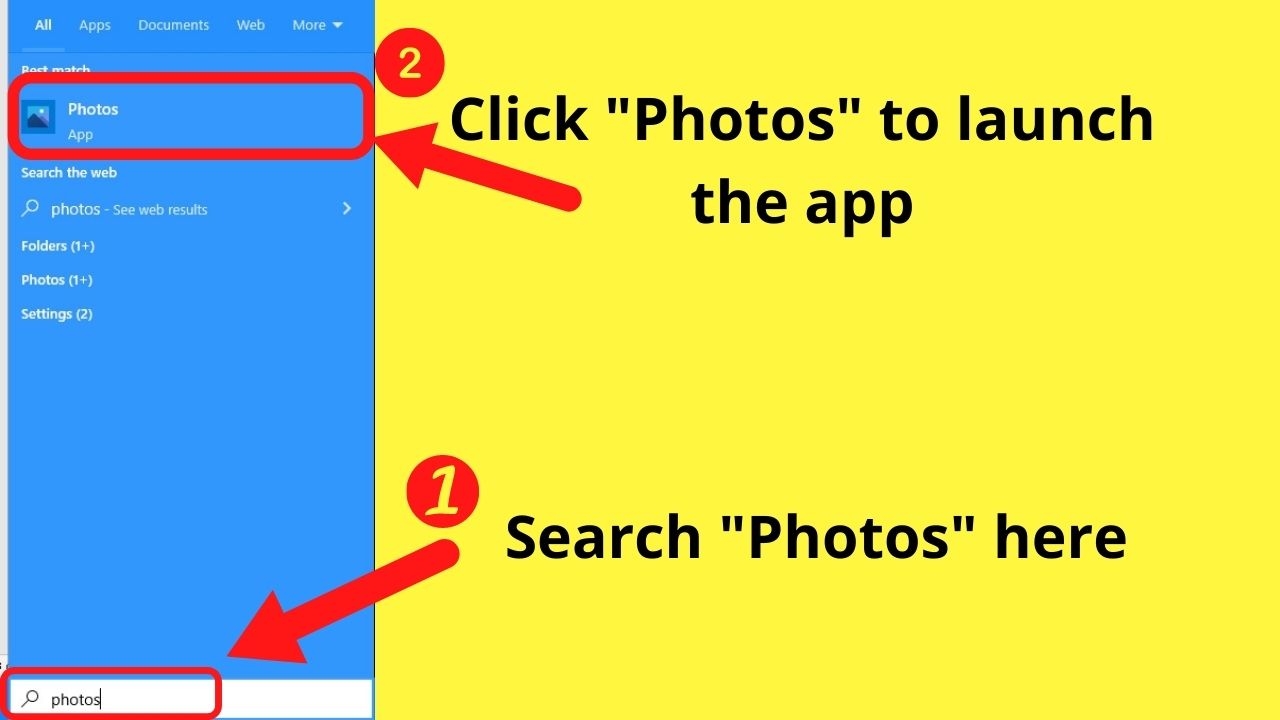
If you do have a different program, type in “Photos” in the search bar and click the “Photos” app to launch the program.
From here, you can select as many images as you want to convert them all into a single PDF file.
Step 1: Hover the cursor over the image and a check box appears in the top right.
Step 2: Check the box to select each image you want to be included in the PDF file
Step 3: Once you have selected all the images you want to convert to PDF, tap on the “print” icon on the top right.
![]()
![]()
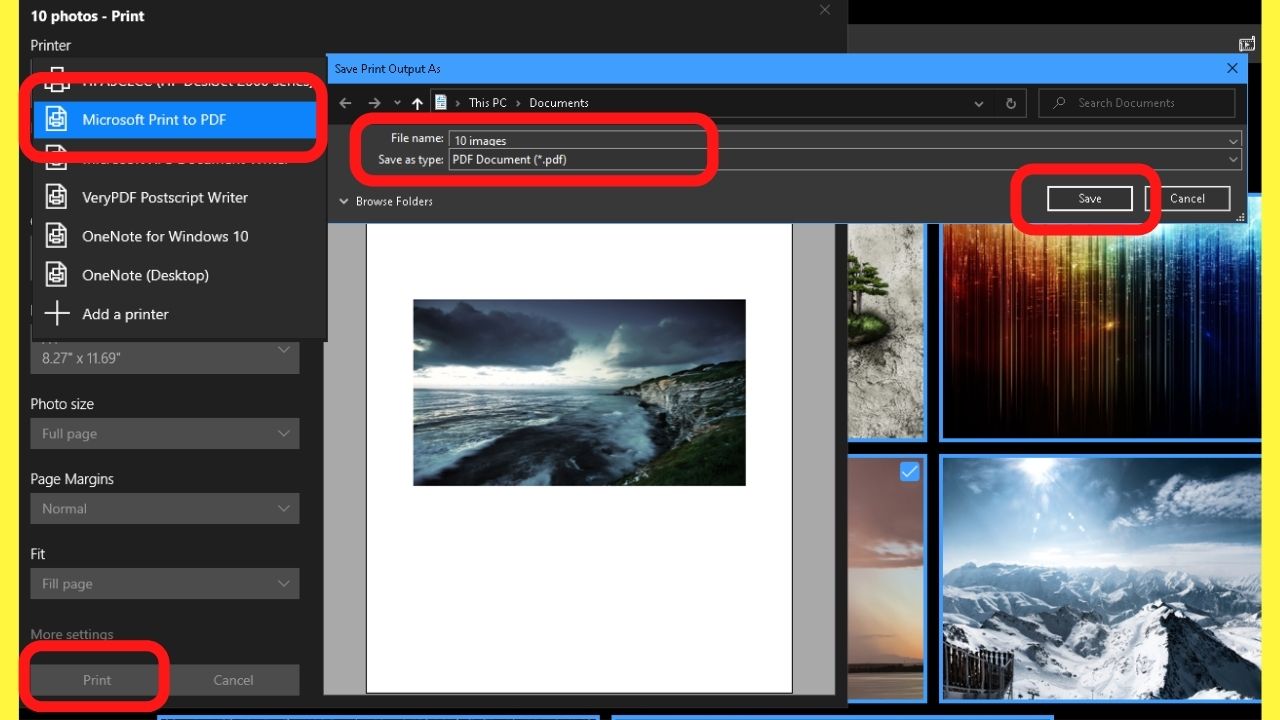
Step 4. On the next screen, set the printer to “Microsoft Print to PDF”.
Step 5. Click print
Step 6. Type in a name to save the file as, then click “save
The PDF with all the images will be exported into a single PDF document. This can be viewed in any browser on any device.
Where this method excels is for creating photo books, or brochures. You can convert a PDF to Word, edit it to include text descriptions, then save the edited .docx file as a PDF.
Method 3: Use Canva to convert a JPG to a PDF file
Despite Canva being primarily an online graphic design tool, it is capable of converting file types.
To convert a JPG to PDF in Canva, create a design template, add the photo to Canva, then download the file as a PDF.
You will need a free account to use the tools. Go to Canva.com and either sign in or sign up for a free account.
Step 1: Click on “Create a design”
Step 2: Select a size such as an A4 document or use custom dimensions
Step 3: On the left, click on “uploads”
Step 4: Click the “Upload media” button
Step 5: Select the JPG file to convert to PDF
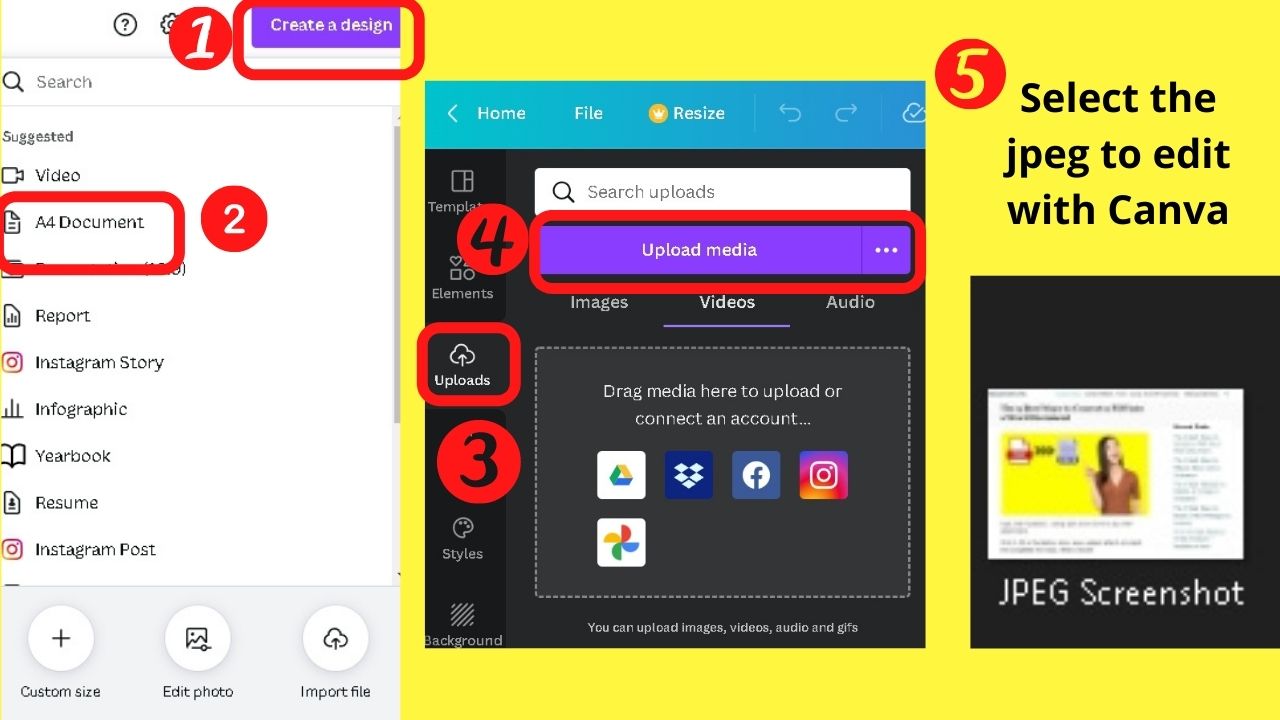
Step 6: Click the image to insert it into the design template
Step 7: On the top right, click on “Share”, then select download
Step 8: On the file type drop-down menu, select either “PDF Standard” or PDF Print”.
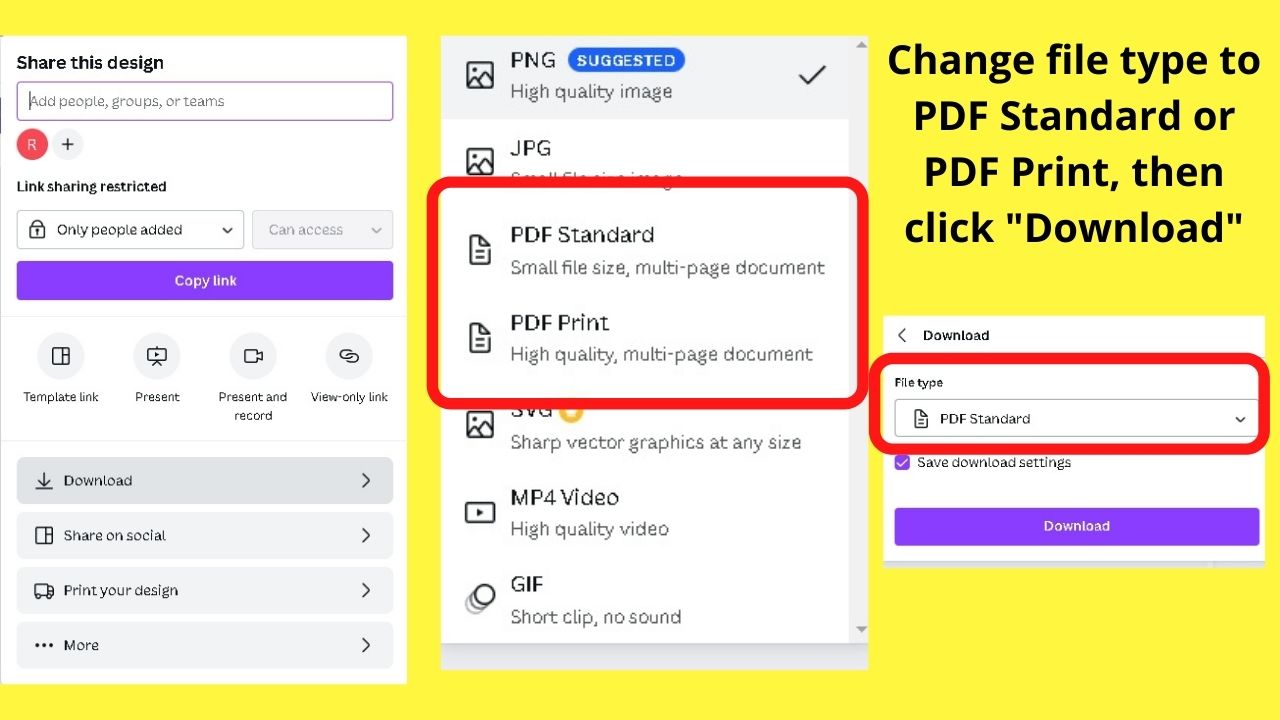
The difference between PDF Standard and PDF Print is the output quality.
- Canva PDF Standard is 96 dpi (dots per inch),
PDF standard is useful when the intention is for the file to be viewed digitally.
- Canva PDF Print is 300 dpi with the option for applying a print bleed.
PDF Print is for high-resolution pictures in Canva.
If you do not intend to print the PDF, use the Standard PDF download.
Method 4: Use Google Drive
Google Drive is handy for managing a range of documents and file types on smartphones.
You can send any or all JPG files stored in your devices Media Gallery to Google Drive.
Step 1: Open your media gallery,
Step 2: Select the image (or images) you want to send to Drive
Step 3: Tap the share icon (in the middle at the bottom of the screen)
Step 4: Tap on “My Drive”.

Step 5: (Desktop) Once the image is uploaded to Drive, tap on the “print” icon on the top right of the screen then select the option to “Save as PDF”.
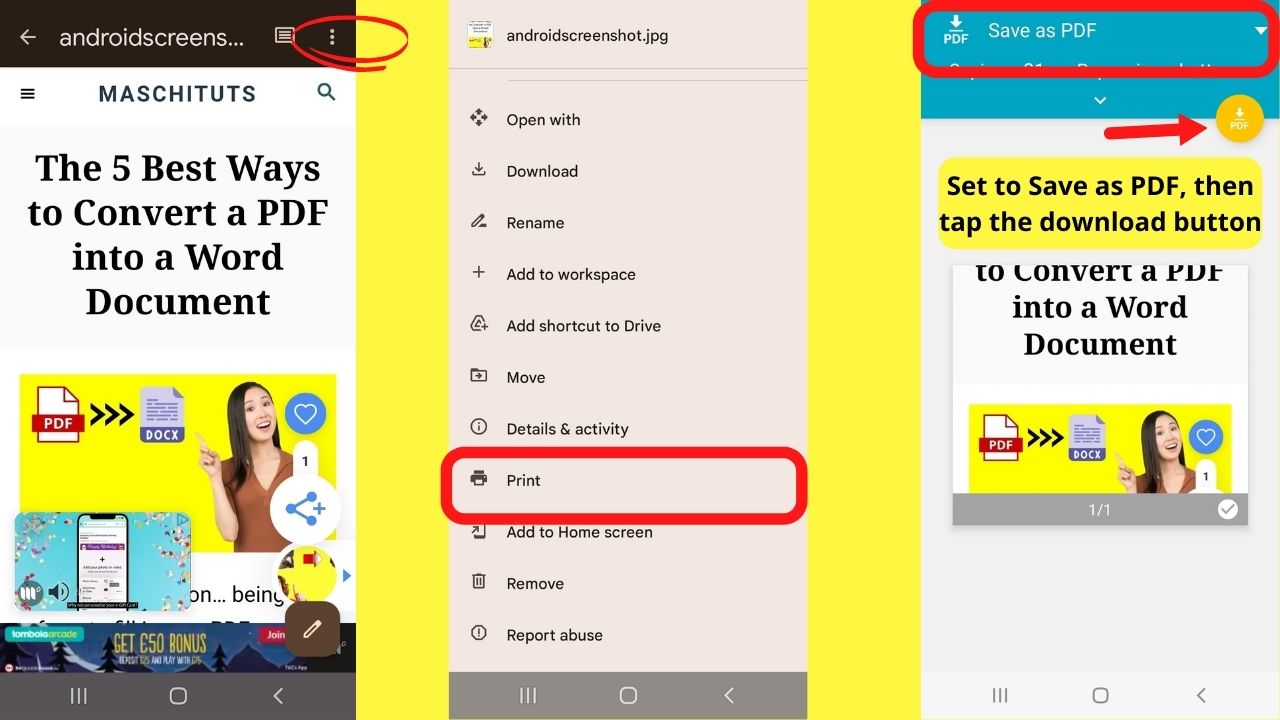
On smartphones: Tap the three vertical dots to the top right, scroll down the list of options, and select “print”.
Step 6: On the top left, select the “Save as PDF” option.
Step 7: Tap on the orange button that has the download icon with PDF beneath it.
Step 8: Select the location to save the PDF to, then tap “save”.
The PDF will now be stored as a document on your device instead of in the images folder.
If you need to make edits to the document, note the location as it will be needed to convert PDF to Word (or any other editable format), to edit the document, then save it as a PDF again.
Method 5: Use an Online JPG to PDF converter
Many tools are available for multiple file-type conversions. Adobe created the PDF extension and they offer a free JPG to PDF tool.
Go to the official Adobe.com website, select the “PDF & E-signatures” tab in the website navigation menu, then select “online tools”. Select the Convert to PDF Option.
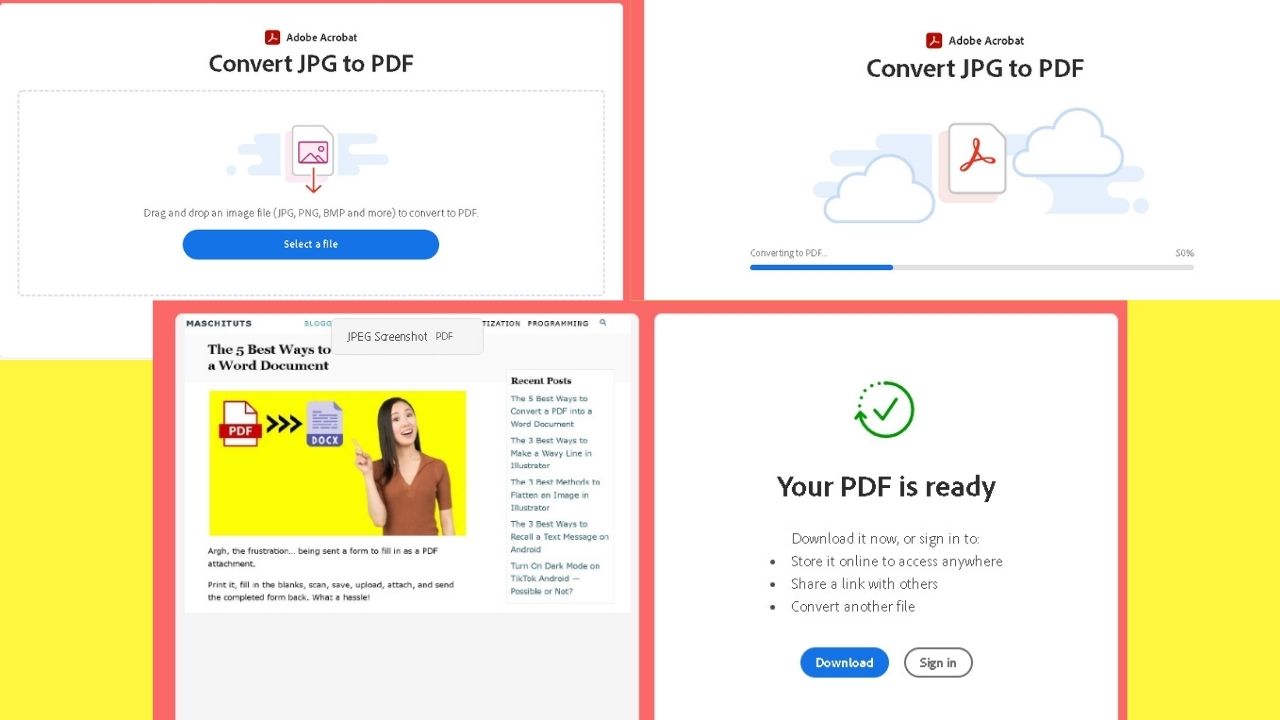
Step 1: Click the select a file button
Step 2: Select the JPG to be converted to PDF
Step 3: Click open and the tool will start the file conversion process. (it only takes seconds)
The Adobe JPG to PDF is beneficial for scanned documents that have been saved in JPG format as it uses Optical Character Recognition (OCR).
Drive and Word both have text extraction technology, but the results after the file are converted can be different from the original.
The good news is that if one method does not produce the intended result, you can move on to another.
For text-heavy images, such as scanned forms and letters, the formatting and quality of text extraction differ based on the efficiency of OCR technology.
The above five methods all work to convert JPG to PDF.