

Ooh! I’m planning to have the Canva team print this business card design I’ve made. And, they must keep things picture-perfect on that business card — no white gaps whatsoever.
But, how do I exactly relay that to the print team without attaching written instructions or a recording of it?
Well, that’s what a print bleed is for, and we’re going to learn about it here.
What is Print Bleed in Canva?
Print bleed is the part of the document that’s beyond the trim edge of the page. It’s ⅛ of an inch, serving as an allowance for potential cutting misalignments. If you don’t add this allowance, you’ll risk having white gaps on the edges of the final product.
What Print Bleed in Canva is: Things You Should Know
As mentioned earlier, print bleed is the part of the design that goes beyond the part where you’ll trim the document.
Technically, this print bleed they call is ⅛ of an inch from the edge of the design you have.
With that ⅛ inch allowance, you’ll have some sort of leeway with possible misalignments during the cutting process.
Even when you hire the services of professional printing services, print bleed’s such a useful guide to have.
It’s like a universal instruction to cut off until this part of the document, leaving no white gaps to the edge of the paper.
Also, this serves as a guide for the designer itself to extend the image or elements of the design beyond the trim line.
So, how do you make sure to keep this print bleed thing seen on my Canva design before the actual printing process?
How to Activate Print Bleed in Canva
- Click the “File” tab
- Select “View Settings:
- Choose “Show print bleed”
- Stretch the design’s background to cover the white gaps surrounding the design’s edges
- Select the “Share” button
- Choose “PDF Print” in “File Type”
- Tick the “Crop marks and Bleed” box
Step 1: Select the “File” tab

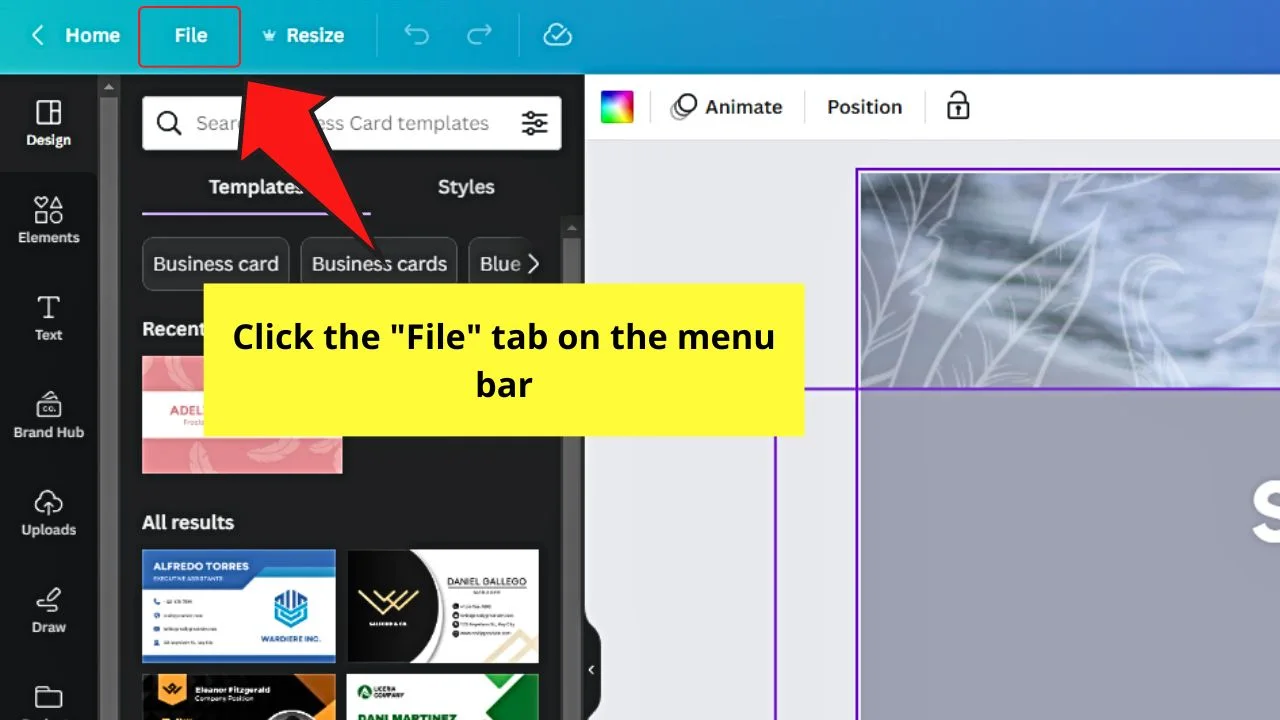
This tab is found on the menu bar between the “Home” and “Resize” tabs.
You will then see a faint box surrounding the safety line of the document you’re working on.


The safety line is the part of the design where you put all the crucial elements into it to avoid being cut off during the printing process.


That said, text and other graphical elements you don’t want to be trimmed off should be found inside the safety line.
Adjust your design elements accordingly if you find some of them exceeding the safety line.
Step 2: Click the “View Settings” option
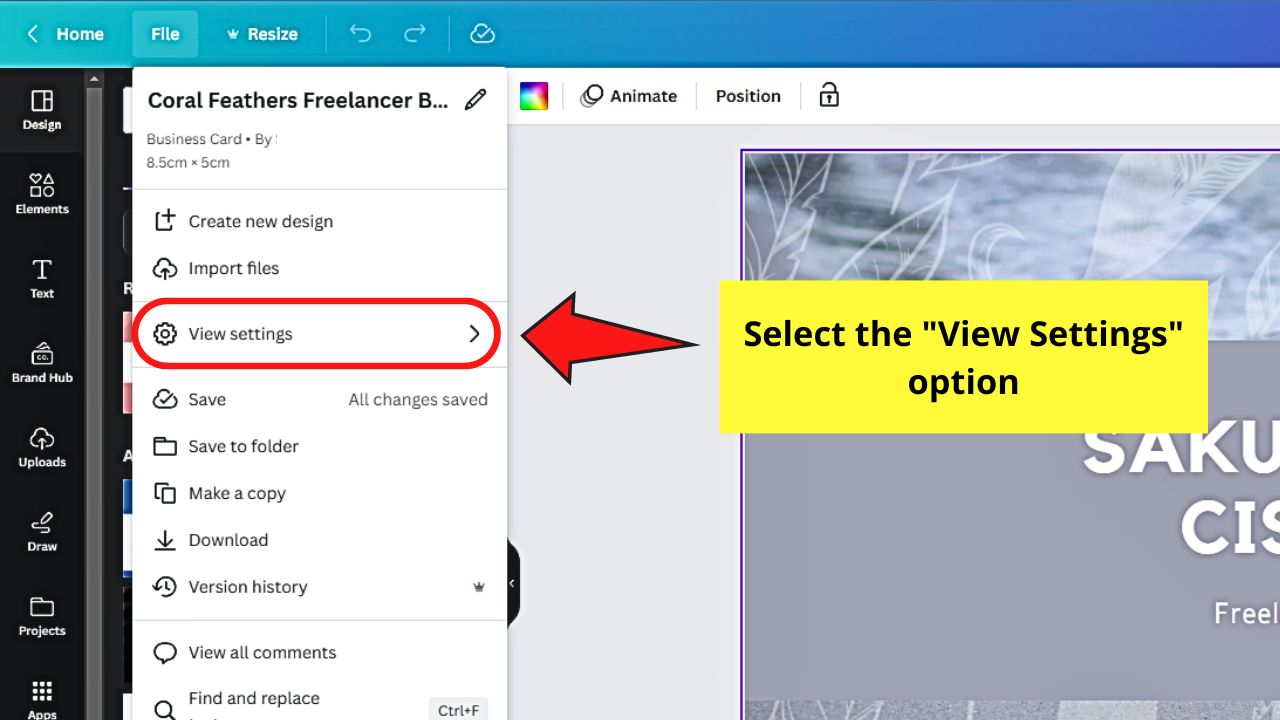

You’ll see this as the third option in the “File” dropdown menu between “Import files” and “Save.”
A new dropdown menu then opens to its right side.
Step 3: Select “Show print bleed”
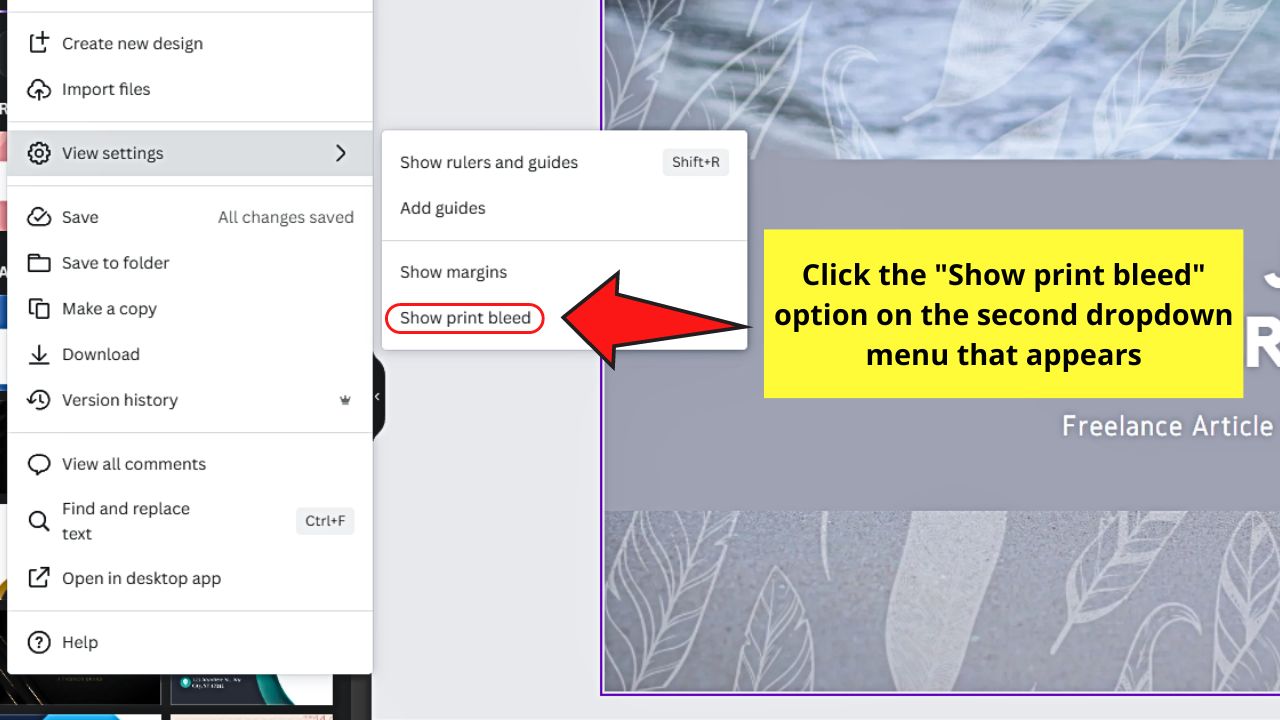
This is the last option on the second dropdown menu. You’ll then see the faint white broken lines surrounding the design.
This move will now make another faint box surround the perimeter of your design ⅛ inch from the edge of the document.


So, if you see that the background of your designs extends well beyond that of the print bleed area, you’re already safe.
Step 4: Stretch the background of your design to the document’s edge to cover those white edges
Do this step if you find that after adding the print bleed white gaps are surrounding your design edges.
You can even stretch out some of the design elements you added if trimming some parts of them won’t affect the look of your project.
Step 5: Click the “Share” button

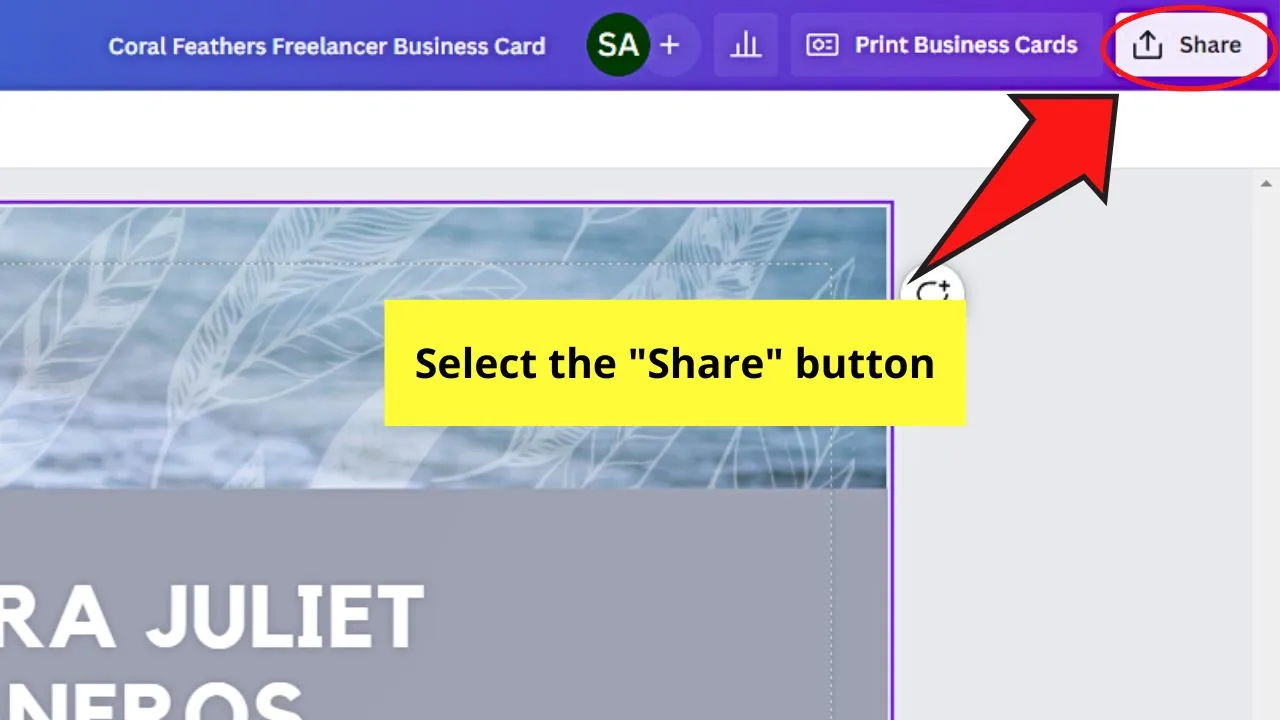
You’ll find this button on the editor page’s upper right corner.
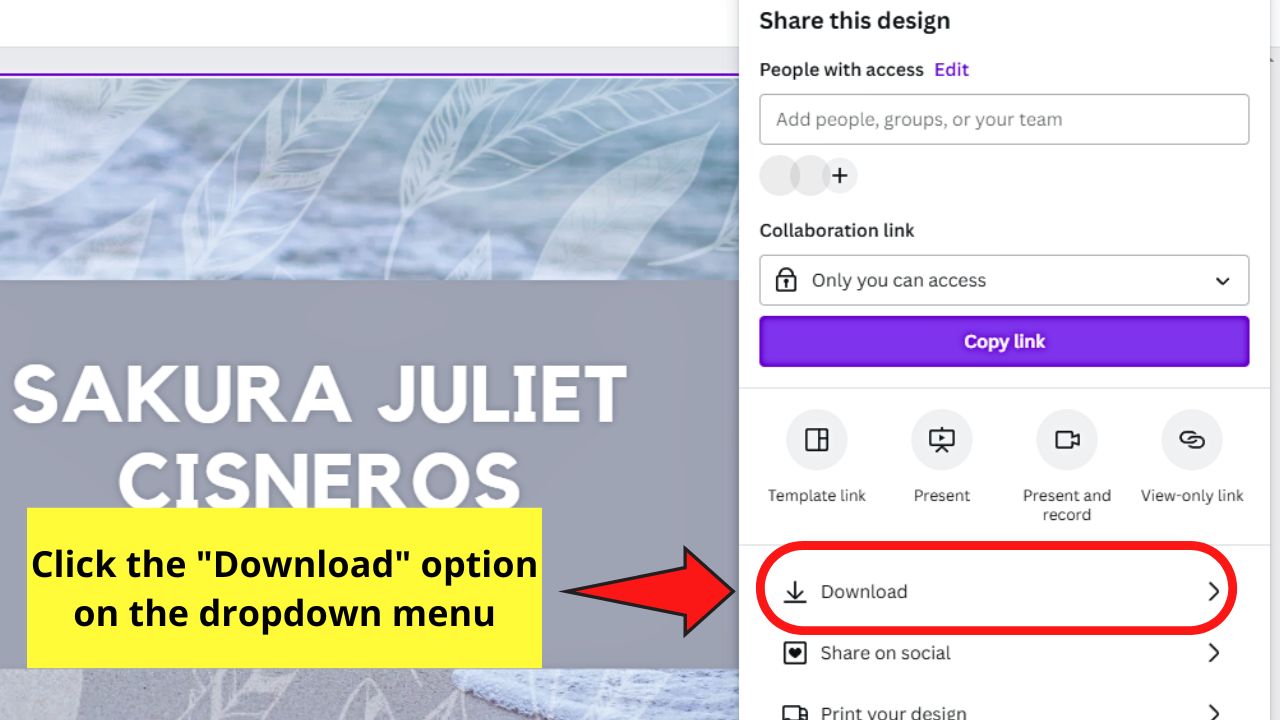
A dropdown menu then appears, where you can select “Download.”
Step 6: Choose “PDF Print” in the “File Type” menu
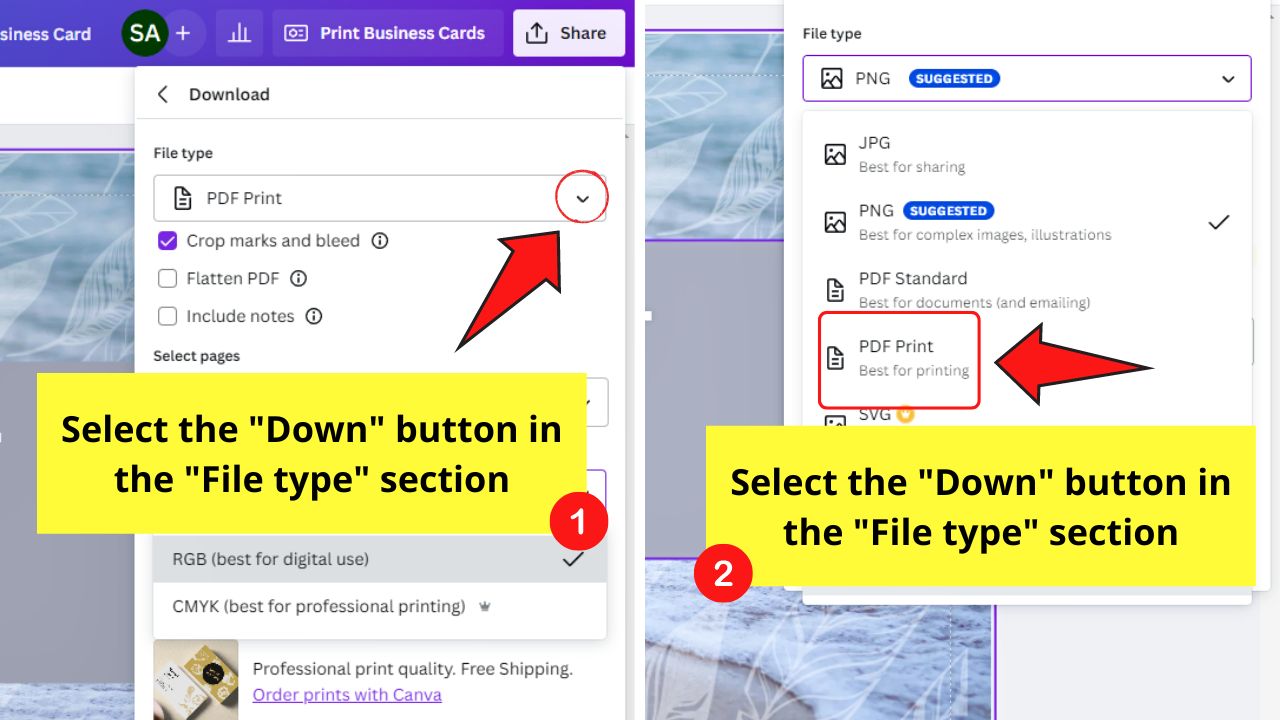

Click the “Down” button in the “File Type” section and you’ll see “PDF Print” between “PDF Standard” and “SVG.”
This file type is the best option when you’re printing the design with the bleed line.
Step 7: Tick the “Crop marks and bleed” box
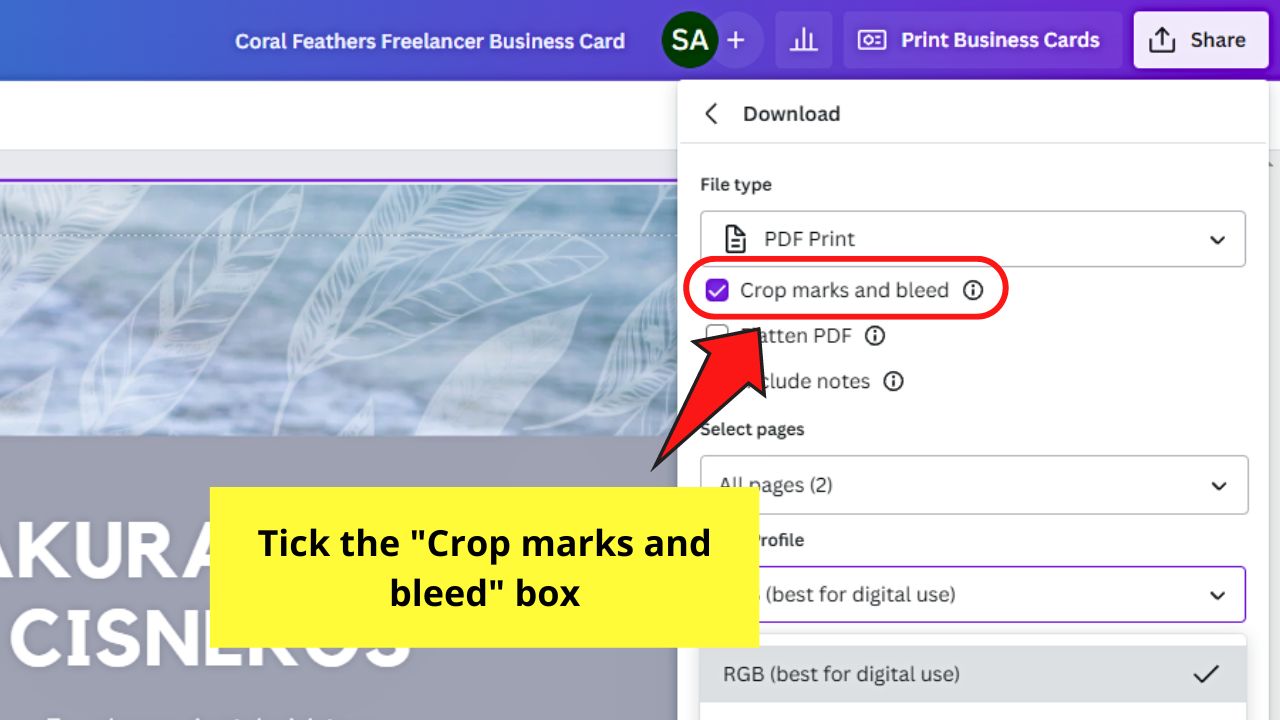

From there, proceed with downloading your design to your device.
And, when you check how the newly-downloaded file looks, you’ll notice the crop marks that intersect somewhere on the design.


That’s the print bleed area we’ve been talking about earlier. And, in case you find that you see white lines surrounding your design, don’t fret about them.
Those white lines serve as the guide to cut that part out up to the print bleed area.
So, you don’t need to explicitly instruct the person printing your design about where they should cut. Print bleed will do just that for you.
How to Keep Print Bleed Marks When Ordering Prints in Canva
In case you want to leave the printing of your Canva design to professionals, you can always order prints.
But how can you save the print bleed of the design so the Canva team will be guided on where to cut?
After activating the print bleed feature and setting the file type as a PDF, here’s what you should do next.
Step 1: Click the “Order prints with Canva” hyperlink
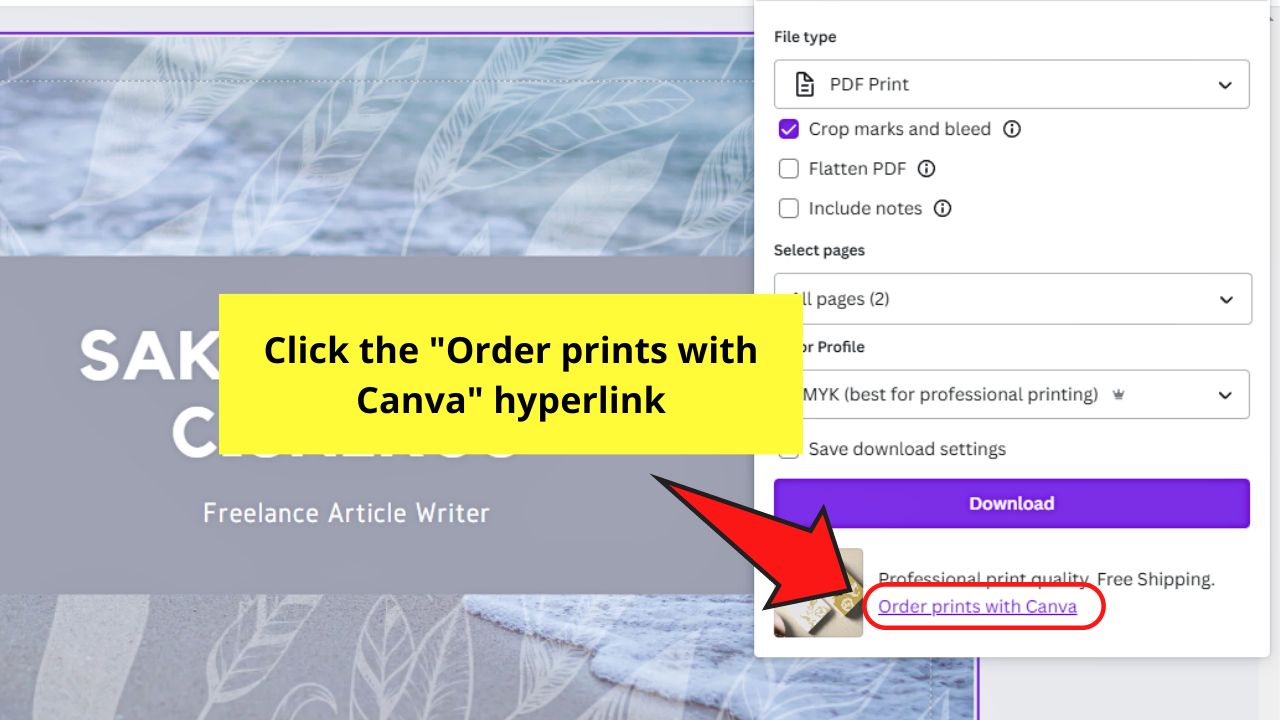
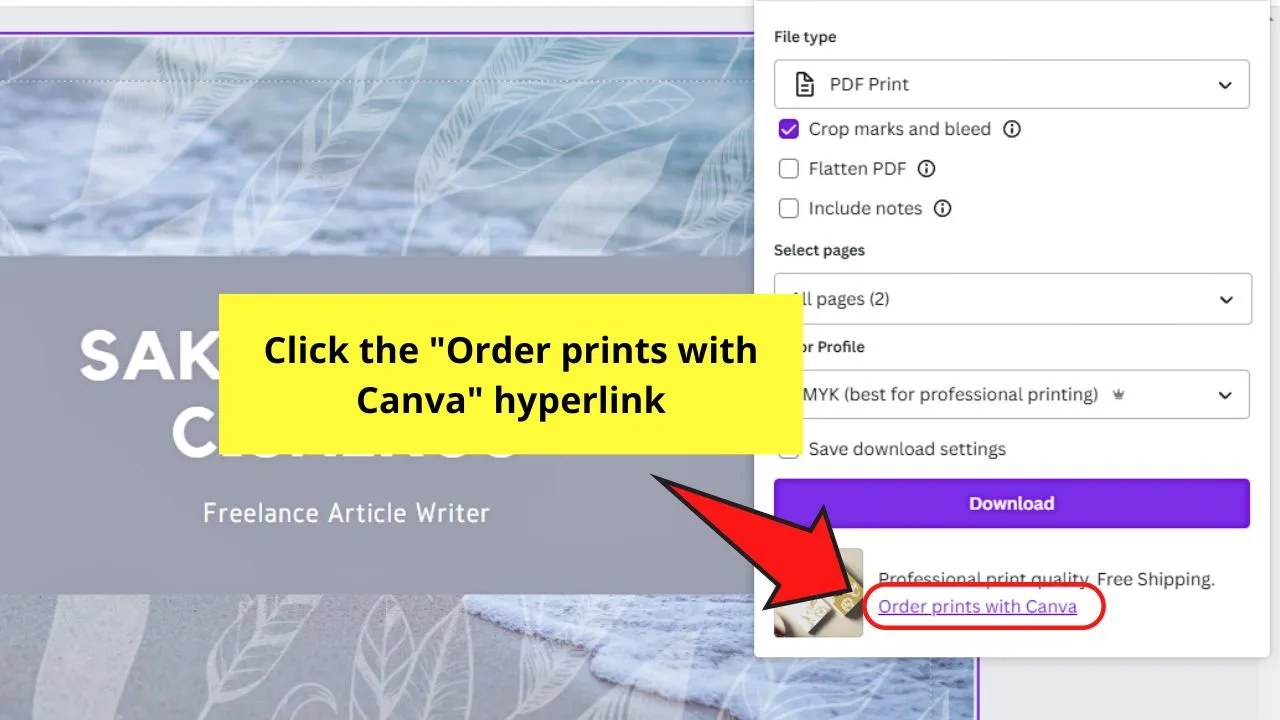
You’ll find this text at the bottom of the “Download” dropdown menu. You’ll then be taken to the “Business Cards” menu.
Step 2: Select the pages you want to be printed
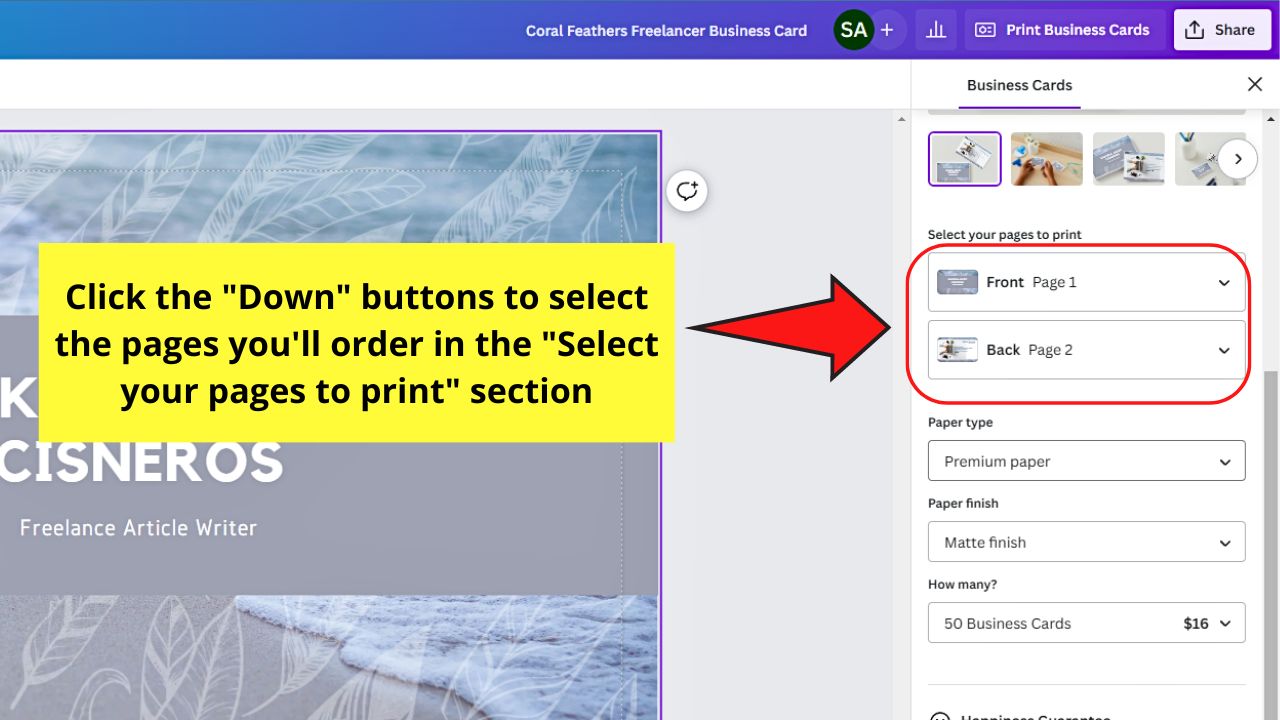

Go to the “Select your pages to print” section and click the “Down” button for the “Front” and “Back” options.
Choose the page for each side of the design.
Step 3: Set the “Paper type,” “Paper finish” and the number of pieces you’ll order
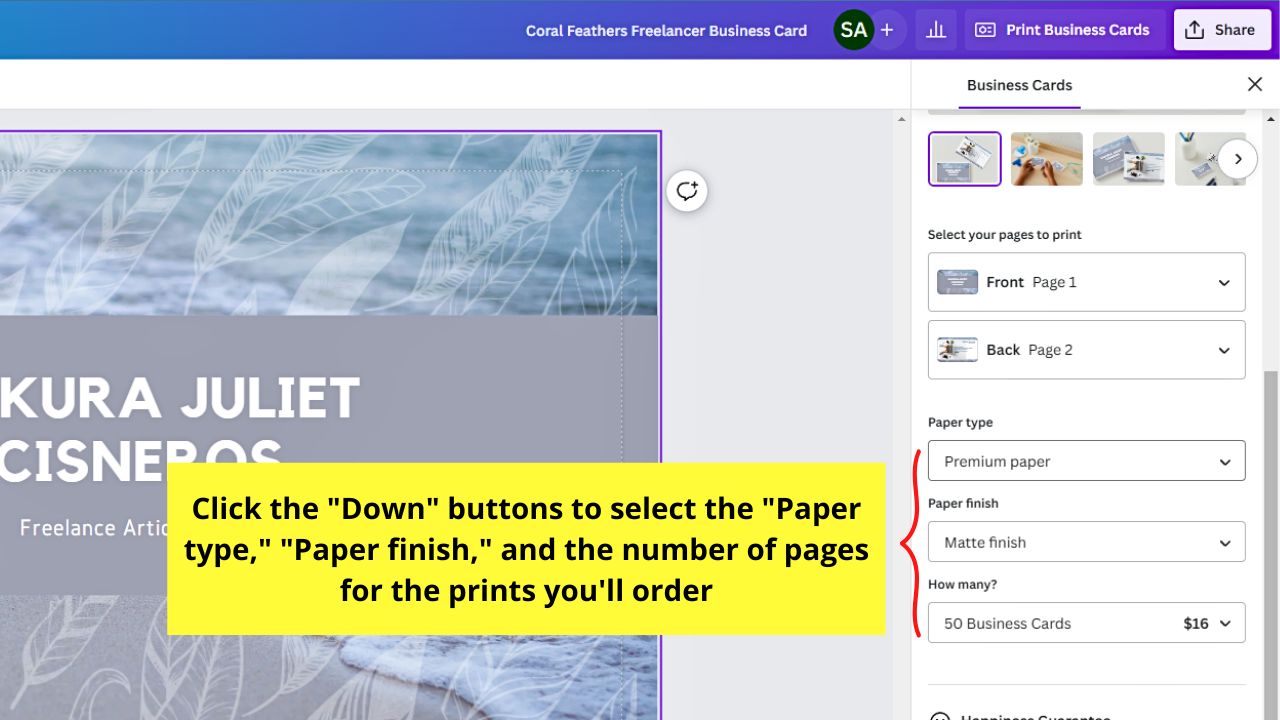
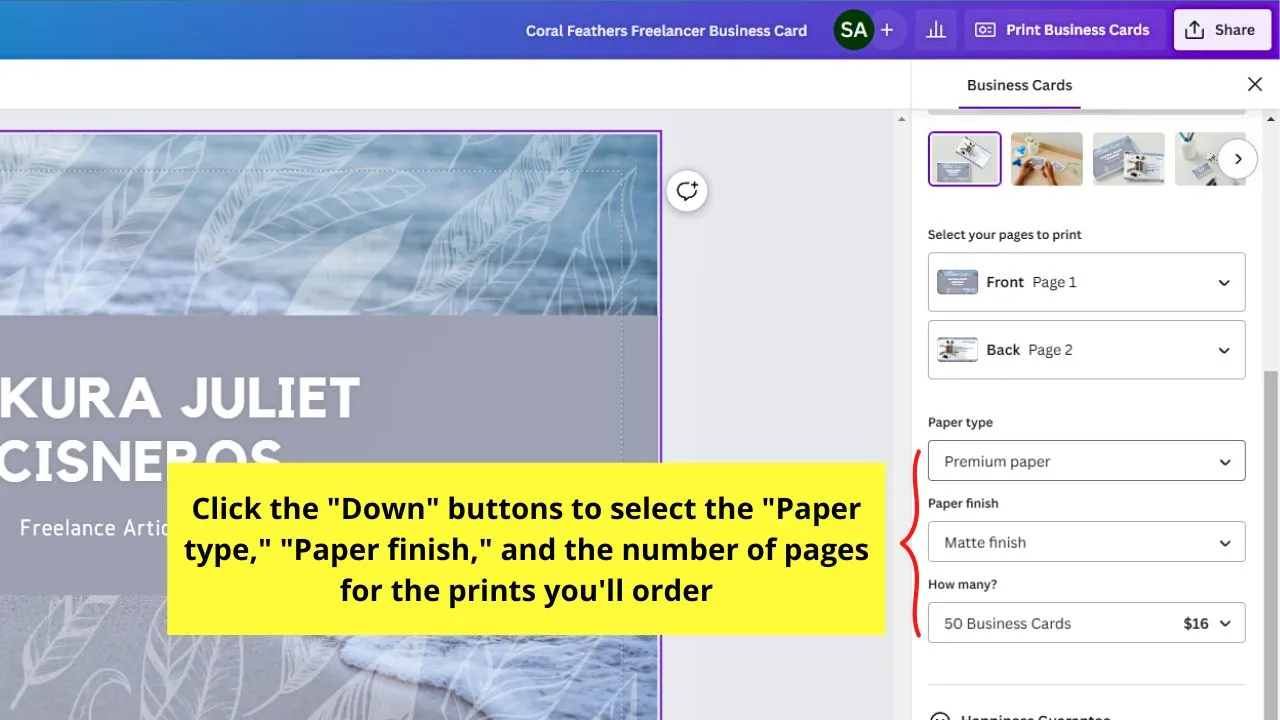
Click the “Down” buttons for each section and make the corresponding choices for each item.
Step 4: Click the “Continue” button

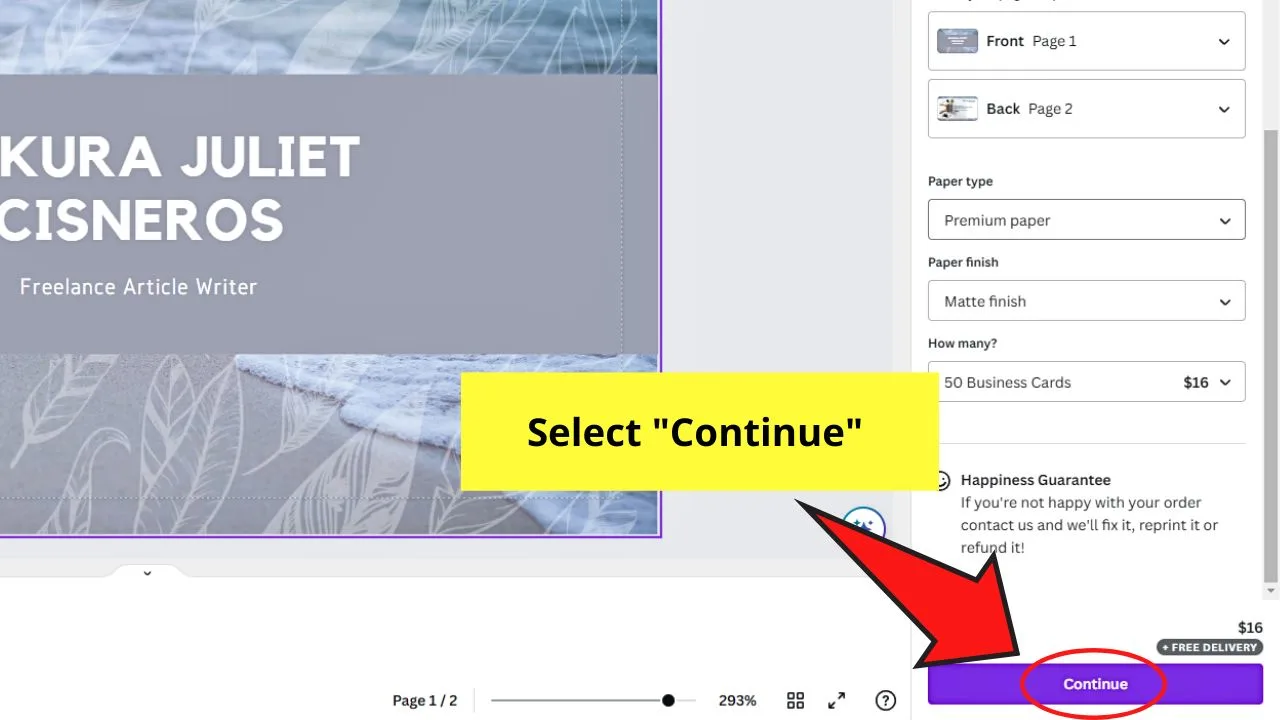
This will take you to the next section you’ll complete — “Let’s get ready to print.”
Step 5: Click the toggle for “Adjust edges for printing”

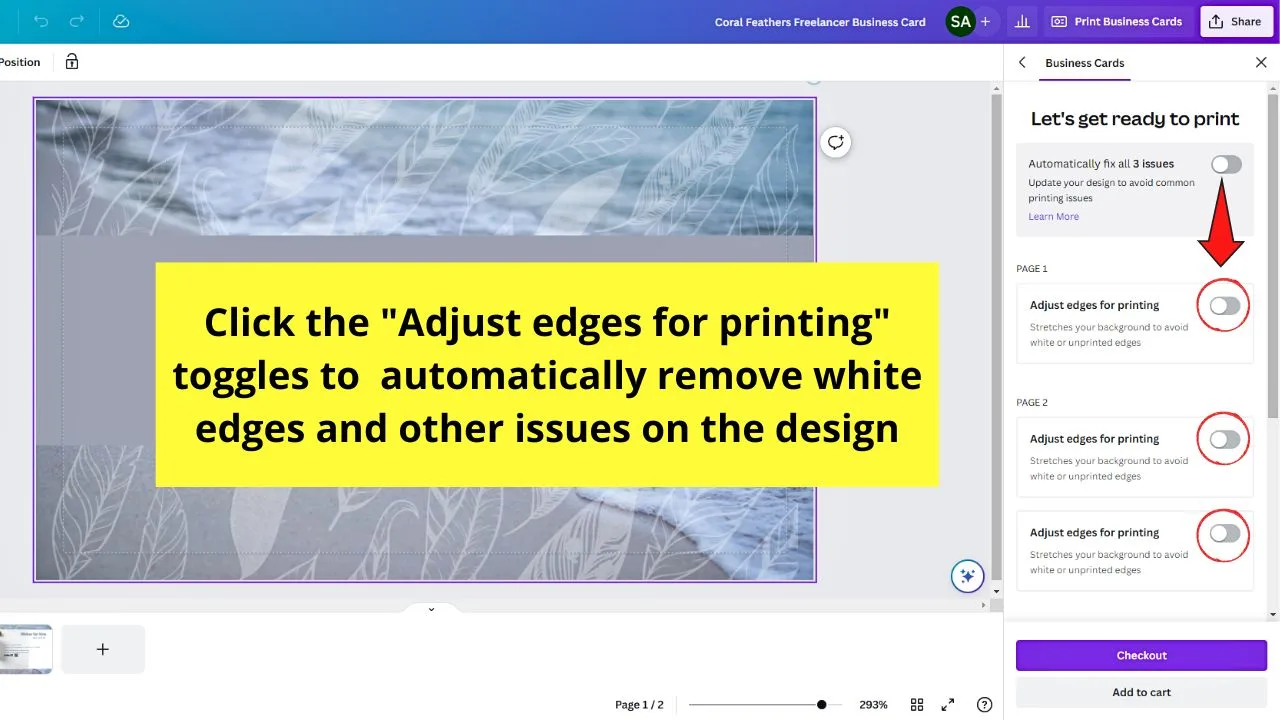
Depending on what issues are detected by Canva, you can find this option in the different page sections.
Activating this option will automatically stretch the background image to remove unprinted edges.
You can also click the “Automatically fix all [number] issues” toggle so all the issues detected will be fixed.

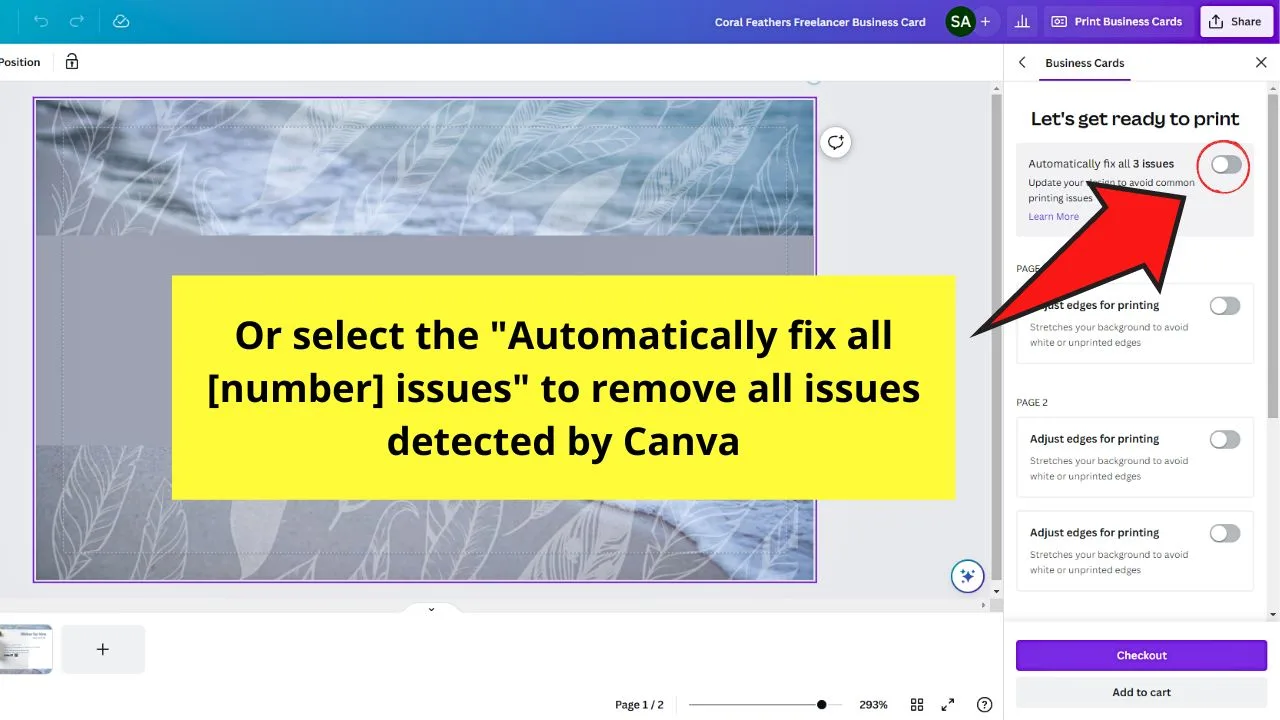
You’ll notice that the print bleed is still visible during this step of the process.
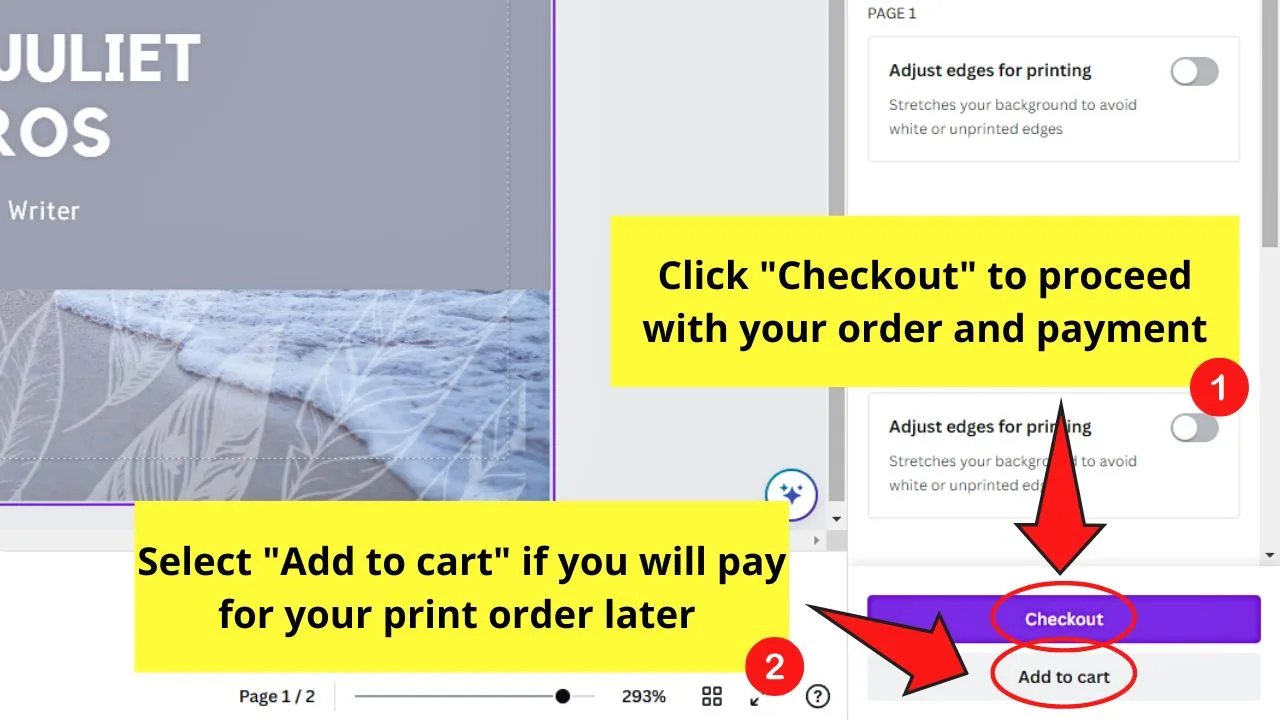
Then select “Checkout” or “Add to cart” after the adjustments are made. If you’re okay with how the design looks, click “Checkout” and fill out the payment details to complete the order.
But if you’re still waiting for funds for the print order or another person’s decision, select “Add to cart” instead.

Print Bleed vs. Margin — The Difference
If you’ve been reading attentively earlier, I’ve mentioned about margins and print bleeds.
Most of you would think they’re the same as they appear as boxes surrounding your design.
Technically, margins serve as a marker telling you or the person printing your work not to cut out that area of the design.
Print bleed tells you to extend your design’s background ⅛ inch from the final trim size to avoid having white gaps during the printing process.
Frequently Asked Questions about What Print Bleed in Canva is
Is the print bleed feature exclusive to Canva Pro users?
Showing print bleed on your Canva design isn’t exclusive to Canva Pro users. Both the free and the premium users can avail of this nifty feature by heading to the File button on the menu bar.
What will I do if I find white edges surrounding my design after clicking the Show print bleed option?
In case you see white edges surrounding your design, just extend the background beyond the print bleed area. You can also stretch out the elements you added if you don’t mind them being trimmed out of the design.
What do margins do?
Margins serve as a guide for telling anyone who’s printing your design not to cut out any element in that area.


Hey guys! It’s me, Marcel, aka Maschi. On MaschiTuts, it’s all about tutorials! No matter the topic of the article, the goal always remains the same: Providing you guys with the most in-depth and helpful tutorials!

