Changing the sender name in outgoing WordPress emails replaces WordPress from the sender name field.
It should be noted that changing the name fields will have no bearing on email deliverability.
WordPress, by default, sends mail from the PHP servers running the WordPress software. To improve delivery rates, SMTP mail servers need to be used.
For your internal emails sent from the WP-Mailer (PHP mail, rather than SMTP), changing the sender name from ‘WordPress’ can be done easily.
Here’s how you do it:
How to change the sender name in an outgoing WordPress email
To change the sender name in an outgoing WordPress email, you can either download a plugin such as “WP Change Email Sender,” or you can make some changes to your WordPress theme’s functions.php file.
Changing the from field in your functions.php file
Changes can be made directly in PHP within your theme’s functions.php file. These are theme-specific so when you update or change your theme, the script will likely need to be added again.
The code snippet can be pasted at the bottom of your functions.php file.
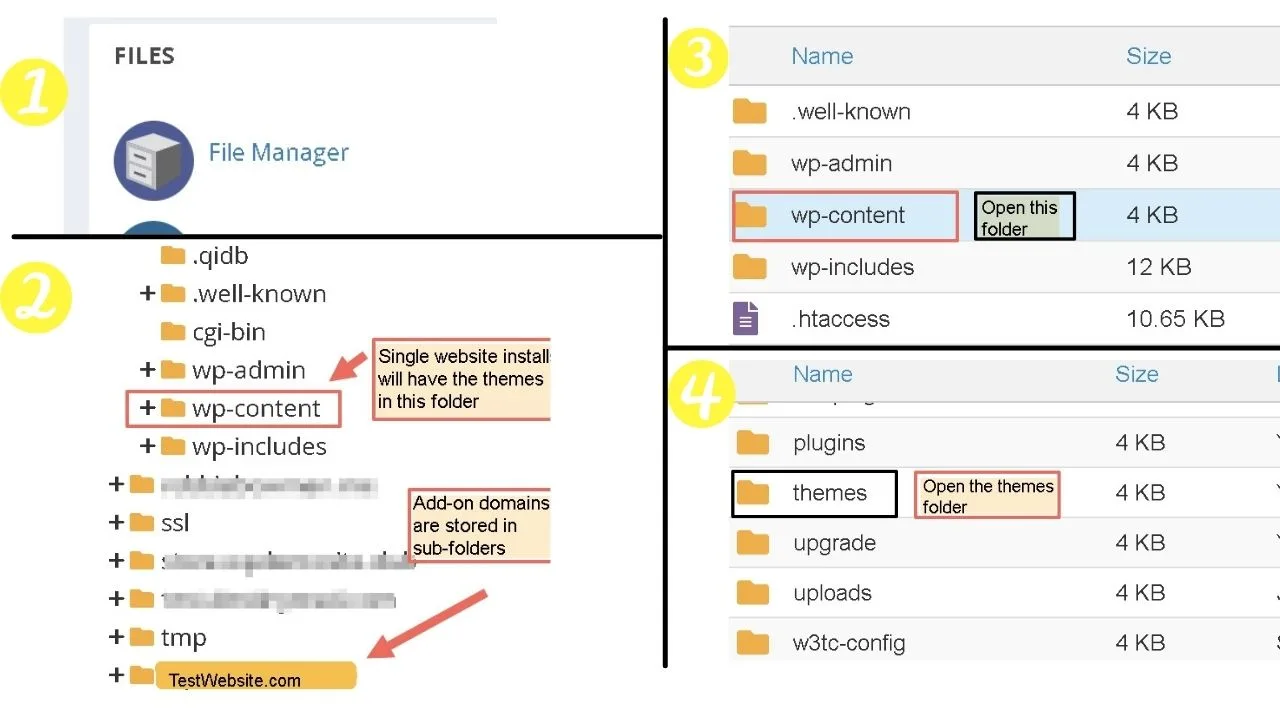
Log into cpanel (yoursite.com/cpanel)
Select your website root directory – If you have more than one website, it will be a subdirectory in your parent folder, which is the Public_HTML folder.
Within that folder, open the folder for WP-Content, then open the “Themes” folder.
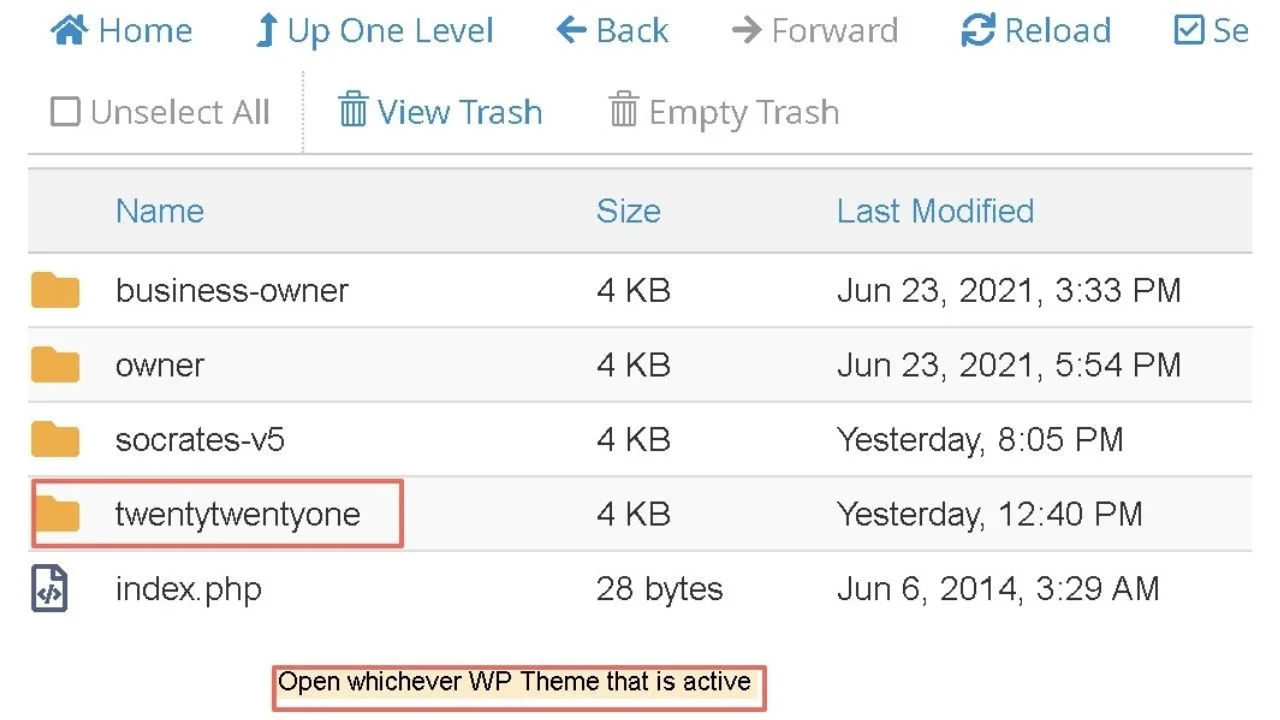
Select the active theme to change,
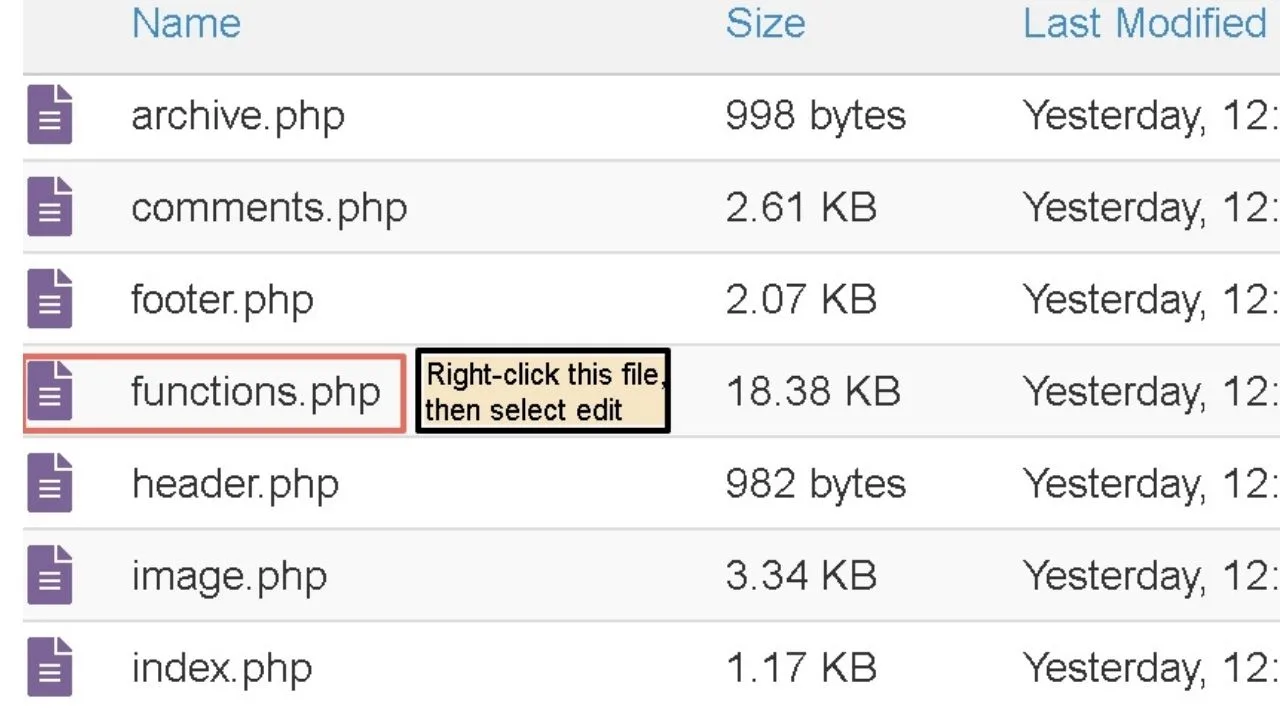
Navigate to the functions.php file, right-click and select edit.
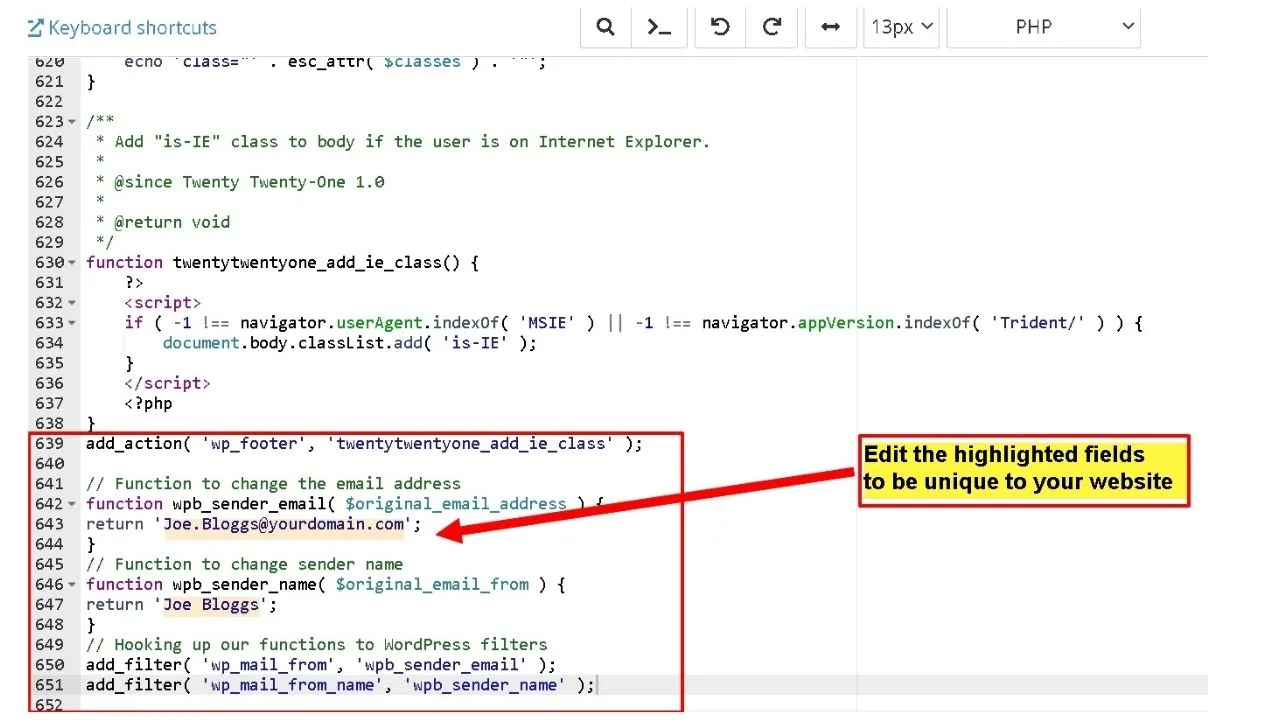
Scroll to the bottom of the code and add the following snippet
// Function to change the email address
function wpb_sender_email( $original_email_address ) {
return '[email protected]';
}
// Function to change sender name
function wpb_sender_name( $original_email_from ) {
return 'Joe Bloggs';
}
// Hooking up our functions to WordPress filters
add_filter( 'wp_mail_from', 'wpb_sender_email' );
add_filter( 'wp_mail_from_name', 'wpb_sender_name' );
Obviously, replace the name “Joe Bloggs” and “yourdomain.com” to be relevant to your website or business.
Now, go back to WordPress and take an action to trigger an email to be sent.
Actions that trigger WP to send mail are adding a new user, changing passwords, or requesting a recovery email.
In the example below, a new user was added triggering an email notification to be sent from WP with the WordPress name changed. WordPress is replaced with the sender name and ‘WordPress’ is removed from the subdomain URL.
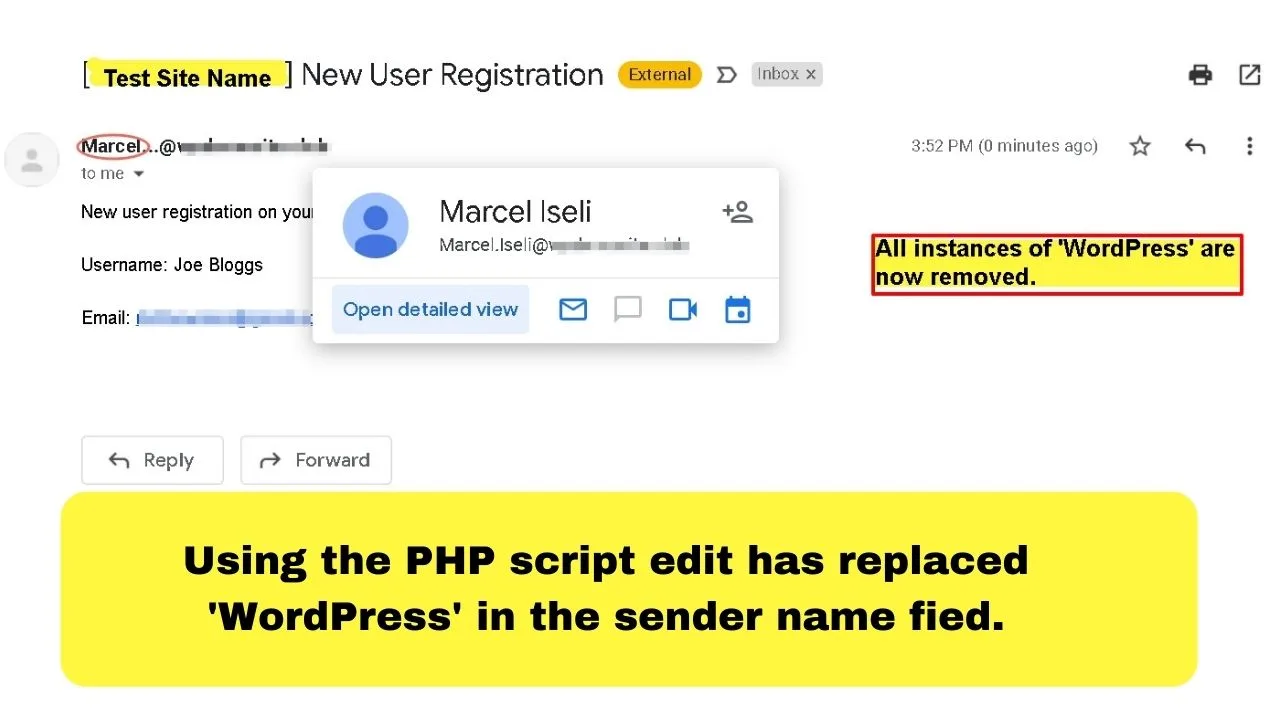
Surprisingly, the email notification arrived in the primary inbox. Not the spam folder, which is where most WordPress email notifications wind up.
This is because WordPress emails are, by default, sent from the PHP web server.
On shared hosting plans, it is almost inevitable that those emails will trip a spam filter.
SMTP mail is sent from a mail server. Those are more reliable.
3 plugins to change sender name in outgoing WP email
1. WP Change Email Sender (By Aminur Islam)
Search by keyword for “WP change email sender”, find the one by Aminur Islam, then install and activate the plugin.
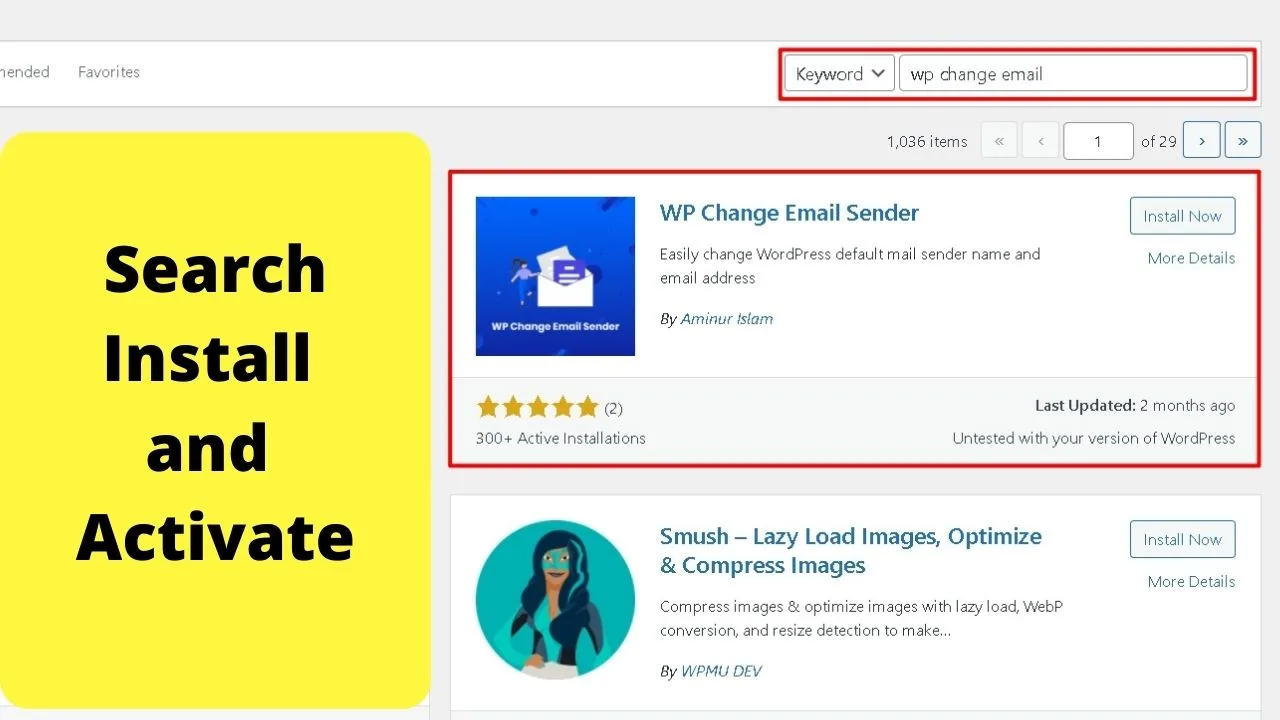
Once activated, scroll down your active plugins list and click the “settings” option for WP Change Email Sender”.
This will redirect you to the “General” options page for WordPress.
Scroll to the bottom of your general settings. A new section is added that lets you change the sender email.
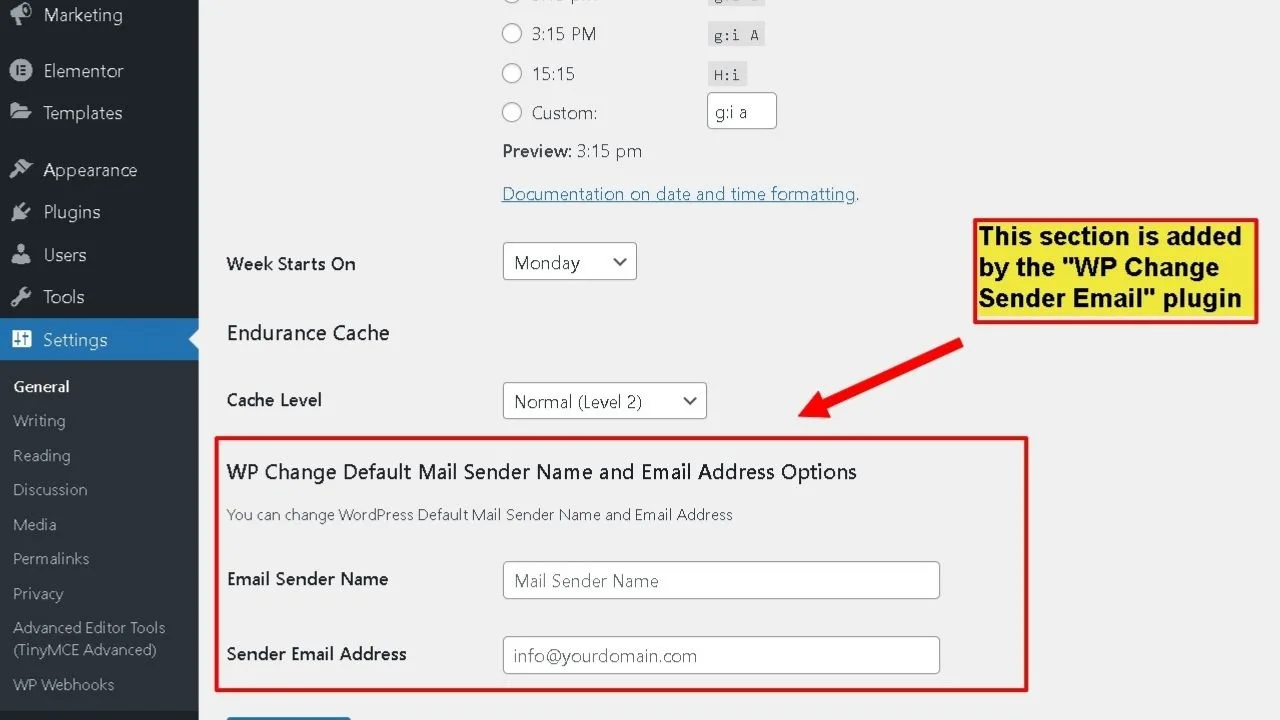
That has to be the simplest method.
This first attempt landed the WordPress email in the spam folder, but that’s because the sent from field was masked.
Once correcting it to the same site URL it was being sent from, it did land in the primary inbox. That is something to note when changing your sent from field.
If you do try to mask your domain as another, it will be flagged by spam filters.
Especially when it’s sent from a PHP mail server.
2. CB Change Mail Sender Plugin (By Abul Bashar)
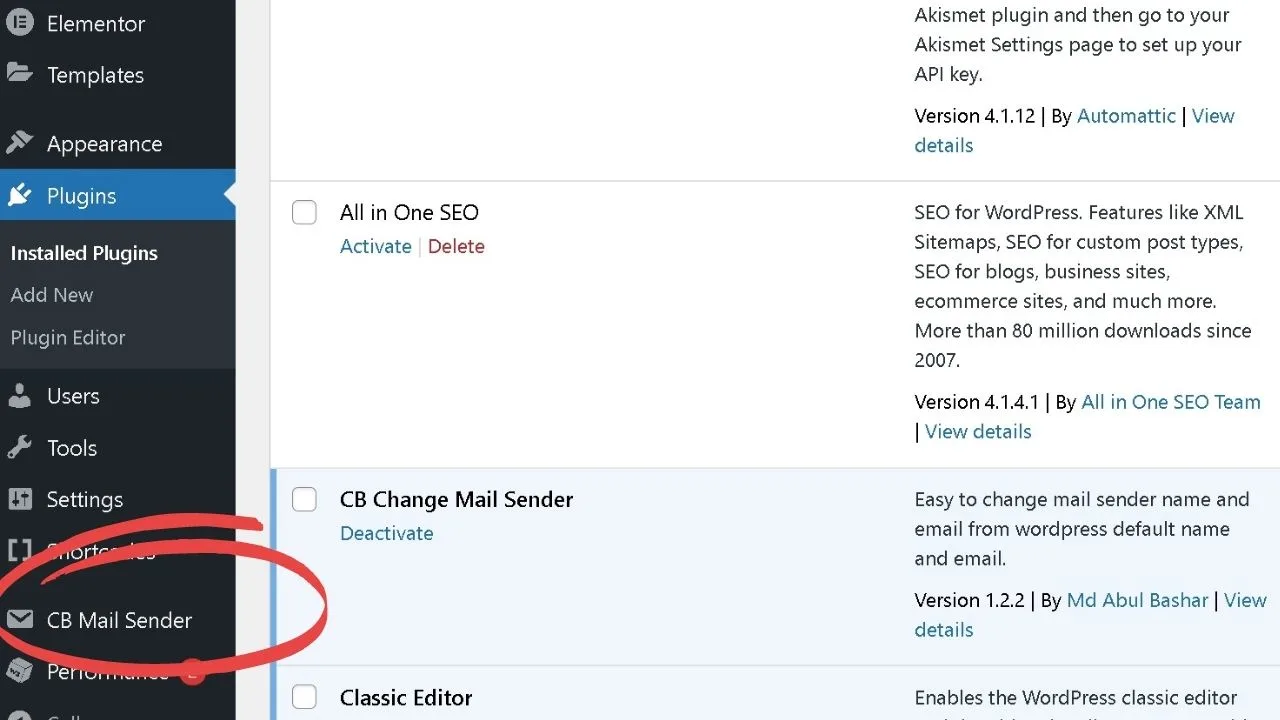
Go to plugins, select “add new” then search by keyword for “CB Change Mail Sender”. Select the one “By Abul Bashar”. Install and activate the plugin.
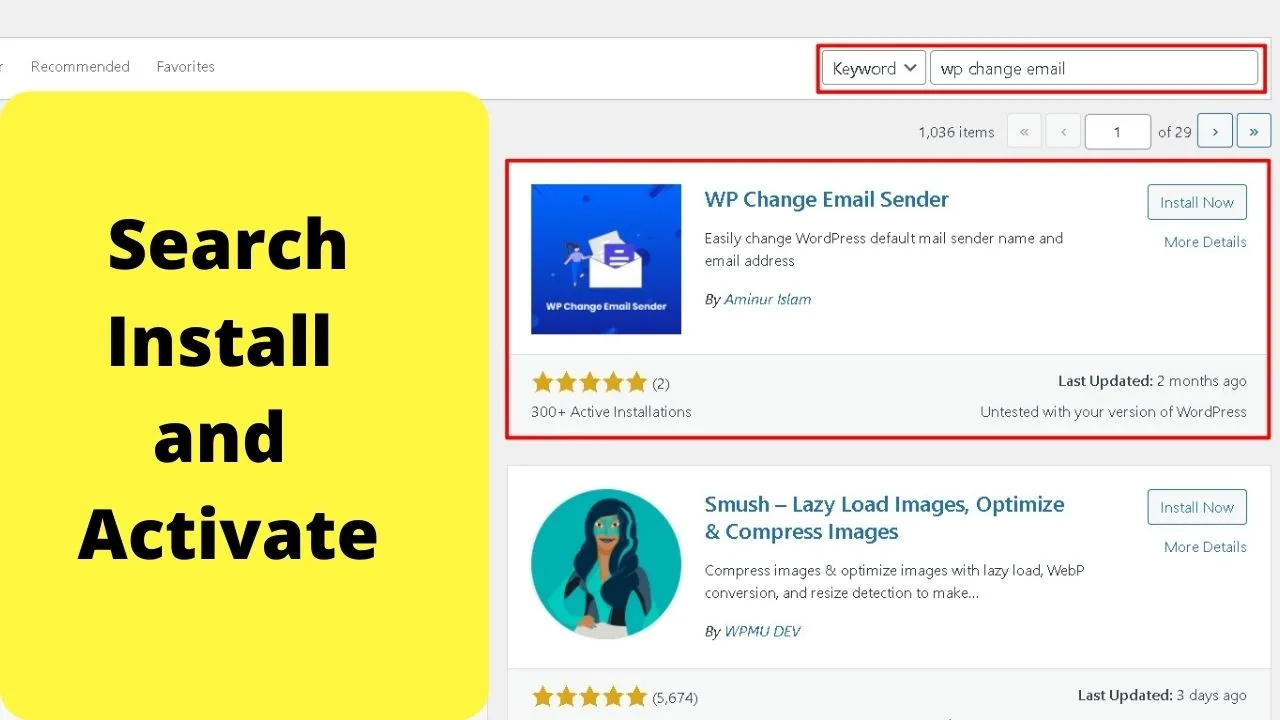
Unlike with the last plugin, this does not add an extra section to your general settings page, but instead, the settings are found in the left sidebar.
Click the “CB Mail Sender” tab and it takes you to the settings page.
It is the same fields as the earlier plugin. The only difference being this clogs up space in your sidebar.
3. Stop Emails Going to Spam
Head to the plugins dashboard, click “add new” search by keyword for “stop emails going to spam”.
To confirm you are installing the correct one, the plugin is created by “fullworks”.
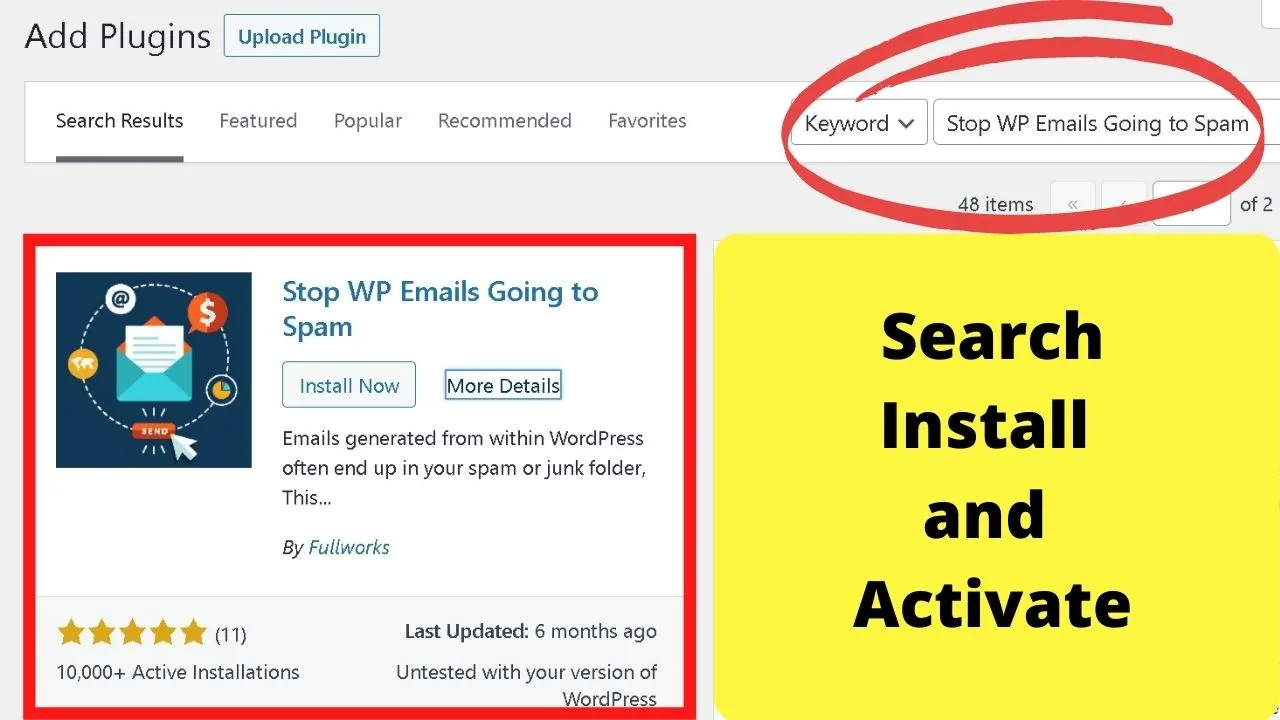
This plugin solves two problems. First, it sets the envelope sender, checks the server IP has an SPF (Sender Policy Framework) record set, which is a way of authenticating email.
By default, WP-Mail is unverified. It is only a script that runs on a PHP server.
By setting the envelope sender, it adds a layer of authentication, which is what stops (or should stop) WP emails being sent to the spam folder.
There is an additional option to change the default WordPress email option.
Changing the WordPress default mail address removes it from the URL.
As an example, instead of [email protected], it could be set to show the sender field as [email protected], or [email protected].
Changing the “WordPress default name” changes the name in the sender name field.
Frequently Asked Questions related to how to change the sender name in outgoing WordPress email
Why do WordPress emails get flagged as spam?
Having WordPress in the name field is not the sole trigger to trip spam filters. It is the PHP mail server that sends them. The only way to safeguard your mail from tripping spam filters is to use an SMTP mail server, or an authentication plugin such as the “stop emails going to spam” WP plugin.
Can you change the WordPress outgoing email with your web hosting email address?
The codes above are for configuring the WP-mail.php settings to rename the sender name field and remove WordPress from the email sender. If you set up website emails with your web host, those use SMTP. Configuring those can be done with a WordPress SMTP email plugin.

Hey guys! It’s me, Marcel, aka Maschi. On MaschiTuts, it’s all about tutorials! No matter the topic of the article, the goal always remains the same: Providing you guys with the most in-depth and helpful tutorials!


