

Adding a table to WordPress used to be difficult, involving oodles of markup language.
HTML was the original way to add tables to any website. Then CSS came along making it even more complicated.
Today, feature-rich tables can be built from right within WordPress or using external services then embedding the table (or even a spreadsheet) right within WordPress.
Spreadsheets are still tables, just with extended functionality.
These are handy when you have a large dataset to present in a logical manner. One that users can interact with.
Read on to discover the types and easiest methods to create tables and display them beautifully on your WP website.
How to add a table to WordPress
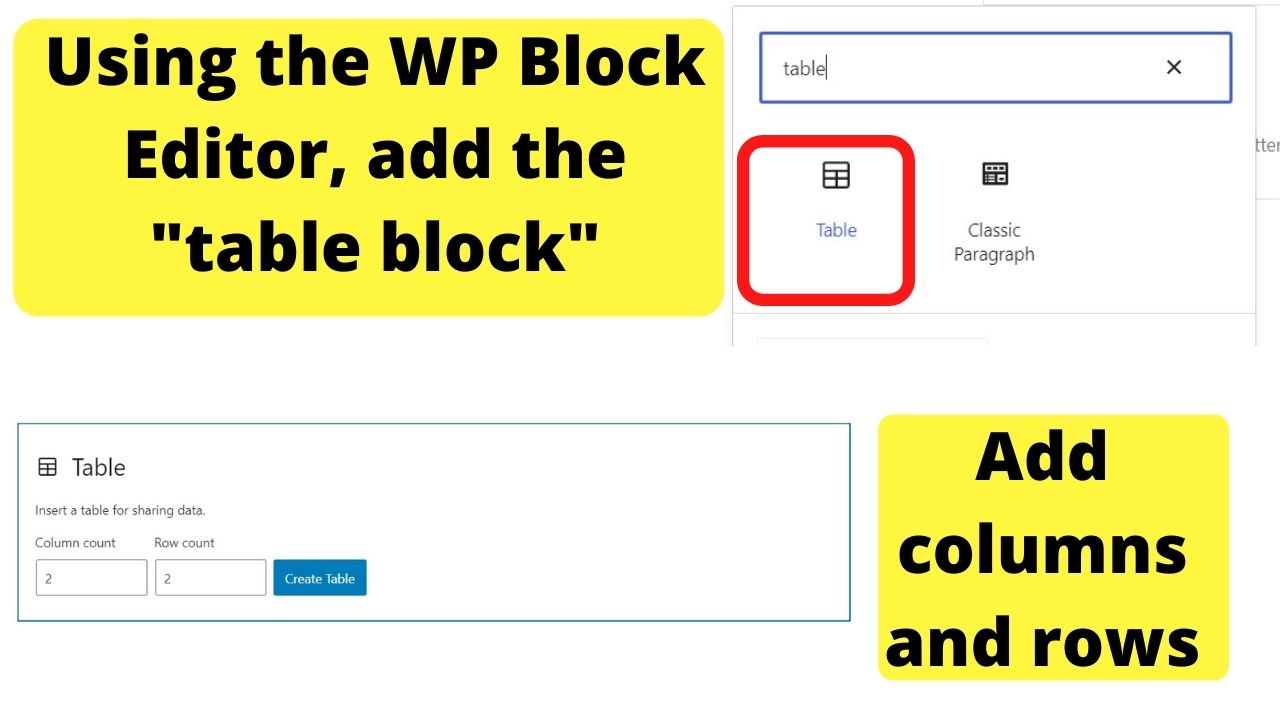
- Click the “+” symbol at the top left of the WordPress editor
- Type in “Table” in the Search box
- Click the Table block to insert it
- Enter the desired column and row count
- Click on “Create Table” to confirm
Add a multi-column table in WordPress block editor
The regular table in the Block Editor is surprisingly customizable and easy to configure.
Using the block editor, click the + icon, type in “tTble,” and click on the “table” block. A prompt will show to create the table.
Insert the number of rows and columns you want.

For demonstration purposes, we created a leaderboard. The sort you may want to do if you were running an affiliate contest to prompt affiliates to push harder to win bigger contest prizes.
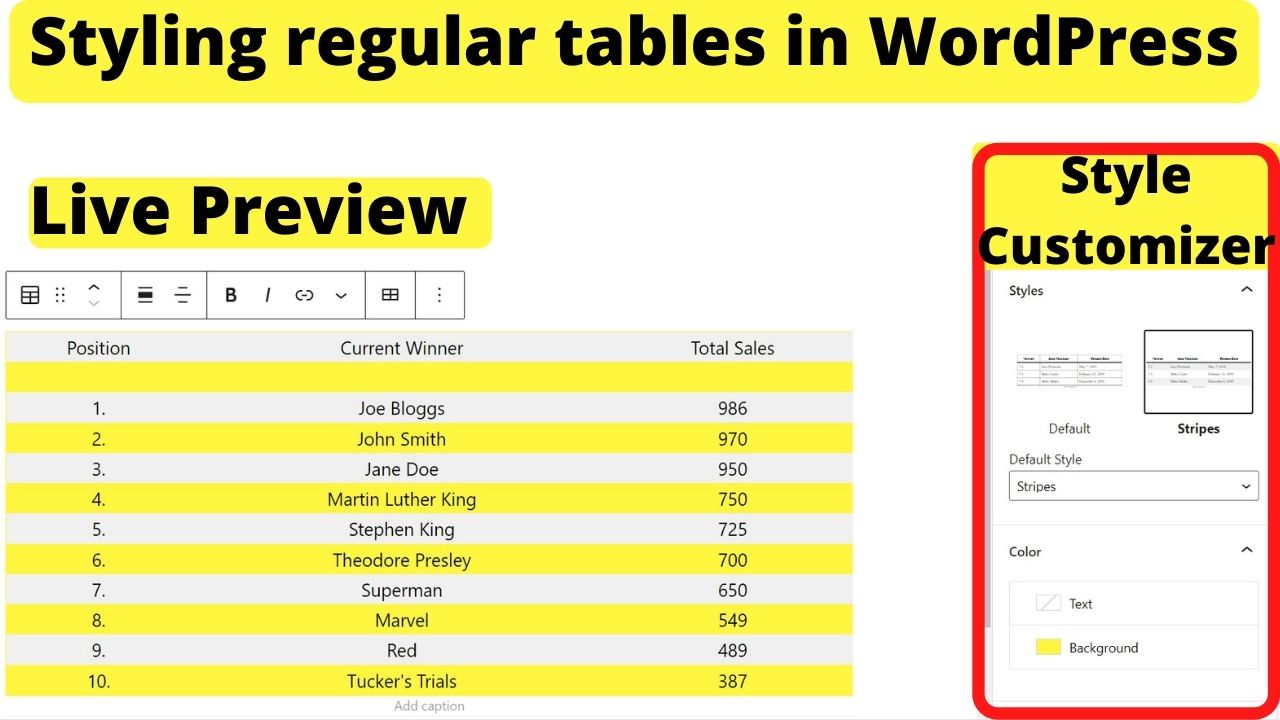
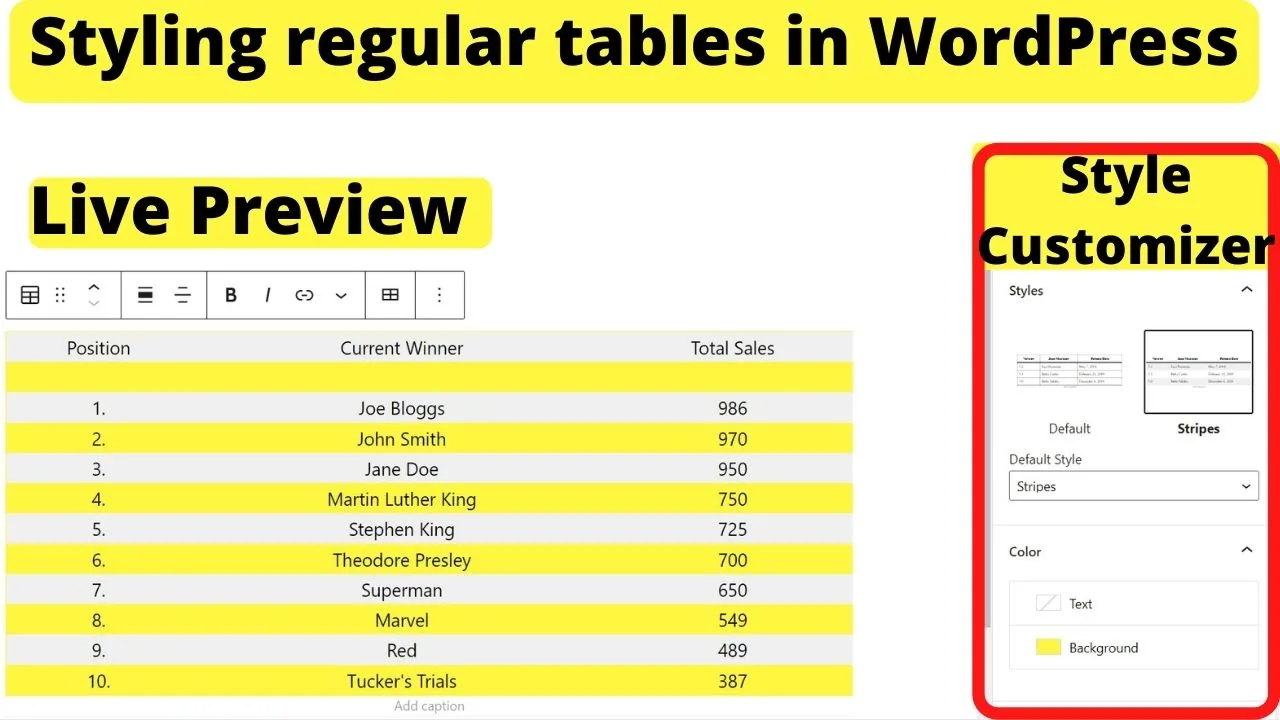
Once you have your data in the table, click anywhere to open the customizer on the right side of your WP editor.
From here, you can change the style, add a header and footer, fix the table width, format text, change font colors, and backgrounds, alter the typography, including the font sizes, and add an HTML anchor to your table.
Adding an anchor is handy to link directly to your table in WordPress rather than a blog post.
Anchors are handy for mailings, too. Since tables are a fast way to convey data, mailing out price changes with a link directly to the table can be useful.
Recipients can click the link to go directly to the pricing table.
Add a pricing table easily
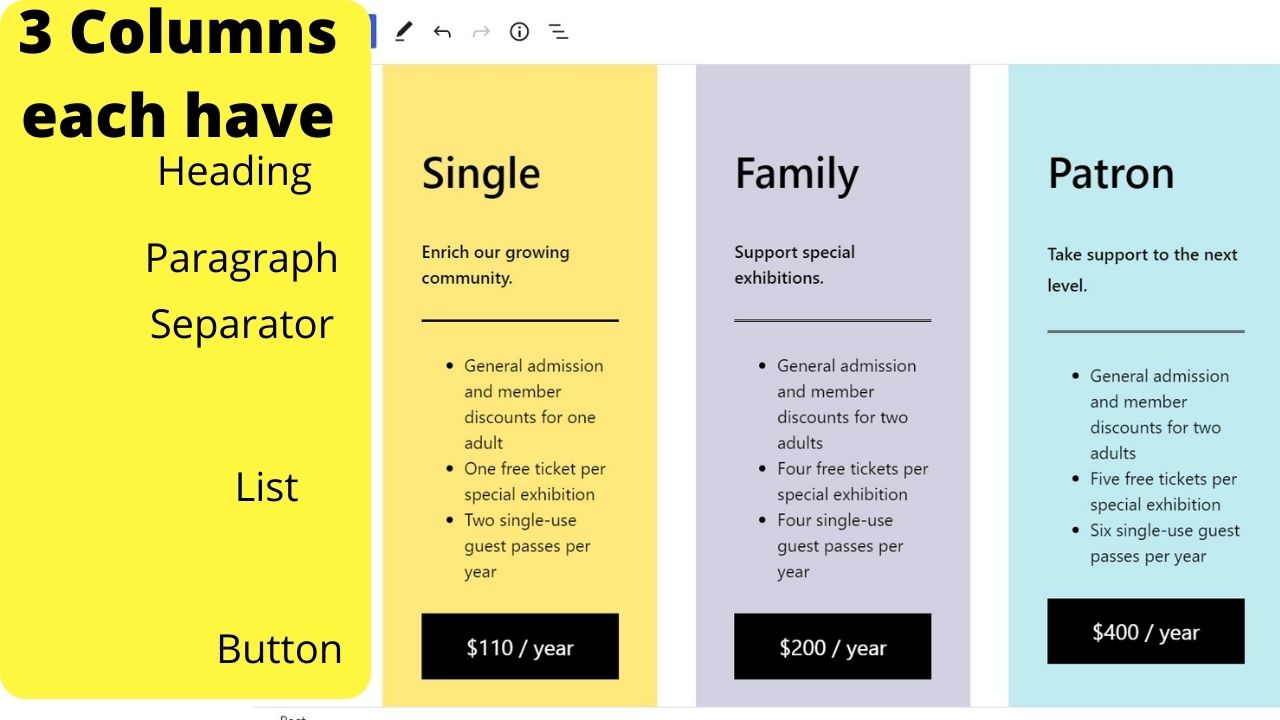
A neat feature of the Gutenberg (block) editor is the pre-formatted blocks. It now has a 3-tier pricing table ready to go.
Click the + symbol, type in “table” in the search field and select the pricing table.

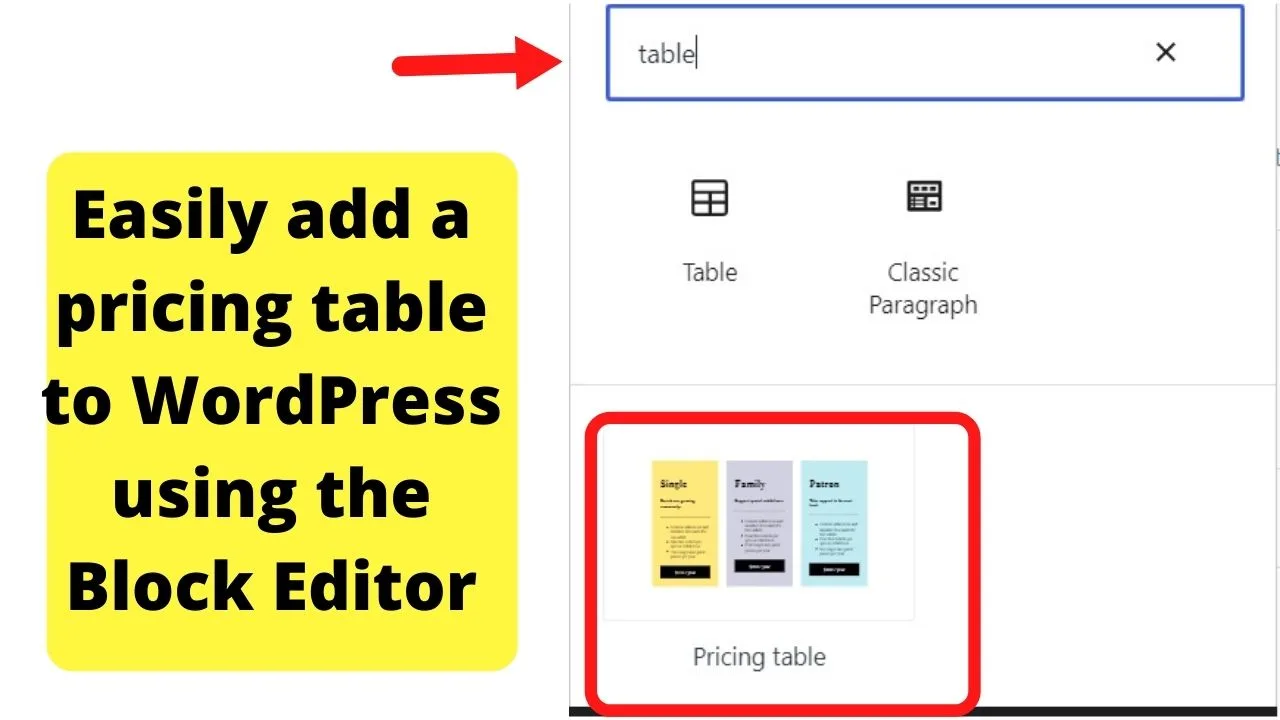
This adds a 3-column layout with 3 pricing blocks.


The pricing table block consists of multiple blocks. A heading block, followed by a paragraph, a separator, a list block, and finally a button.

If you only want two columns, click the three vertical dots on one column and select “remove column”.
Click any element to open the toolbar, then select the three vertical dots to make changes to them.
This is by far the simplest way there has ever been to add styled pricing tables to WordPress without using CSS, or HTML.
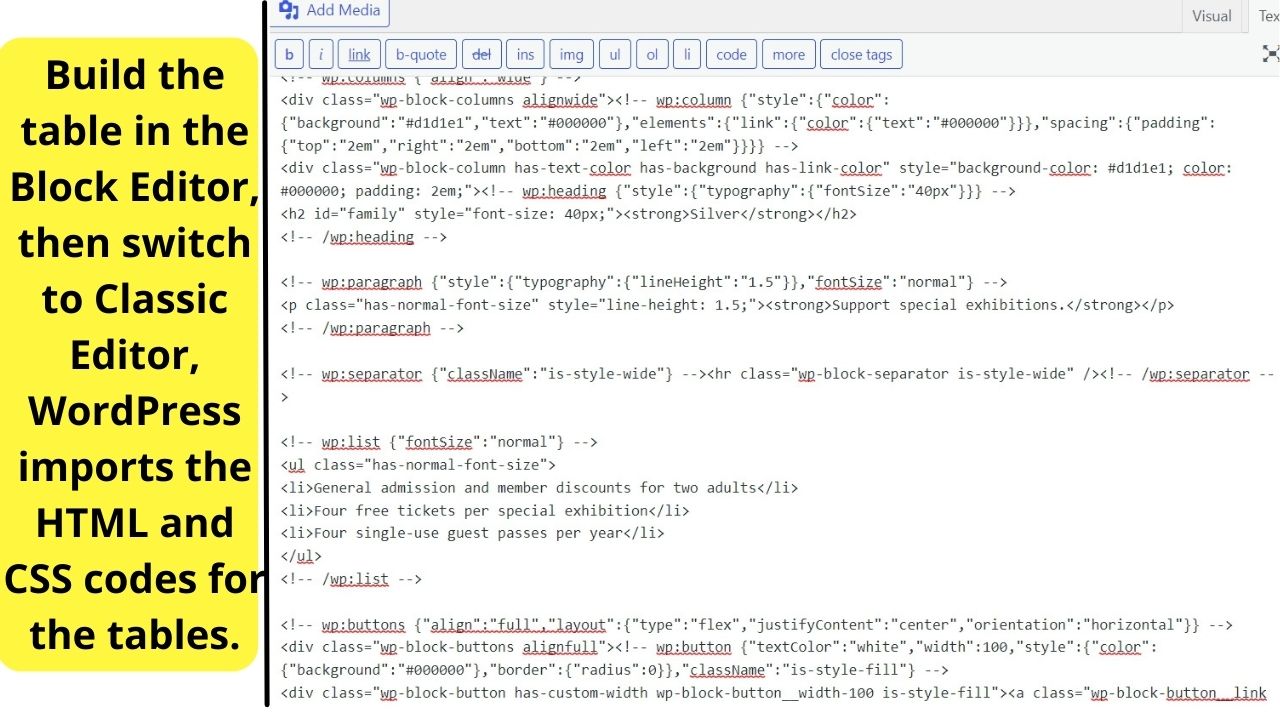
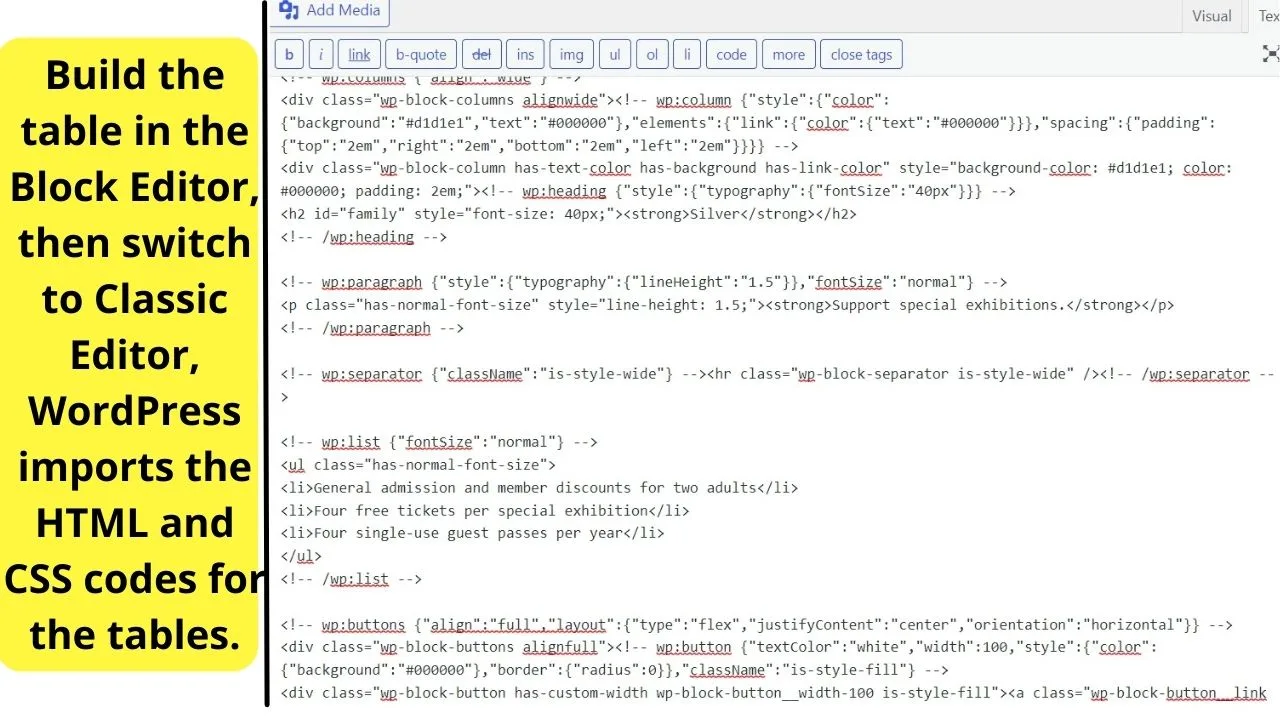
For those using the Classic Editor, deactivate the plugin, create the draft post or page using the Block Editor, save it as a draft, then reactive the Classic Editor plugin.
When you go back to edit the post or page, all the codes are imported over automatically.
Create tables within columns in HTML
A while back, we published a tutorial covering how to create columns in WordPress. Part of that was creating a table with a 2-column layout.
To create anything in HTML on WordPress, you need to select the “text” mode in the Classic Editor, or if using the block editor, add the “custom HTML” block.
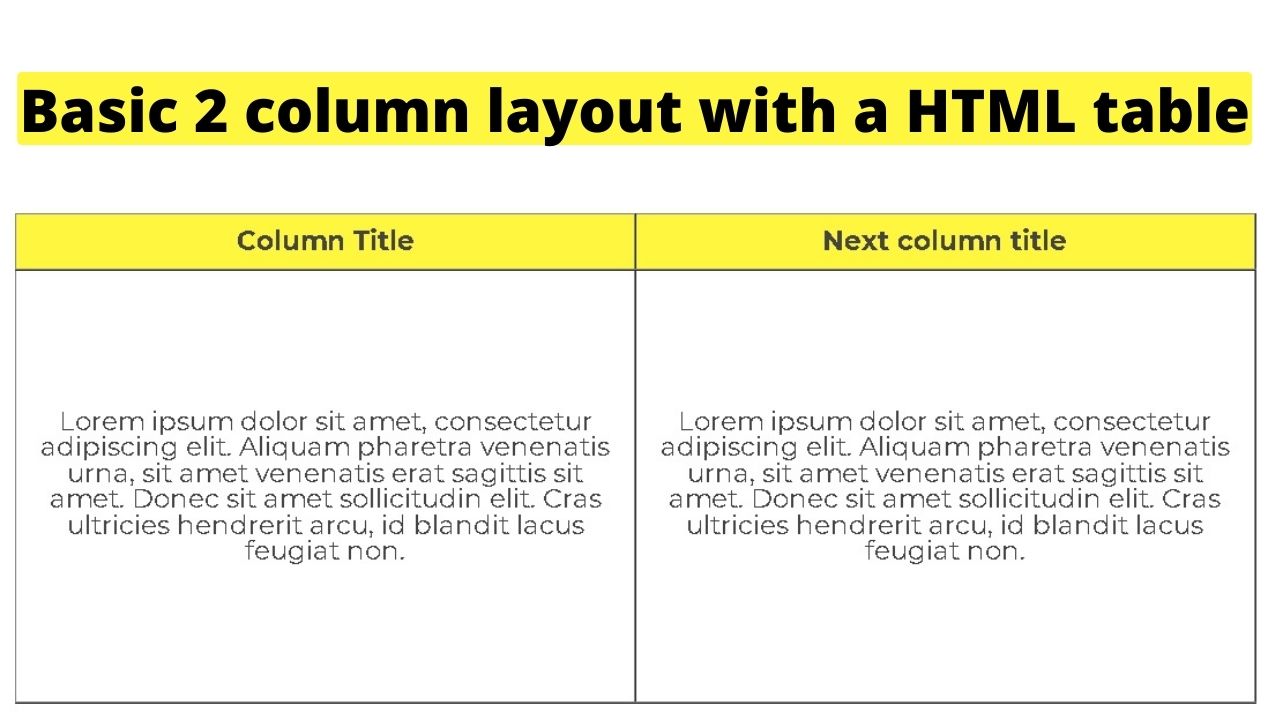
The code to add a table is…
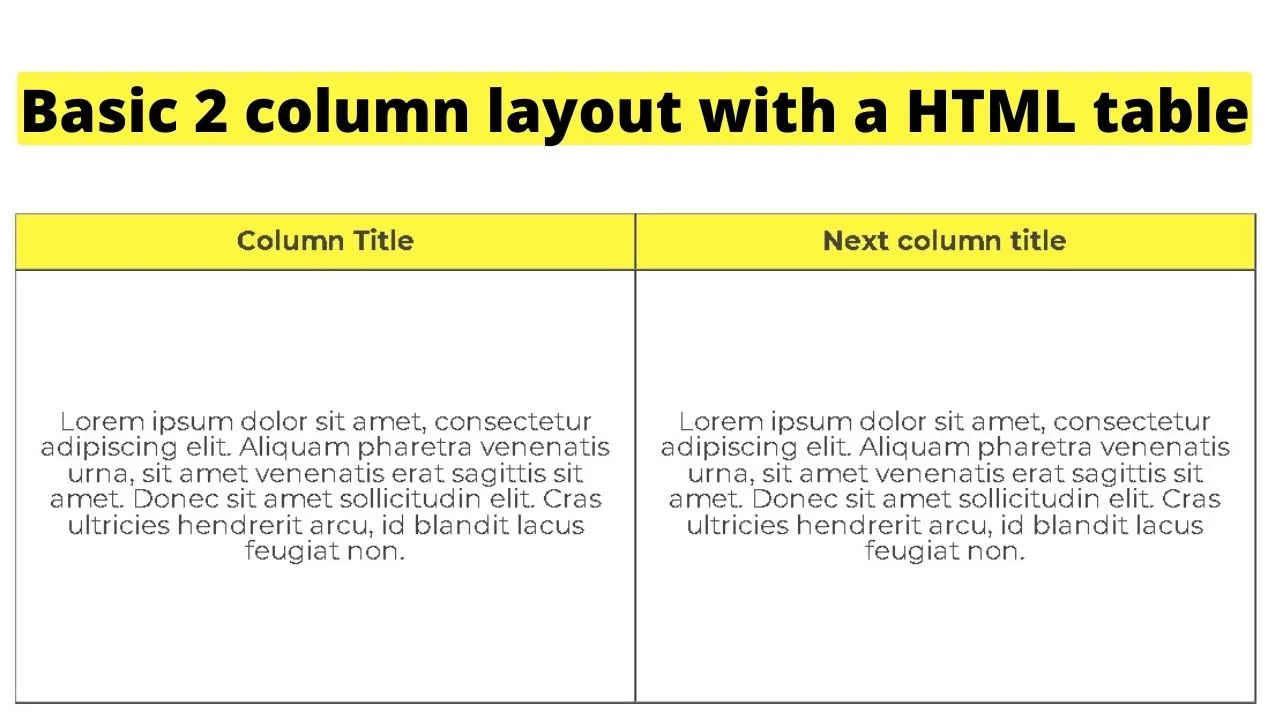
<table style="width: 100%; height: 48px;" border="”5″" width="”1200″" cellspacing="”50″" cellpadding="”50″">
<tbody>
<tr style="background-color: #fff73f;">
<td style="text-align: center; height: 16px;"><strong>Column Title </strong></td>
<td style="text-align: center; height: 16px;"><strong>Next column title</strong></td>
</tr>
<tr style="height: 16px;">
<td style="height: 300px; text-align: center;">Lorem ipsum dolor sit amet, consectetur adipiscing elit. Aliquam pharetra venenatis urna, sit amet venenatis erat sagittis sit amet. Donec sit amet sollicitudin elit. Cras ultricies hendrerit arcu, id blandit lacus feugiat non.</td>
<td style="height: 300px; text-align: center;">Lorem ipsum dolor sit amet, consectetur adipiscing elit. Aliquam pharetra venenatis urna, sit amet venenatis erat sagittis sit amet. Donec sit amet sollicitudin elit. Cras ultricies hendrerit arcu, id blandit lacus feugiat non.</td>
</tr>
</tbody>
</table>
The above code creates…
How to embed Google Sheets in WordPress
A neat but little-known feature of Google Sheets is that you can publish them to the web, and those can be embedded within WordPress websites.
Moreover, you can set the sheet to show updates in real time.
So, to embed Google Sheets in WordPress, follow these steps:
- In Google Sheets, select the sheet you want to embed
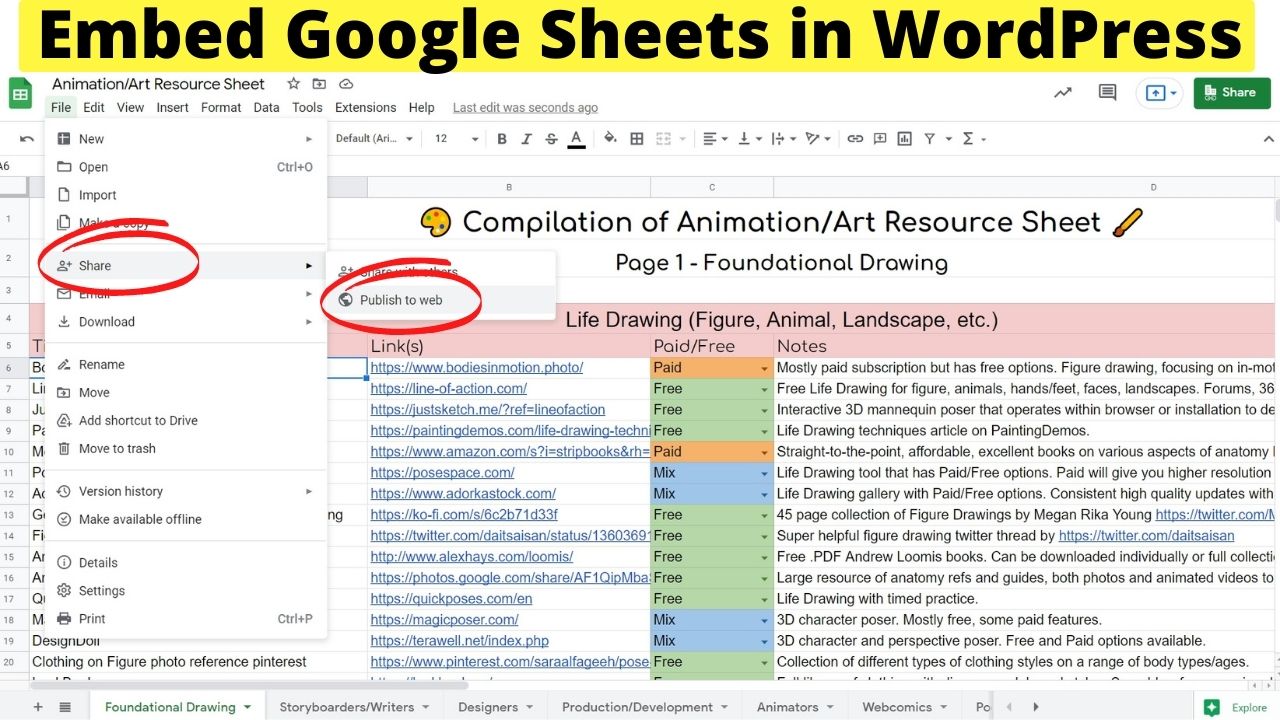
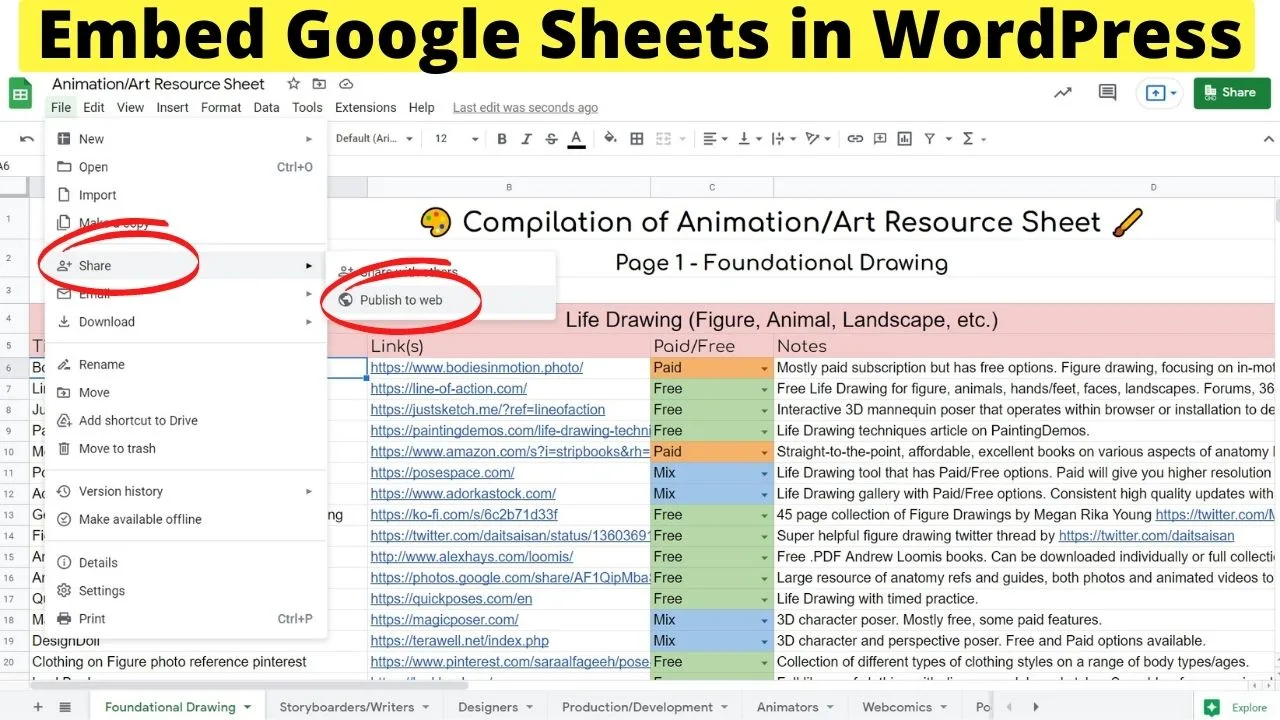
- Click File
- Select Share
- Click on “Publish to the web”
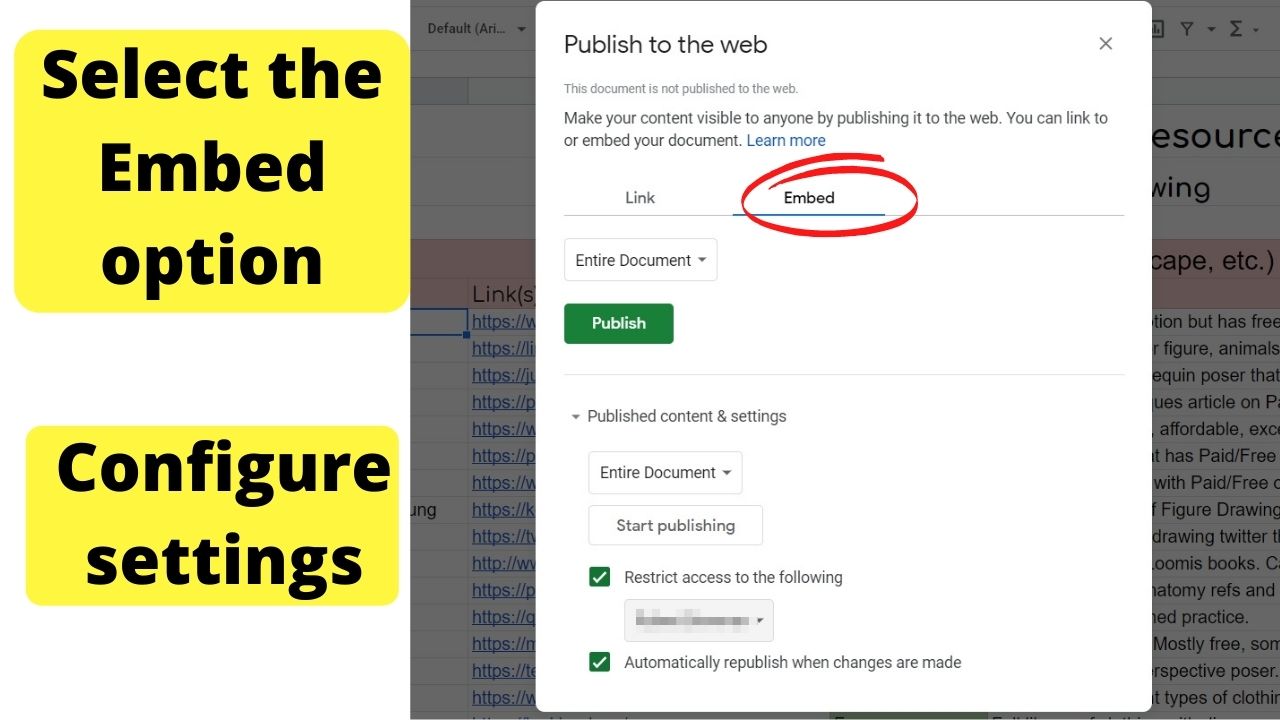
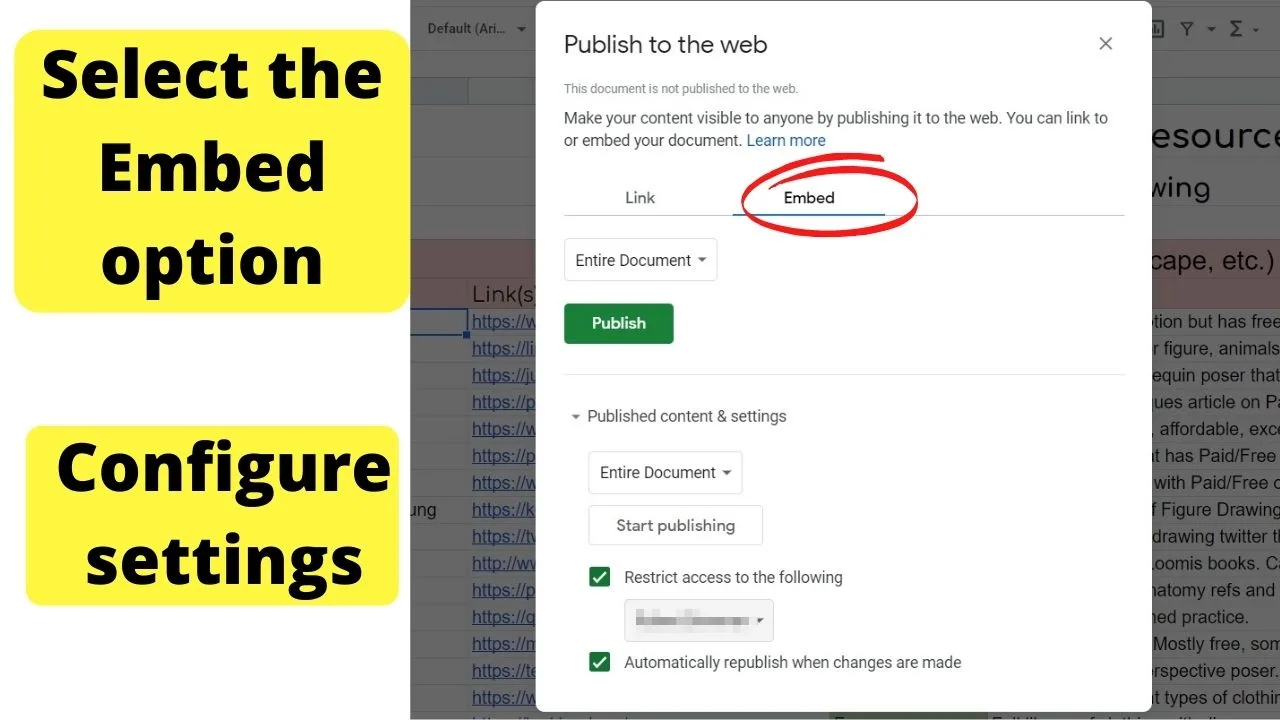
- Select the “Embed” option
- Click on Publish
- Copy the embed code
- Paste the embed code into the WordPress Text Editor (Classic Editor) or paste it into a Custom HTML block (Gutenberg Editor).
First, head to Google Sheets and select the sheet you want to embed. Click “File,” then select “Share,” then “Publish to the web.”
A popup prompt will show options to share on the web with a direct link or via an embed. Select the embed option.
Clicking the dropdown arrow for “published content and settings” lets you configure the privacy settings, such as who can access and edit the content.
If you want to push updates from the Sheet to your embedded sheet, check the box for “automatically republish when changes are made.”
If you have a collection of sheets, you can embed them all as a collection, or an individual sheet.
Once you have set up what you want to share and how, click the “publish” button. It will give you an embed code.
Copy the embed code and paste that into the “text” editor in WordPress. If using the block editor, use the “Custom HTML” block.
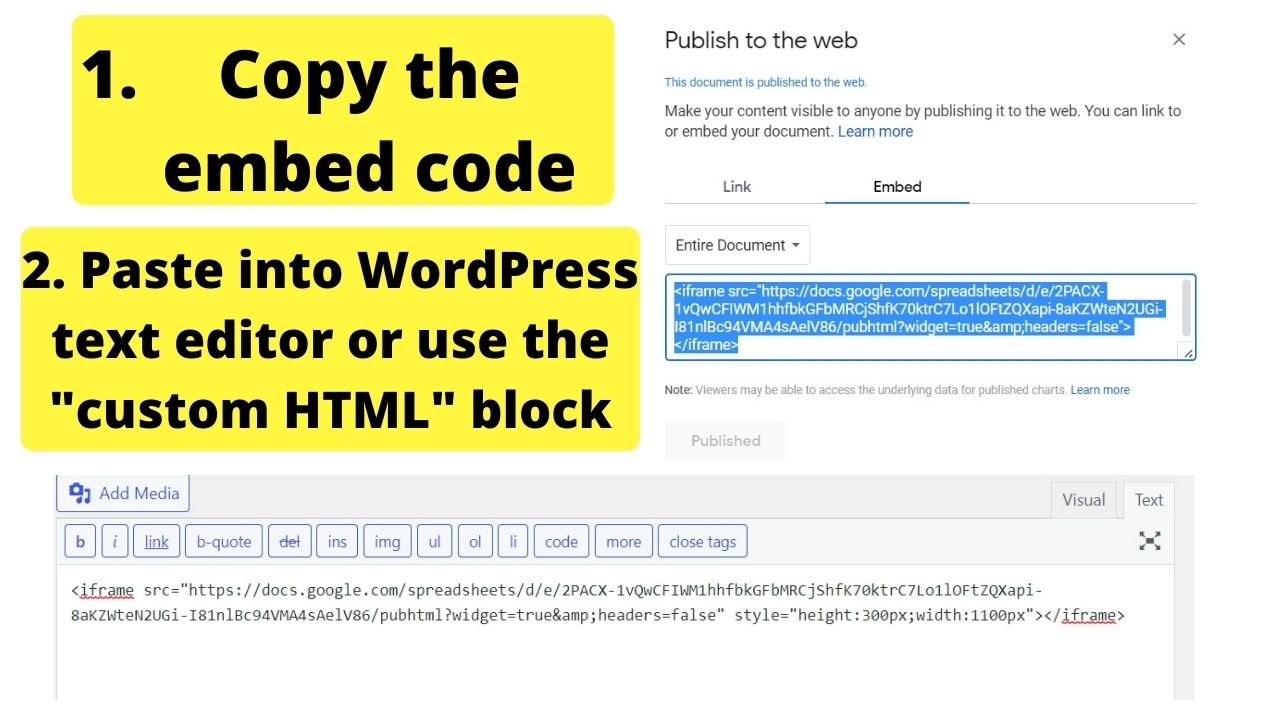
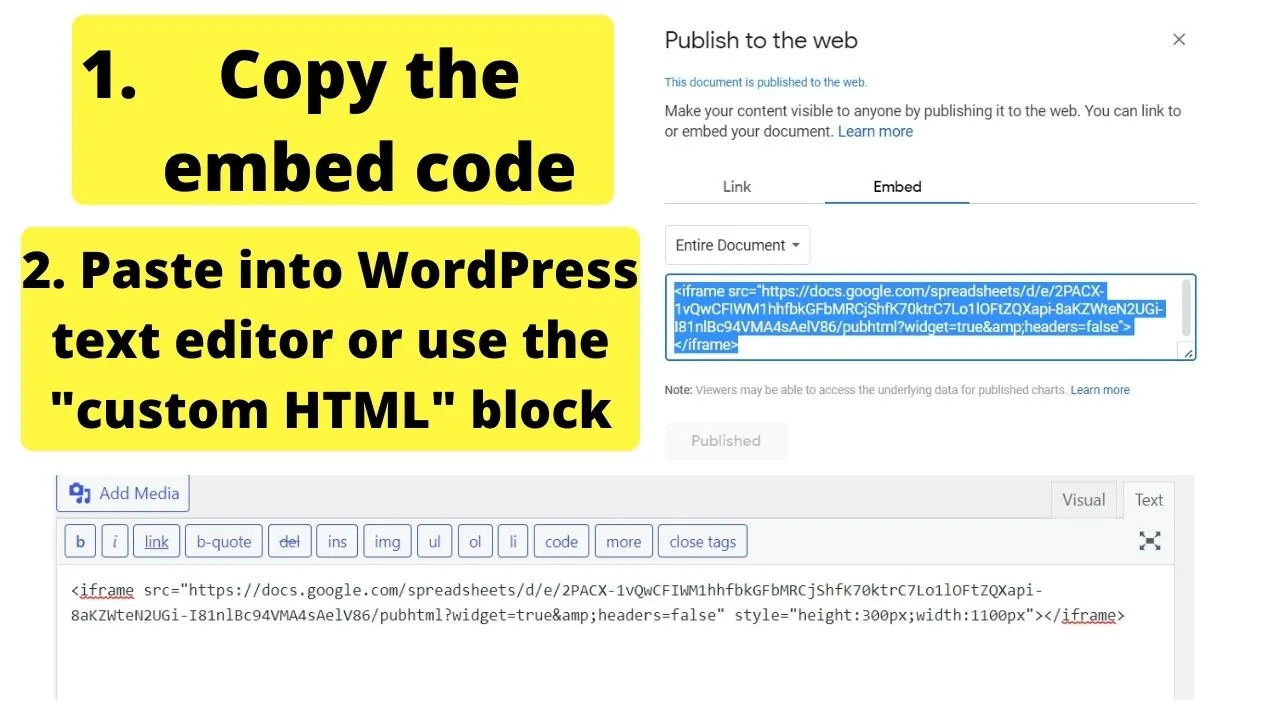
Press preview before publishing because Google’s embed code does not have sizes included. The result is a tiny blurb on a web page.
Within the embed code, after where it has “headers=false” leave a space and add the following code:
style="height:500px;width:1100px">
The numbers for the height and width can be changed to suit your theme. Press preview to see how the sheet looks. Once you are happy with the appearance, click publish.
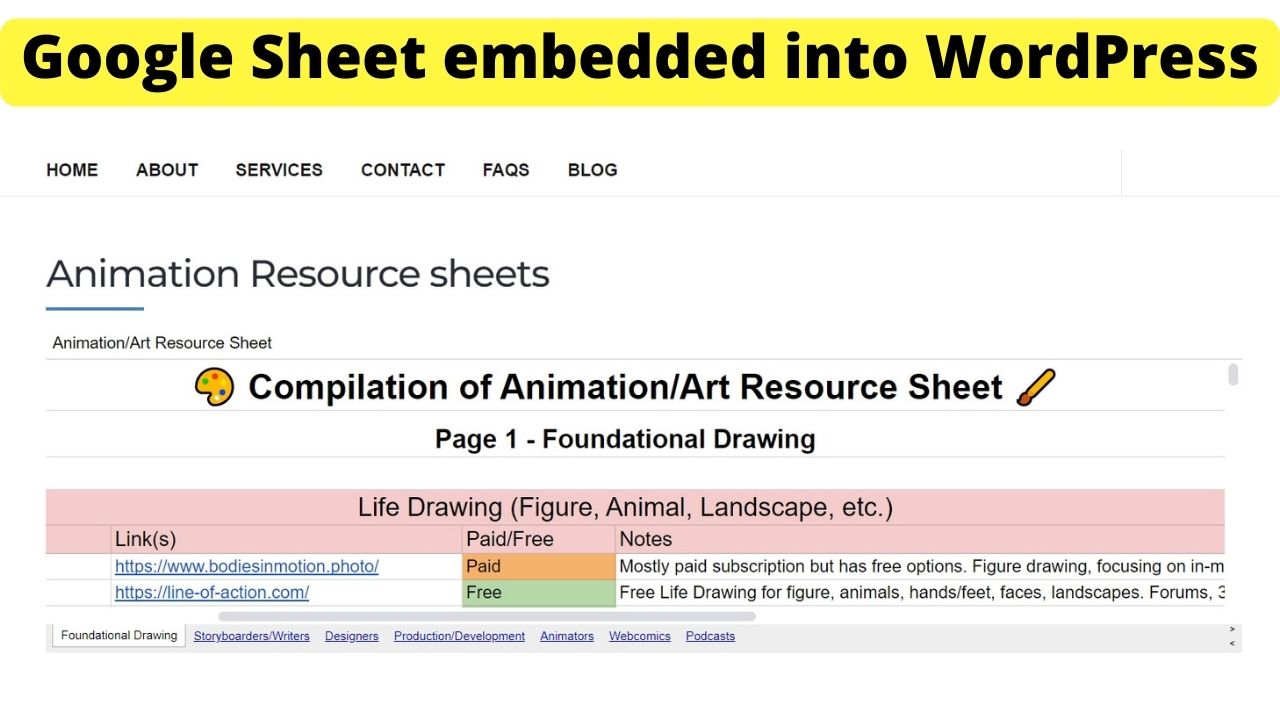
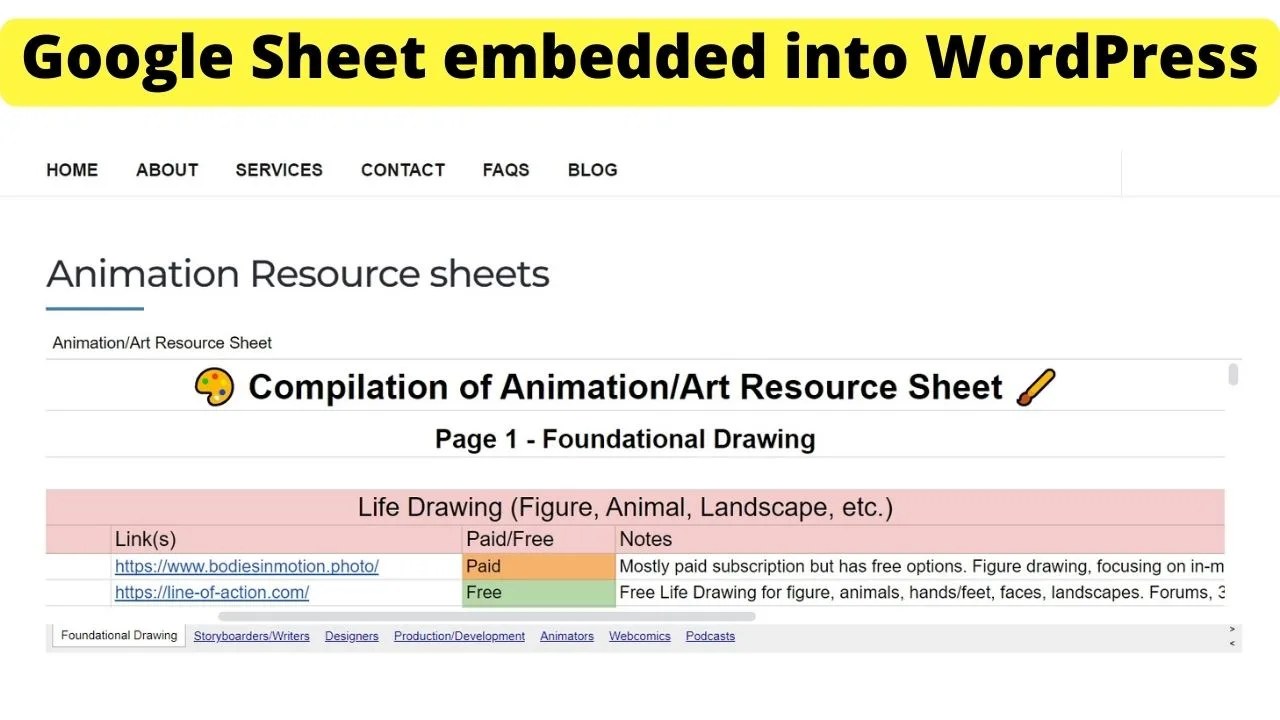
As it is a spreadsheet, which is essentially a complex table, users can scroll up, down, across, and click to open additional sheets in a collection if you do have more than one sheet.
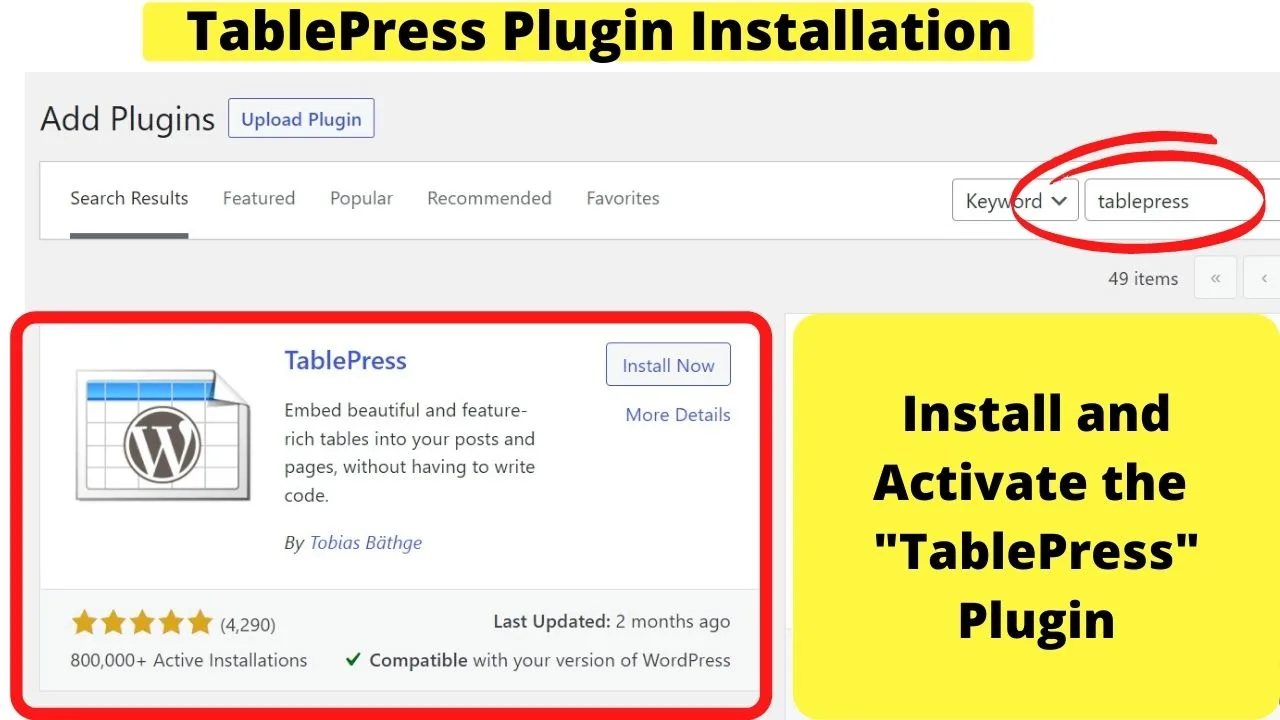
Build complex HTML tables within WordPress using the TablePress plugin
The TablePress plugin is one of the most actively used plugins in WordPress for building tables.
It eliminates the need to mess with HTML code, making table creation faster and simpler.
To get started, go to “Plugins,” select “Add new,” and type “tablepress” in the search box on the top right.

Once the plugin is activated, a new “TablePress” menu is added to your left sidebar. Click on “Add New” to start building your first table.
Something to note here is that the tables are built within the plugin page. Not within the WordPress editor.
Tables are created using the TablePress plugin then embedded in WordPress posts and pages using a shortcode.
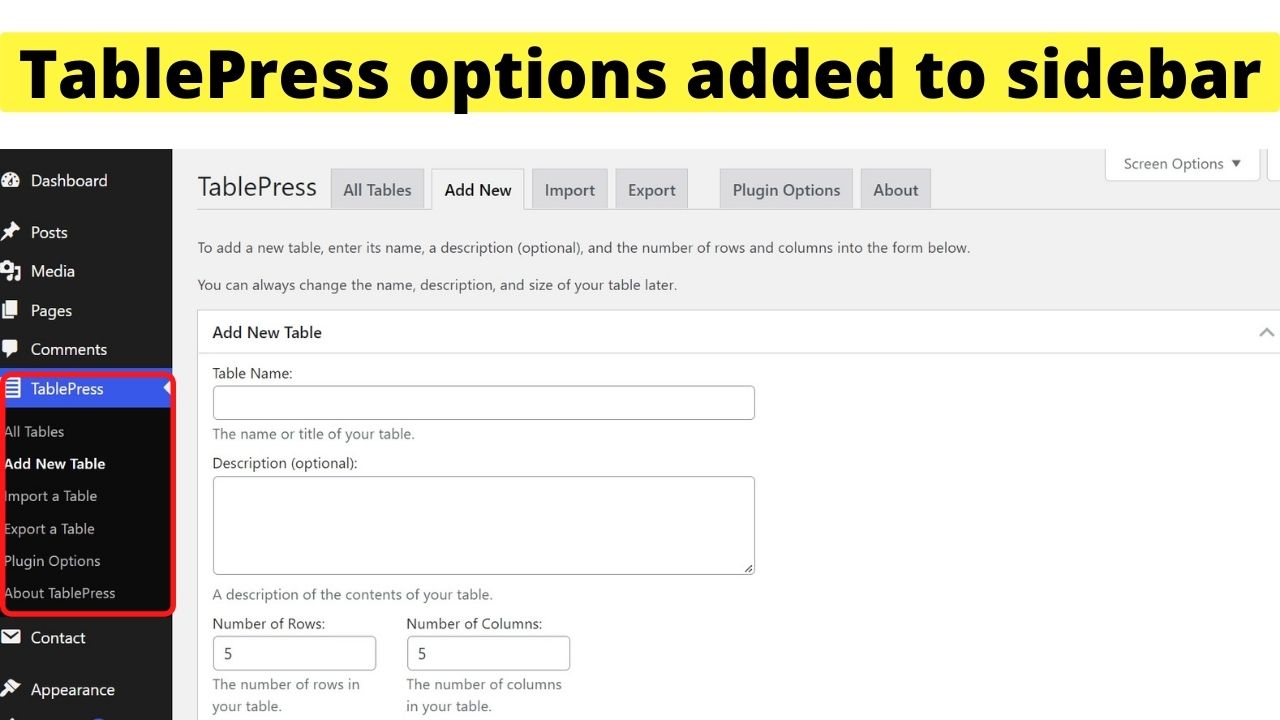
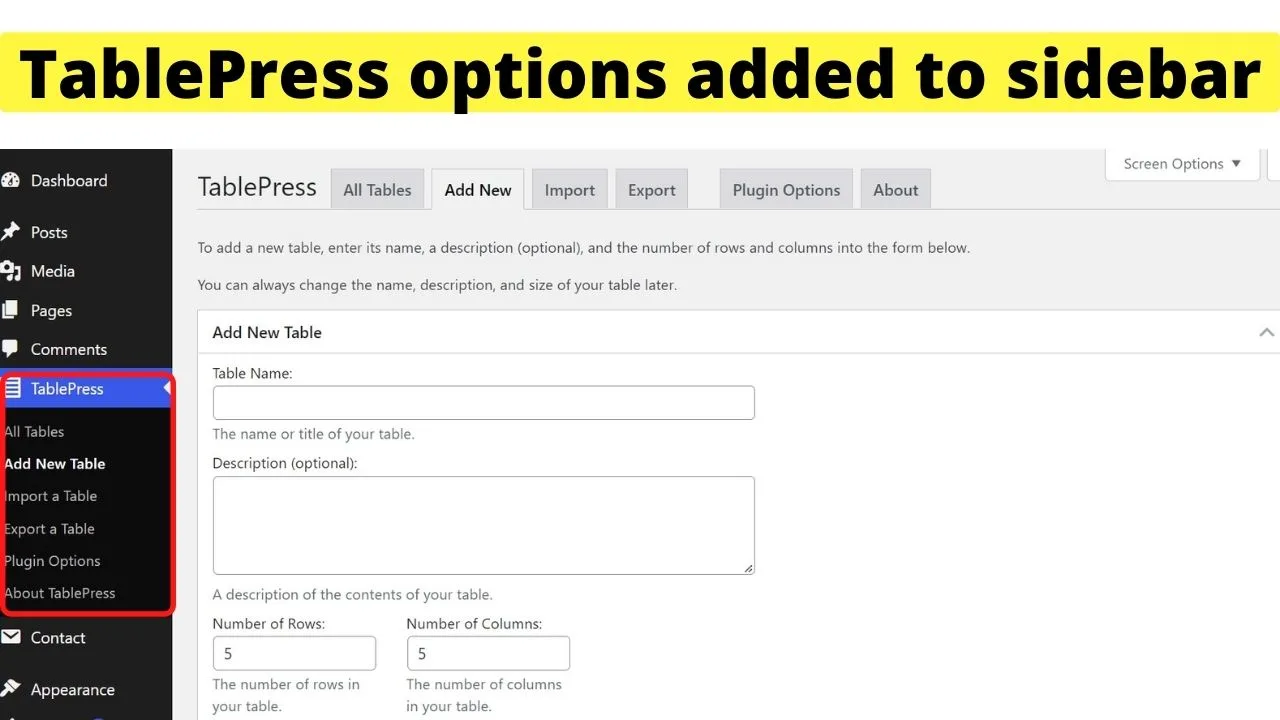
Give your table a name, then on the next screen, start adding your data.
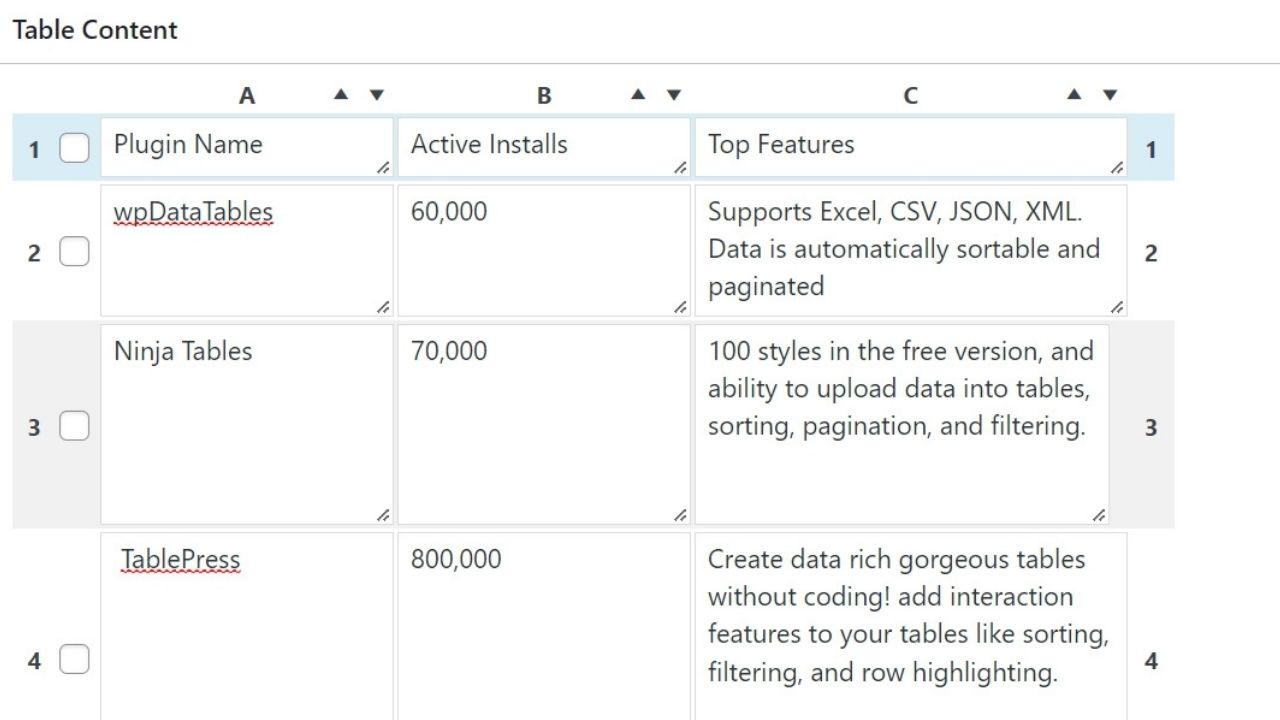
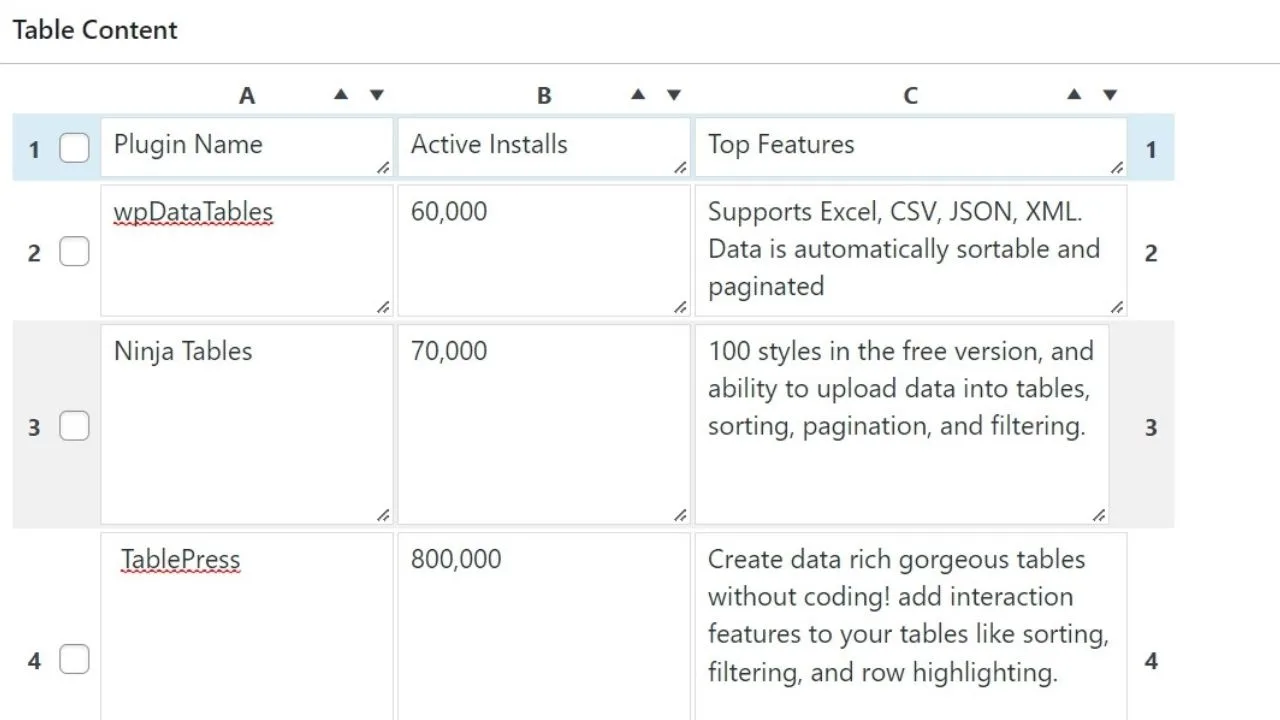
Once the data is added, scroll down the page, and you can start styling the table. Once you have it ready to publish, click “Save”, then copy the shortcode.
You can find the shortcode at the top of the table you are editing, or by selecting “all tables” on the left sidebar.
Load the page or post you want to include the table on, paste in the shortcode, press preview, and the table will be embedded within the content.


The TablePress plugin makes creating tables in WordPress a breeze. In addition, there is a wide range of add-ons that extend the functionality for more powerful tables with advanced features, including using PHP.
Currently, TablePress extensions can be downloaded, tried, and tested before paying, and even at that, the developer suggests a donation amount rather than requiring a purchase upfront.
I personally do love TablePress a lot. It is very easy to use and offers a ton of customization options.
A thing I particularly like about TablePress is the fact that you can very quickly edit existing tables.
TablePress makes it very easy to edit these tables as for each table you insert into a page or article, you will always find an “Edit” link directly under the table (in Live Mode) that lets you easily add or delete stuff on the fly.


Hey guys! It’s me, Marcel, aka Maschi. On MaschiTuts, it’s all about tutorials! No matter the topic of the article, the goal always remains the same: Providing you guys with the most in-depth and helpful tutorials!

