Are you curious how shop owners in Etsy make their shop covers or banners stand out from the rest?
Well, you don’t need to become expert graphic designers to be able to make Etsy banners that are eye-catching.
And, since Etsy banners are meant to be used as an information board, you can change what you put on them from time to time.
So, if you’re ready to learn how to make Etsy banners with Canva as your graphic design tool, read on.
How to Create an Etsy Banner in Canva
You can start creating Etsy banners from pre-designed templates or from blank ones. Whatever you choose, change the background and add graphic elements to help show your customers what your shop is about. The key here is to keep your design simple, informative yet attractive.
Making Etsy Banners in Canva — The How-tos
Creating banners for your Etsy shop in Canva depends on whether you want to create one from scratch or if you simply want to make one as quickly as you can.
Regardless of your reasons for designing Etsy banners, you’ll learn here how to create one from blank and pre-designed templates.
Designing Custom Etsy Banners in Canva
Step 1: On Canva’s home page, head to the Custom Size button and encode the dimensions for your Etsy banner.
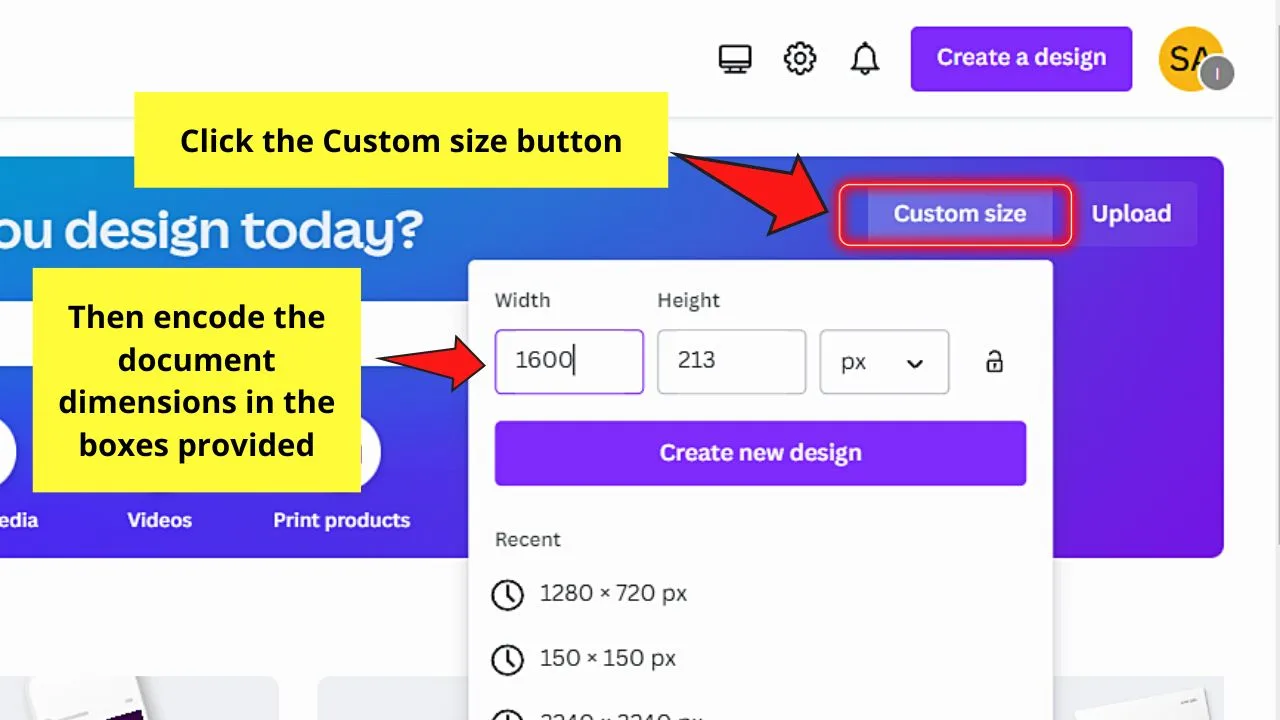
If you’re new to Etsy, you’ll be surprised to know that you can create 2 kinds of banners: a big one and a mini version.
For the big Etsy banner, 3360 x 840 px is the ideal size, while for the mini banner, 1600 x 213 px is the recommended one.
Whatever option you use, keep the document in landscape mode. And, if you’re not sure how to change to landscape mode in Canva, better read about it on this site.
Step 2: Once you’re on the editor page, start by changing the background.
If you prefer a plain background, click on the canvas and select the color picker tile on the editor toolbar.
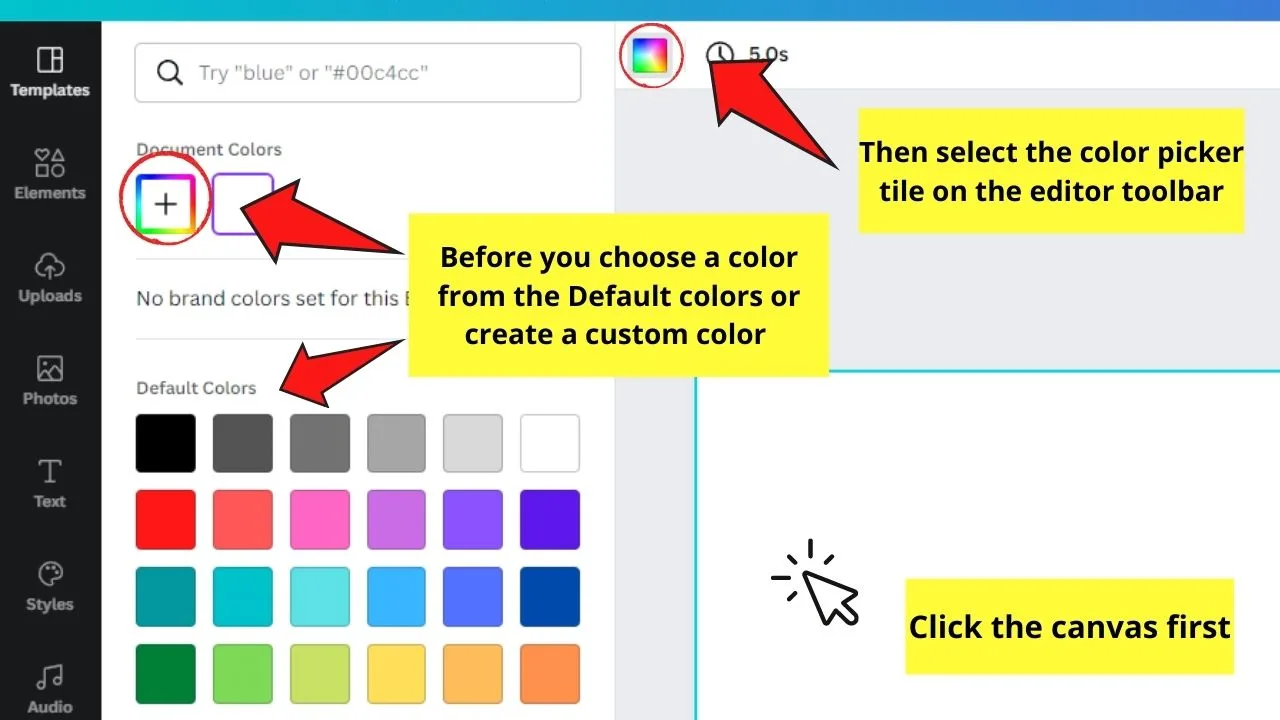
Select from Canva’s default color gallery or create custom ones by clicking the rainbow-colored “+” tile.
Step 3: But, if you prefer to use images that are related to what you sell on Etsy, head to either the Uploads tab to use your images or to the Photos tab to select from Canva’s vast stock image gallery.
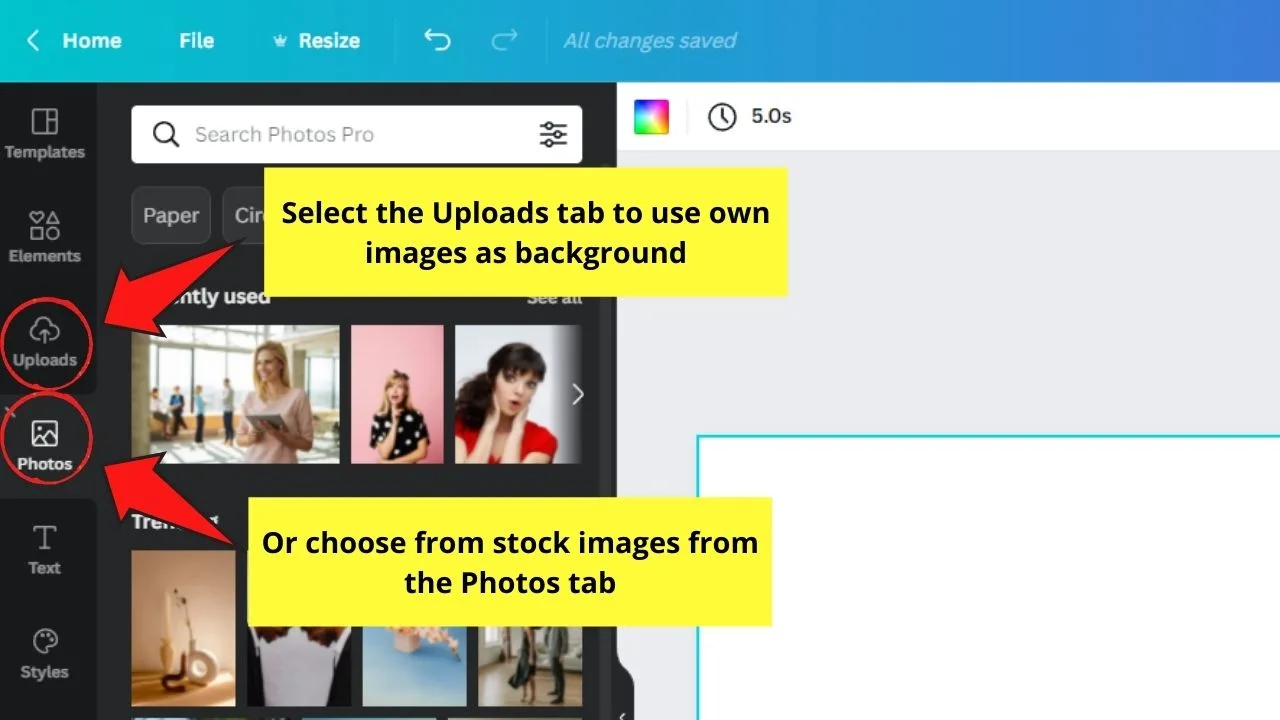
Then, drag the photo you selected on the canvas. Resize the image by dragging the white circles until the image occupies the whole canvas.
But, to simplify this step, just right-click on the photo and choose the Set image as background option.
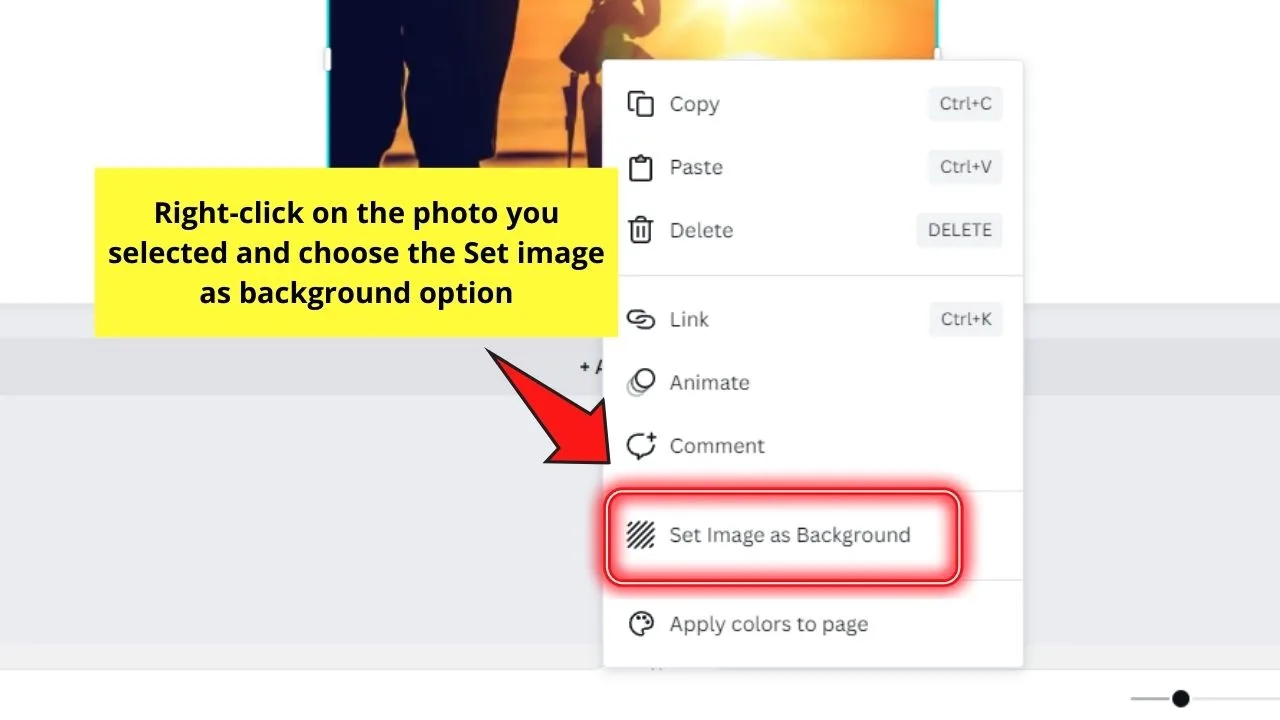
Then, adjust the crop positioning of the photo by double-clicking on it and dragging the photo sideways, downward, or upward. Click outside the gray area to save the changes you created.
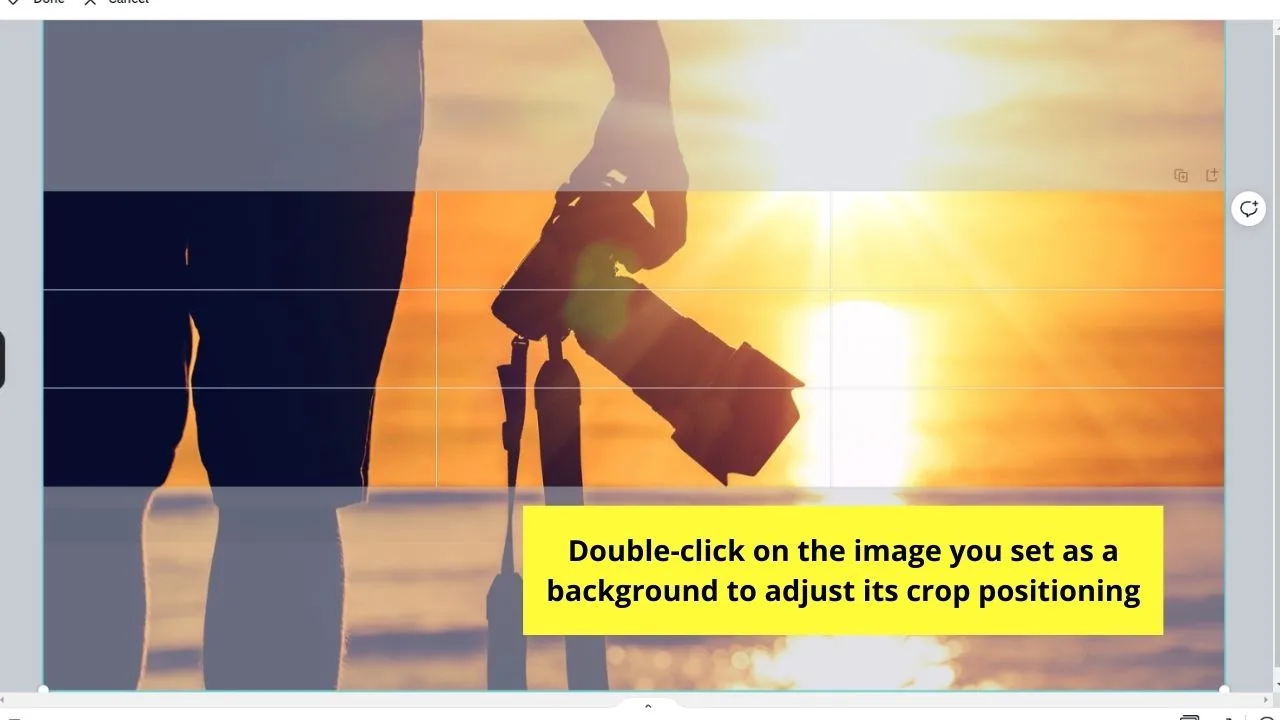
Step 4: Once you’re satisfied with your banner’s background, head to the Elements gallery to add your graphic elements.
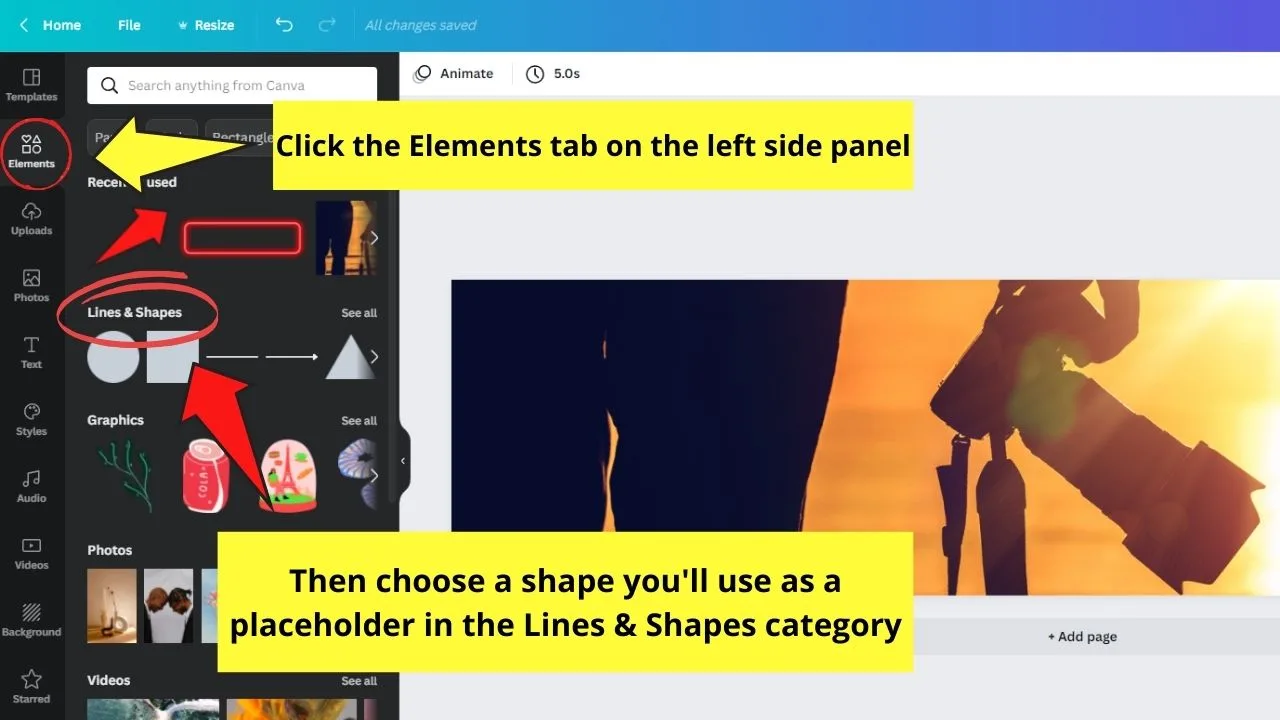
You can opt to fill a shape with an image using various frames from the Frames section, or you can simply add a shape as a placeholder for your text from the Shapes & Lines section.
If you select the 2nd option, click and drag the shape (preferably square) and resize it to make it fit the whole length of the page.
You can opt not to make the placeholder that big, but make sure that the text you’ll put in it fits.
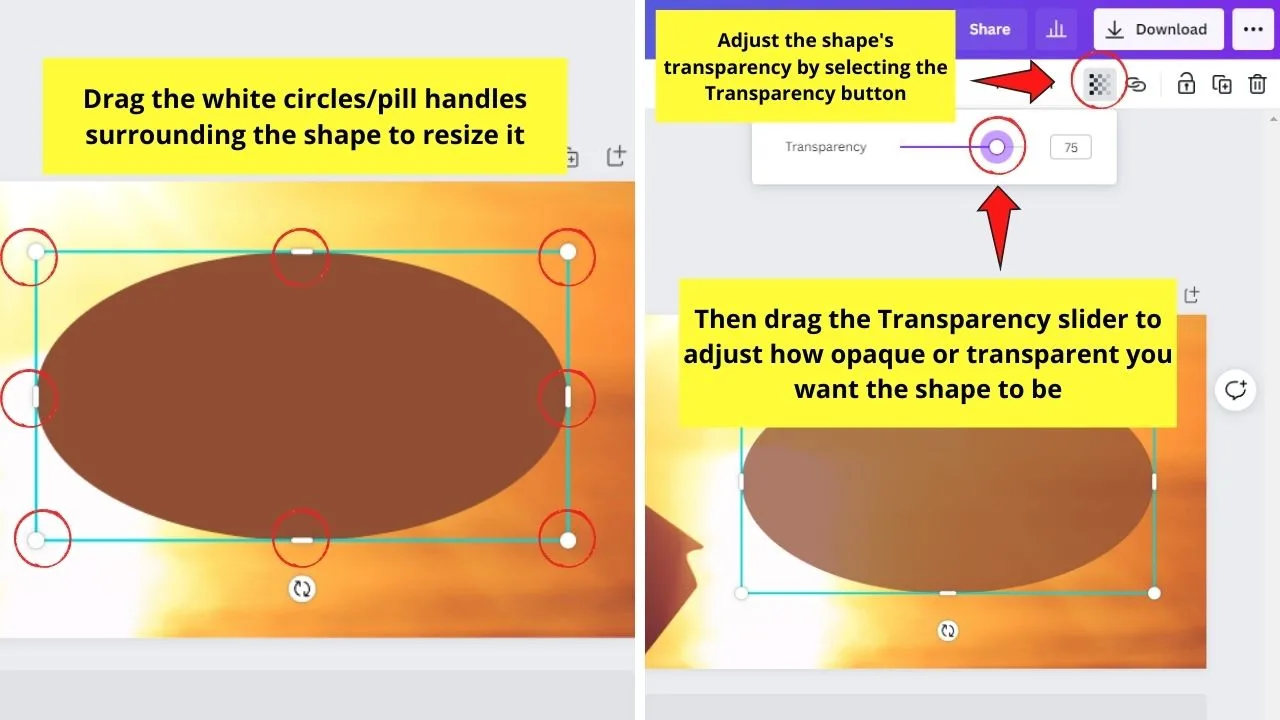
Then, adjust the transparency of the placeholder by selecting the Transparency button in the editor toolbar. Then, drag the slider to adjust the placeholder’s transparency.
You can even change the shape’s color by clicking on it and selecting a hue from the color picker button.
Using shapes as placeholders is an effective method to make the text stand out more especially when the background image used is quite a busy one.
Step 5: If you want to add your store’s logo to your Etsy banner, simply head to the Uploads tab and select the Upload media button.
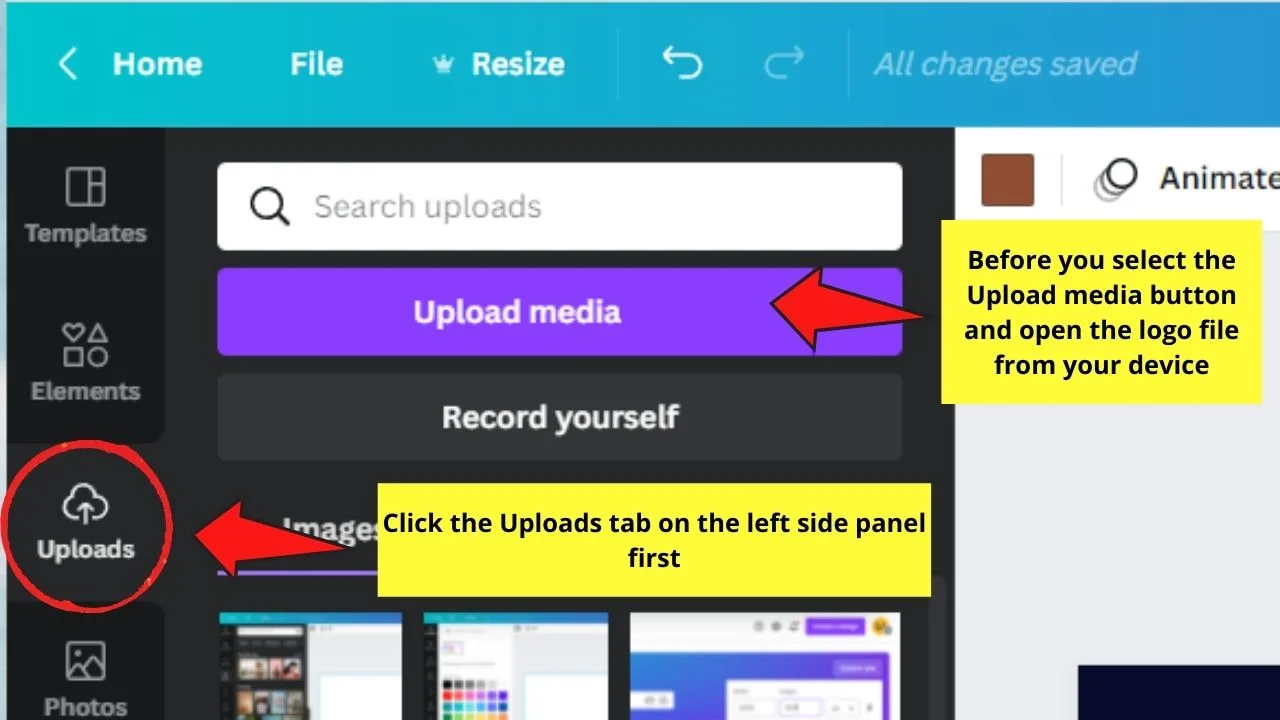
Then, once the logo’s in the Uploads gallery, click and drag it to the canvas so you can resize and position it accordingly.
If you’re not sure how you can design a logo in Canva, you can view the footage below for a quick tutorial.
But, again, this step’s optional as you can place your store’s logo in other places on your Etsy page.
Step 6: Then, start adding text to your Etsy banner.
Press T on your keyboard to directly add text boxes to the canvas or head to the Text tab on the left side panel so you can choose to add the heading text box.
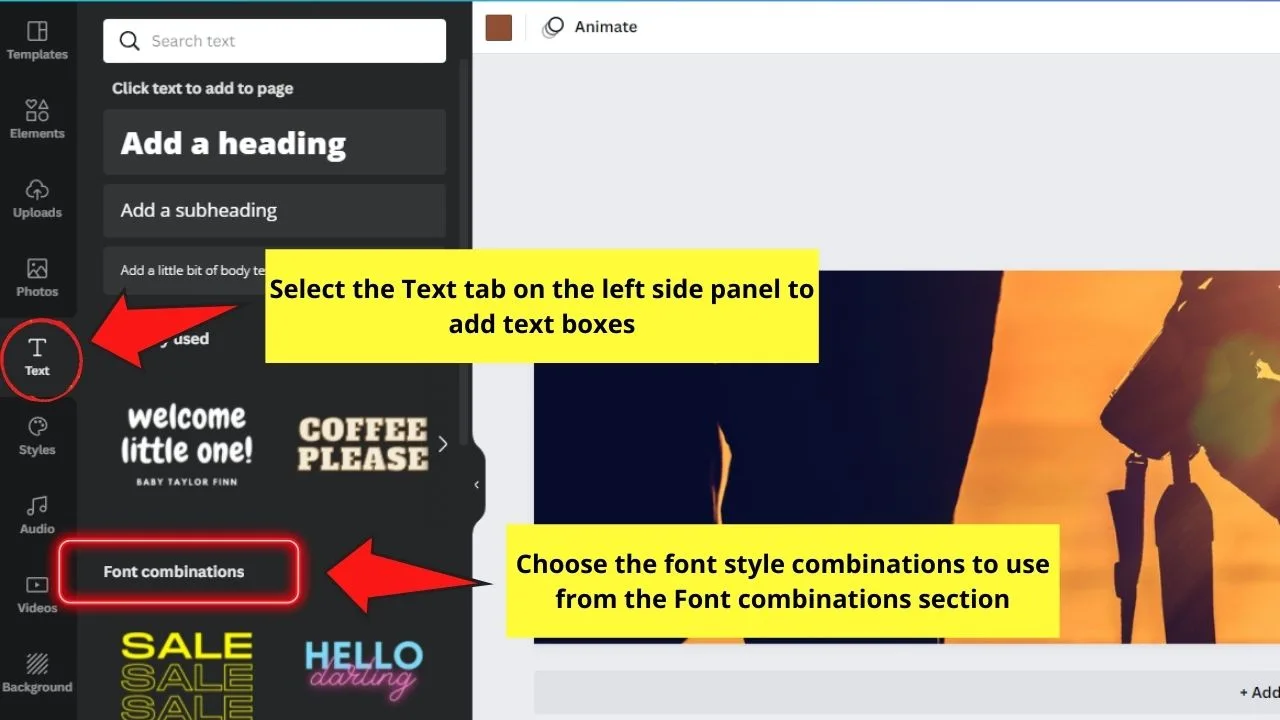
Or, you can opt to select a font style from the various font combinations available in the Text gallery as well.
Step 7: Download your newly-designed Etsy banner by selecting the Share button on the menu bar and the Download button in the dropdown menu that appears.
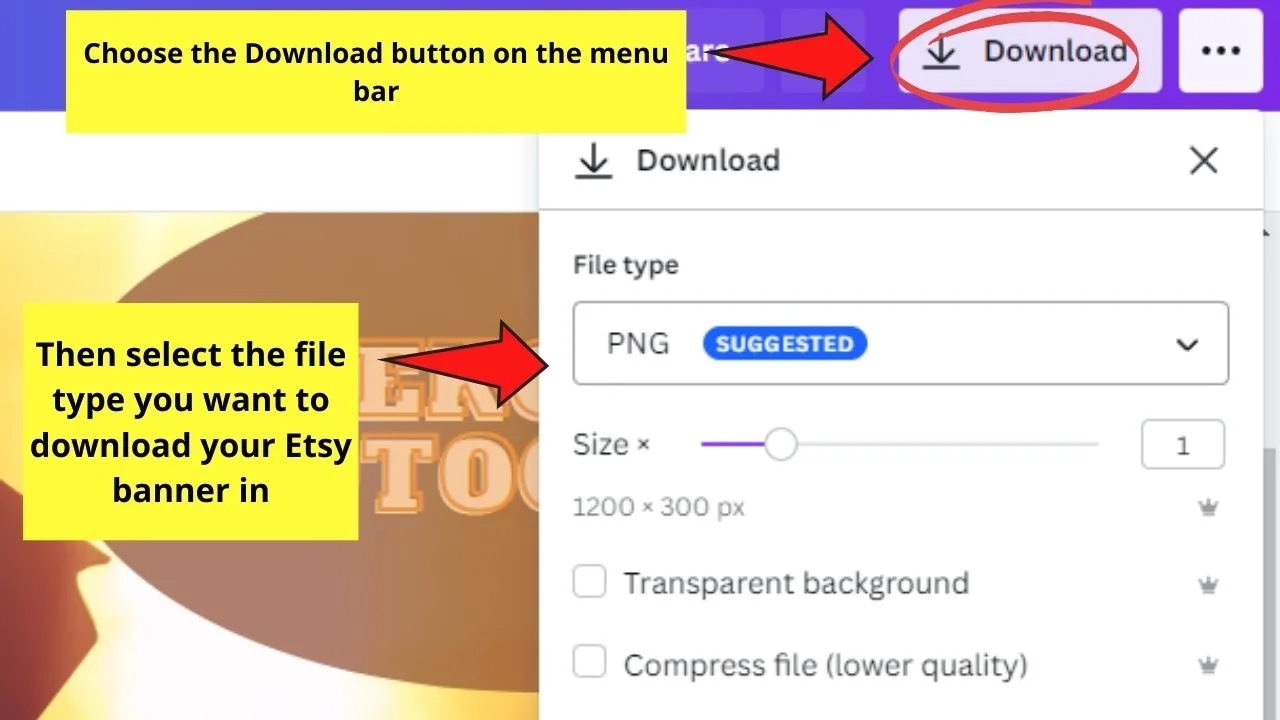
Then, choose the File type before you hit Download to save your Etsy banner design.
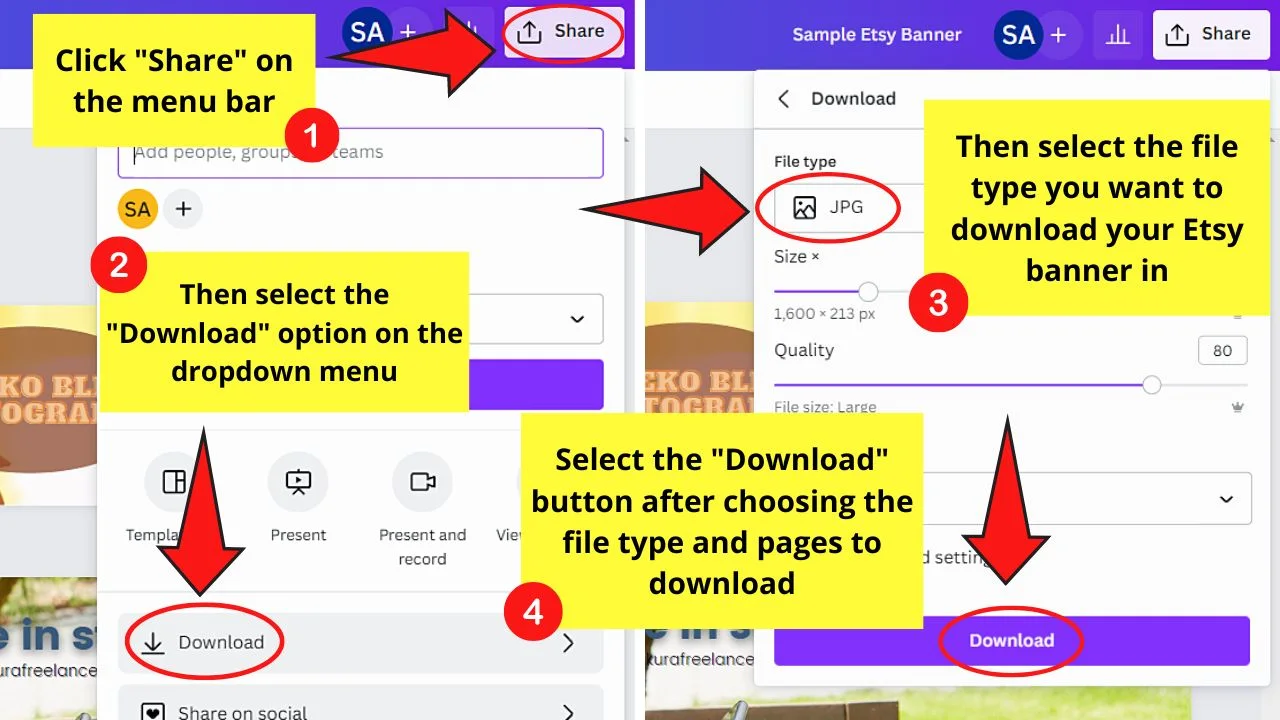
Once the download process is finished, just head to your Etsy store and upload your banner on it.
Sweet, huh? Well, you’d be more amazed at how easy it is to create Etsy banners in Canva if you use pre-designed templates.
Creating Etsy Banners Using Pre-Designed Templates
Step 1: On Canva’s home page, head to the search bar and type in “Etsy banner.”
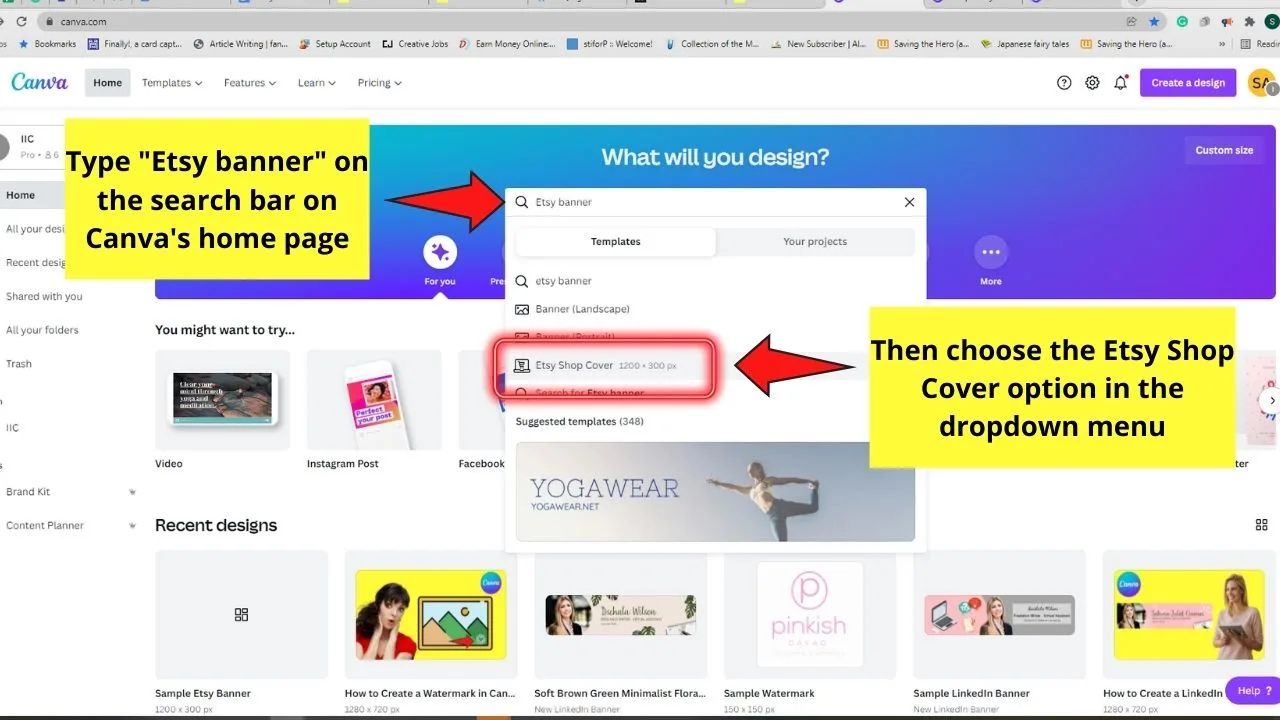
Click on the Etsy Shop Banner option (the one that indicates the 1200 x 300 px size). You will then see the template gallery.
Step 2: Once you’re in the template gallery, browse through the Etsy banner templates available and click one that you want to use.
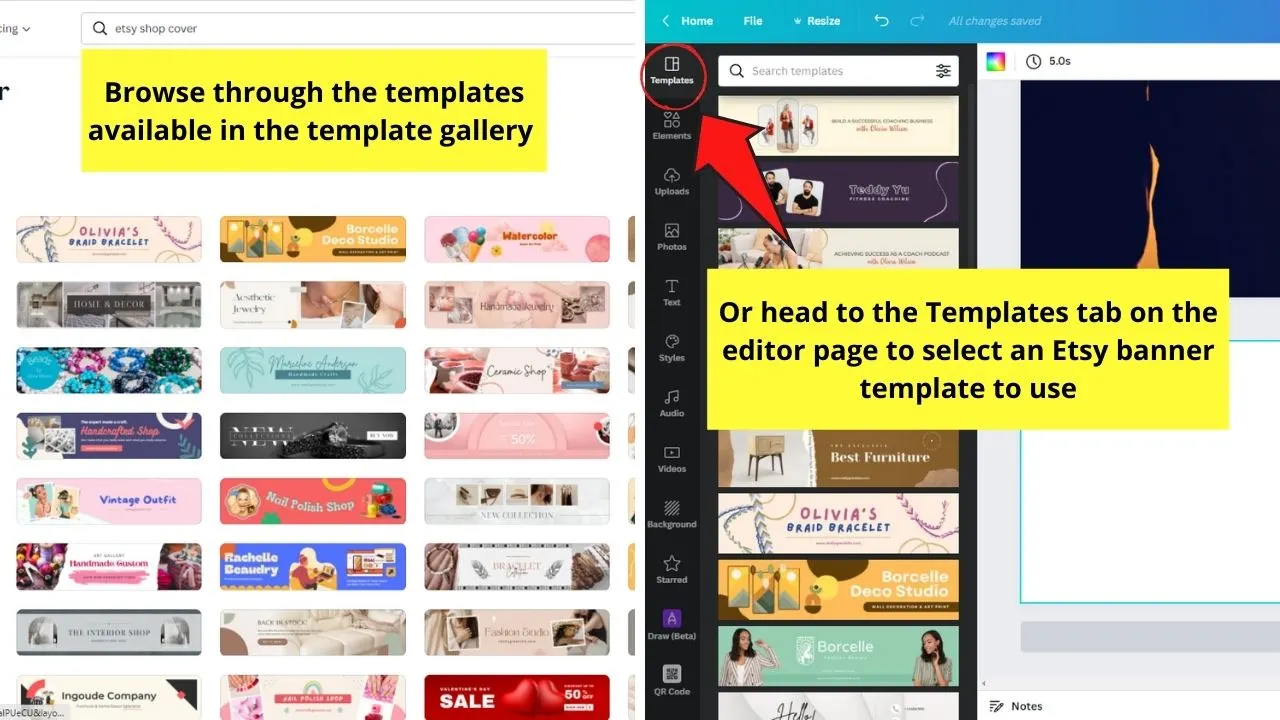
You can also head to the Templates tab on the editor page to browse through the Etsy banner template designs available.
Step 3: Begin customizing the Etsy banner template by editing the text components.
You begin by replacing the messages inside the text boxes by double-clicking and typing your store’s name on it instead.
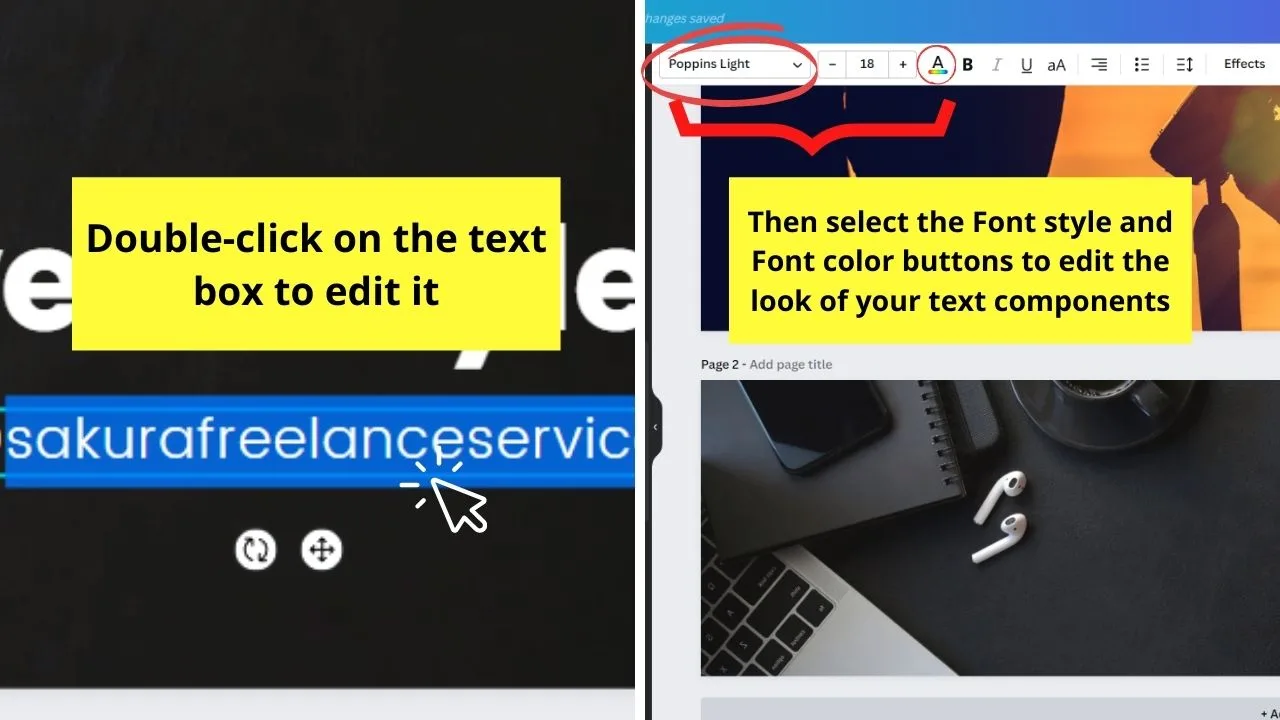
Then, change the text’s font style and color by selecting the text first before heading to the Font style and Font color buttons respectively.
Resize the text box by dragging the white circles.
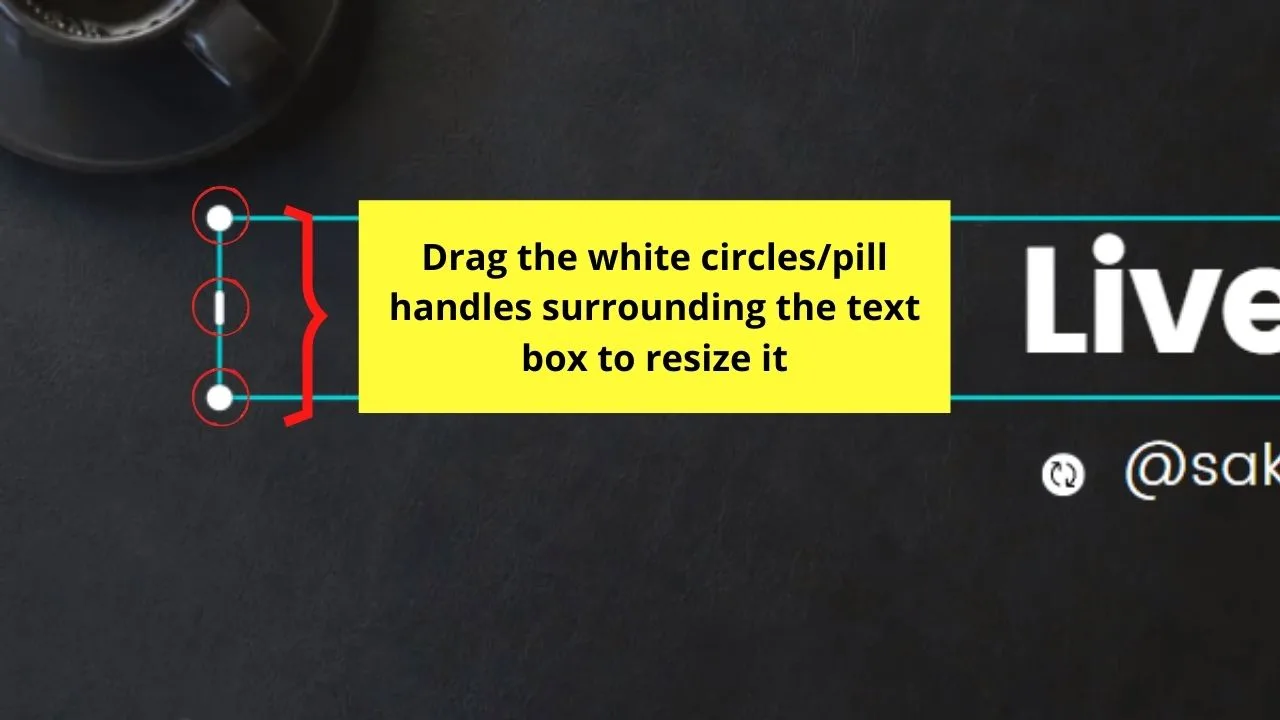
You can also indent the text inside the text box to add some stylish flair to your Etsy banner. If you prefer a video tutorial on this, view the footage below.
Step 4: Once you’re done editing the text components of the banner, time to change the background.
If you simply want to replace the background image used, just click on the photo and press Delete to remove it.
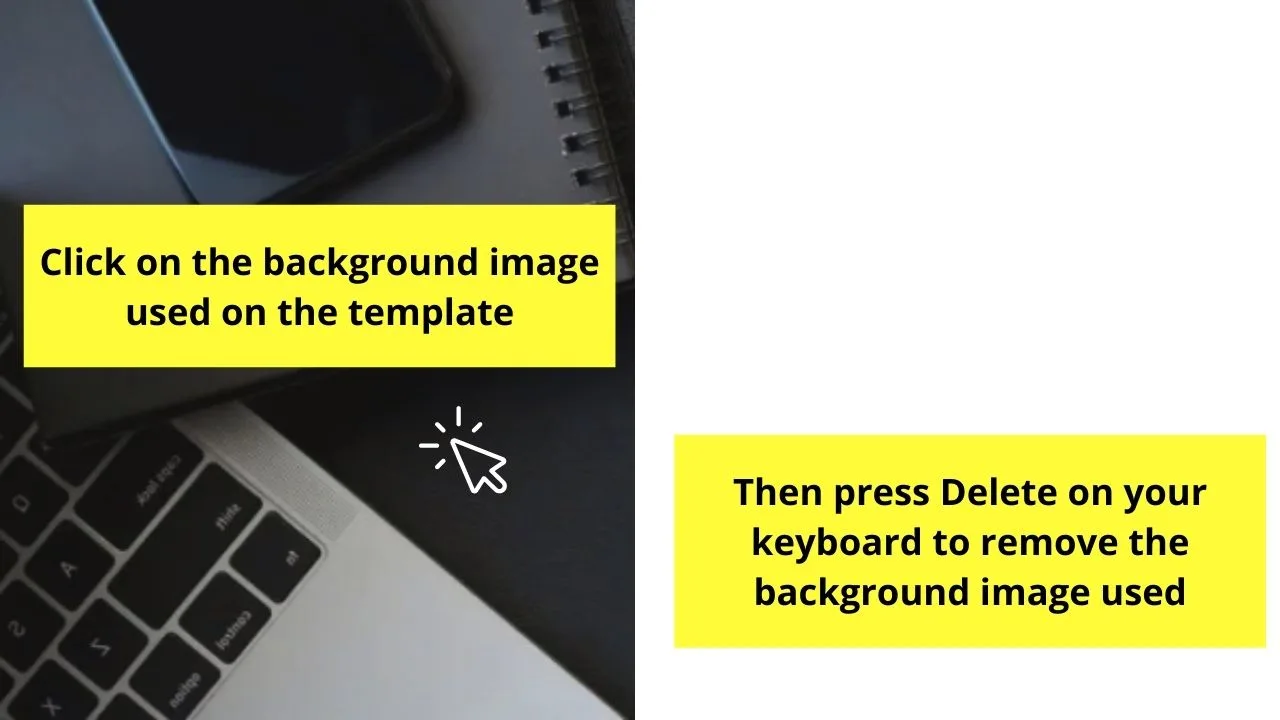
Then, head to the Photos tab on the left side panel and use the search bar function to find the photo that best fits your Etsy store.
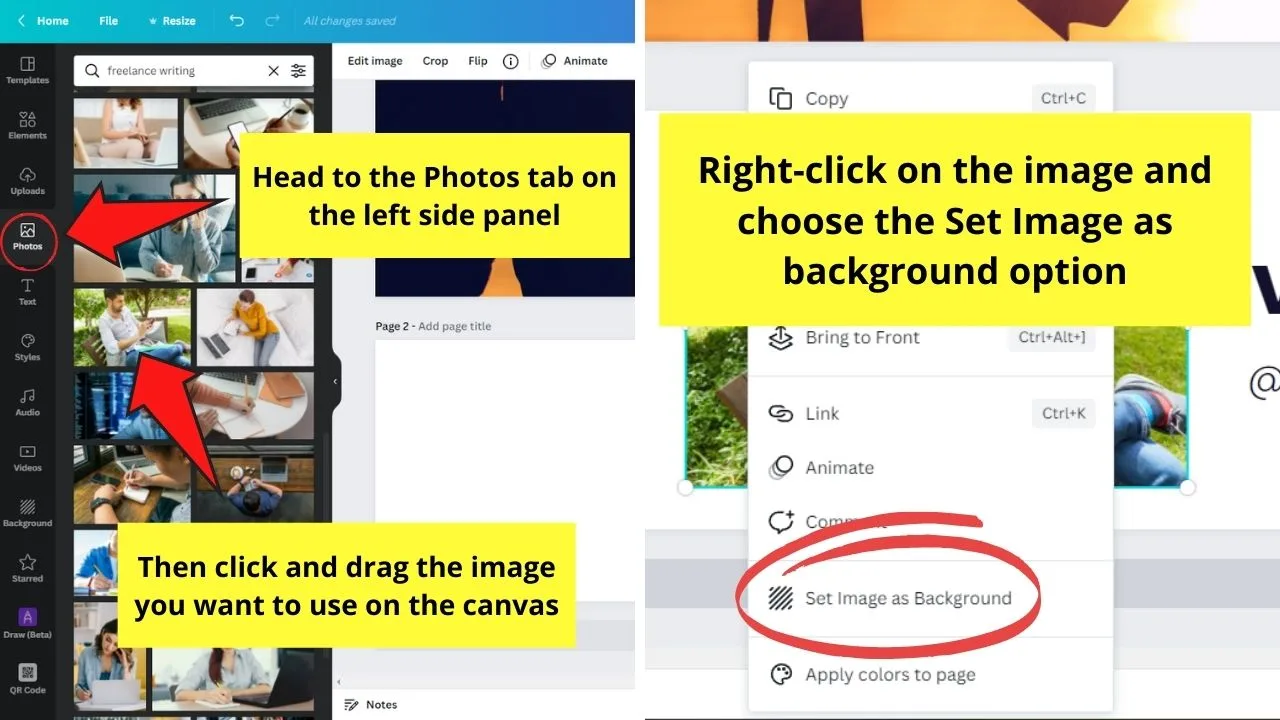
Click and drag the image to the canvas, right-click on it and click the Set image as background option.
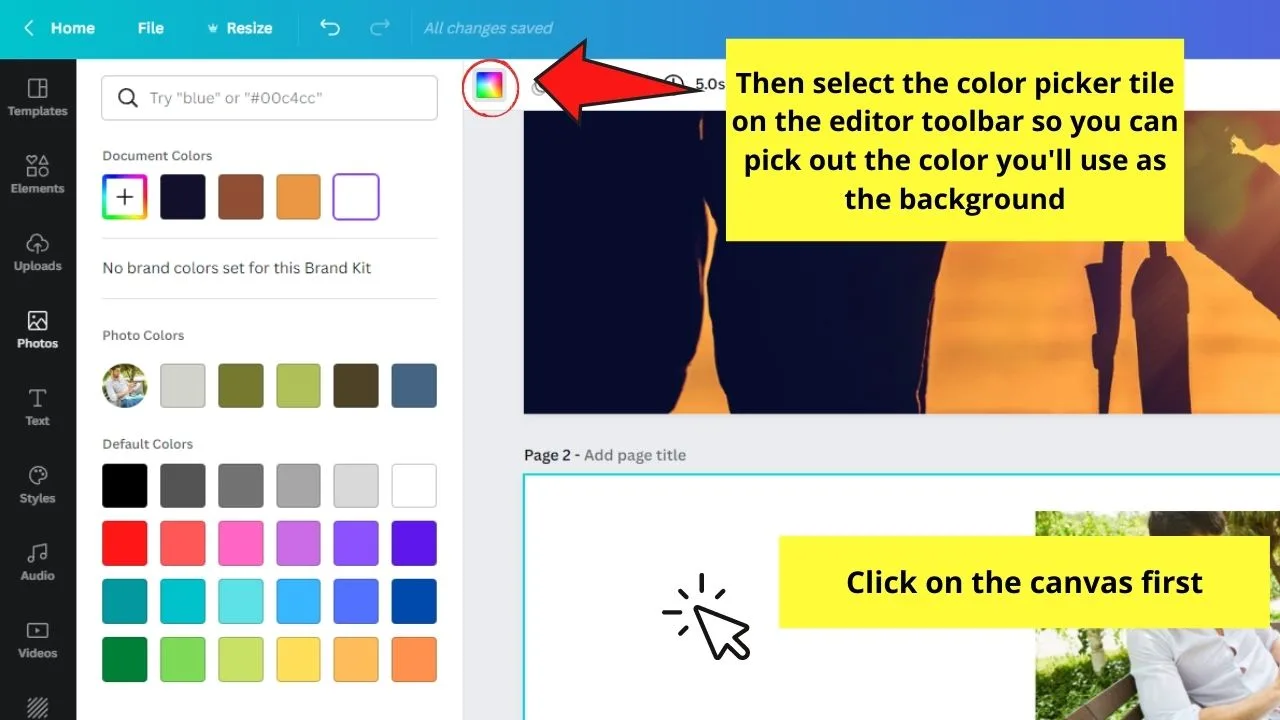
But, if you opt to use plain colors, select the canvas and click the color picker tile to choose from the Default colors or create a new hue through the rainbow-colored “+” tile.
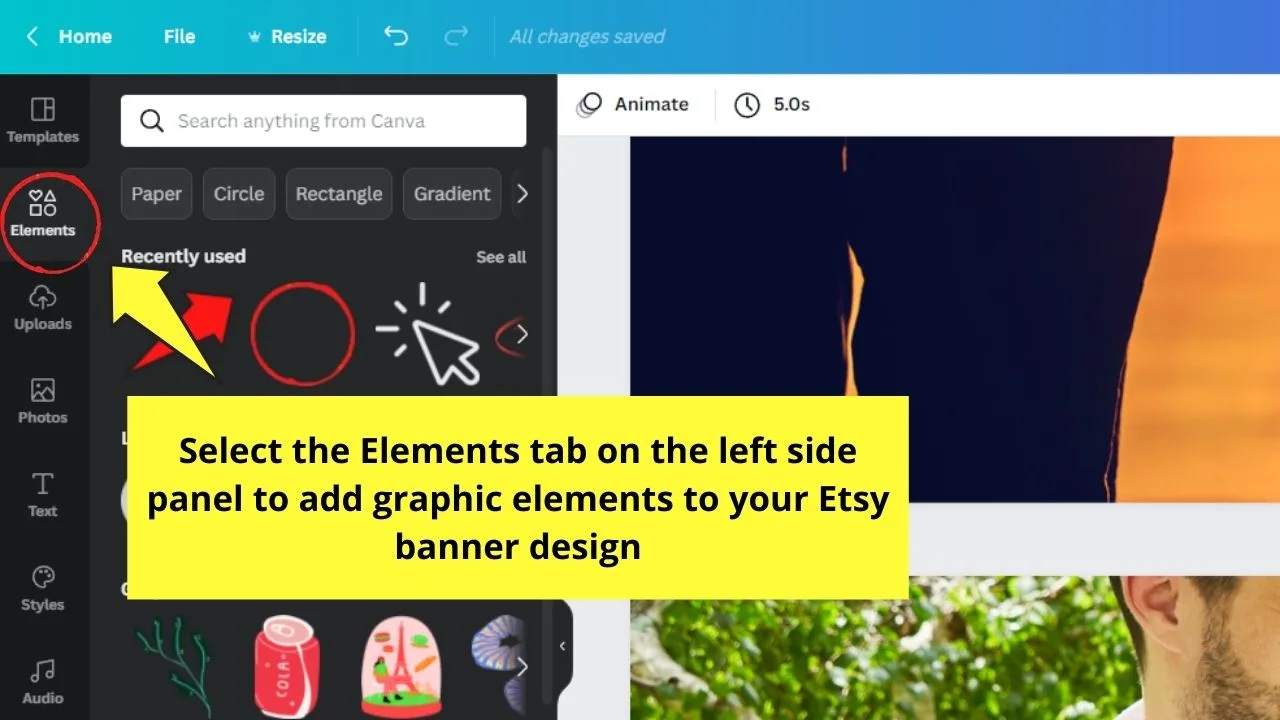
Step 5: If you want to add graphic elements, head to the Elements tab and type the keyword of the element you’re looking for.
But, this step can be optional as you don’t want to put too much clutter on your Etsy banner.
Simplicity and attractiveness are the main factors you should consider when designing one.
Step 6: Once you’re good with how your Etsy banner looks, click the Download button and follow the steps to export the image to your device.
Then, head to your Etsy store and upload your new banner on it.
So, start designing your Etsy banner in Canva now!
Frequently Asked Questions about How to Create an Etsy Banner in Canva
What’s the ideal dimension to use when designing Etsy banners?
Ideally, Etsy banners are sized much smaller (760 x 100 px) than what Canva uses (1200 x 300 px/ 1200 x 160 px). But, using the smallest dimension will help in keeping your image in high-resolution and avoid any stretching.
What components should you include in an Etsy banner?
Since Etsy banners serve as the billboard of your store, you should put relevant information on them. As much as possible, keep your fonts and color scheme simple but eye-catching. You can even add your brand logo to the banner if you want.
Can you create Etsy banners even if you’re on a Canva free account?
You definitely can design Etsy banners with a free account in Canva. However, refrain from adding premium elements, images, and font styles to your design so you won’t pay anything. You’ll know if those elements are premium ones if you see the crown icon on their lower right.

Hey guys! It’s me, Marcel, aka Maschi. On MaschiTuts, it’s all about tutorials! No matter the topic of the article, the goal always remains the same: Providing you guys with the most in-depth and helpful tutorials!


