Whether you want to show that special someone just how you feel, create an asset for an event, or create something entirely new, there’s always room for a heart!
Since Illustrator doesn’t have a Heart Shape tool, though, how do you make one?
When making a heart in illustrator, you can either draw it by hand using the pencil tool, or build it using basic shapes. All you need to do is decide which method suits you best!
Here are two ways to make a heart in Illustrator.
How To Make A Heart In Illustrator Using The Pencil Tool
Press “N” to equip the Pencil tool. Go to “Window” and click on “Swatches”. Select a fill or stroke color from the Swatches panel. Use your cursor to draw a heart shape. Finally, right click on the Shaper tool and select the Smooth tool, then drag it over any rough edges in your shape.
This is a great method for creating a full shape quickly and can even help add a hand drawn feeling to your image if you want it to.
How To Make A Heart In Illustrator Using The Pencil Tool – Step-by-step Guide
Step 1:
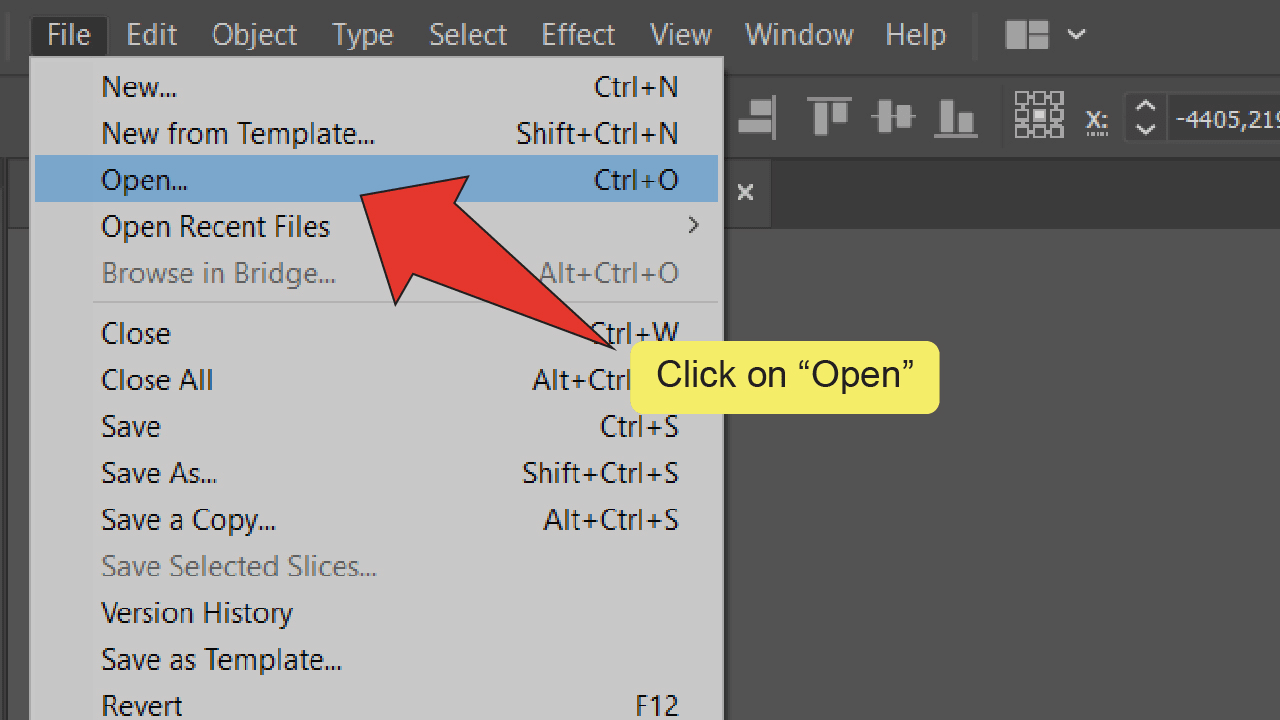
Open your Illustrator file. Open your document by double clicking on its corresponding Illustrator file, or if Illustrator is already open, you can go to “File” on the top menu, and then “Open” and choose the file you want to open. To speed things up, you can also use the keyboard shortcut COMMAND+O (MAC) “Ctrl+O” (Windows).
Step 2:
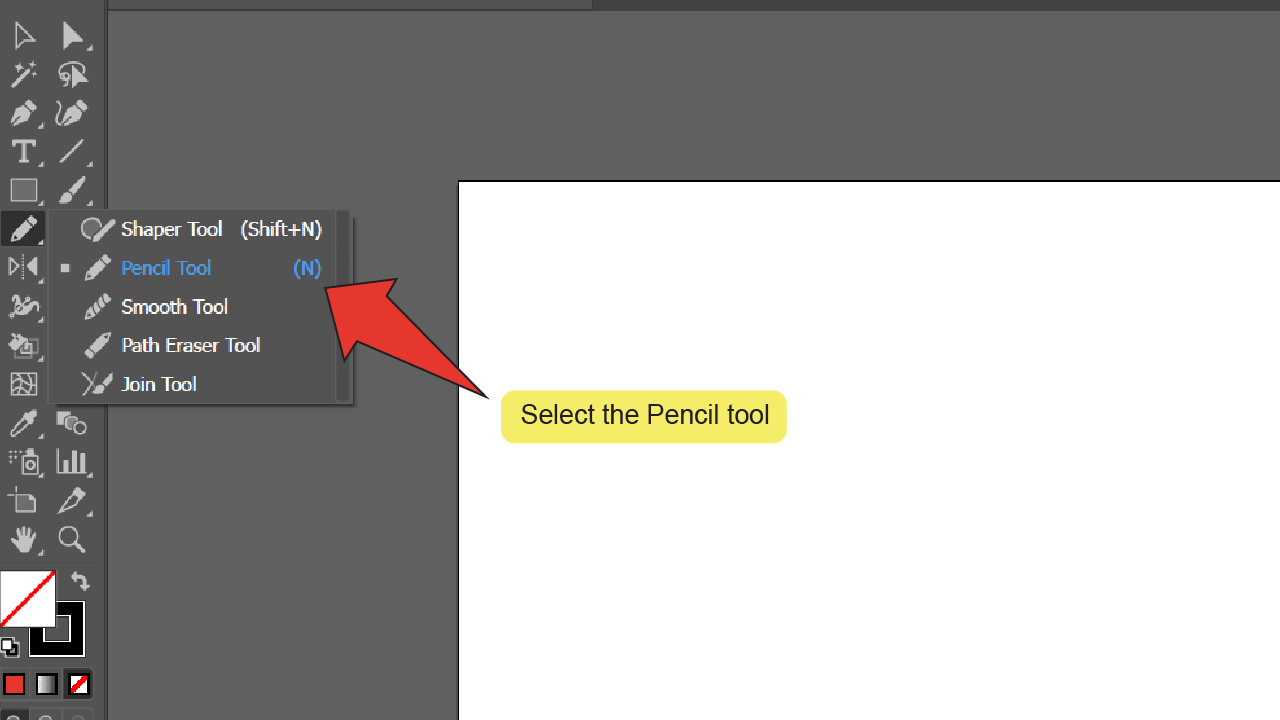
Find and equip the Pencil tool. Look for and right click the Shaper tool, located on the toolbar on the left side of your screen then select the Smooth tool to equip it. Alternatively, you can use the keyboard shortcut “N” to quick-select the tool.
Step 3:
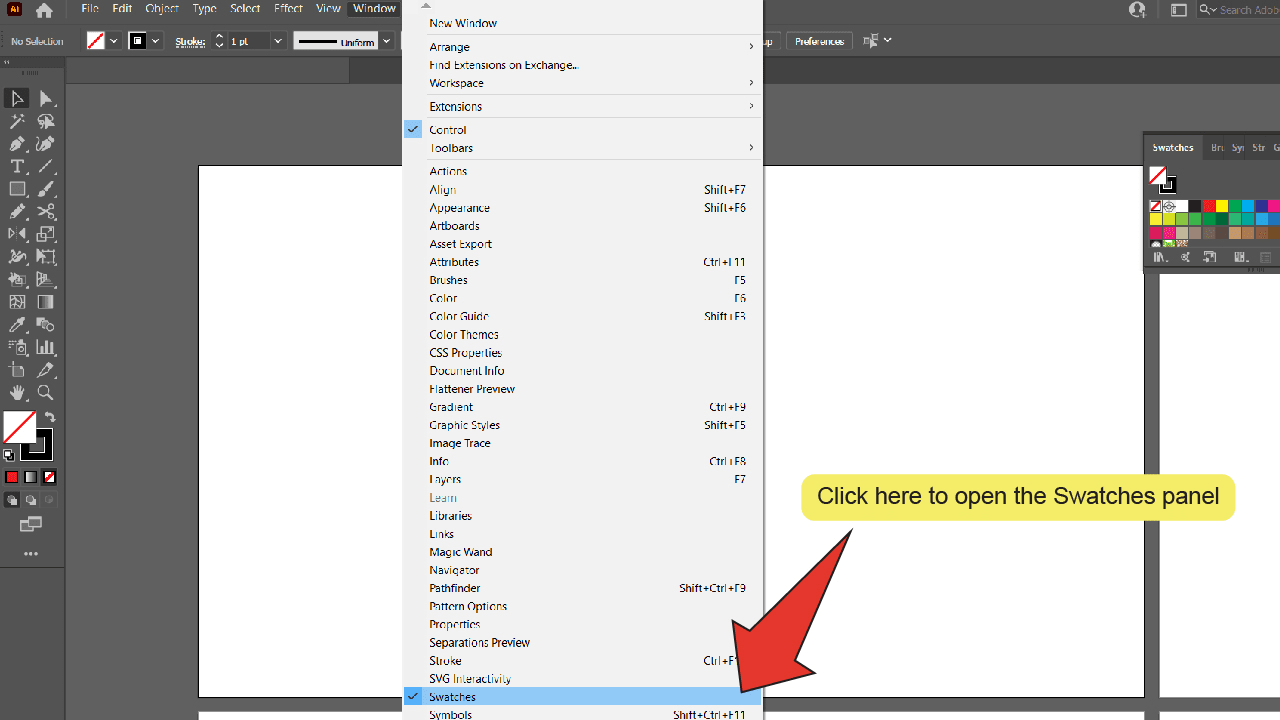
Open the Swatches panel. At the top of the screen, go to “Window” and click on “Swatches”. The Swatches panel should pop up at the right side of your screen.
Step 4:
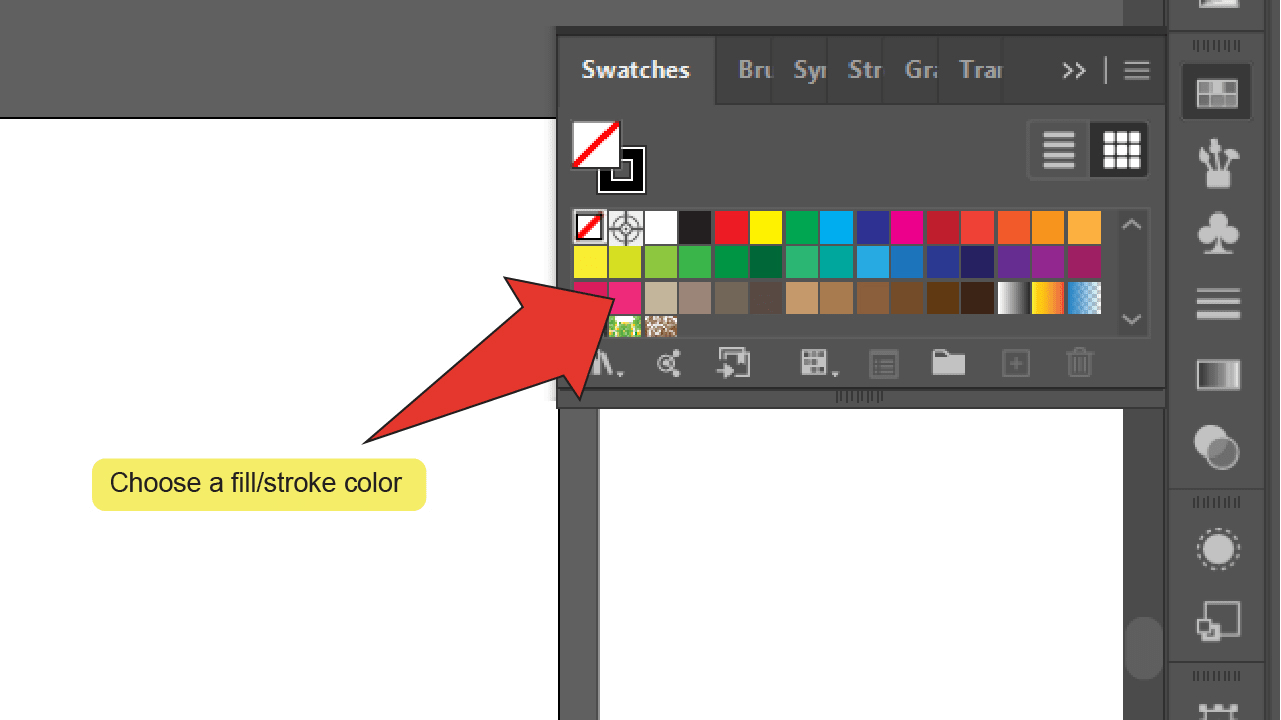
Select a fill and/or stroke color. Click on any color from the swatches panel to select it as your fill or stroke color. You can press the “X” key to toggle between editing your fill and stroke color. You can also press “Shift+X” to switch your stroke and fill colors.
Step 5:
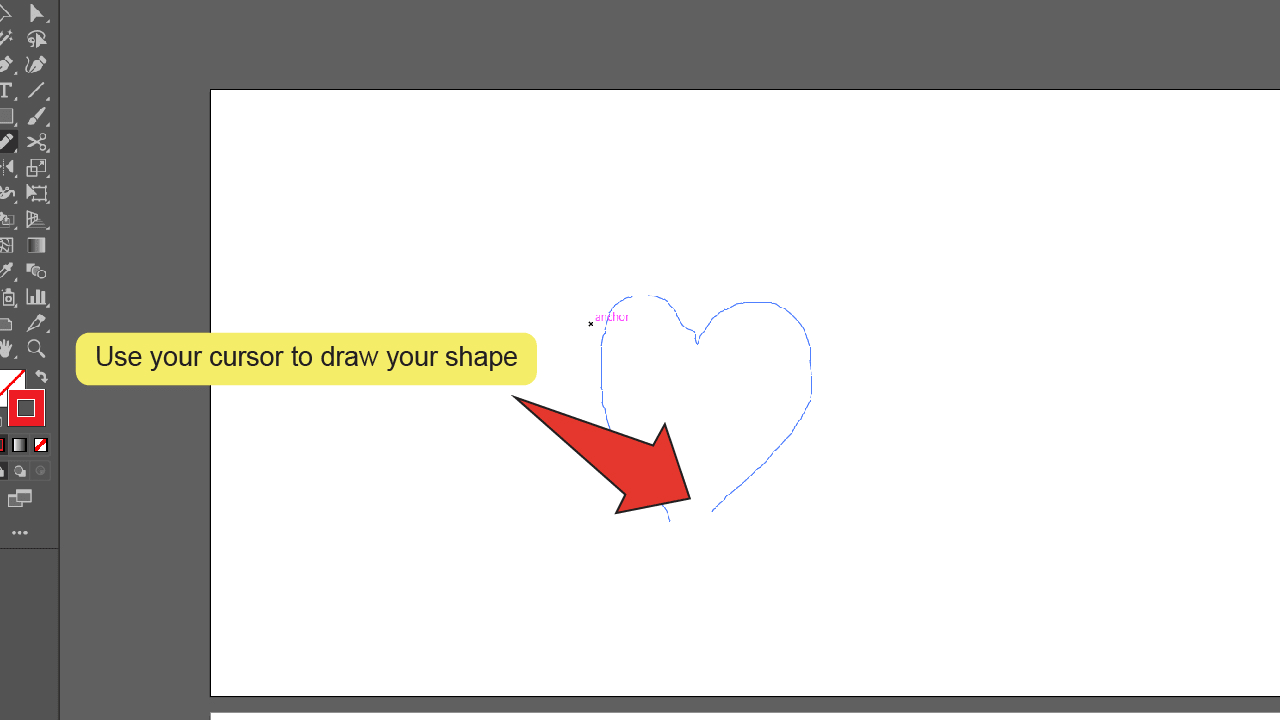
Draw your shape. Trying to start and finish from approximately the same point, click and drag your cursor in the shape of a heart.
Step 6:
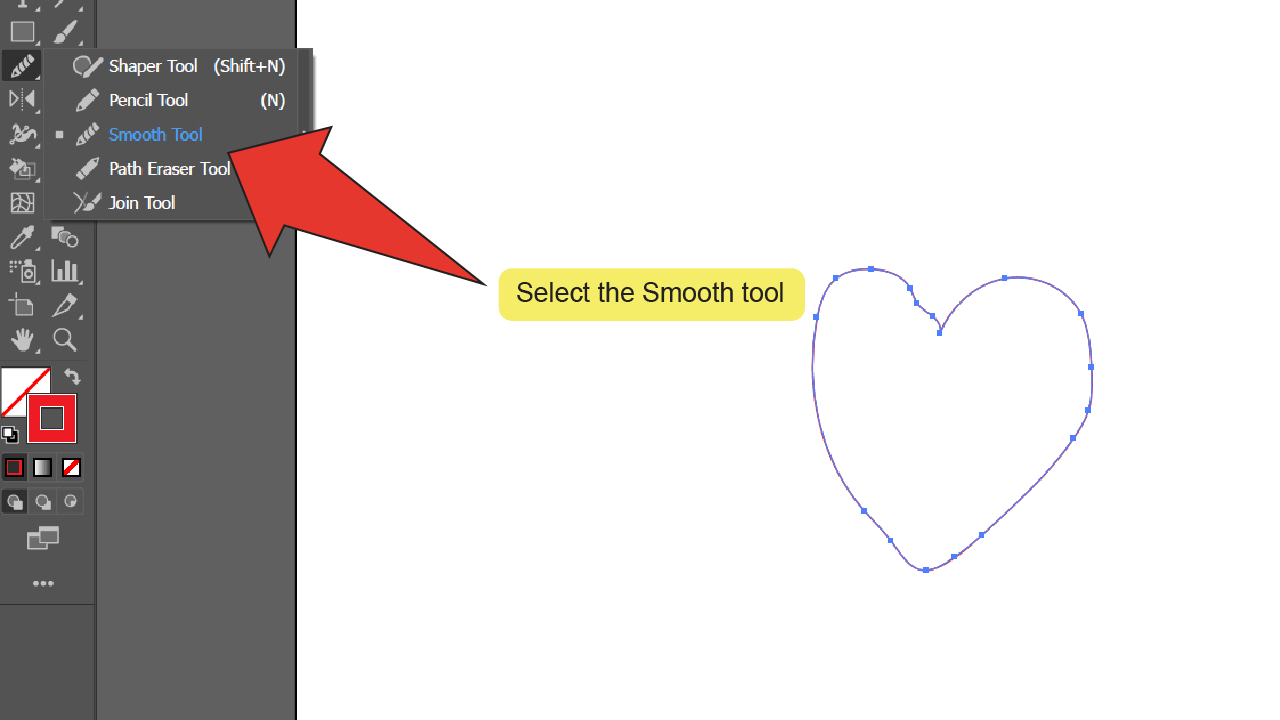
Find and equip the Smooth tool. Look for and right click the Shaper tool, located on the toolbar on the left side of your screen, then select the Smooth tool to equip it.
Step 7:
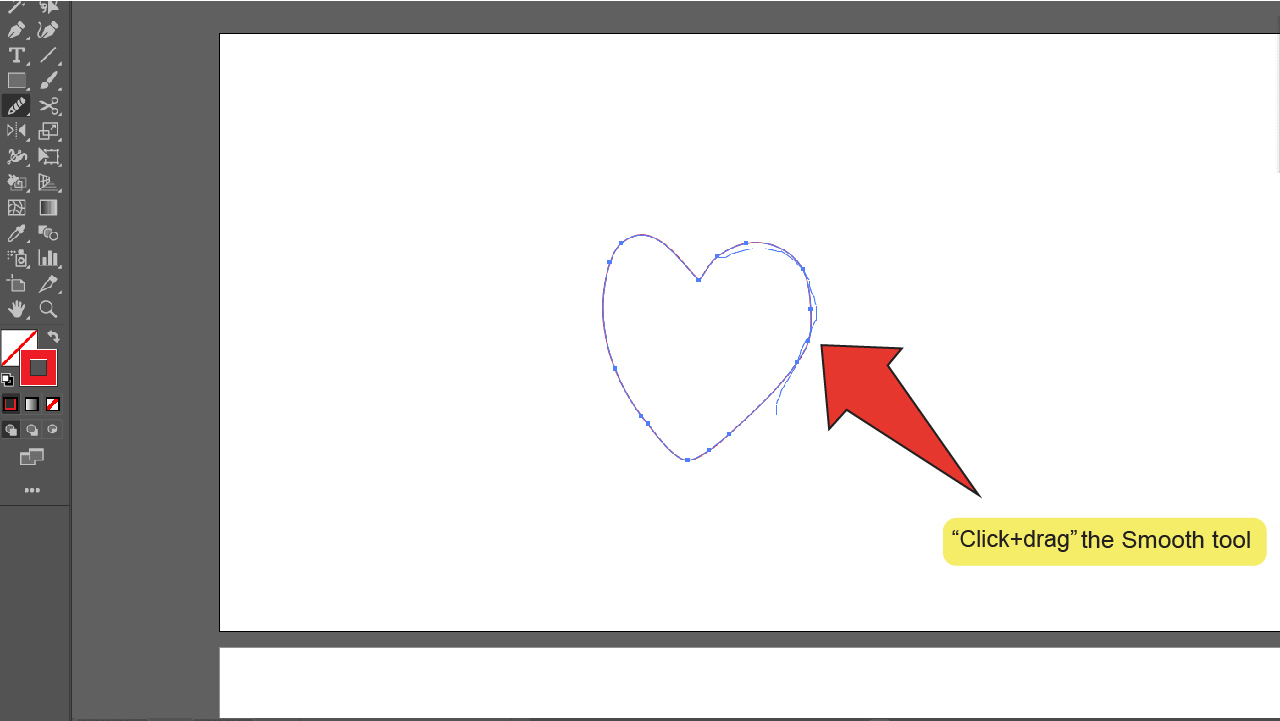
Refine your shape. Making sure that your shape is still selected, click and drag your cursor over any rough edges around your shape to smooth them out.
2. How To Make A Heart In Illustrator Using Vector Shapes
This method involves using basic shapes (just two circles and a square) to build a heart shape almost like a puzzle.
How To Make A Heart In Illustrator Using Vector Shapes – Quick Guide
Press “L” to equip the Ellipse tool. “Shift+Click+Drag” to draw a circle. “Alt+Click+Drag” to copy it. Press “M” to equip the Rectangle tool. “Shift+Click+Drag” to draw a square. Turn the square 45 degrees. Arrange your shapes to form a heart. Go to “Window” then “Pathfinder” and click on “Unite”.
2. How To Make A Heart In Illustrator Using Vector Shapes – Step-by-step Guide
Step 1:
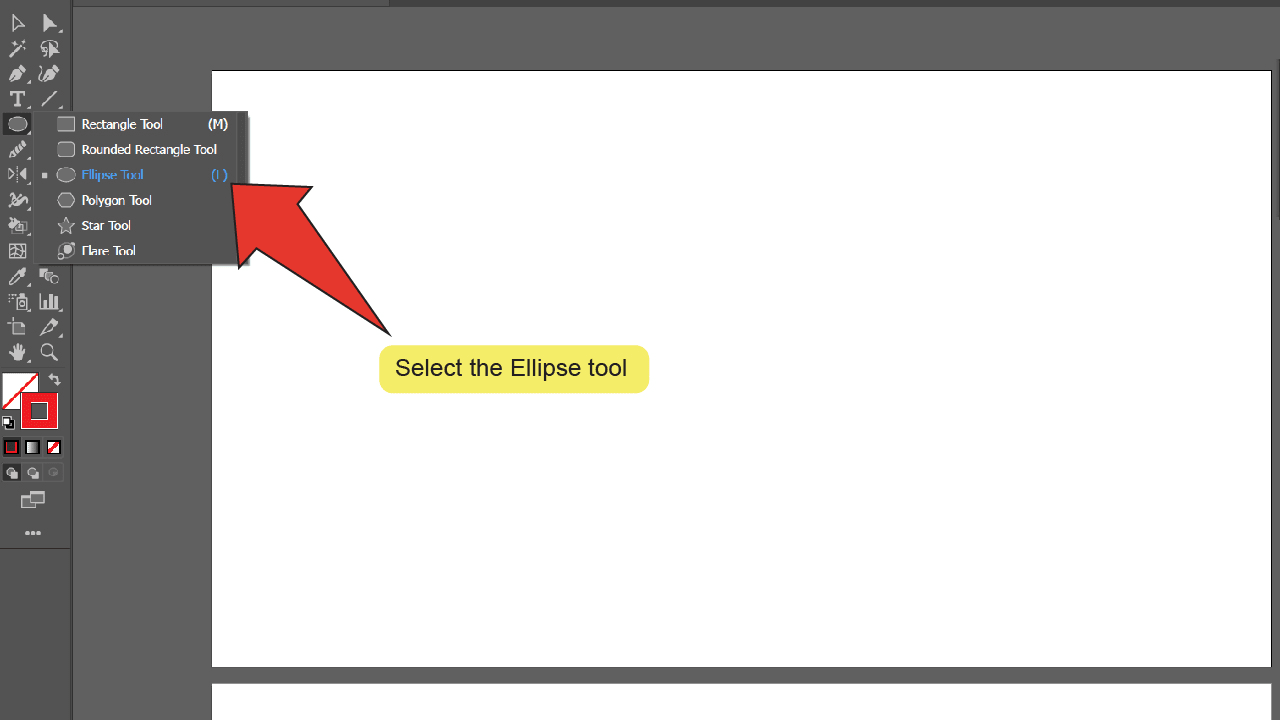
Find and equip the Ellipse tool. Look for and right click the Rectangle tool, located on the toolbar on the left side of your screen, then select the Ellipse tool to equip it. Alternatively, you can use the keyboard shortcut “L” to quick-select the tool.
Step 2:
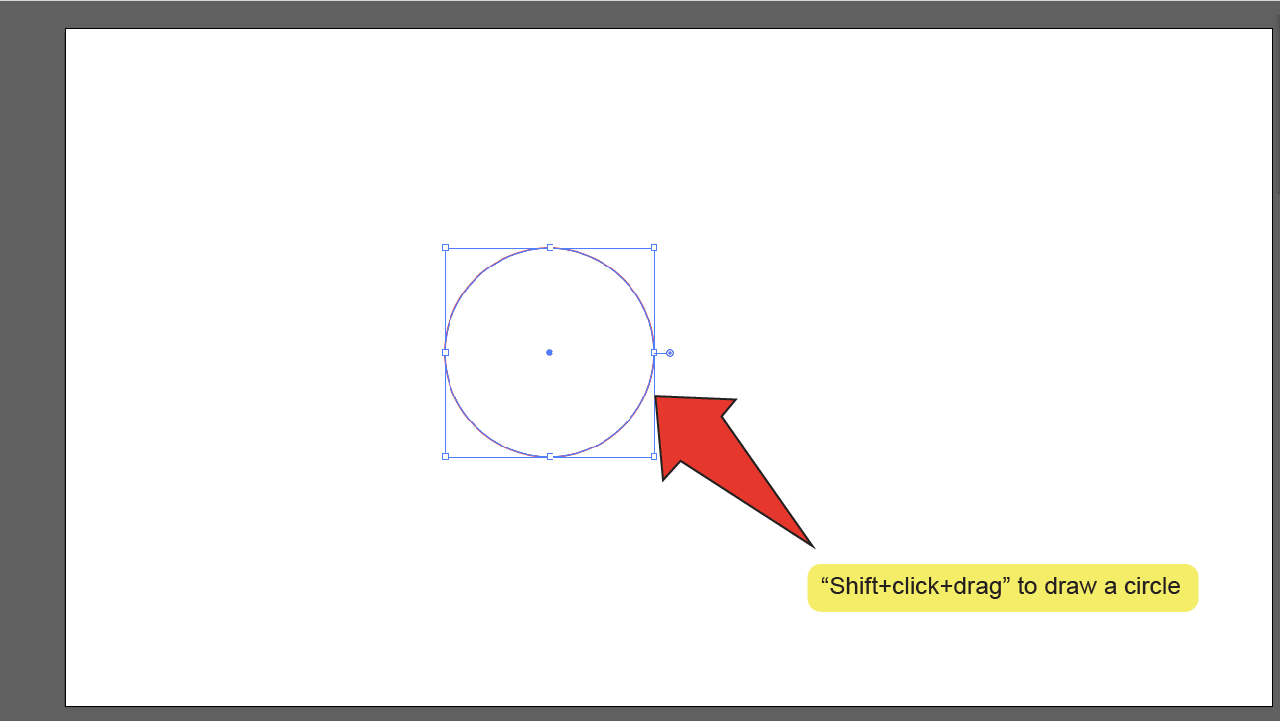
Place your first circle. Hold down the “Shift” key, then click and drag anywhere on your artboard to draw your first circle. For a more exact size you can click on the artboard and enter the dimensions of your shape into the resulting window.
Step 3:
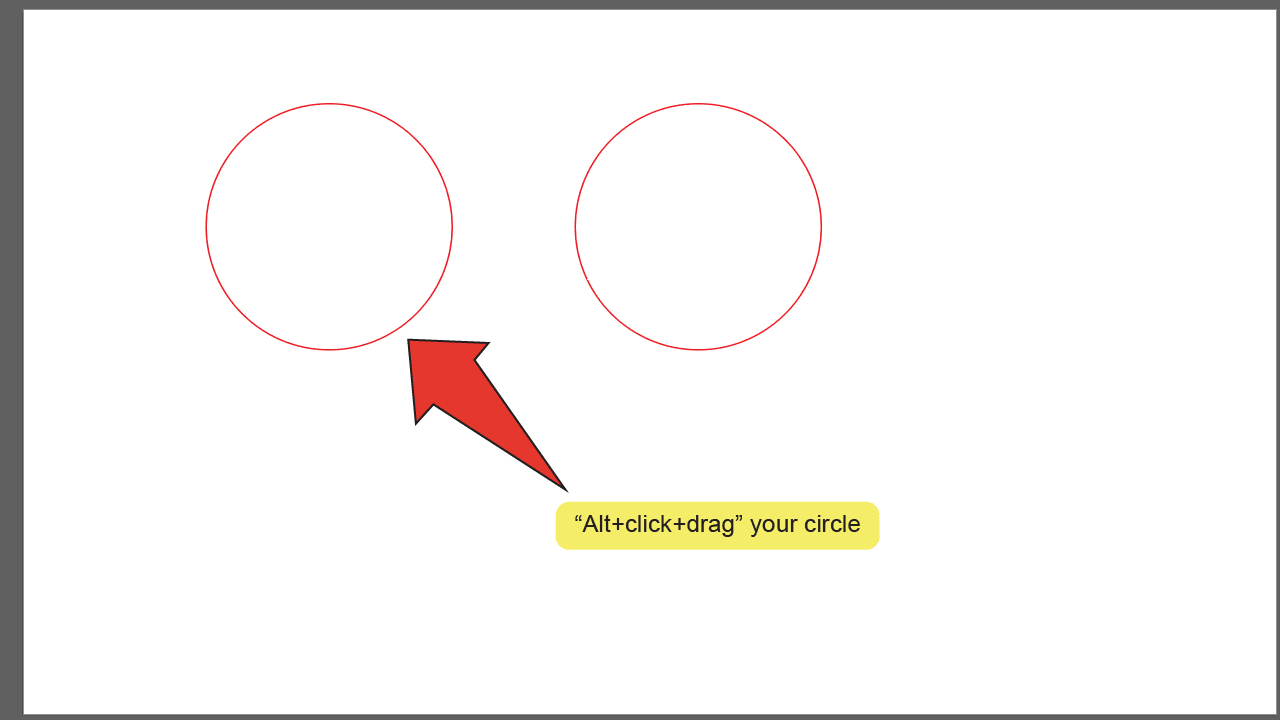
Duplicate your first circle. While your first circle is still selected, press and hold the “Alt” key, then click and drag the object to duplicate it.
Step 4:
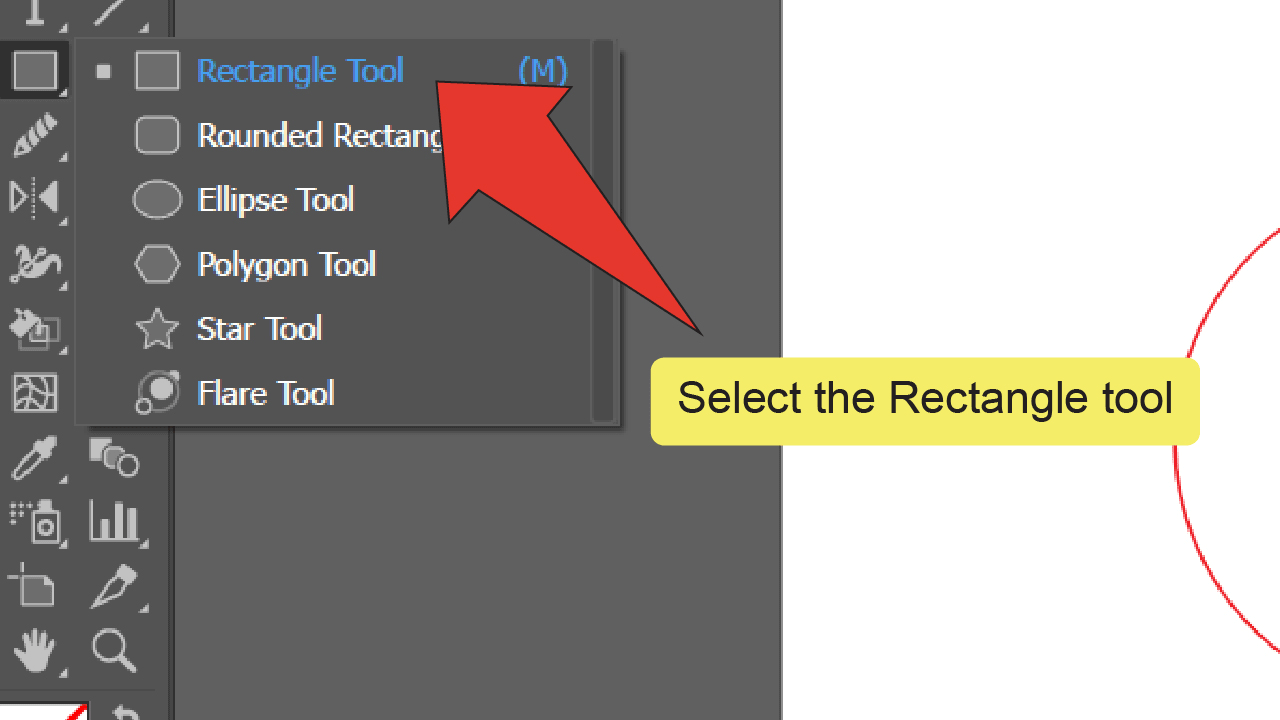
Find and equip the Rectangle tool. Look for and select the Rectangle tool, located on the toolbar on the left side of your screen. Alternatively, you can use the keyboard shortcut “M” to quick-select the tool.
Step 5:
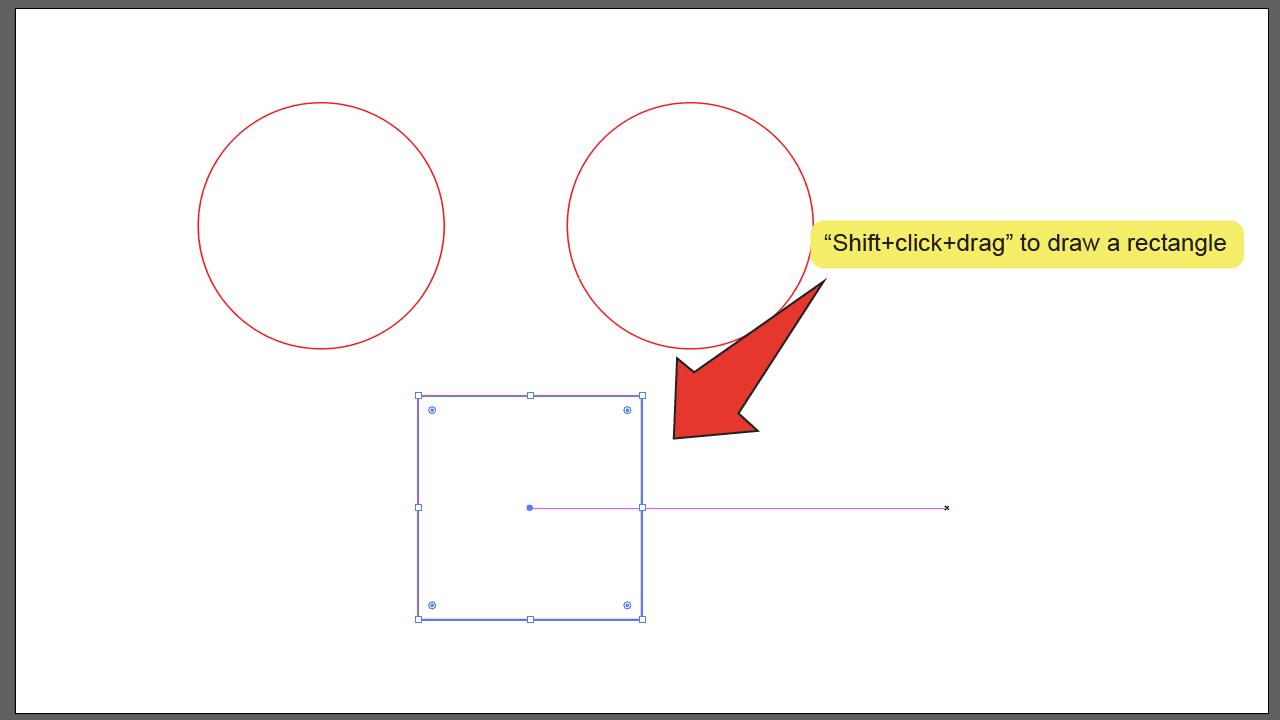
Place your square. Hold down the “Shift” key, then click and drag anywhere on your artboard to draw a square. For a more exact size you can click on the artboard and enter the dimensions of your shape into the resulting window.
Step 6:
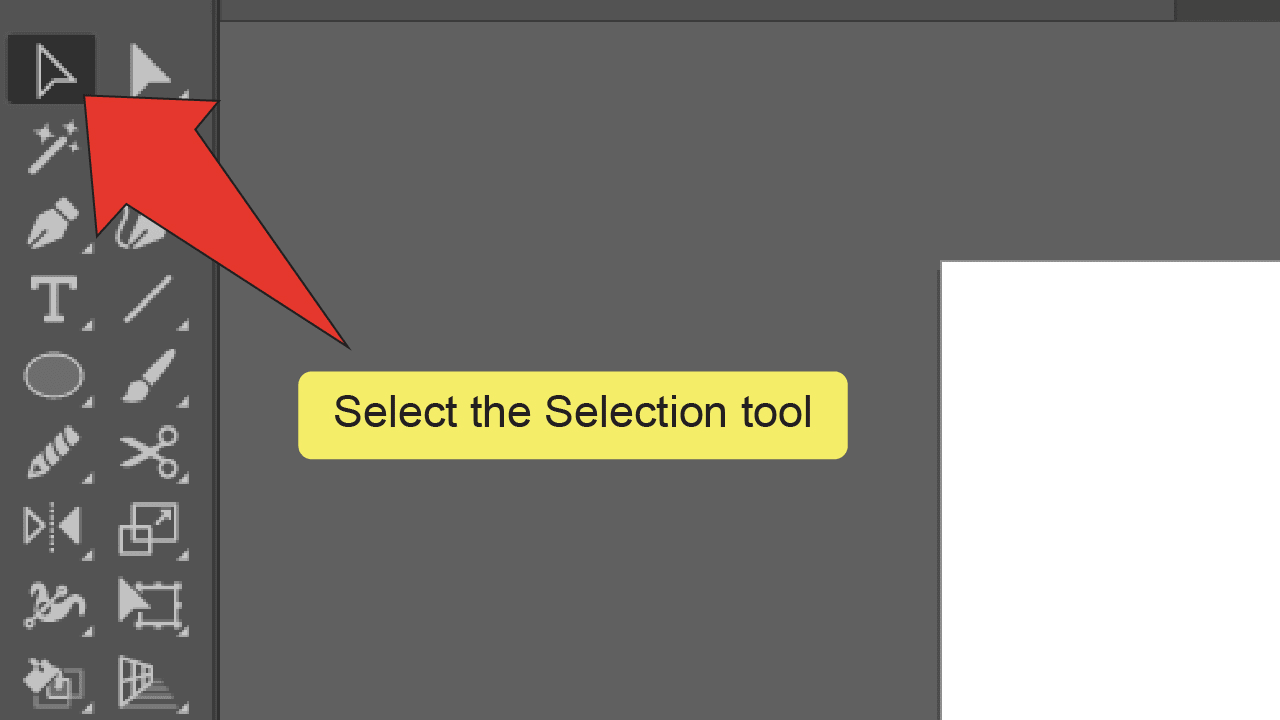
Find and equip the Selection tool. Look for and select the Selection tool, located on the toolbar on the left side of your screen. Alternatively, you can use the keyboard shortcut “V” to quick-select the tool.
Step 7:
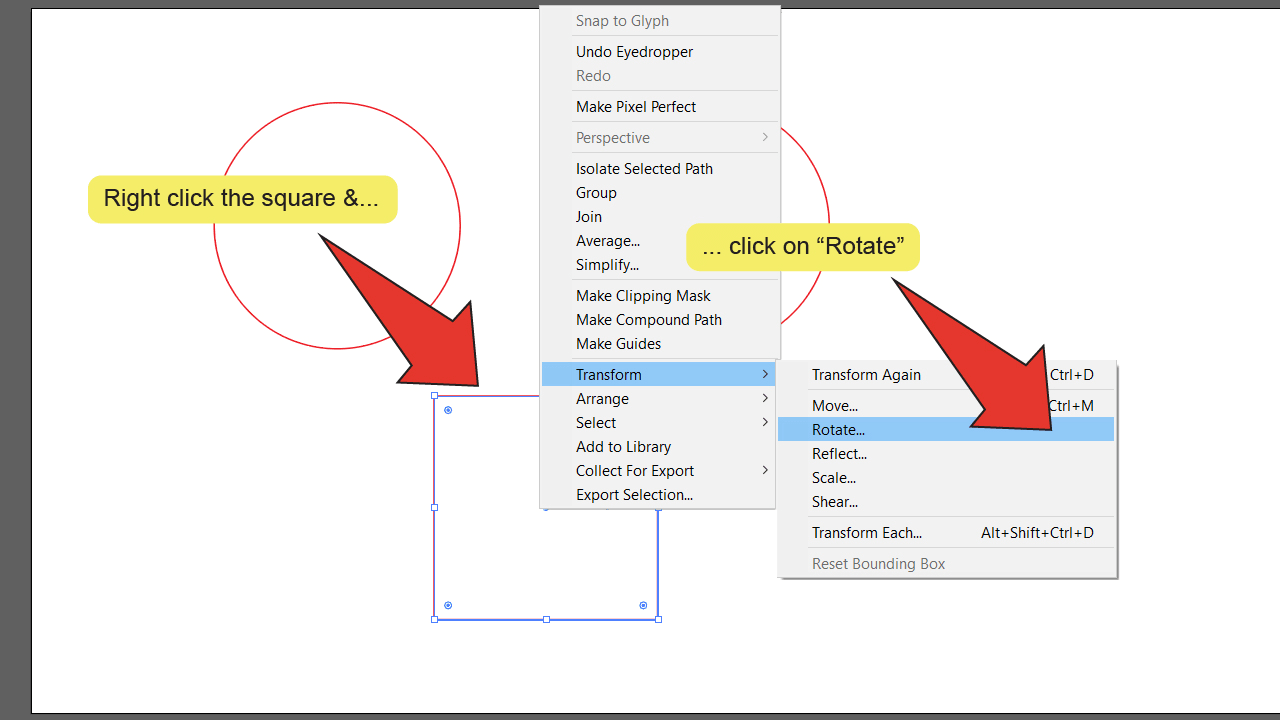
Open the Rotate window. Right click on your square, then go to “Transform” and select “Rotate”.
Step 8:
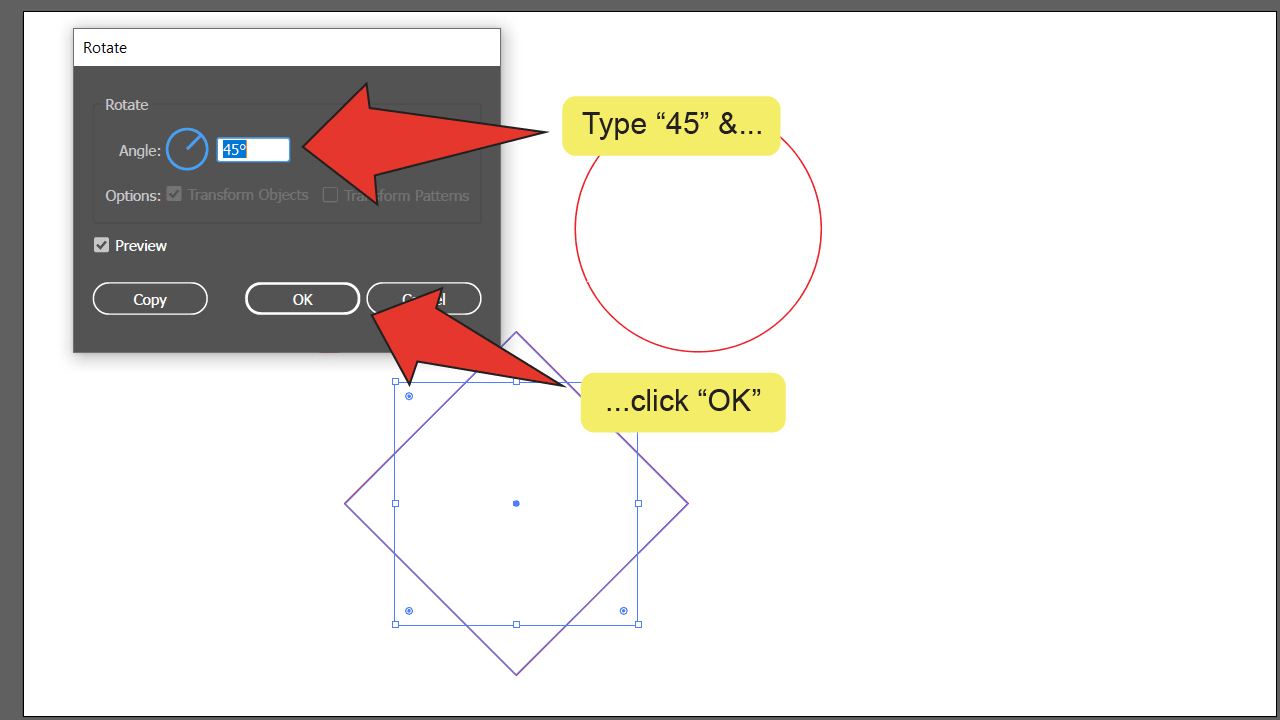
Rotate your square. On the Rotate window, type “45” into the text box next to “Angle” and click on “OK” to finalize your change.
Step 9:
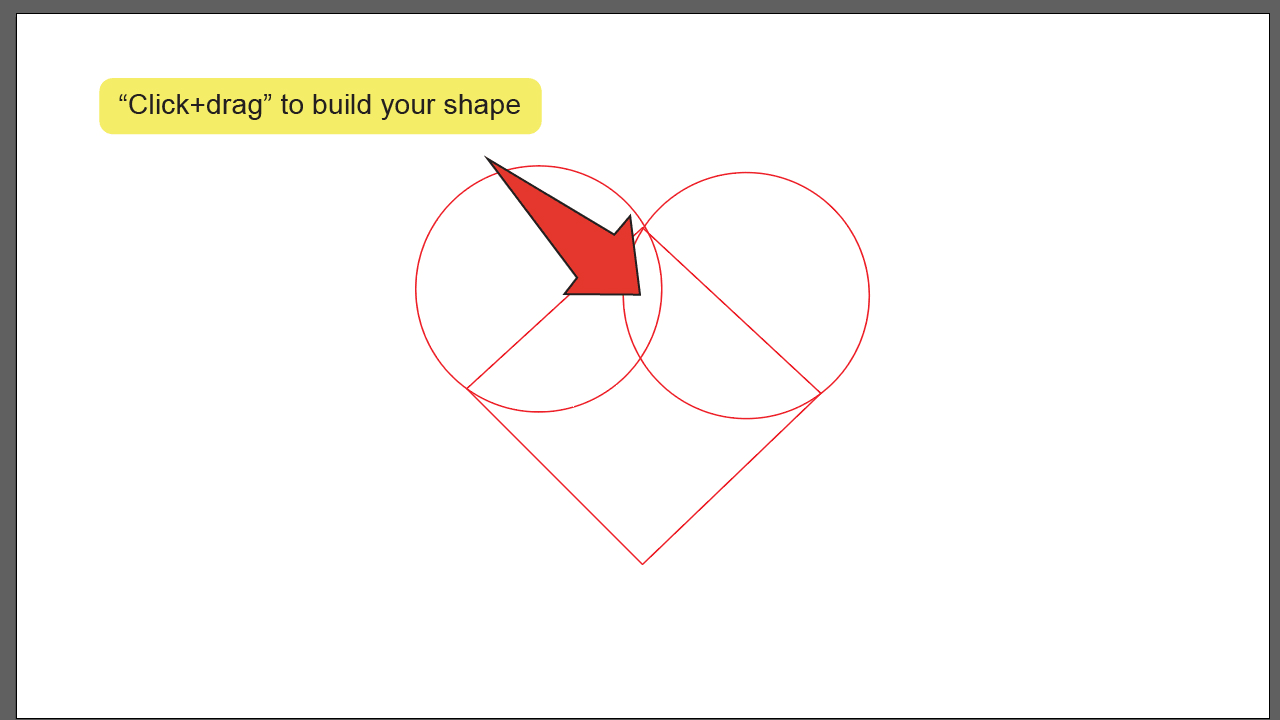
Arrange your shapes. Click and drag your shapes so they form a heart shape together.
Step 10:
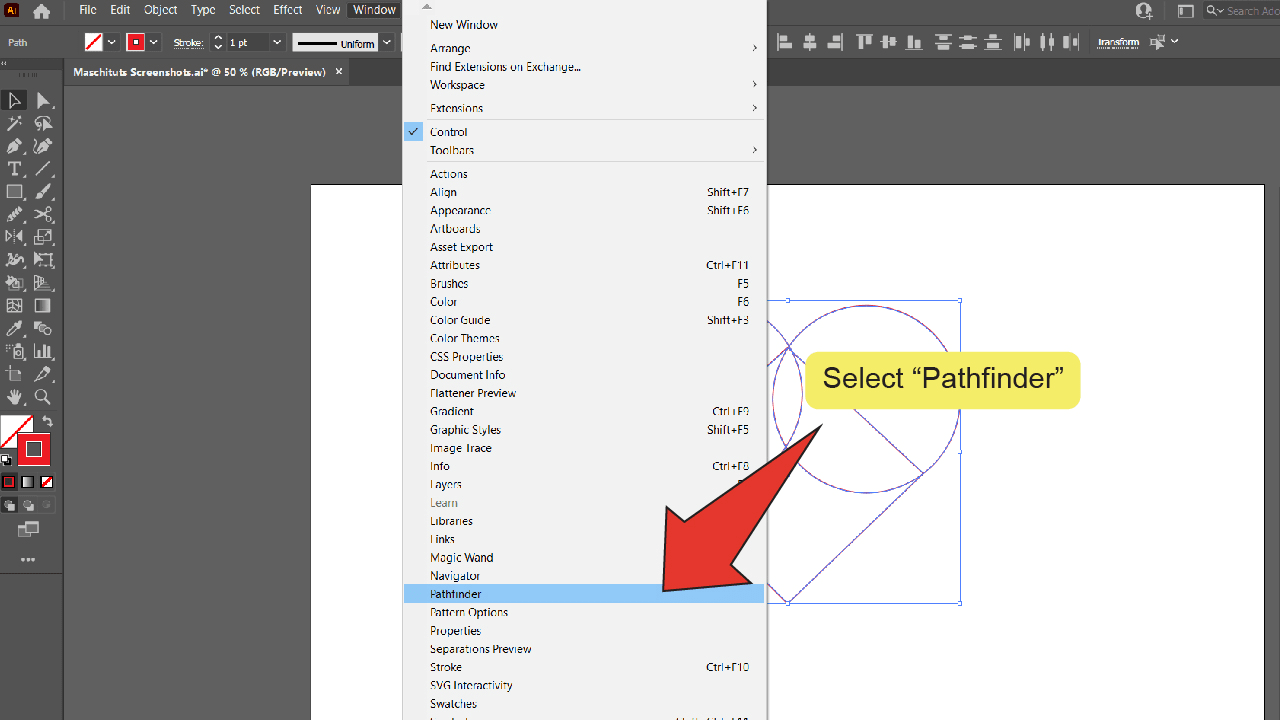
Open the Pathfinder panel. On the menu at the top of the screen, go to “Window” and click on “Pathfinder”. The Pathfinder panel should pop up on the right side of your screen.
Step 11:
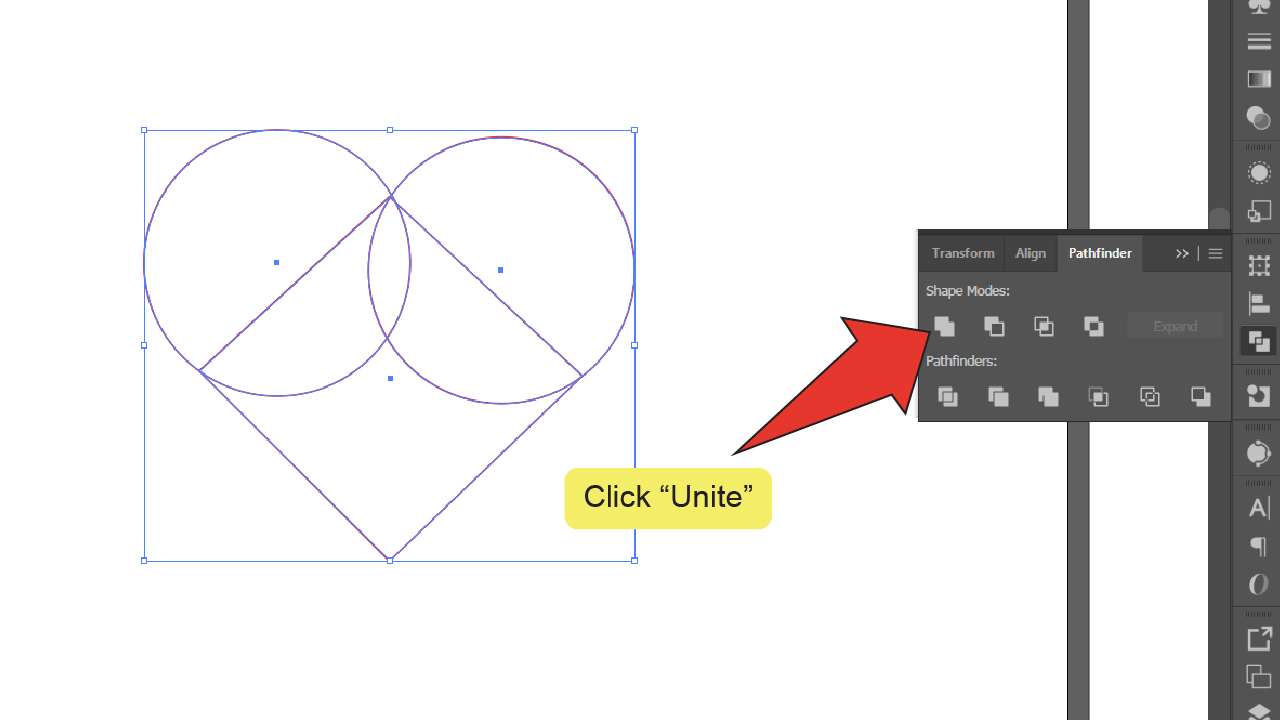
Click on “Unite”. On the Pathfinder panel, find and click on the Unite icon. This will compile all three of your objects into a single shape.
Frequently Asked Questions About How To Make A Heart In Illustrator
How can I make sure my heart is symmetrical?
If you’re struggling to draw or build your shape symmetrically, you can draw or build one half of the shape, copy and horizontally flip it and use the Unite function to combine them into one shape.

Hey guys! It’s me, Marcel, aka Maschi. On MaschiTuts, it’s all about tutorials! No matter the topic of the article, the goal always remains the same: Providing you guys with the most in-depth and helpful tutorials!


