
It is not uncommon to run out of storage space on your phone these days. Often voicemails take up a large portion of the space on your device, and most people remain oblivious to it.
That is when deleting unnecessary voicemails can be your go-to option. On the other hand, instead of deleting your voicemails, you also have the option of keeping specific conversations private.
Factory Resetting Your Phone to Delete Voicemail on Android
How to Delete Voicemails on Android using the Caller app
Frequently Asked Questions about How to Delete Voicemails on Android
How to Delete Voicemail on Android
To delete voicemail on Android, follow these steps:
Step 1: Locate the Visual Voicemail app on your device
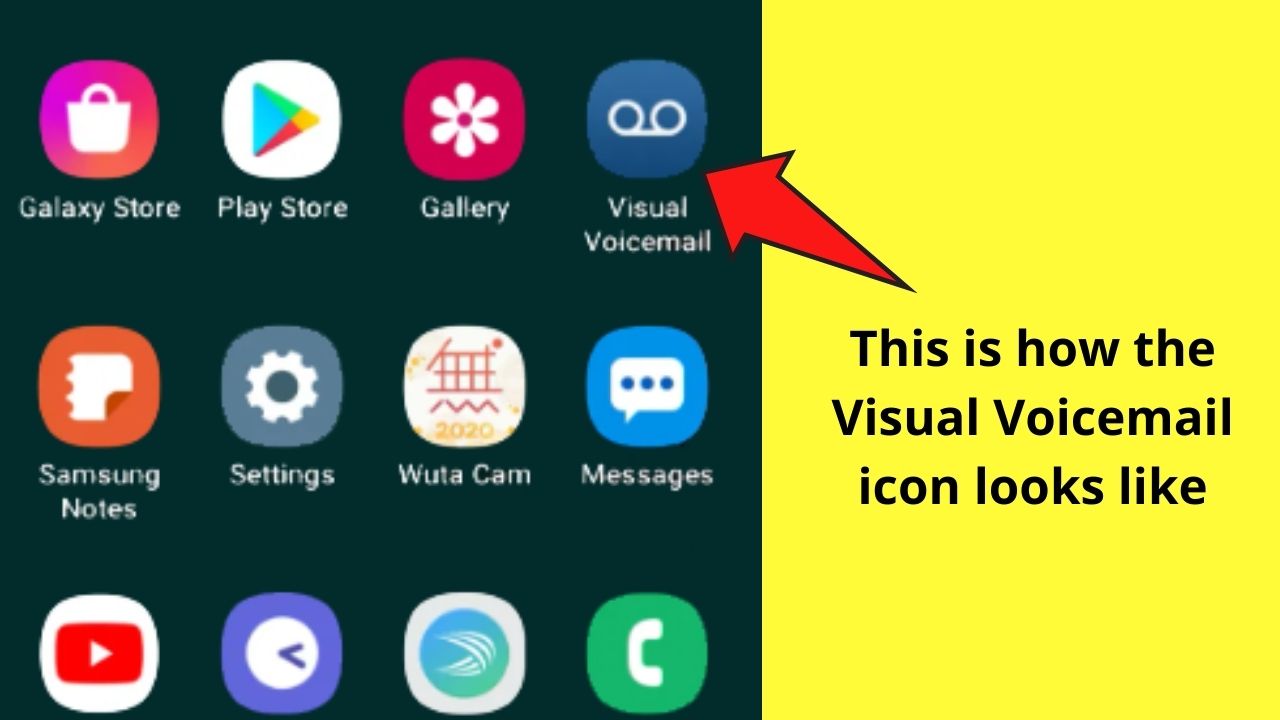
This method requires you to first locate the Visual Voicemail app on your device, which should look something like two circles joined by a line at the bottom. To know how to set up your voicemail, read our article on How to Call Your Voicemail.
Step 2: Tap on the Visual Voicemail app to view your entire voicemail history
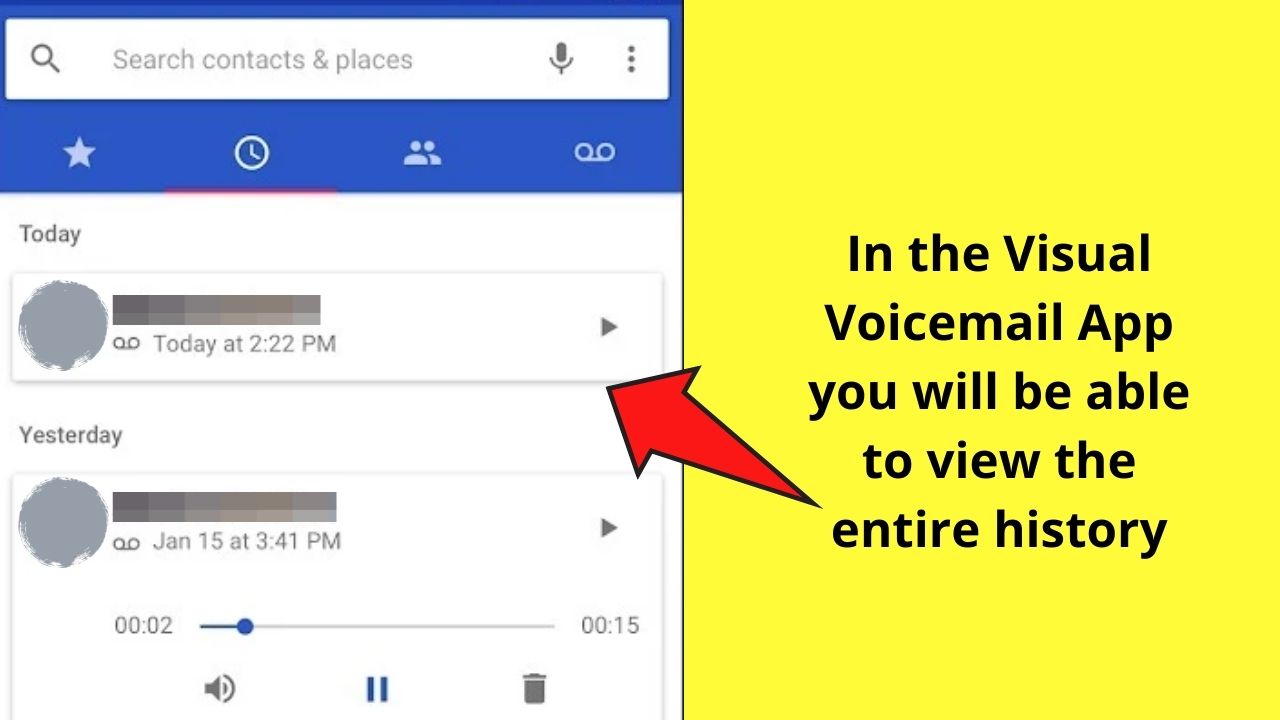
From here, you can delete, archive, as well as playback voicemails. Our article on Voicemail Storage on Android may catch your eye if you want to find out more about how much storage you have for voicemail archives.
Step 3: Locate the voicemail you wish to delete.
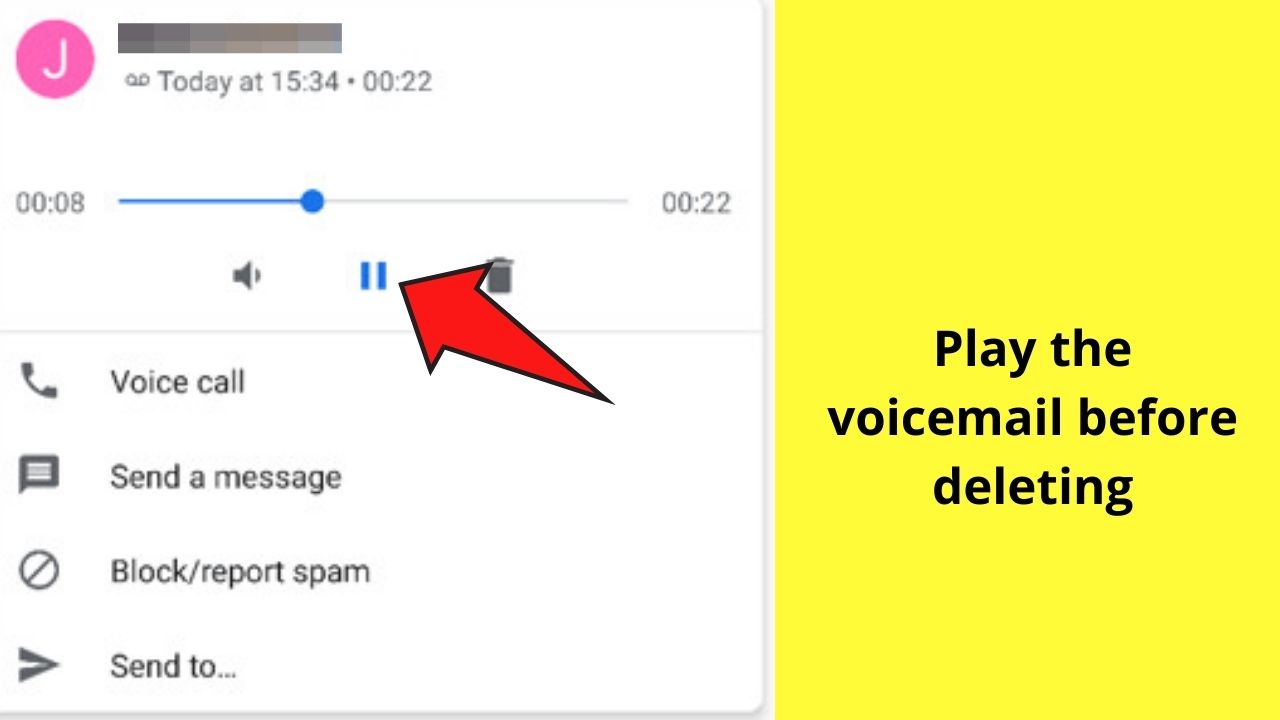
Before deciding to delete the voicemail, click on the triangle to play the voicemail.
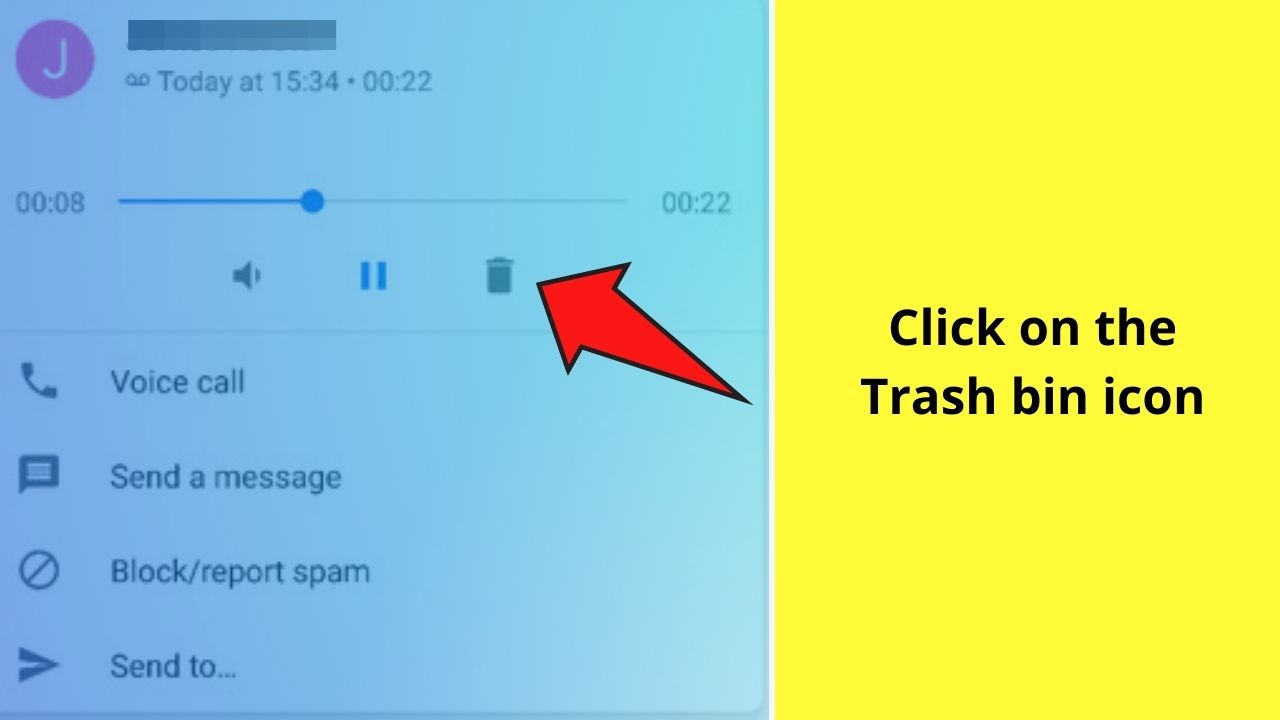
Step 4: Long hold on to the voicemail until it is selected.
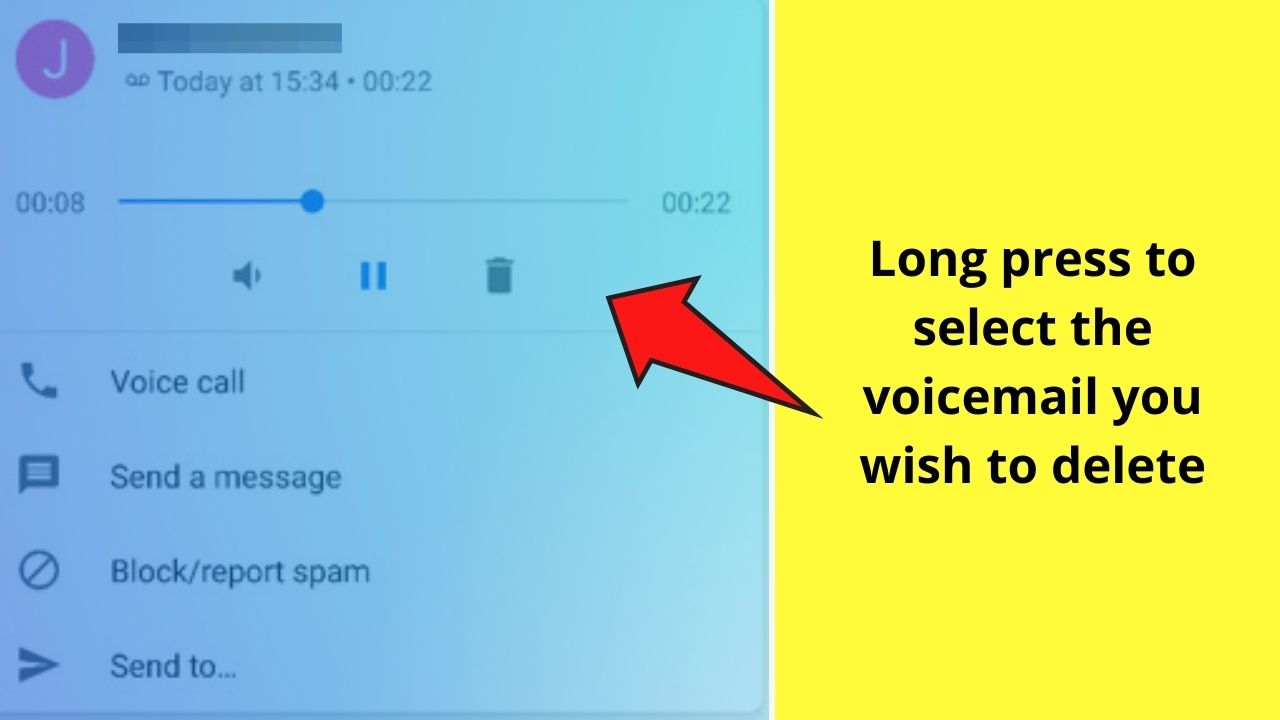
Step 5: Tap the Trash bin icon on the bottom right of your screen to delete the voicemail.
If you wish to delete multiple voicemails, long hold on one voicemail and then click on the remaining ones once the first one is selected.
Clear Visual Voicemail Data Using the Settings App
Sometimes, bugs occur while trying to delete voicemails from your device. If even after multiple attempts, they are not deleted. In this case, you would want to head over to the device settings and clear data from there.
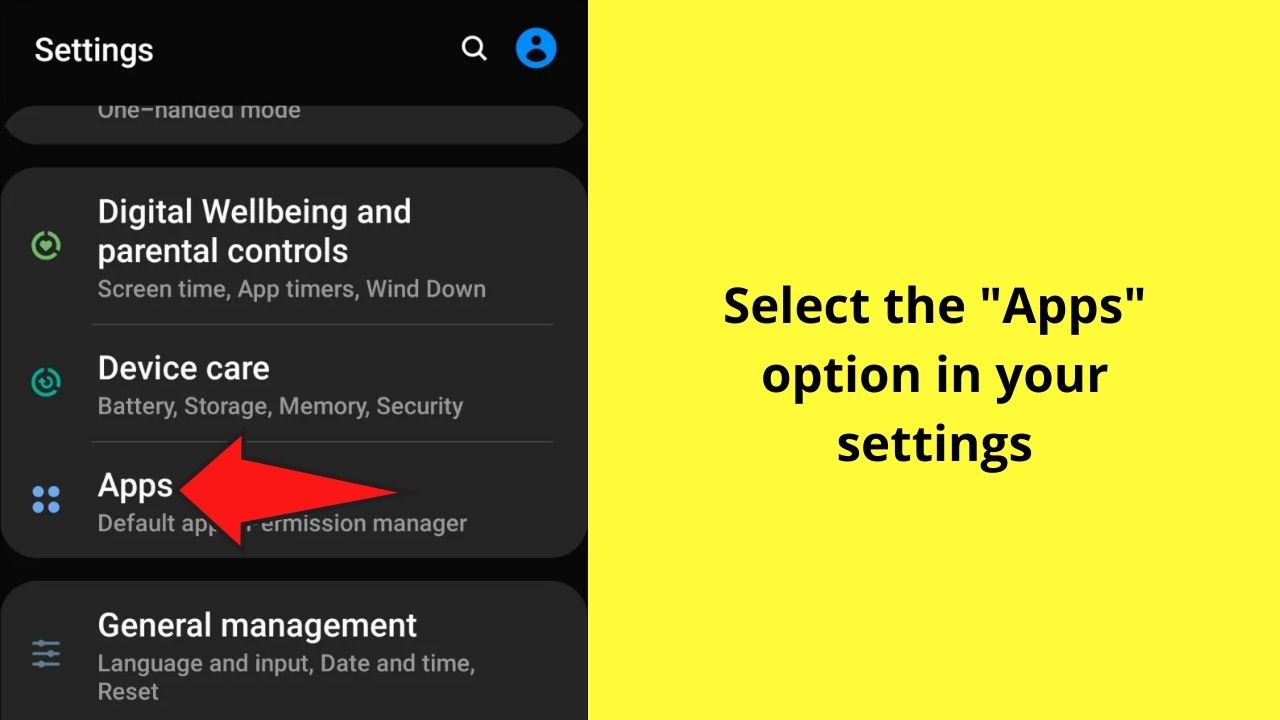
Step 1: Go to the “Settings” option on your device either by clicking on the icon on your home screen or by hovering down your notification bar and selecting the settings option.

Step 2: Head over to the “Generals” section and click on the “Apps” option.
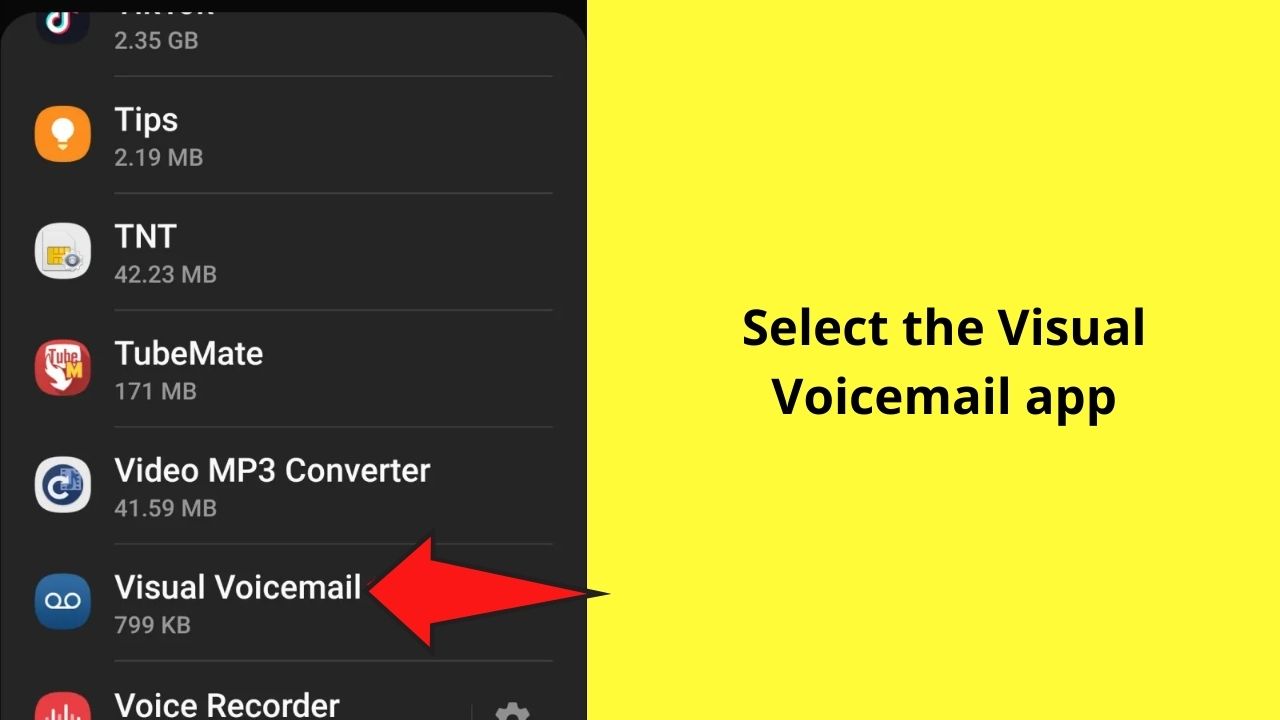
Step 3: Hover down the Apps section to locate the Visual Voicemail option.
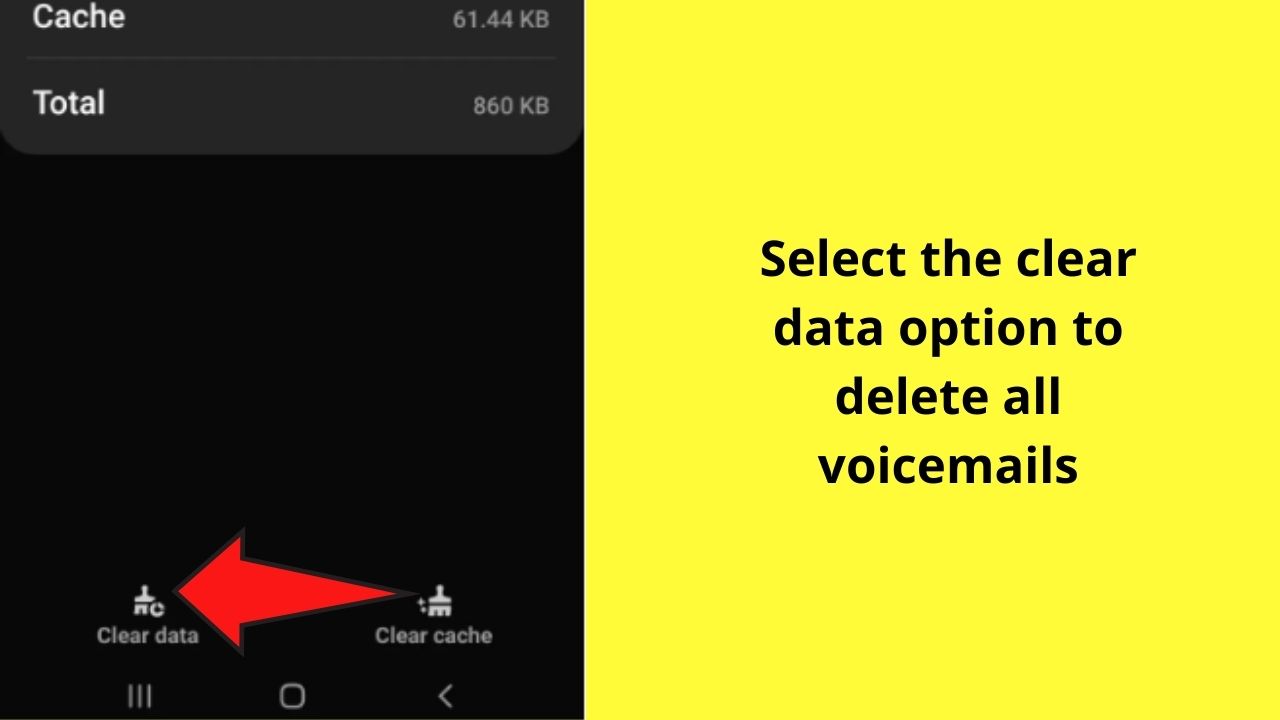
Step 4: Then click on the clear data option at the bottom left of the screen. This will delete all data within your Visual Voicemail app.
Factory Resetting Your Phone to Delete Voicemail on Android
If, even after multiple attempts to clear data and delete voicemails manually from the app end up futile, you can expect in the worst-case scenario that a virus has invaded your device. Although this is an unfortunate method of deleting voicemails, we advise you to back up all your important documents and images before availing this option.
You can factory reset your phone by either going to your settings availing the reboot option, or using the pin that came with your device to reset your device manually.
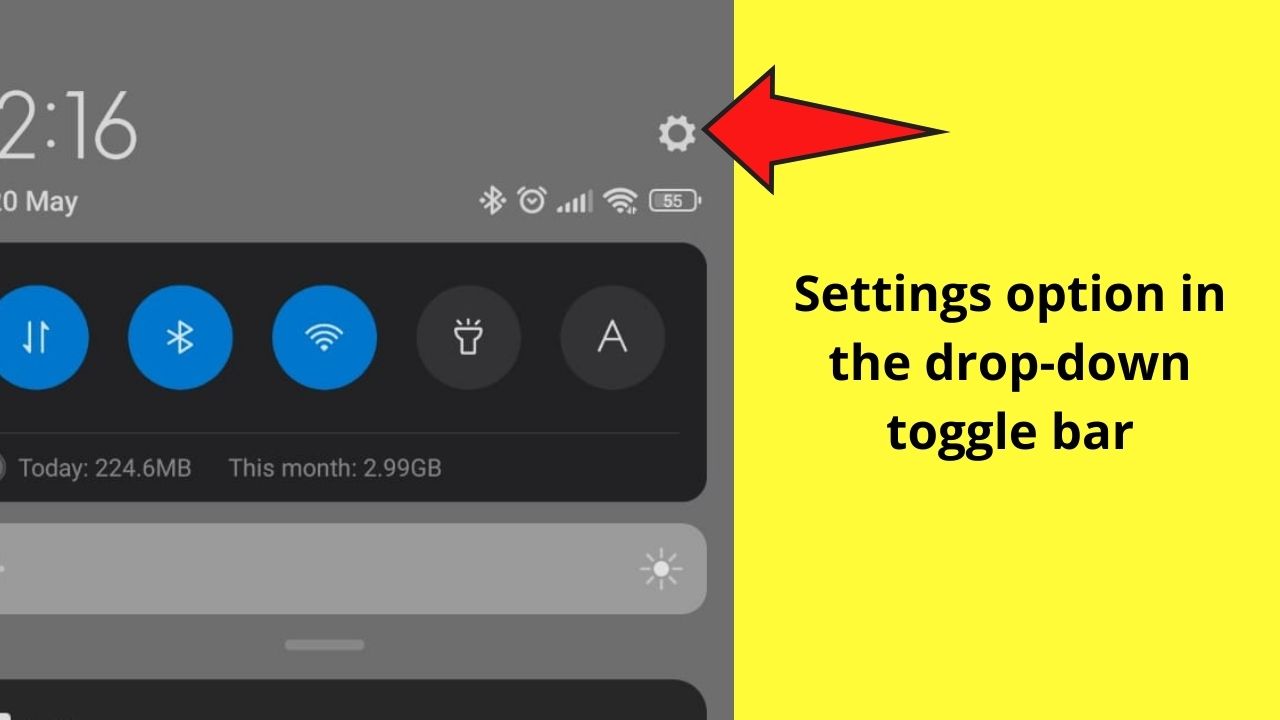
Step 1: Go to the device settings by either clicking the option on your home screen or dragging down your toggle bar.
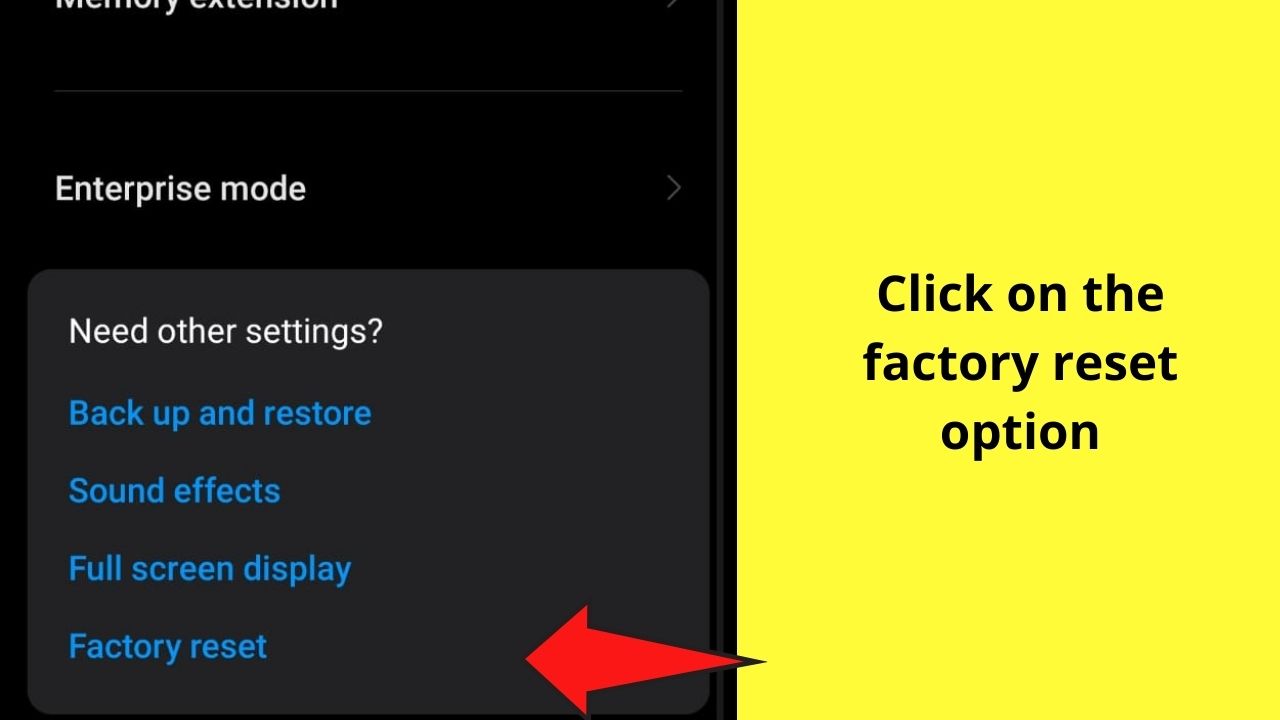
Step 2: Go to the “Additional setting” option located below the Apps option.

Step 3: Hover down to view the factory reset option.
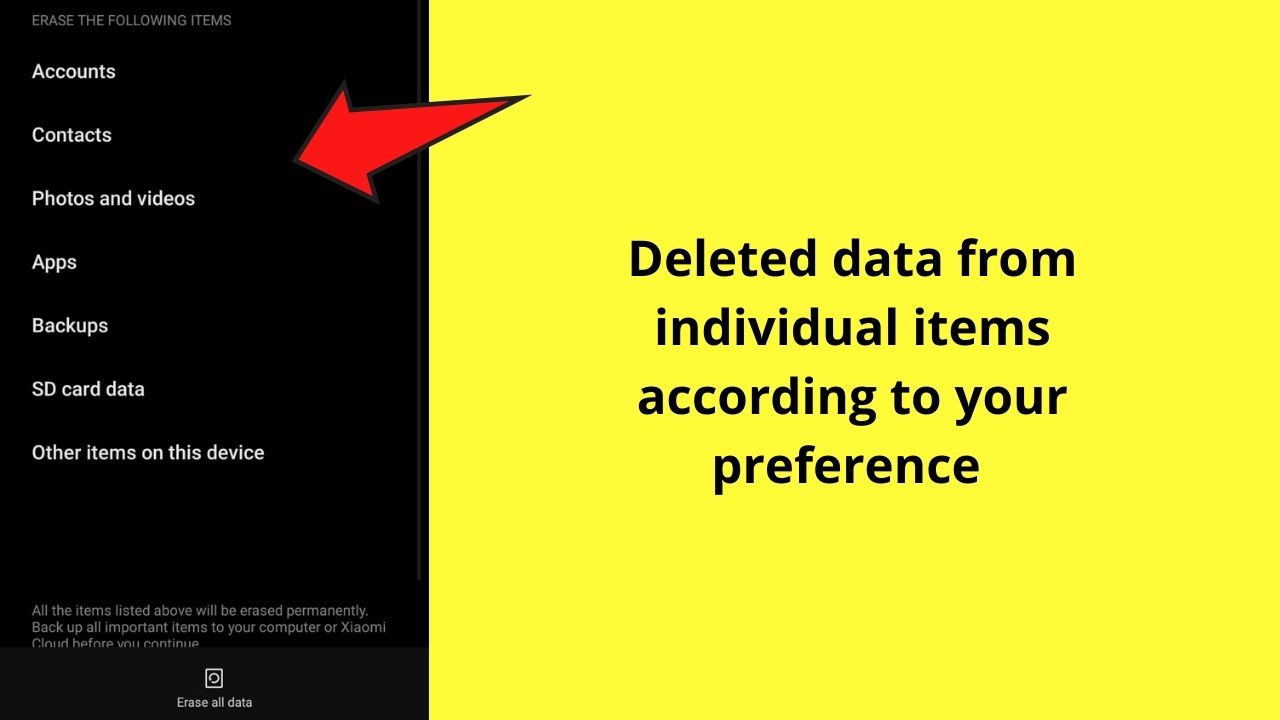
Step 4: Select whichever desired item you would like to erase data for.
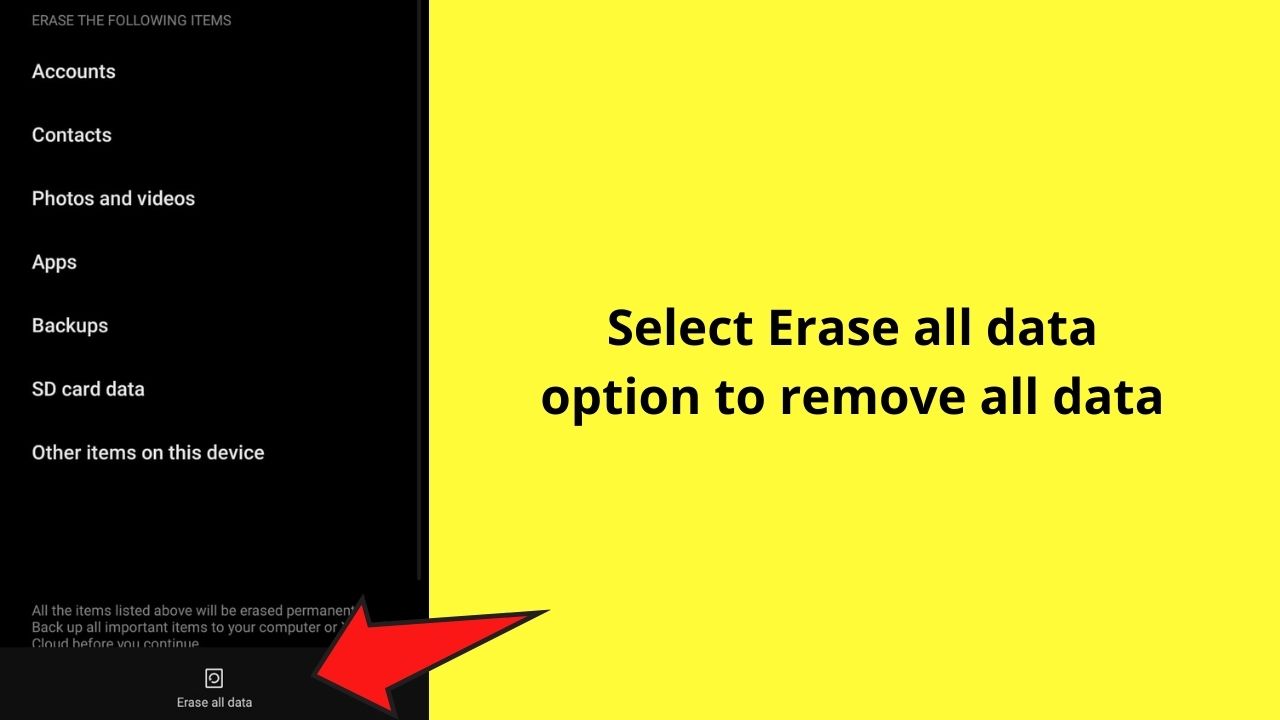
Step 5: Alternatively, you can erase all data by clicking on the “Erase all data” option at the bottom of your screen.
How to Delete Voicemails on Android using the Caller app
If your device does not have a dedicated Visual Voicemail app or the idea of factory resetting and clearing data from your app does not entice you. Using the Caller app to delete your voicemail is your best bet, provided that your app is not infested with any virus or bug.
To delete voicemails using the “Caller” app on Android, follow these steps:
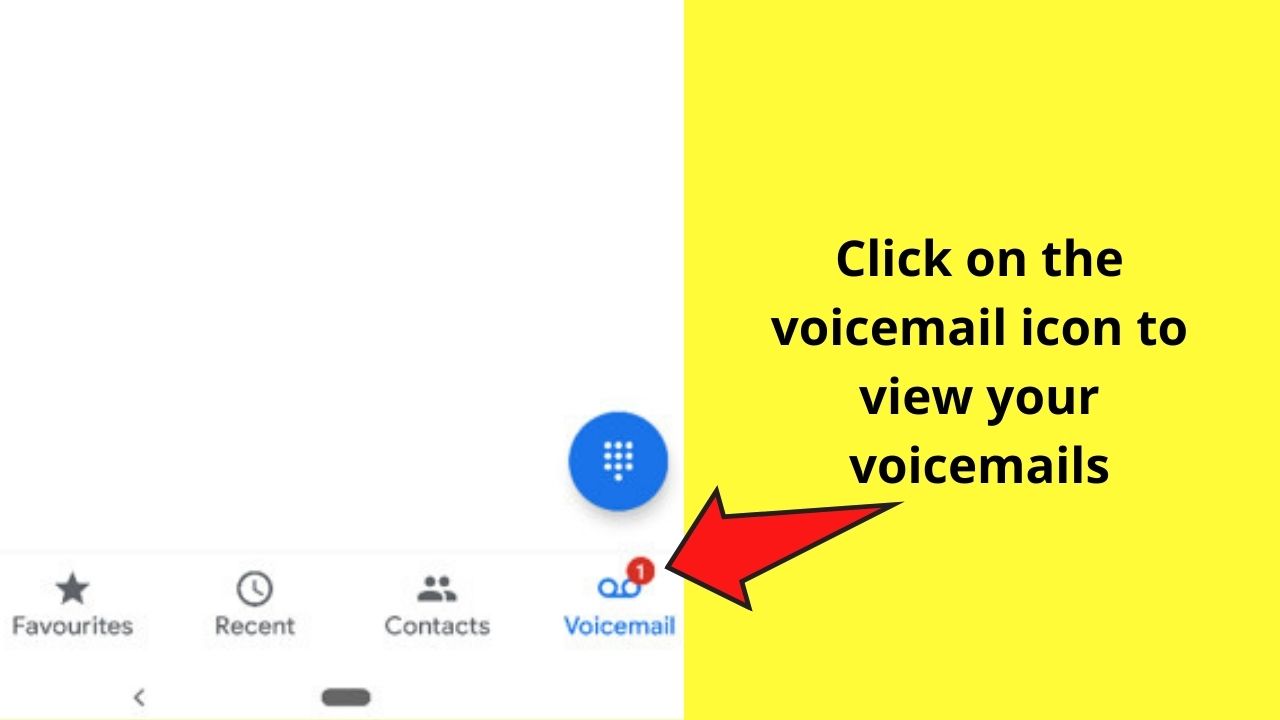
Step 1: Locate your Caller App on your home screen.

Step 2: Head to the voicemail tab by clicking on the option at the bottom right of your screen.
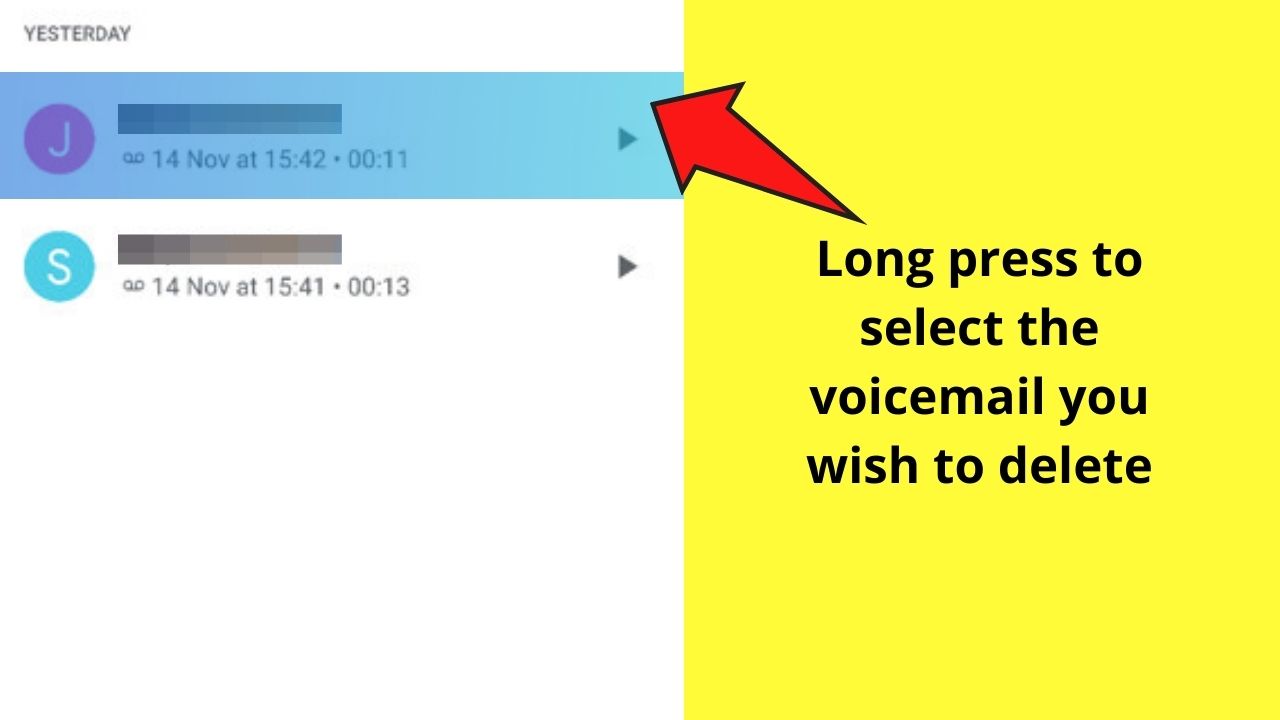
Step 3: Select the desired voicemail you would like to delete.
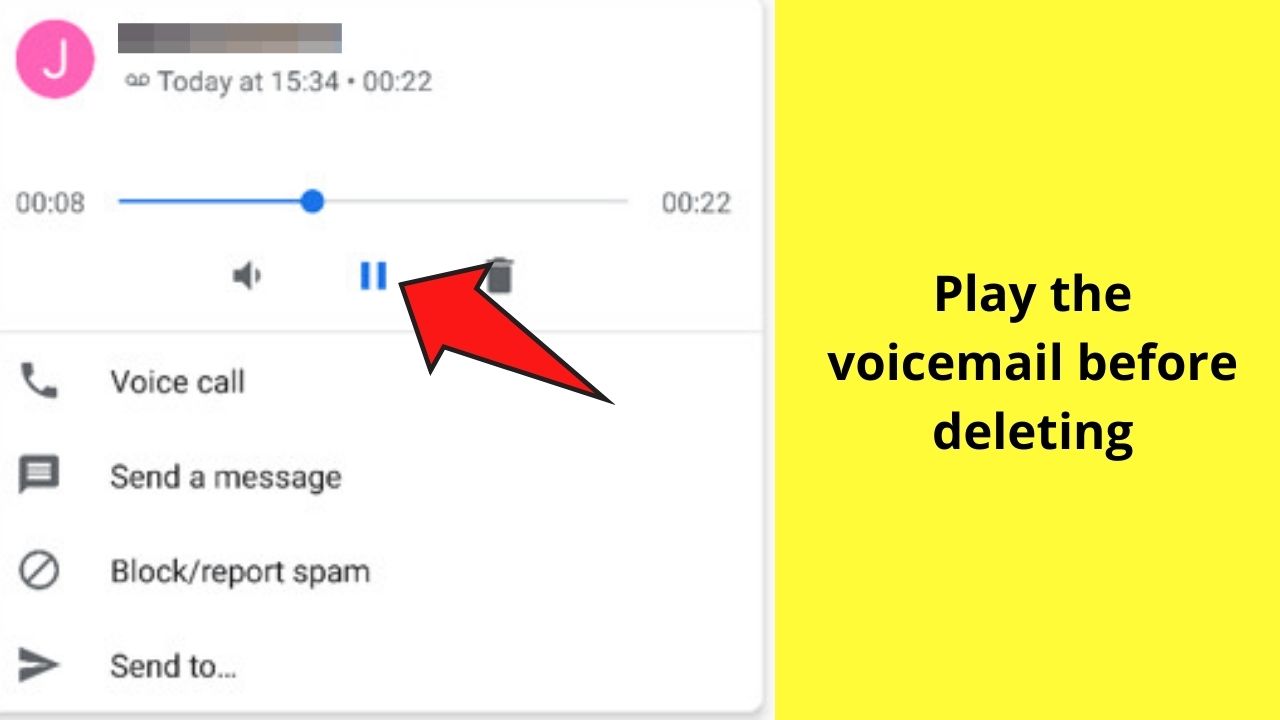
Step 4: Before deleting the voicemail, play the voice note for confirmation.
Step 5: Long press the voicemail once you confirm that this is the voice note you would like to delete.
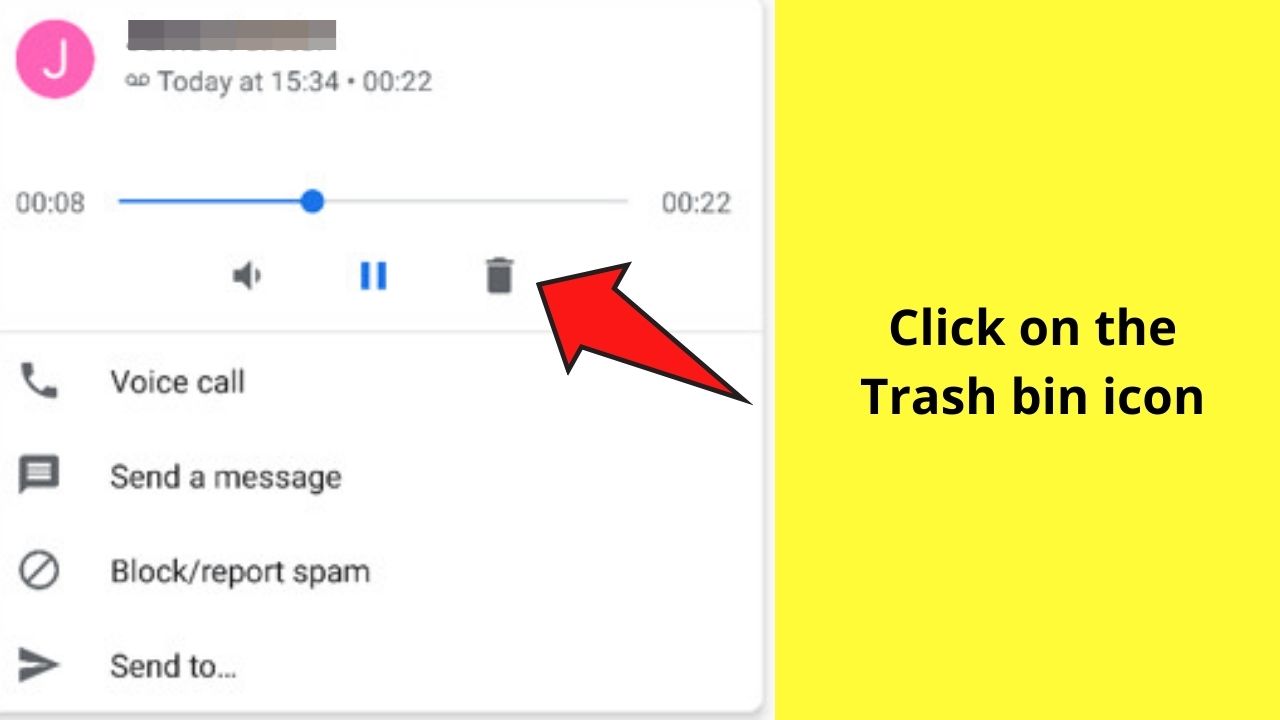
Step 6: click on the Trash bin icon to delete the voicemail. You can also select multiple voicemails at once to delete them by long-pressing one voicemail, and once it is selected, follow through with selecting subsequent voicemails.
Frequently Asked Questions about How to Delete Voicemails on Android
Can we restore deleted voicemails on Android devices?
To restore voicemails on your device, click on the Voice App. Next, hover over to the top left, tap on the menu option, click on the Voicemail icon, long-press the conversation that you would like to recover from your archives, and select restore from the archive.
Where can I find the Visual Voicemail App on my Android device?
To view the Visual Voicemail App, the first step would be to activate it. Without this, you cannot receive voicemails. If you have set it up already, you should be able to locate an icon indicating two circles joined by a line.
How to disable voicemails on my Android device?
First, open your Phone app and contact your service provider’s customer service. Proceed by tapping on the call icon and following the instructions you are provided with at the other end of the line. These instructions would differ depending on your service provider.