

Argh, the frustration of robotic voice menus that give you a list of options to choose from, then prompts you to press a number on your dial pad. For example, press 5 to speak to an agent.
You look at your phone and there are no buttons to press.
So much for the smartphone. Not so smart now.
It is the Android developers that do not always make it simple for you to make your phone act the way you need it to.
Learn the fundamentals of the dial pad on Android, the various settings to control different functions, and of course, what to do when things stop working as they should.
How to get the dial pad back on my android phone
There are five things you can try to fix a broken dial pad on Android: Clear data and the cache for the phone app, Check system updates, free up storage space, restart the device or Install an alternative dialer app. The most reliable dialer app is the “Phone by Google” application.
Is your dial pad really broken or has it just not been opened?
Before proceeding to the troubleshooting steps and fixes for the dial pad not working on Android, we’ll begin with the basics because if this is your first dance with Android, the dial pad is not displayed until you push a button to call it up.
How to activate the dial pad during a phone call
This is the most frustrating time to realize that your dial pad has disappeared.
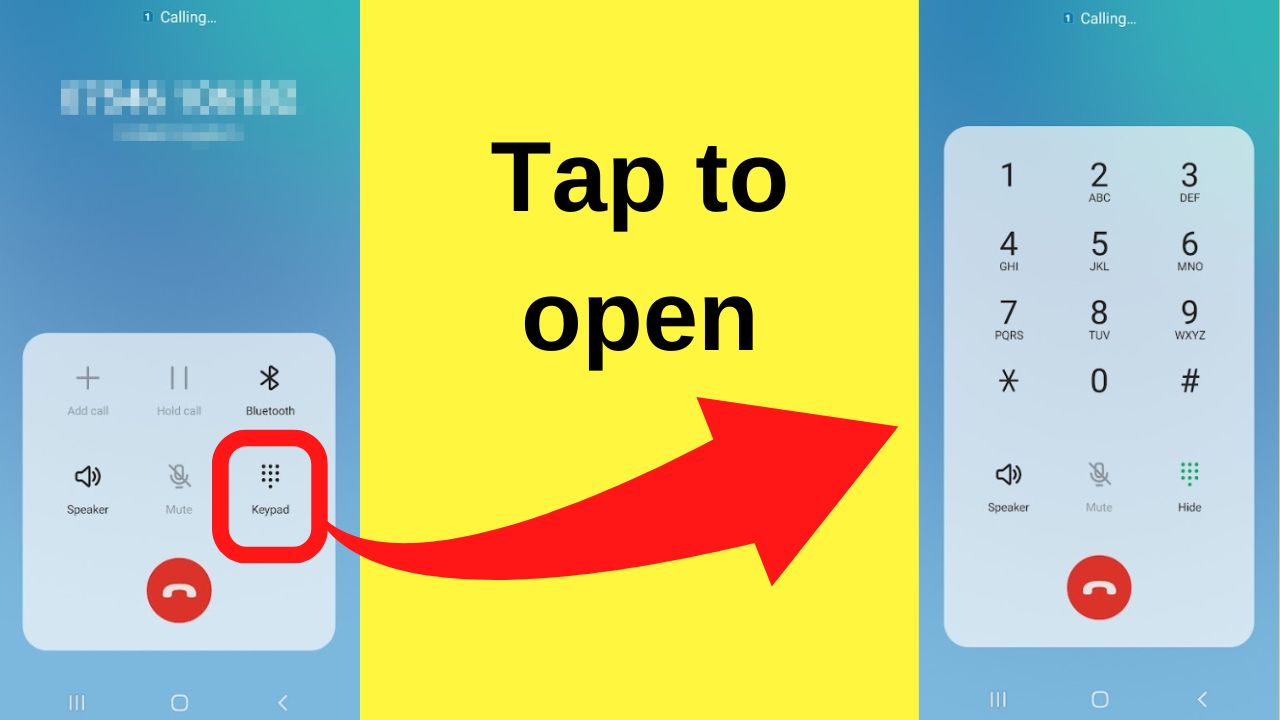
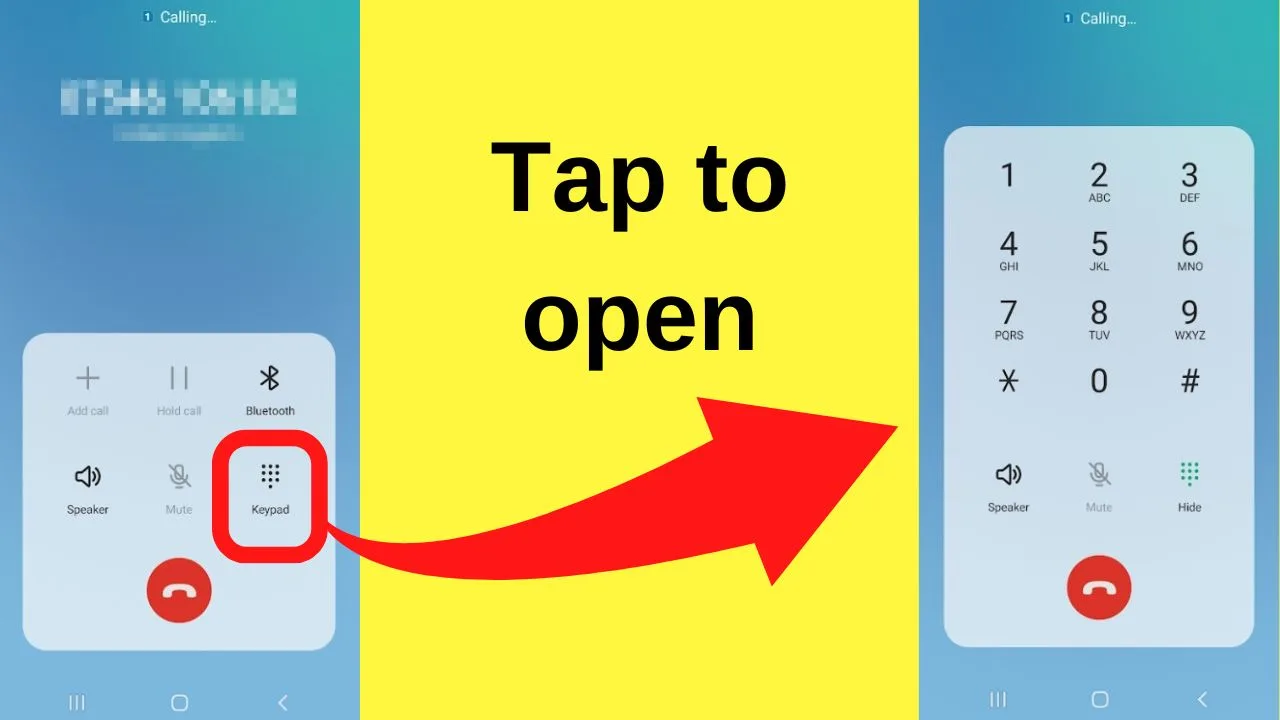
You do not need to hang up the call because this feature activates your dial pad with a single tap.
Tap on the keypad (or dial-pad) depending on your device and the number keys will show on the screen.
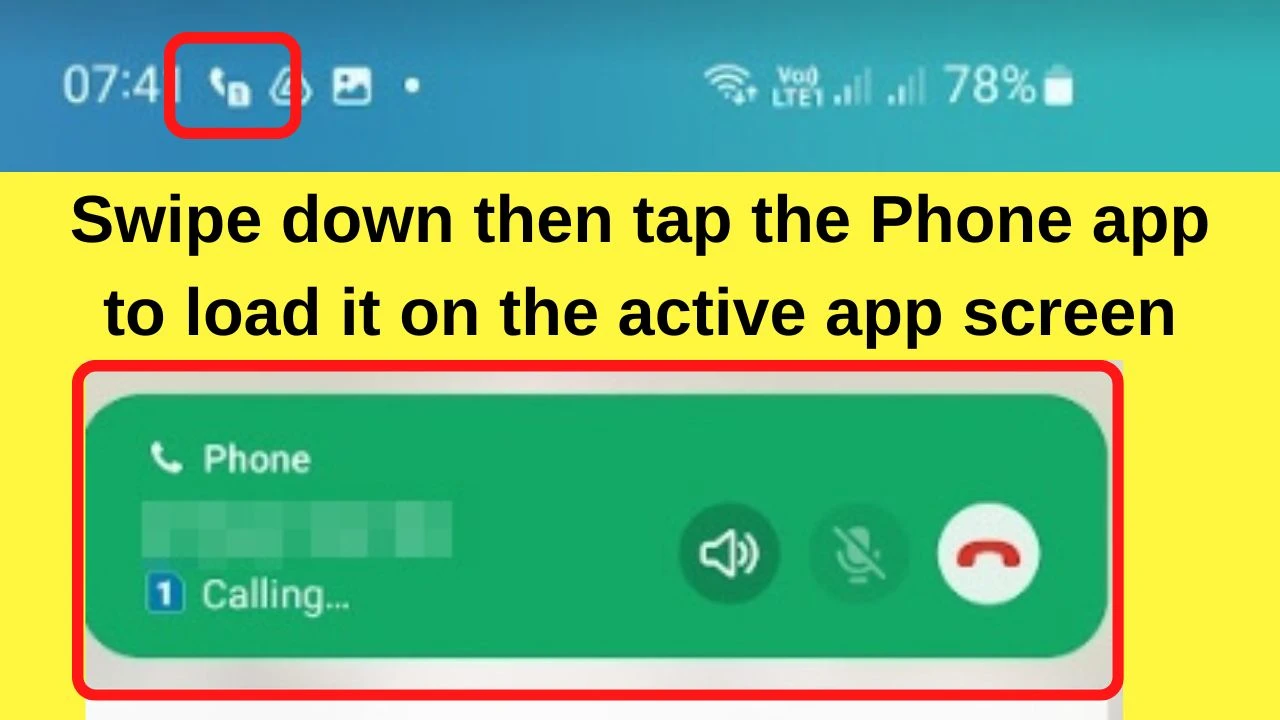
Android can run multiple apps at once so it is possible that your phone app disappears from view.
To bring it back, swipe down from the top of your screen to open the app drawer and then tap on the phone symbol to load your phone app.

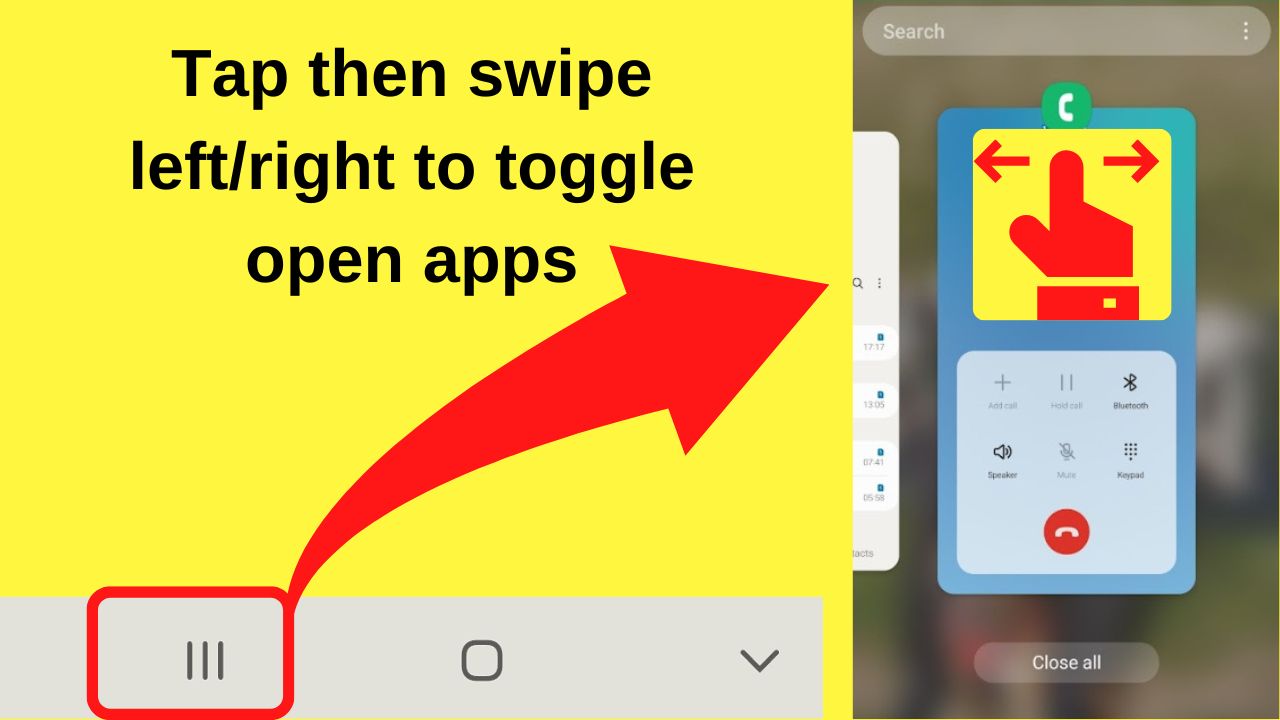
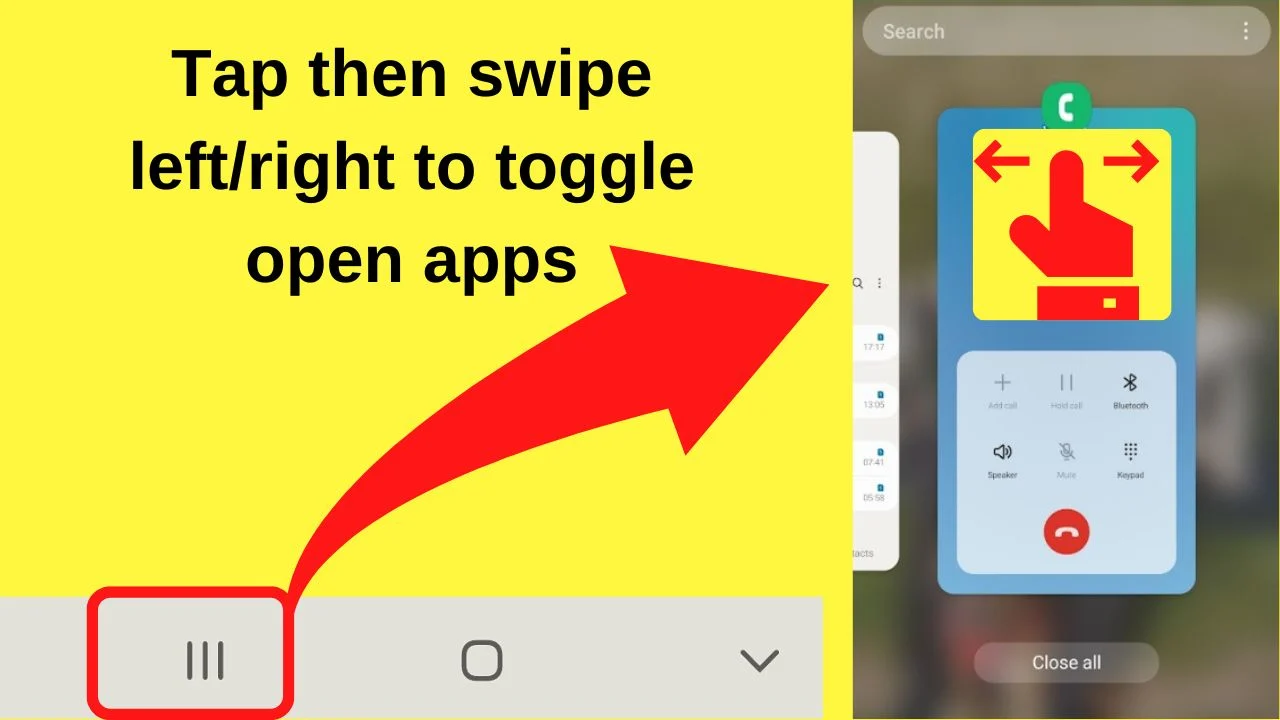
Alternatively, tap on the three vertical lines on the bottom left of your screen. This will show you all the apps that are currently open.
Swipe left and right until you see the phone app. Tap on it, then you can open the dial pad view either during a call or to dial a number.


How to load the dial pad in the Google phone app on Android
On nearly all Android phones, the dial pad does not load straight away. Instead, the default view is often your most recent contacts, favorites, or your entire contacts list.
The bottom of the screen has a few options for you to choose from.
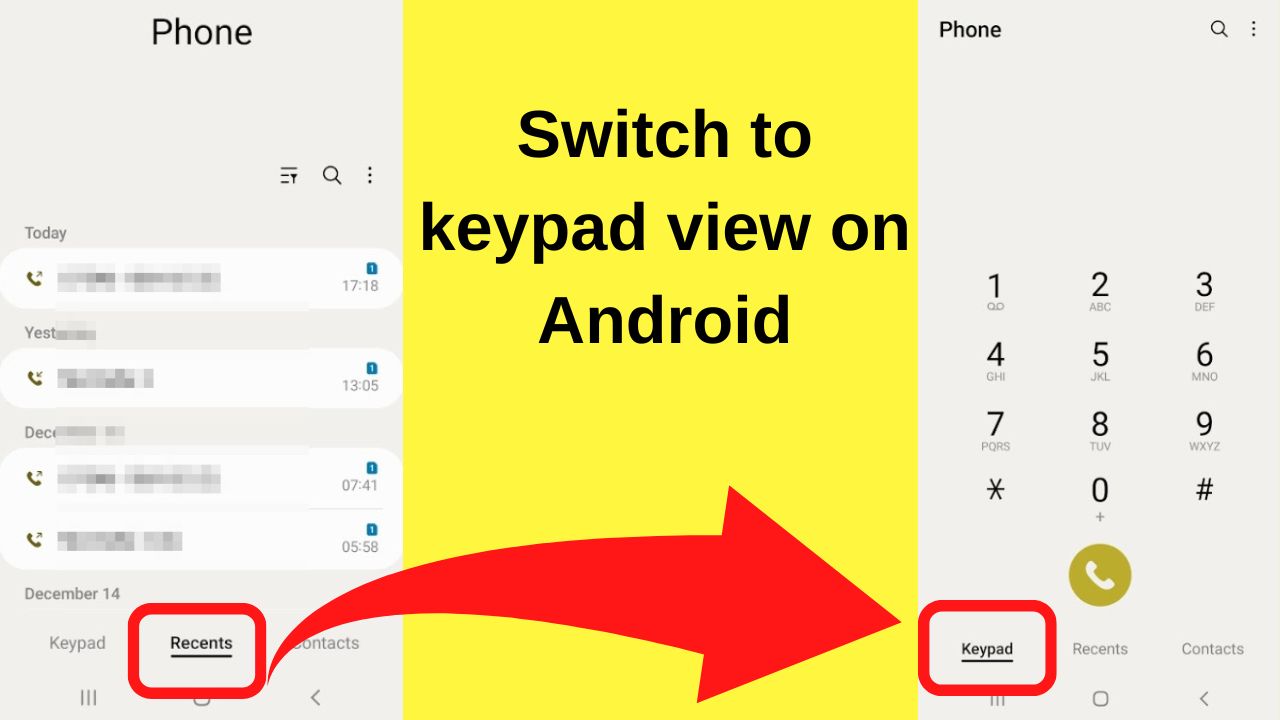
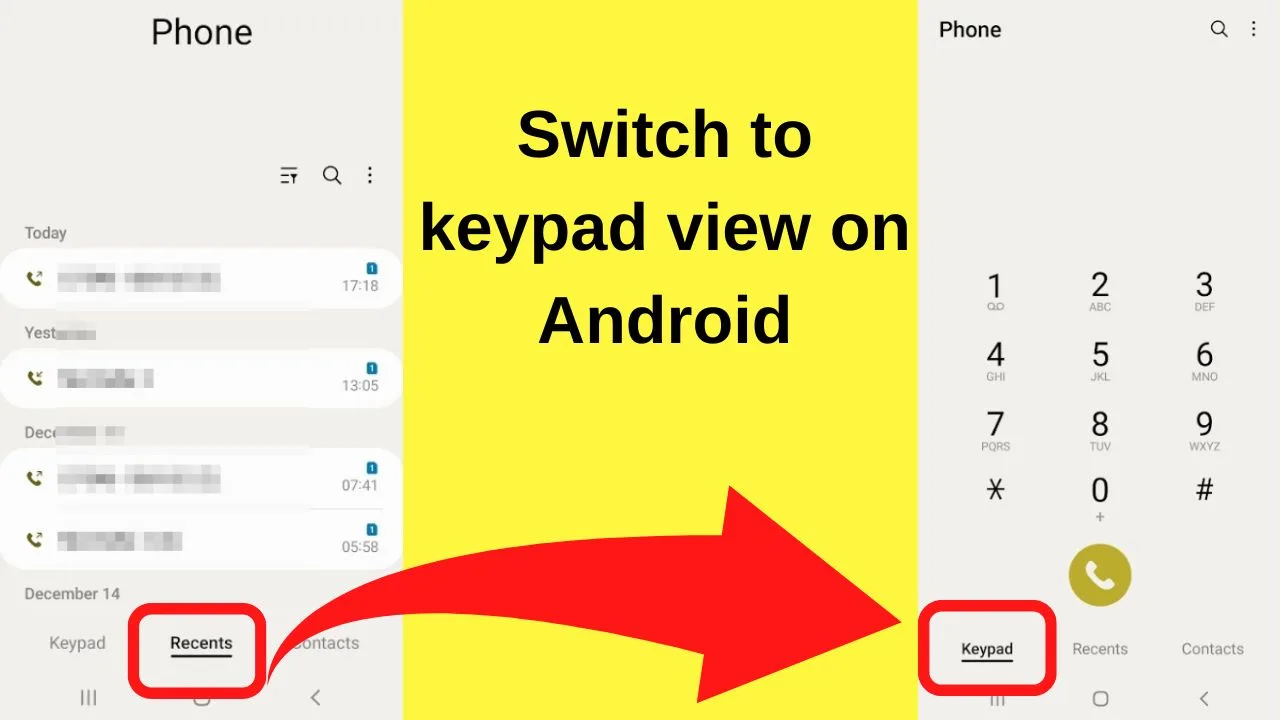
On the Samsung phone app, the options are
- Keypad
- Recents
- Contacts
To call a number that is not saved on your device, tap on the keypad tab on the bottom left of your screen.
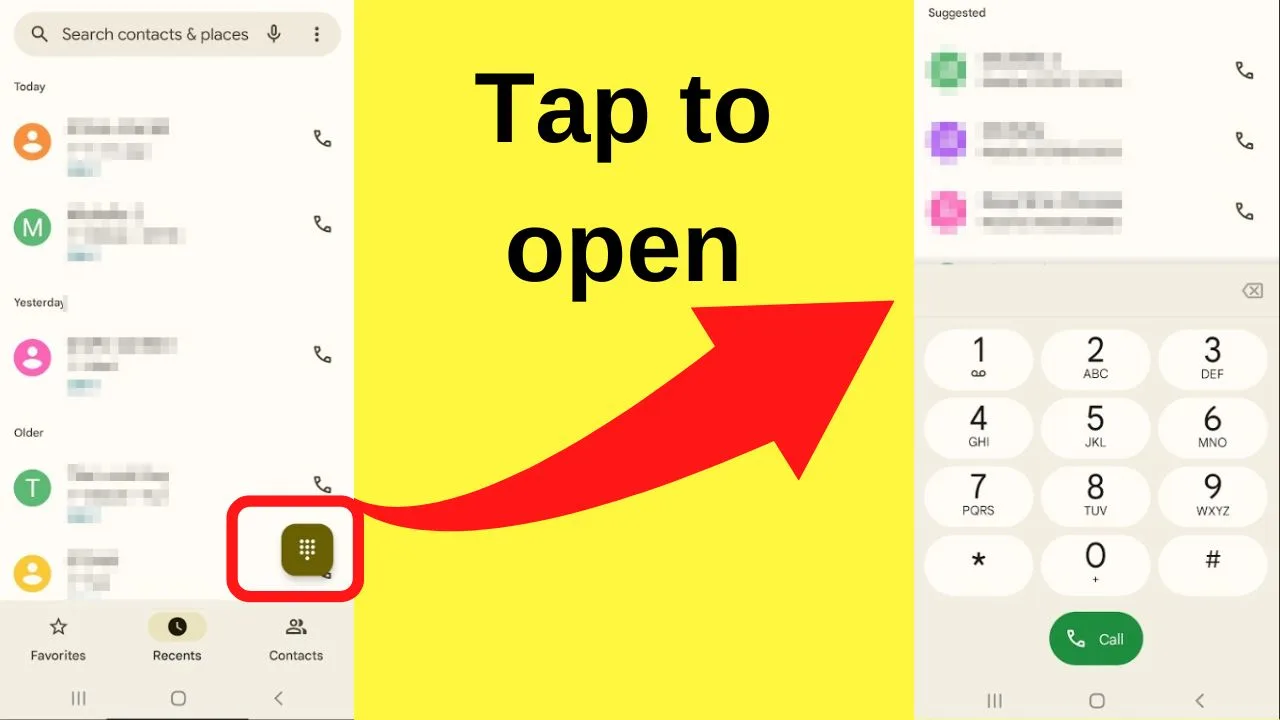
On the Google phone app, the dial pad is not listed by a word. Instead, there is an icon that floats at the bottom of the screen that when pressed, loads the dial pad.
The icon looks like a square with dots in the sequence of a dial pad – a 3 x 3 grid of buttons with an extra button located at the lower middle, which is where the call button would be located.
Tap on the dial pad icon to load the numerical keypad using the Google phone app.

If the above does not work, continue on with the troubleshooting steps below to get your dial pad back!
Dial pad not working? Try these 5 fixes
1. Clear data and the cache for the phone app
Clearing the data for any app will usually remove all of the data. This is not the case with Android phone applications. Your contacts and call history will remain as is.
Step 1: Go to Settings
Swipe down from the top of the screen then tap the gear icon.
![]()
![]()
Step 2: Tap on Apps
Select apps in the settings menu.
![]()
![]()
Step 3: Scroll to the Phone app
Select the phone app that is set as the default. You can have more than one phone application installed on Android, however, only the one set as default will be in use. Select the active phone app that you want to clear the cache on.
![]()
![]()
Step 4: Select Storage
![]()
![]()
Step 5: Clear cache
![]()
![]()
Step 6: Clear data
Once you tap on “clear data”, a dialogue box pops up alerting you to the data that will be erased. Top “ok” to proceed.
![]()
![]()
2. Check system updates
System updates are important for all devices, not just Android. Within these are patches/fixes for known bugs.
When an update is available, push notifications alert you to them. But with so many apps (and websites) pushing messages to your phone, it is easy to miss it.
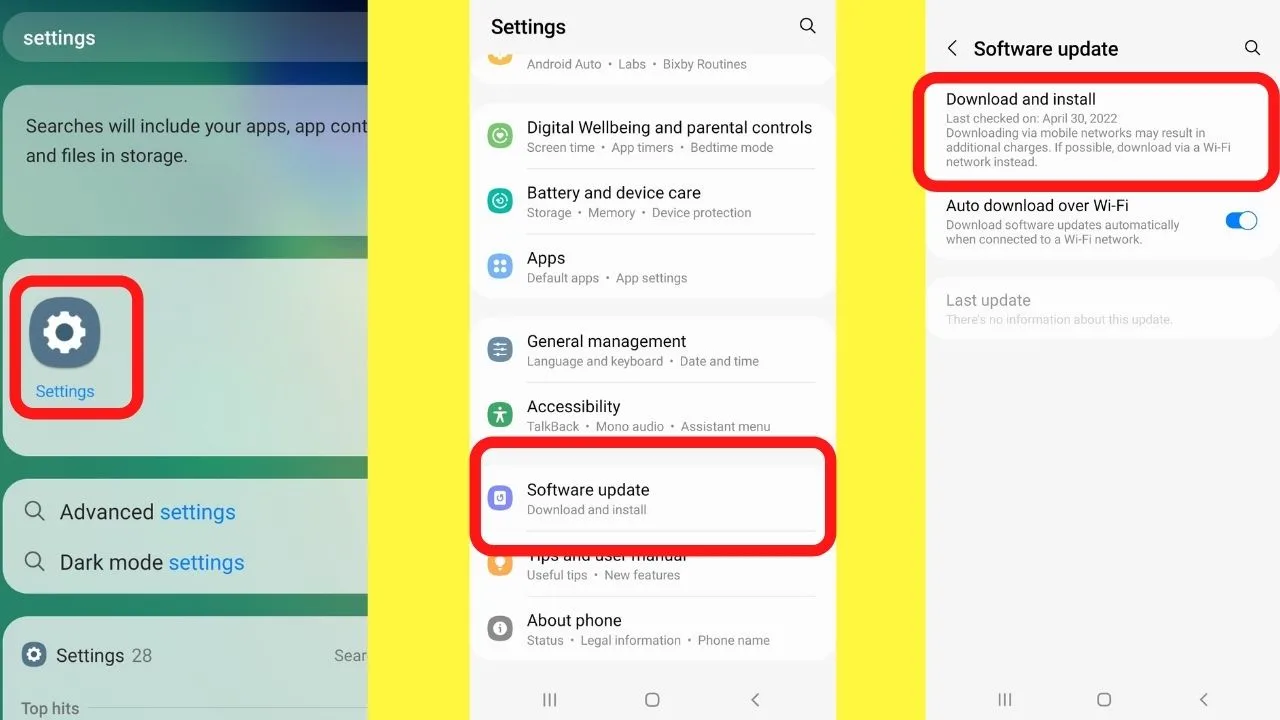
To install any available system updates, go to Settings > Tap on Software > Update or System Update > Download and install.

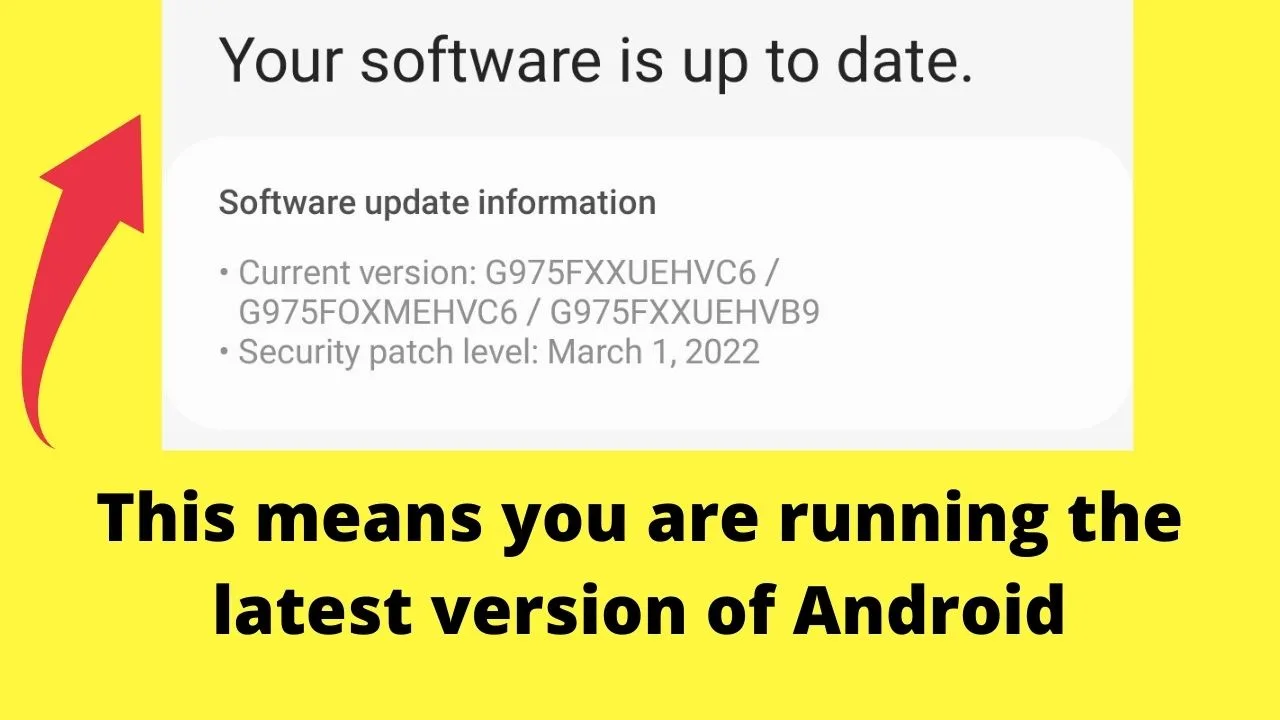
If no updates are available, it means you have the latest software running.

There can still be issues even with the latest updates installed. It could be a buggy update, a partial install, or a memory-intensive update that is too much for old devices to handle.
If you find that you have installed an update, and then things went haywire, you may need to uninstall updates on Android, which is done just as easily.
3. Free up storage space
When the memory on Android devices becomes constrained, things begin breaking.
Check what memory your device has available. Low memory is what you are alerted of through error messages when it becomes problematic.
Before that though, there is an integrated system in Android that will terminate apps in the background to keep your active apps working.
After all, if they are running in the background, you will not notice them being terminated, right? Perhaps.
The real issue is with high-pressure memory resources. Android handles these with a system feature called low memory killer daemon (lmkd).
When the system is affected by high memory pressure, the response is to kill off whatever non-essential processes are happening to keep the apps that are in use functioning.
The dial pad is an essential process so it should not stop functioning, however, it can happen, such as if a more important task is in progress like performing system updates, backups, or syncing to the cloud.
By freeing up storage space, you are essentially removing the burden on the system from determining which apps to kill and which ones to keep running, despite high memory pressure.
Most Android devices are capable of handling loads of apps, but if you are experiencing low memory errors already, expect it to interfere at some point with the normal functioning of your phone.
Your best bet is to go through your apps and remove anything that is no longer used.
How to delete unused apps
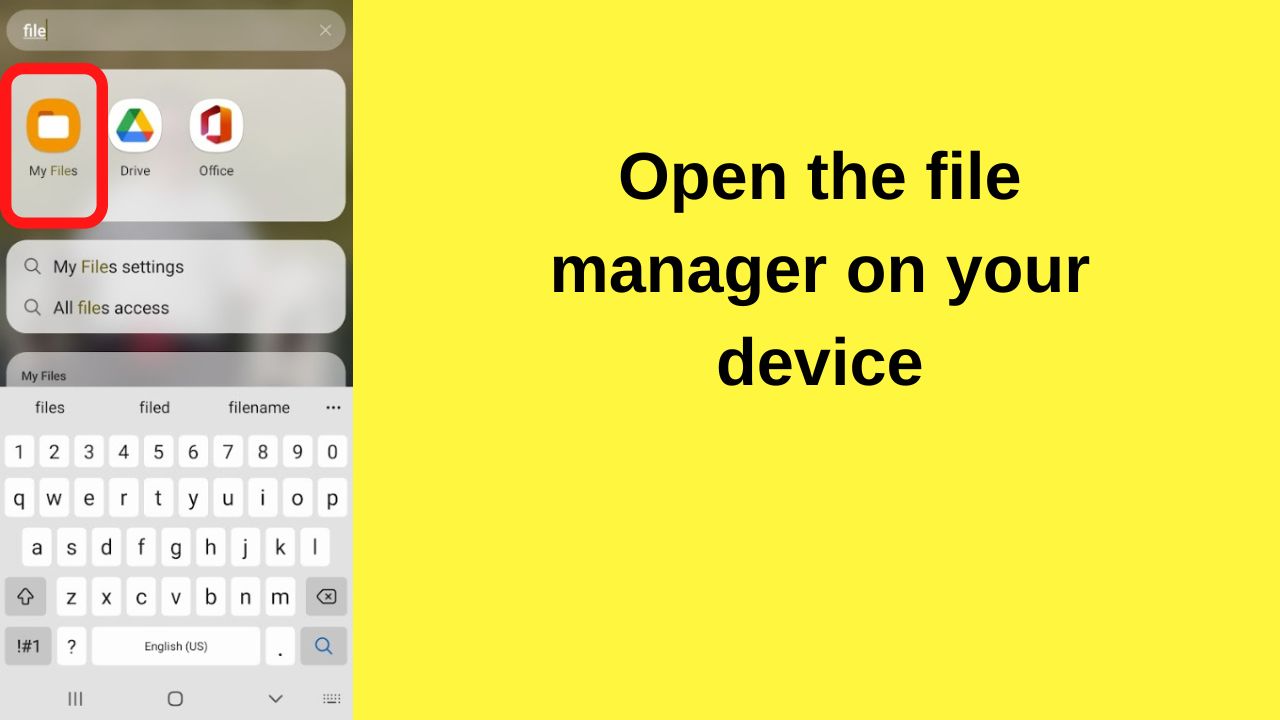
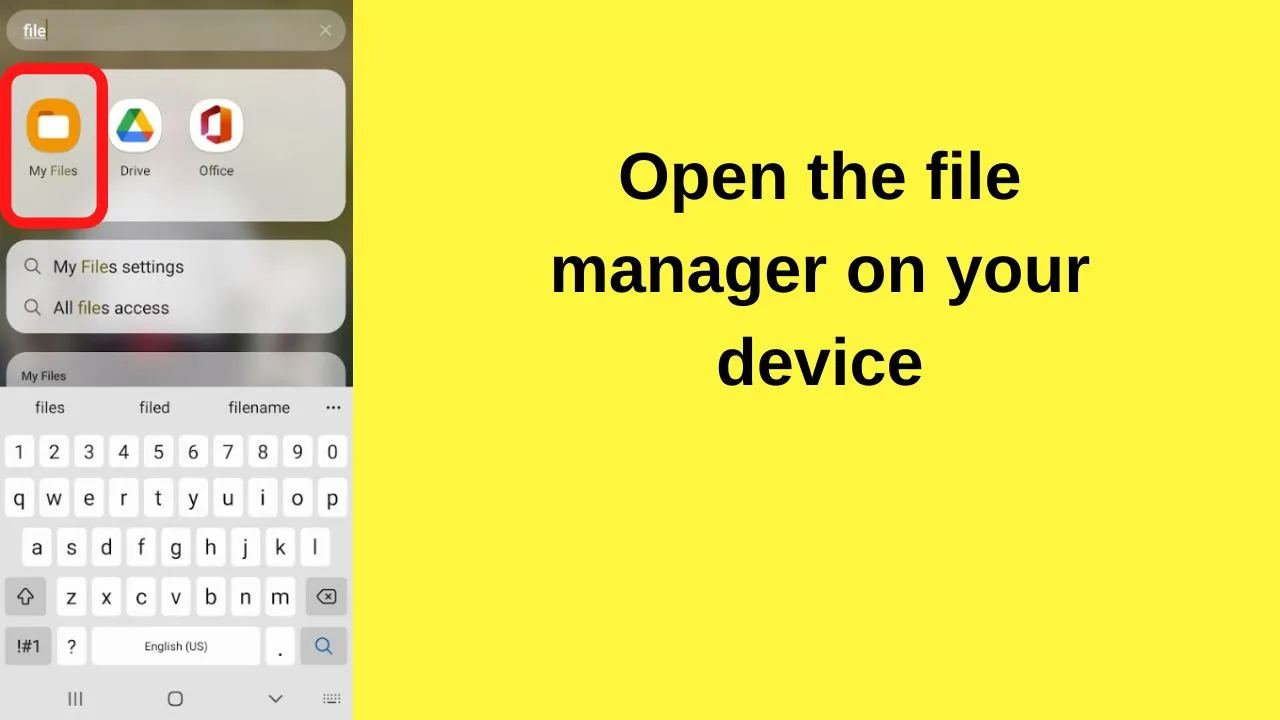
Step 1: Go to my files
Type “file” in into your device’s search bar on the home screen. Some devices use “File Manager”, others have “My Files. Tap whichever file manager your device has available.
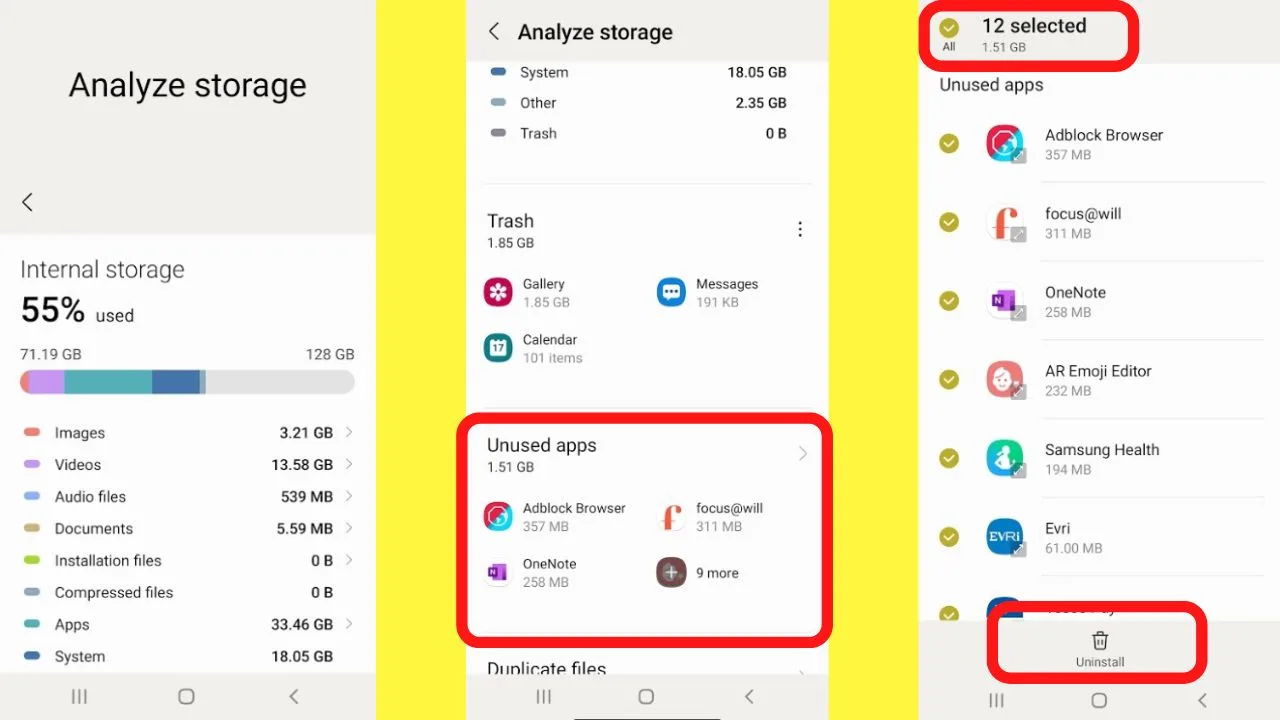
Step 2: Select Analyze storage


Step 3: Remove unused apps
The next page shows how much “internal storage” is used and what is using the most. In most cases, it will be images and videos, but there can be an astonishing amount of memory being hoarded by apps.
Scroll down to the “unused apps” section, tap on the expand arrow or plus icon, then select which apps to remove.
Tap Uninstall to batch remove unused apps from your phone.

Once apps are uninstalled, memory will be freed up, eliminating low memory issues.
4. Restart the device
On the majority of Android devices, long pressing on the power button (which is holding the power button in for five to ten seconds) will load an options screen for powering your phone down.
All have similar wording…
- Power off
- Restart
- Emergency mode (sometimes called battery-saver mode)
Tap on the restart button.
This approach is often all that is needed to fix niggly issues on Android.
When the system restart is performed, it purges multiple caches leading to an uptick in performance.
On older phones, particularly those with low memory, frequent restarting can be beneficial.
5. Install an alternative dialer app
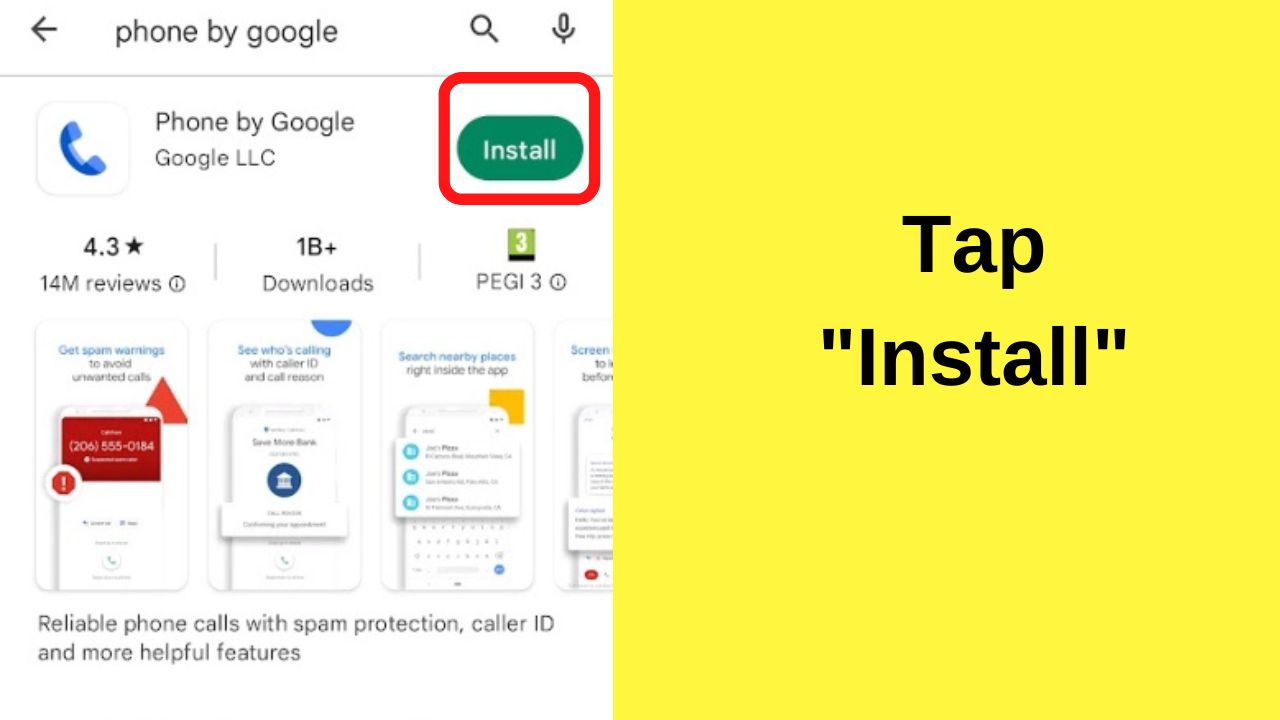
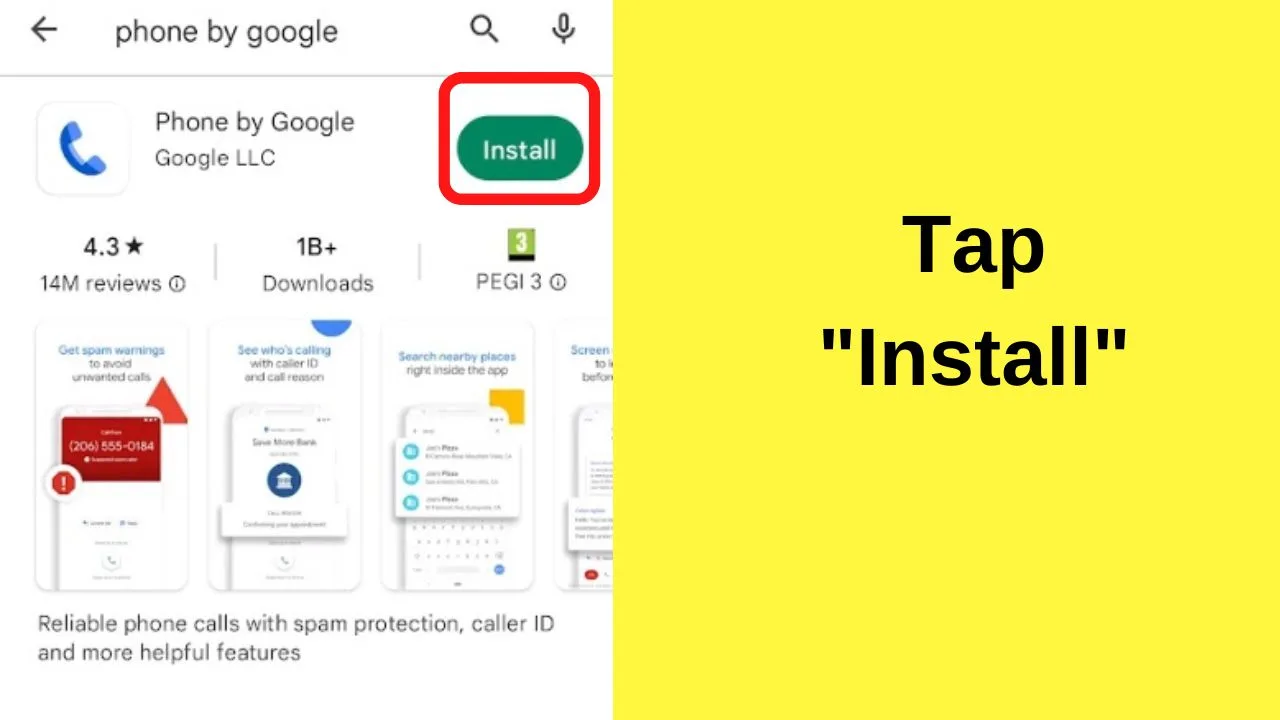
The Phone by Google app is the most popular and reliable dialer app for Android. It is updated frequently, and rarely causes issues.
To install,
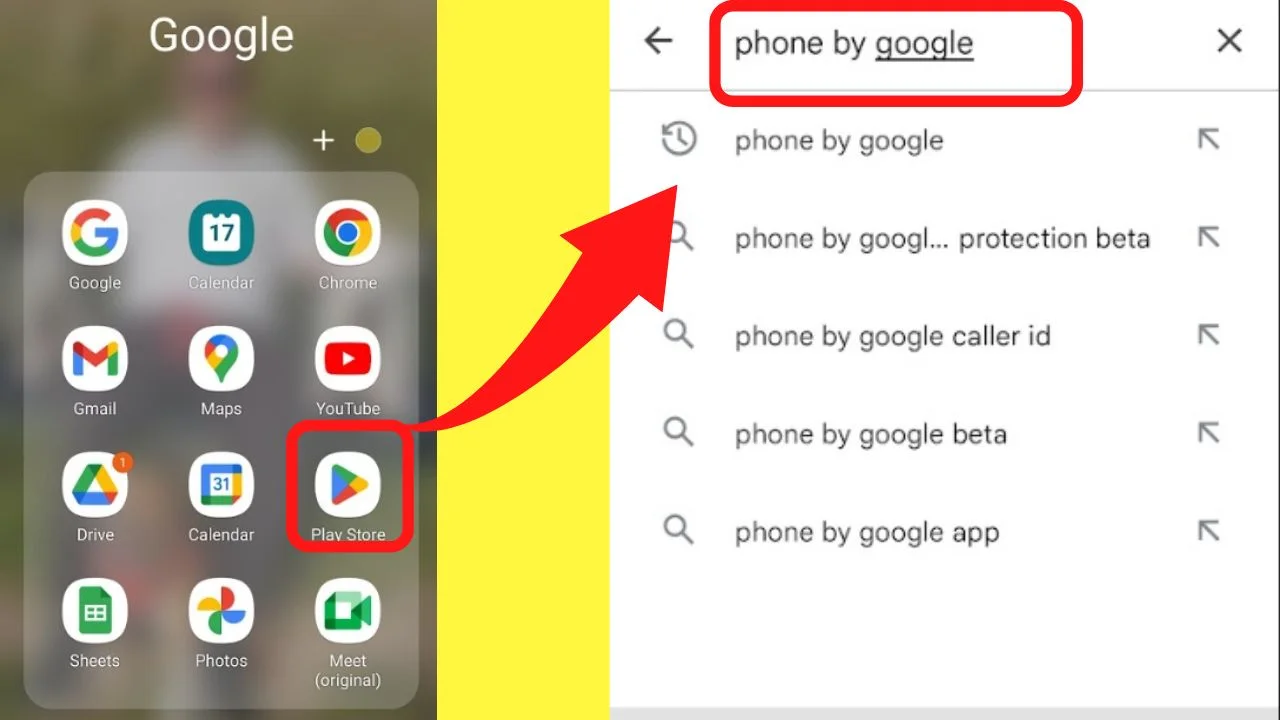
Step 1: go to the Google Play Store and search for “Phone by Google”.

Step 2: Tap install
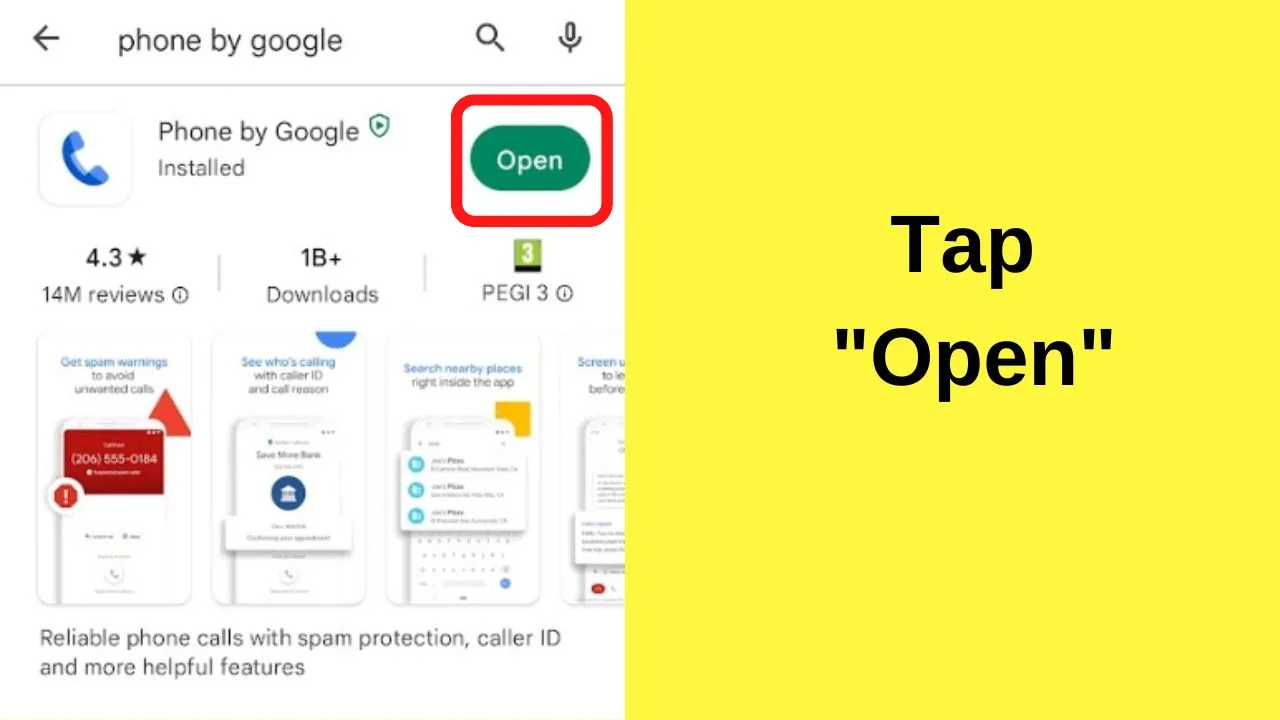
Step 3: Tap Open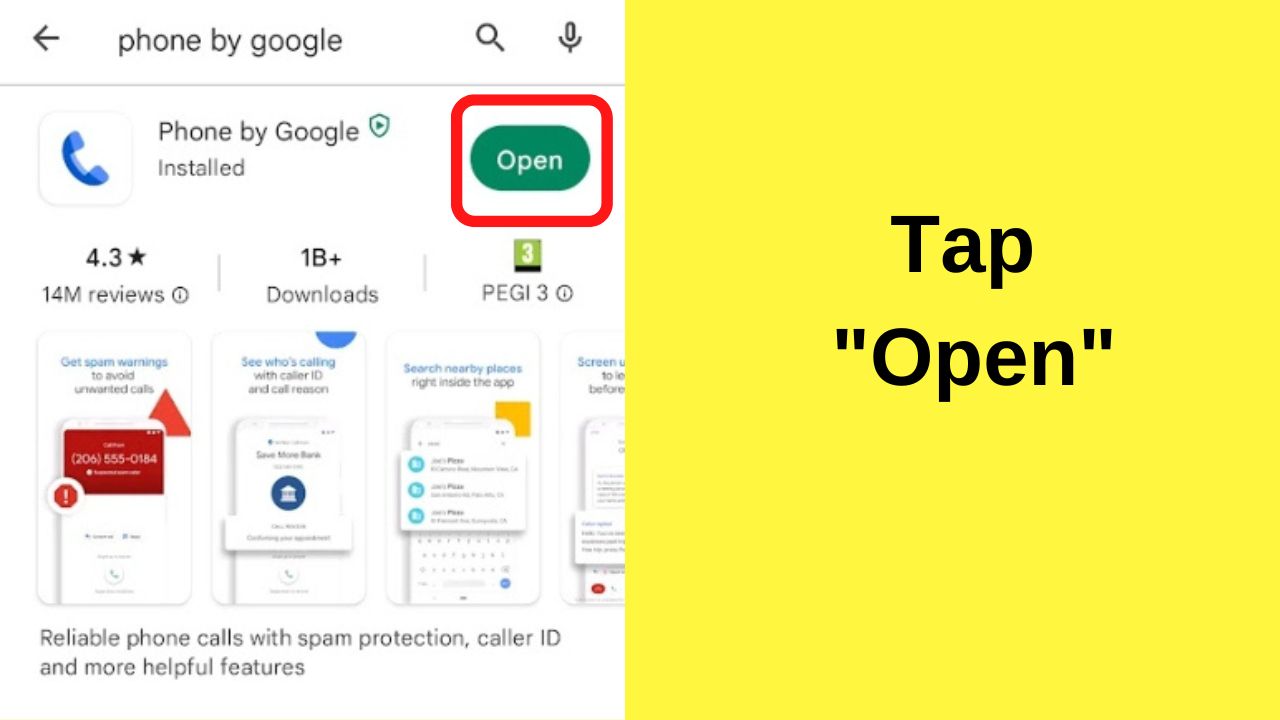
Step 4: Set the app as your default phone app

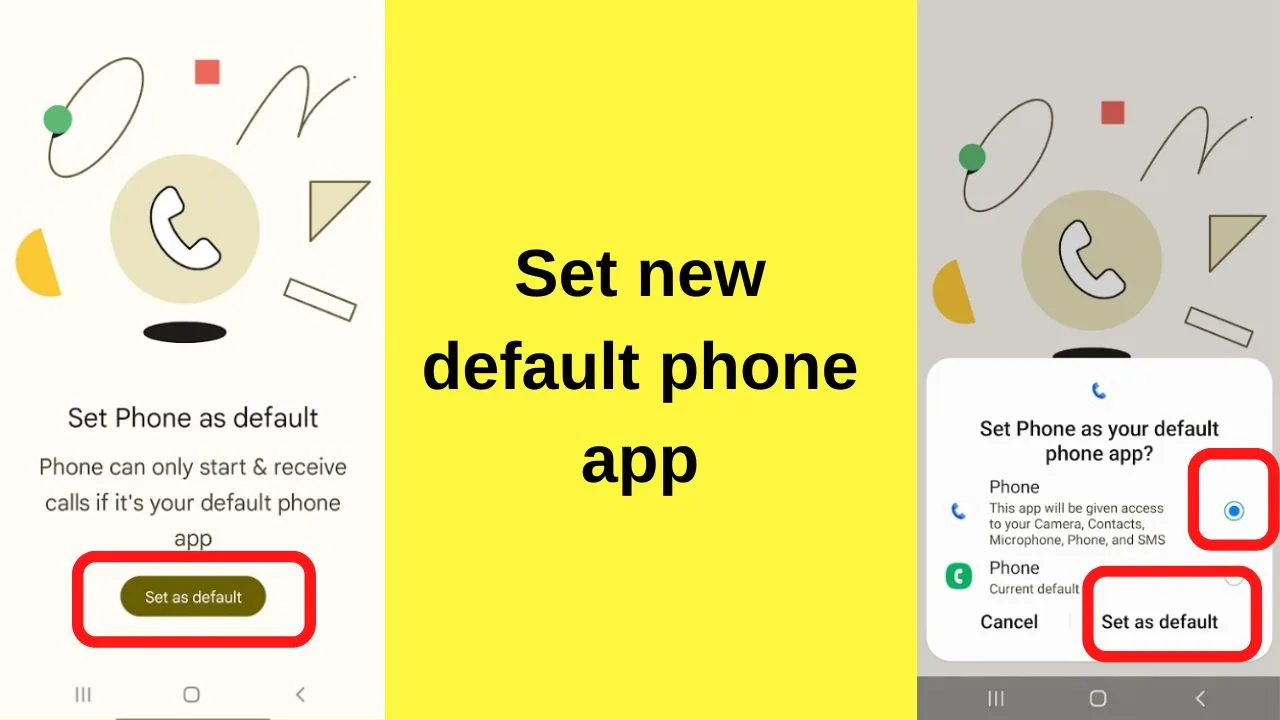
The app needs to be set as your default phone app before it can be used.
Now that you know how to fix a broken dial pad on Android, you might also be interested in knowing “how to recall a text message on Android because at the end of the day we all make mistakes when sending messages and knowing how to recall messages can literally save your life at times!


Hey guys! It’s me, Marcel, aka Maschi. On MaschiTuts, it’s all about tutorials! No matter the topic of the article, the goal always remains the same: Providing you guys with the most in-depth and helpful tutorials!

