Instagram is such a great social media app for sharing photos and videos of memorable life events. You can even create a fun reel to compile those videos and photos.
Aside from these features, Instagram also allows its users to add effects and even filters to reels or stories. Some of these filters enhance the video’s look; others add an element of fun to them.
Among the IG filters available, the most popular is the crying filter. If you’re curious how you can use such a feature on Instagram, keep reading to find out how.
How to Use a Crying Filter on Instagram Reels
- Tap “+” on the home page.
- Press “Reels” on the bottom menu of the editor page.
- Tap “Effects” on the left-side panel.
- Press “Search.”
- Type “crying face” inside the search bar.
- Choose the crying filter you’ll use on the gallery.
- Tap the bookmark icon to save the filter.
Make sure though that the IG app is updated. If you haven’t, visit either the “App Store” (iOS) or “Play Store” (Android) and press the “Update” button.
Remember, an outdated Instagram app is just one of the reasons why your Instagram filters won’t work.
After updating your IG app, go ahead and follow the steps below so you can use the crying filter:
Step 1: Press the “+” button on the Instagram home page

This button is found to the left of the “Messenger” icon.
Step 2: Tap “Reel”
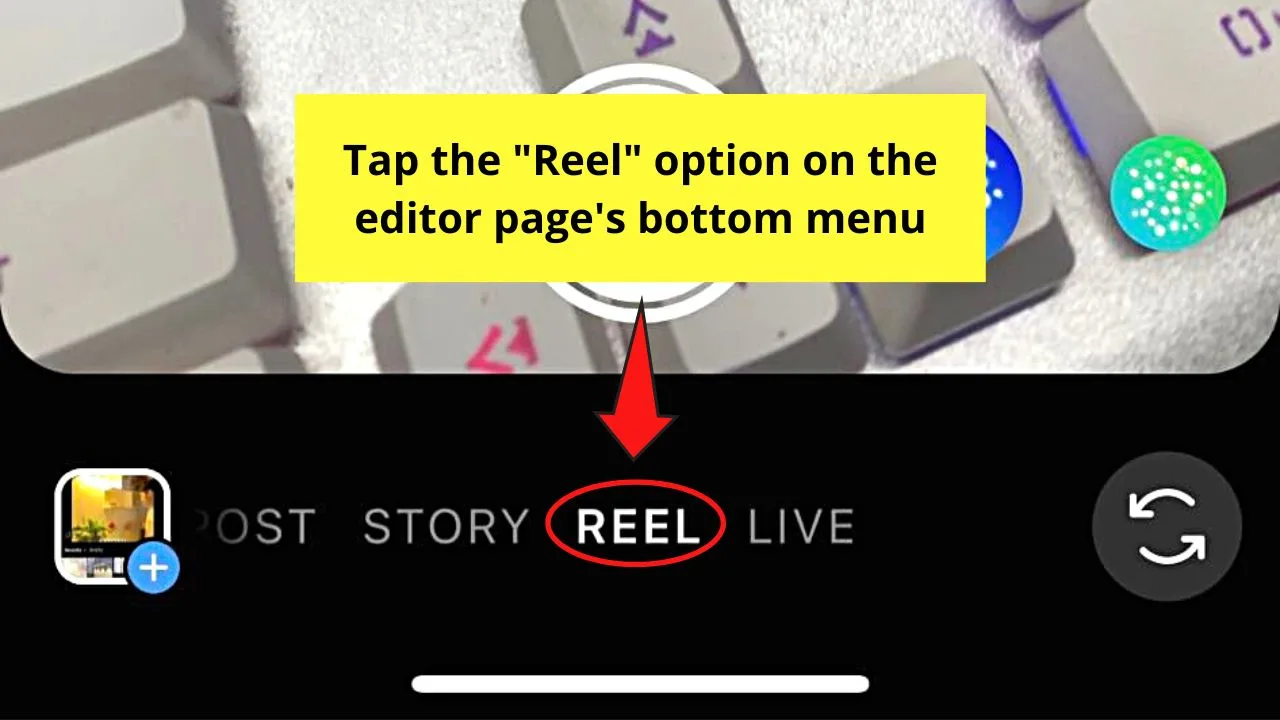
You’ll find this option on the bottom menu of the editor page.
Step 3: Press the “Effects” icon
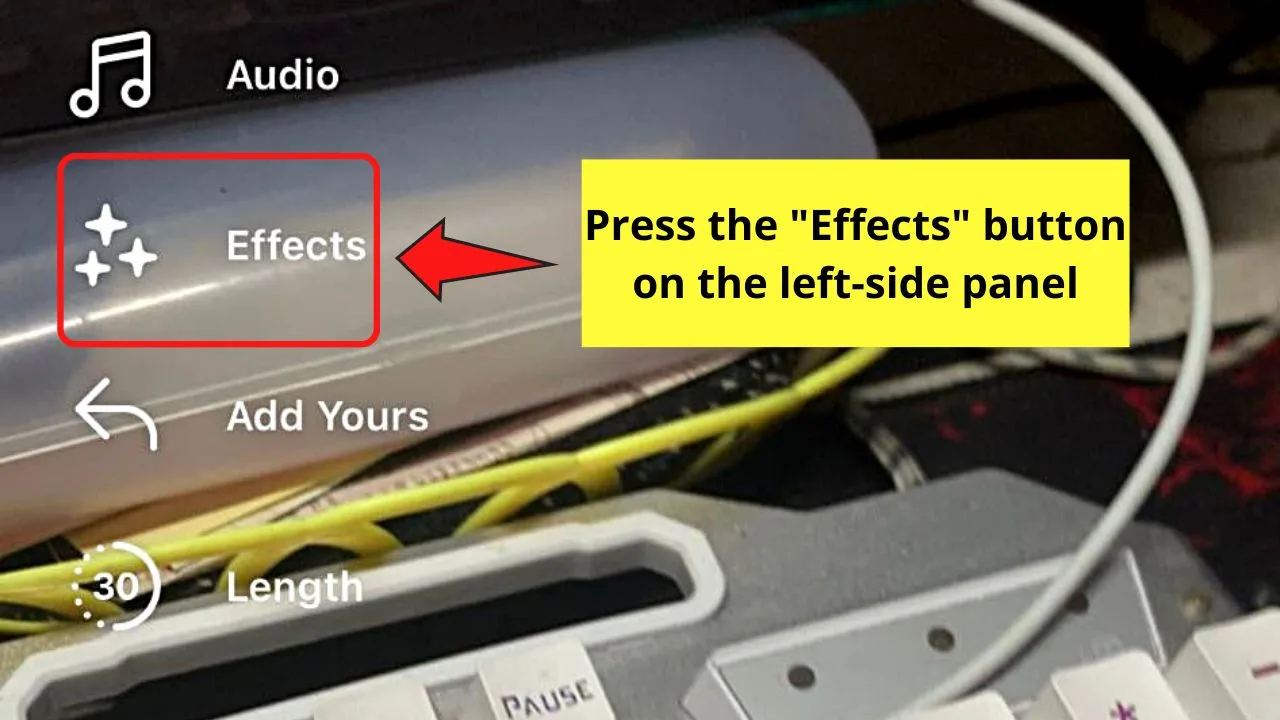
You’ll only find this option when you’re inside the editor page. The “Effects” button appears as sparkles on the left-side menu.
Step 4: Tap the “Search” button on the effects gallery header bar
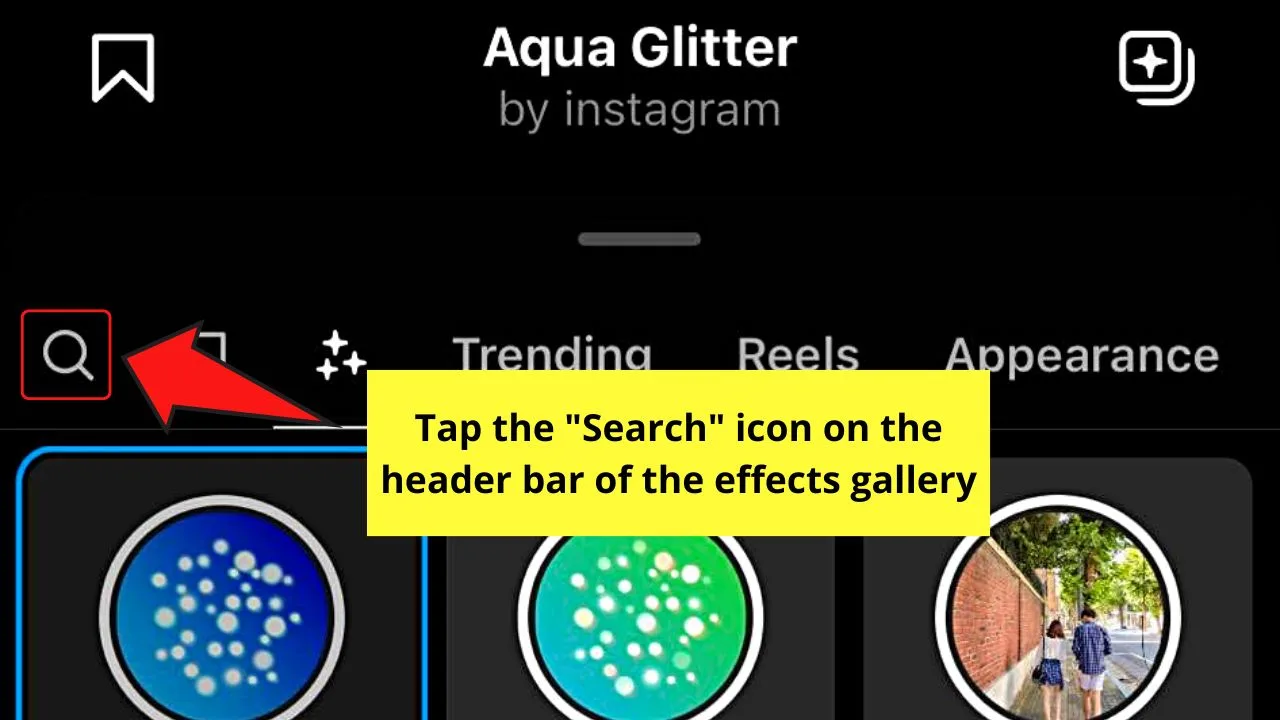
You won’t miss out on this icon as it appears as a magnifying lens.
Step 5: Tap the search bar and type “crying face” or “crying filter” in it
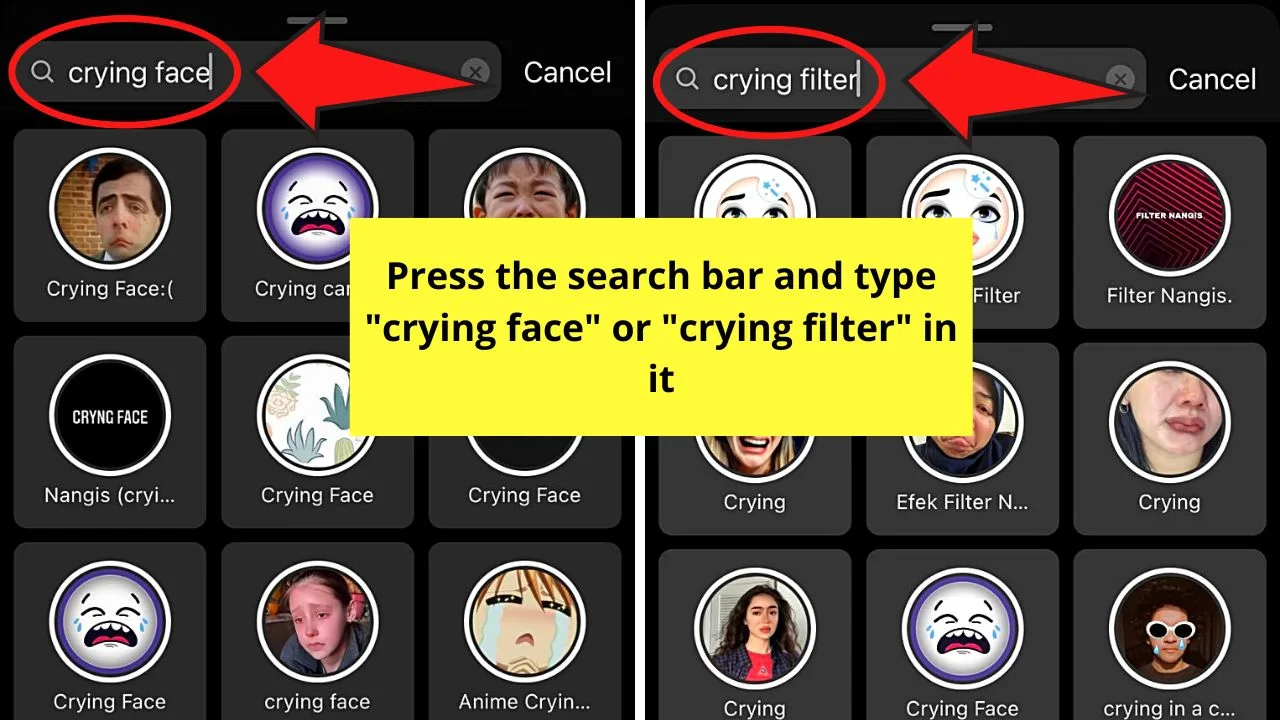
A gallery of crying filters will then appear below the search bar.
Step 6: Press on a crying filter thumbnail

As there are different options for the crying filter, choose one that you like best. Since I like anime, I’ll tap the “Anime Crying” filter.
You will then see the chosen filter fill up the space inside the circle on the preview window.
Step 7: Tap the bookmark icon
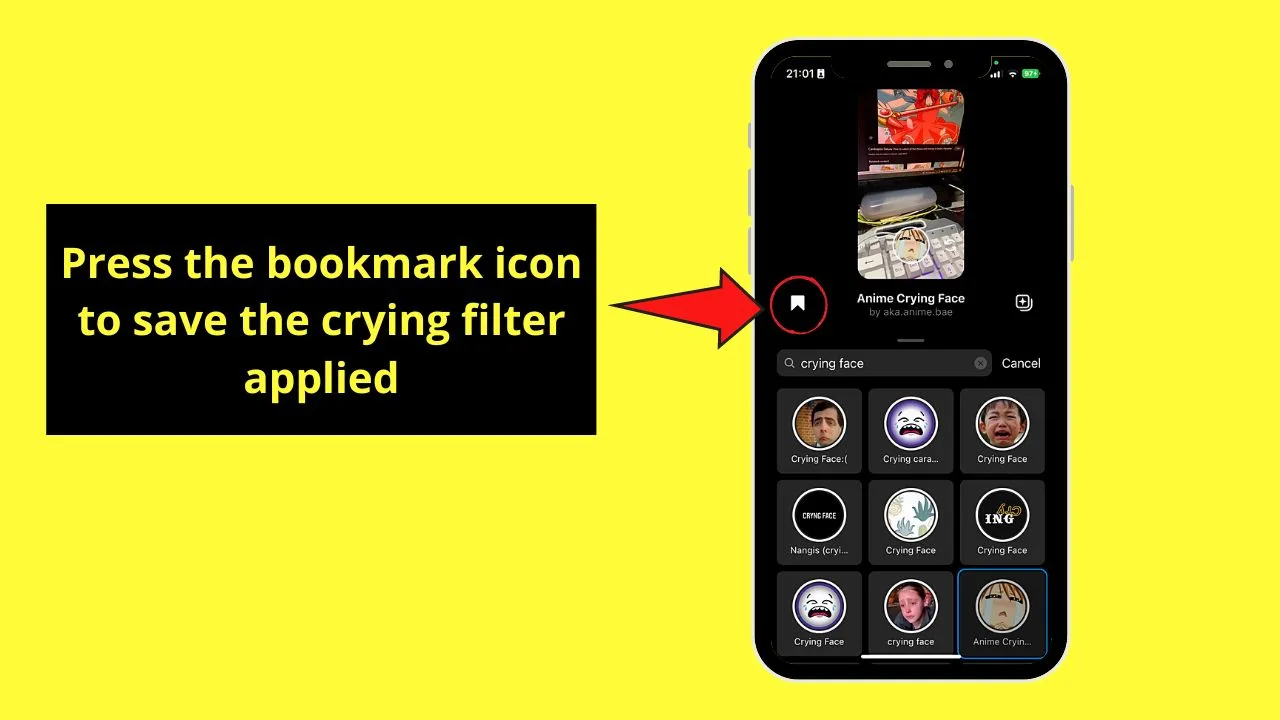
Doing this step saves the crying filter for later use, making it easier for you to find it.
You’ll then find the crying filter you saved on the left side of the “Record” button.
This step is optional though. Not bookmarking this filter won’t affect your ability to use it in future IG reels.
Then, record your IG reel by tapping on the preview window and pressing the “Record” button.
But, this crying filter isn’t exclusive to IG reels only. Even on stories, you can use it as well.
How to Use a Crying Filter on Instagram Story
- From Instagram’s home page, swipe your finger to the right.
- Swipe the bottom menu to the left to choose “Story.”
- Swipe the “Effects” carousel to the left and tap “Browse effects.”
- Press the “Search” button.
- Type “crying face” in the search bar.
- Tap the crying face filter you want to use
- Press the bookmark icon to save the filter chosen.
Again, before you can use this filter, update your Instagram app first. After which you can proceed with the following steps:
Step 1: Swipe right on Instagram’s home page

This move will lead you to the editor page directly.
Step 2: Swipe the bottom menu to the left and stop at “Story”

You’ll find this menu between the “Gallery” and the “Switch Camera” buttons.
Step 3: Swipe the “Effects” carousel to the left and press “Browse effects”
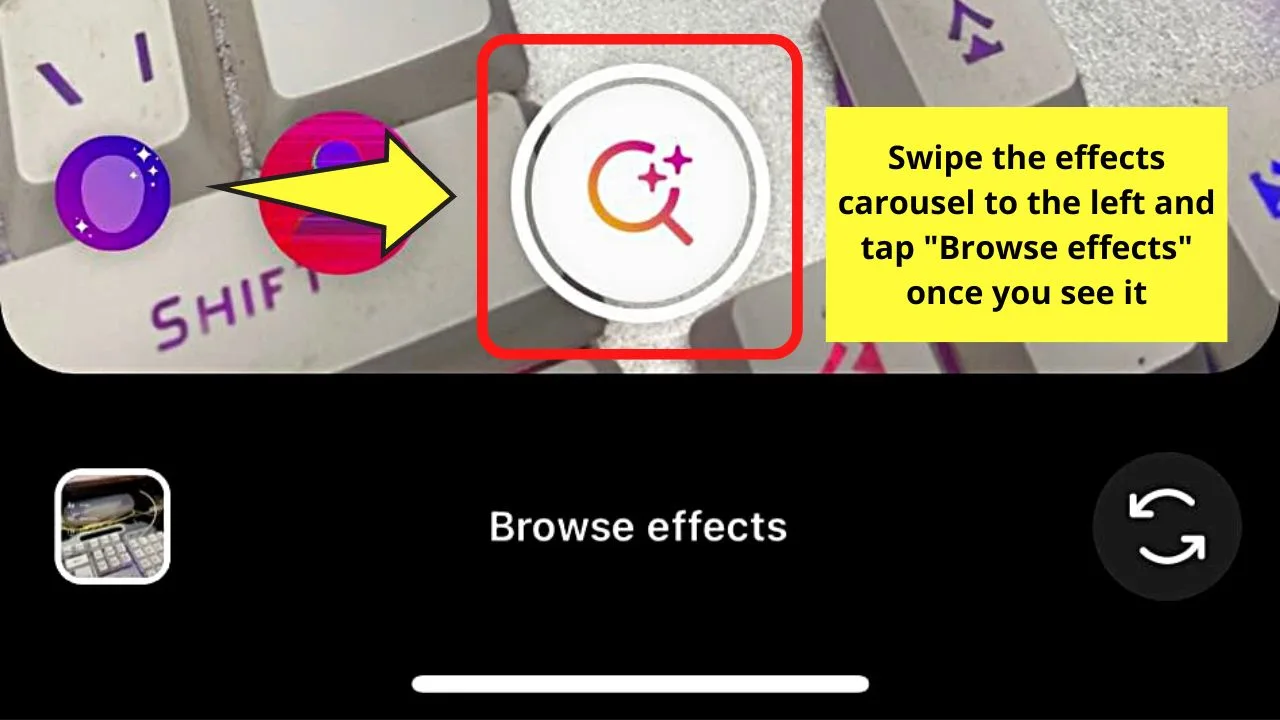
“Browse Effects” is found to the rightmost of the “Effects” carousel, hence the need to continue swiping to the left.
Step 4: Tap “Search”
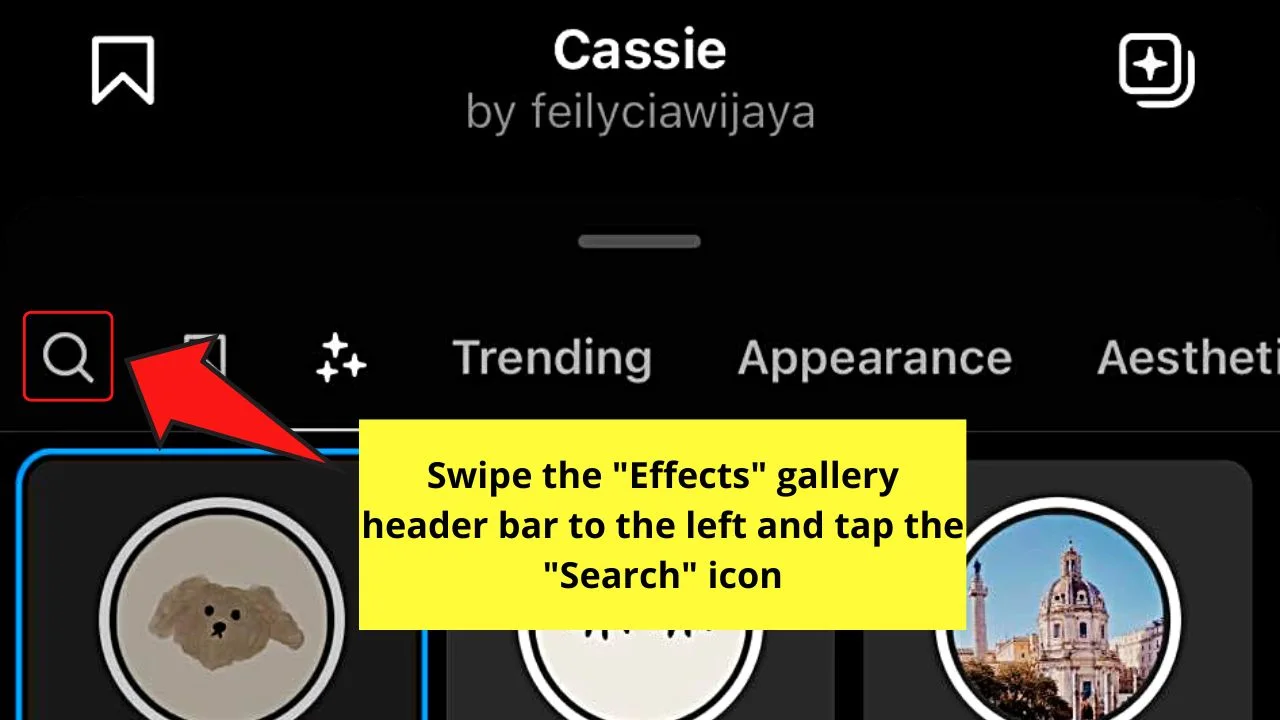
This “Search” icon appears as a magnifying lens on the “Effects” gallery header bar.
But, as the “Trending” tab is the one featured by default, you have to swipe the header bar of the “Effects” gallery to the right until you see the magnifying glass icon.
Step 5: Press the search bar and type “crying face”

You can also type “crying filter” instead.
A gallery of crying filters then appears below the search bar.
Step 6: Choose the crying filter you want to use
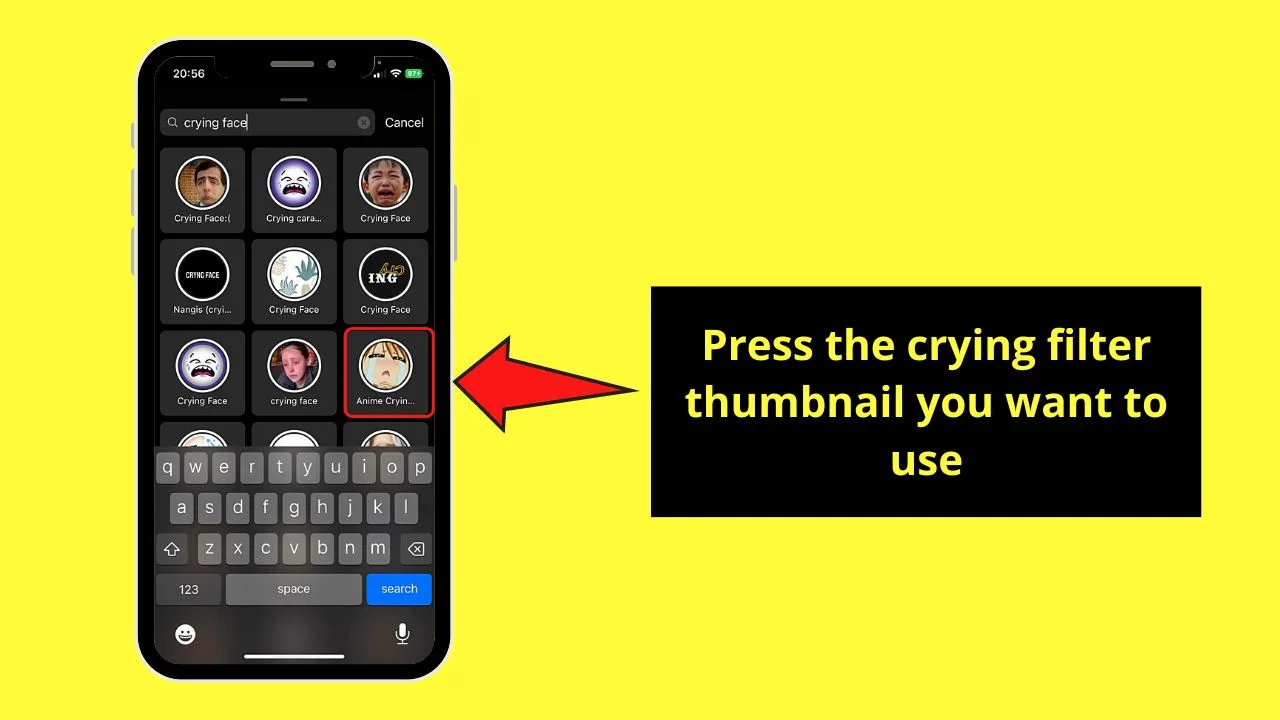
You can tap the filter thumbnails one by one until you find the one you’ll use.
The crying filter you have selected will then appear inside the circle of the preview window.
Step 7: Press the bookmark icon
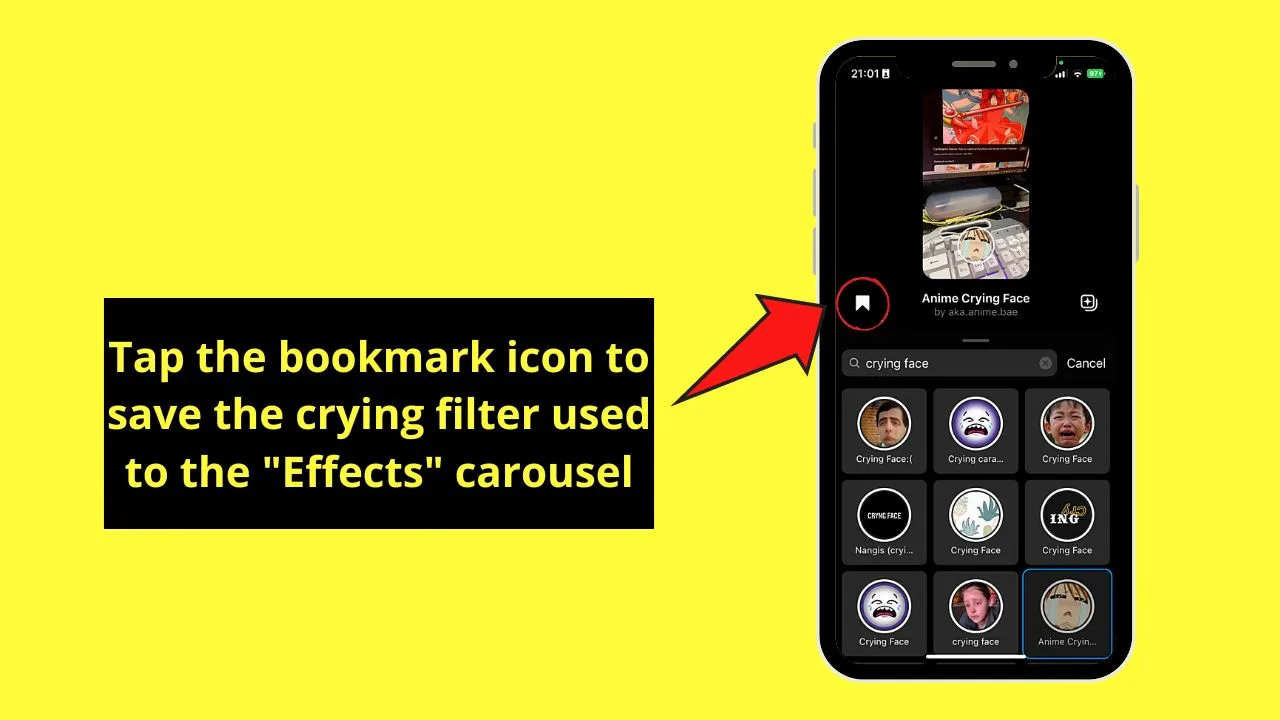
Doing this step will save the crying filter you selected and add it to the “Effects” carousel. But, again, this is merely optional.
After which, tap on the preview window and capture the photo with the filter used for your story.
Now that you know these steps, start making Instagram reels and stories with this crying filter.
You can also try using the before and after filter in the same app too.
Frequently Asked Questions about How to Use a Crying Filter on Instagram
Why can’t I find the crying filter on the effects carousel on IG’s editor page?
The crying filter is user-created. You need to search for it before you can use it. To do so, swipe the effects carousel to the left and tap “Browse effects.” Press the “Search” button and type “crying filter” in the search bar. Lastly, choose the crying filter you want to use.
How do I add the crying filter to my effects carousel on the editor page?
Add the crying filter to your IG effects carousel by tapping the bookmark icon on the lower right of the preview window. You will then find the said filter at the leftmost of the effects carousel.
Is the crying filter exclusive to Instagram?
The popular crying filter is not exclusive to Instagram. You can also find this on TikTok and Snapchat.
Do I need to download the crying filter first before I can use it on my Instagram stories or reels?
There is no need to download the crying filter on Instagram. You simply have to search for it from the effects gallery and tap its thumbnail to use it. You can also save it by tapping the bookmark icon to add it to your effects carousel.

Hey guys! It’s me, Marcel, aka Maschi. On MaschiTuts, it’s all about tutorials! No matter the topic of the article, the goal always remains the same: Providing you guys with the most in-depth and helpful tutorials!


