

Are you a fan of creating fun reels and stories with the various filters that you can see on Instagram?
If you do, you’ve probably come across one of the most popular filters nowadays — the “Before/After” filter.
So, if you’re quite lagging behind this latest trend, here’s how you can incorporate this filter in the reel you’re creating.
How to Use Before and After Filter on Instagram
- On Instagram’s home page, press the “+” button after launching the app.
- Press the “Reel” option.
- In the “Reels” screen, tap “Effects.”
- Press the “Search” icon at the lower left of the screen.
- In the search bar that appears, type “Before After S Scan.” Select the first result that appears from the search.
- After adding the filter, add an image that you want the scan to show after by pressing “Add media.”
- Once the photo’s added, begin recording the video by tapping the circle icon.
Using The Before and After Filter on Instagram — 7 Basic Steps to Follow
As mentioned earlier, the “Before and After” filter for reels on Instagram is one of the most popular reels used by users of the app.
Not only is it a creative outlet for some of the users especially when used as advertising gigs, but it also serves as entertainment for the rest.
If you’re curious about how you can join this popular trend and not use the Instagram reels you created with Canva, then read and follow the steps I’ll lay down below.
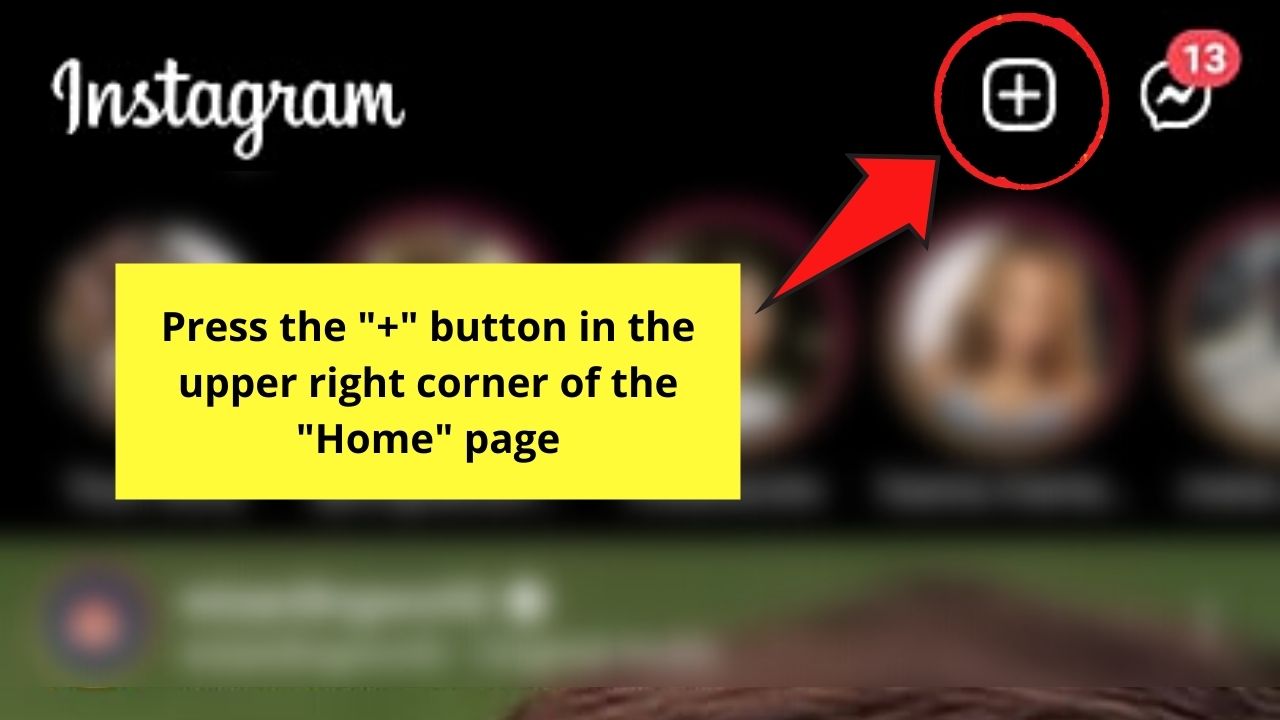
Step 1: Once you launch the Instagram app on your phone, tap the “+” button on the “Home” page.

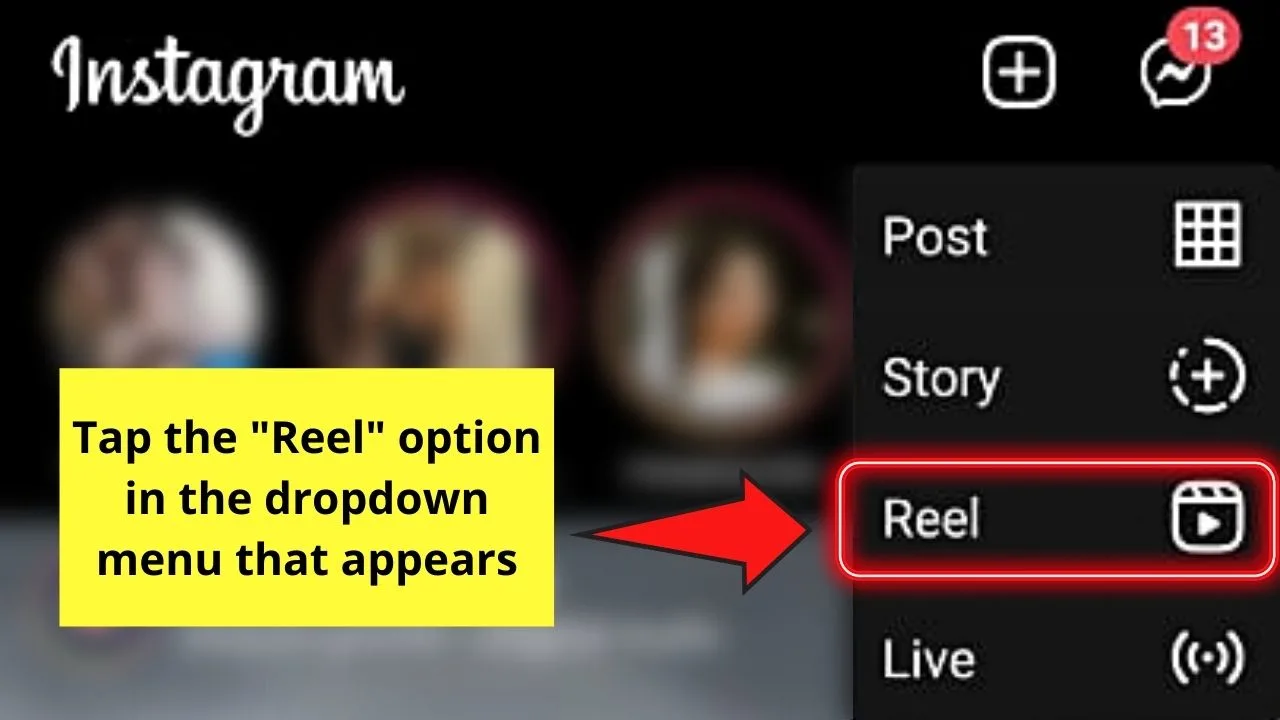
Step 2: On the dropdown menu that appears, you’ll see 4 options you can create: Post, Story, Reel, and Live.
Since we’re aiming to create a reel, tap the “Reel” button.

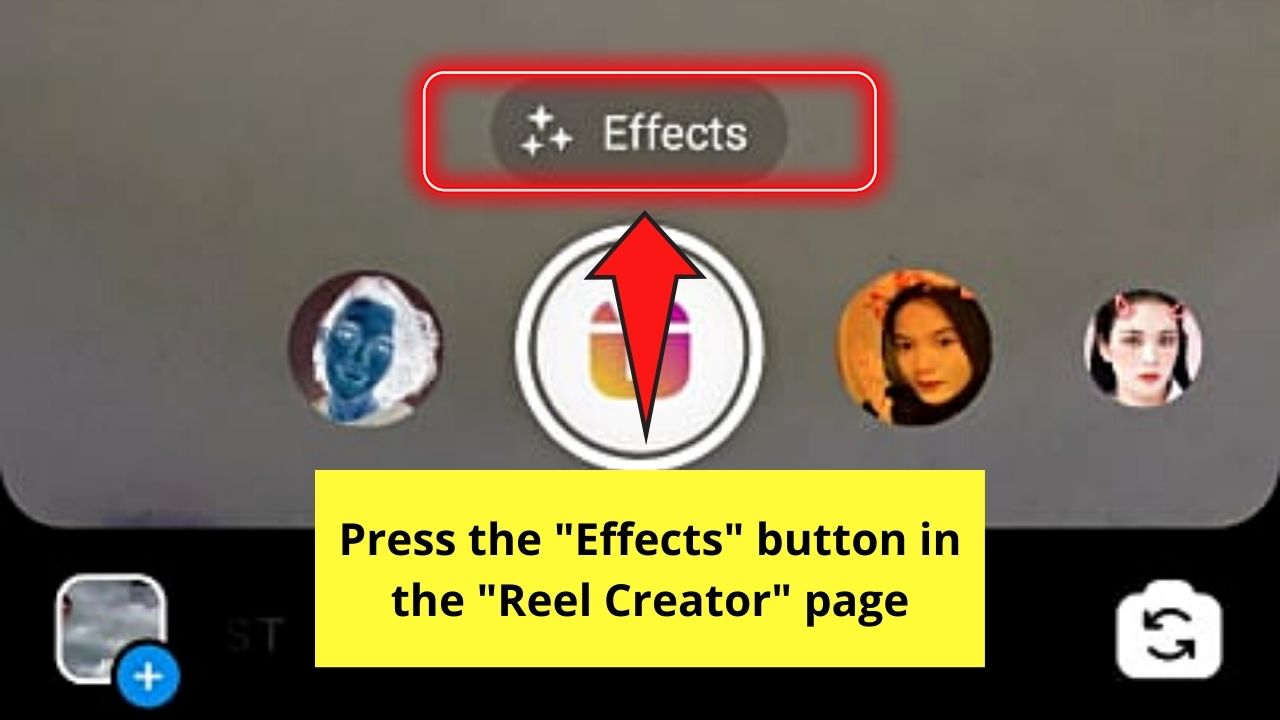
Step 3: Once you’re on the “Reels Creator” page press the “Effects” button found above the circle in the middle.

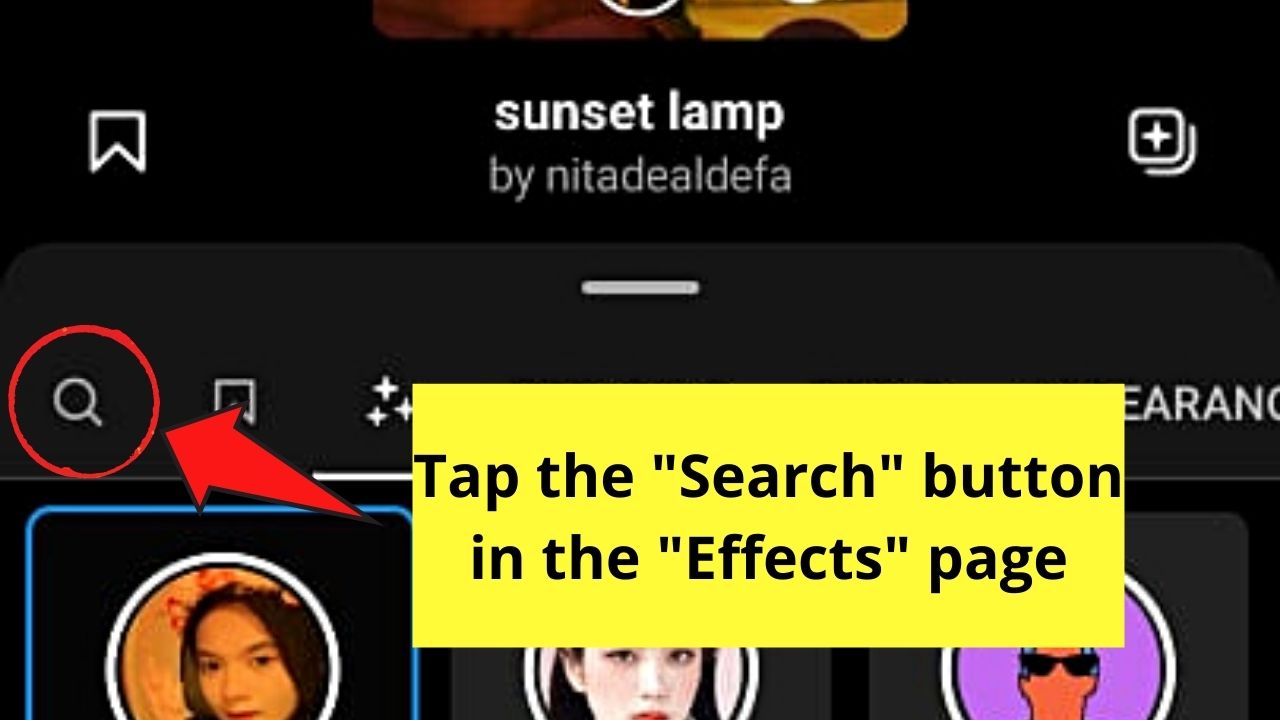
Step 4: In the “Effects” menu, tap the “Search” icon. You won’t miss this button as it takes the shape of a magnifying lens.

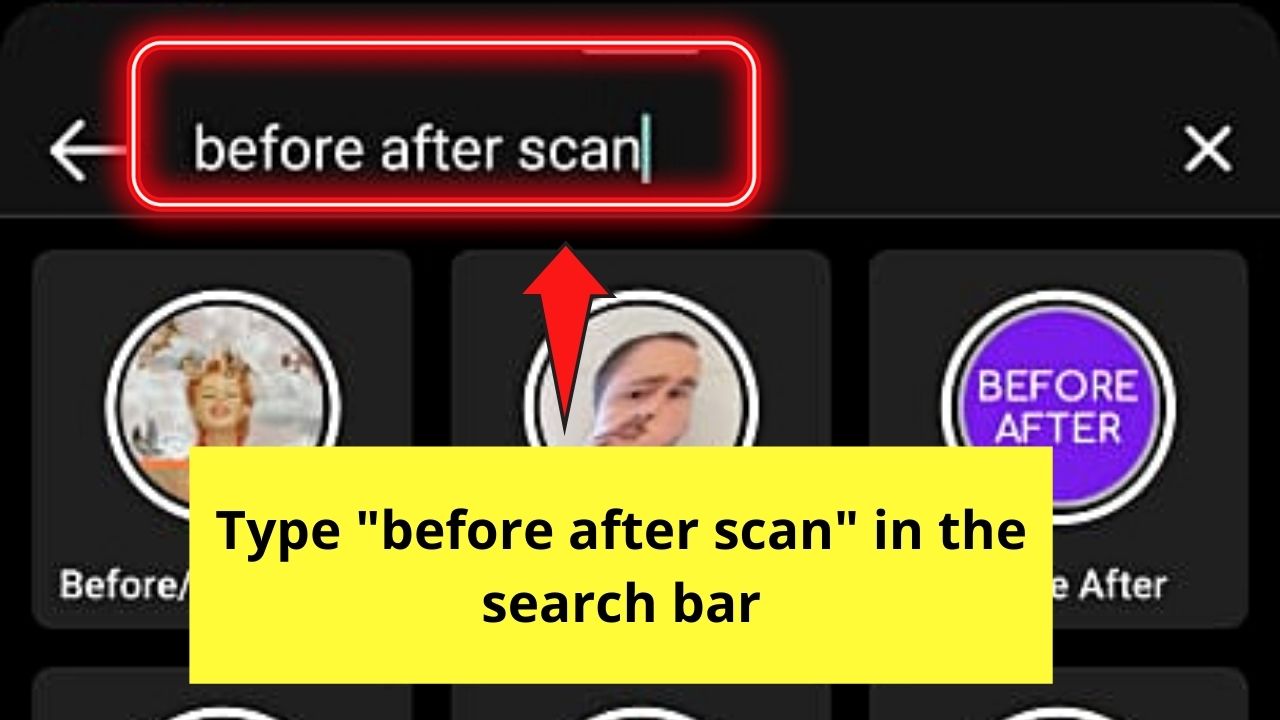
Step 5: You will then see a search bar appear.
Tap once on the said search bar and encode the “Before After S Scan.” This is the keyword for you to search the filter.


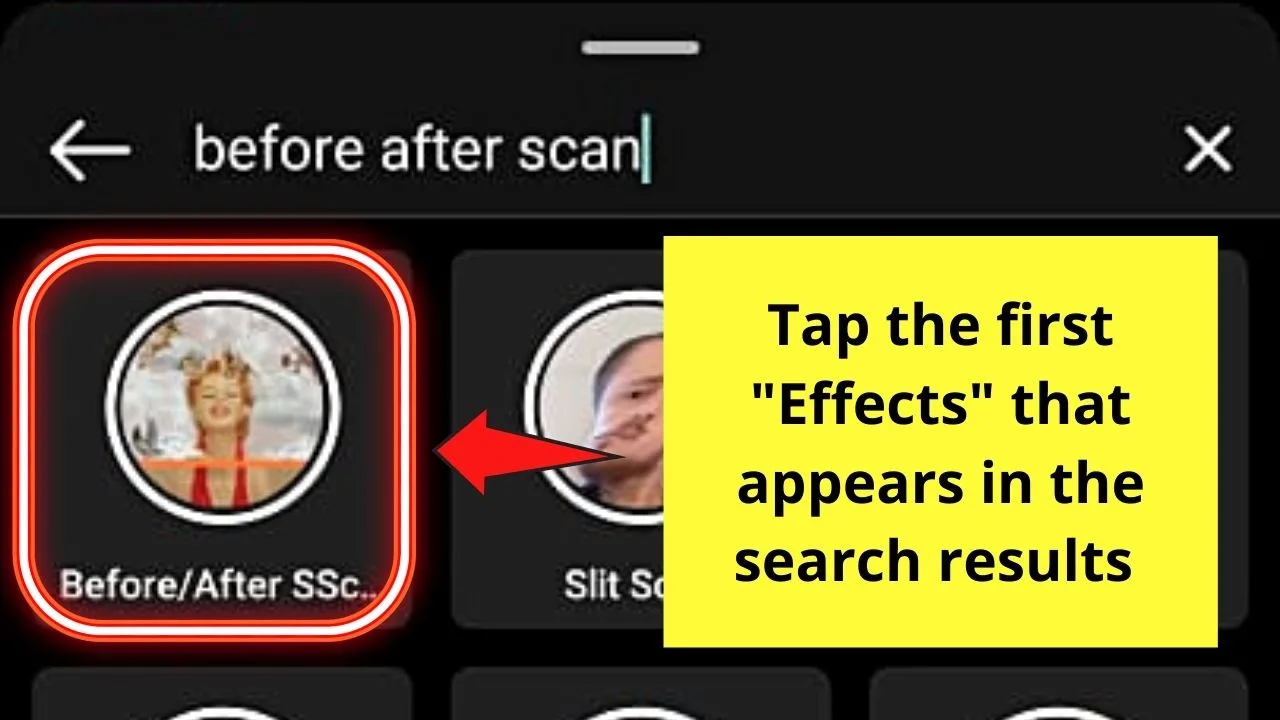
The page will then take a few seconds to load all the effects that fall in the same category as the keywords you typed in the search bar.
From all the search results that appear, tap the first effect that appears in the search results. You’ll find this at the leftmost part of the page.

Step 6: After you added the filter, head back to the “Reel Creator” page and tap the “Add media” icon.

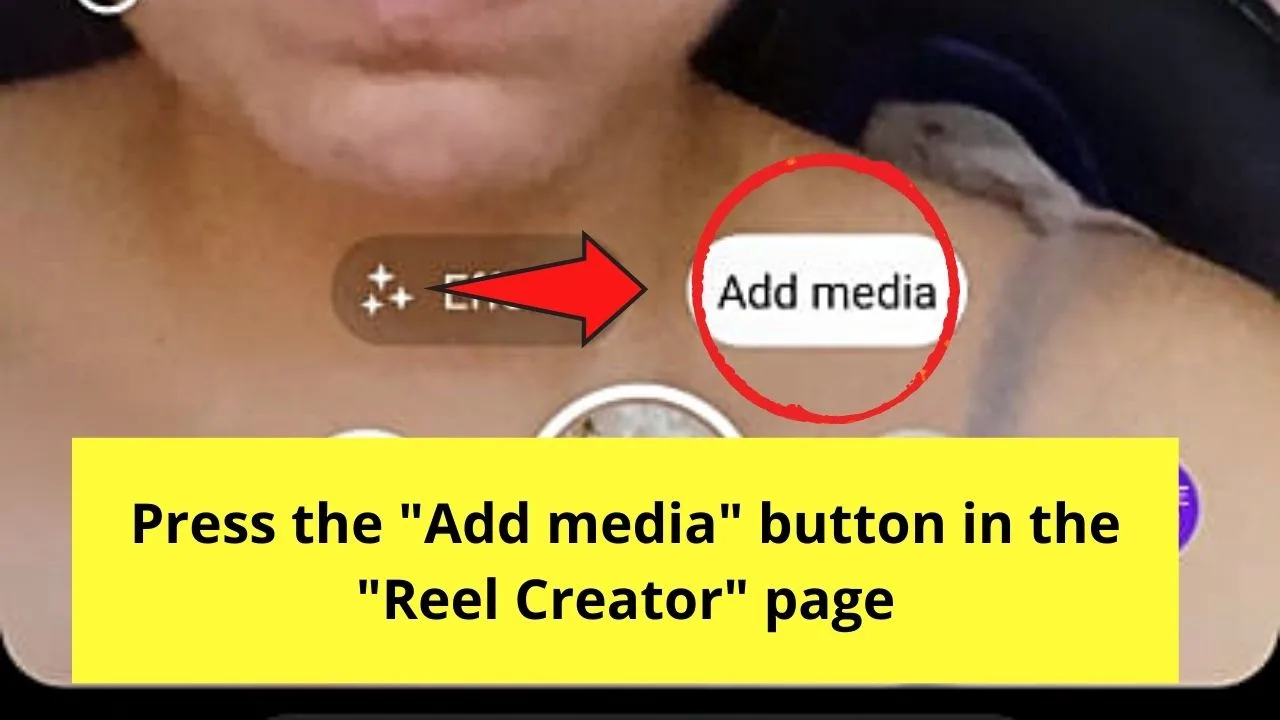
This move will redirect you to the gallery where you can select a photo that will appear after the “scan” happens.

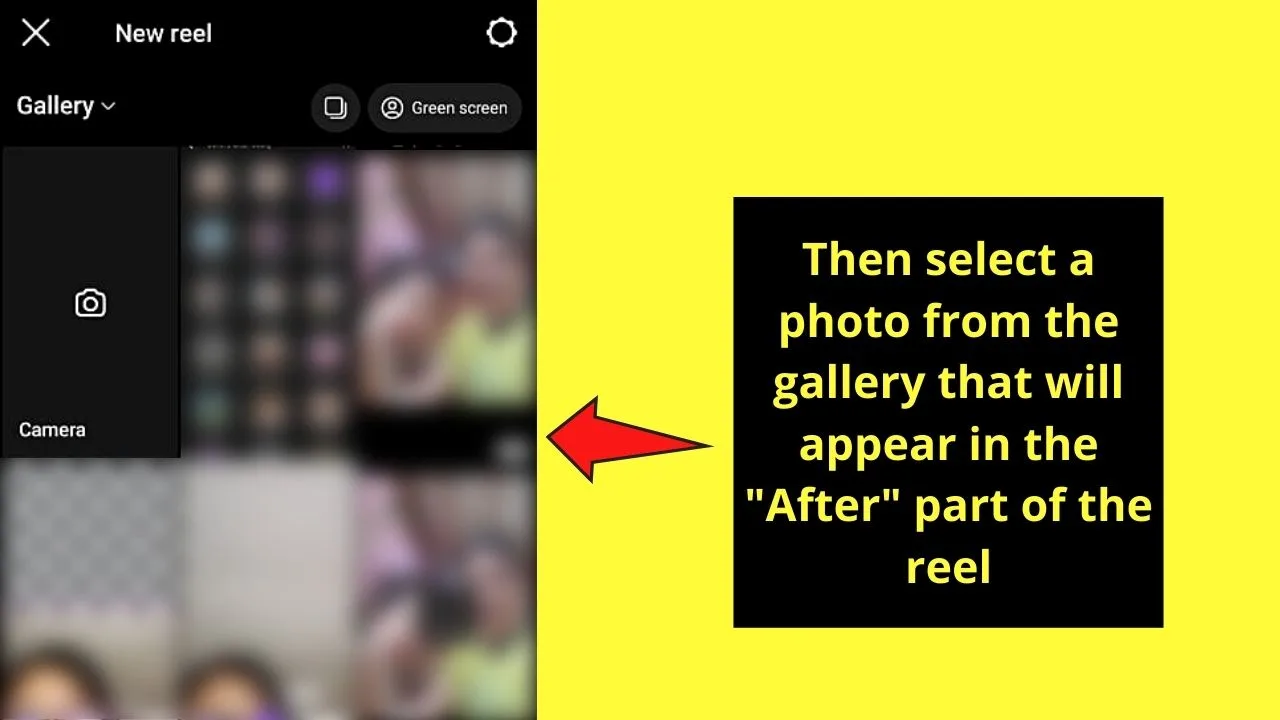
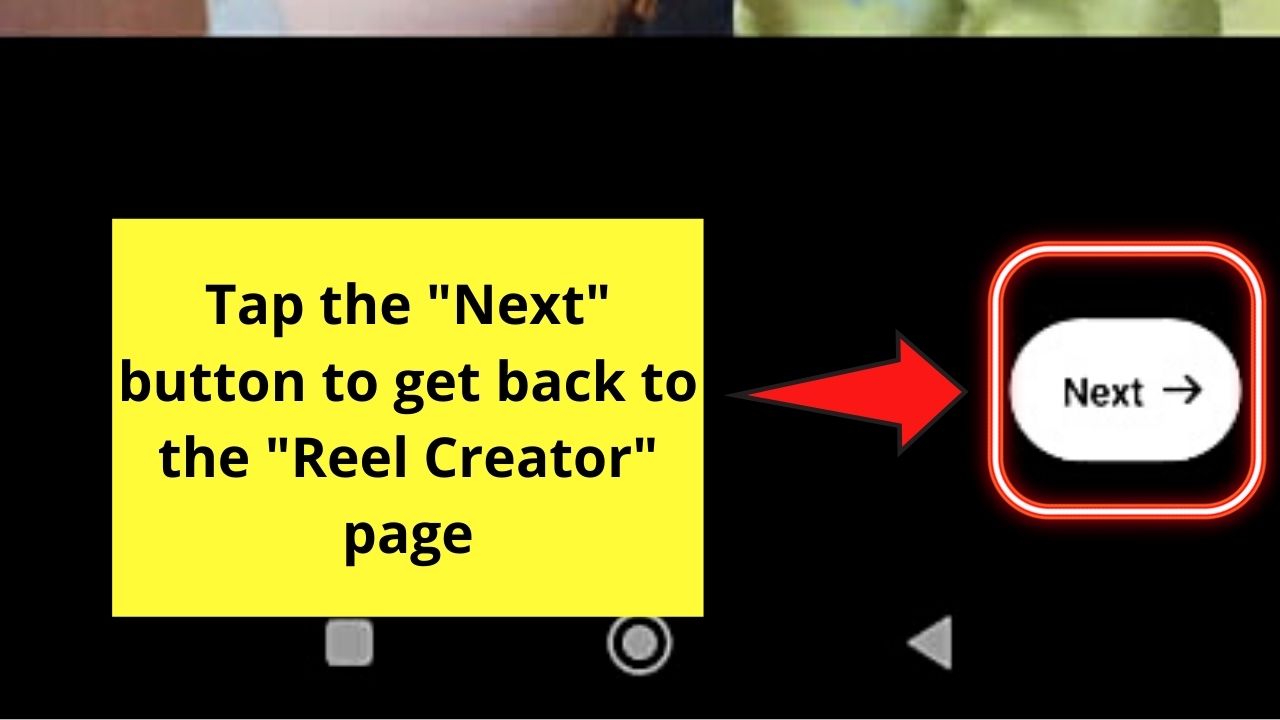
Step 7: Once you selected the photo you’d like to appear, press the “Next” button.

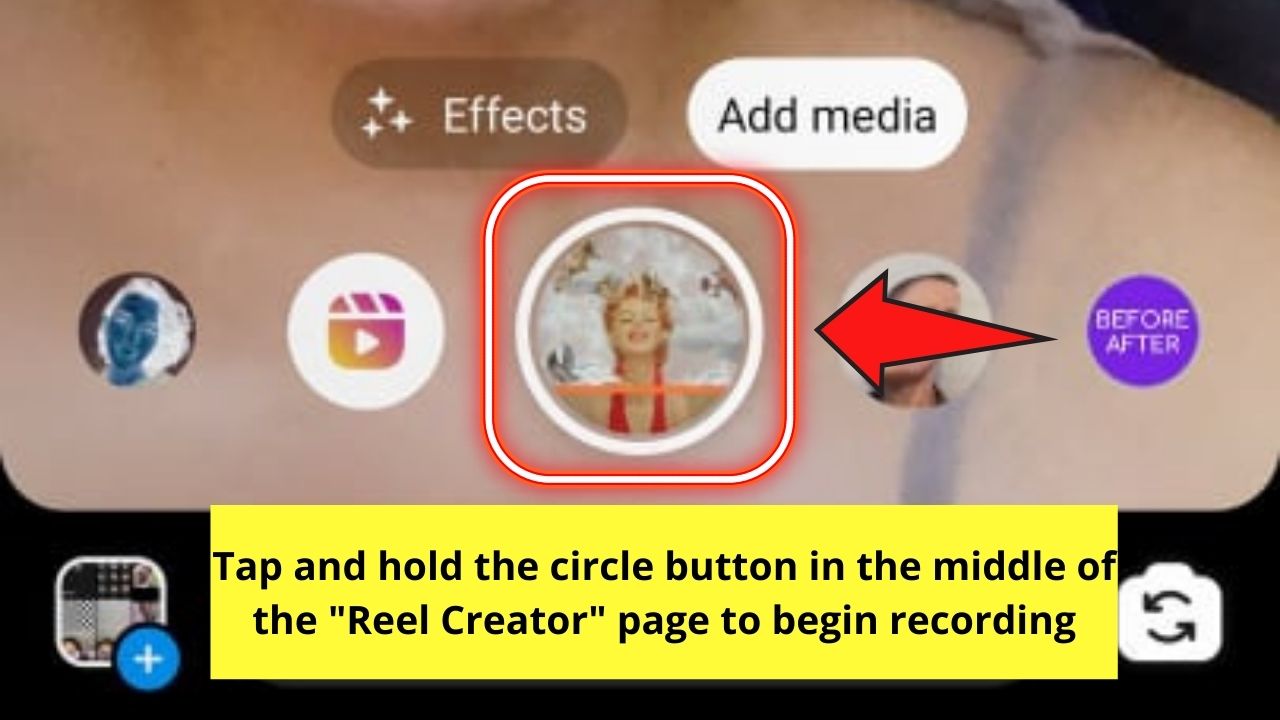
Then, tap and hold the circle you’ll find in the middle of the screen to begin recording.

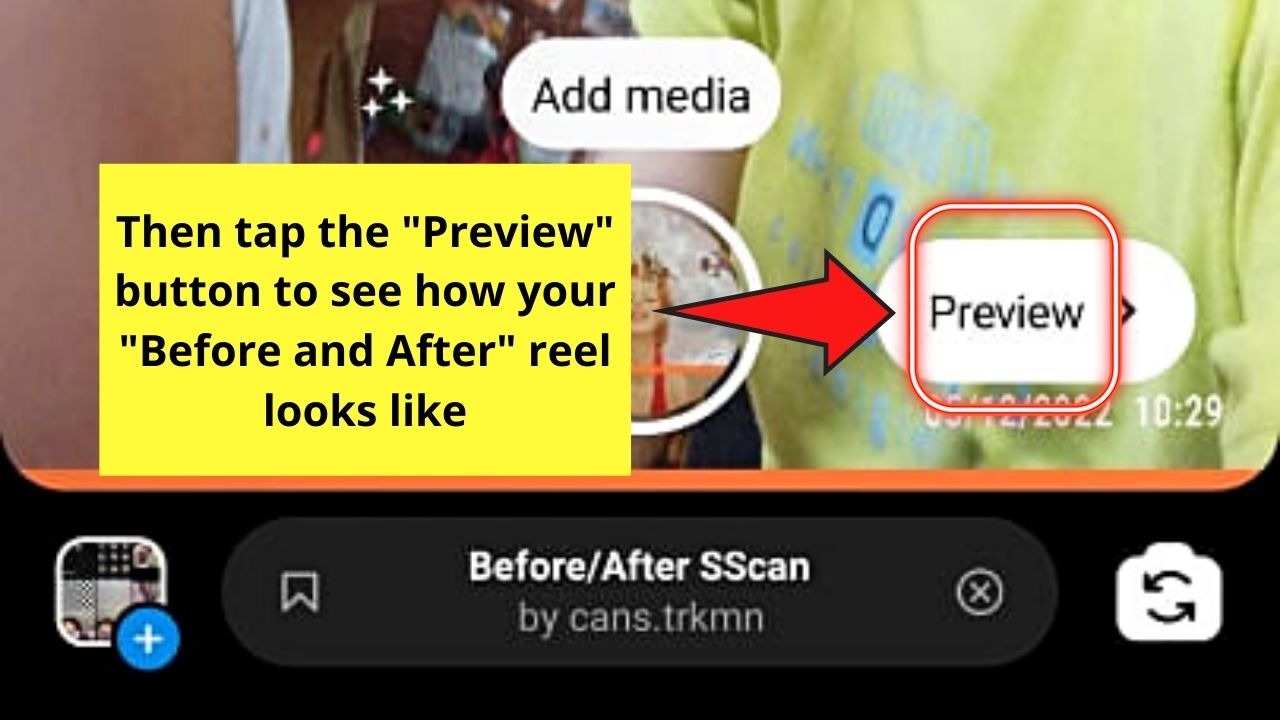
And, once you’re done recording your version of the “Before and After” filter, you can watch a preview of the reel by tapping the “Preview” button.

If you’re satisfied with how it looks, you can tap the “Done” and “Post” buttons successively to share your reel.
If you aren’t okay with the result, you can opt to record another reel with the same filter and add GIFs, stickers, and even music to it after.
So, are you now ready to try this popular filter after pausing the current reel you’re watching on Instagram?
Frequently Asked Questions about How to Use Before and After Filter on Instagram
Why is it that when the “Before and After” filter on my reel begins playing, a checkered design appears behind me?
The checkered background appears after applying the “Before and After” filter on your Instagram reel if you haven’t selected an image yet. To prevent this from happening, tap the “Add Media” button and select a photo from your phone’s gallery or capture a new one with the “Camera” option.
Can you still add music to your Instagram reel after adding the “Before and After” filter?
You can add music to your Instagram reel even after adding the “Before and After” filter. Just tap the “Sticker” icon or swipe your finger upward on the screen to activate the “Sticker” menu. Then, select “Music” and find the song you’ll use. Tap the said song clip to add it to your reel.


Hey guys! It’s me, Marcel, aka Maschi. On MaschiTuts, it’s all about tutorials! No matter the topic of the article, the goal always remains the same: Providing you guys with the most in-depth and helpful tutorials!

