Want to spice up the images and videos before posting them on Instagram? Third-party editors aren’t needed to achieve the feat. All you need is to use an Instagram filter.
Among these various Instagram filters, the most popular would be the Paris filter. It softens the person’s skin tone and brightens the image but is not too harsh compared to other filters.
Think of it as applying light makeup to achieve a natural finish.
If you want to get this filter, you’re in the right place. Get the Paris filter using 4 incredibly simple steps below.
How to Get the Paris Filter on Instagram Story
First, open the “Story” creator page by tapping “+” or swiping your finger to the right. Then tap “Capture” to take a photo or upload an image through the “Gallery Preview” button. Swipe to the left until you’ll find the word “Paris” splashed in the middle of the picture you added.
From there, you can further edit the IG story you’re creating by adding music, text, or stickers.
If you’re ready to glow up without makeup, here are the steps you should follow to a T.
Step 1: Open Instagram’s “Story” creator page
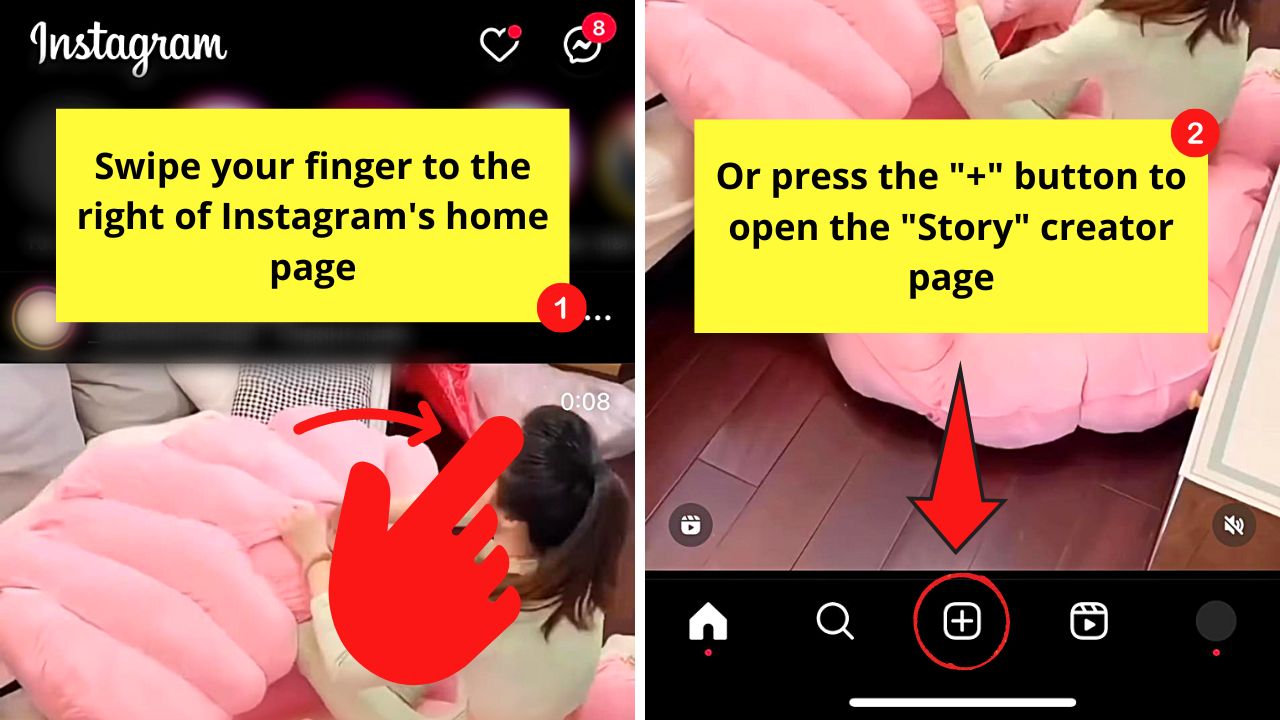
You can tap the “+” button in the middle of the bottom menu or swipe your finger to the right.
Once there, make sure “Story” is highlighted on the bottom menu.
Step 2: Add a photo
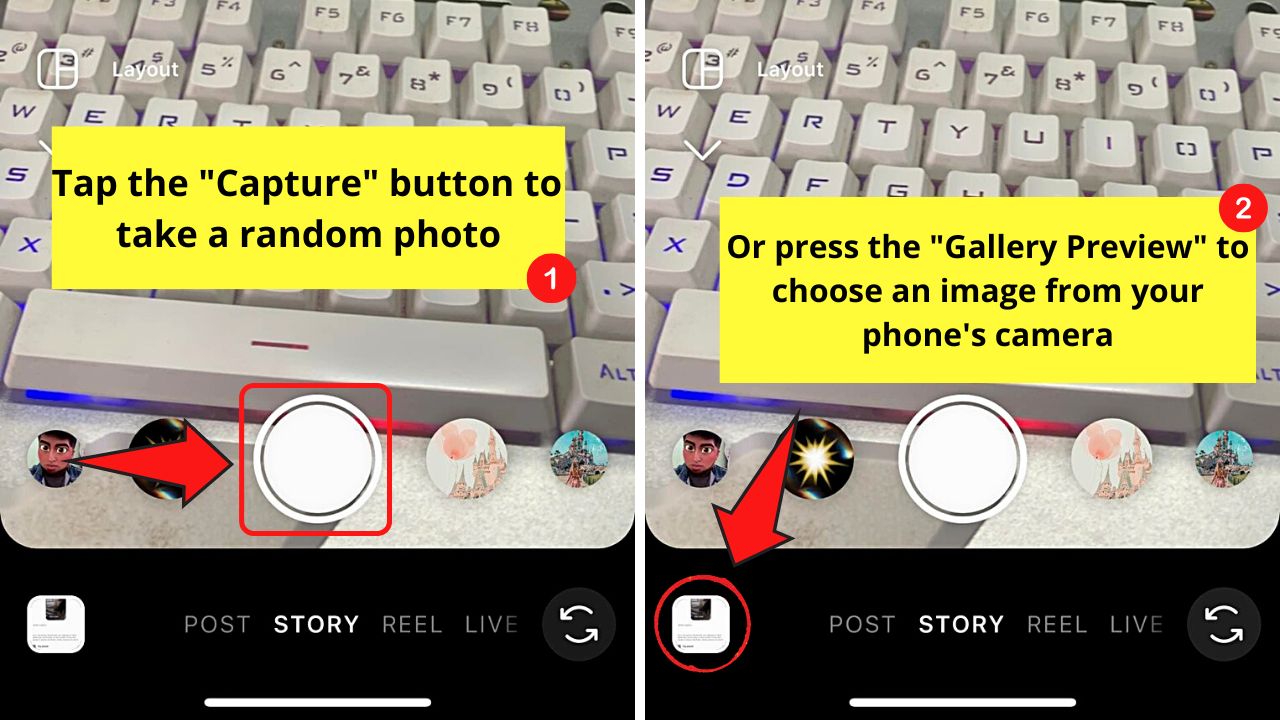
If you prefer to take an instant picture, press the “Capture” button. This takes the shape of a white circle in the middle of the “Effects” carousel.
You can also choose an image saved on your phone’s gallery. Just tap the “Gallery Preview” button and choose an image.
Once the image loads in the “Story” creator page, go to the next step.
Step 3: Swipe your finger to the left once
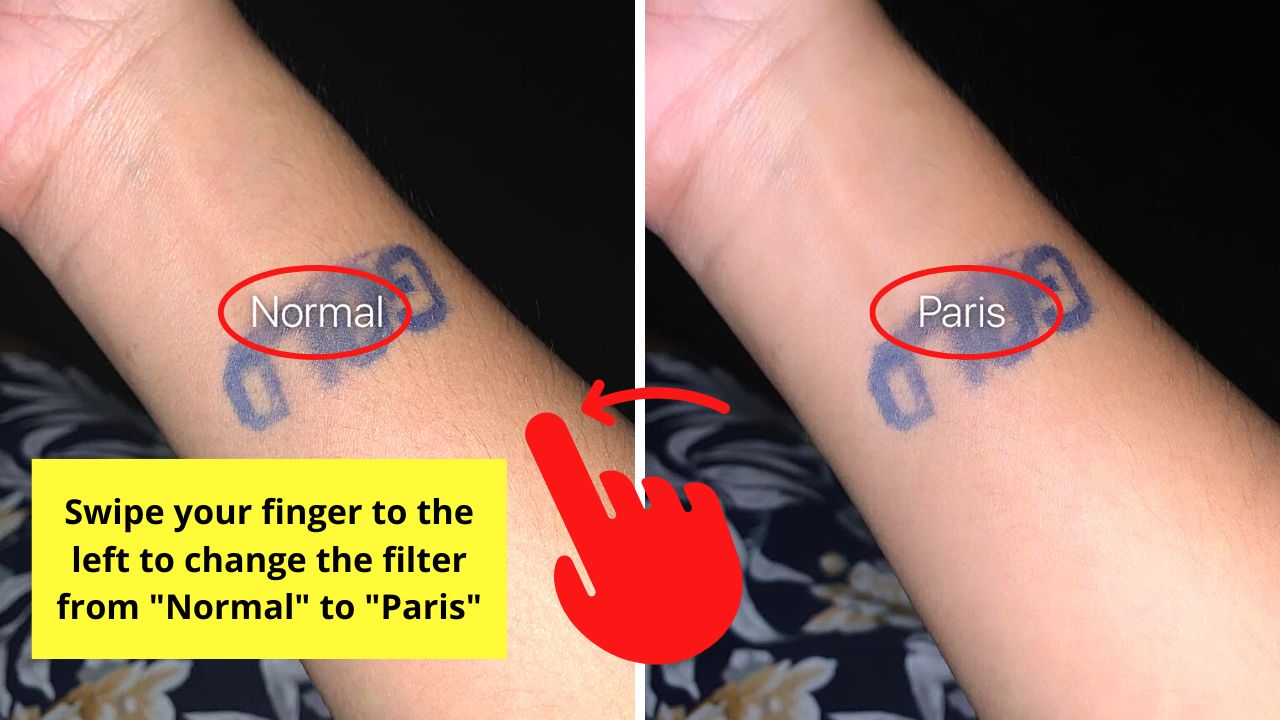
By default, the image added to the “Story” creator page has a “Normal” filter applied to it.
Swiping once to the left changes the filter from “Normal” to “Paris.”
You’ll then notice that the image has become brighter. It also blurs out any imperfections (bumps, pimples, etc.) there.
Step 4: Post the image as an Instagram story
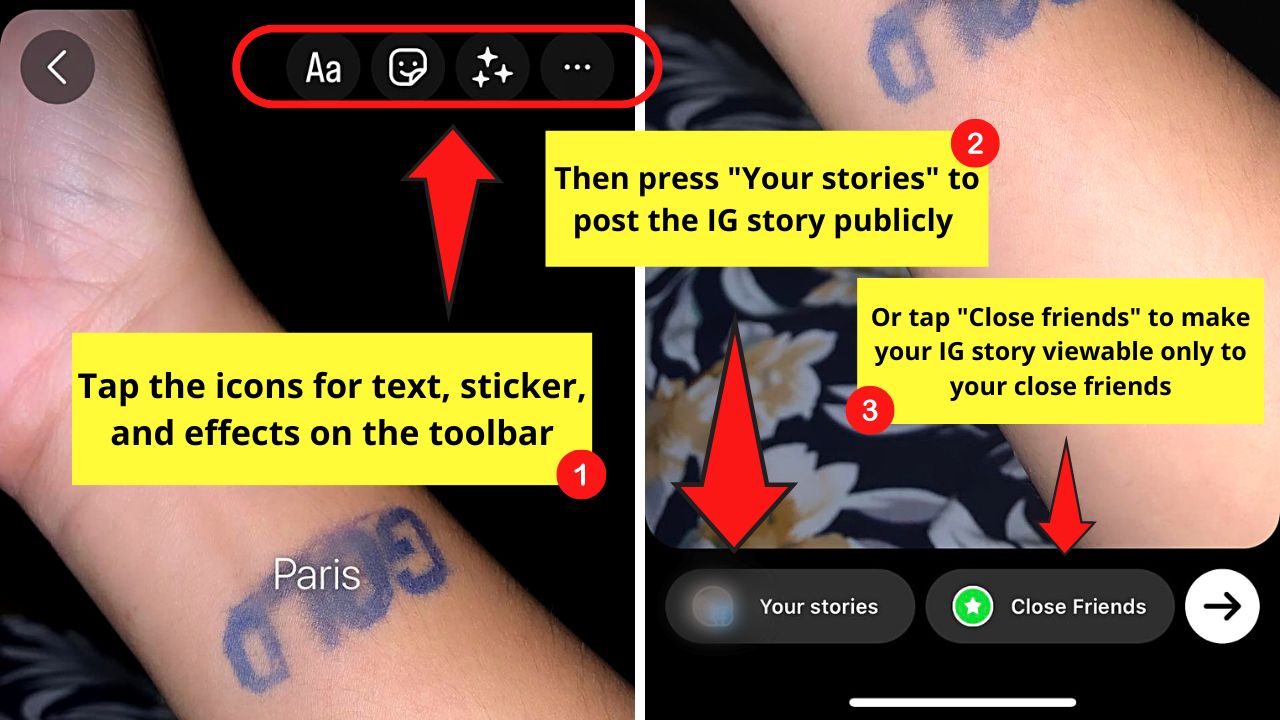
Once done adding the Paris filter, add text, stickers, music, and other effects by pressing their respective icons on the toolbar.
Then, choose the IG story’s audience by tapping “Your Story” or “Close Friends.” The former option posts the story publicly, while the latter makes your IG story visible only to select people.
Frequently Asked Questions about How to Get the Paris Filter on Instagram
Can you use the Paris filter for Instagram reels?
Unfortunately, the renowned Paris filter is only available in IG stories. You can only find this filter by swiping your finger to the left after adding an image to the Instagram “Story” creator page.
Is the Paris filter only available on iPhones?
The Paris filter is available to both iPhones and Android. The same steps also apply to getting this filter in both phone models. Simply swipe your finger to the left after adding a photo to the “Story” creator page to get the said IG filter.
Do I need to update the Instagram app on my phone to use the Paris filter?
Though not required, it is better to update your Instagram app if you want to use the Paris filter. One of the reasons why some filters on Instagram don’t work or are unavailable is an outdated app version used.
What happens to the image on your Instagram story after the Paris filter is applied?
The Paris filter softens the skin tone of the person’s image while making it look more glowing. Any imperfections on the skin like pimples, freckles, or bumps will be smoothened and toned down. The result is a blemish-free and natural-looking photo.
Do you need to use a filter when posting an image as an Instagram story?
Filters on Instagram are created to change how the pictures uploaded or captured look before posting them. While they can enhance how the images look, it’s not necessary to use them when posting an IG story especially if they are of good quality already.