

It’s natural to be curious about the effects that you can apply to objects while working on a file in Illustrator, but sometimes they don’t work out the way we want.
This tutorial will show you how to erase an unwanted effect and will allow you to play with the available effects as much as you want cause erasing them is so simple and quick!
Just make sure to pay attention to the details on each step, and you’ll learn a tool that you’ll keep forever!
How to Remove an Effect in Illustrator
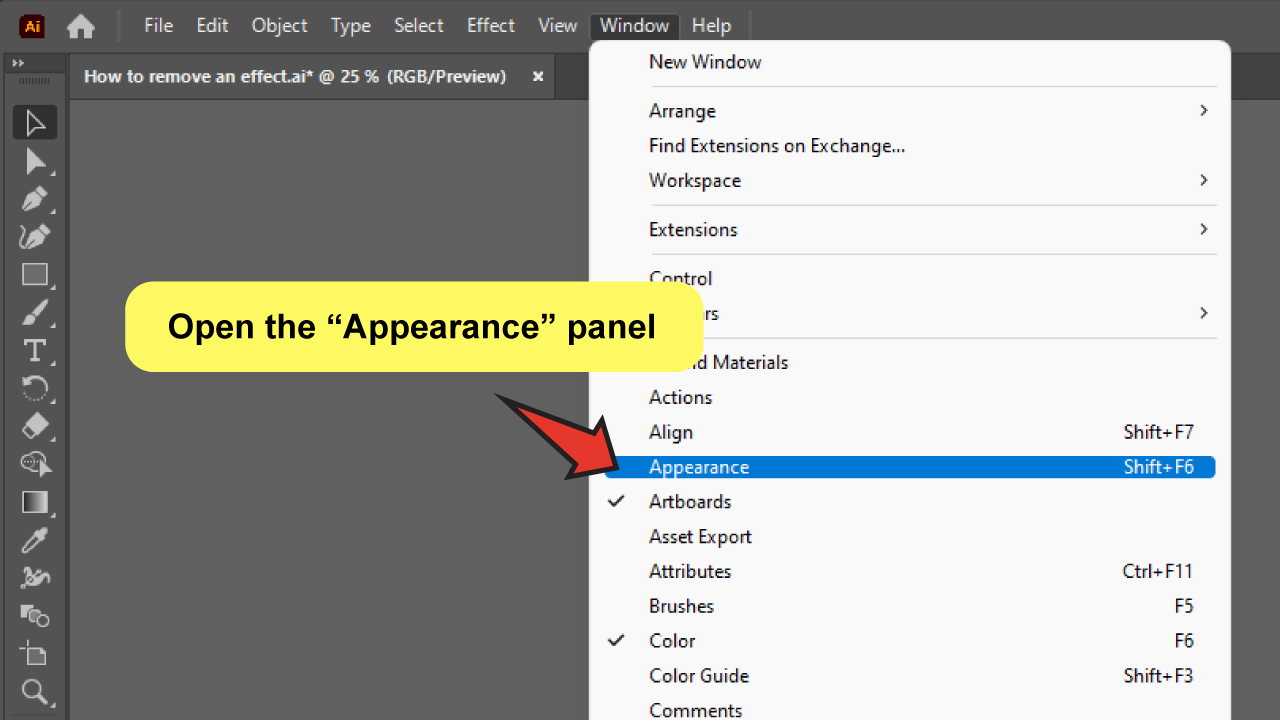
To remove an effect in Illustrator, open the “Appearance” panel. To do so, go to “Window”>”Appearance.” Then, either drag and drop the effect onto the trash icon, or click on “Remove Item” from the menu options available in the right top corner of the panel, while the effect is still selected.
Step 1:
Open the “Appearance” panel.
While the file you’re working on is still open, you need to locate the object that you want to edit and the panel to edit it.
To view the “Appearance” panel, go to the top-menu “Window” option, and click on “Appearance.” You can also use the “Shift + F6” keyboard shortcut.

Step 2:
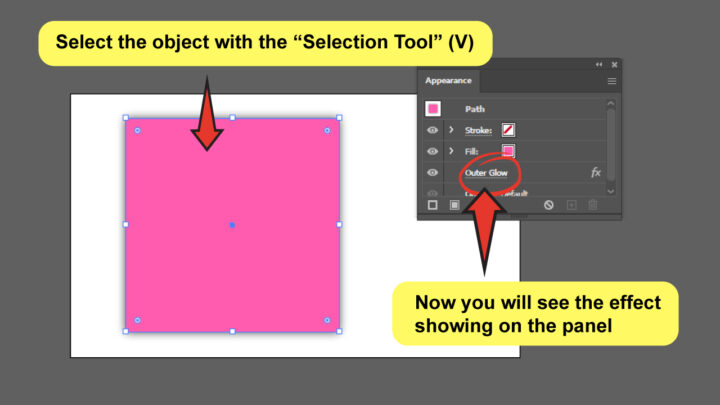
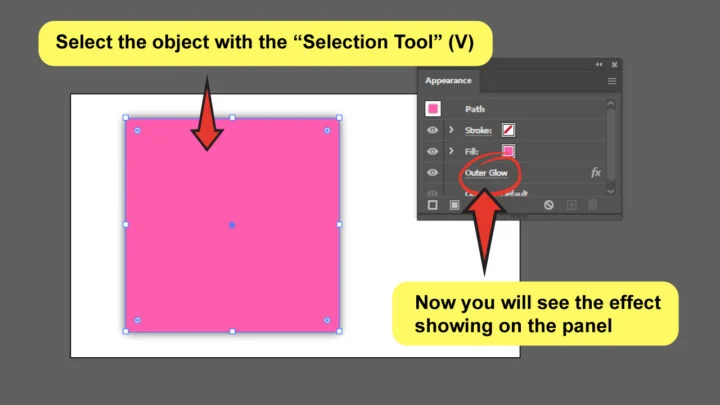
Select the object that has the effect to visualize it on the panel.
To remove the desired effect first use the “Selection Tool” (V) to select the object.
If the object that has the effect belongs to a group, you must first ungroup it or click on it with the “Direct Selection Tool” (A) to be able to pick this one separately. Otherwise, you won’t see the effect showing up on the panel.
If the effect is applied to a group, it is not a problem! Simply click on the entire group, but take note that ungrouping it will remove the effect.
Once you click on it, you’ll see that the “Appearance” panel has changed and the object’s effect has become visible on it.
Step 3:
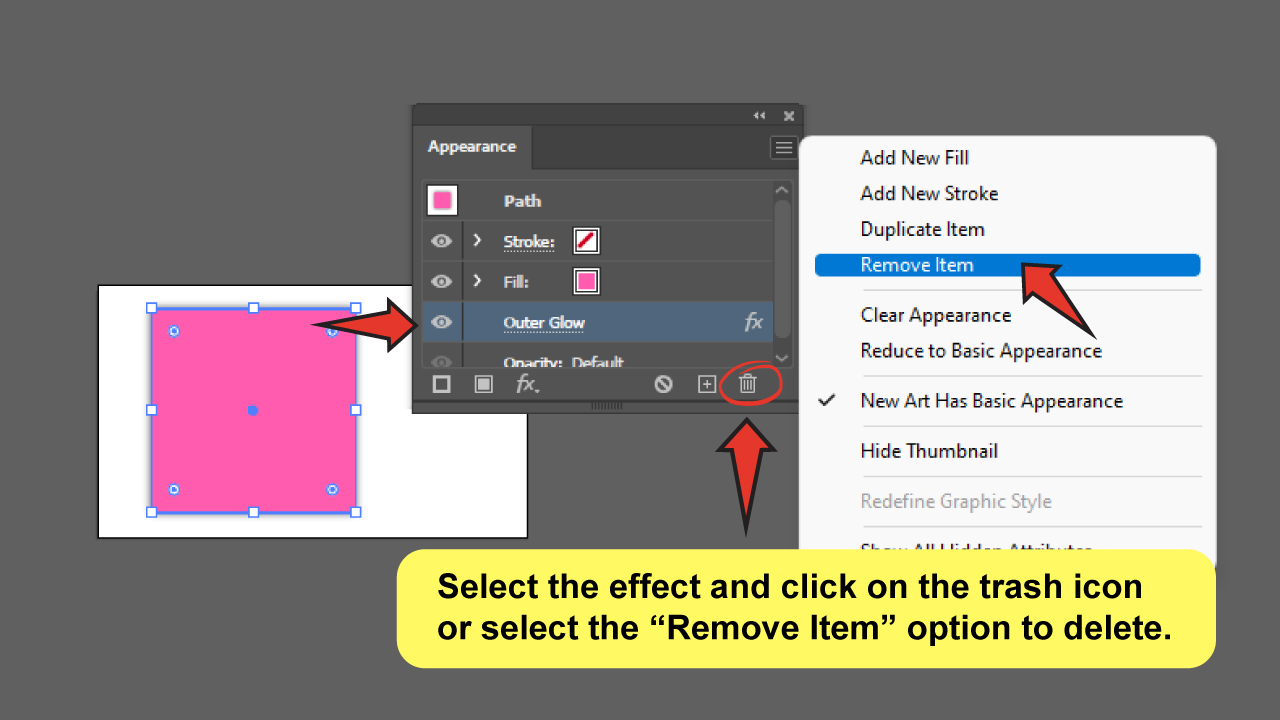
Remove or hide the effect.
All you have to do now is drag and drop the effect to the trash icon or simply click on it while it’s still selected.


Another way is to go to the “Appearance” menu options, located on the top right corner of the panel, and select “Remove Item” while the object is selected.
Just be careful enough to choose the right one before you delete it, cause it can be a lot when you have multiple effects applied on the same object!

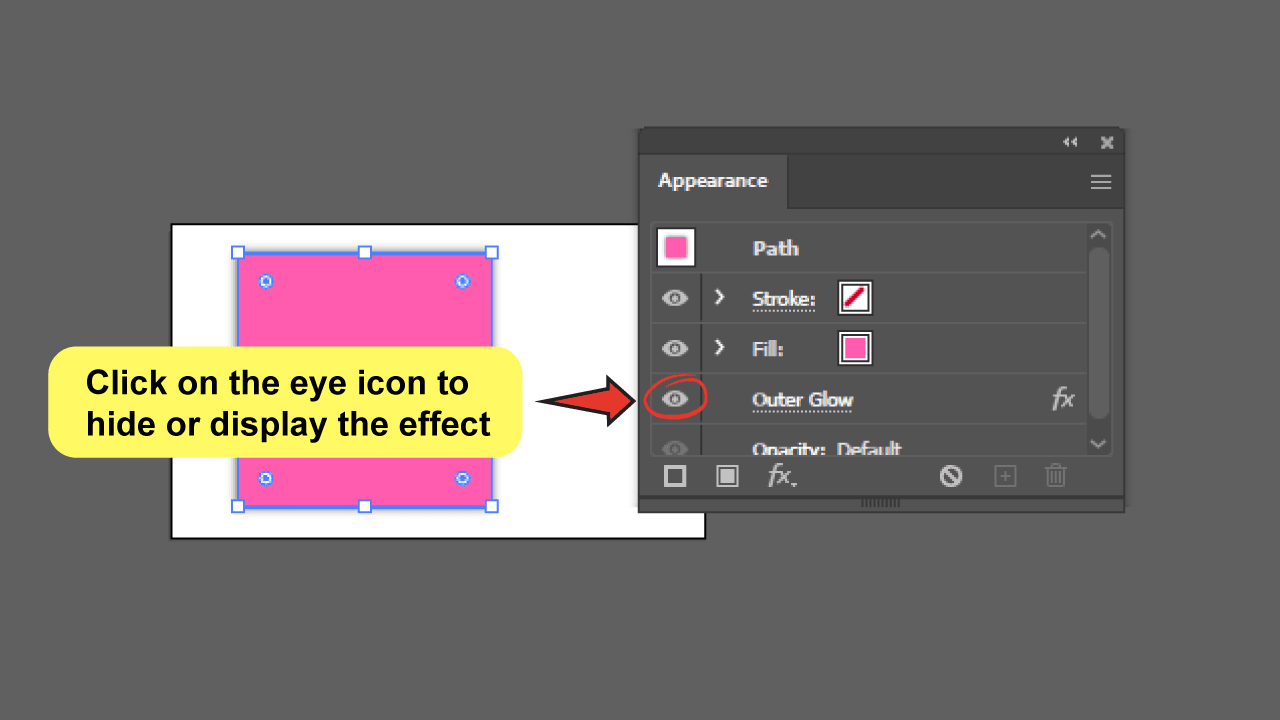
You can also hide it and see what the object looks like without it. Simply click on the eye icon next to the effect on the left side. This will hide the effect, and you may reactivate it at any moment by clicking on the same icon!

Frequently Asked Questions About How to Remove an Effect in Illustrator
What if I change my mind and I want the effect back after it’s been removed?
Simply click CTRL+Z whenever you find yourself regretting a recent action.
What if I want to remove all the effects that my object has at once?
Select the object, and then click the “Clear Appearance” icon at the bottom of the panel. This option will also remove the overall appearance of your object.
What should I do if I want to remove an effect from a group without ungrouping it?
Double-click on the object with the “Selection Tool” (V), this will take you inside the group and allow you to select the object that you want to edit. You may now use the same procedure to remove the effect from that item.


Hey guys! It’s me, Marcel, aka Maschi. On MaschiTuts, it’s all about tutorials! No matter the topic of the article, the goal always remains the same: Providing you guys with the most in-depth and helpful tutorials!

