
Do you ever run out of inspiration or feel like your artwork is missing something? Or maybe you get to the point where you want to improve and spice up your design a little?
I happen to have the perfect solution for that! We’ll make use of one of Illustrator’s awesome blending modes. Using these, you can change how an item’s color interacts with the color that is shown underneath it.
We’ll learn how to create a Color Overlay effect in Adobe Illustrator. This can be accomplished in a matter of seconds. Let’s get started!
How to Make a Color Overlay in Illustrator
Step 1:
Open or place an image.
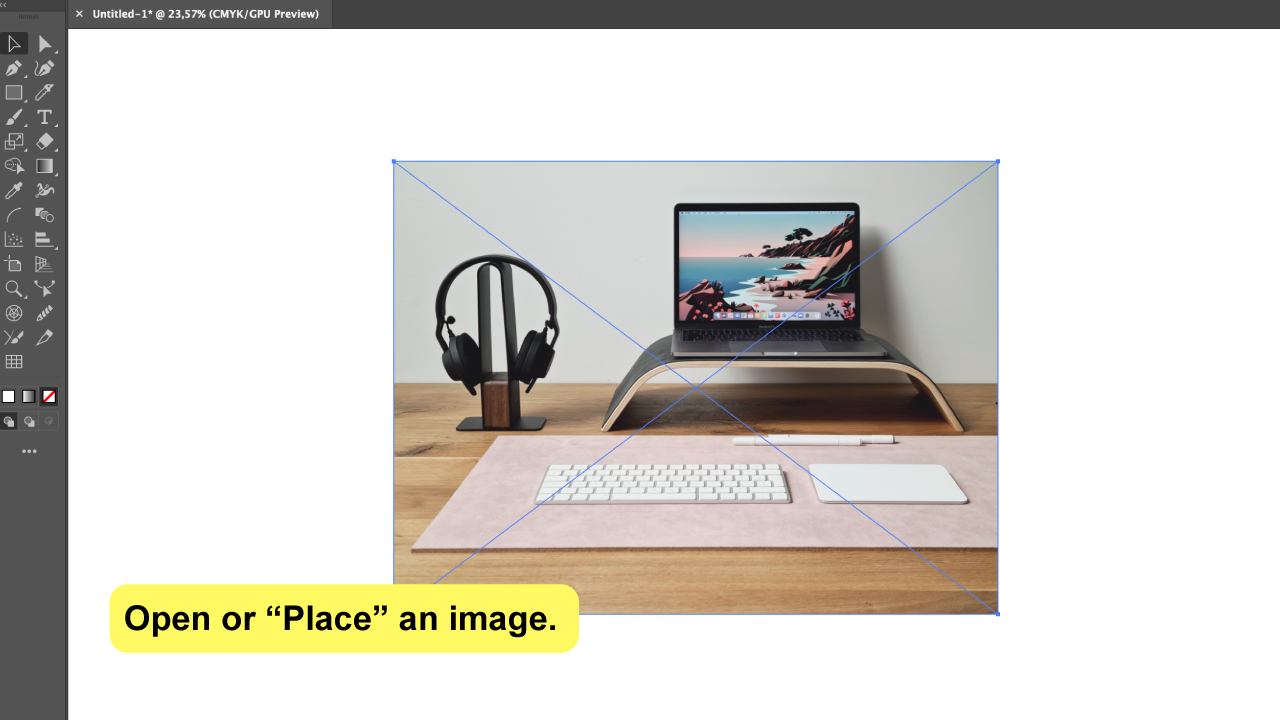

Let’s begin by opening the image you want to edit. You can open it, or import it; both ways will work.
To open, go to “File”> “Open” and select the image you want.
To import it on the file you’re already working on, go to “File”>”Place” and select the image.
Step 2:
Create a rectangle over the image.
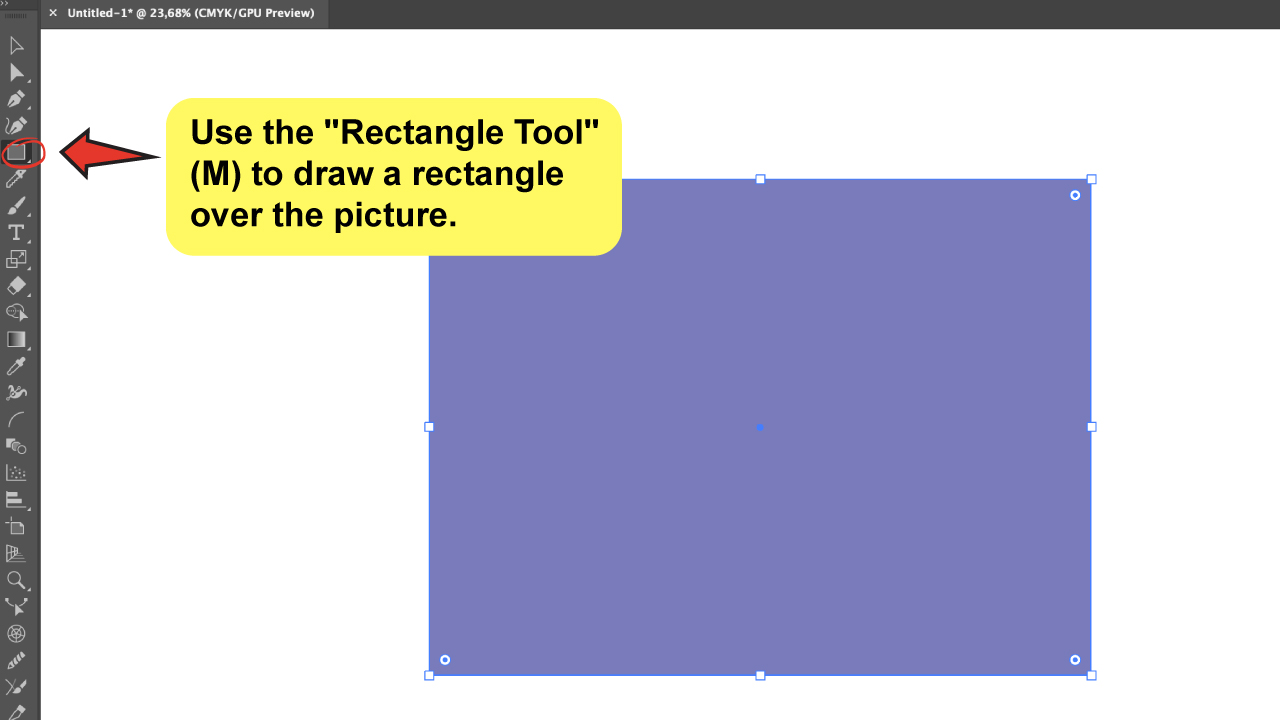

Locate the “Rectangle Tool” on the left toolbar, or just press the “M” keyboard shortcut.
Keep in mind that the rectangle you’re going to draw must be the same size as the picture, or else the effect will be applied in just a portion of it rather than the entire image.
There are three ways to do this. The first is to create the rectangle over the picture so that it would have the same size.
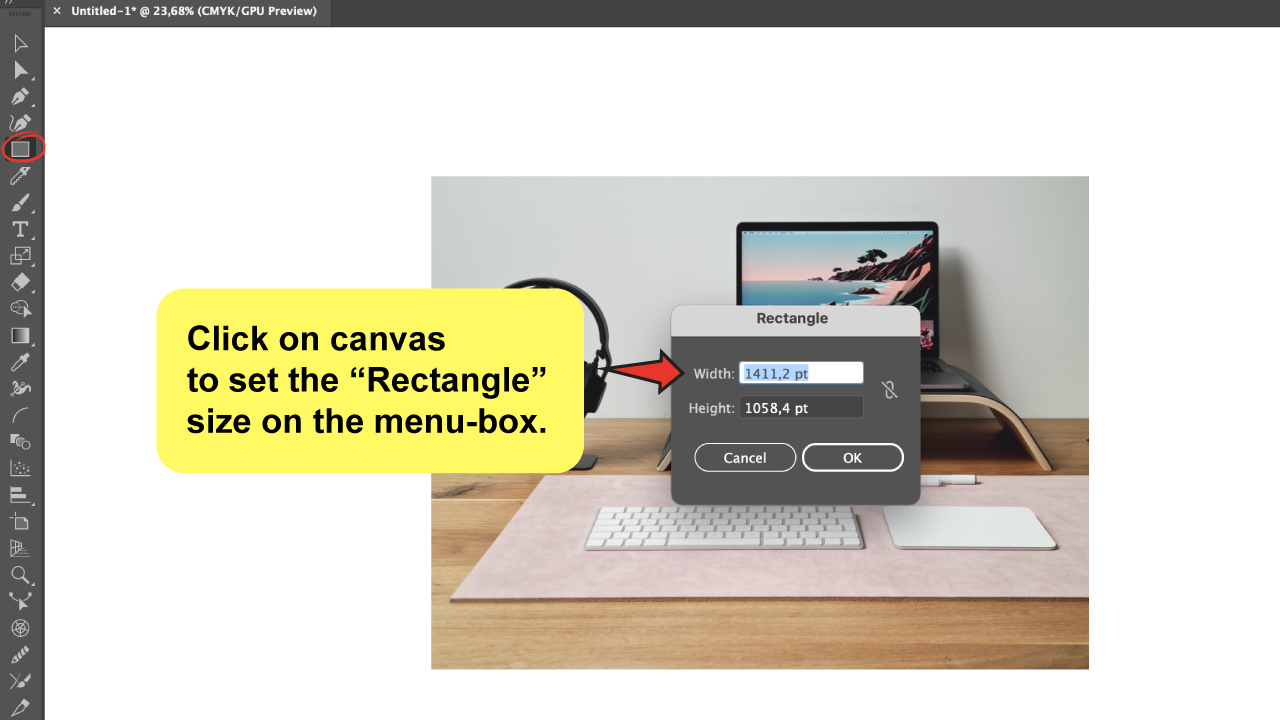
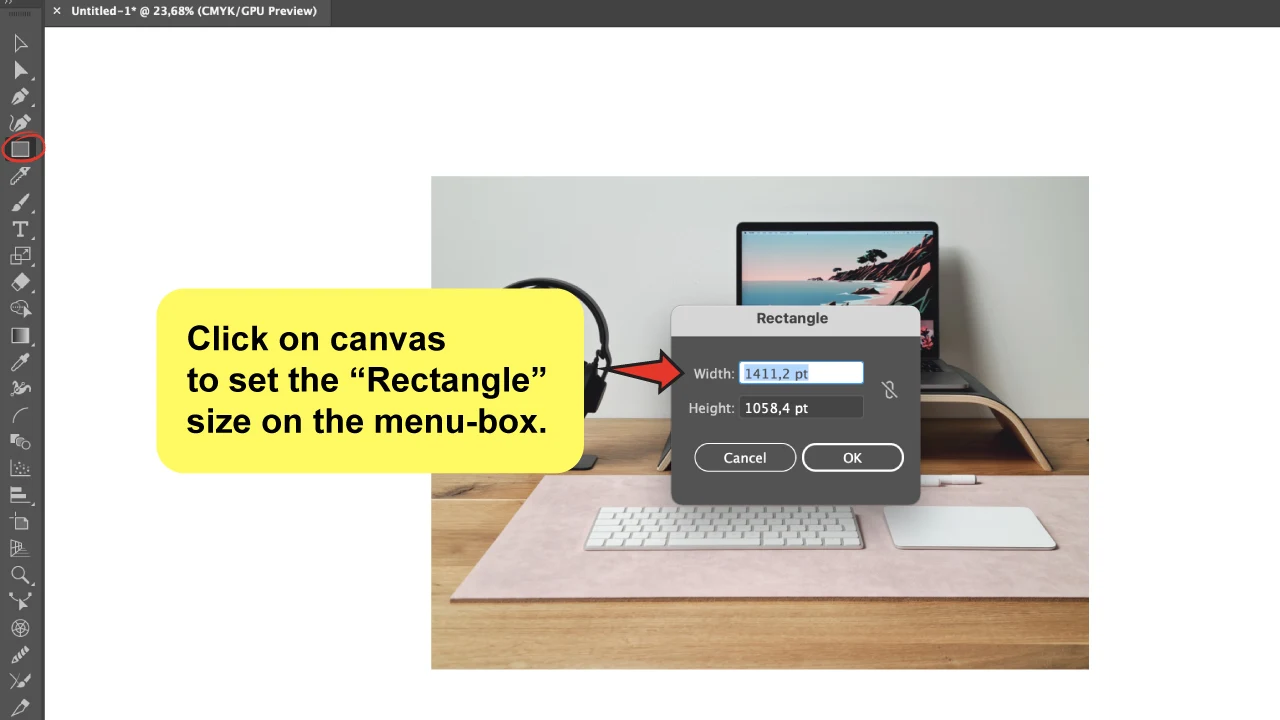
The second way is to define the size of the rectangle beforehand. So just click anywhere on canvas, also with the “Rectangle Tool”, and set the appropriate size on the menu-box that shows up.
In case you didn’t know this, you can check the size of any item in Illustrator by clicking on it and opening the “Info” panel, which you can access by pressing the “Control + F8” keyboard shortcut.
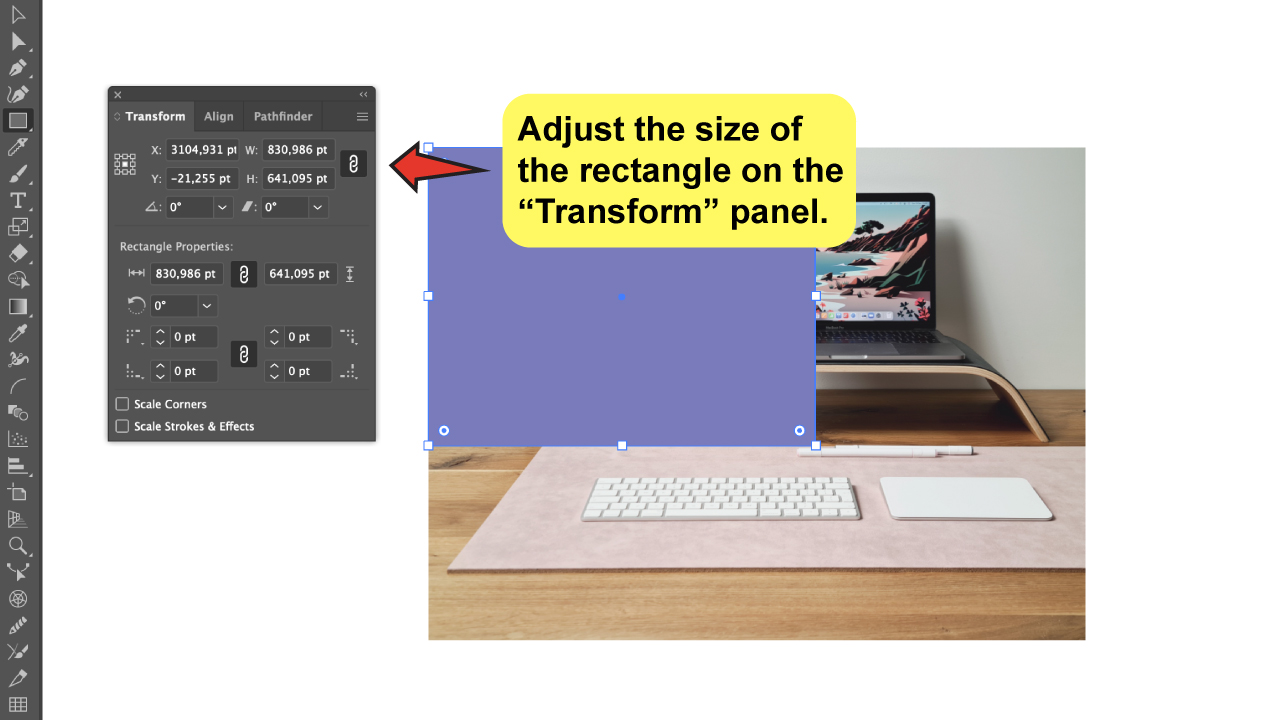
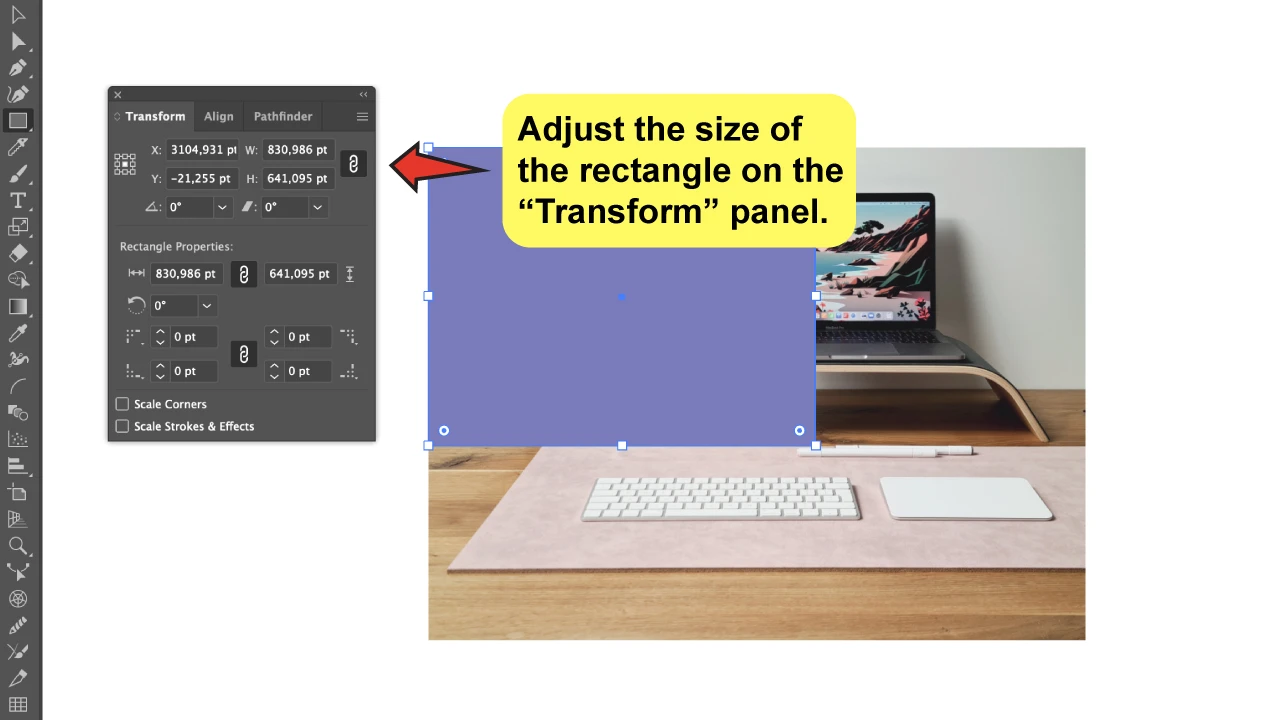
Last but not least, you can simply adjust the size of the rectangle you’ve already created through the “Transform” panel. In case you aren’t familiar with it, use the “Shift + F8” keyboard shortcut to open it, or just go to “Window”>“Transform” on the top-menu.


Take into account that the color of the rectangle will be the overlay color afterward, but there’s no need to rush into choosing its color at this stage, so choose any color for now, and when you’re done with the process, you can try a few options until you find the perfect shade for you.
Step 3:
Align the rectangle with your image.
If you used the second or third method from the previous step to create the rectangle, means that now you should align the rectangle to the image so that they match exactly. To do that, open the “Align” panel from the top-menu by selecting “Window”> “Align”, or press the “Shift + F7” keyboard shortcut.
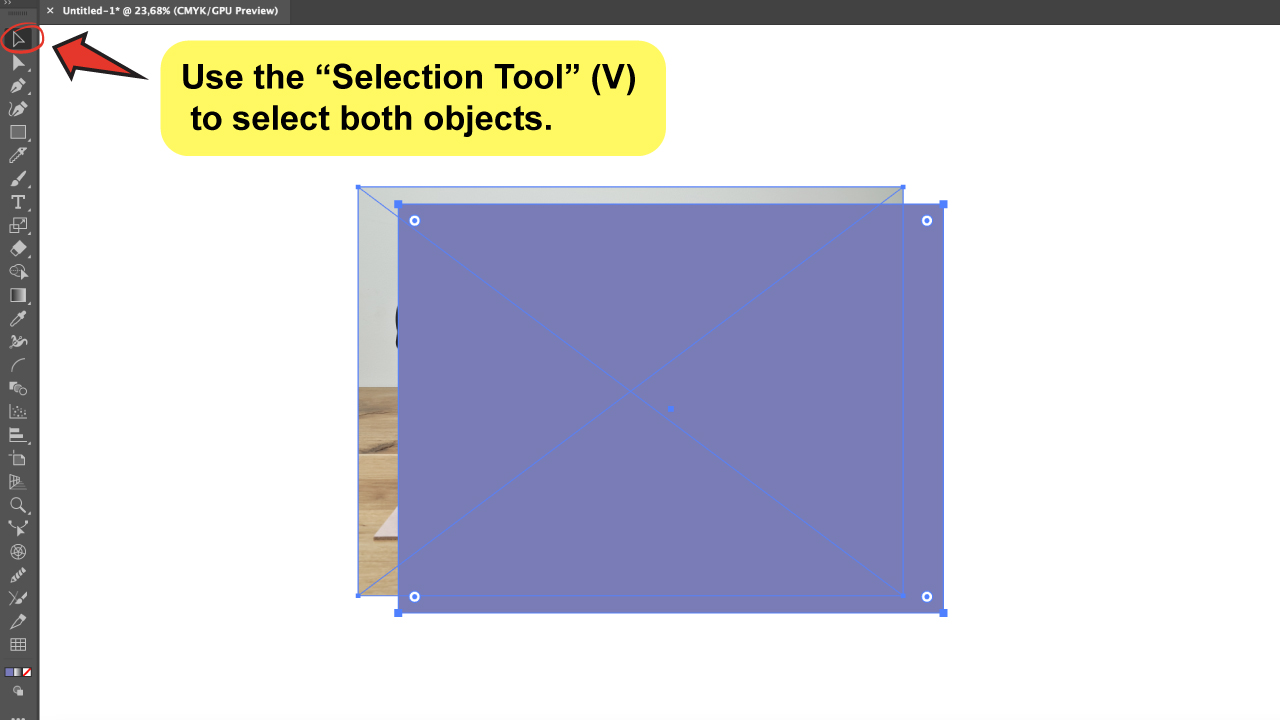
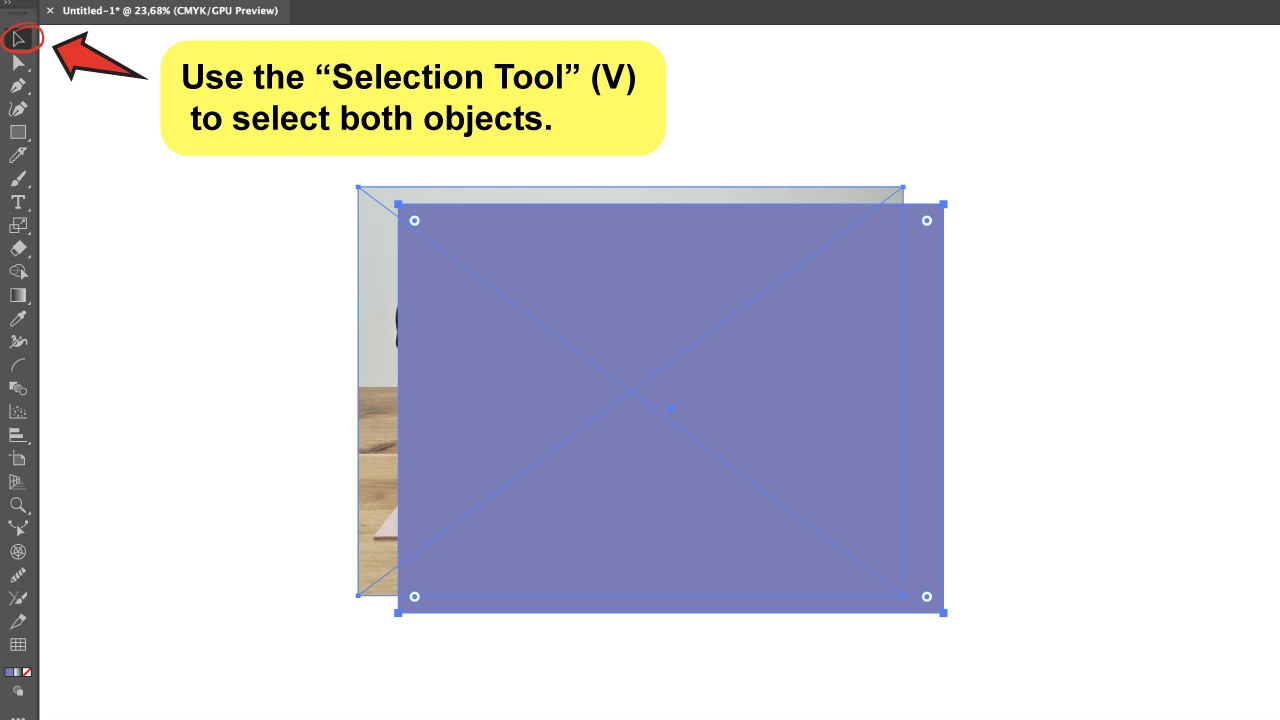
To align both items, first, select them with the “Selection Tool” (V).
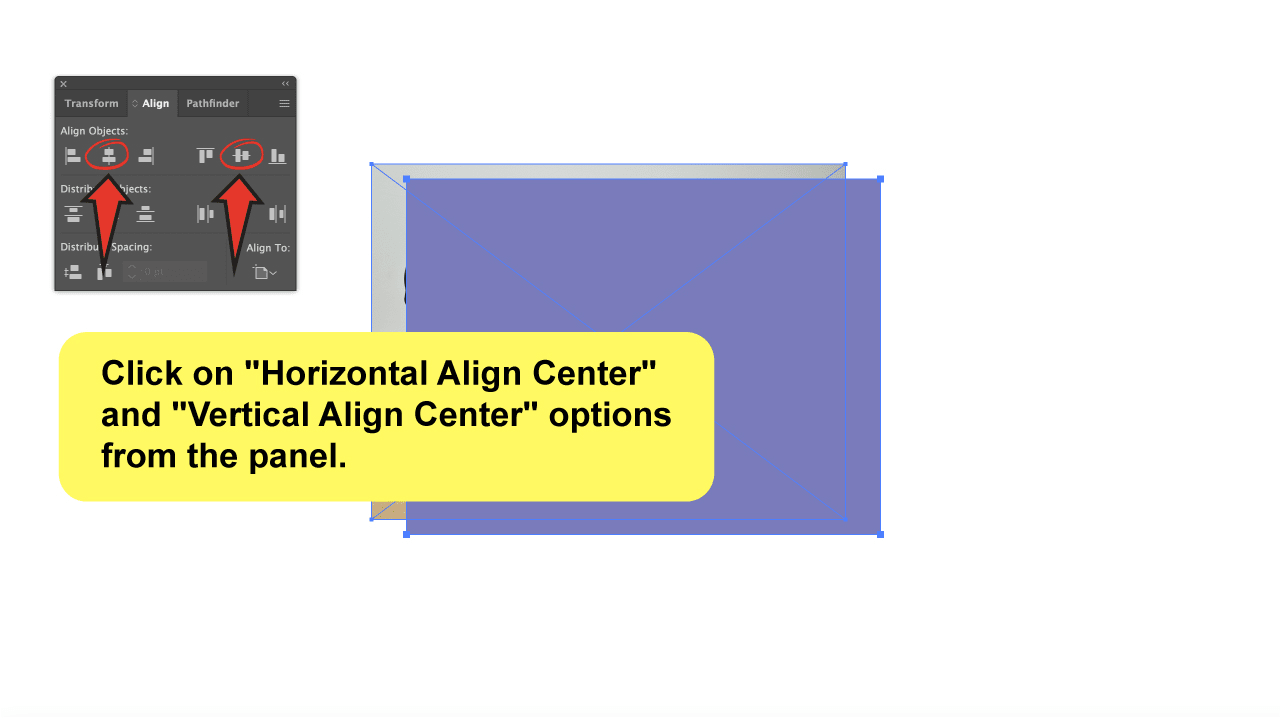
Move back to the “Align” panel, and press the “Horizontal Align Center” and the “Vertical Align Center” options.

Step 4:
Open the “Transparency” panel.

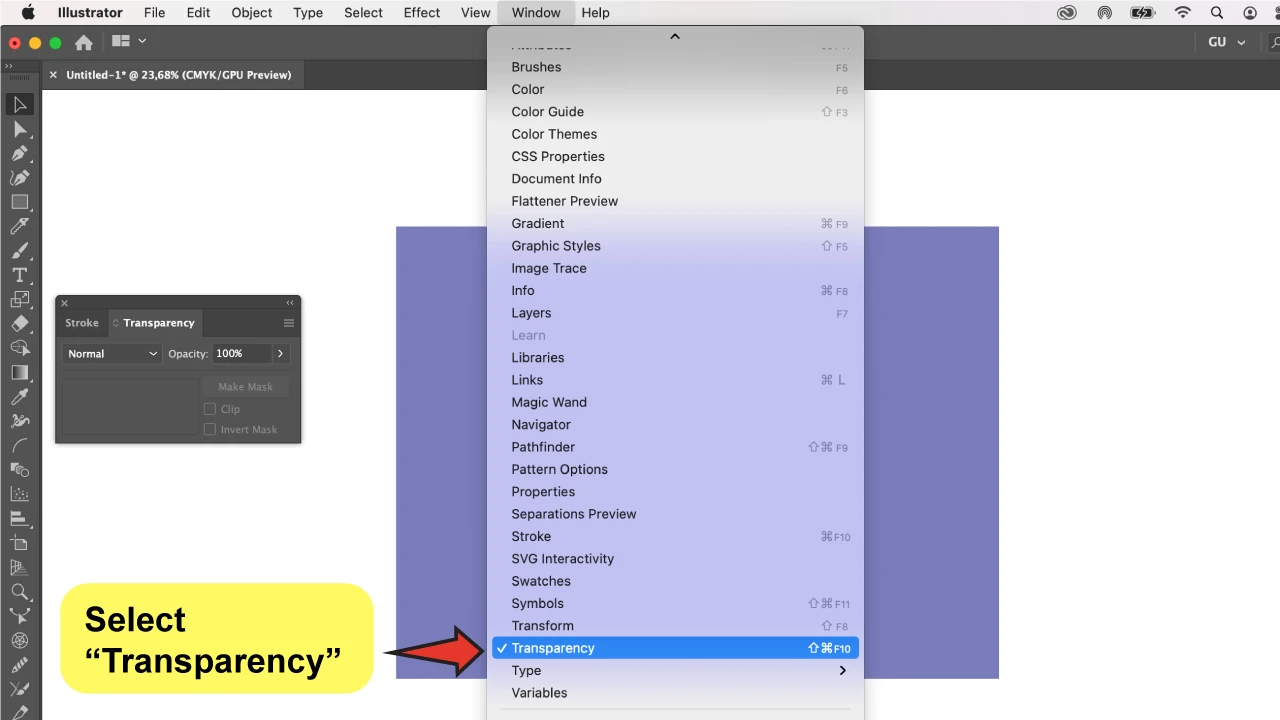
To create an “Overlay” color effect, we need to work through the “Transparency” panel.
If you haven’t opened it already, go to “Window” on the top menu and select “Transparency.” You may also use the “Shift+Ctrl+F10” keyboard shortcut (Command if you are a Mac user) to do so.
Step 5:
Change the blend mode to “Overlay”.

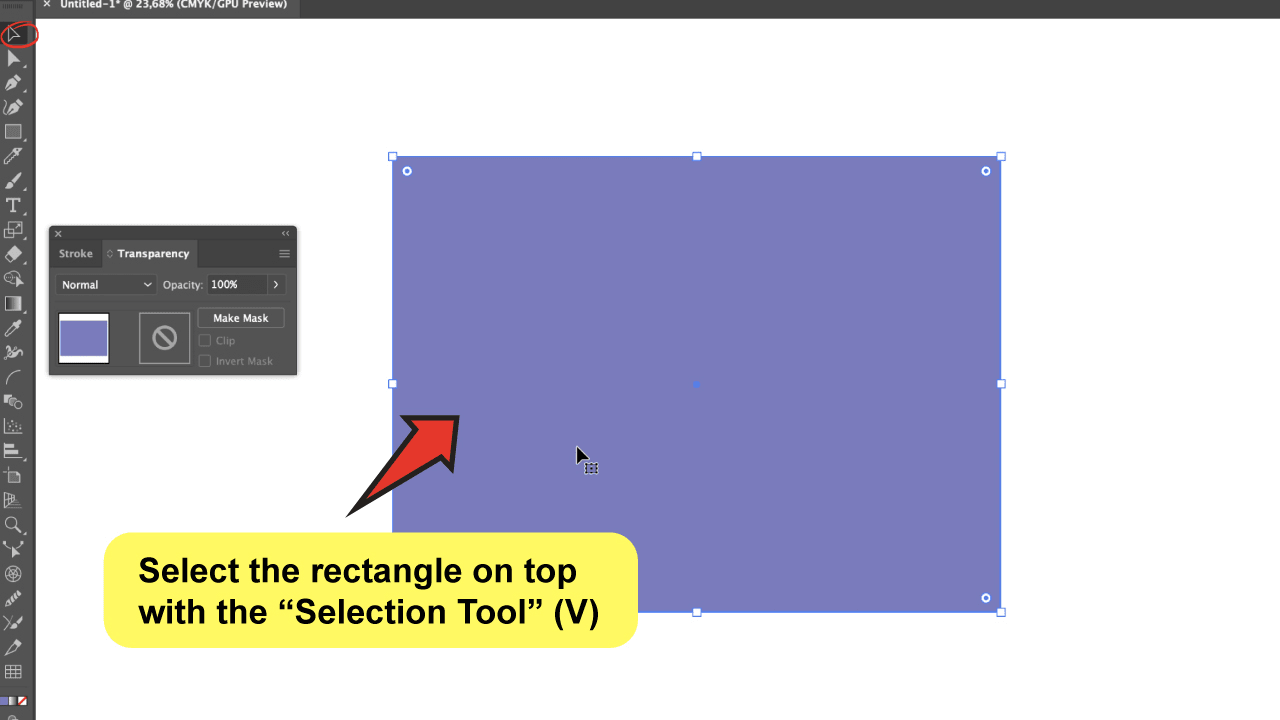
First, it is essential that you select the rectangle on top with the “Selection Tool” (V).
Once you’ve done that go back to the “Transparency” panel, where you will be able to choose from a variety of blending modes that will display if you just click on the drop-down menu you see on the left.
To give you a general idea, the blending modes combine the colors of the top object with the colors of the background object, and the outcome depends on the blending mode and transparency that you select.
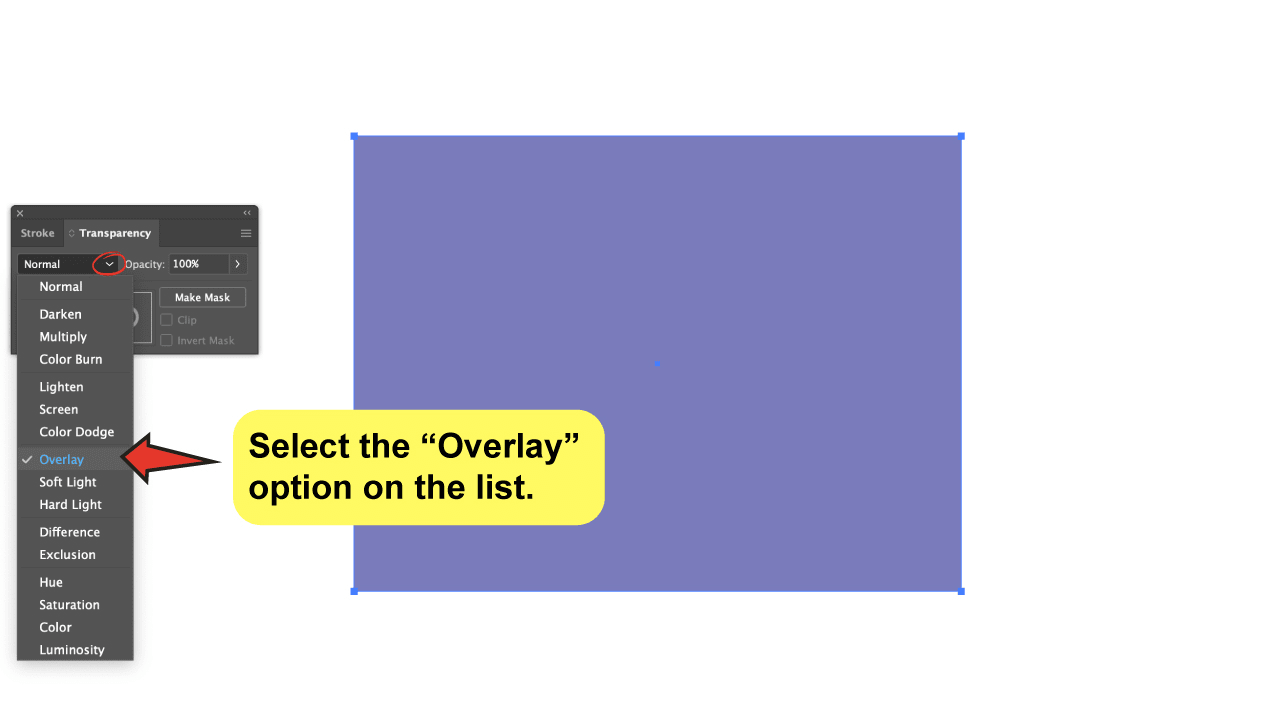
By default, the mode will be always set to “Normal”, so just click on the arrow and scroll down through the options until you find the “Overlay” effect on the list.
Once you’ve selected this mode, it will immediately transform the rectangle into a color overlay.

Step 6:
Do some fine-tuning (experimenting with different colors, etc.)

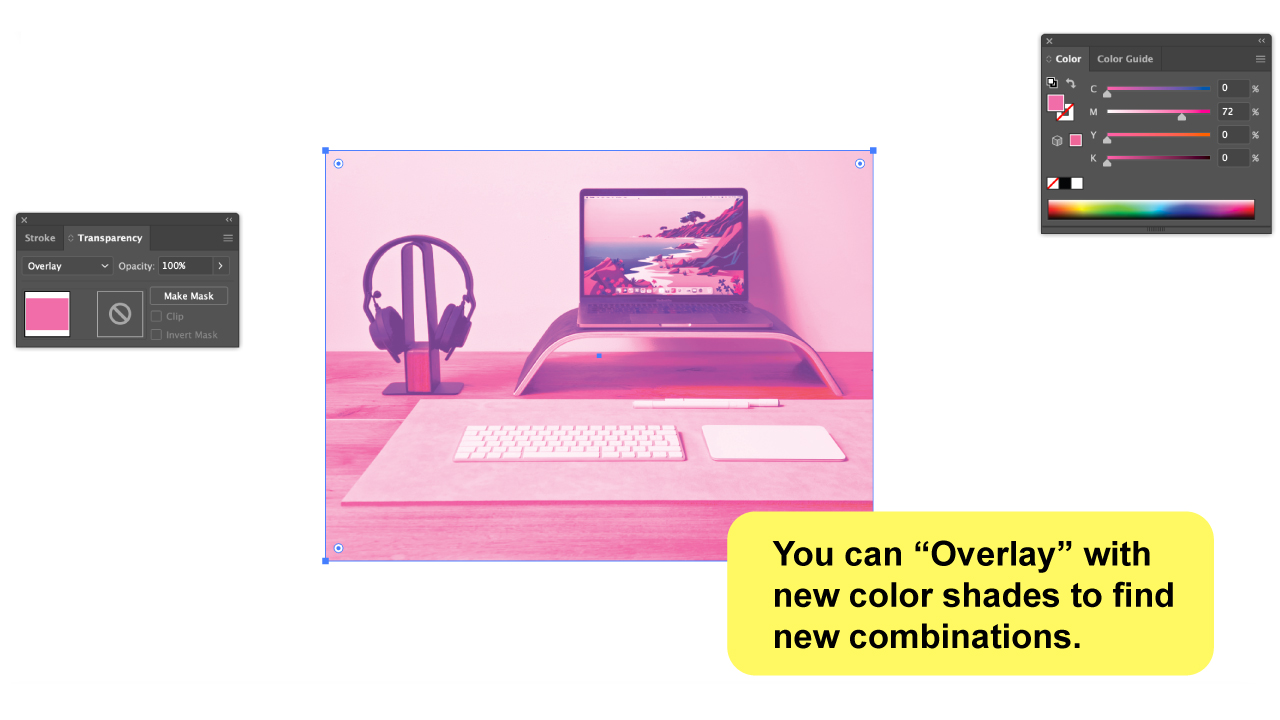
Once the effect has been applied, you’ll see that the color of the rectangle doesn’t look the same. Therefore, at this point, you can define the overall object’s color and appearance and reveal how it really looks. I recommend you take your time to try some variants cause you can get really great outcomes that will uplift your artistic output.
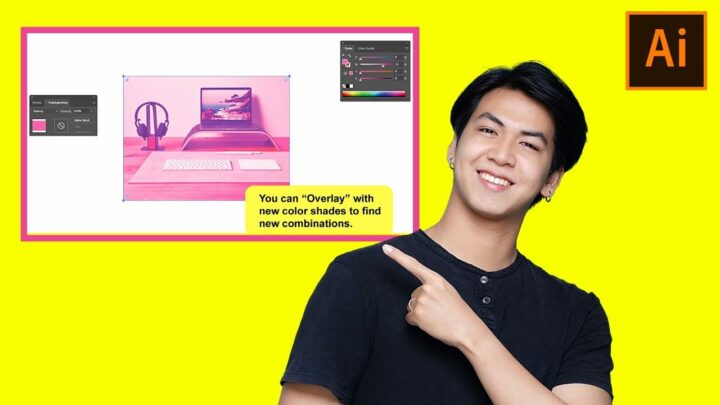
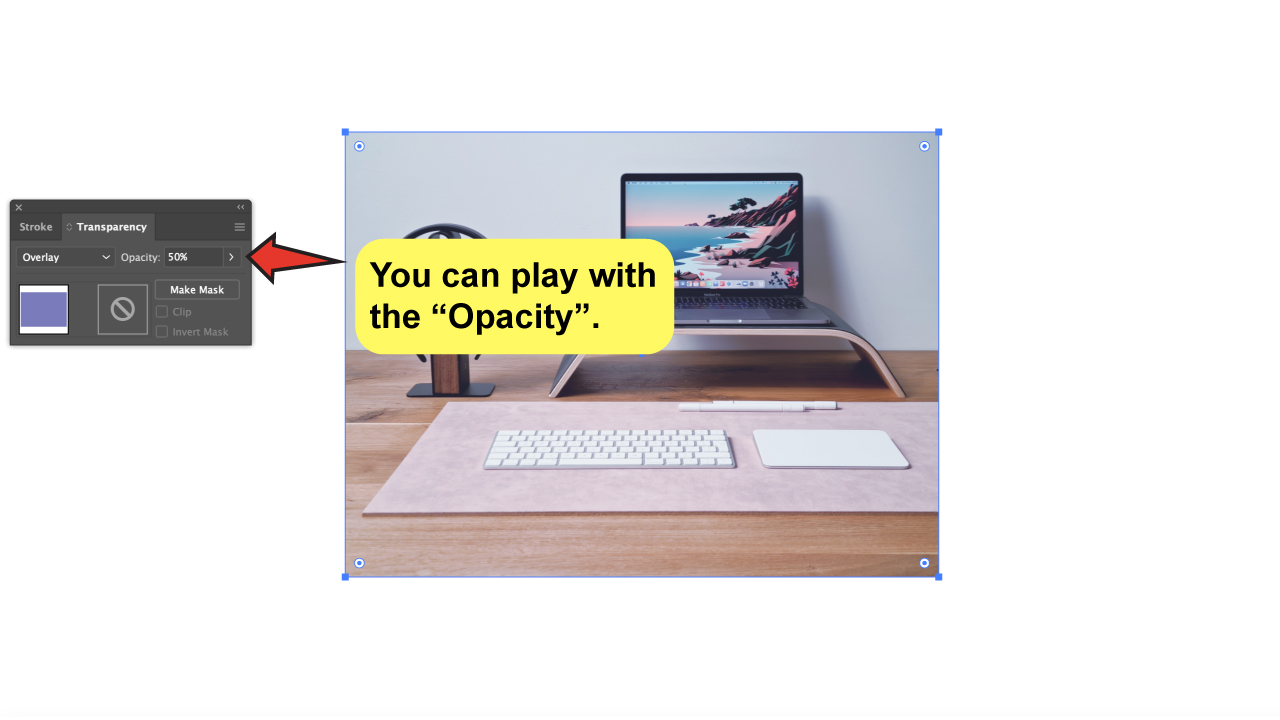
Keep in mind that you can duplicate the rectangle to increase the impact, change the transparency to soften it, or even add a new shade to discover new combinations.
There are many options available!

Frequently Asked Questions About How to Make a Color Overlay in Illustrator
Does the “Overlay” effect in Illustrator only work for images?
You can use the blending modes for any type of content, including images and vectors. You can also apply them to a single object or a group.
How do I change a blending mode in Illustrator?
To change the blending mode in Illustrator, click on the drop-down menu on the “Transparency” panel, and choose the one that you want.


Hey guys! It’s me, Marcel, aka Maschi. On MaschiTuts, it’s all about tutorials! No matter the topic of the article, the goal always remains the same: Providing you guys with the most in-depth and helpful tutorials!

